
01Who this is for
- Restaurant managers who need quick kitchen prep tickets printed for each order.
- Retail store owners who want to issue physical receipts at the point of sale without a separate computer.
- Service based businesses that handle cash transactions and require a drawer to open automatically after payment.
02Thermal receipt printer support, explained
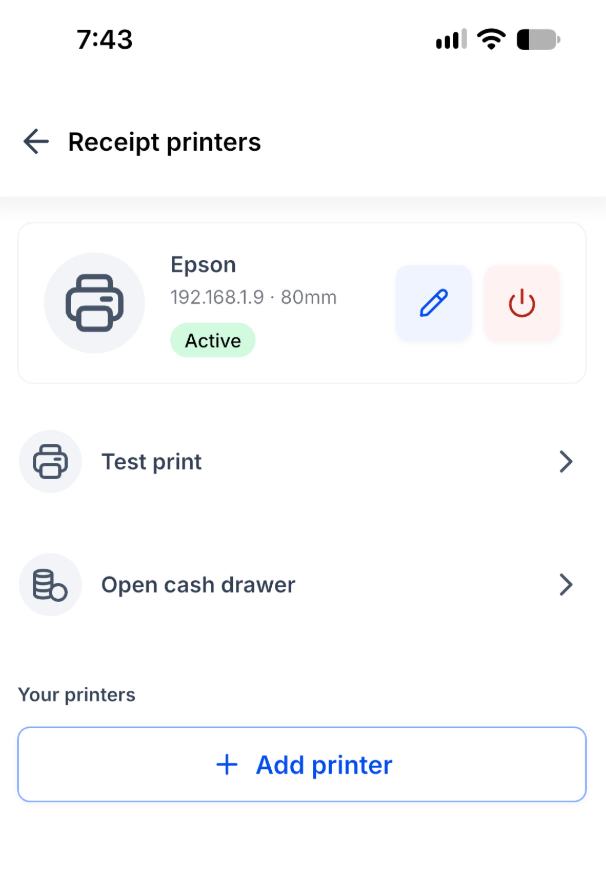
The feature adds a Receipt printers section inside the Payment or Point of Sale settings of the HighLevel mobile app. It discovers network printers that speak ESC/POS commands, stores their connection details per device, and lets the app send print jobs for receipts and prep tickets. When a compatible cash drawer is wired to the printer, HighLevel can also send a command to open it.
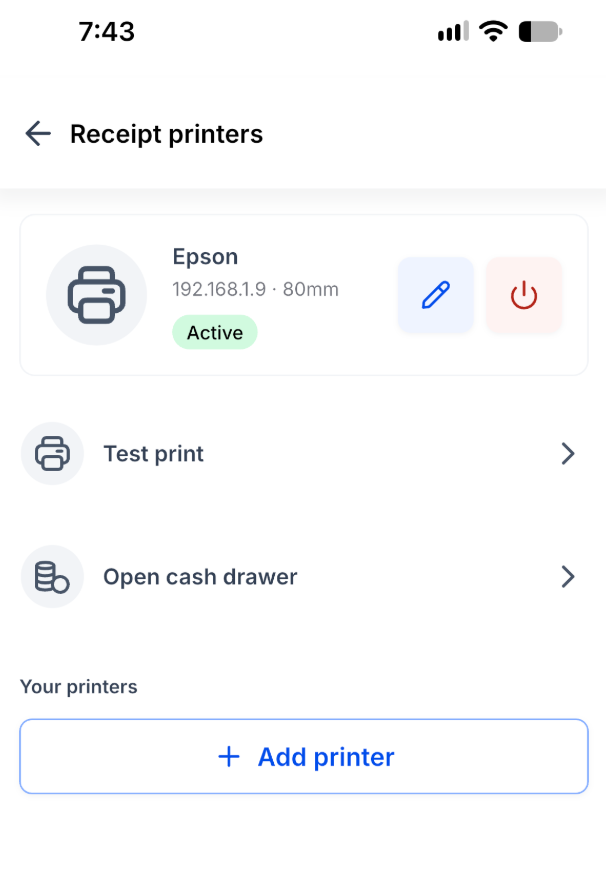
Printers appear as Active entries showing name, IP address, paper size and status. Users can add, edit, test or remove a printer. The app automatically prints a prep ticket after a receipt if the Attach prep ticket to payment receipt option is enabled. All actions are performed from the mobile device; no desktop software is required.
03How businesses use thermal receipt printer support
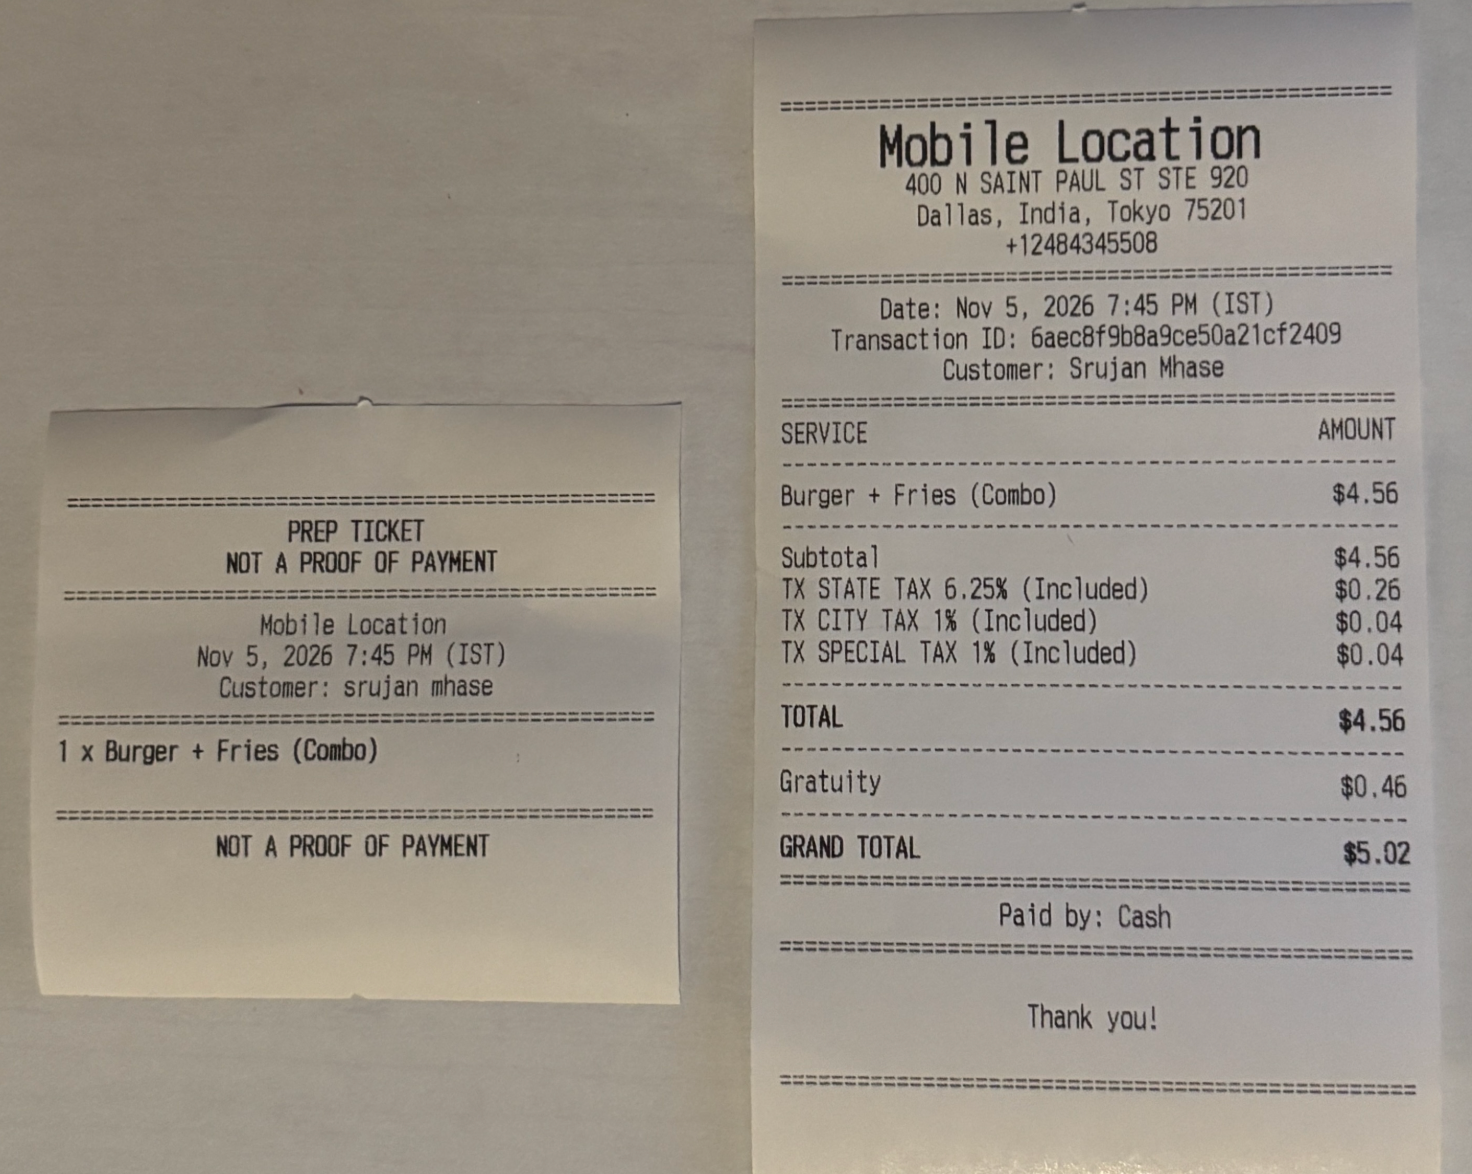
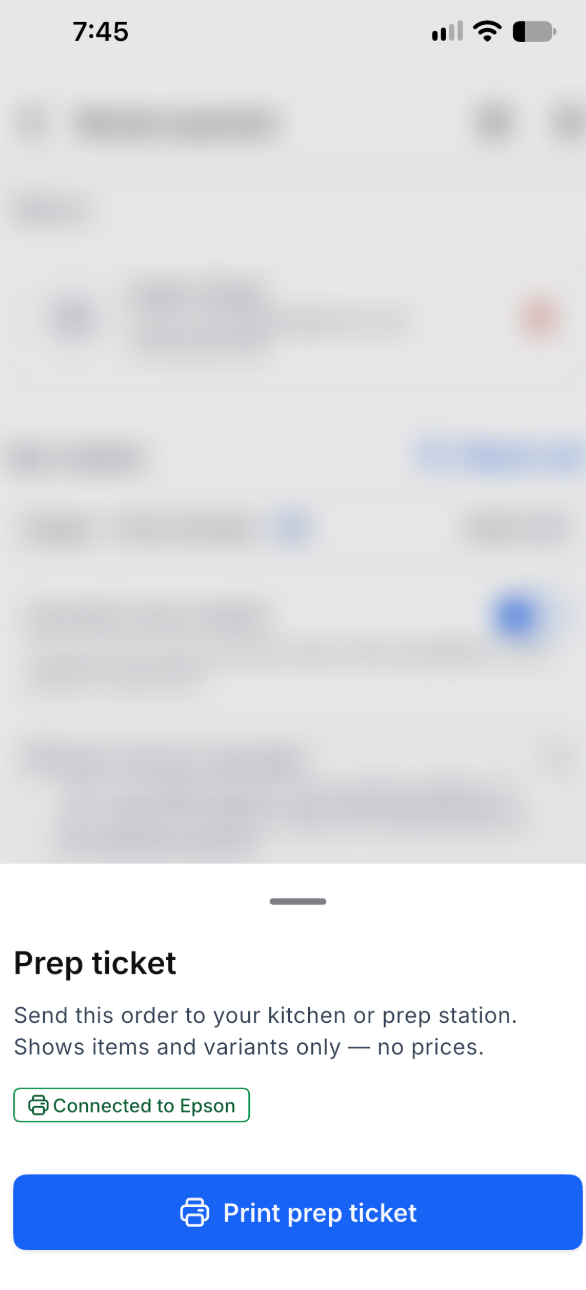
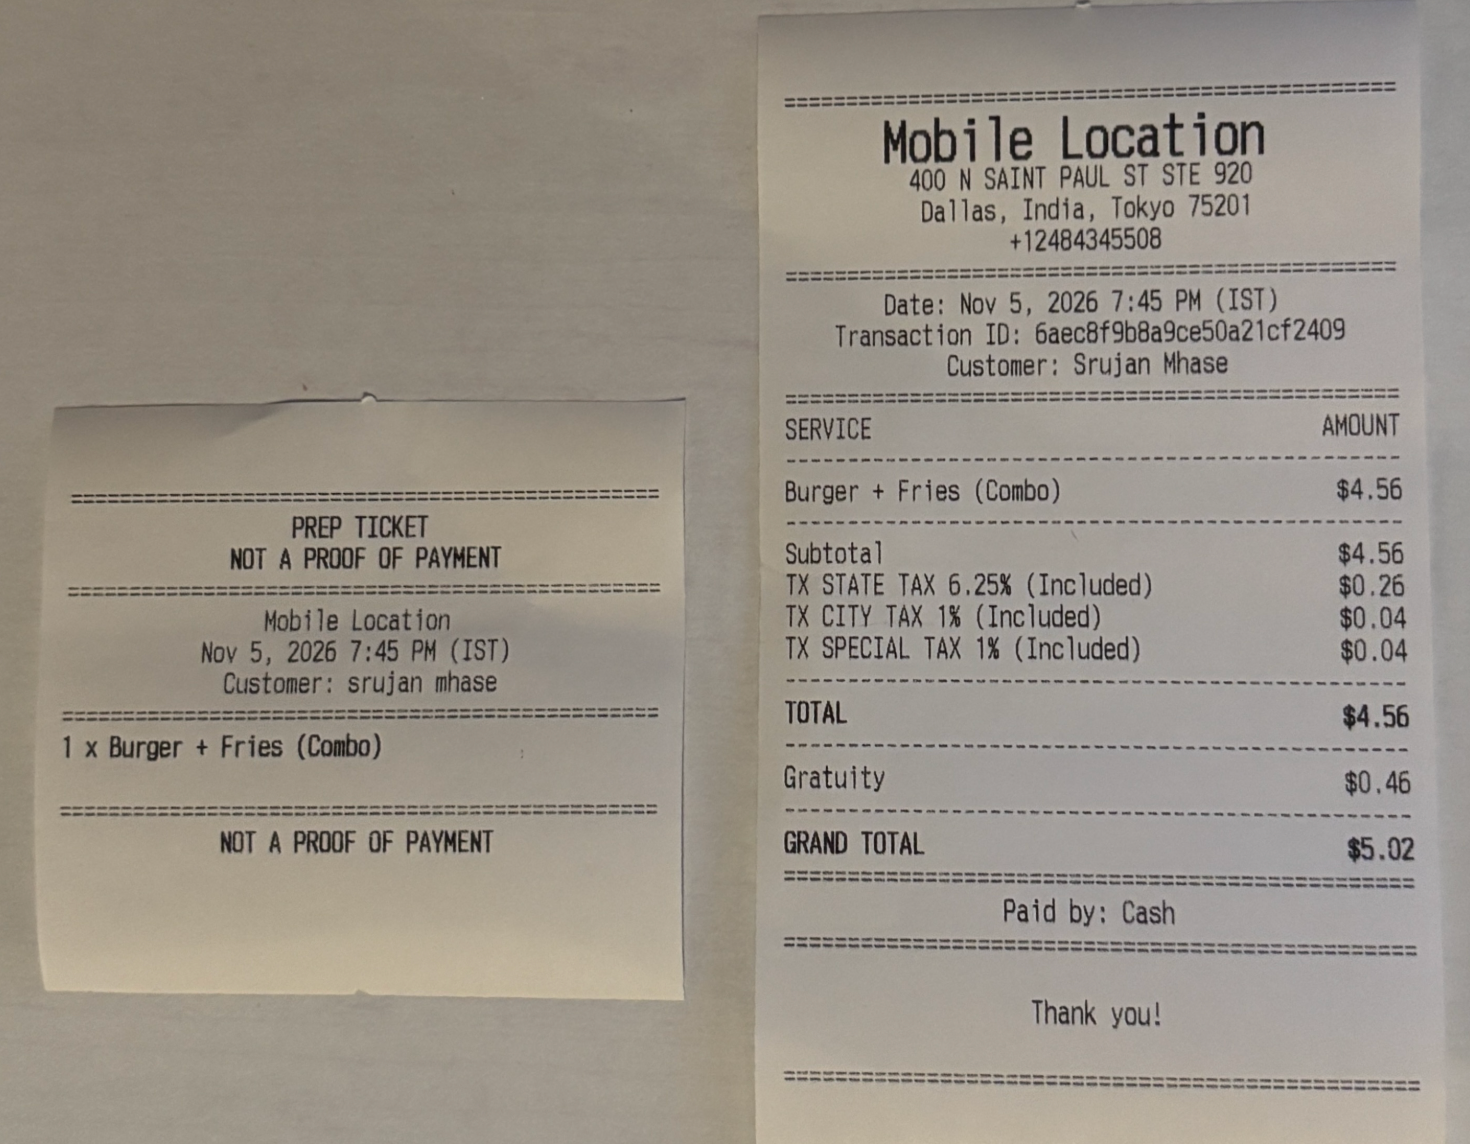
- Restaurant kitchen. Staff add items to an order in the mobile POS, then tap the printer icon on the Review payment screen and select Print prep ticket. The printer spits out a ticket with items and quantities but no prices, helping the kitchen prepare the dish.
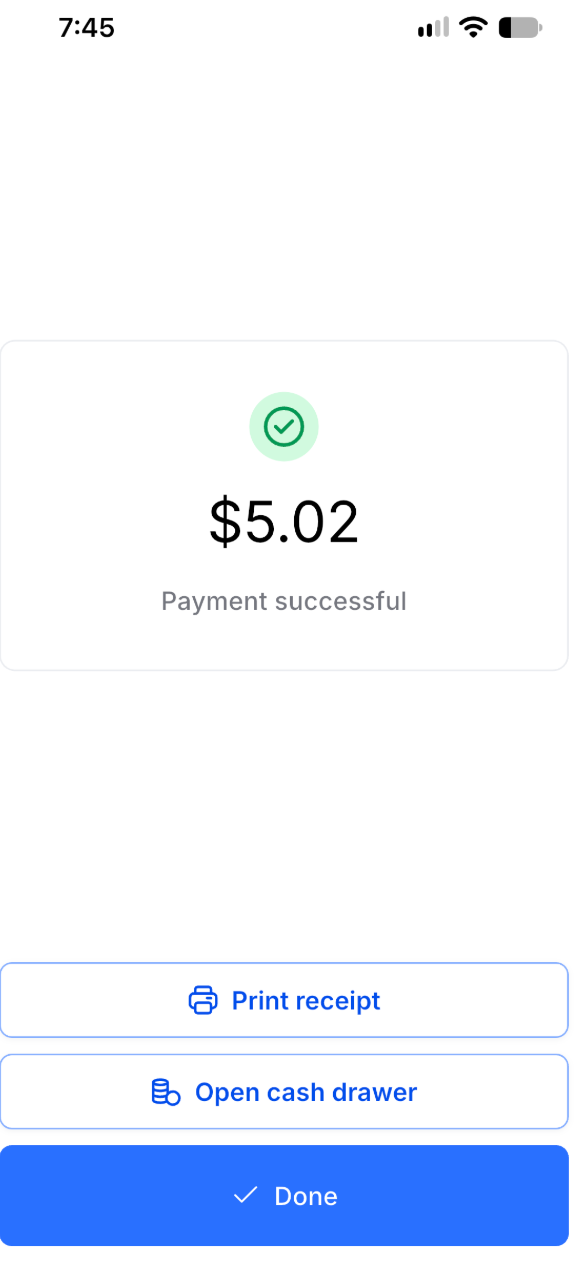
- Retail boutique. After a sale is completed, the user taps Print receipt on the payment confirmation screen. The connected ESC/POS printer produces a customer receipt showing business details, items, taxes and total.
- Hair salon. When a cash payment is processed, the employee taps Open cash drawer on the confirmation screen. HighLevel sends a signal to the drawer via the attached receipt printer, allowing the drawer to open without leaving the app.
04The numbers and rules that matter
- Available on iOS and Android, requiring HighLevel mobile app v4.27.0 or later.
- Paper size 58mm or 80mm.
- Default port 9100, configurable.
05Before you start
- A Wi Fi enabled ESC/POS thermal printer must be on the same local network as the mobile device.
- The printer’s IP address and port (default 9100) must be known.
- iOS devices need Local Network permission enabled in Settings > Privacy & Security > Local Network.
06How to set up and use thermal receipt printer support in HighLevel
Set up a thermal receipt printer
- Open the HighLevel mobile app.
- Navigate to Payment settings or Point of Sale settings.
- Select Receipt printers.
- Tap Add printer.
- Enter a recognizable printer name.
- Type the printer’s local IP address.
- Specify the port, using 9100 if unchanged.
- Choose the paper size, either 58mm or 80mm.
- Tap Save & connect.
- Tap Test print to verify the connection.
- If the printer does not respond, check the network, IP address, port, and ensure Local Network permission is granted on iOS.
07What it looks like in HighLevel
08Settings that matter
- Printer name. Identifies the printer in the app’s list, helping users select the correct device.
- IP address. Specifies where the app sends print commands on the local network.
- Port. Defines the network port for communication; default is 9100.
- Paper size. Sets whether the printer uses 58mm or 80mm rolls, affecting line length.
- Attach prep ticket to payment receipt. When enabled, the app prints a kitchen ticket automatically after each receipt.
- Open cash drawer. Sends a command through the printer to trigger a compatible cash drawer.
09Things to know before you rely on it
- Only Wi Fi network printers that support ESC/POS commands are supported; Bluetooth only and USB only models will not work.
- Printers must share the same local network as the mobile device; different subnets prevent printing.
- The feature works on iOS and Android starting with app version v4.27.0.
- Cash drawers must connect to the printer’s DK/Drawer port; direct USB or Bluetooth connections are unsupported.
10If something goes wrong
- Printer is not connecting. Confirm both devices are on the same network, verify the IP address and port, and ensure Local Network permission is granted on iOS.
- Cash drawer does not open. Check that the drawer is wired to the printer’s DK/Drawer port and that the drawer model is compatible with the printer.
11How it connects to the rest of HighLevel
- Learn how to accept in person payments with NMI and Authorize.net in the mobile POS NMI & Authorize.net integration
- See the consolidated payment hub that aggregates all mobile transactions Consolidated payment hub
Michael's take

I would buy a Wi Fi thermal printer, put it on the same router as the phone, and enter the IP address in the Receipt printers screen. After a quick test print I’d enable the prep ticket option for kitchen staff and make sure the cash drawer is wired to the printer’s drawer port.