
01Who this is for
- Retail shop owners benefit from seeing items and totals side by side for faster checkout.
- Service providers using tablets keep client information visible while adding services.
- Event staff using iPads can manage orders without toggling between screens.
02Mobile app POS, explained
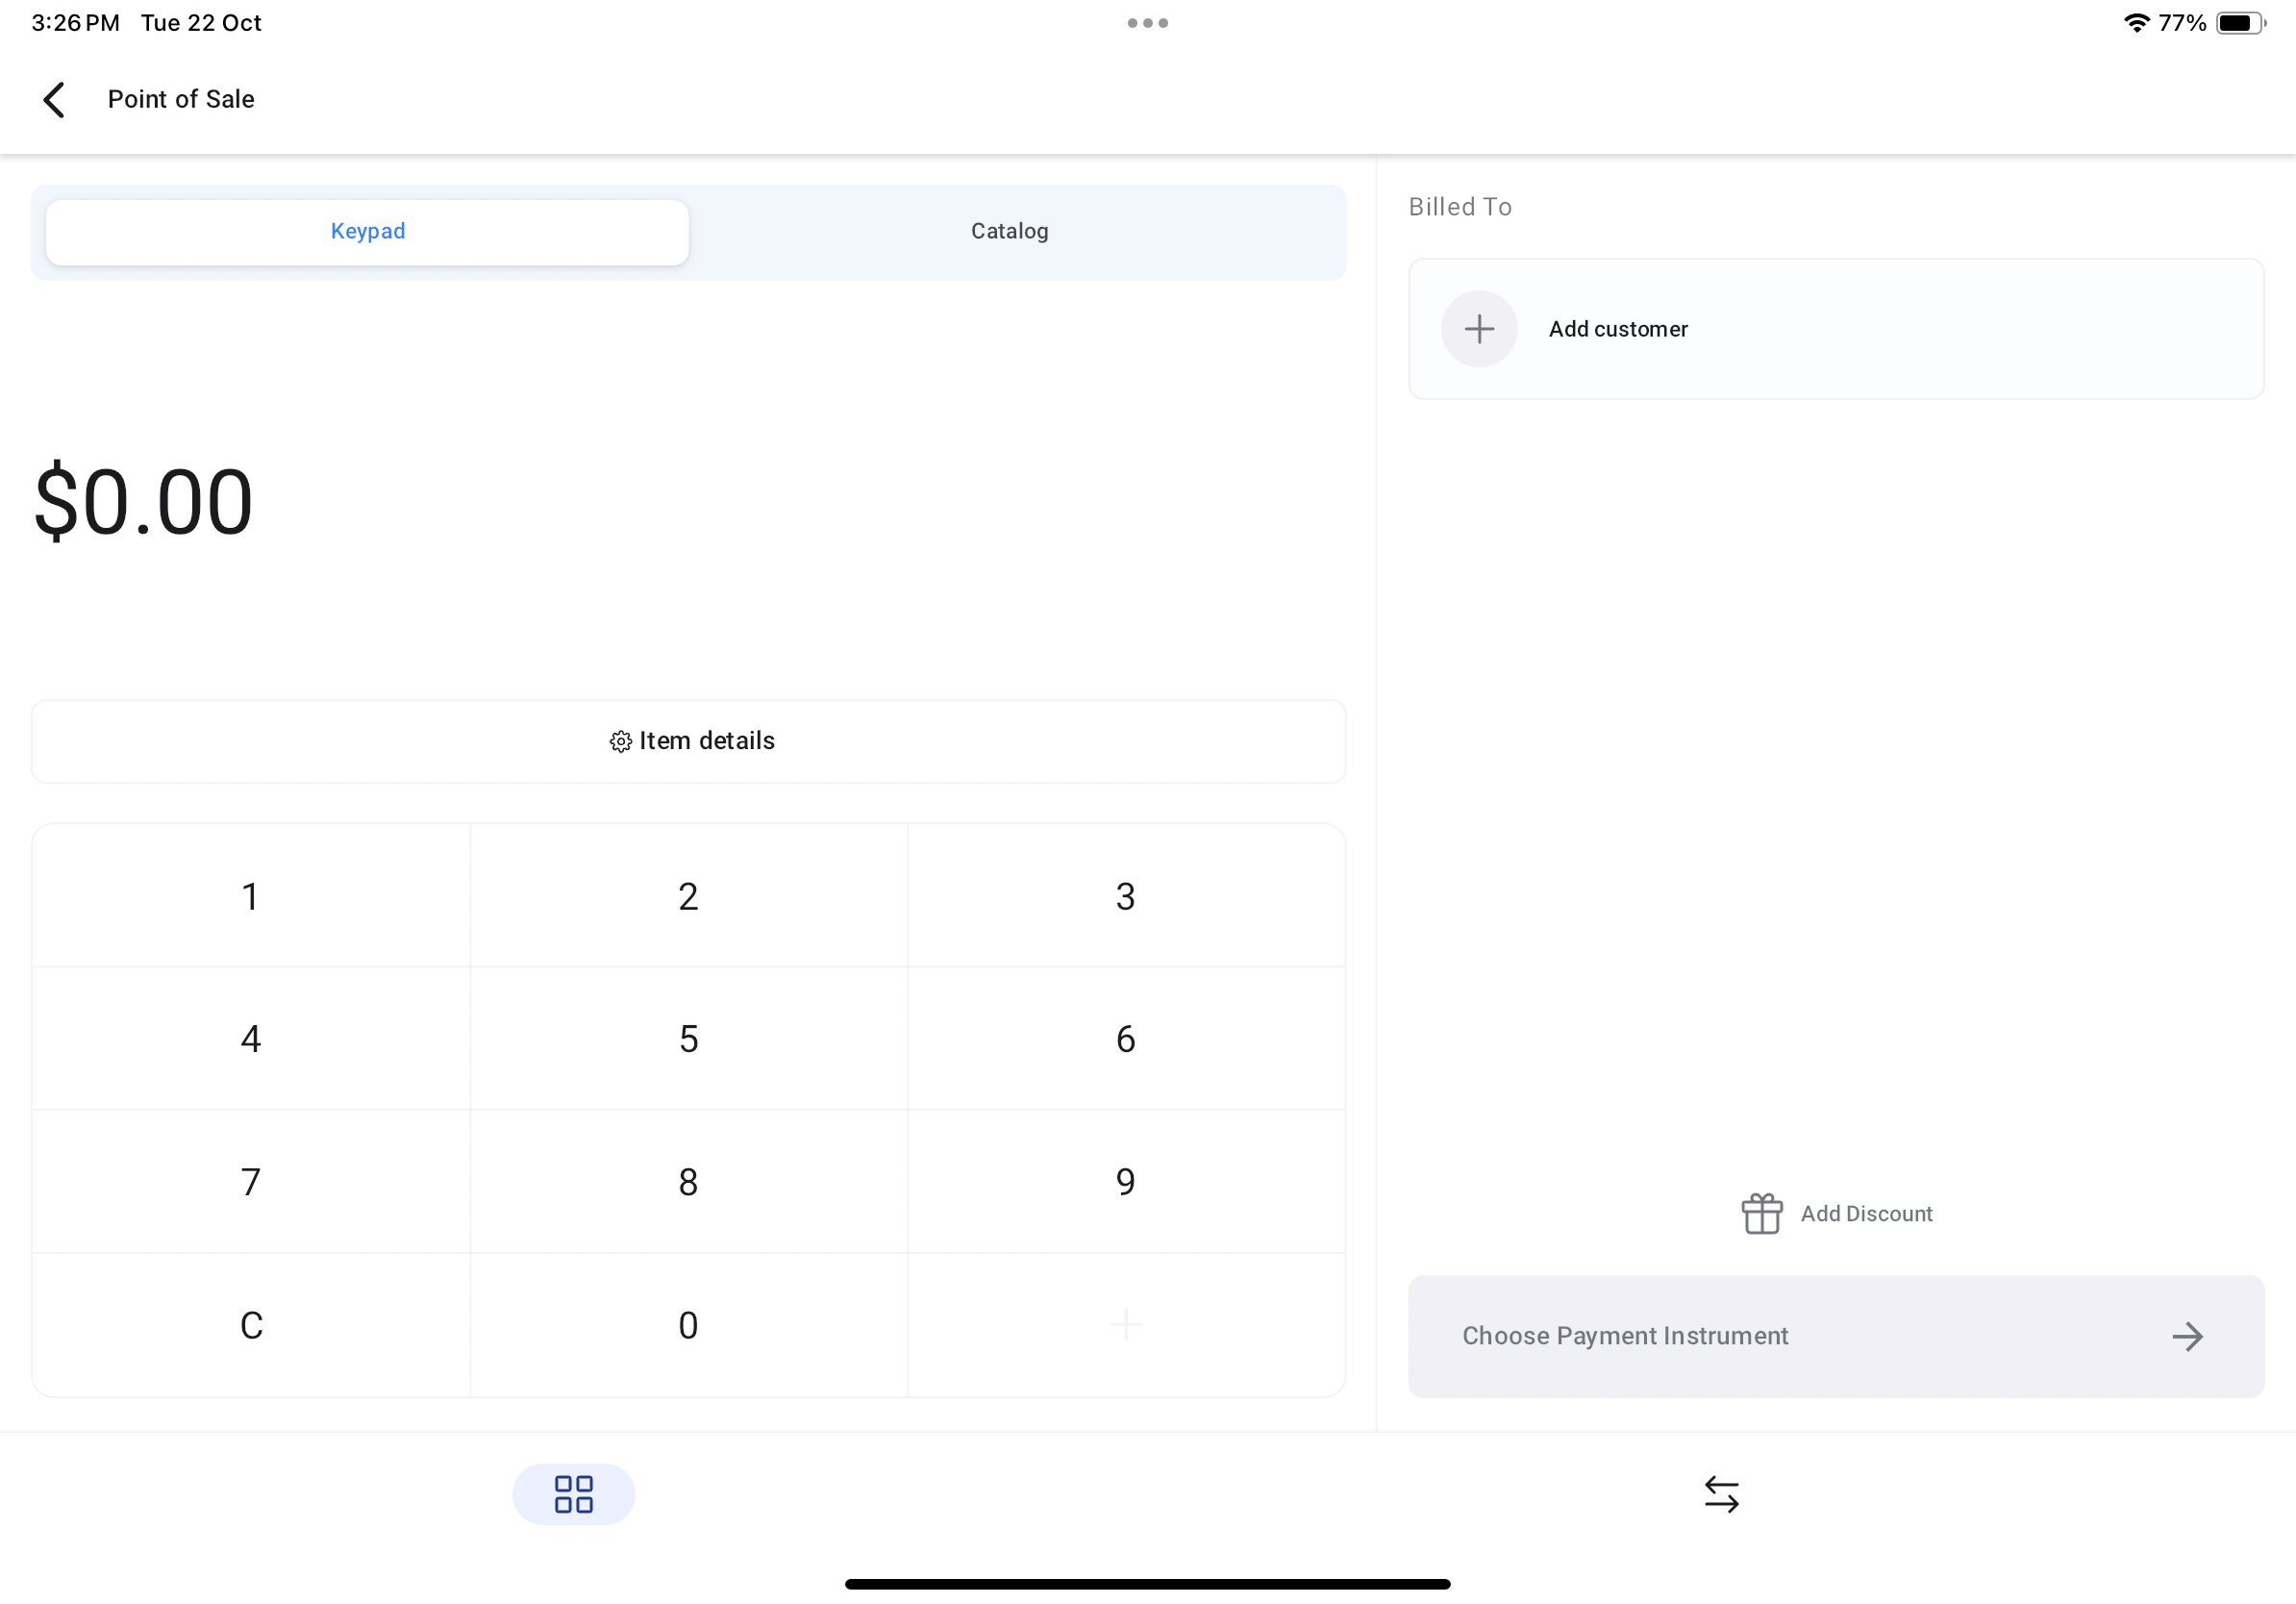
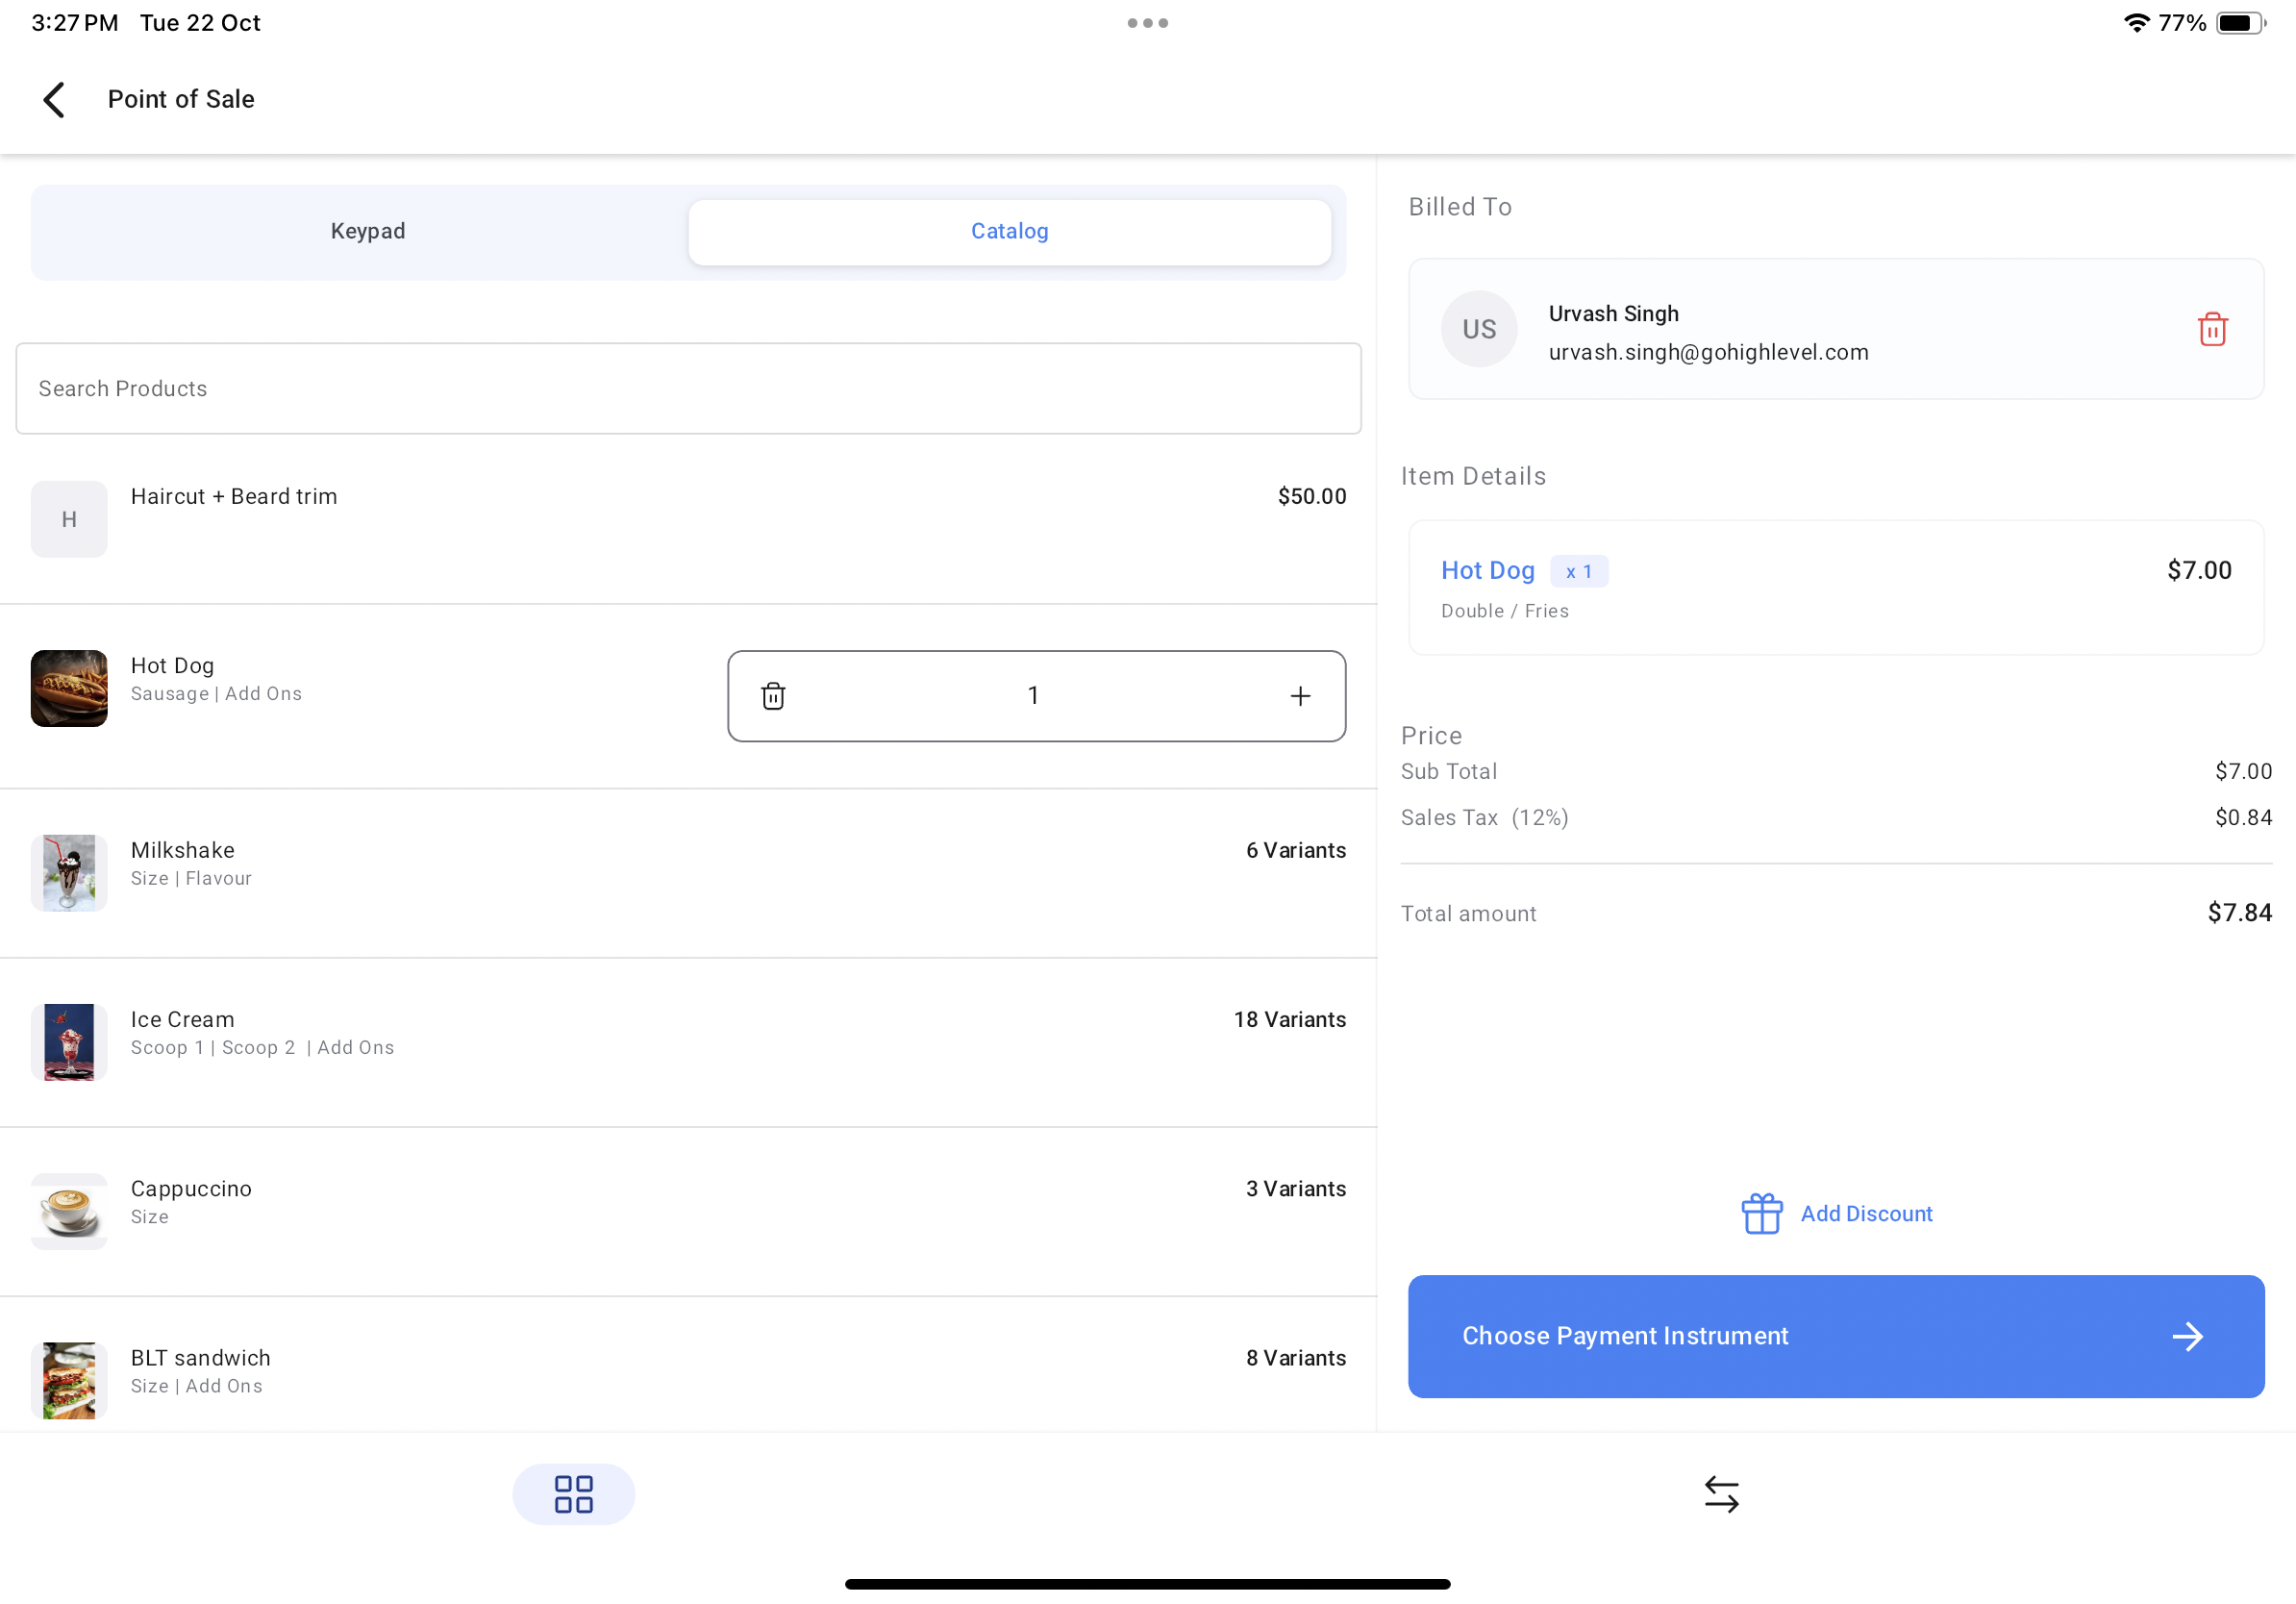
HighLevel’s mobile POS adapts to bigger devices such as iPads and Android tablets. When the app runs on a larger screen, the interface divides into two panes: the item console on the left and the checkout area on the right. This arrangement removes the need to navigate back and forth during a sale.
The POS also respects the device’s orientation. Whether the tablet is held in landscape or portrait mode, the split view remains functional, allowing use with docking stations and attached payment hardware. Users add items from the left pane, link a contact on the right, review details, apply discounts, and finish the transaction with a single tap.
The feature lives inside the HighLevel mobile application. Access it by opening the app on a tablet and tapping the dollar sign icon at the bottom bar. The new layout appears automatically, provided the app version supports the split view behavior.
03How businesses use mobile app POS
- Retail boutique. A boutique employee opens the HighLevel app on an iPad, adds products from the left catalog, sees the running total on the right, applies any discount, and completes the sale with a tap. The split view keeps the checkout visible throughout.
- Salon. A stylist uses the tablet POS to select services from the left pane, attaches the client’s profile on the right, optionally adds a discount, and charges the client without leaving the screen.
- Food truck. The operator runs the app on an Android tablet, enters menu items via the keypad on the left, reviews the order on the right, applies a promotional discount, and finalizes payment in one flow.
04Before you start
- Install the HighLevel, LeadConnector, or whitelabeled mobile app on the iPad or Android tablet.
05How to set up and use mobile app POS in HighLevel
Set up POS on tablet
- Install the HighLevel, LeadConnector, or whitelabeled mobile app on your iPad or Android tablet.
- Open the app and tap the $ icon on the bottom bar to open the POS screen.
- Make sure the app is updated to a version that includes split screen support.
- Observe the new layout with the item console on the left and the checkout panel on the right.
- Add items using the keypad for custom entries or select saved items from the catalog on the left side.
- Link the contact you are charging by selecting them on the right side of the screen.
- Review the item list on the right and tap the Discount button to apply a discount if needed.
- Tap the Charge button, choose the payment method, add an optional tip, and complete the transaction.
06What it looks like in HighLevel
07How it connects to the rest of HighLevel
- Use Stripe hardware terminals with the mobile POS Stripe terminals
- Accept in person payments with NMI and Authorize.net NMI & Authorize.net
- View pricing and plan options for HighLevel Pricing
Michael's take

The split screen design lets staff add items on the left while continuously seeing the order total and customer details on the right, which aligns with this page’s description of more efficient transacting.
Being able to rotate between landscape and portrait means the POS can stay usable whether the tablet is on a dock or being held in hand, matching this page’s note about orientation flexibility.