
01Who this is for
- Business owners can collect final balances without leaving the mobile app.
- Team members using the mobile app can see due amounts directly on calendar events.
02Pay for service appointments, explained
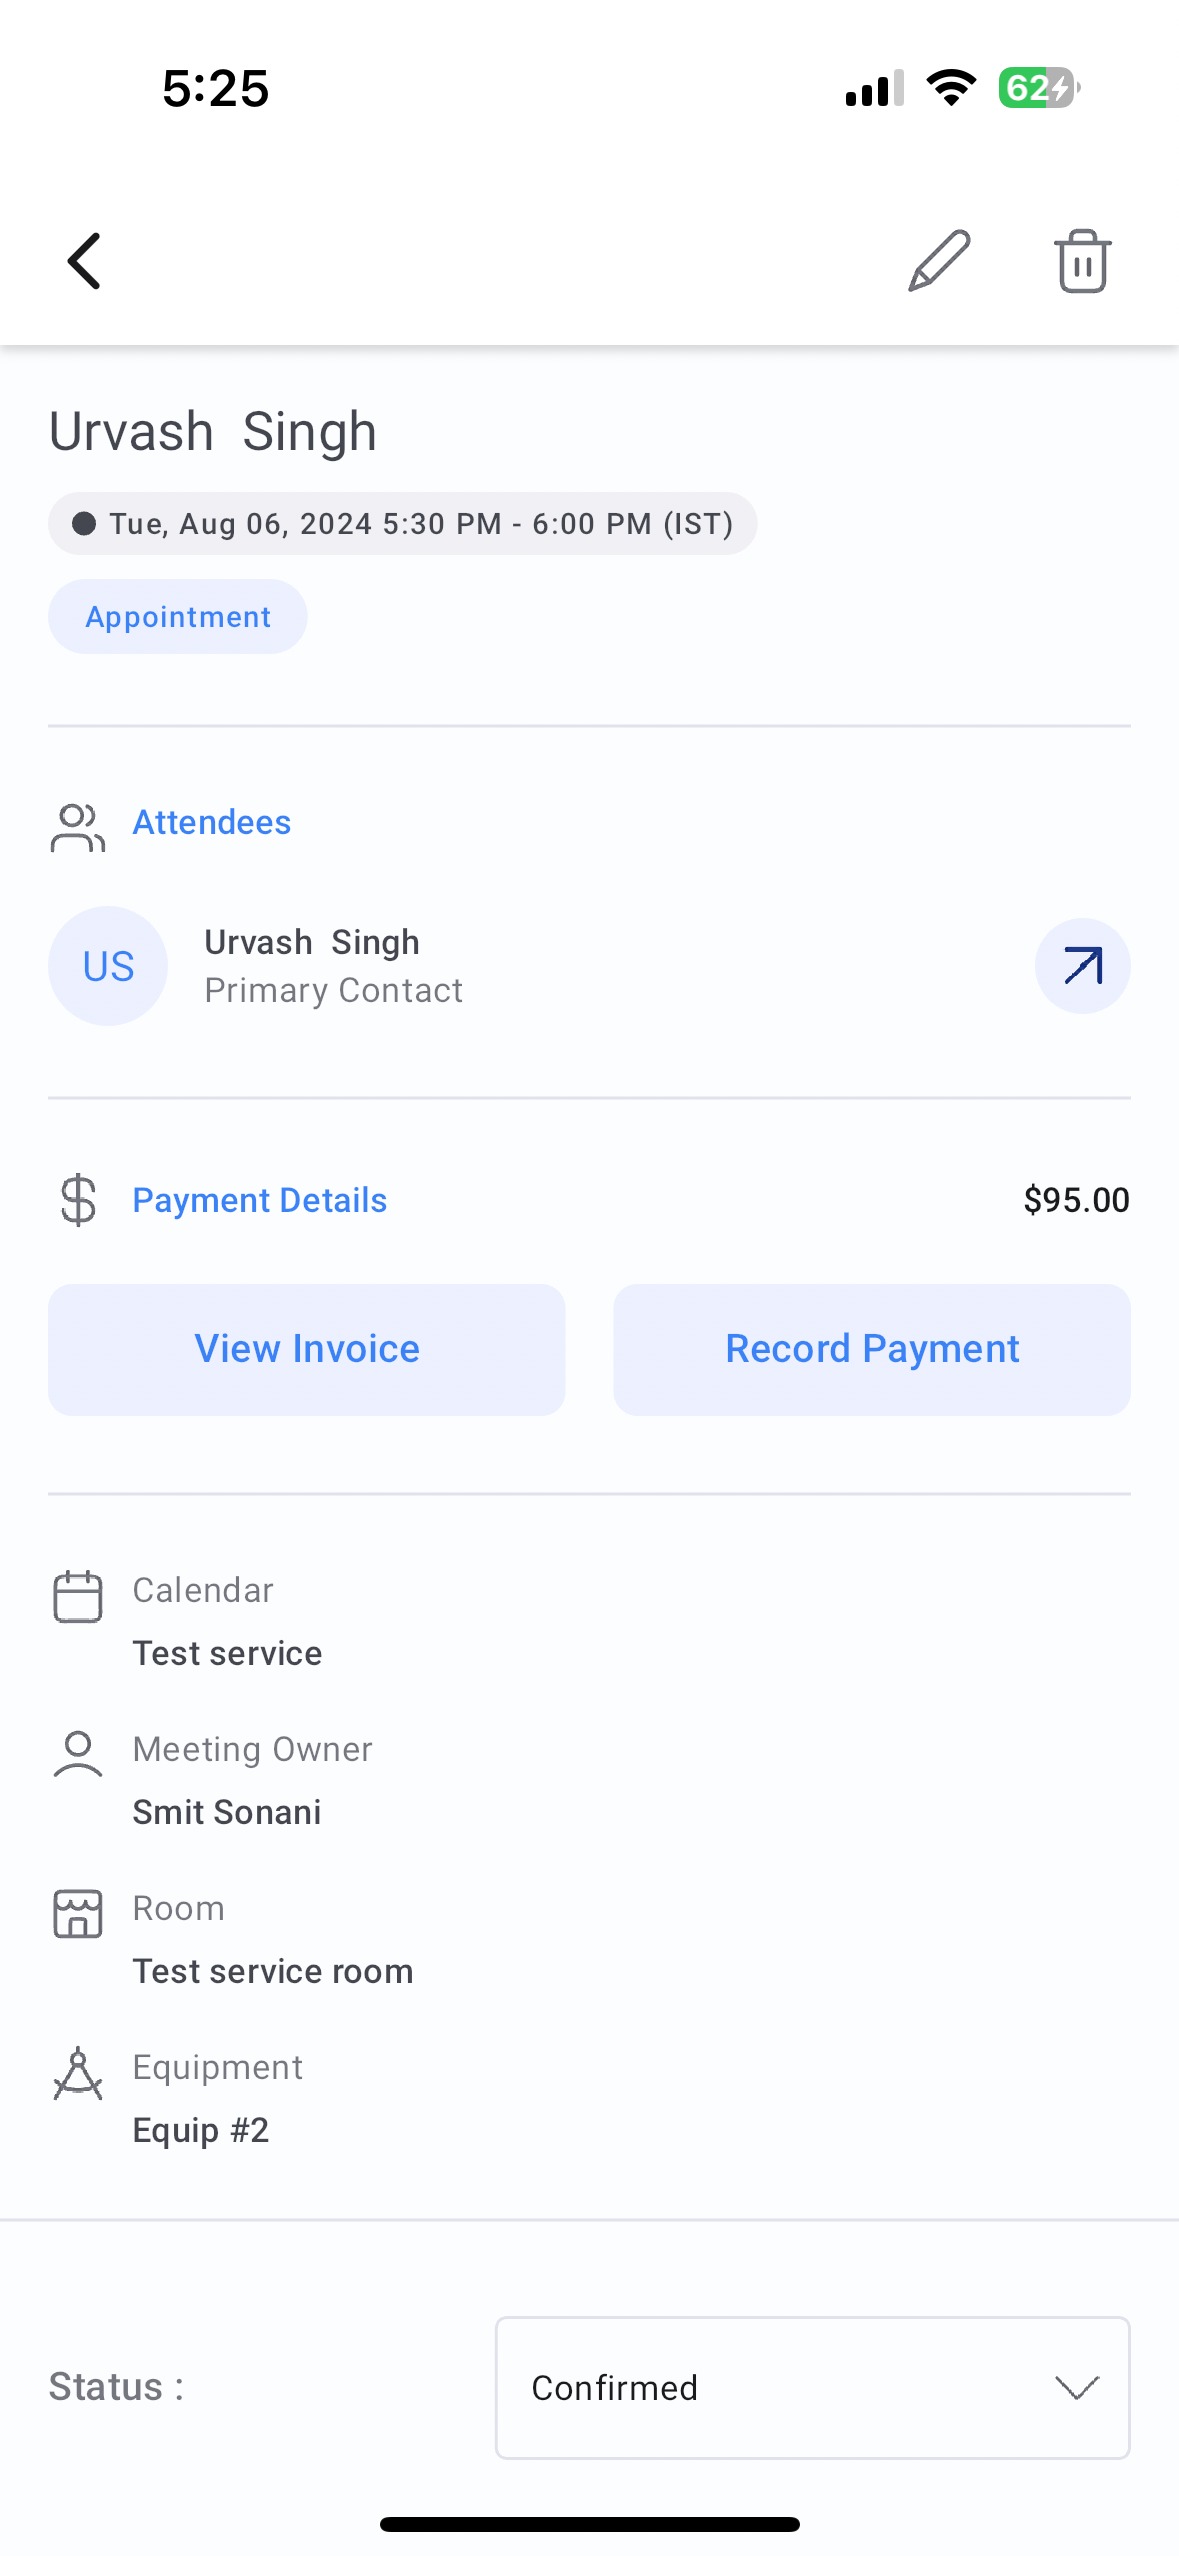
The integration adds a payment button to service calendar events in the mobile app. When a deposit has been recorded for an appointment, the remaining balance appears on the event card and can be paid right away.
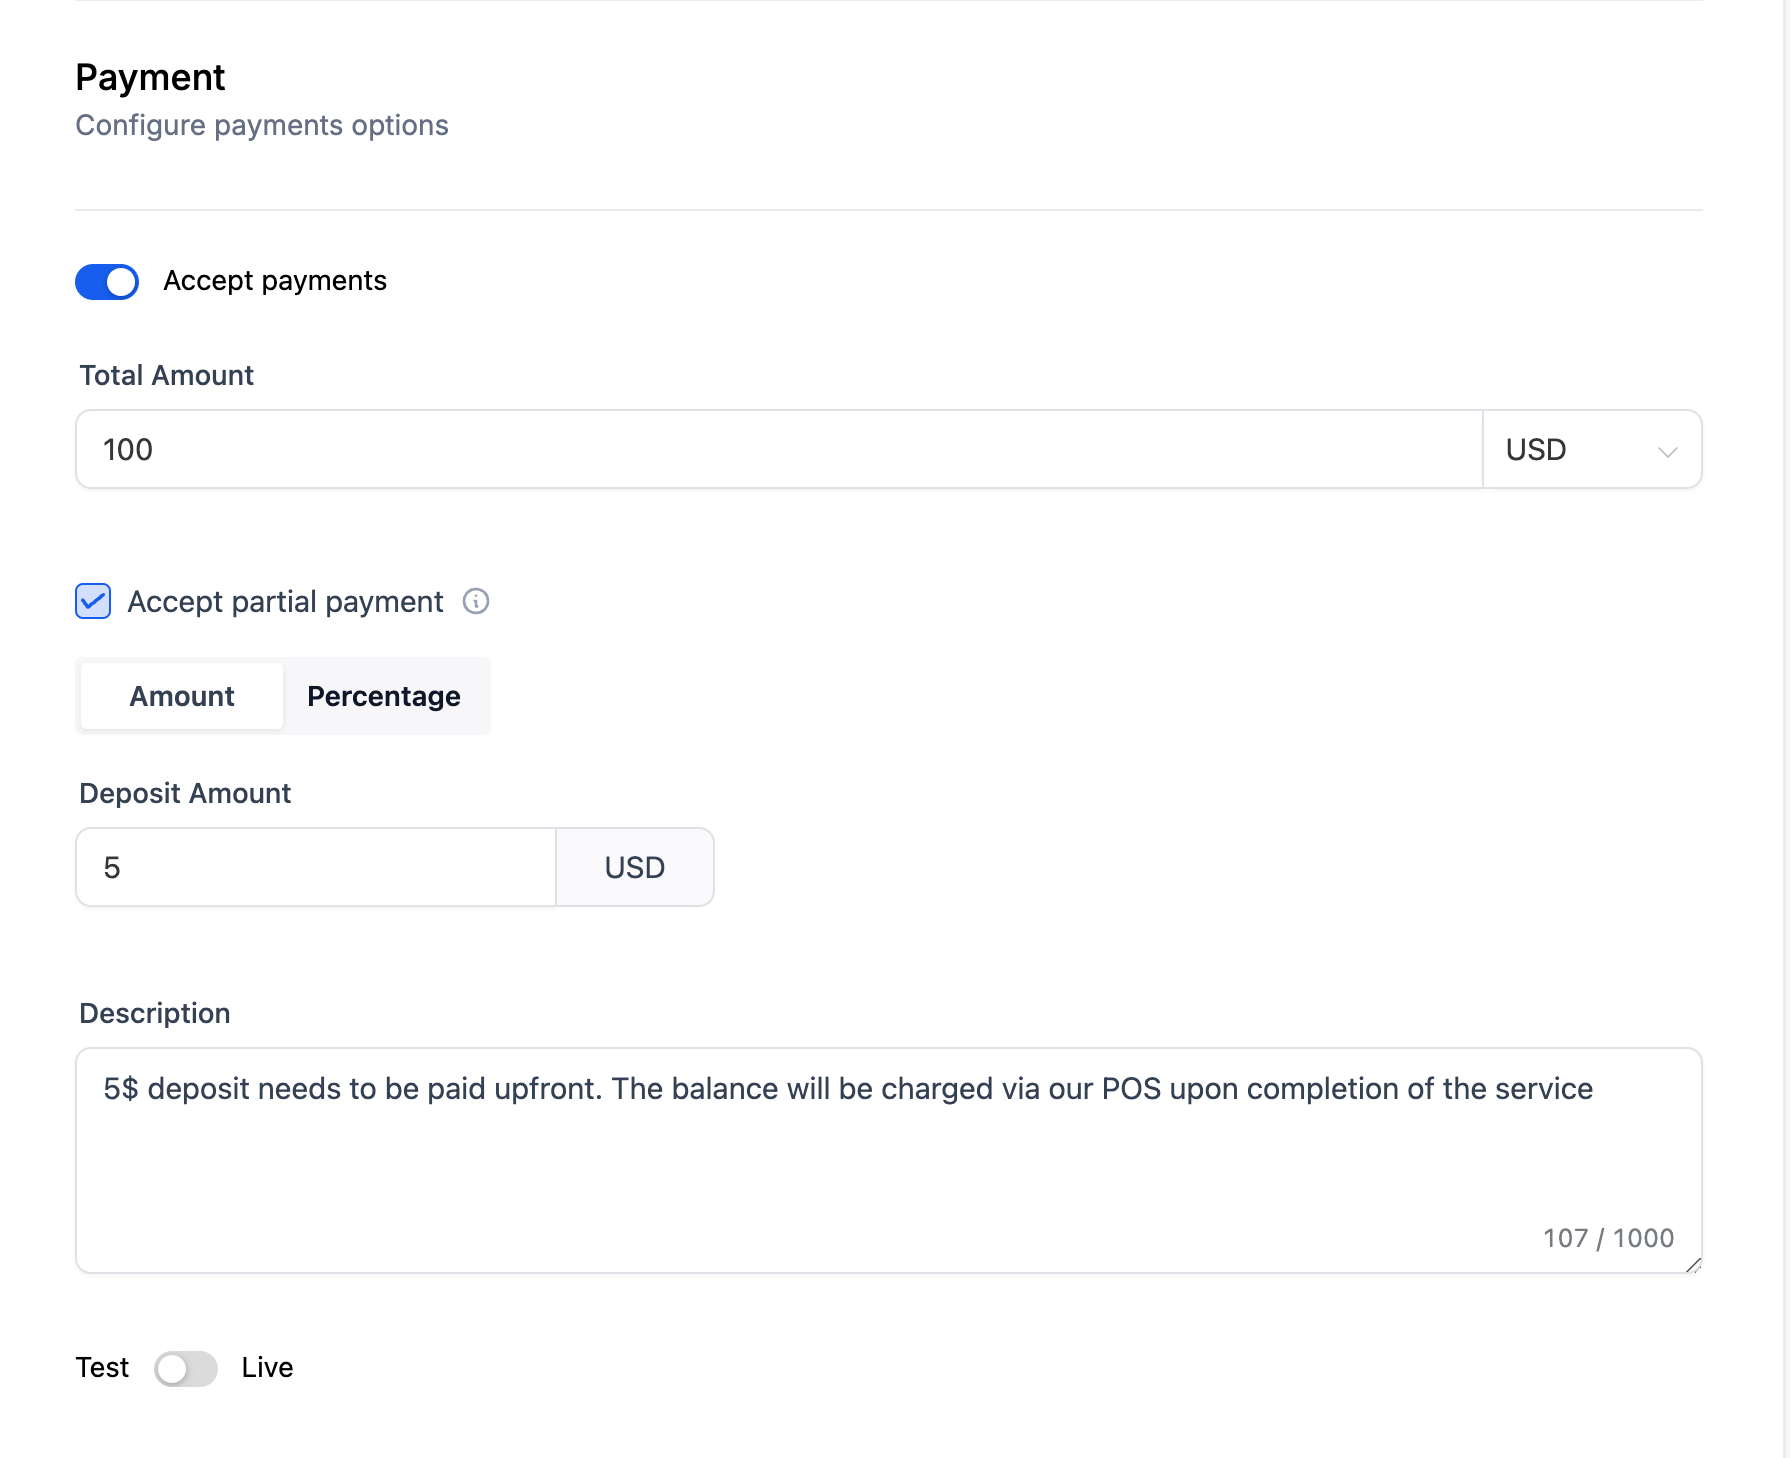
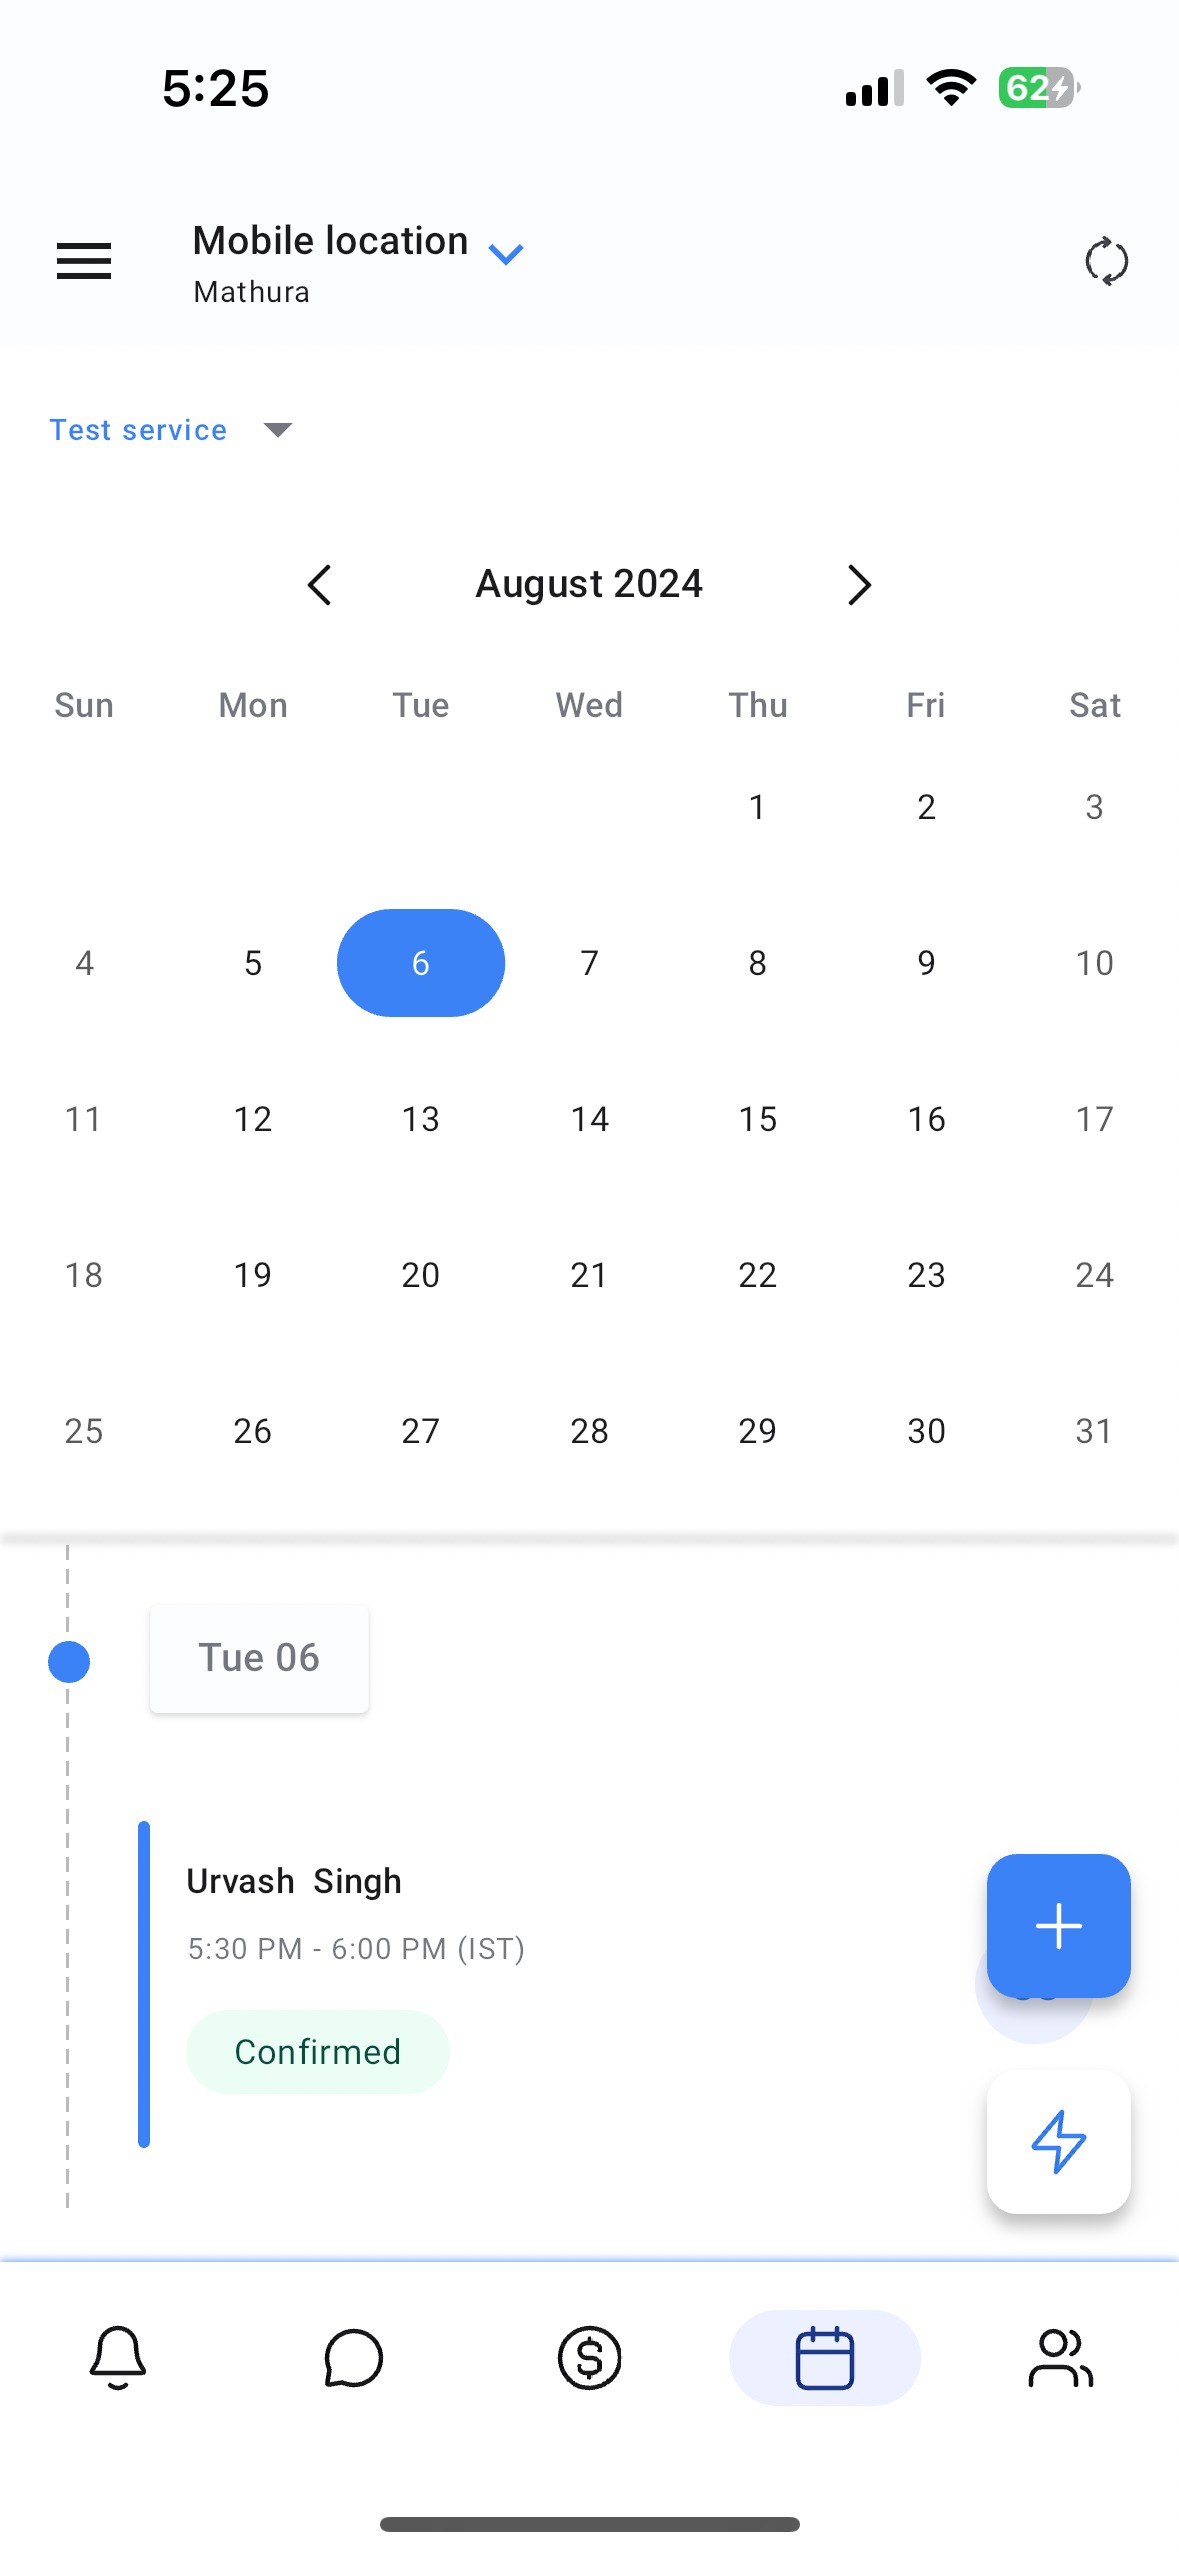
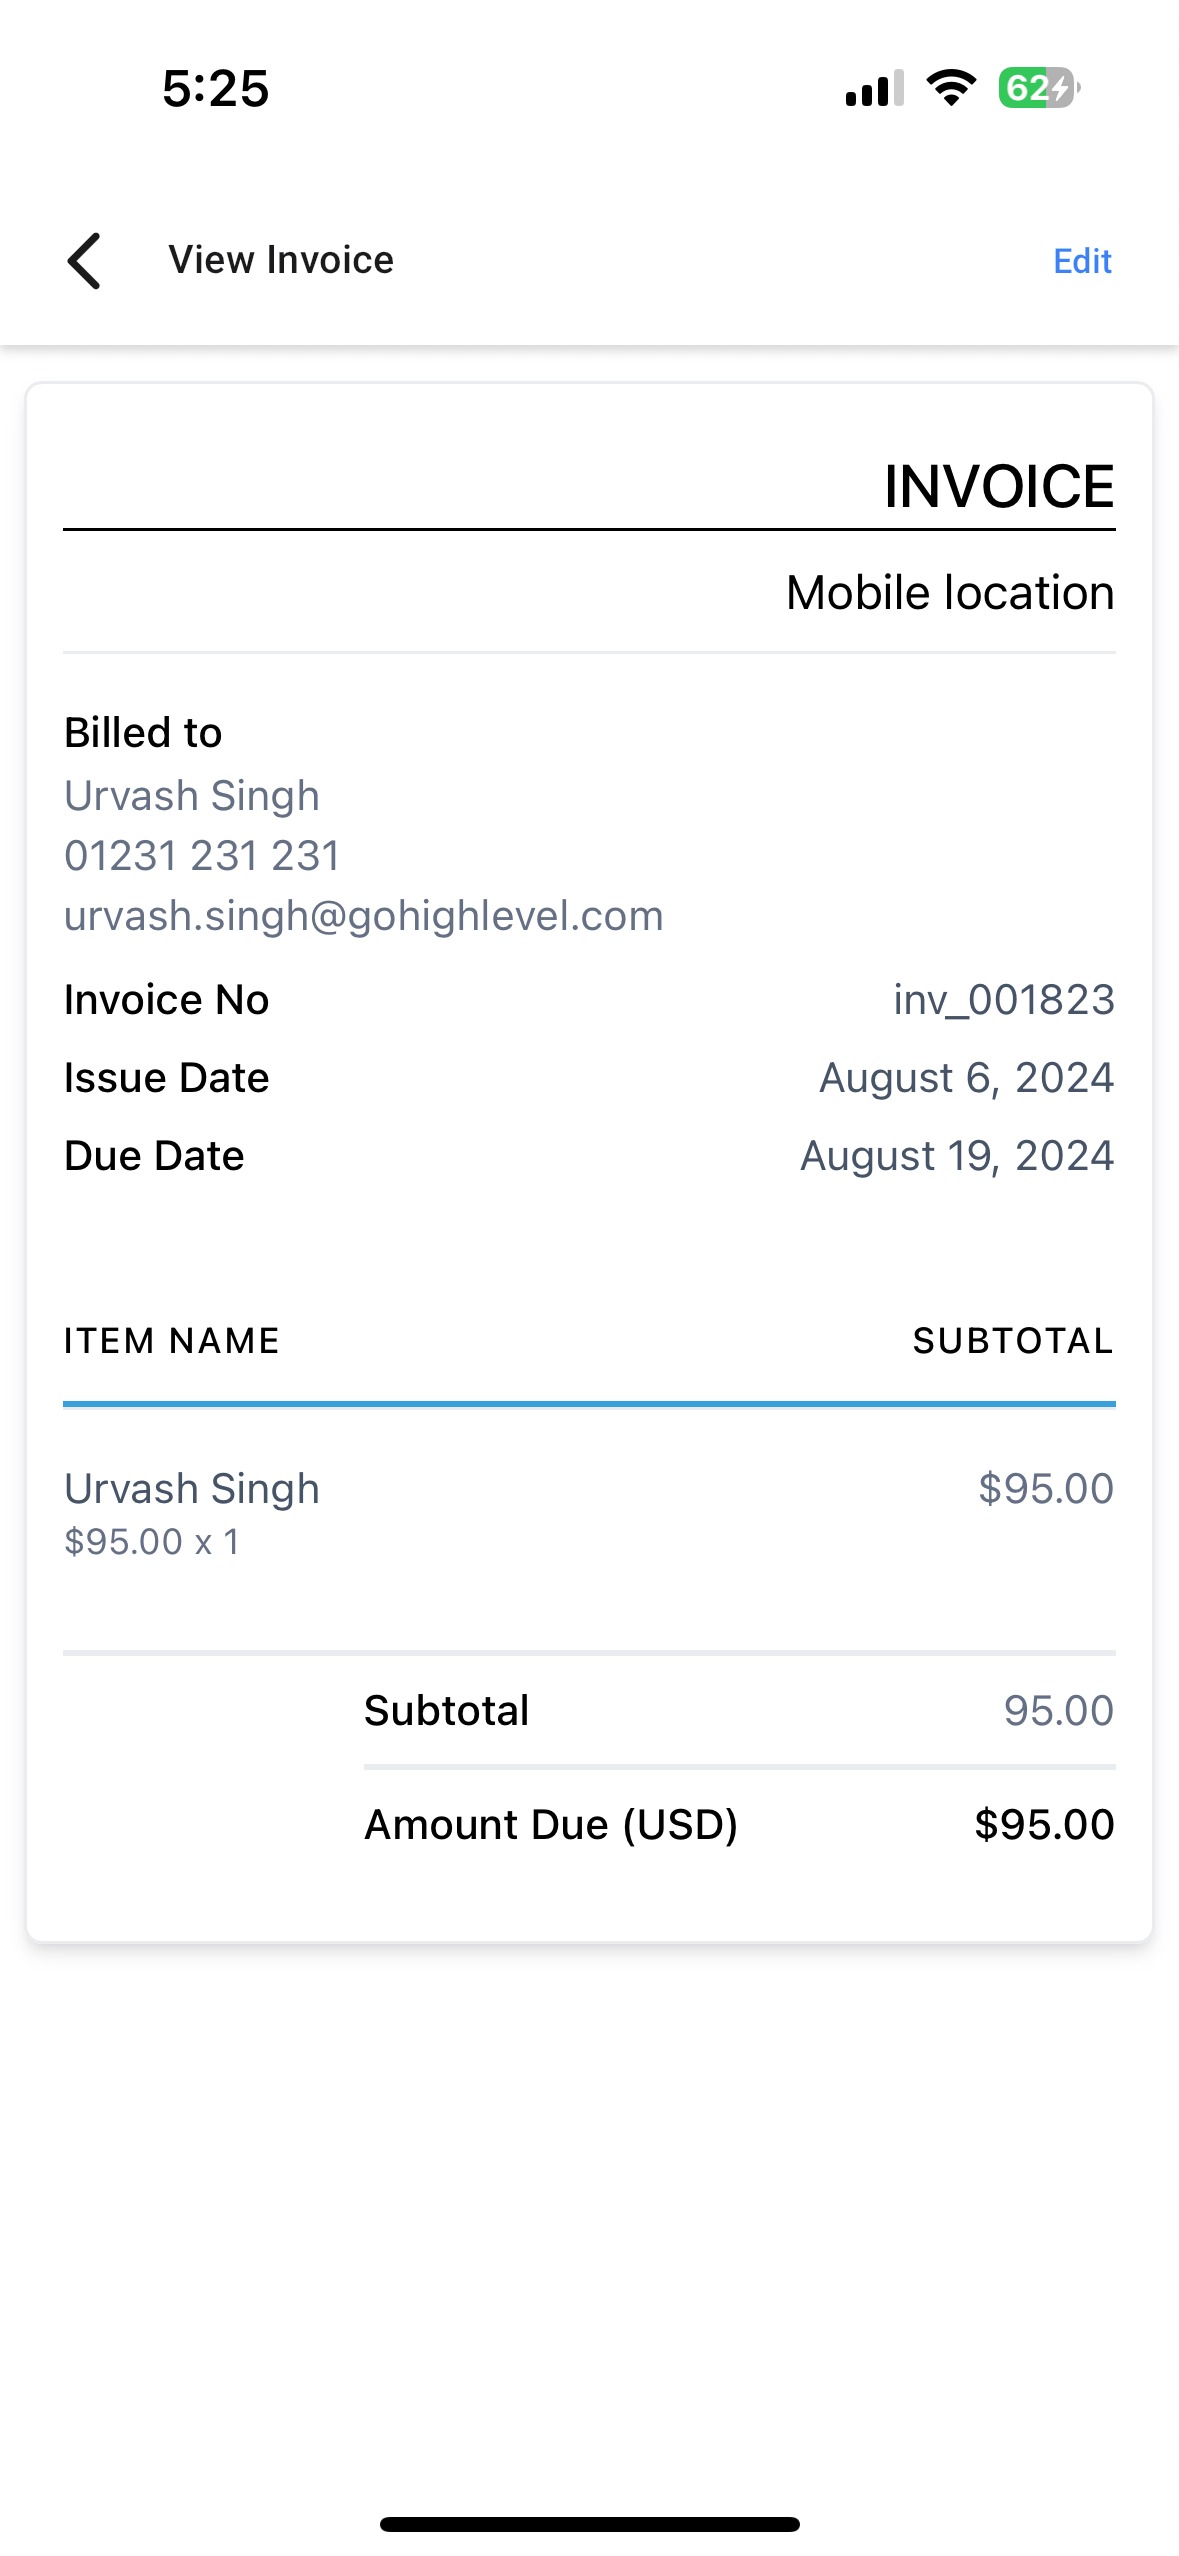
The payment flow works in two parts. First, the calendar on the HighLevel web interface must have the Accept Payments toggle turned on and the payment mode set to Live. Payment settings are defined and saved for that calendar. Second, on the mobile app, the same subaccount sees the appointment under Calendars, displays the due amount, and offers View Invoice and Record Payment actions.
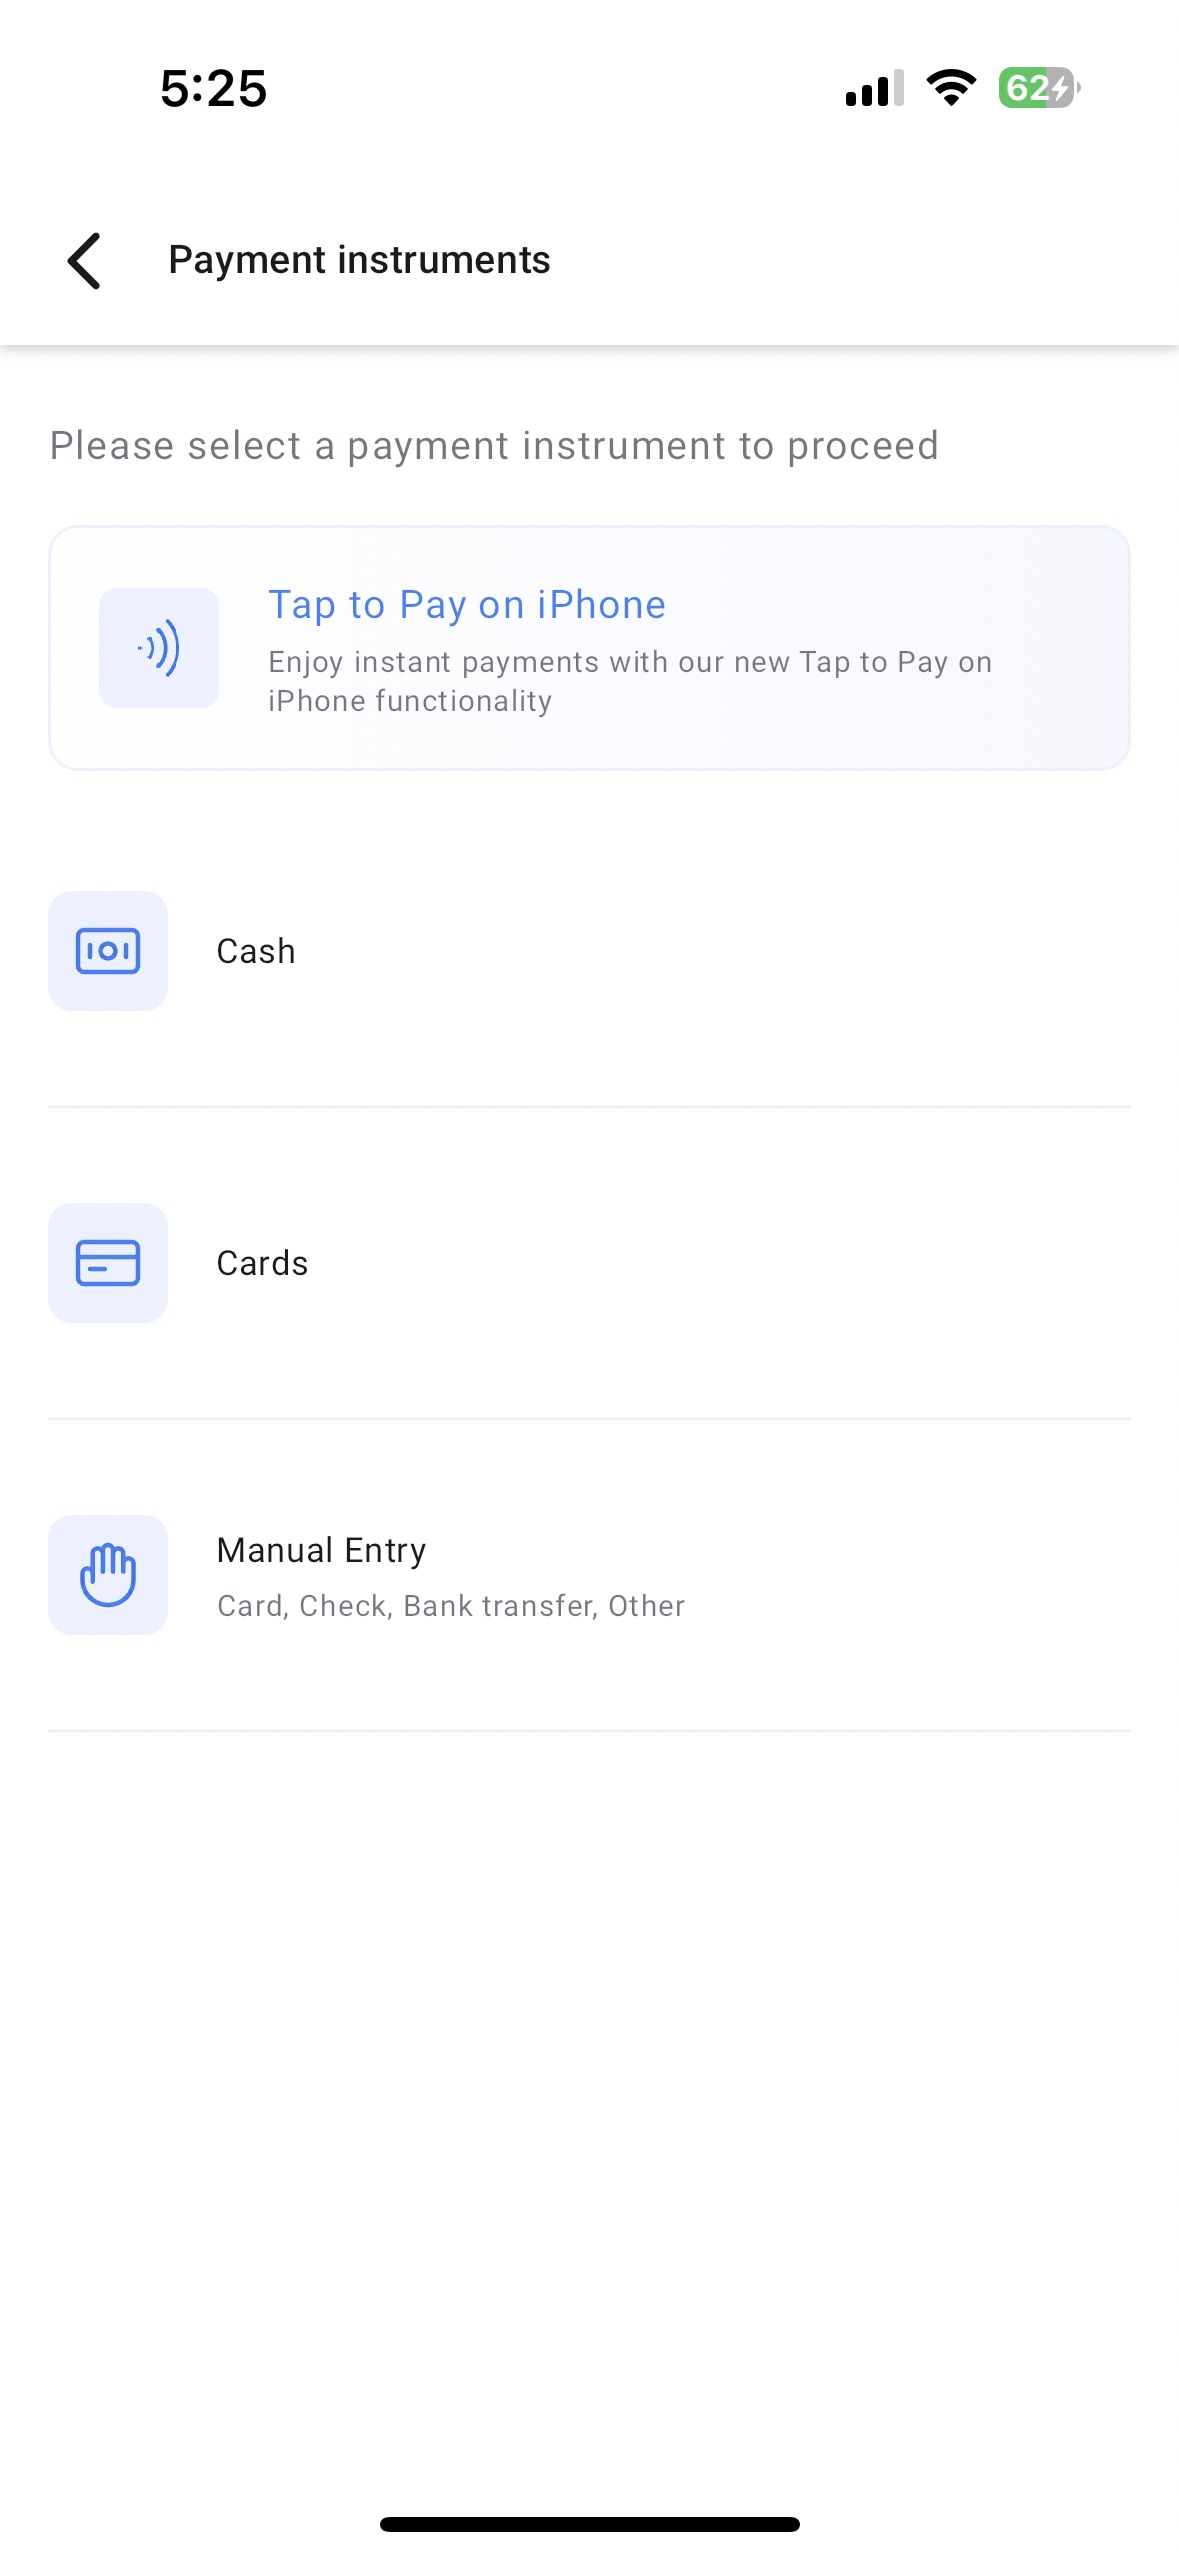
All payment methods supported by the mobile POS, Tap to Pay, card reader, cash entry, or manual amount entry, are available from the Record Payment screen. Edits to the invoice can be made before completing the transaction.
03How businesses use pay for service appointments in the mobile app POS
- Dental practice. The practice enables payments on its treatment calendar, then when a patient arrives for a cleaning, the dentist opens the appointment card in the mobile app, views the balance, and records the payment with a card swipe or Tap to Pay.
- Home cleaning service. After scheduling a cleaning with a deposit, the crew member opens the event on the mobile app, adds any extra supplies to the invoice, and captures the remaining amount using cash or manual entry before leaving the home.
- Auto repair shop. The shop turns on Accept Payments for its service calendar, views the outstanding balance on a repair appointment in the app, and completes the transaction with a credit card reader at the service bay.
04The numbers and rules that matter
- Available on HighLevel v3.78.3.
- Available on LeadConnector v3.78.3.
05Before you start
- The mobile app must be updated to version v3.78.3 or later.
- Open the mobile app with the same subaccount selected.
06How to set up and use pay for service appointments in the mobile app POS in HighLevel
Enable payments for a service calendar
- Open the Calendars section in the HighLevel web interface.
- Select the desired service calendar.
- Find the Forms and Payments area and toggle Accept Payments on.
- Set the Payment mode to Live.
- Configure the payment settings for the calendar.
- Save the changes.
Record a payment from the mobile app
- Launch the HighLevel mobile app and choose the appropriate subaccount.
- Navigate to Calendars and locate the appointment event.
- Tap the event card to open its details.
- Press the Record Payment button.
- Select a payment method such as Tap to Pay, Card, Cash, or Manual Entry.
- Complete the transaction and confirm the payment.
07What it looks like in HighLevel
08Settings that matter
- Accept Payments. Activates payment collection for the selected service calendar.
- Payment mode. Determines whether the calendar processes live transactions or test mode.
09Things to know before you rely on it
- The feature is available in HighLevel version v3.78.3 and LeadConnector version v3.78.3.
- Whitelabelled apps require a request for the update before the feature appears.
10How it connects to the rest of HighLevel
- Consolidated payment hub in HighLevel mobile app Payment hub
- Dynamic products in HighLevel: Edit details during a mobile transaction Dynamic products
- HighLevel pricing and plans Pricing
Michael's take

The new POS integration lets you see the balance, adjust the invoice and take payment right from the appointment card on your phone, removing the back and forth between a calendar and a point of sale.
If I were setting up a haircut shop, I’d enable Accept Payments on the calendar, set the mode to Live, and then simply tap the event when the client is ready. The payment is recorded in the app, keeping the client experience smooth and the books accurate.