
01Who this is for
- Sales teams, keep contracts and proposals tied to each lead for quick retrieval.
- Customer support, store received documents like IDs or signed agreements alongside the contact.
- Marketing managers, attach media assets and track sent proposals within the contact record.
02Docs and Files tabs, explained
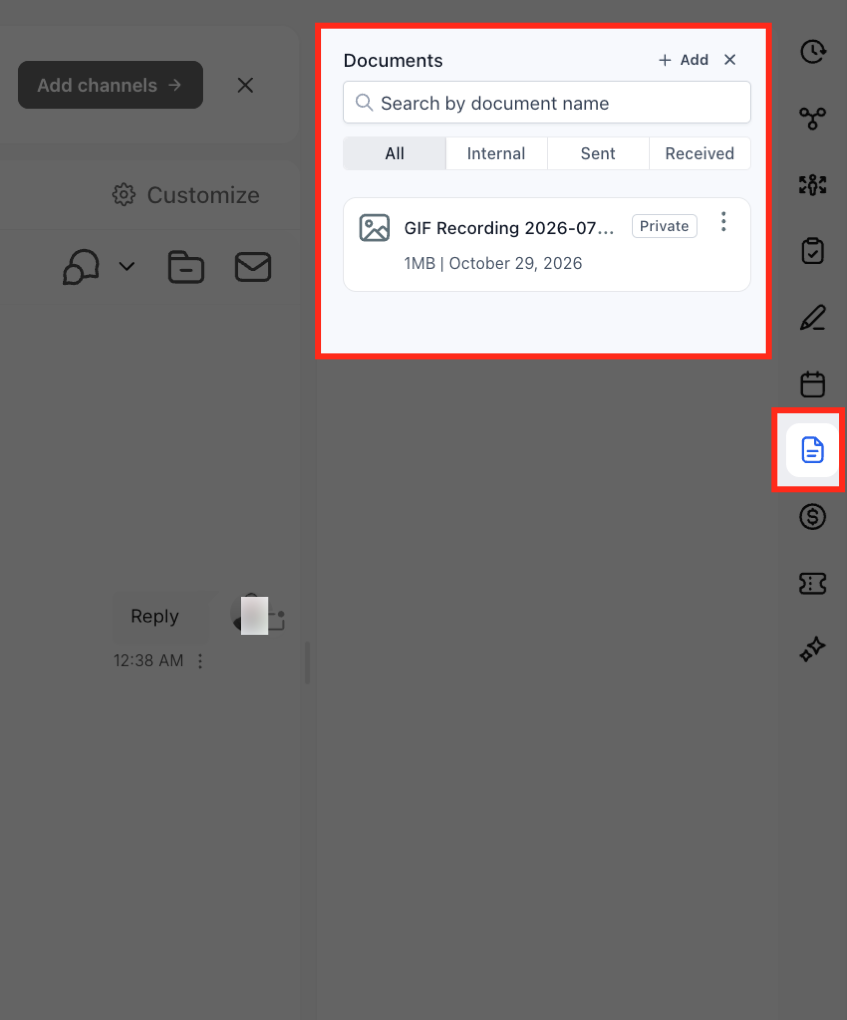
The Docs and Files tab lives inside each contact record. It acts as a central folder for every file related to that contact. You can upload files directly, and the system places them in the appropriate sub folder.
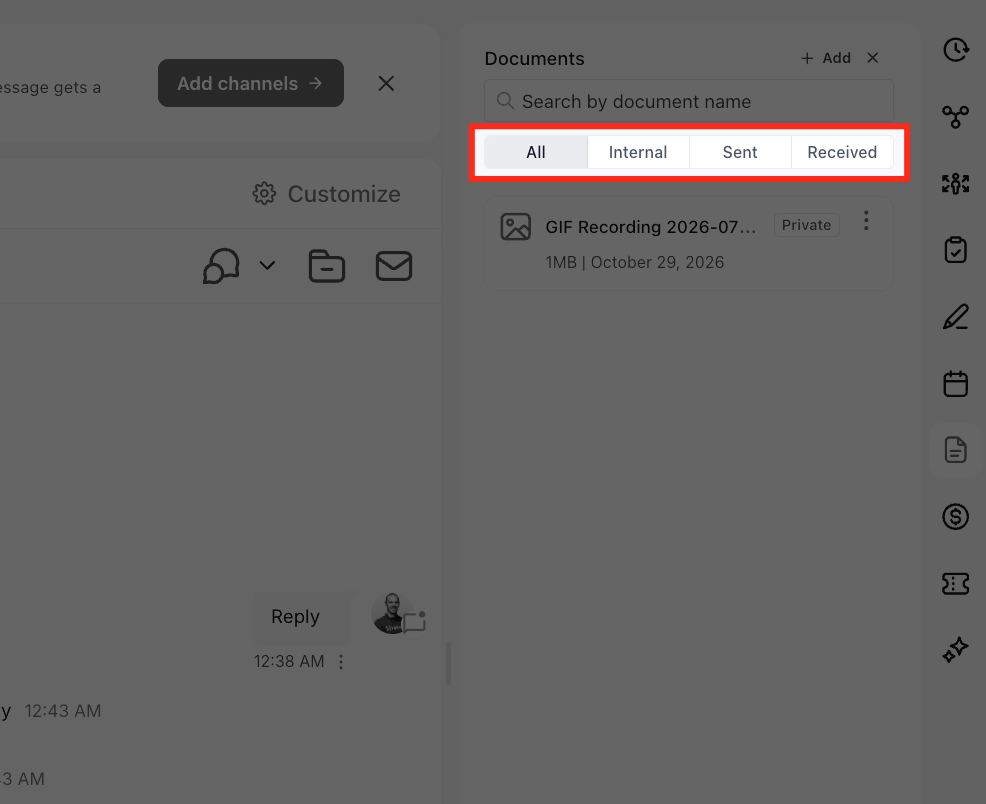
When you add a file manually it goes to the Internal folder. Files sent through messages appear in the Sent folder, while inbound attachments land in the Received folder. Files linked via custom fields are stored under a nested Custom Fields folder. The tab works on both desktop and mobile versions of HighLevel.
03How businesses use docs and Files tab
- Real estate agency. Agents upload purchase agreements and property photos to a client’s contact record. The platform stores them in the Internal folder, and agents can preview the files without leaving HighLevel.
- Legal firm. Lawyers attach signed contracts and case documents to a client’s record. Incoming documents from clients are saved automatically in the Received folder for easy review.
- Event planning company. Planners upload proposals and vendor contracts to each event contact. Sent proposals are saved in the Sent folder, keeping a clear history of what was shared.
04The numbers and rules that matter
- Upload up to 10 files per upload.
- Maximum total upload size: 250 MB.
- Mobile app version 3.97.3 or above required.
05Before you start
- Make sure you’re on version 3.97.3 or above on mobile devices.
06How to set up and use docs and Files tab in HighLevel
Upload files to a contact
- Open the desired contact from the dashboard.
- Click or swipe to the Docs and Files tab on the contact record.
- Tap Upload and choose files from your computer or device, up to ten at a time.
- Confirm the selection to add the files to the contact.
- The uploaded files appear automatically in the Internal folder.
07What it looks like in HighLevel
08Settings that matter
- Upload capacity. Sets the maximum number of files per upload and the total upload size.
- Supported file types. Specifies which document formats can be uploaded, such as PDF, DOCX, JPG, PNG, PPT, GIF.
09Things to know before you rely on it
- You can upload up to 10 files in a single action.
- The total size of uploaded files cannot exceed 250 MB.
- Only the listed file formats are accepted.
- Renaming files after upload is not supported.
- Mobile access requires HighLevel app version 3.97.3 or newer.
10How it connects to the rest of HighLevel
- The Docs and Files tab integrates with contact records, allowing files to be linked directly to each client. All Mobile & Desktop App features
- Files uploaded via custom fields appear under the Custom Fields folder for easy reference. Custom Values guide
- Access Docs and Files on mobile devices with the HighLevel app version 3.97.3 or later. Mobile app guide
Michael's take

Michael ReimerFounder of CRM Pros, HighLevel Commander and Certified Admin
The Docs and Files tab is a clean way to keep client documents in one spot.
Skip it if your team never needs to share or reference files inside HighLevel.
Get More InformationOpens on HighLevelPublished November 2, 2026 · Updated November 17, 2026