
01Who this is for
- Digital marketing agencies benefit because they can store client assets together and retrieve them by tag for campaign builds.
- Real estate firms gain a central place for property photos and videos, allowing quick folder uploads from shoots and easy preview before embedding on listings.
- Online course creators keep lesson PDFs, recordings, and graphics organized, using tag searches to locate media for each module without leaving HighLevel.
02Media storage, explained
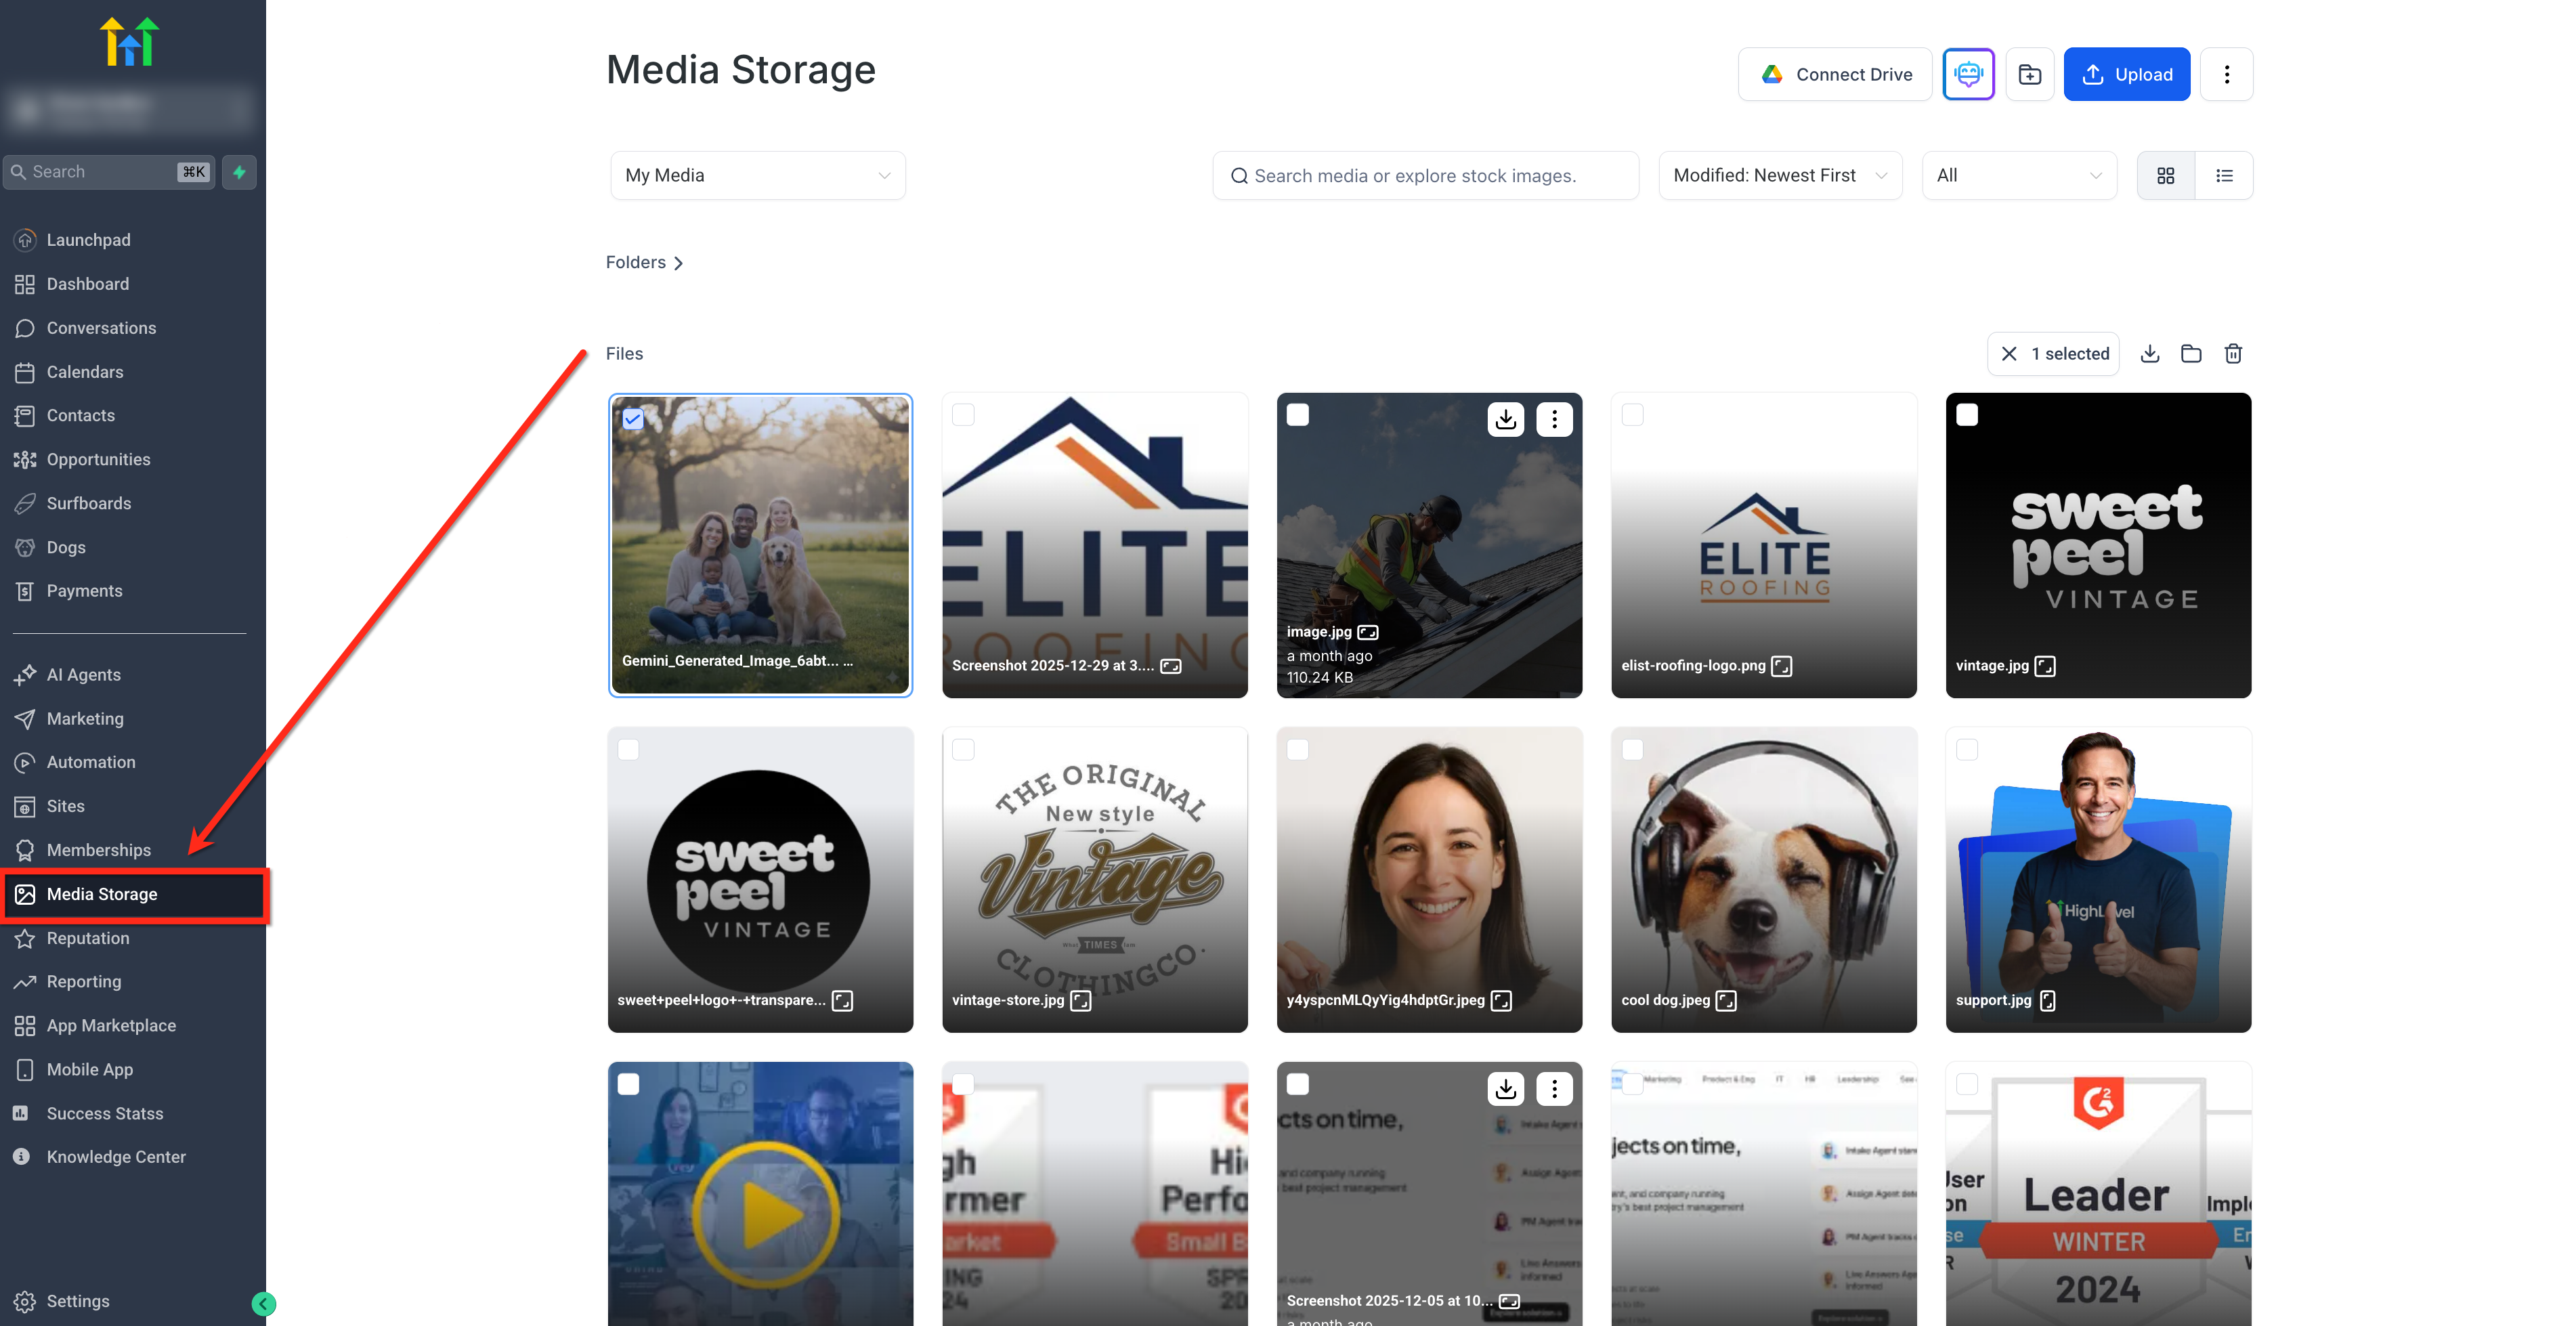
Media Storage is a built in file library accessed from the left sidebar of the HighLevel dashboard. It accepts images, videos, audio files, and common document formats. Files can be dragged in, uploaded as folders, or imported from URLs and web pages.
The library shows upload progress, lets you tag items, search across folders, preview files, edit supported text types, and move or download entire folders. Deleted items go to a shared Trash for 30 days before permanent removal.
03How businesses use media storage
- Digital marketing agency. The agency uploads client campaign assets as a folder to keep the original structure. It then tags each file by client and campaign, enabling team members to find the right image with a tag search. The agency also imports multiple graphics from a partner’s landing page in one step.
- Real estate firm. A realtor imports high resolution property photos directly from a cloud storage URL, previews them, and edits any accompanying text files with property details. The firm moves completed property folders into a sales ready folder and downloads entire folders as ZIPs for offline sharing.
- Online course creator. The creator tags lesson PDFs and video lectures, then uses the tag search to pull the correct media into a course page builder. Text based syllabus files are edited directly in preview, avoiding extra download and upload steps.
04The numbers and rules that matter
- Folder uploads support up to 3 levels of nested folders.
- Folder uploads support up to 1,000 files per upload.
- Webpage scan detects up to 1,000 files per scan.
- Deleted files remain in Trash for 30 days before permanent removal.
- Edited files larger than 5 MB can be saved but lose preview capability.
- Supported audio formats: MP3, WAV, M4A, AAC, OGG, FLAC.
- Supported document formats: PDF, DOC, DOCX, XLS, XLSX, PPT, PPTX, TXT, CSV.
05Before you start
- Be in the Subaccount view of the HighLevel dashboard.
06How to set up and use media storage in HighLevel
Upload a folder
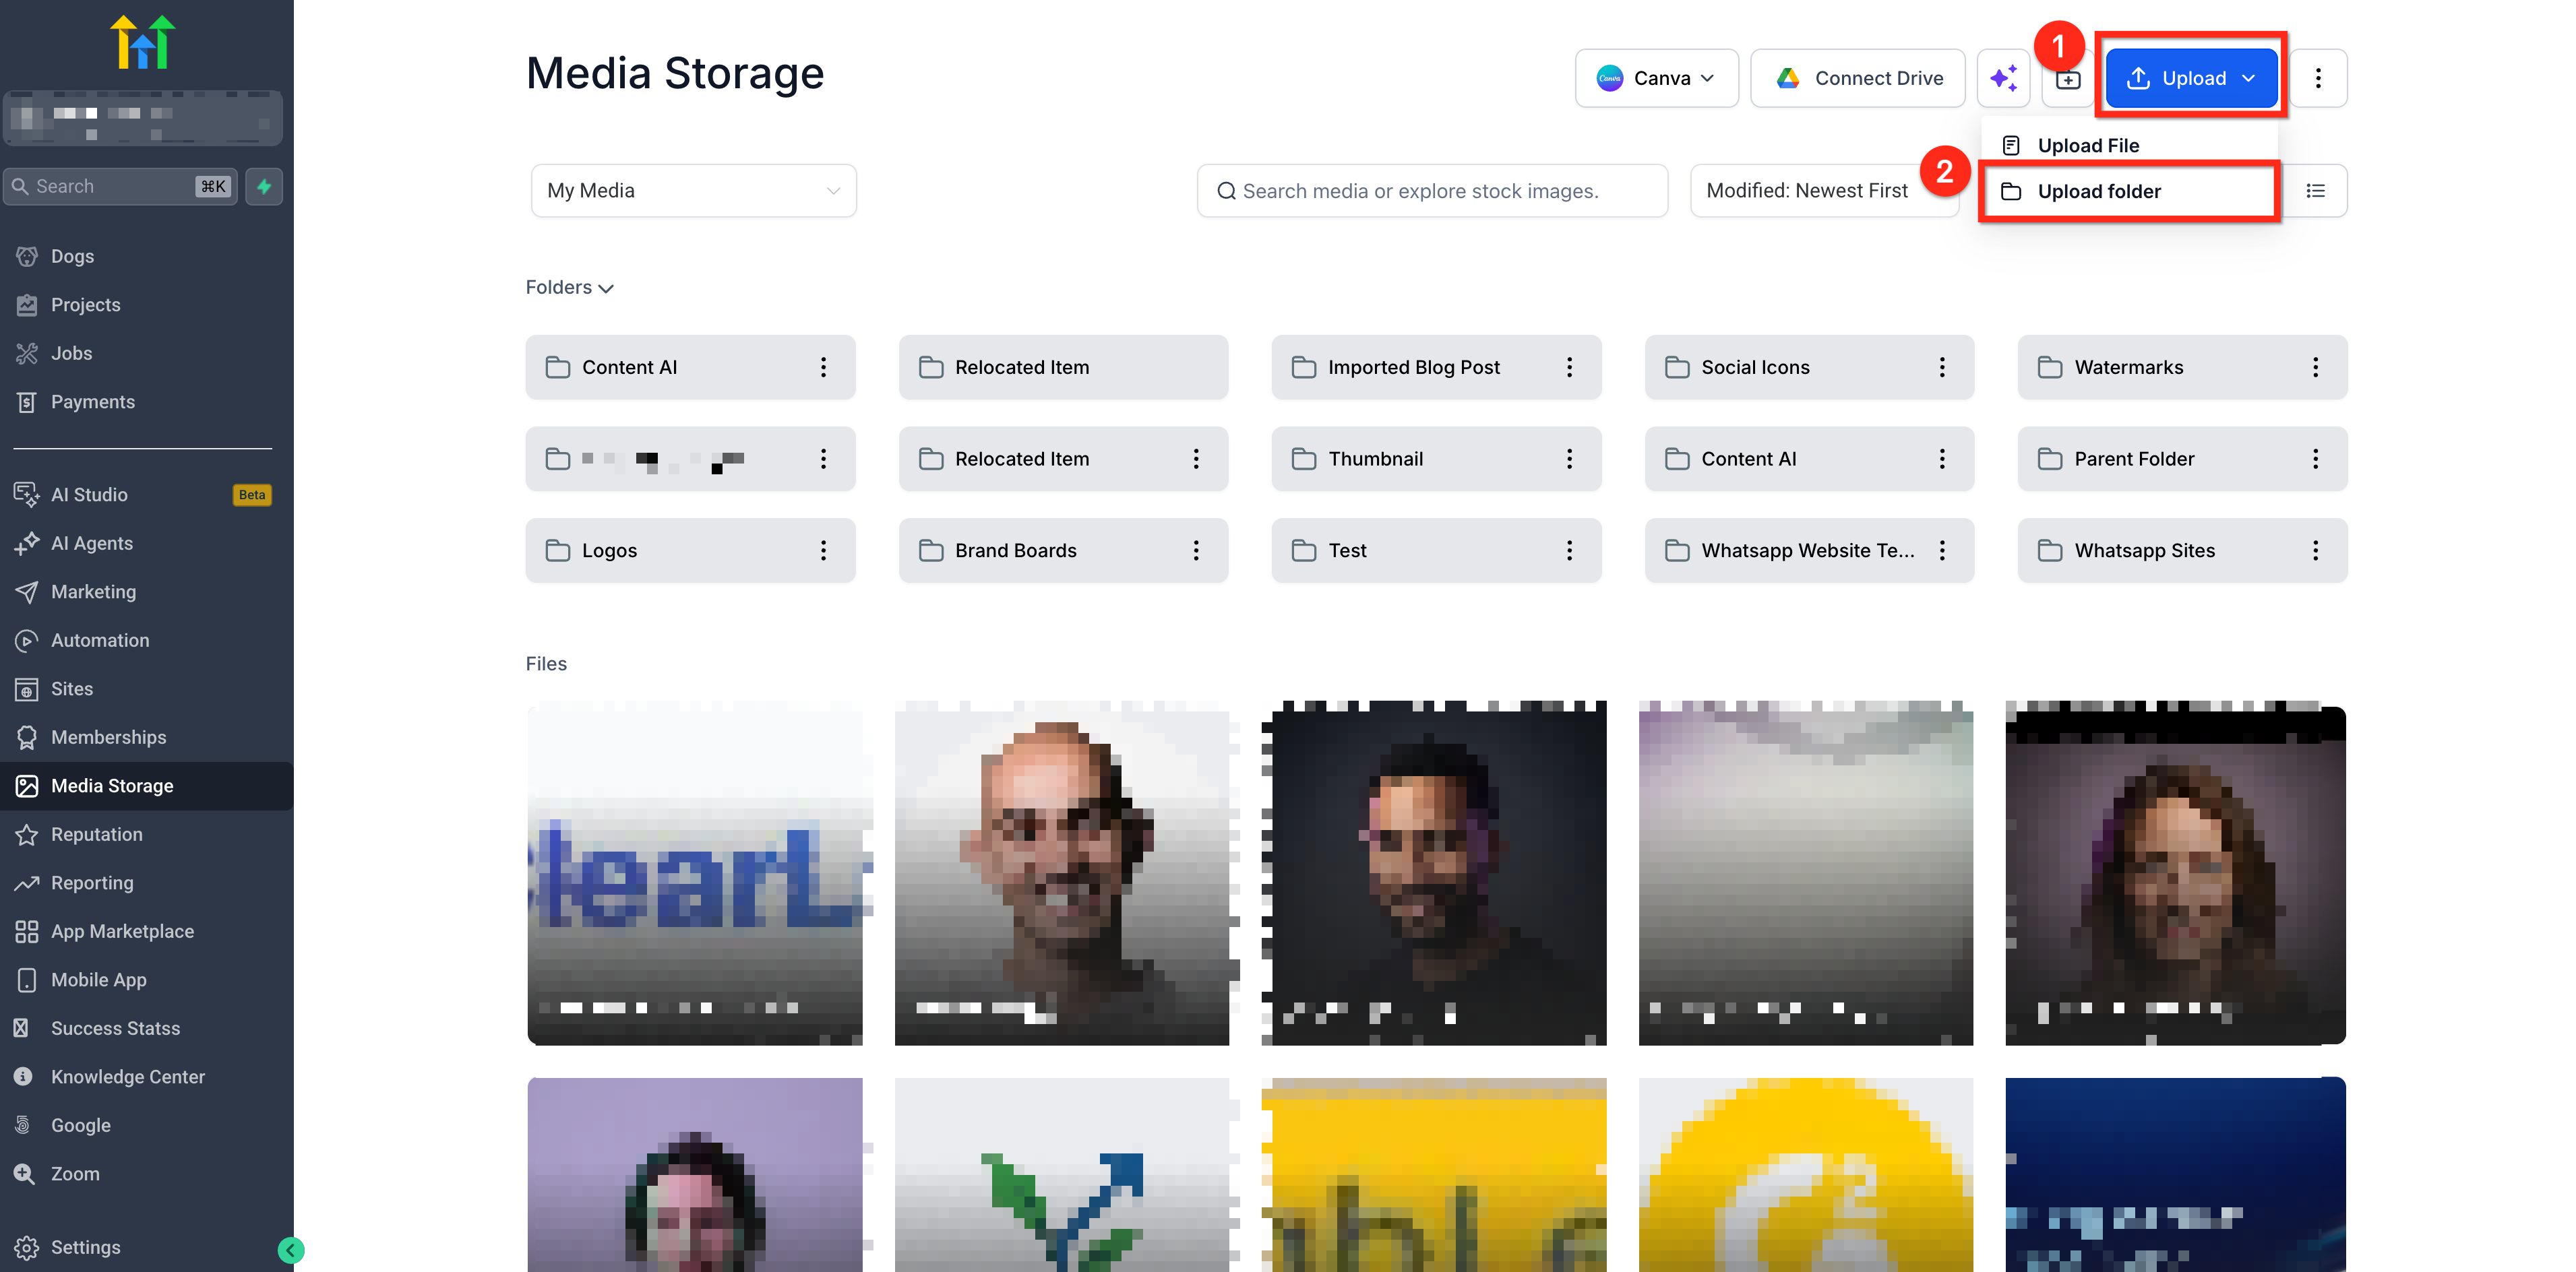
- Click the Upload button inside Media Storage.
- Select the Upload Folder option from the dropdown.
- Choose the folder on your computer and confirm the upload.
Upload a file from a URL
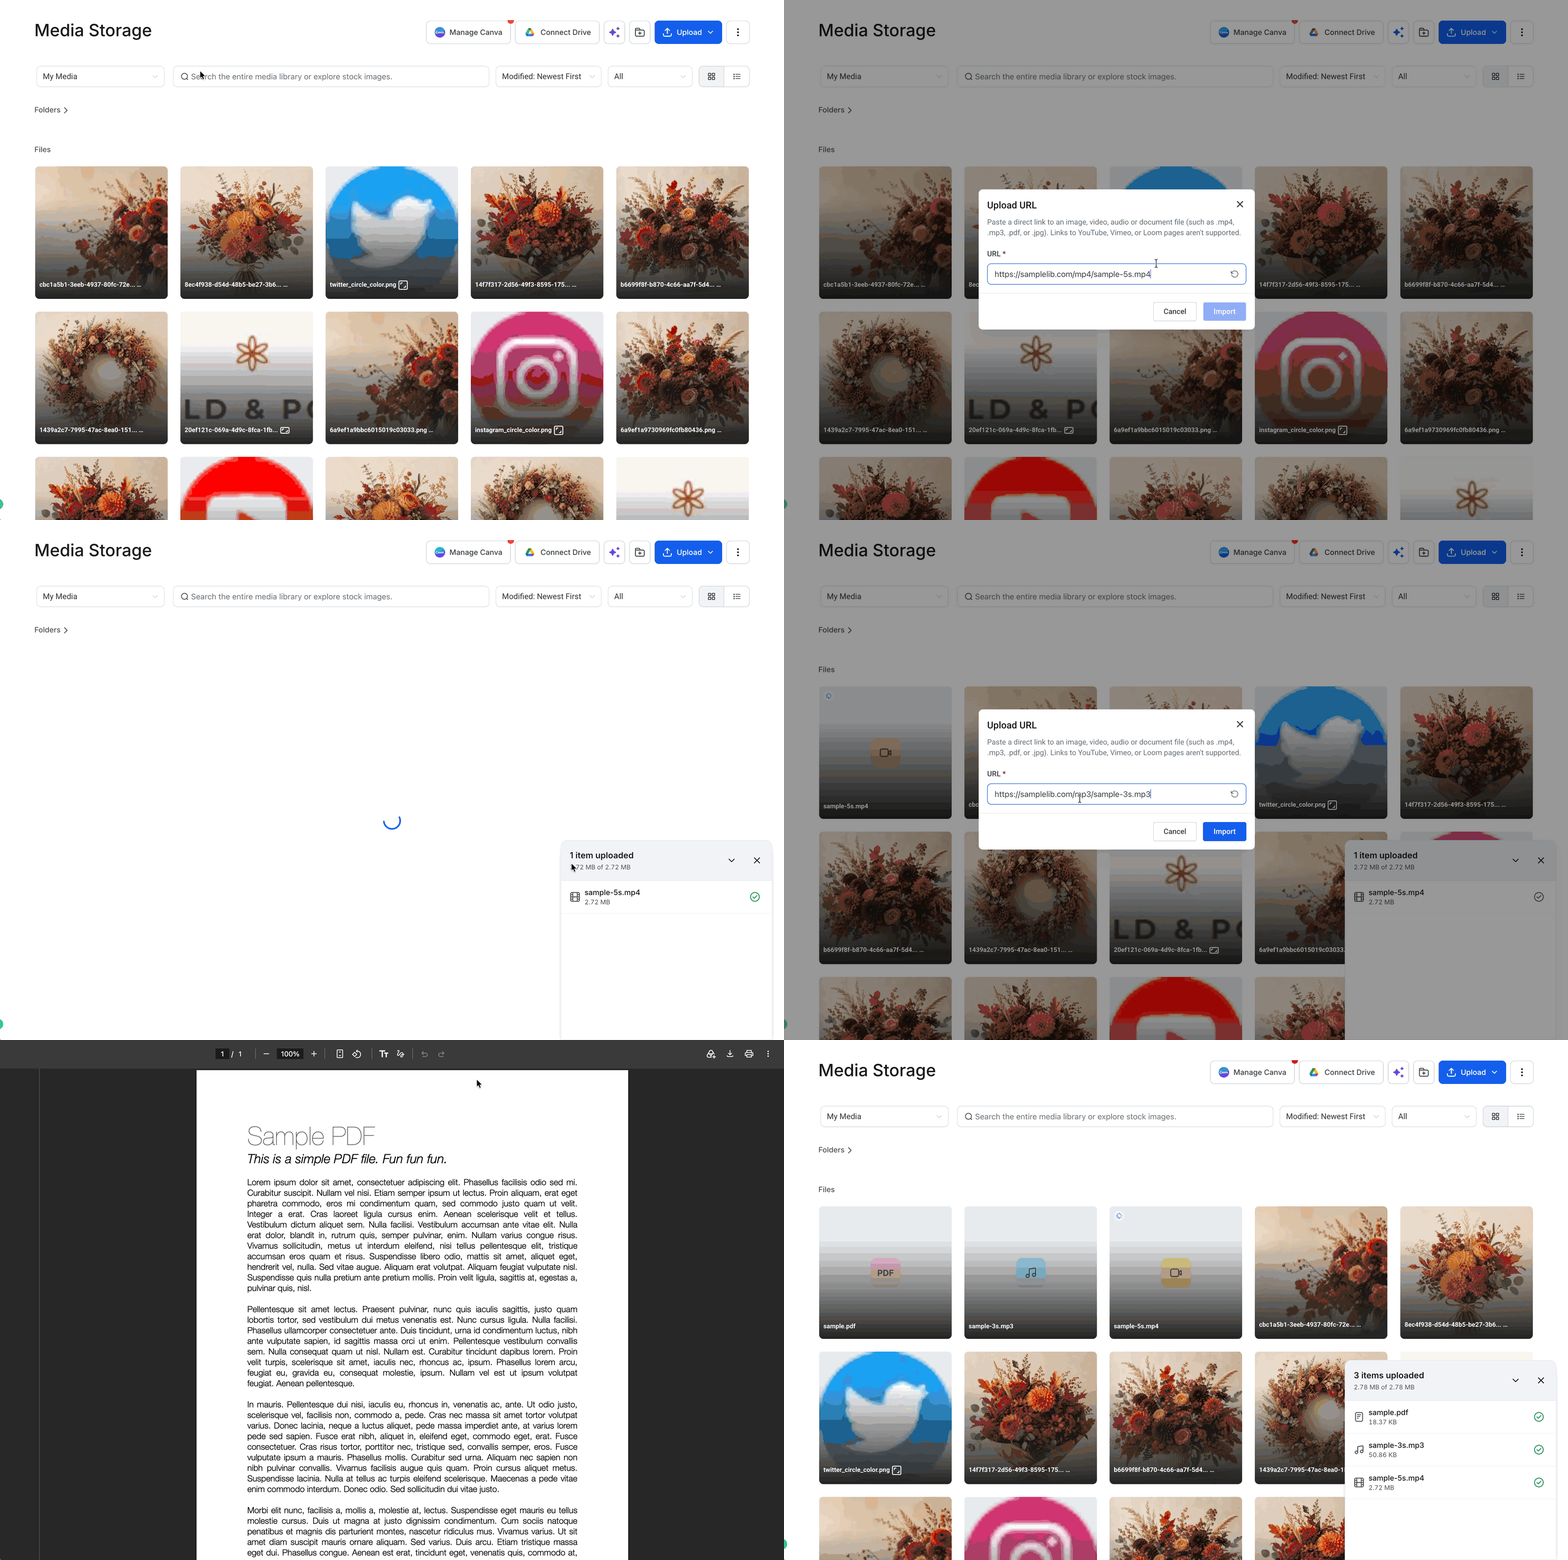
- Click the Upload button.
- Select Upload URL from the menu.
- Paste a direct link to the file and wait for the fetch to complete.
- Check the copyright confirmation box and click Import.
Import multiple files from a webpage
- From the Subaccount view, click Media Storage in the left sidebar.
- Click Upload in the upper right corner.
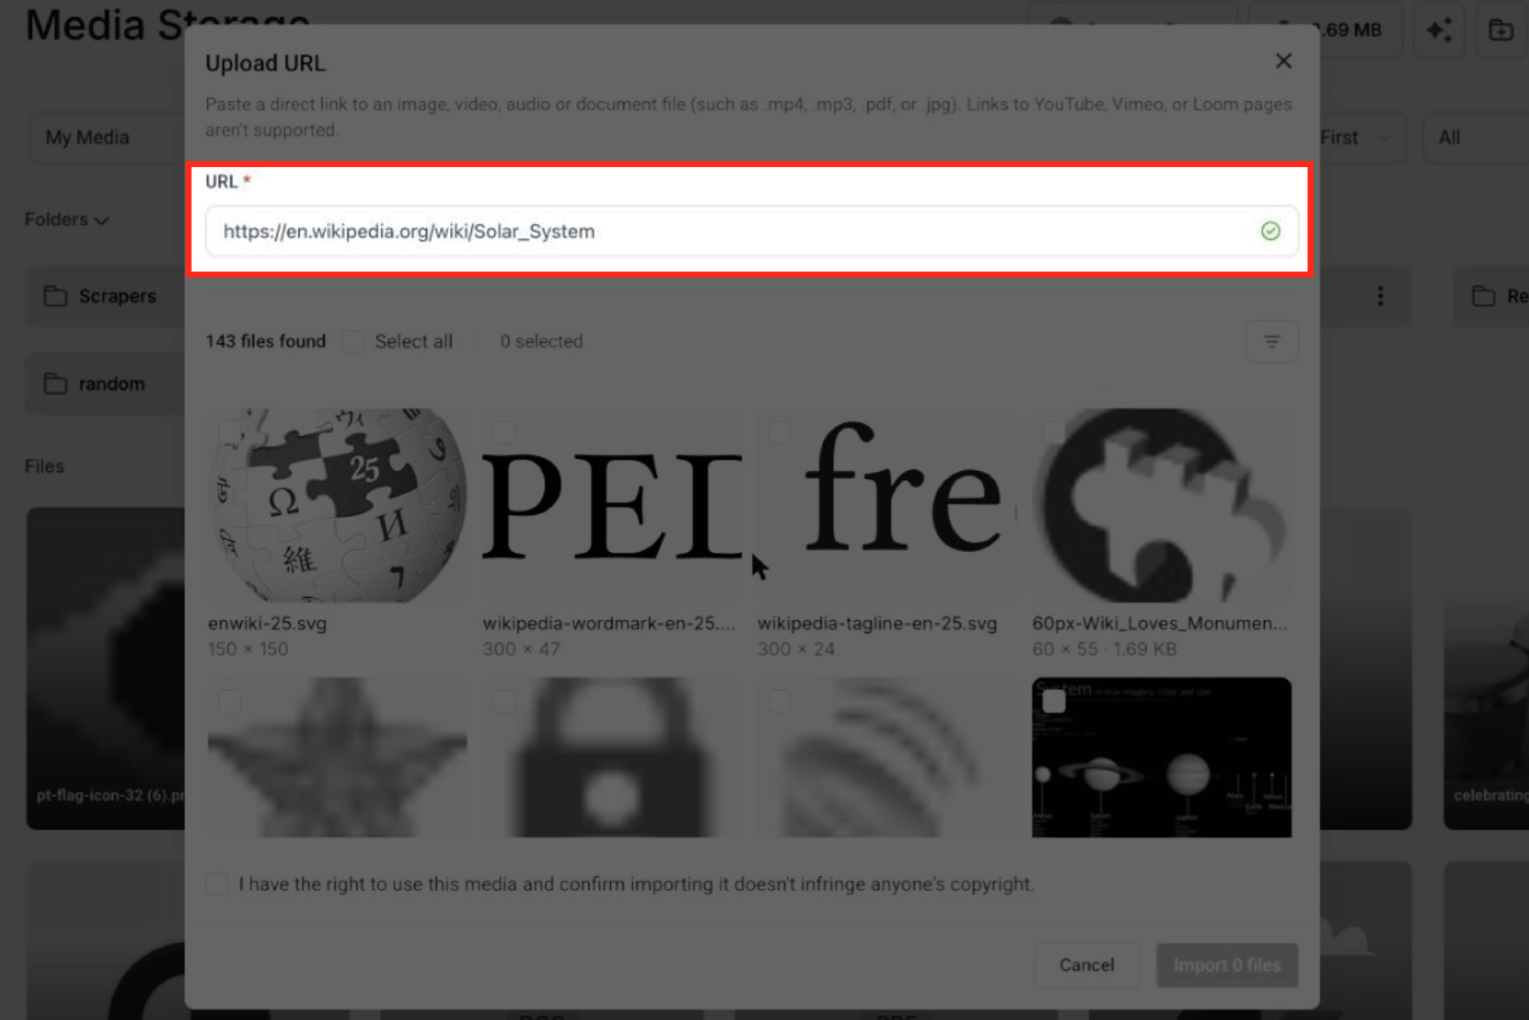
- Choose Upload URL from the dropdown.
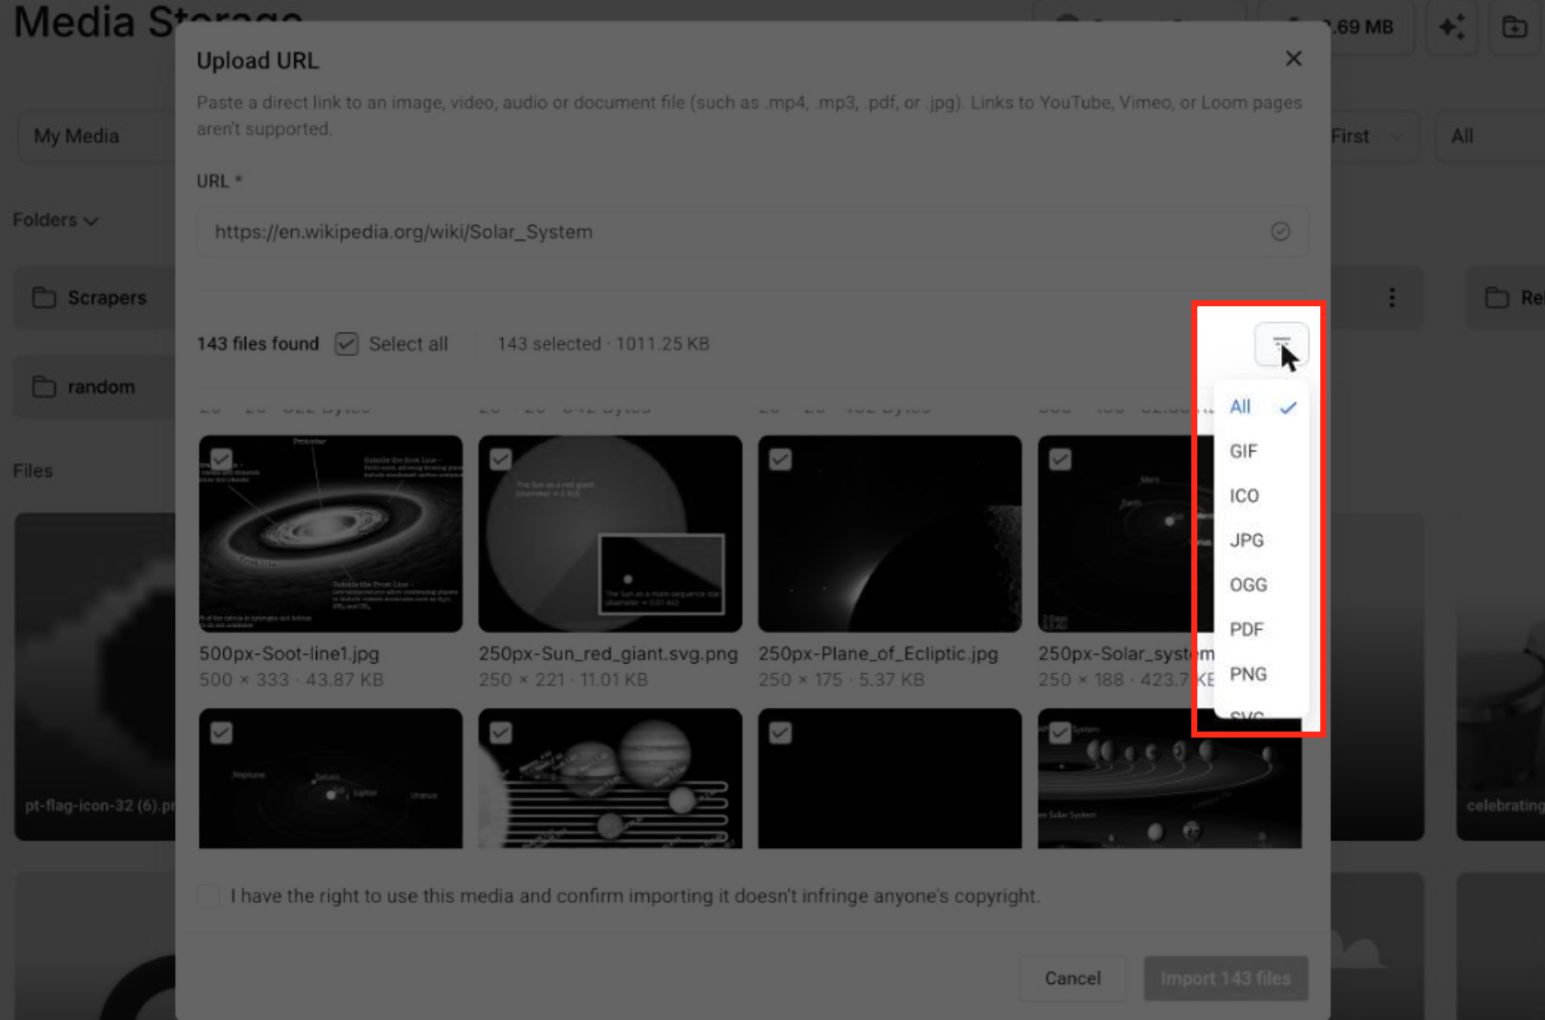
- Paste the webpage address into the URL field and wait for the scan.
- Click the file type filter icon and pick a format to narrow results.
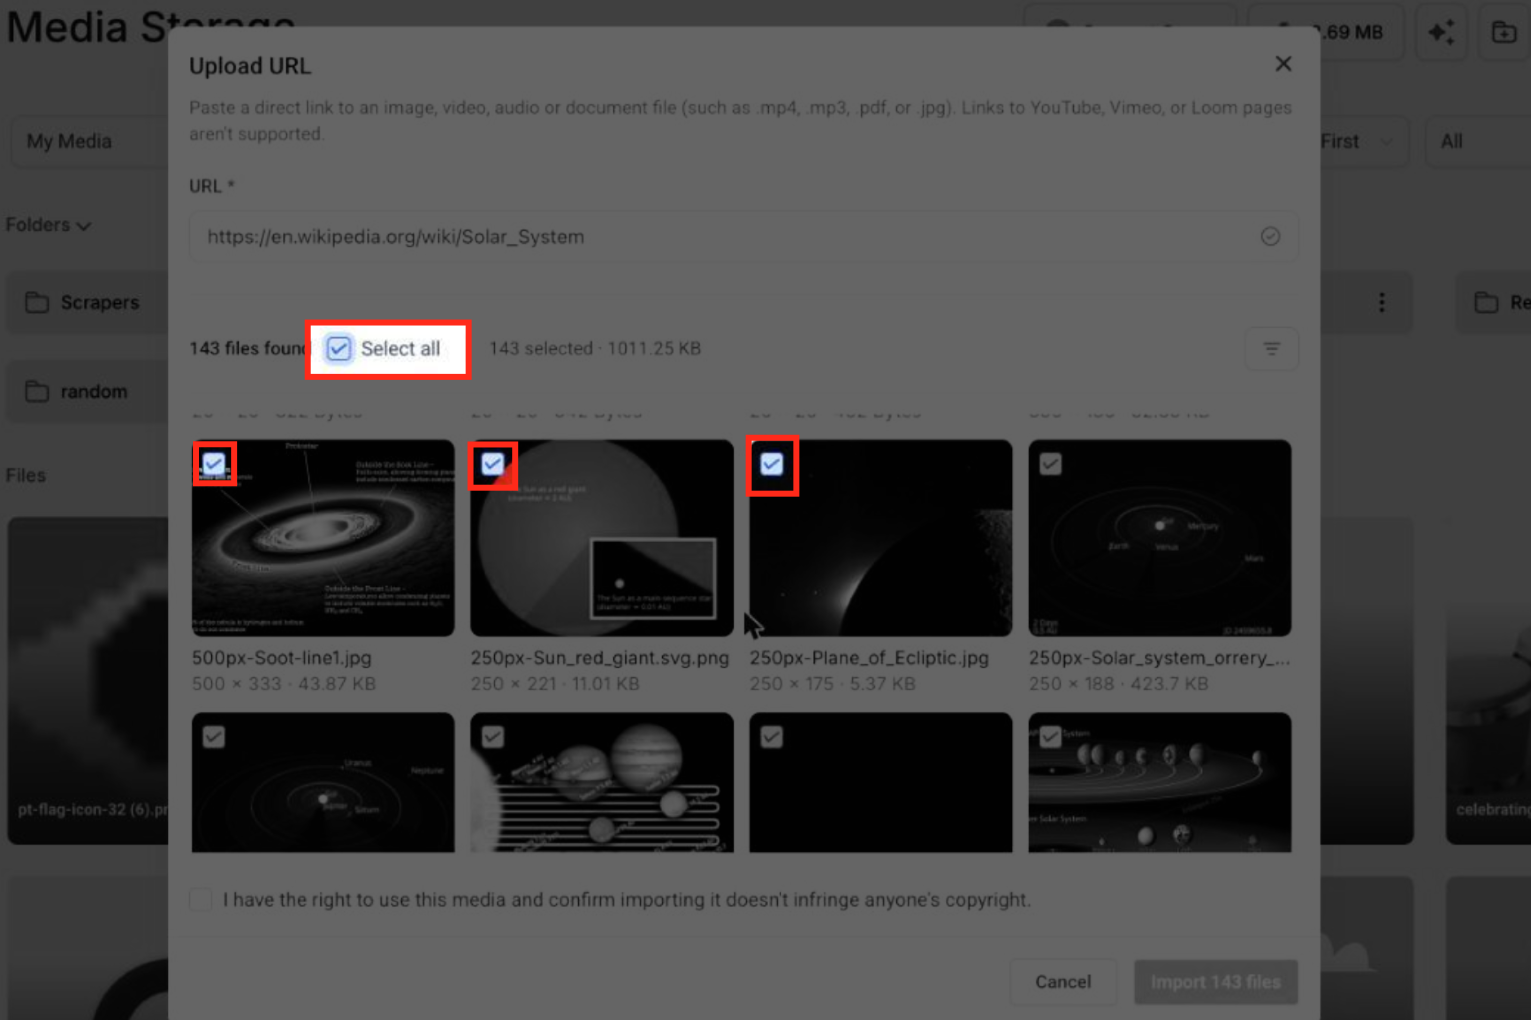
- Review the detected files and mark the ones to import with checkboxes.
- Select the copyright confirmation checkbox.
- Press the Import N files button to add the selected media to the library.
Search files by tag
- Open Media Storage from the Subaccount view.
- Click the search bar at the top of the Media Storage screen.
- Enter the desired tag and examine the returned results.
Open the containing folder
- Locate the file using the Media Storage search bar.
- Click the three dot menu next to the file.
- Select Open containing folder to navigate to its location.
Preview a file
- Click the three dot menu for the chosen file.
- Choose Preview from the menu.
- View the file in the preview window.
Edit a text file in preview
- Open the file in Preview.
- Click Edit in the preview toolbar.
- Make changes and click Save.
Move an entire folder
- Click the three dot menu next to the folder.
- Select Move to Folder.
- Pick the destination folder (or create a new one) and confirm.
Download a folder as a ZIP
- Click the three dot icon next to the folder and choose Select.
- Verify the folder is selected (add more folders if needed).
- Click Download to save the ZIP file to your computer.
Cancel uploads
- Hover over the file that is uploading and click the X to cancel that single upload.
- To stop all uploads, close the upload panel; a confirmation appears. Choose Continue Uploading to return or Cancel Uploads to stop everything.
07What it looks like in HighLevel
08Settings that matter
- Upload Folder. Enables you to select an entire folder from your computer and keep its internal structure when adding it to Media Storage.
- Upload URL. Allows a direct file link or a webpage address to be entered so HighLevel can fetch and import the referenced media.
- Copyright confirmation checkbox. Requires you to affirm that you have the right to use the imported media before the file is added to the library.
09Things to know before you rely on it
- Folder uploads support up to three levels of nested folders and a maximum of 1,000 files per upload.
- Webpage imports detect at most 1,000 files per scan; extra files are not shown.
- Edited text files larger than 5 MB can be saved but will lose preview capability afterwards.
- YouTube, Vimeo, Loom, and Google Drive page URLs cannot be used for webpage imports.
- Downloading a folder as a ZIP requires enough free disk space in the browser environment.
10How it connects to the rest of HighLevel
- Explore the built in image editor for quick adjustments. Image editor
- Add designs directly from Canva into your Media Storage library. Canva integration
- Use the file type filter in Media Center to locate specific assets faster. File type filter
- Review all Media Storage capabilities in one place. Media Storage overview
- Check pricing options or start a trial to access Media Storage features. Pricing
Michael's take

Media storage provides real time upload progress, folder level uploads and the ability to import files directly from a webpage, which streamlines asset collection.
The 30 day trash window and the 5 MB preview limit on edited files are worth noting before you rely on it for large scale design work.