
01Who this is for
- Marketers who create social posts need quick visual tweaks without leaving the platform.
- Funnel builders can adjust images on the fly to keep branding consistent.
- Email designers can add text or stickers to pictures before inserting them into campaigns.
02Built in image editors, explained
The built in image editor is a lightweight workspace that appears as a modal when you select Edit on any image stored in Media Storage. It lives inside the Media Library and can be opened from any module that uses the library, such as Social Planner, Funnels or Email Builder.
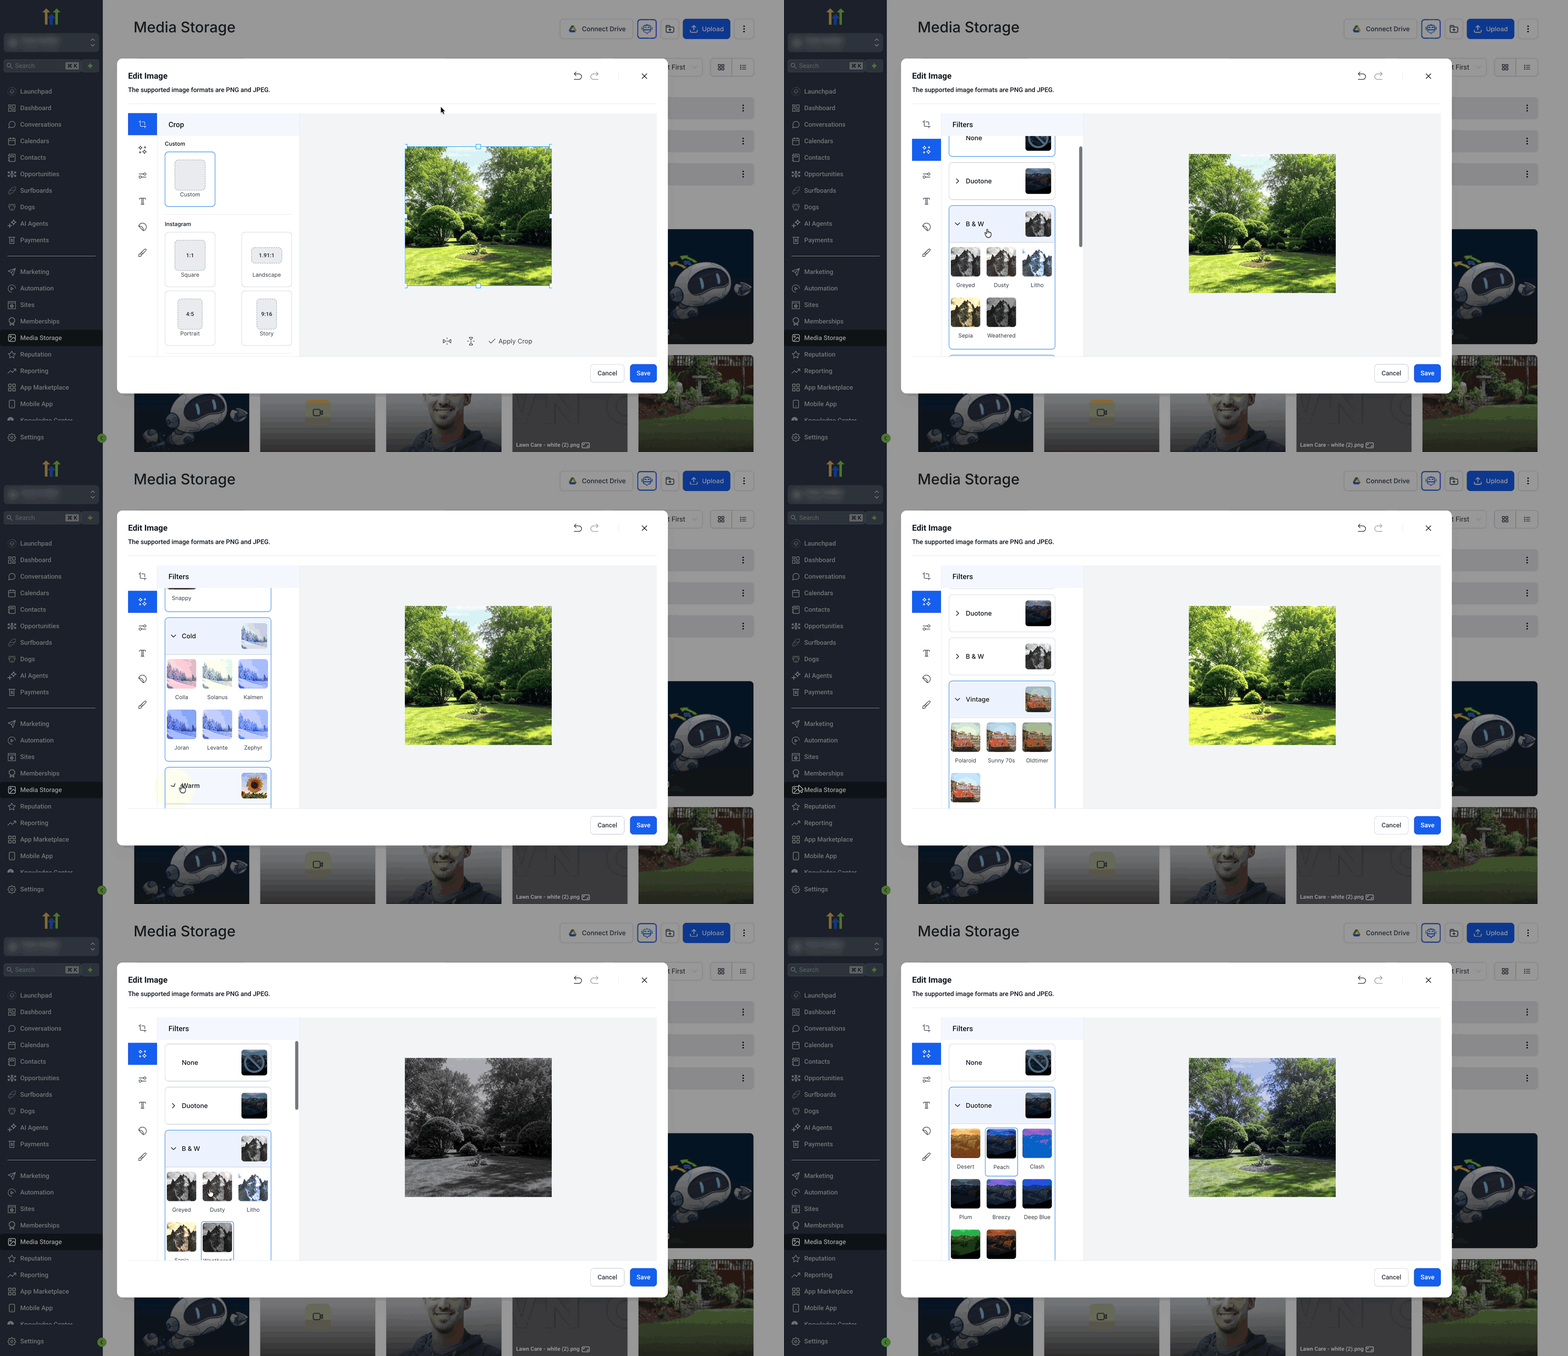
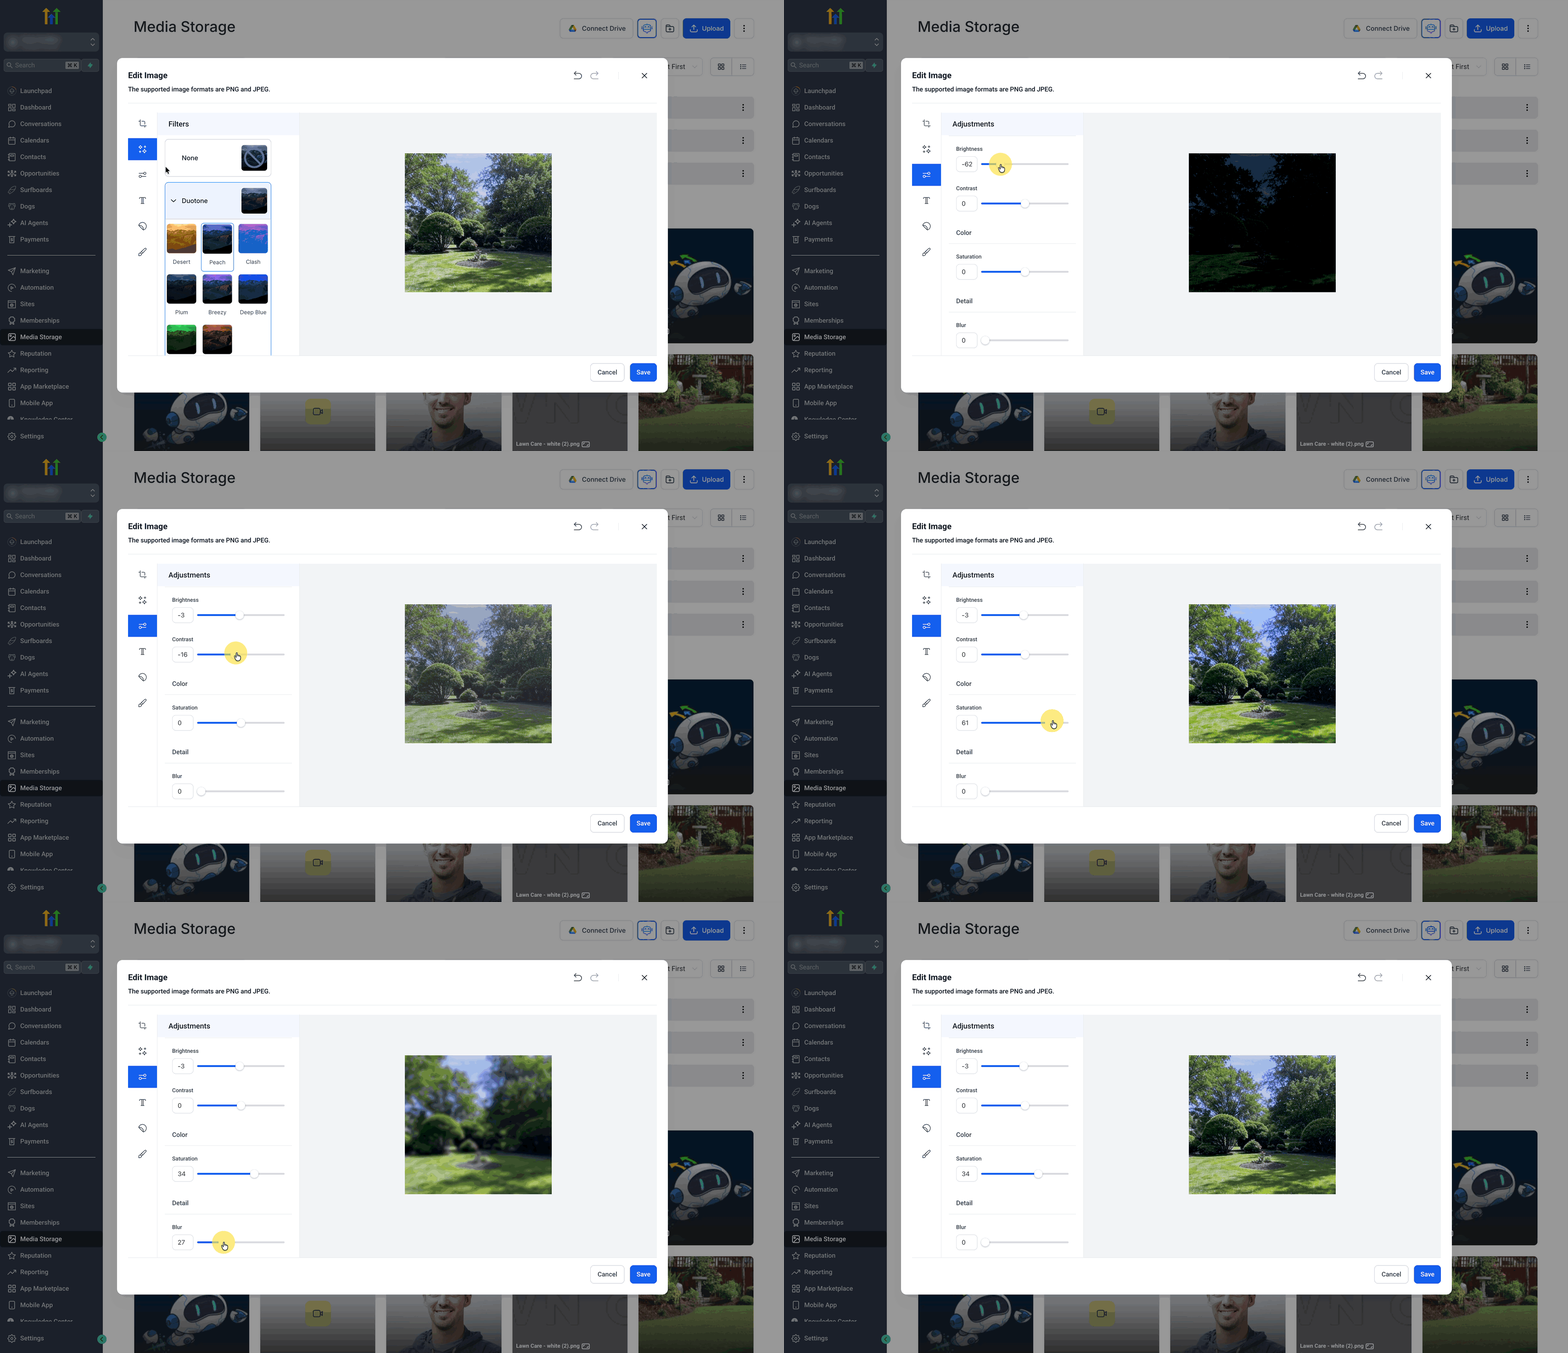
Within the editor you can crop, rotate, flip, apply a range of filters, tweak brightness, contrast, saturation and blur, and layer text, stickers or brush strokes. All changes are saved back to the Media Library, making the edited file right away available wherever the library is used.
The tool works only on desktop browsers; edits made on desktop are visible on mobile devices once saved.
03How businesses use built in image editor
- Digital marketing agency. The agency uploads client graphics to Media Storage, opens the editor, applies a custom crop and brand colors, saves the file, and then drags it into Social Planner posts.
- Real estate office. An agent selects a property photo, adds a watermark text with the office logo using the editor, saves the new image to a folder, and inserts it into a funnel landing page.
- Ecommerce store. The store owner edits a product photo to adjust brightness, adds a promotional sticker, saves the version, and uses it in Email Builder newsletters.
04Before you start
- Access HighLevel on a desktop web browser.
- The image you want to edit must already be stored in Media Storage.
05How to set up and use built in image editor in HighLevel
Edit an image
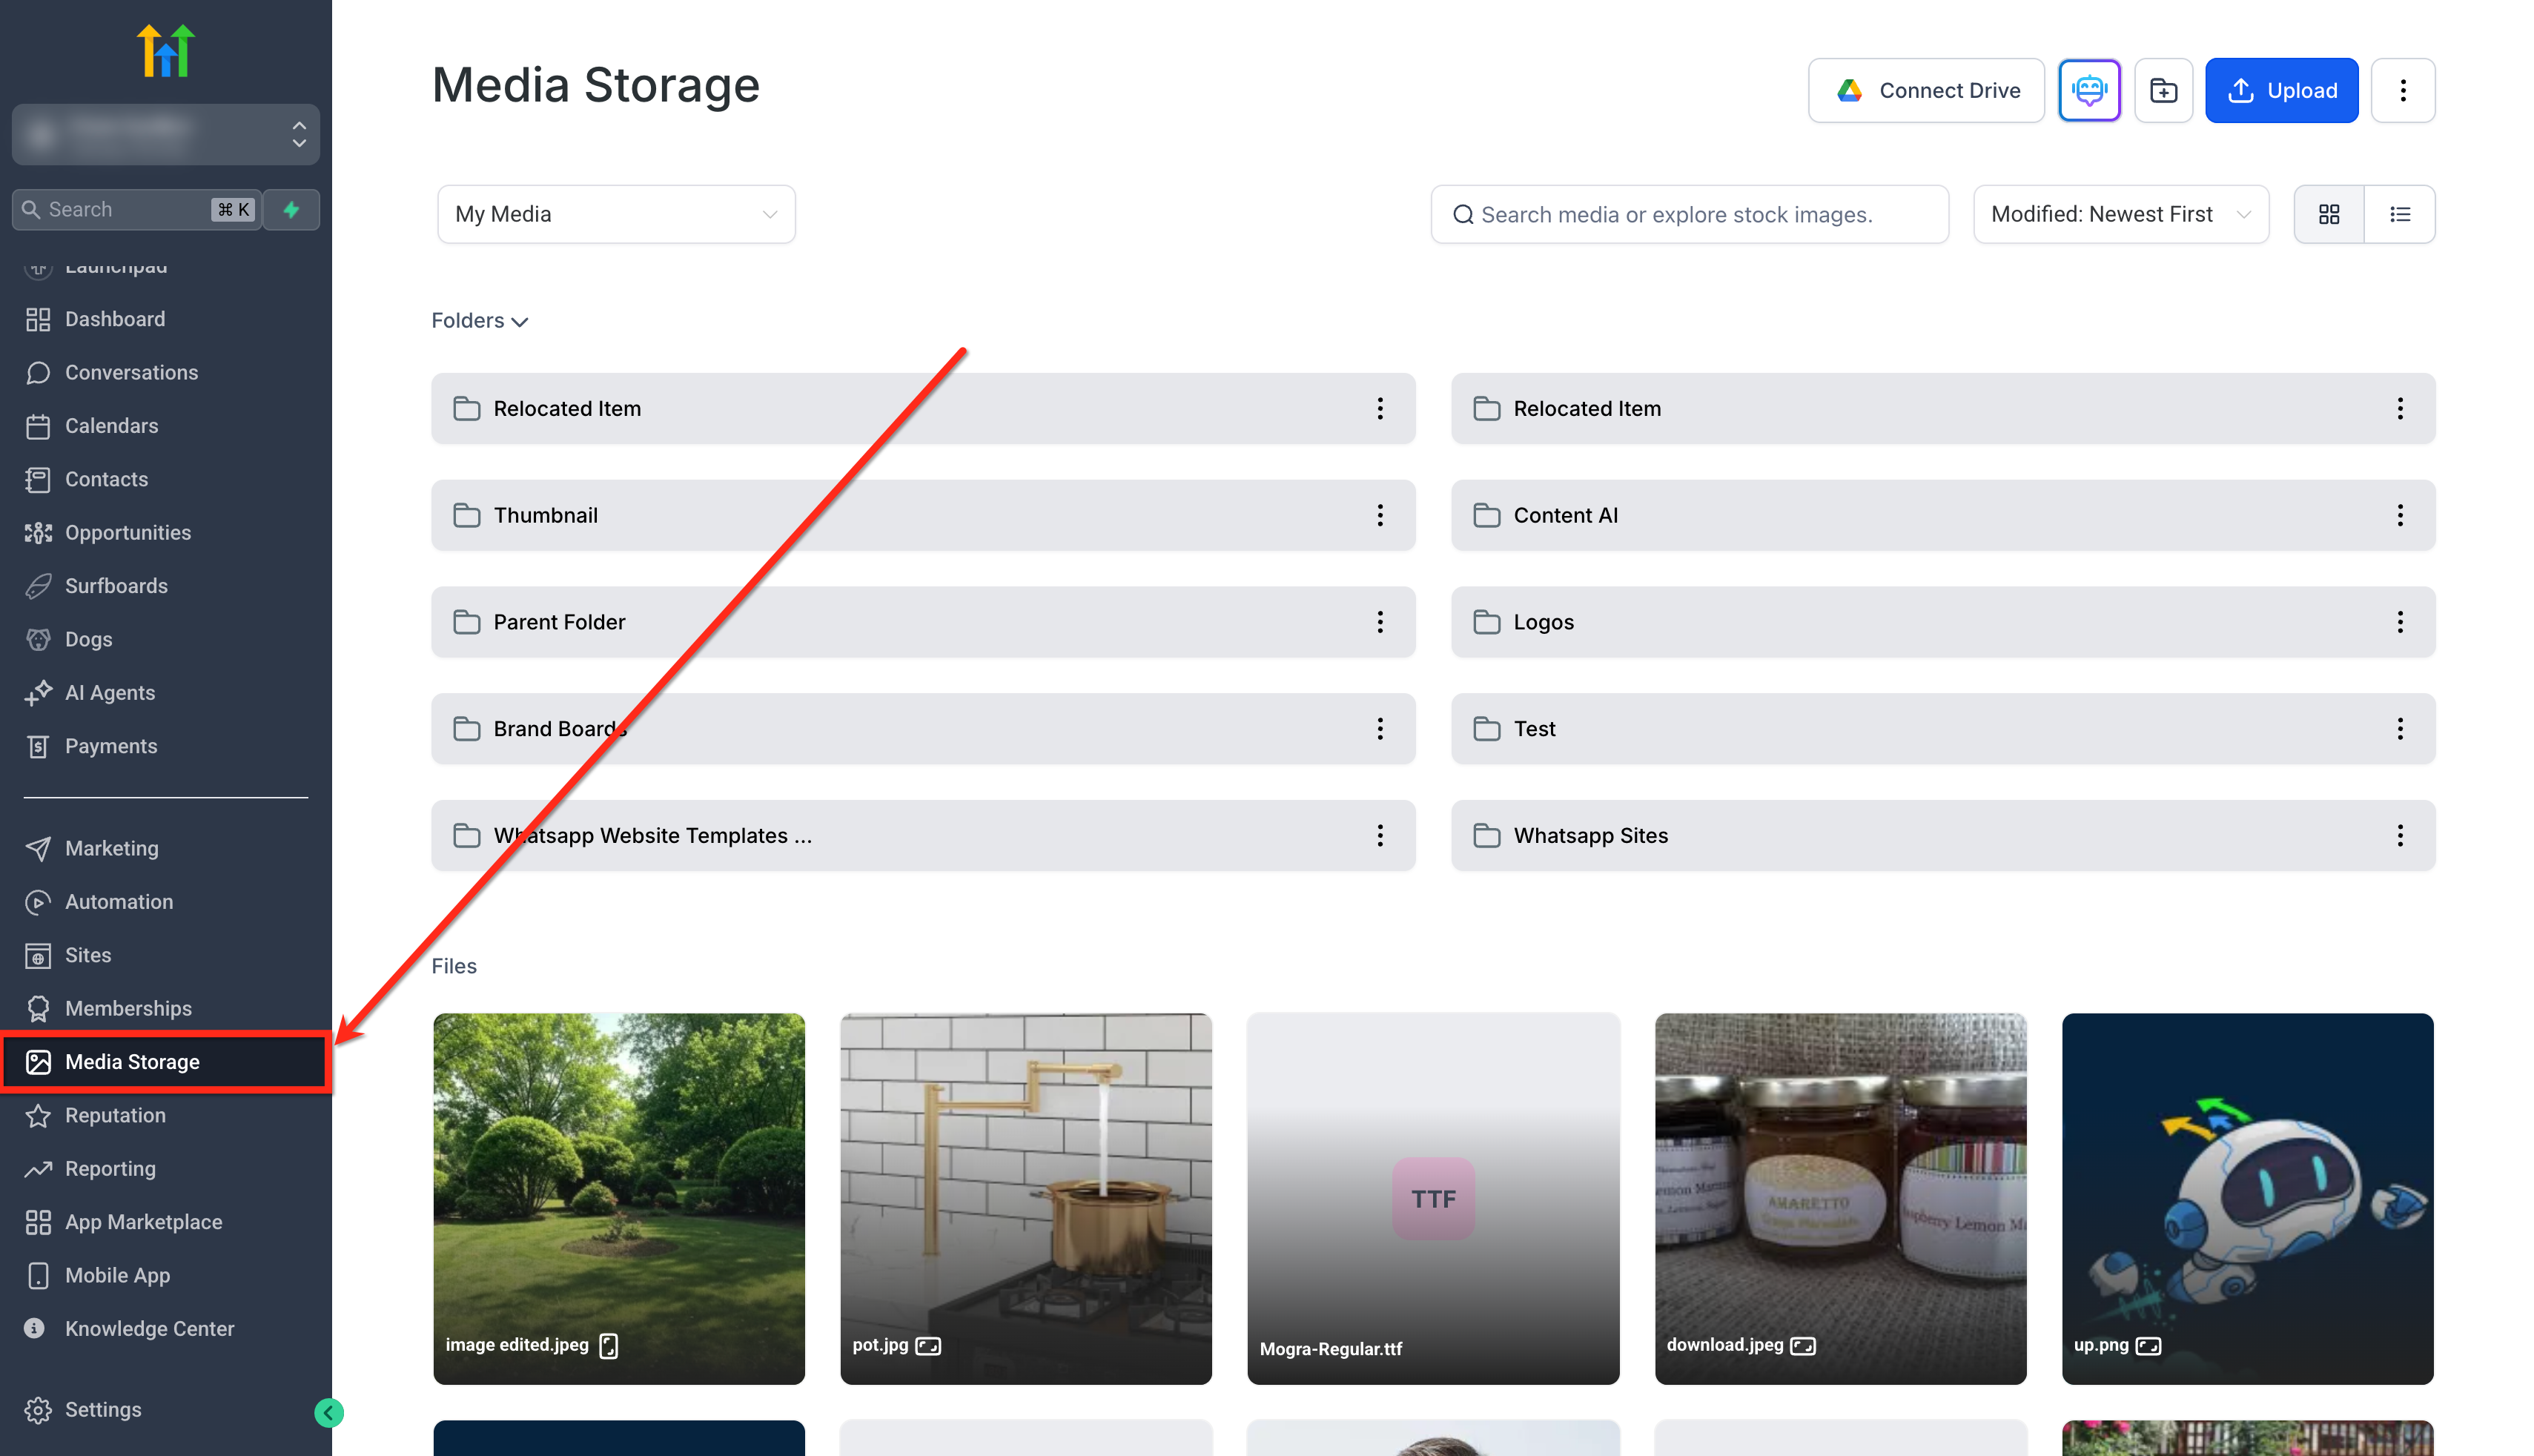
- Click Media Storage from your subaccount.
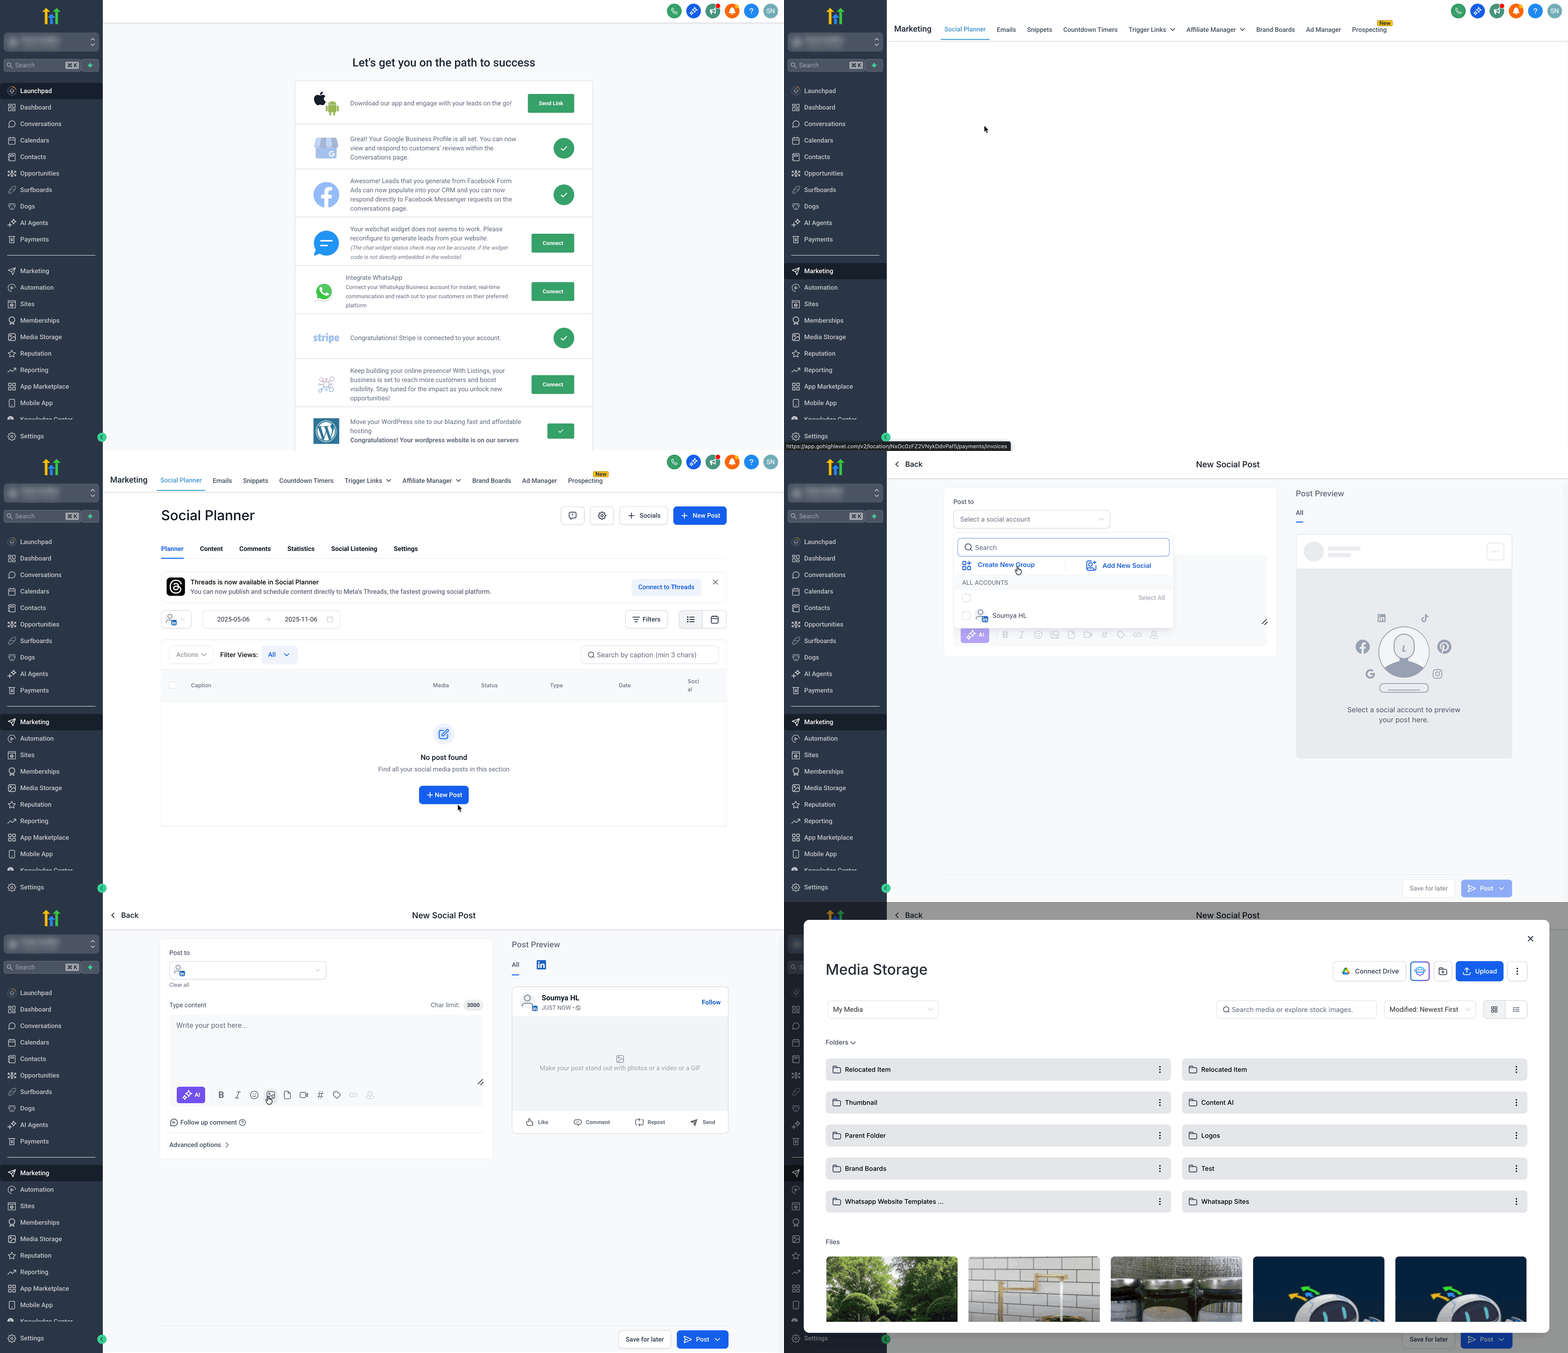
- Or open any Media Library supported module like Social Planner and click the Upload from Media Storage button.
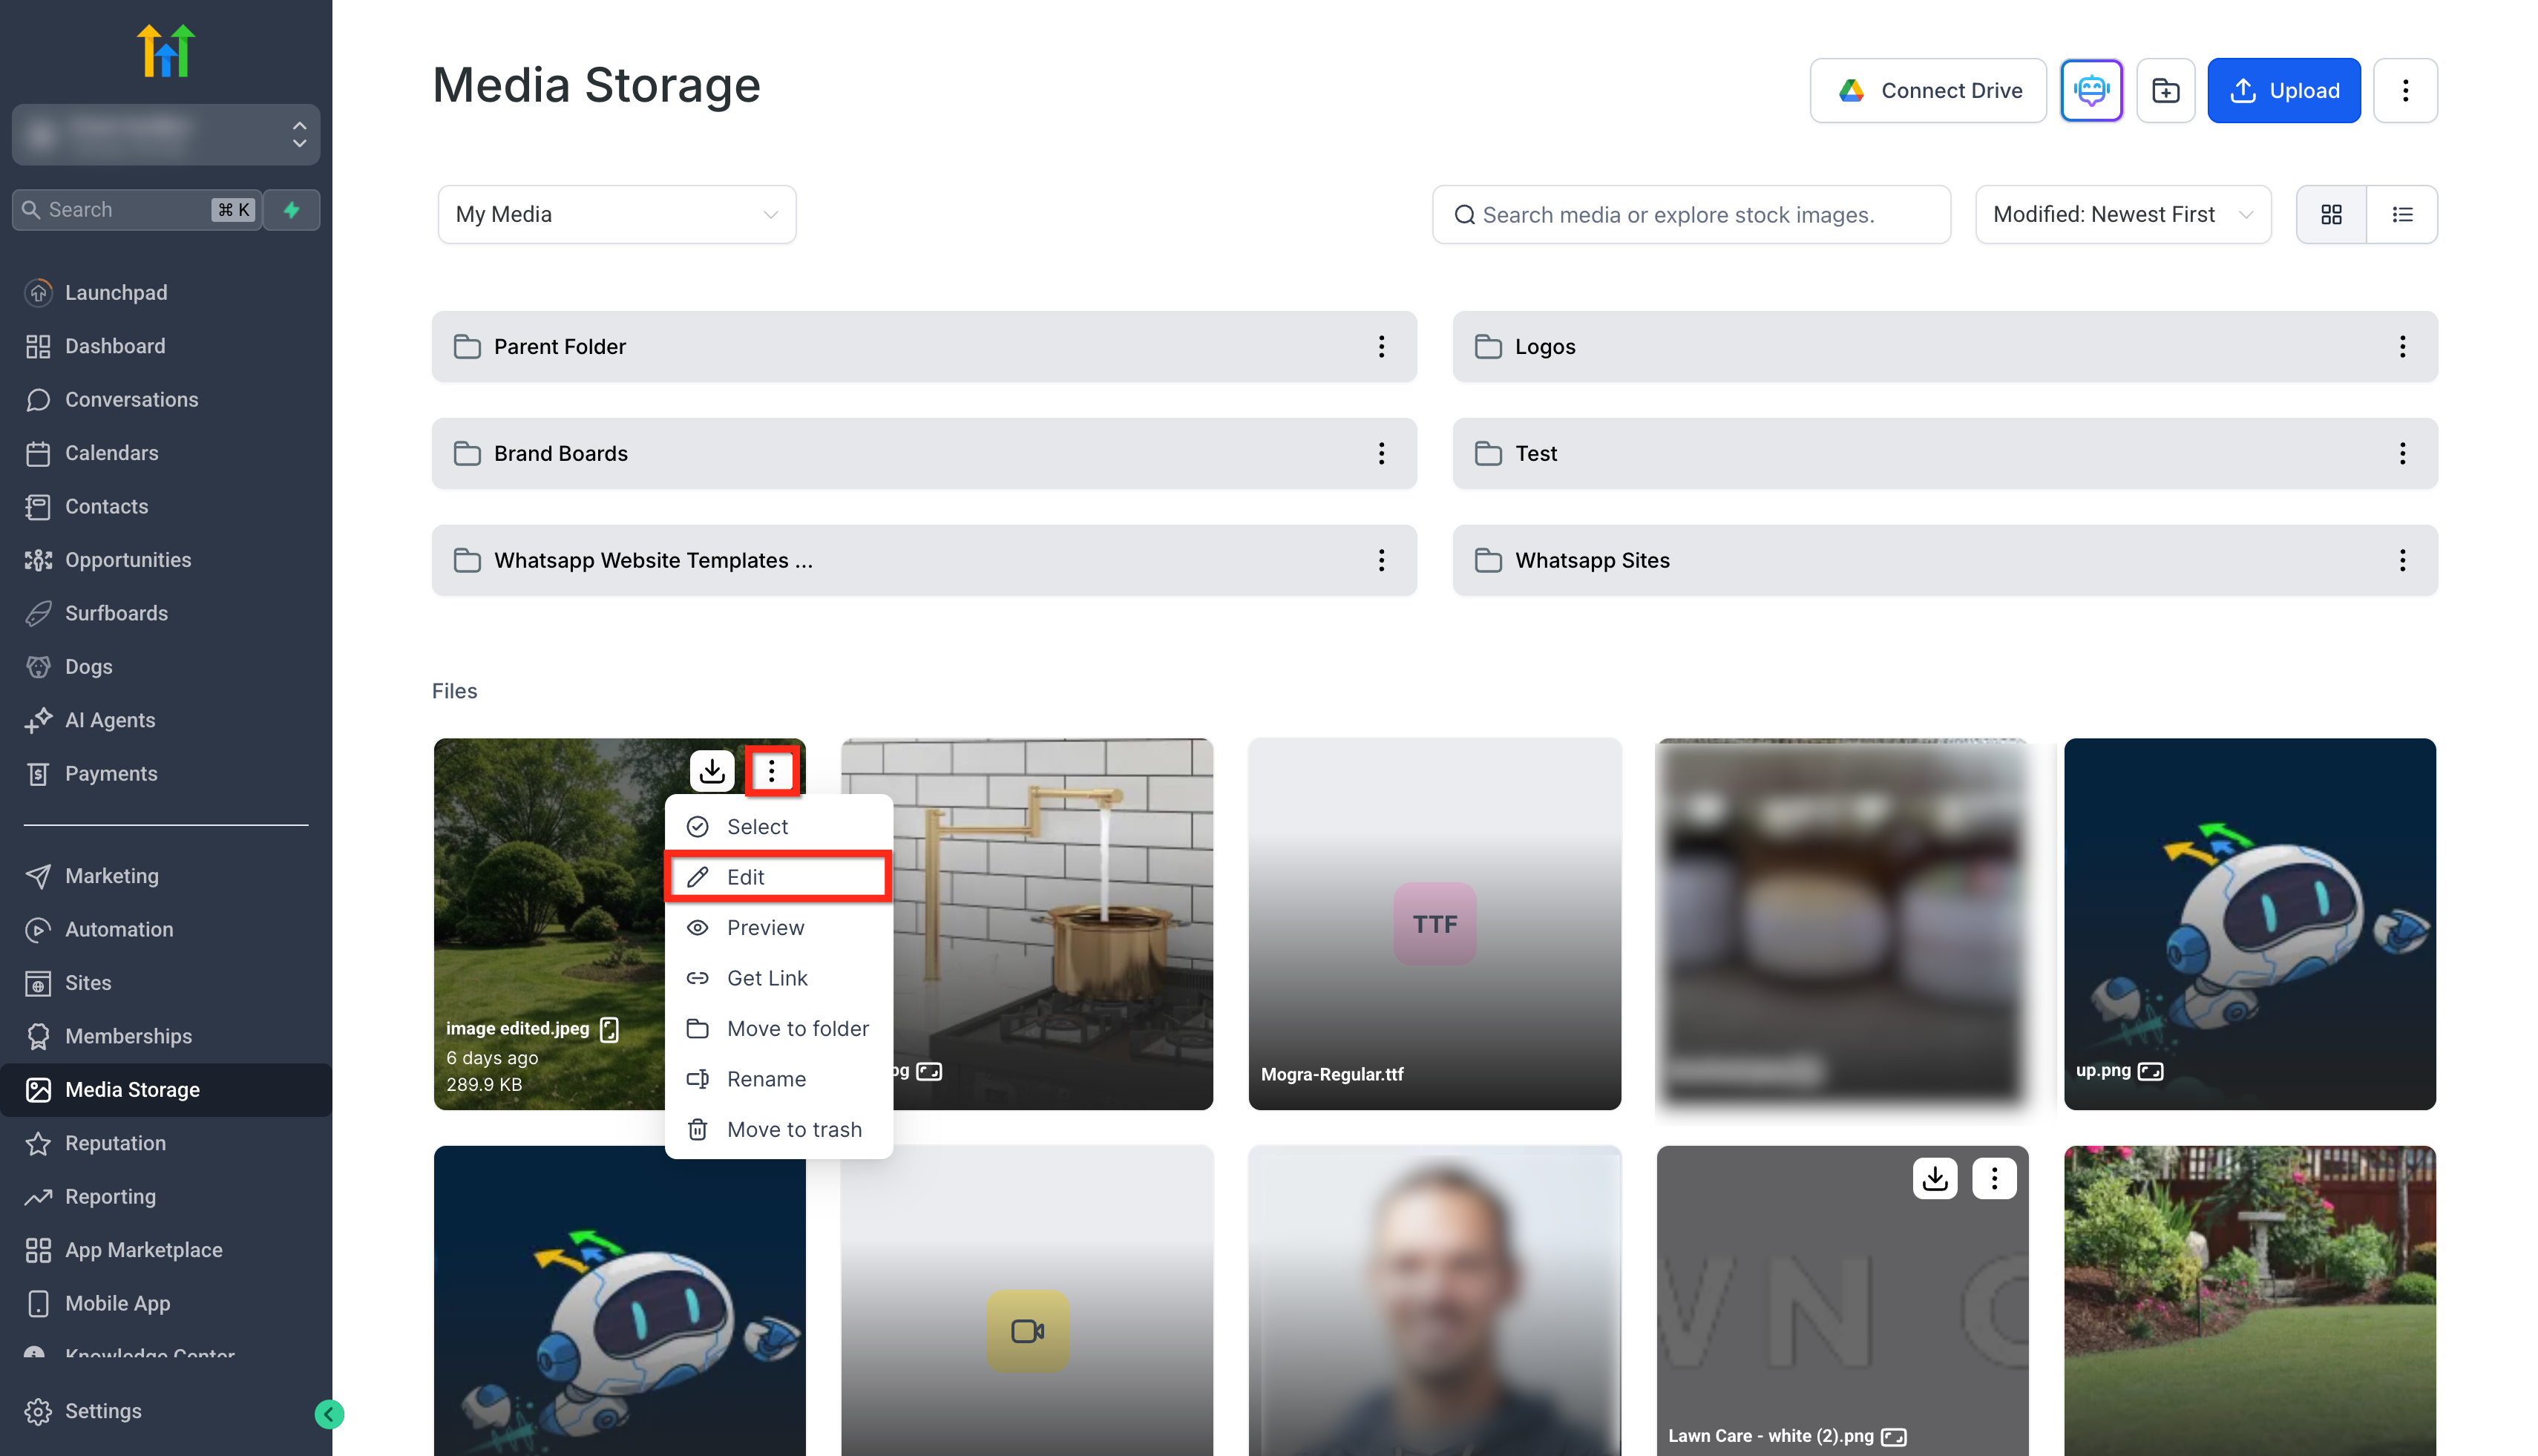
- Hover over the target image and select the three dot menu in the upper right corner.
- Choose the Edit option to open the editor modal.
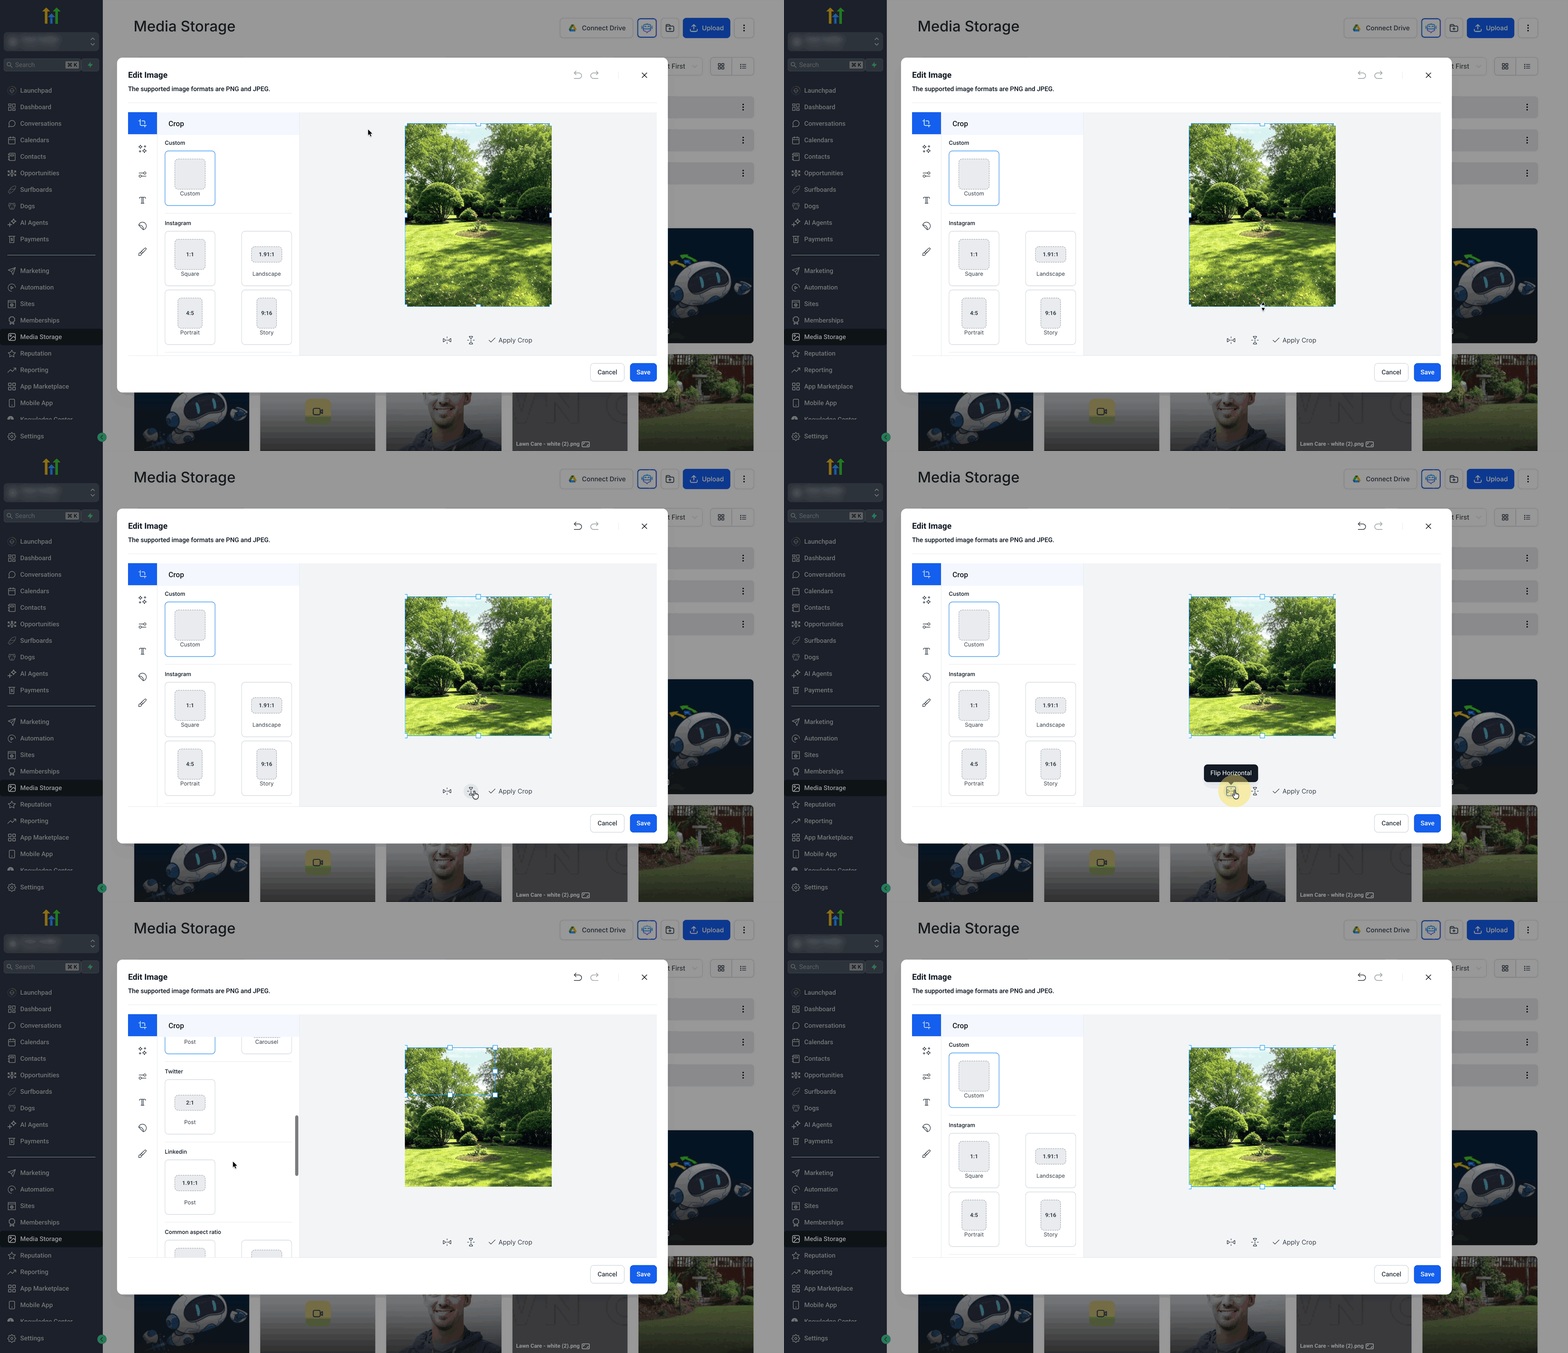
- Use the Crop tool to set a custom aspect ratio or pick a preset ratio.
- Apply a horizontal or vertical flip to the image.
- Select a Filter from the available collection and apply it.
- Adjust Brightness, Contrast, Saturation and Blur using the adjustment sliders.
- Insert Text and set the font family, size, alignment, font color, background color and line spacing.
- Add a Sticker, choosing an Emoji or Shape, and modify its opacity and color.
- Use the Brush to draw, setting brush hardness, size and color as needed.
- Click the Undo or Redo icons to revert or redo any recent changes.
- Press Save, give the image a name, and optionally choose a destination folder.
- Confirm Save to store the edited picture as a new file in the Media Library.
06What it looks like in HighLevel
07Things to know before you rely on it
- Only PNG and JPEG files can be edited.
- The editor is available on desktop browsers only; the mobile app does not support it.
- Bulk editing of multiple images is not possible; each image must be opened individually.
08How it connects to the rest of HighLevel
- Add and reuse images with the media picker Media picker guide
- Expanded file type support in the Media Library File type support
- Canva integration for design assets Canva integration
- HighLevel pricing and plans Pricing
Michael's take

The built in image editor feels like a small convenience that can become a real shift for teams that juggle dozens of visuals. It removes the need to hop to Photoshop or another app, so you stay in HighLevel and keep your assets tidy.
A boutique marketing agency that crafts social posts and funnel pages for clients will love it. They can tweak a brand photo, add a headline and a sticker, then push the finished image straight into Social Planner without ever leaving the platform.