
01Who this is for
- Businesses can create ticketed events to sell passes and track in person attendance.
- Educators can host online RSVP events to gather participants without payment.
02Events, explained
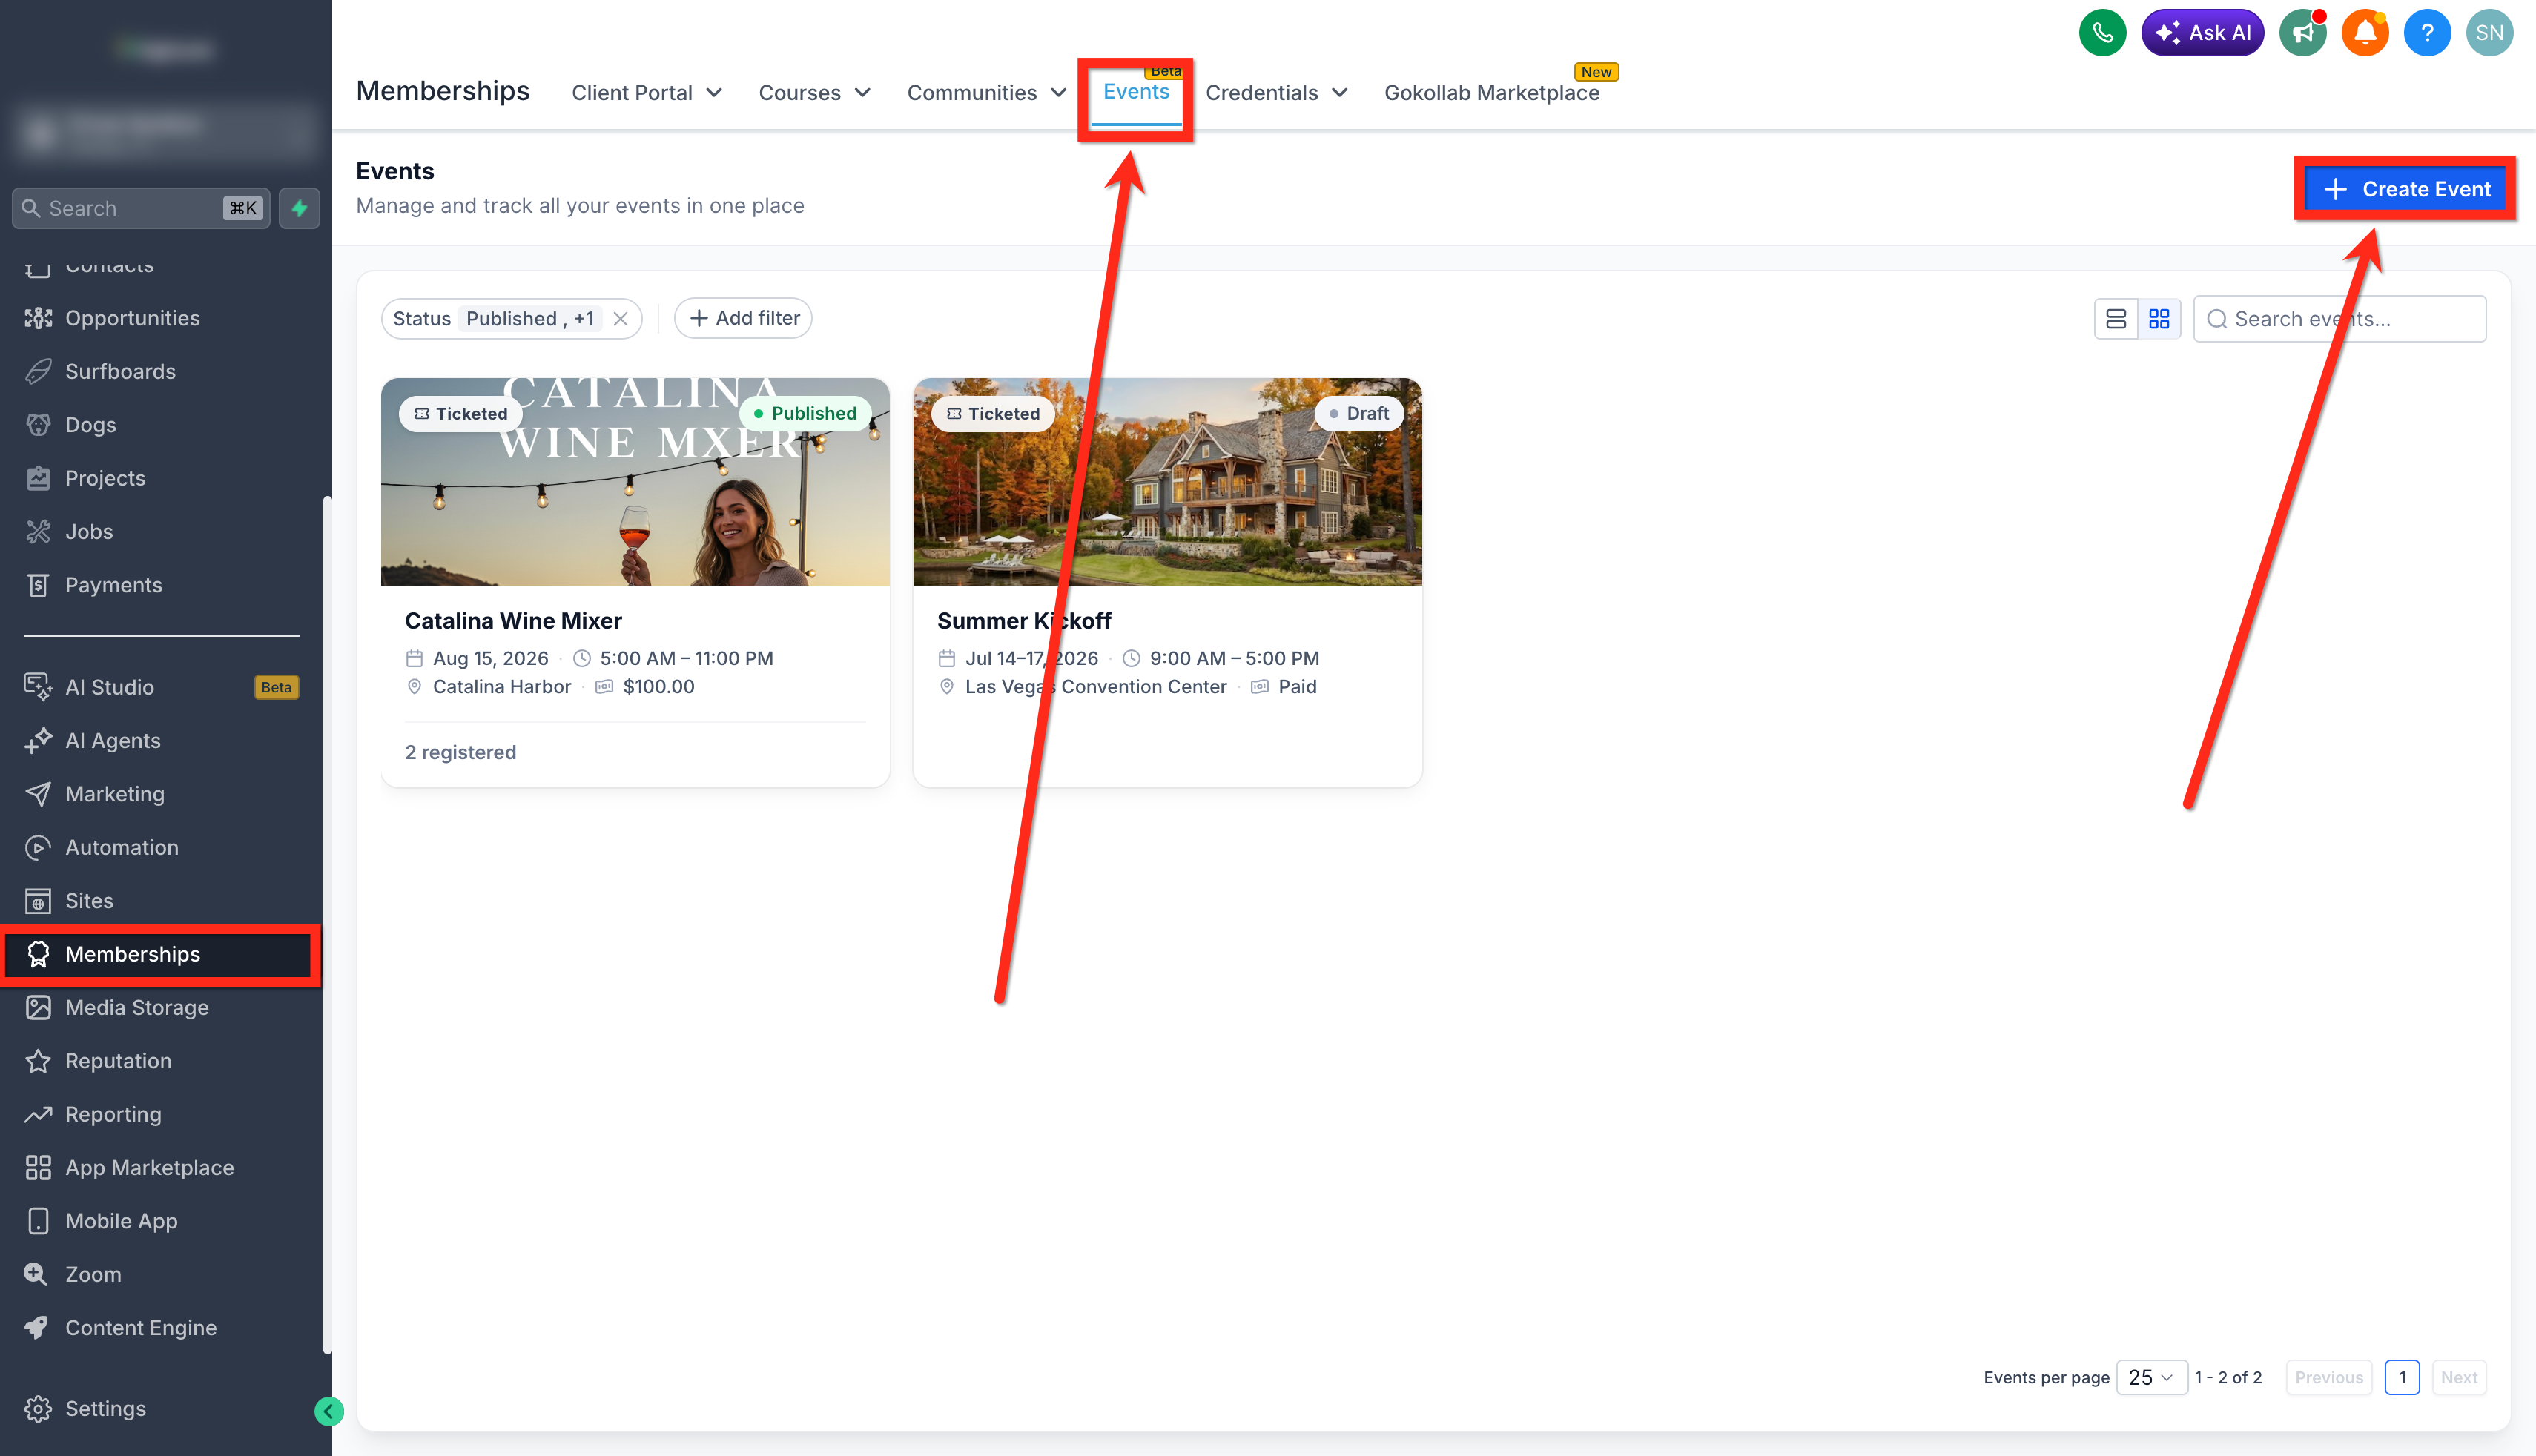
The Events feature is accessed via Client Apps > Events in each subaccount and provides a single workspace for creating public event pages, setting ticket types, adding coupons and configuring schedule and speaker information.
After configuring details, the event can be published to generate a live registration URL, and organizers can monitor registrations, issue refunds and scan QR codes for on site check in.
03How businesses use events
- Fitness studio. Create a ticketed event for a new class series, set up multiple ticket types for members and guests, and publish the page so clients can purchase passes online. Use the QR code scanner to check members in at the studio.
- Online language school. Set up an RSVP event for a free webinar, add an online location with a meeting link and publish the registration page. Attendees sign up without payment and receive the joining instructions via email.
- Conference organizer. Define ticketed early bird and regular tickets, add a percentage off coupon code for promotional partners and publish the event page. Track registrations in the dashboard and scan tickets at the venue for entry.
04The numbers and rules that matter
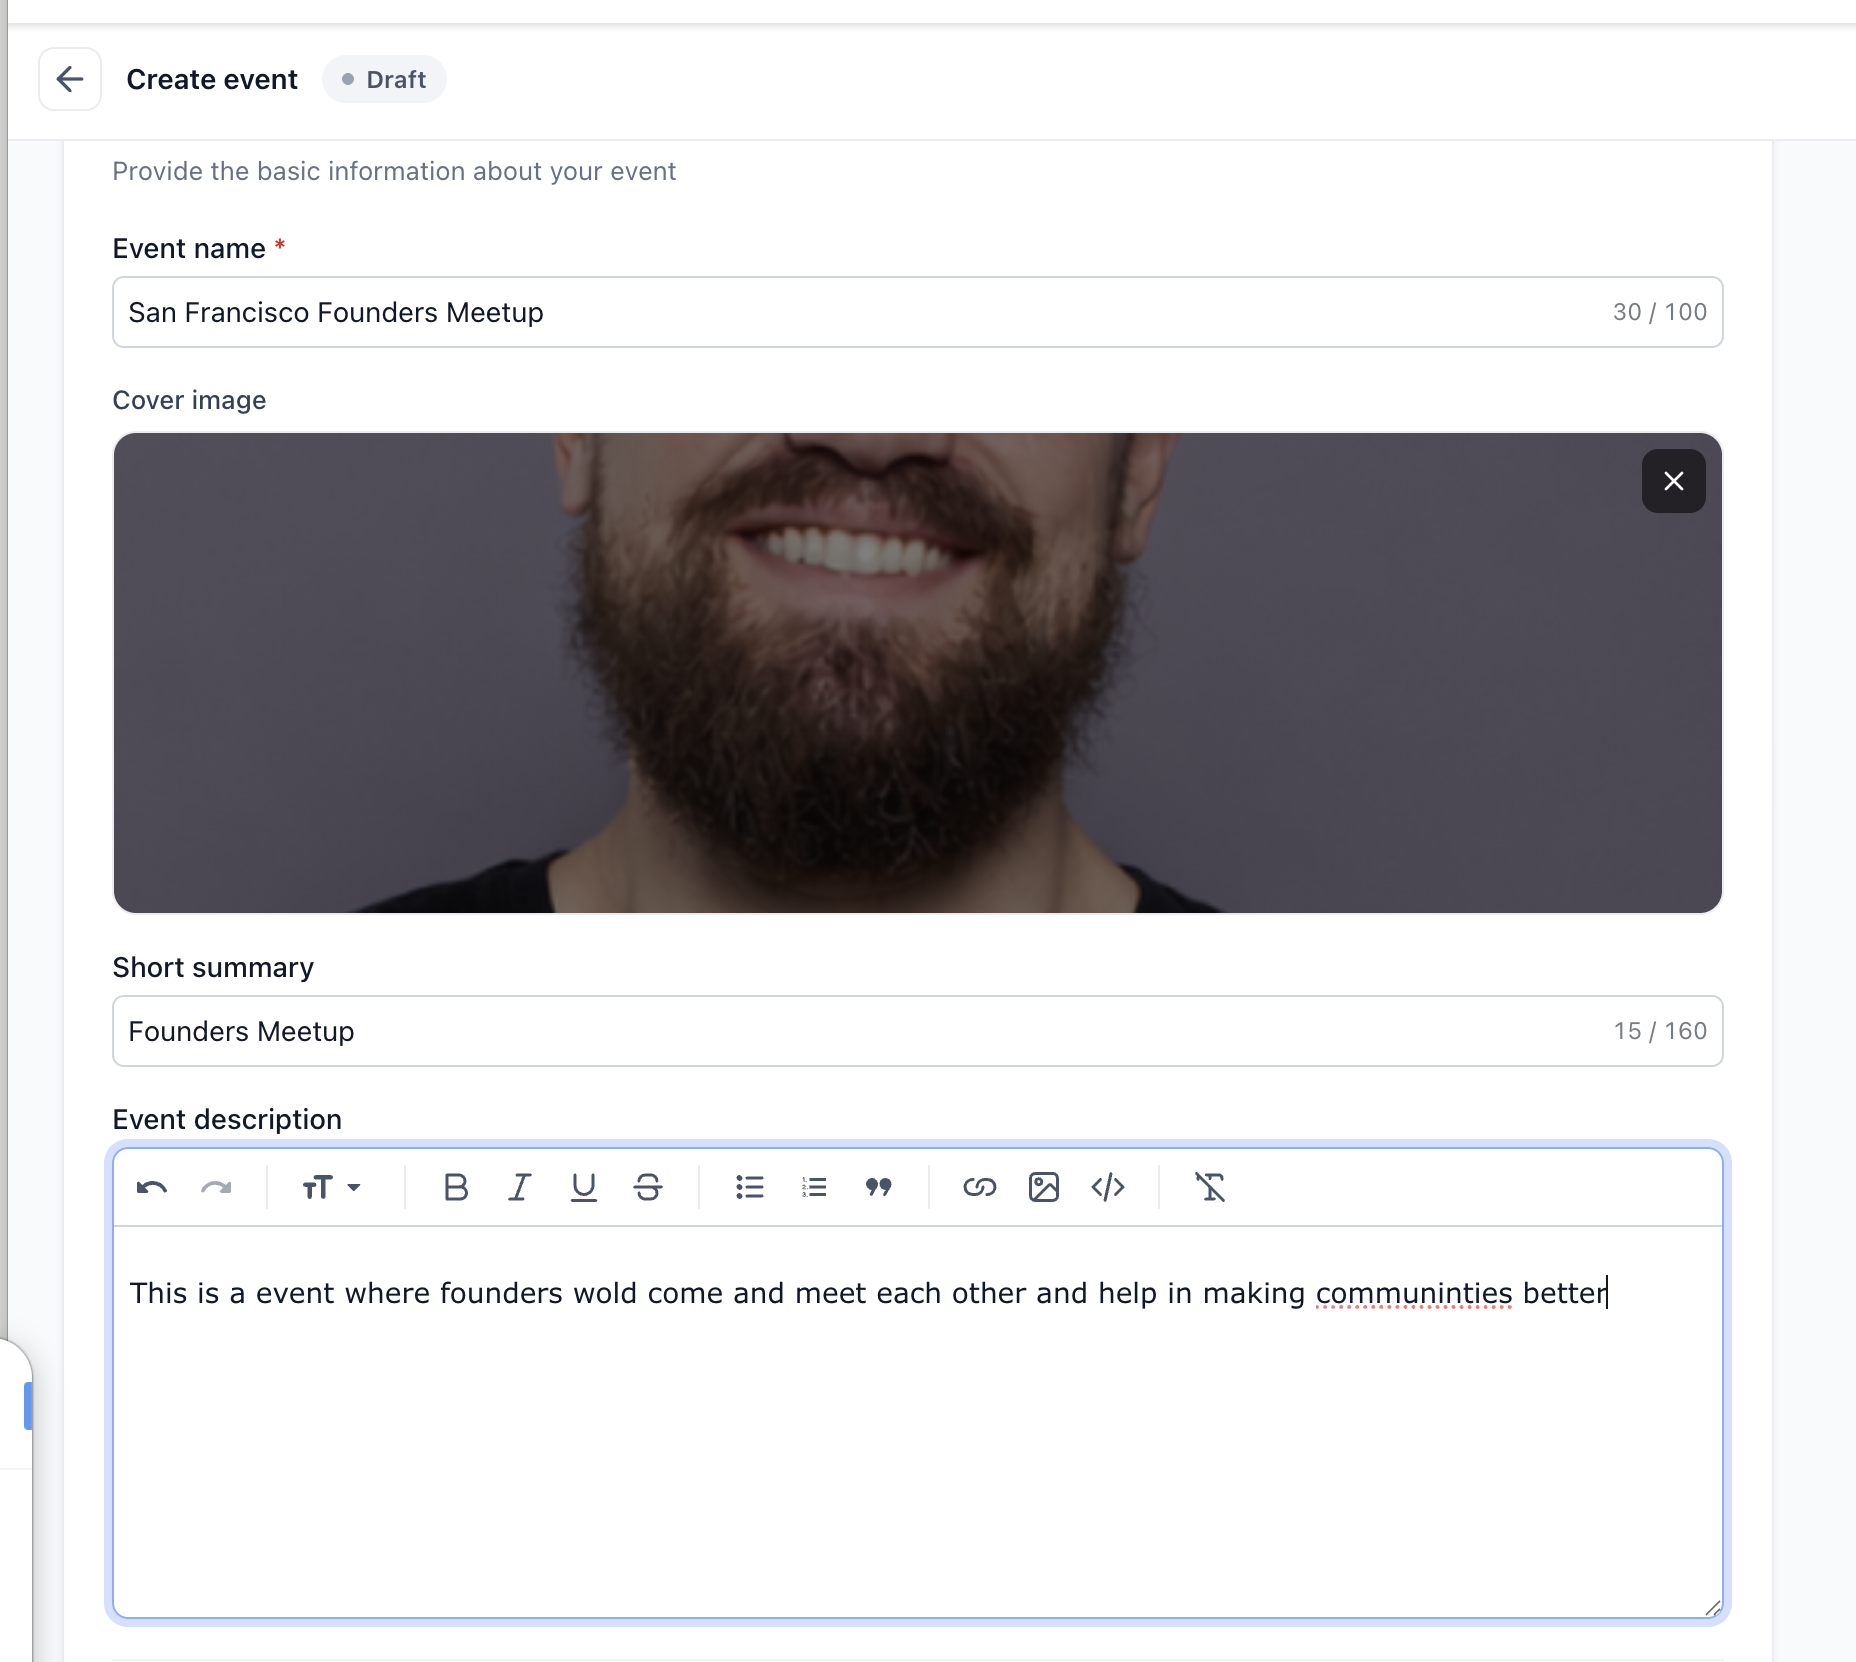
- Event name up to 100 characters.
- Cover image max 5 MB, recommended 1920 × 1080 px, PNG/JPG/GIF.
- Short summary up to 160 characters.
- Organizer image max 5 MB, recommended 400 × 400 px.
- Favicon upload PNG or JPG up to 5 MB.
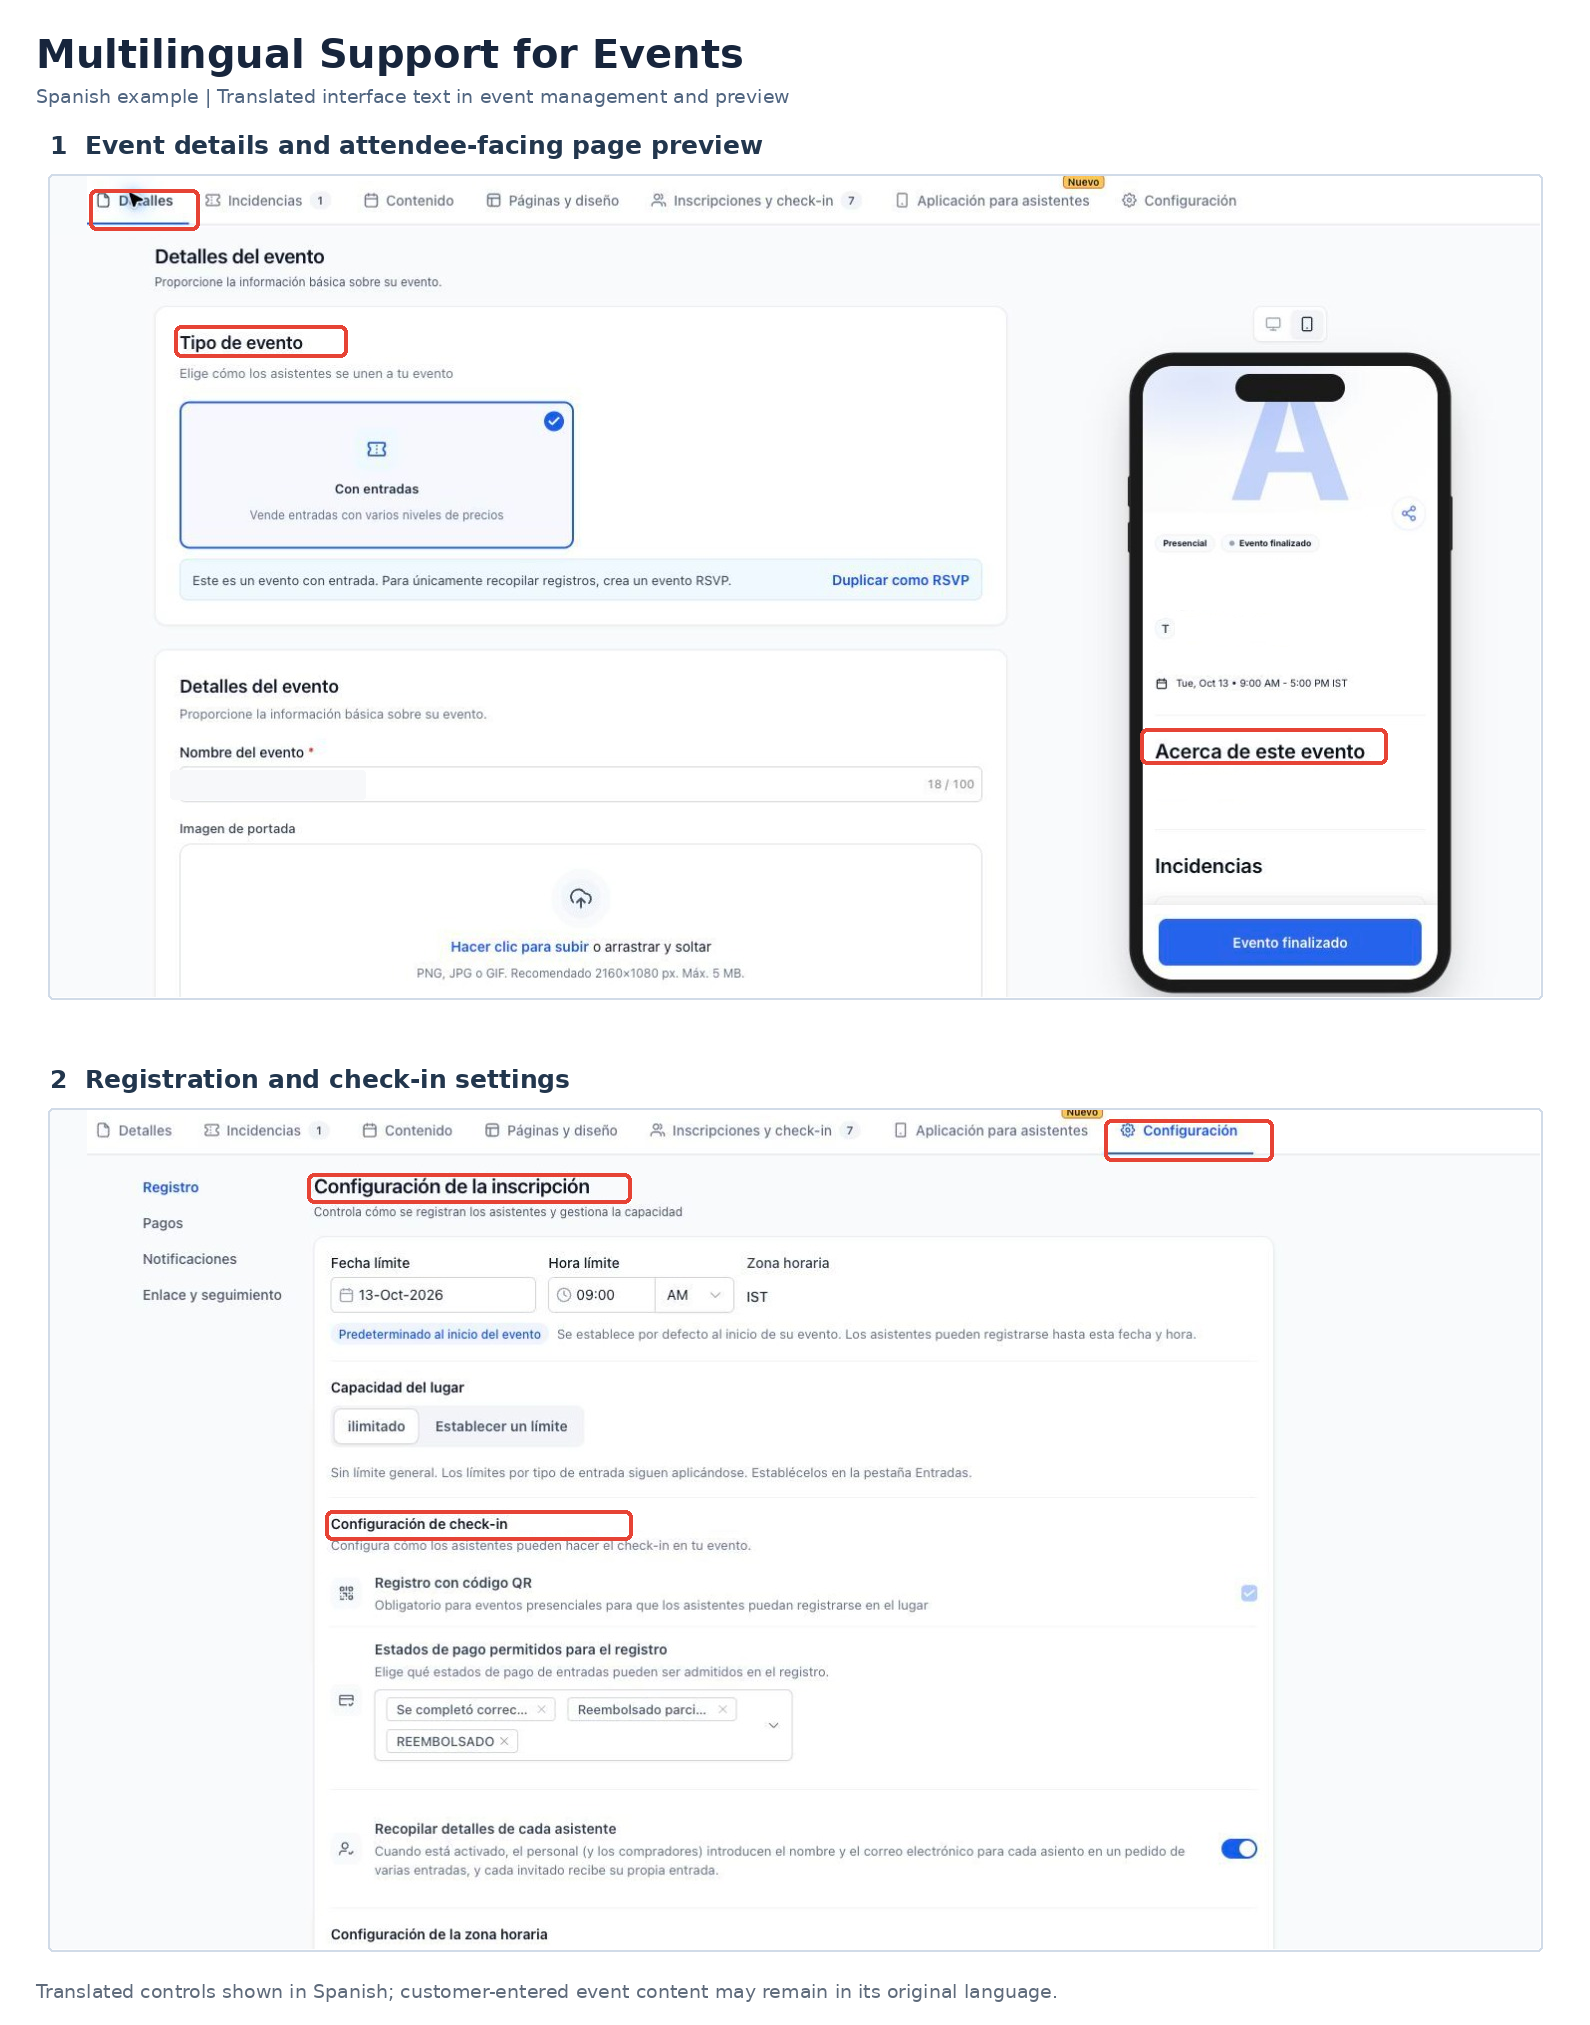
- Supports 13 languages: English, Spanish, French (Canada), French (France), Portuguese (Brazil), Portuguese (Portugal), German, Dutch, Italian, Danish, Norwegian, Finnish, Swedish.
- Total capacity default 0 for unlimited.
- Daily summary email sent at 9:00 AM event timezone.
05How to set up and use events in HighLevel
Create a new event
- Open Subaccount View > Memberships > Events and click + Create Event.
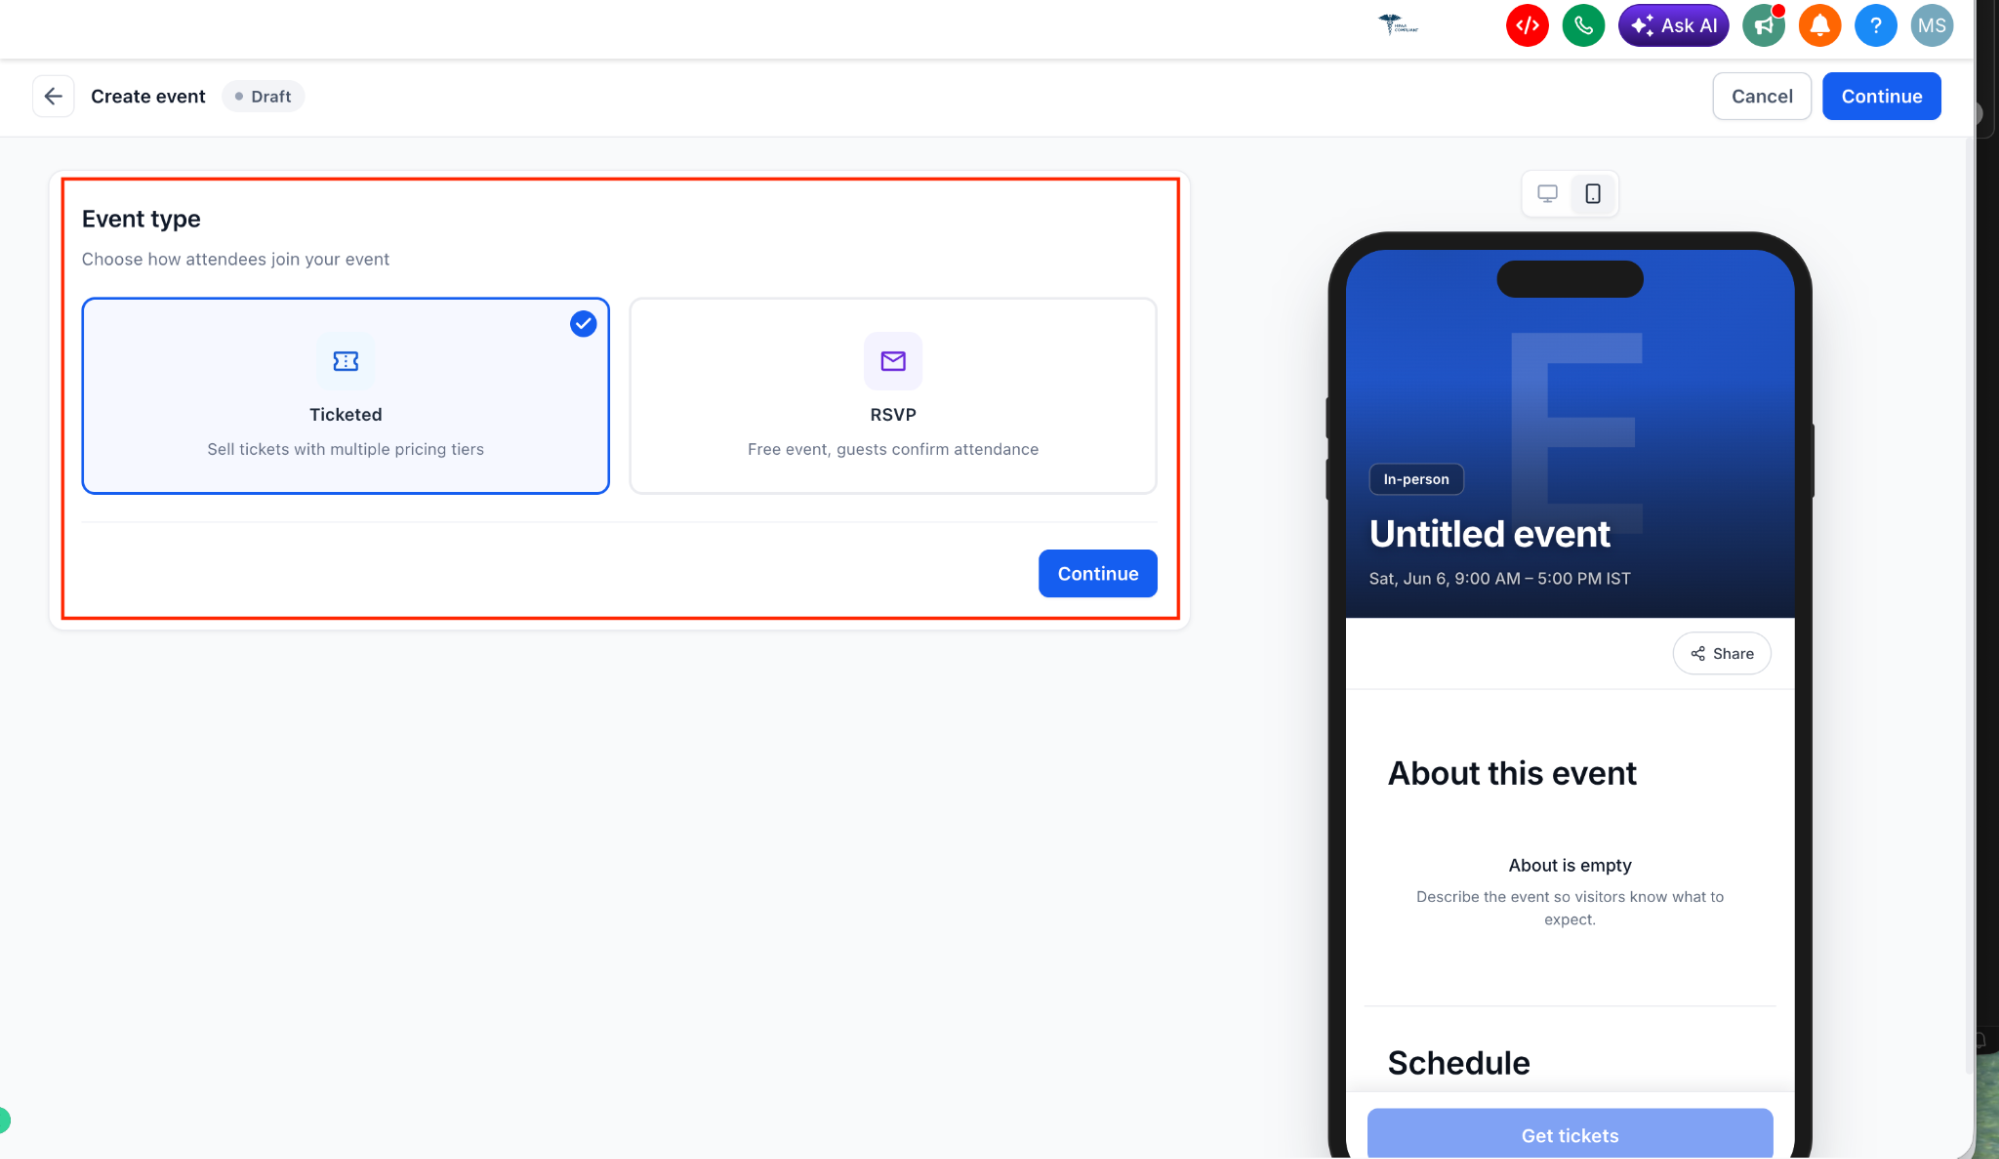
- Choose Ticketed or RSVP as the event type (this cannot be changed after the event is created).
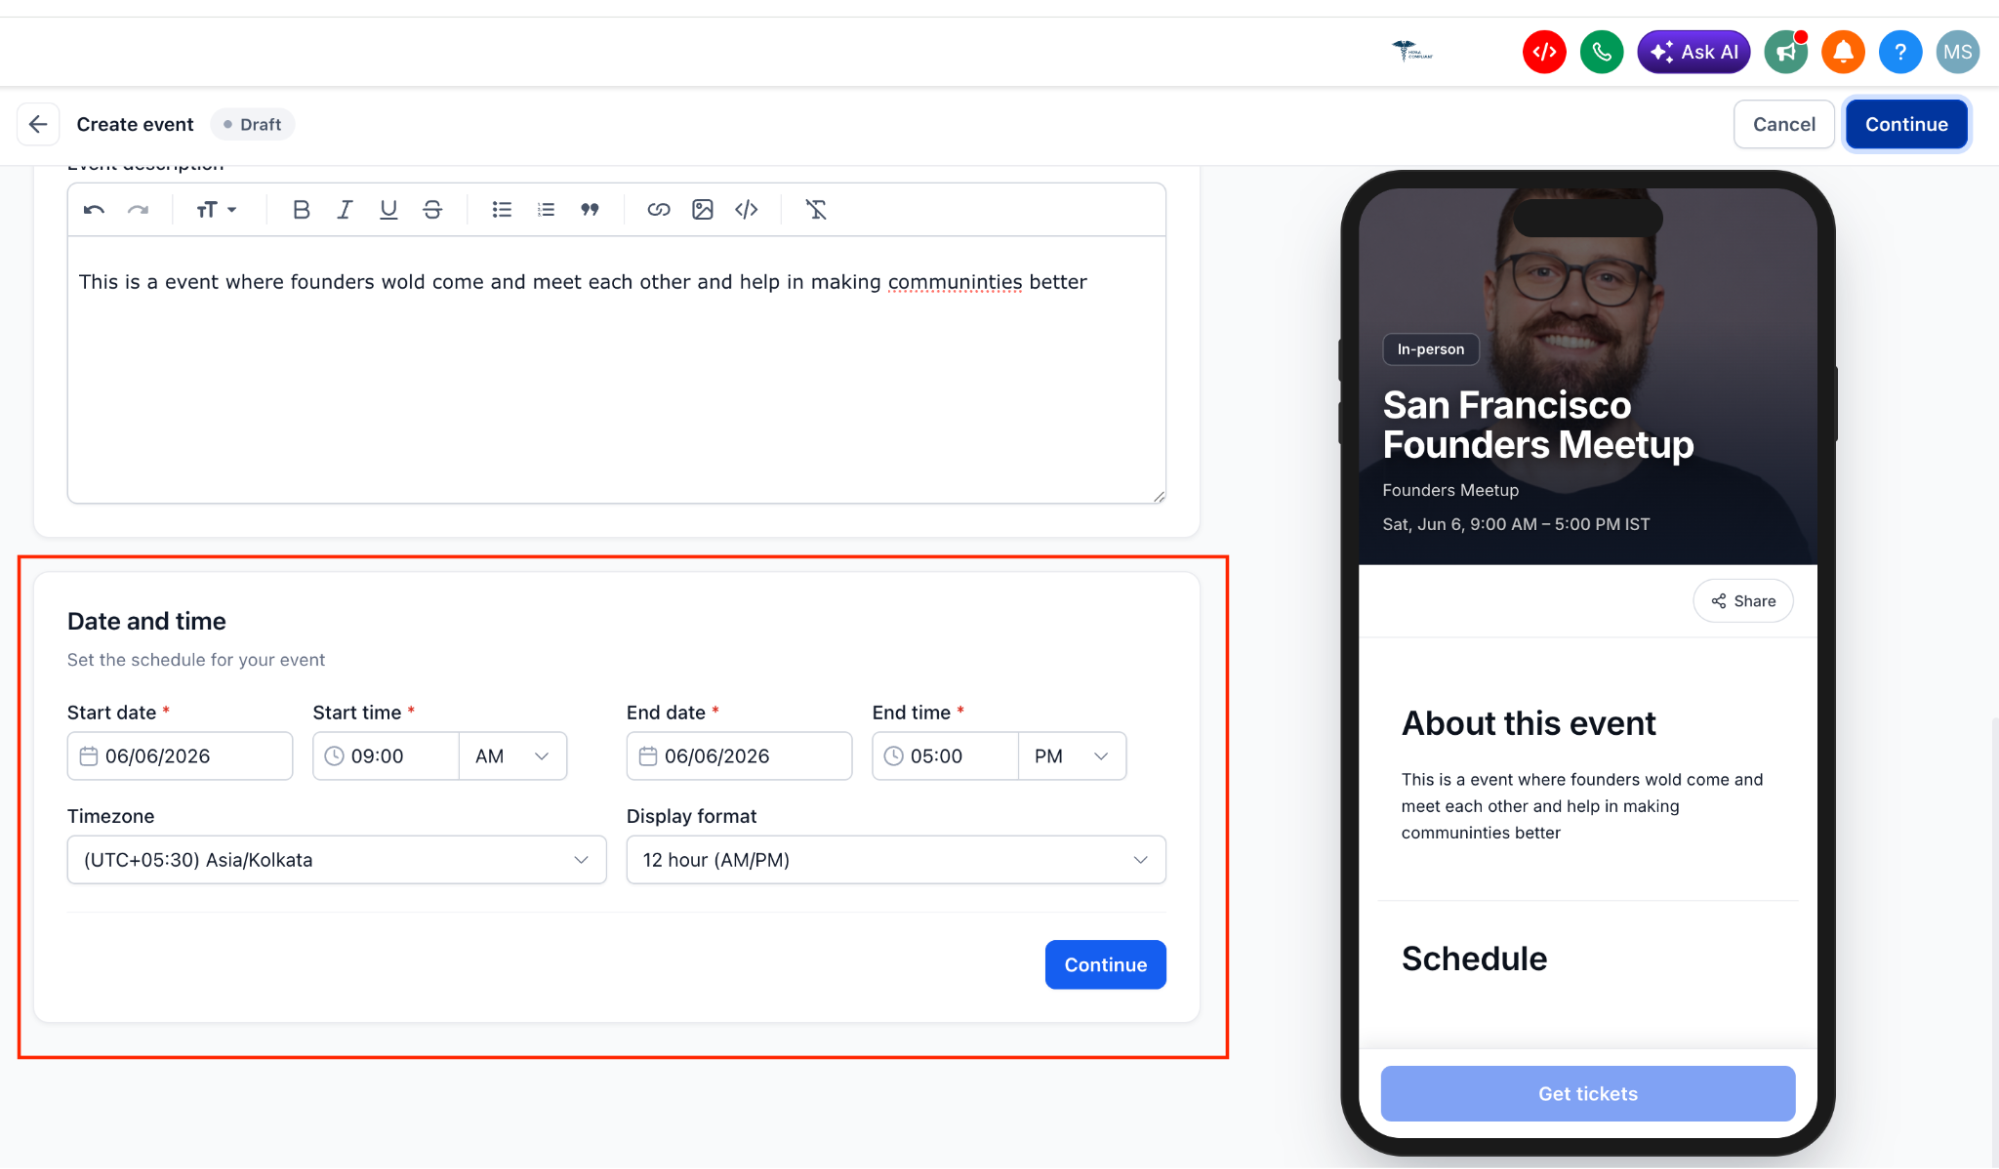
- Enter the event name, upload a cover image, write a short summary and add a description.
- Set start and end dates, select the timezone and choose a 12 hour or 24 hour display format.
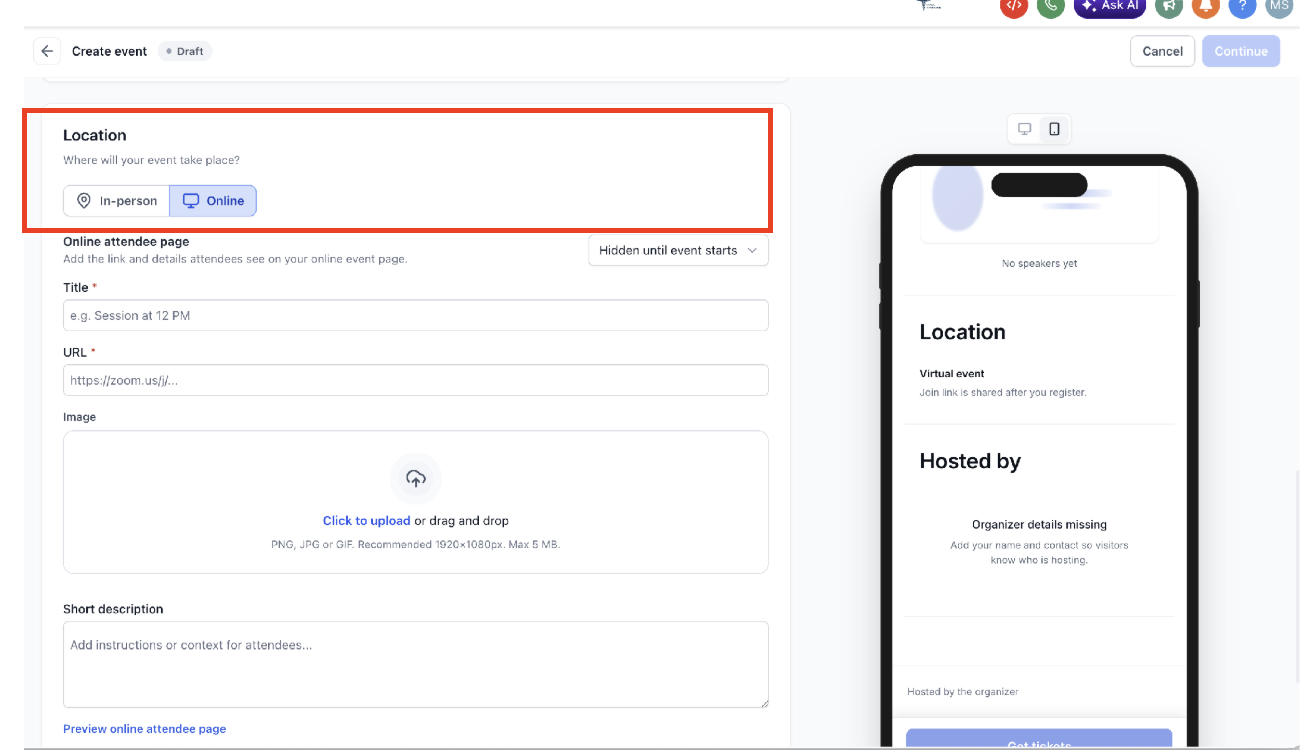
- Enter a physical address for an in person location or add a session title, meeting URL and instructions for an online location.
- Provide the organizer’s name and email and optionally add a website, phone number and organizer image.
- Click Create event to save the draft.
Add ticket types
- Open the event from Subaccount View > Memberships > Events.
- Navigate to Tickets and click + Add Ticket Type.
- Enter the ticket name, set a fixed price or mark it as free, define quantity and sale period.
- Save the ticket type.
Add coupon codes (optional)
- From the event dashboard go to Tickets > Coupon Codes.
- Click to add a new coupon and type a coupon name.
- Enter the code, percentage discount, active period and any usage limits or ticket restrictions.
- Save the coupon.
Add schedule and speakers (optional)
- In Schedule select Add schedule to enter a session title, time, stage or location, description and assign speakers.
- In the Speakers sub navigation select + Add speaker to enter the speaker’s name, photo, tagline, description and social links.
Customize the public event page
- Select Pages & Design to configure event details, schedule and checkout pages.
- Customize page sections, colors, typography and templates.
- In Checkout configure the title and additional form fields; first name, last name and email remain required.
- Use the mobile and desktop previews to review the result.
Configure settings and sharing
- Select Settings and review registration deadline, total capacity (0 for unlimited) and check in eligibility.
- Enable Live mode to accept real payments; when off the event runs in test mode.
- Set organizer and attendee email templates, sender name and sender email.
- Define the URL slug, Meta Pixel integration, favicon and embed code for the public page.
Publish the event
- Select Publish event to make the public registration page available.
- Use the three dot menu to share, duplicate, unpublish, archive or delete the event.
06What it looks like in HighLevel
07Settings that matter
- Registration. Controls the registration deadline, total capacity limit and check in eligibility for the event.
- Live mode. Enables real payments; when off, the event runs in test mode.
- Notifications. Sets organizer and attendee email templates, sender name and sender email.
- Link & Tracking. Defines the URL slug, Meta Pixel integration, favicon and embed code for the public page.
08Things to know before you rely on it
- Event type (Ticketed or RSVP) cannot be changed after the event is created.
- Event name is limited to 100 characters and short summary to 160 characters.
- Cover images and organizer images may be up to 5 MB each.
- Coupon codes apply only to Events and do not affect other HighLevel products.
- The platform supports 13 languages; missing translations appear in English.
- Attendees cannot transfer tickets themselves; organizers must edit registrations manually.
09How it connects to the rest of HighLevel
- Learn how to connect events with workflows for automated follow up. Event and workflow integration
- Embed an event page on any website using the provided code snippet. Embed events
- Read about handling refunds, cancellations and check in eligibility. Manage refunds
Michael's take

Michael ReimerFounder of CRM Pros, HighLevel Commander and Certified Admin
Events can be a convenient way to handle ticketing and RSVPs without needing a separate platform, though the setup involves several steps.
If your needs are limited to a simple sign up form or calendar reminder, a basic landing page or community event may require less configuration.
Get More InformationOpens on HighLevelPublished November 2, 2026 · Updated November 17, 2026