
01Who this is for
- Founders who run paid webinars and need to return money without removing access.
- Event planners who sell tickets and must keep inventory accurate when attendees cancel.
02Event refunds & cancellations, explained
The Event Refunds & Cancellations feature lives in the Registrations tab of each event. From there you can open a actions menu for any attendee and choose to refund, cancel, or combine the two actions. Refunds can be full or partial, and you can add notes that appear on the payment record.
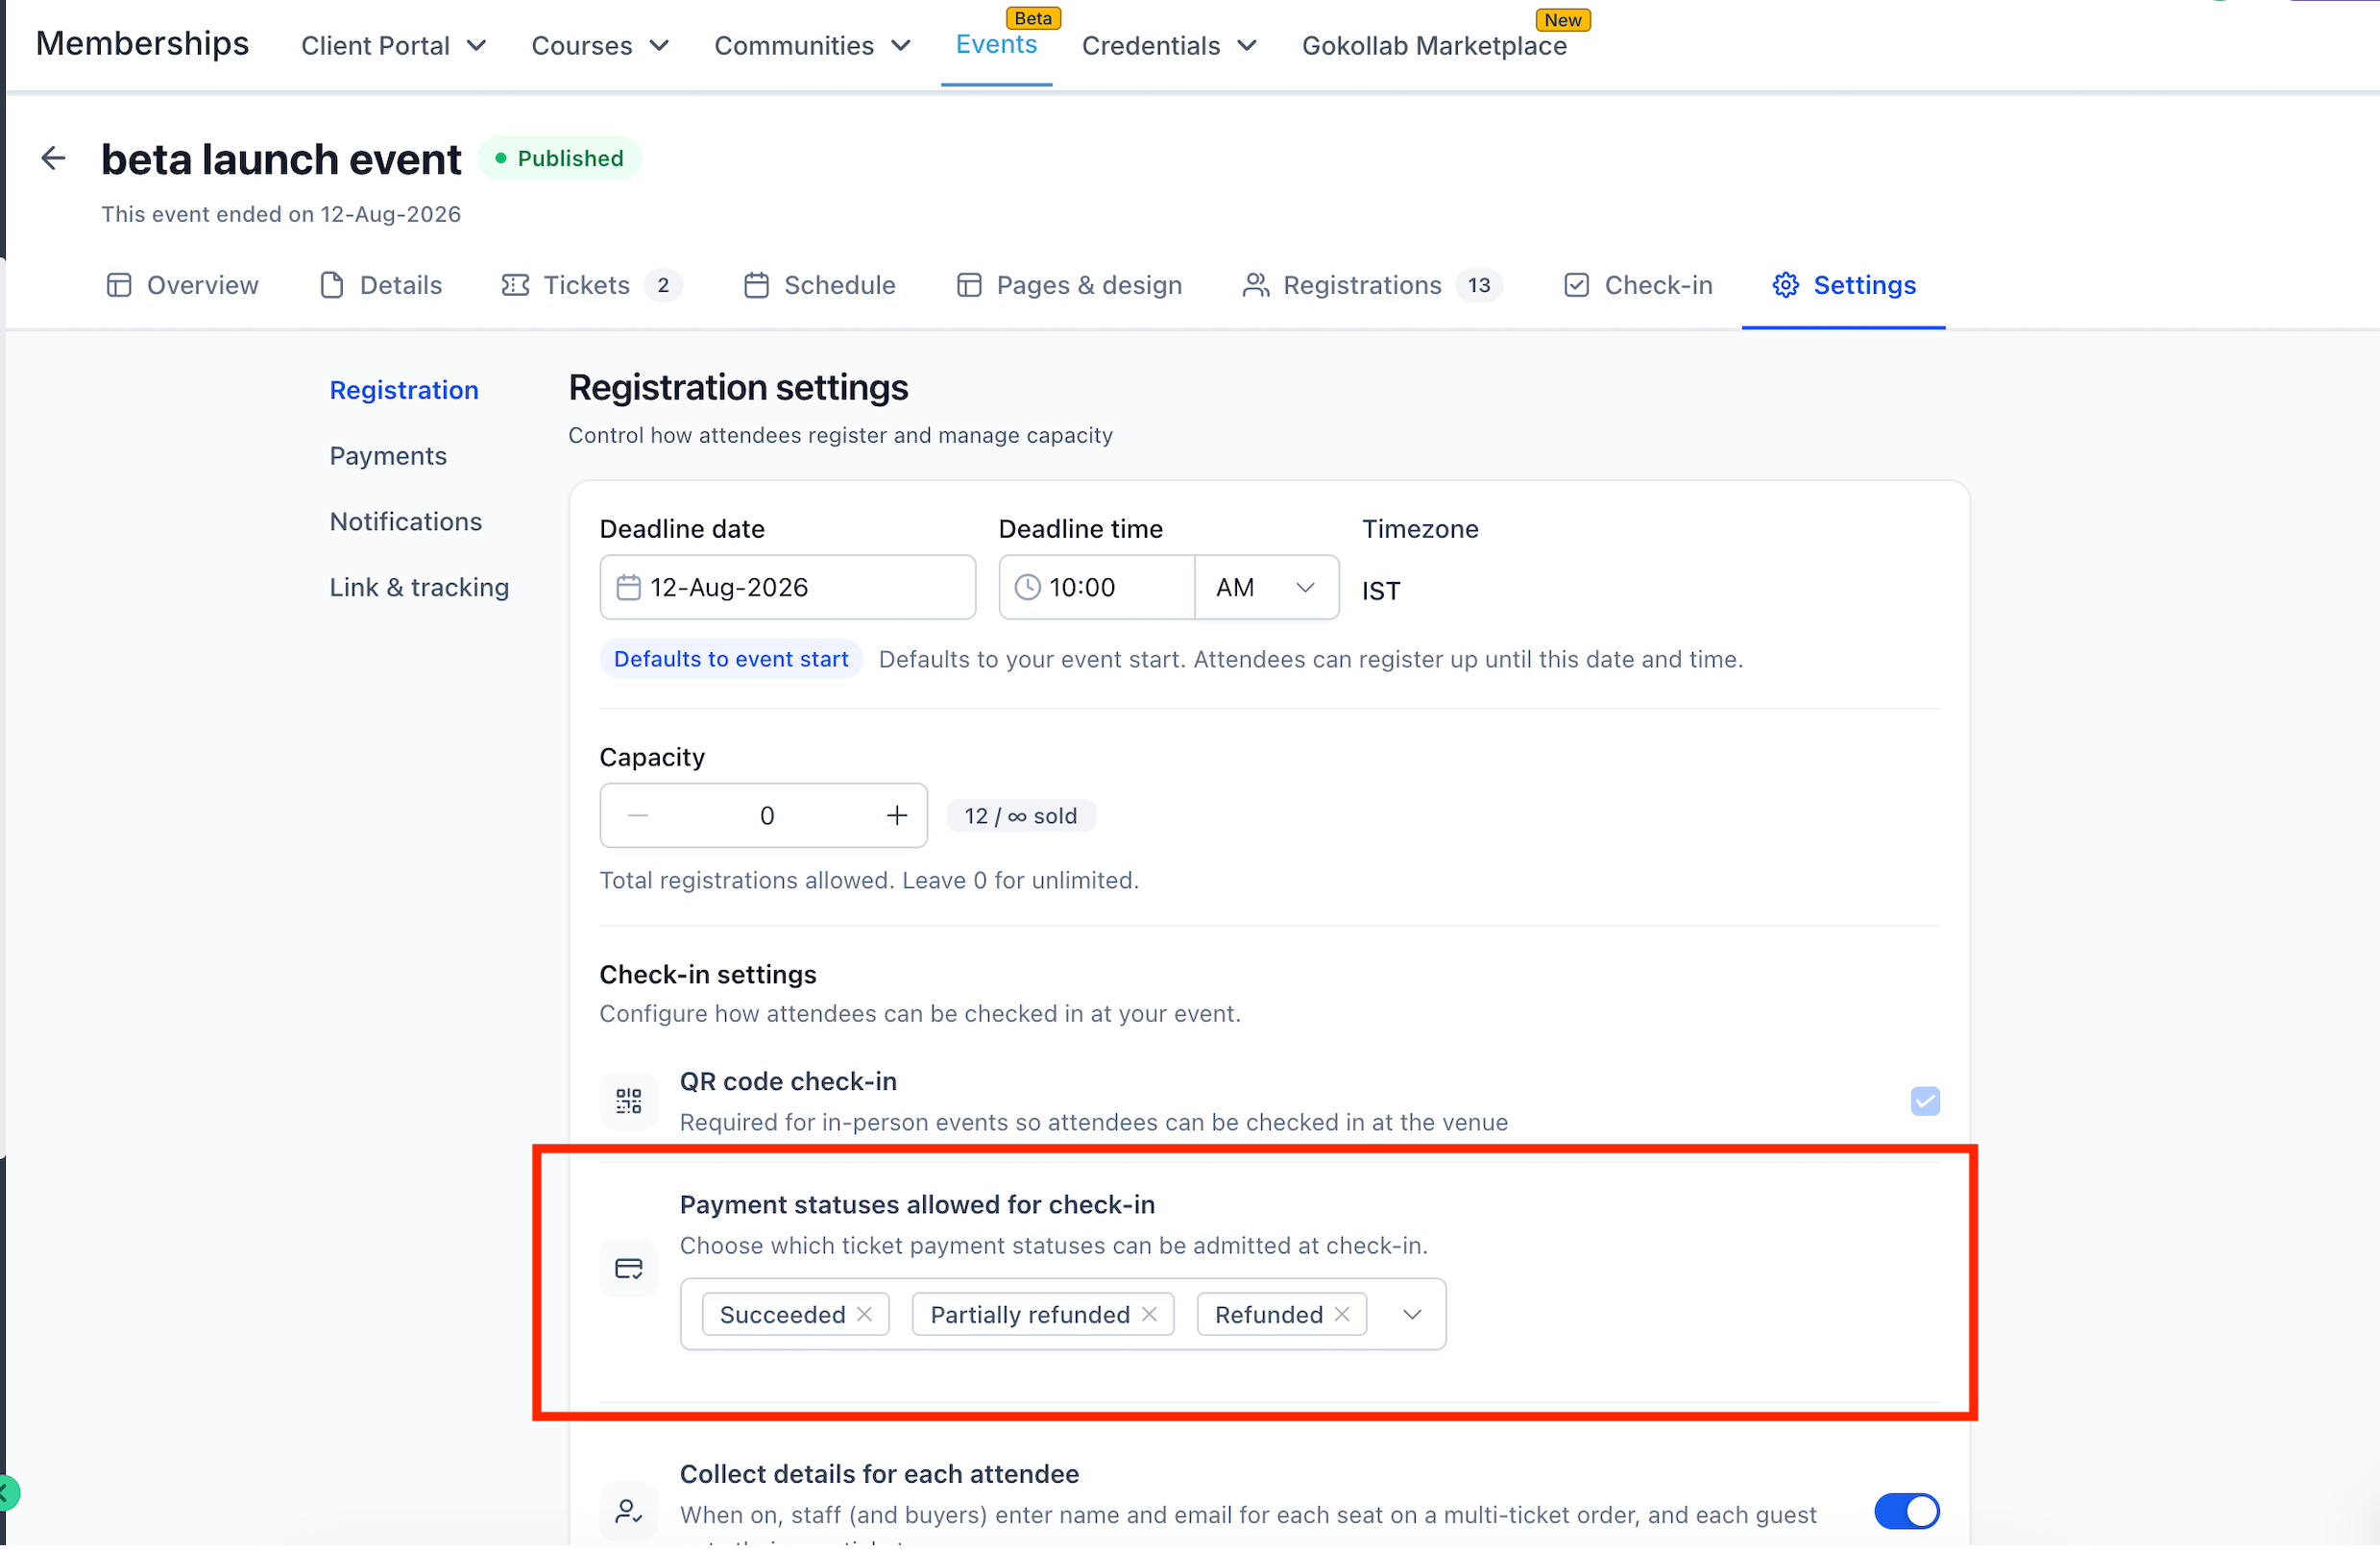
The same interface also holds a setting for QR code check in eligibility. In the event’s Registration settings you pick which payment statuses, Succeeded, Partially refunded, Refunded, are allowed to scan a QR pass. This controls who can enter the venue based on their payment state.
03How businesses use event refunds & cancellations
- Yoga studio. When a class participant asks for a refund, the studio selects Initiate refund from the attendee’s actions menu, enters the amount, and leaves the cancel option unchecked so the participant can still attend future classes. The studio also configures check in to allow only Succeeded payments.
- Conference organizer. If a registrant can no longer attend, the organizer chooses Cancel registration from the actions menu, adds a reason for internal tracking, and confirms the cancellation. Seats return to inventory and the QR pass stops working.
- Online workshop host. The host issues a partial refund when a attendee downgrades to a cheaper ticket. They open Initiate refund, select the ticket, enter a lower amount, and confirm. The host also includes Refunded status in the QR eligibility list so the attendee can still join the session.
04The numbers and rules that matter
- Refund dialog may show an estimated arrival window such as 4 to 6 business days.
05How to set up and use event refunds & cancellations in HighLevel
Open event registrations
- Navigate to Memberships > Events.
- Open the specific event you want to edit.
- Select the Registrations tab.
- Locate the attendee whose record you need to change.
Issue a refund
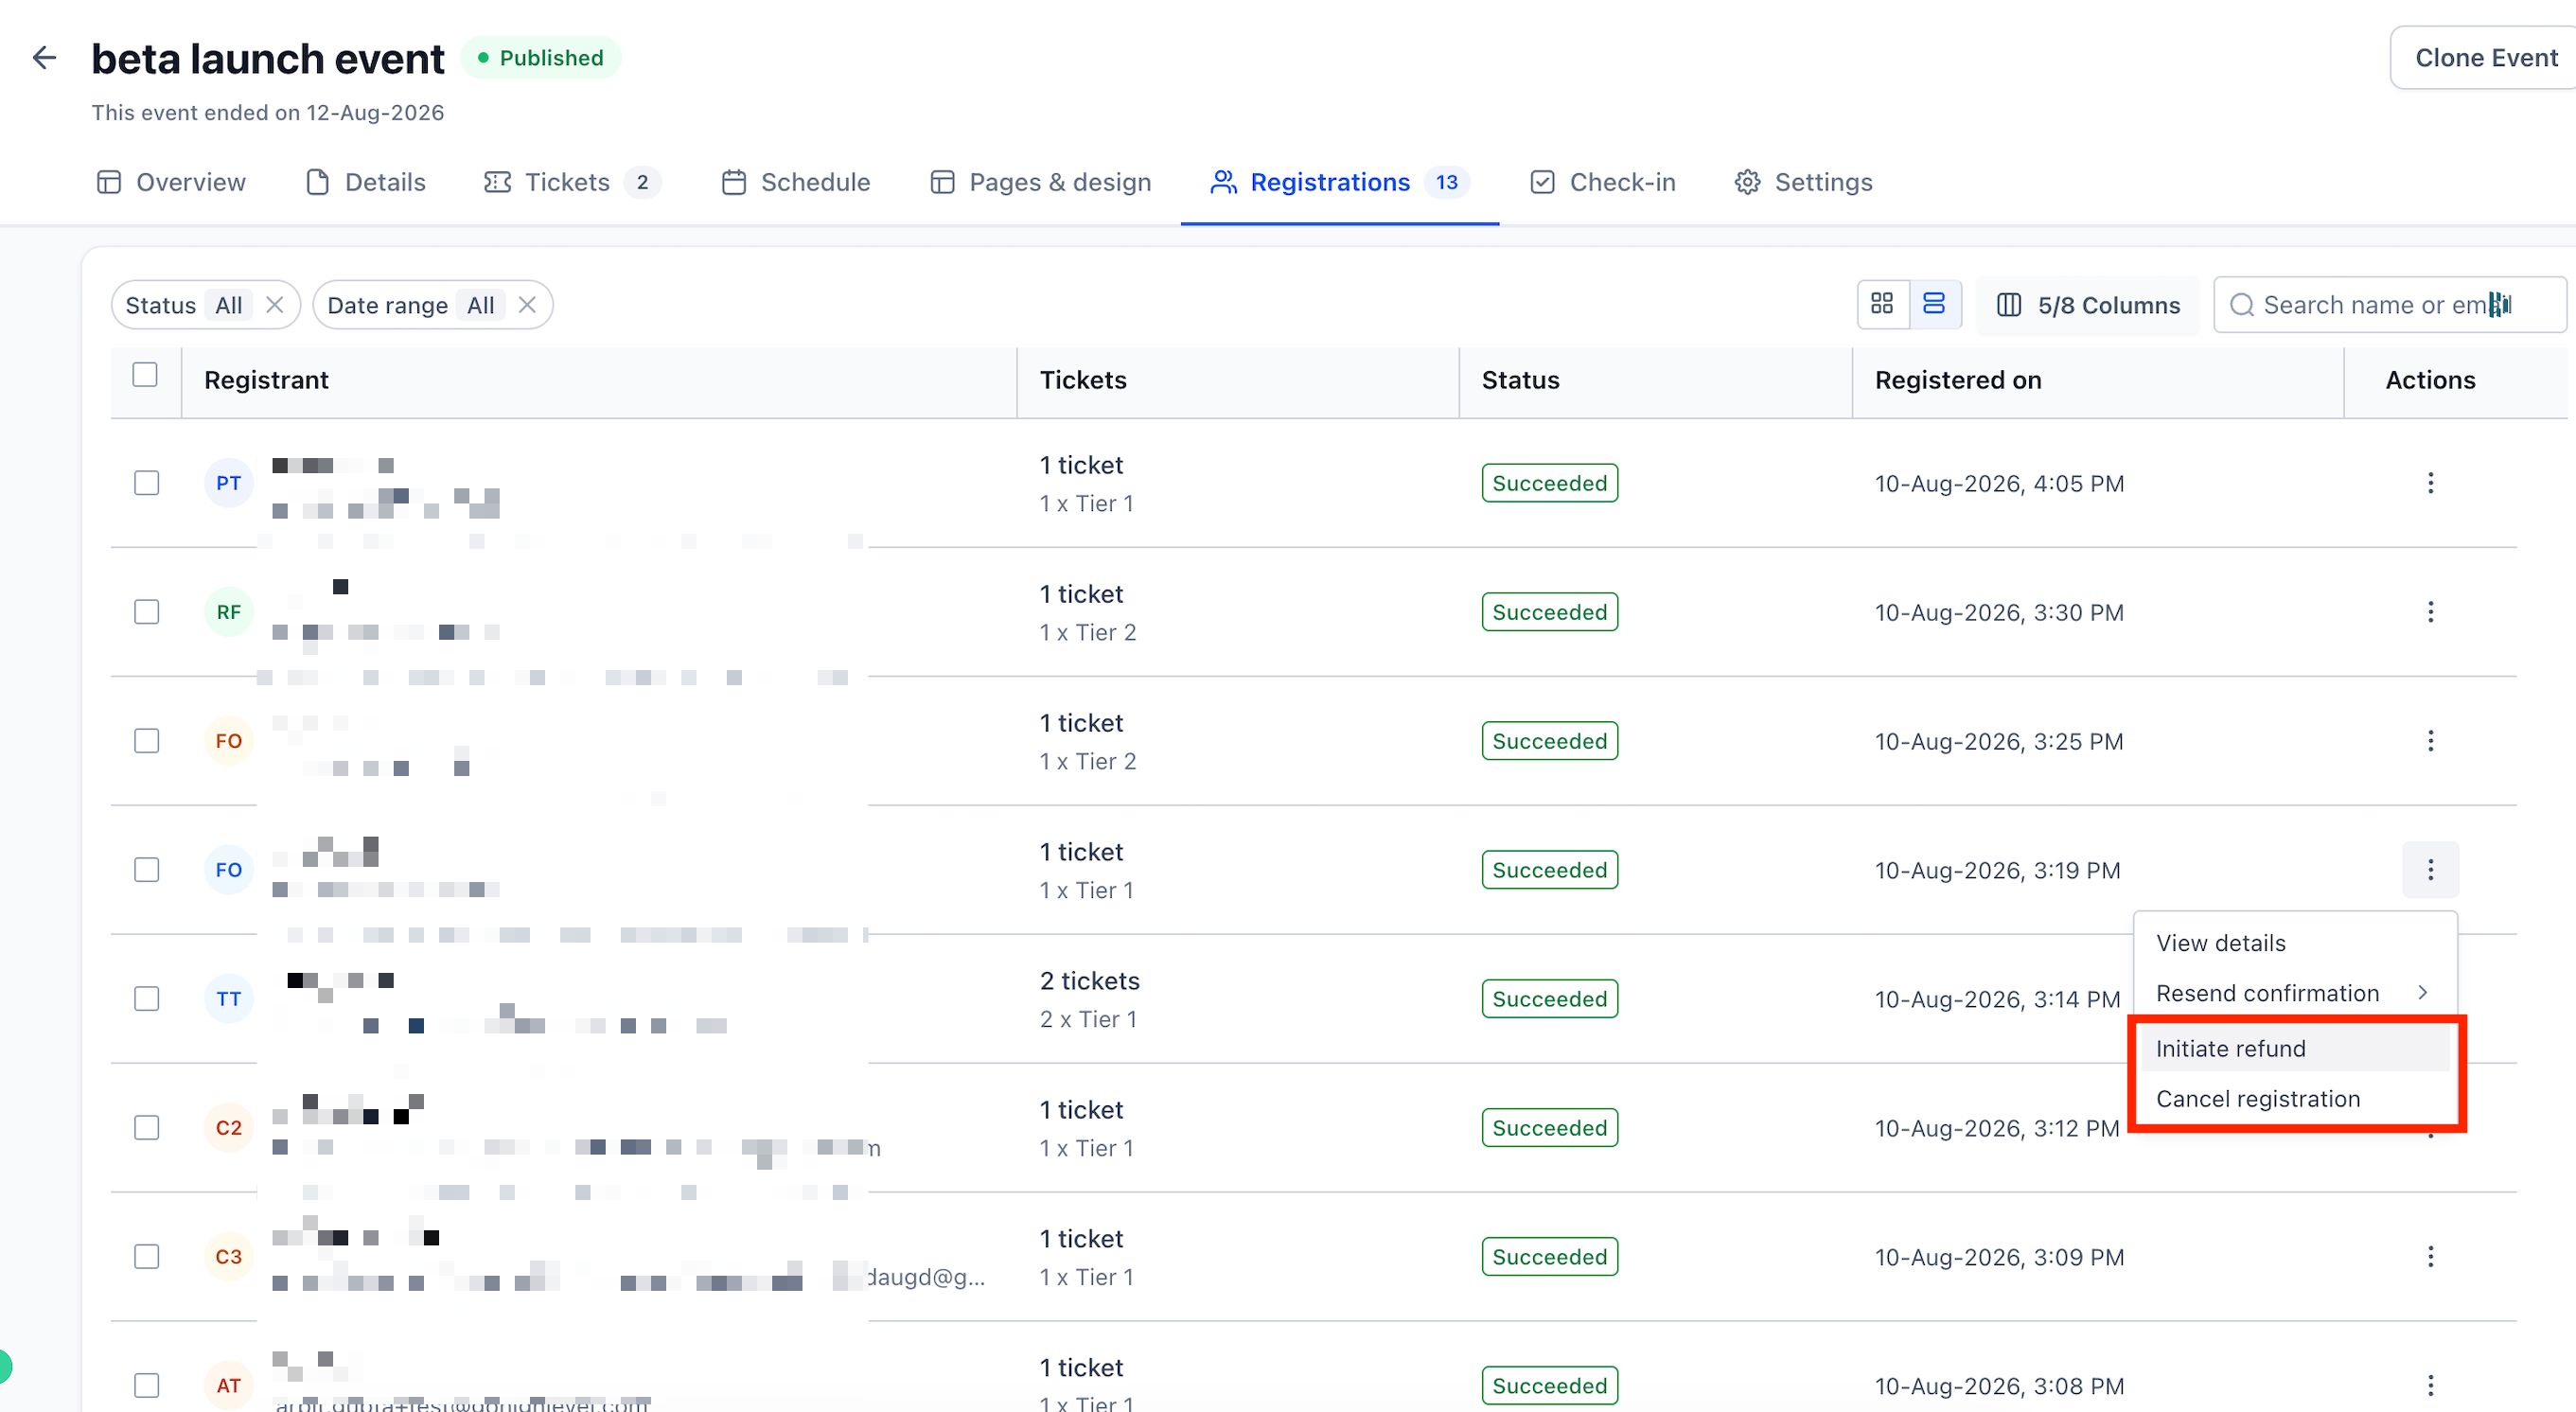
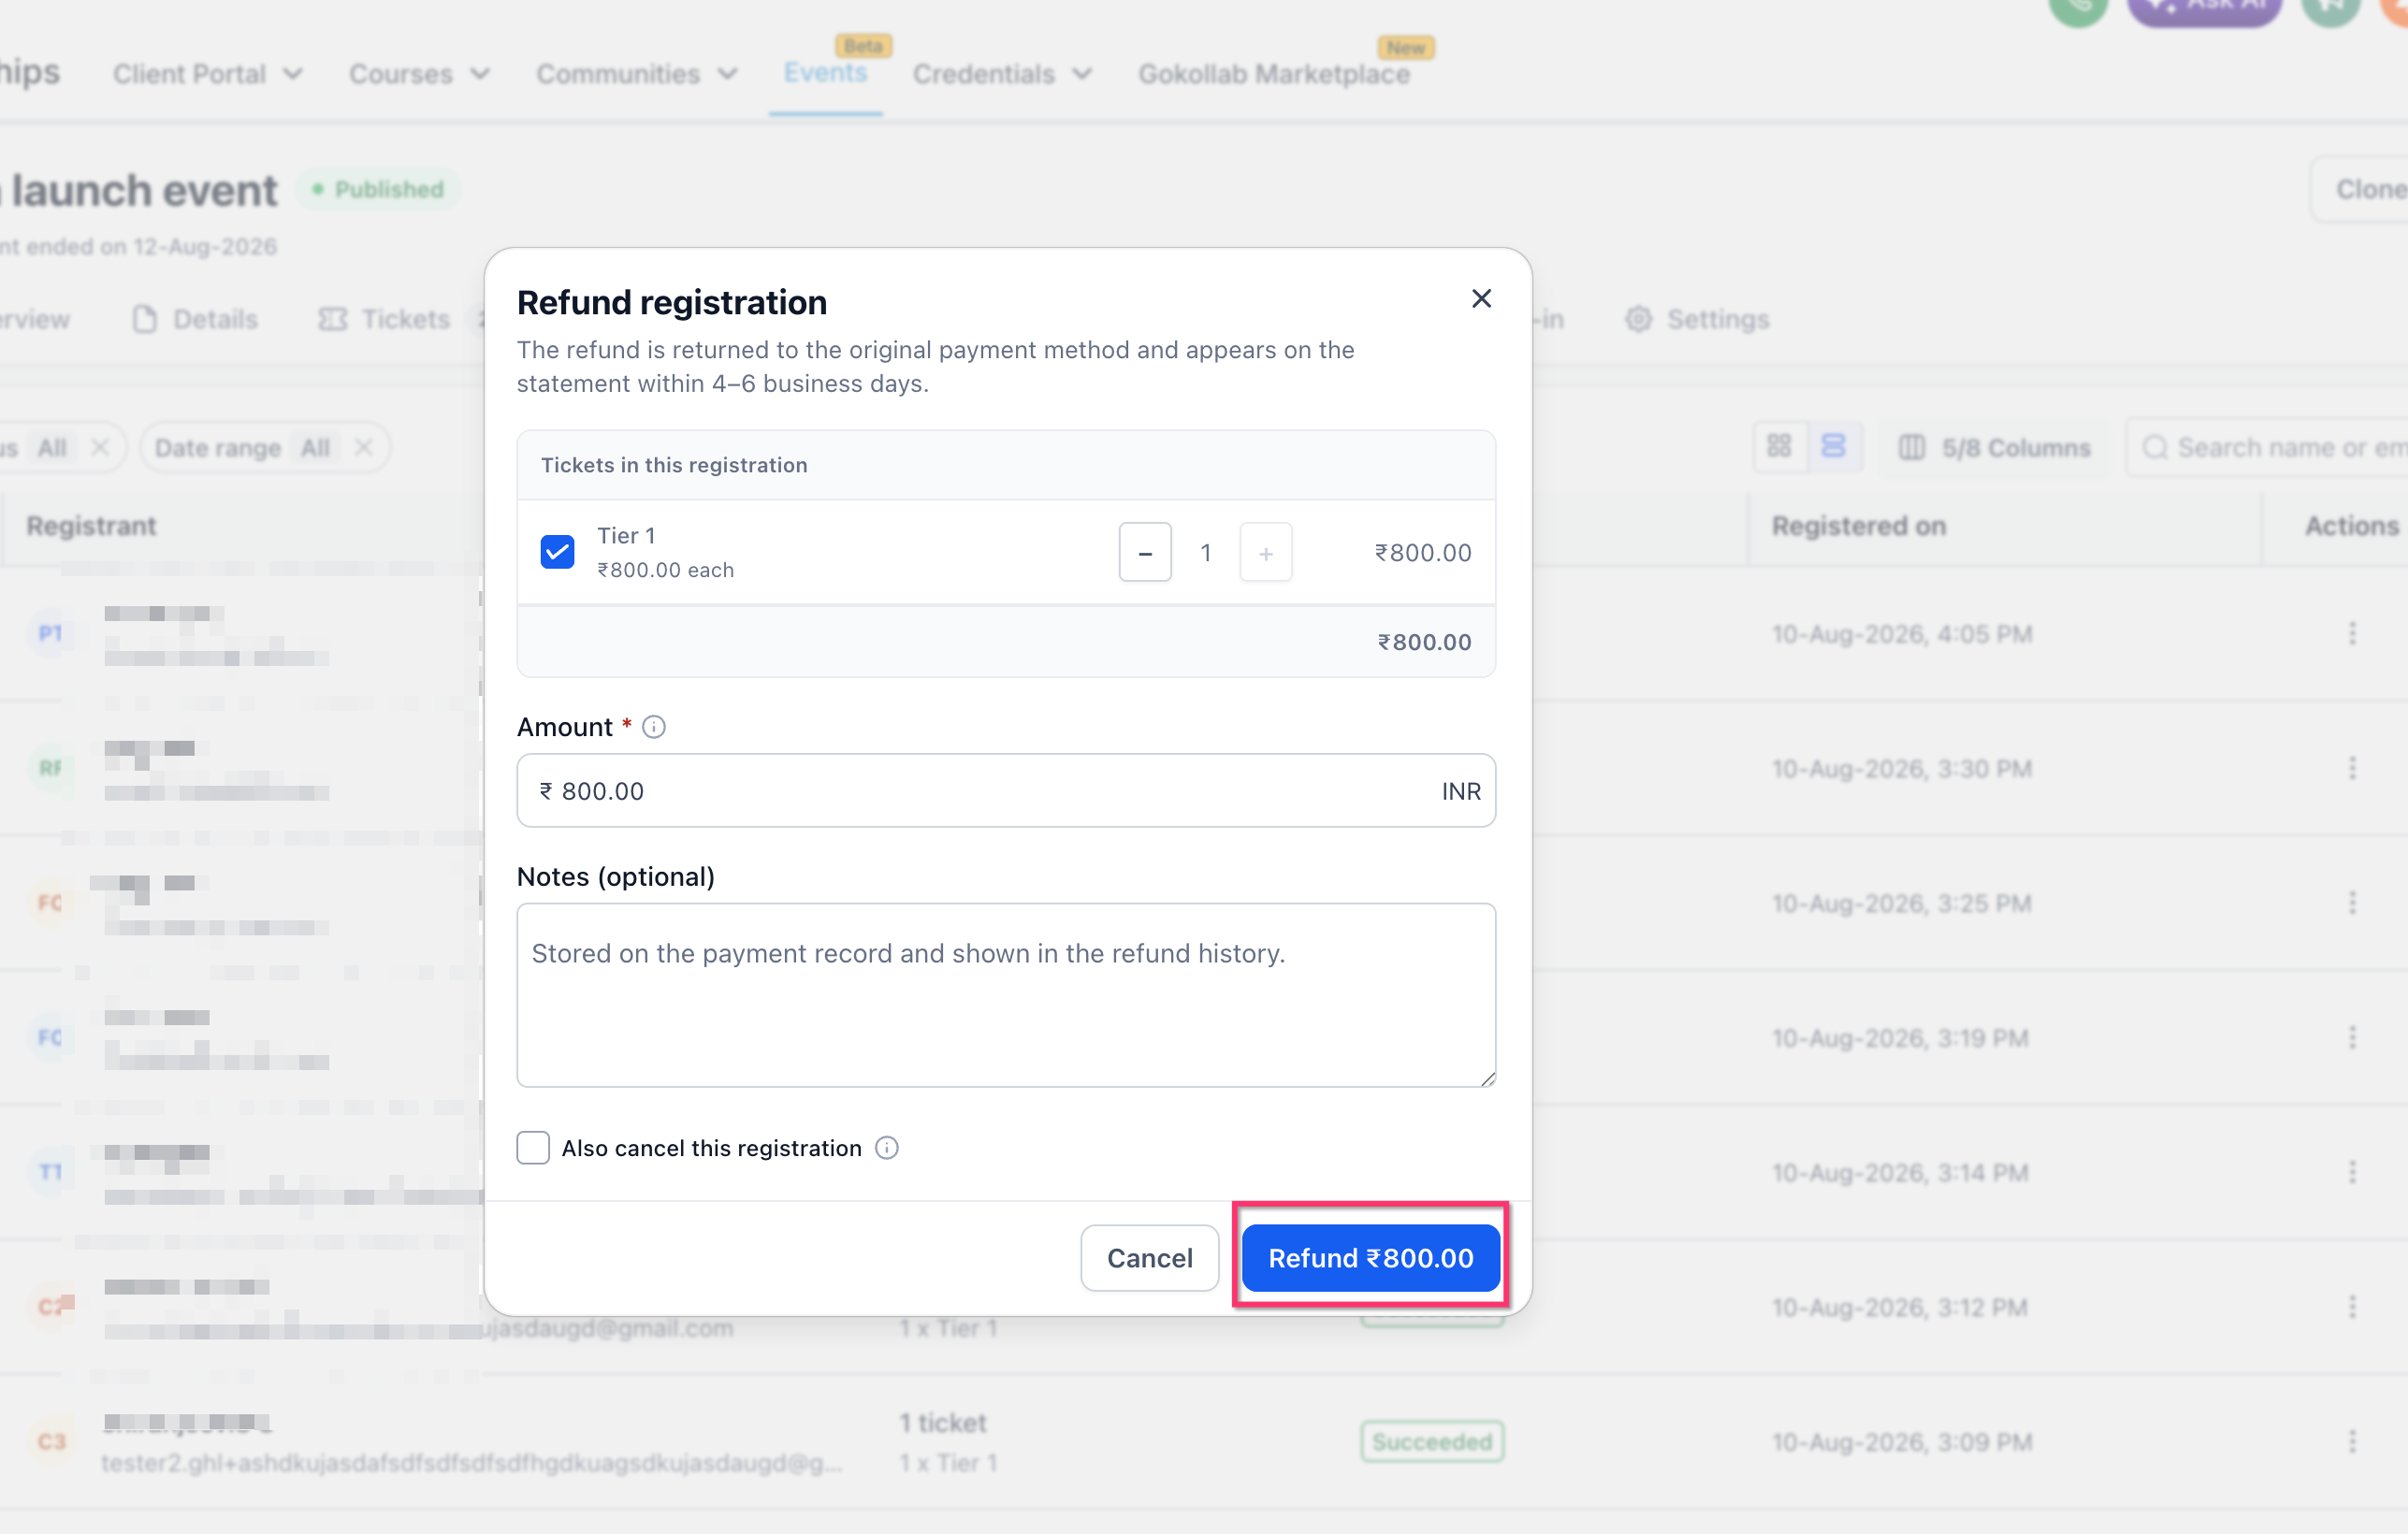
- Select Initiate refund from the attendee’s Actions menu.
- Choose the ticket or tickets to refund.
- Enter the refund amount.
- Add optional notes if desired.
- Leave Also cancel this registration unchecked when the attendee should stay registered.
- Click the refund button to submit.
Issue a partial refund
- Open Initiate refund from the attendee’s Actions menu.
- Select the applicable ticket.
- Enter an amount lower than the full refundable amount.
- Add optional notes if needed.
- Confirm the refund by clicking the refund button.
Refund and cancel together
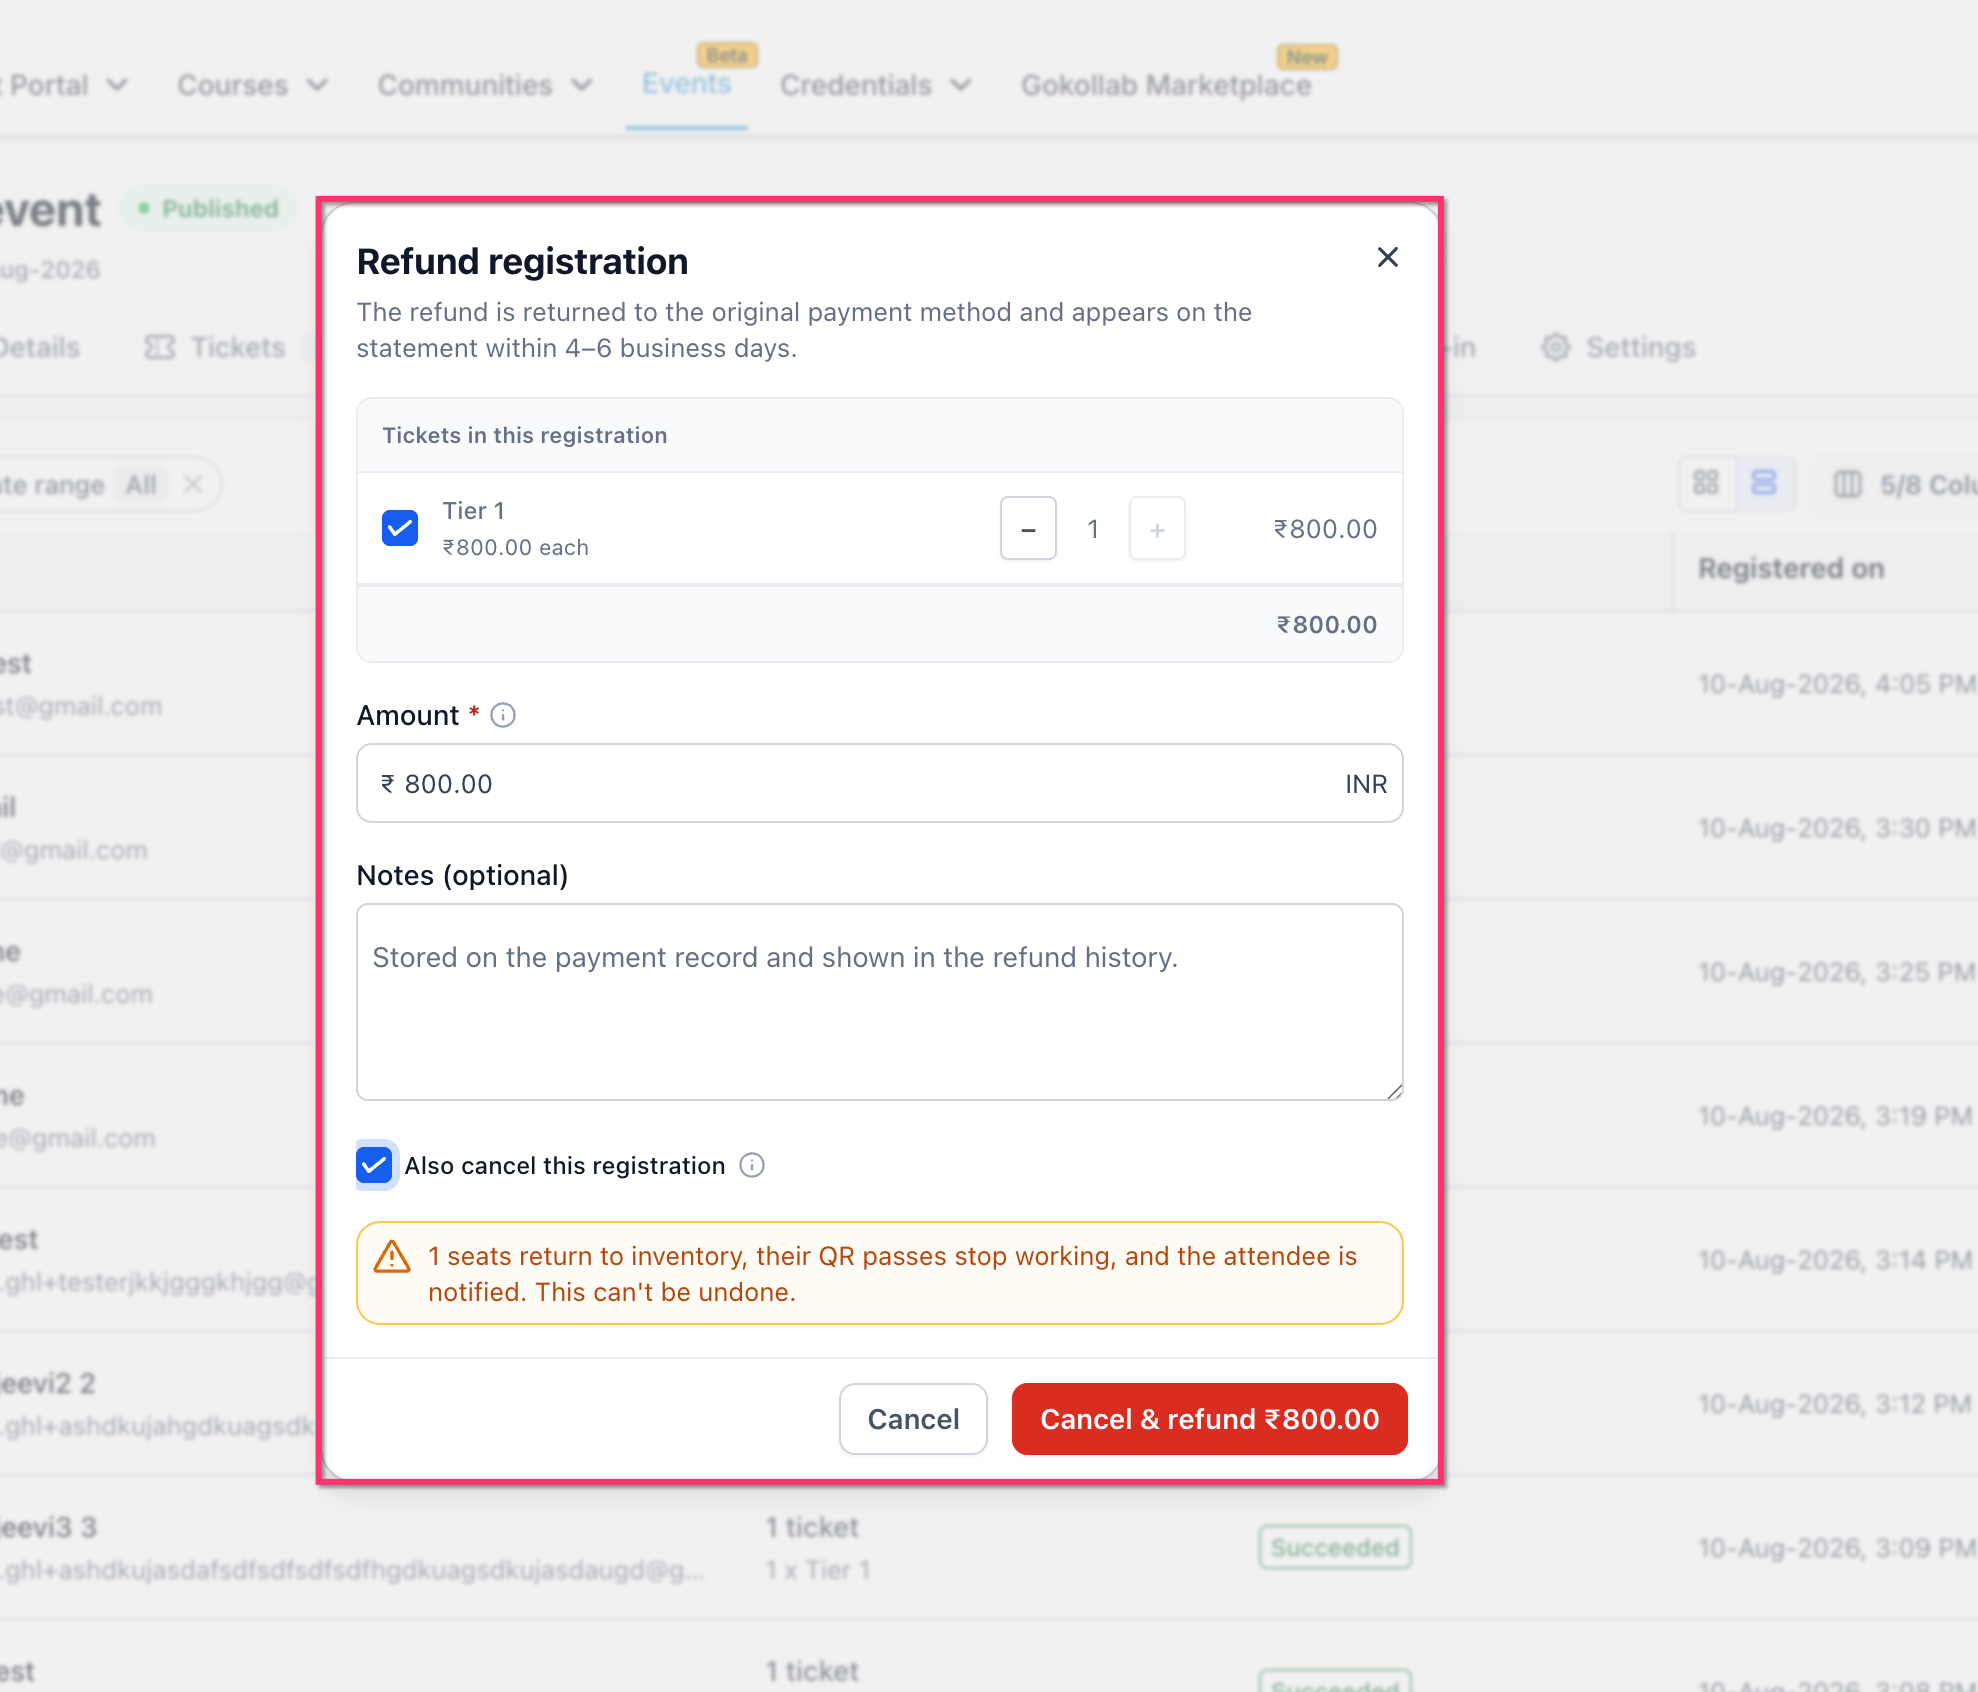
- Open Initiate refund from the attendee’s Actions menu.
- Enter the refund amount.
- Select Also cancel this registration.
- Review the cancellation warning that appears.
- Confirm the combined refund and cancellation action.
Cancel without a refund
- Open the attendee’s Actions menu.
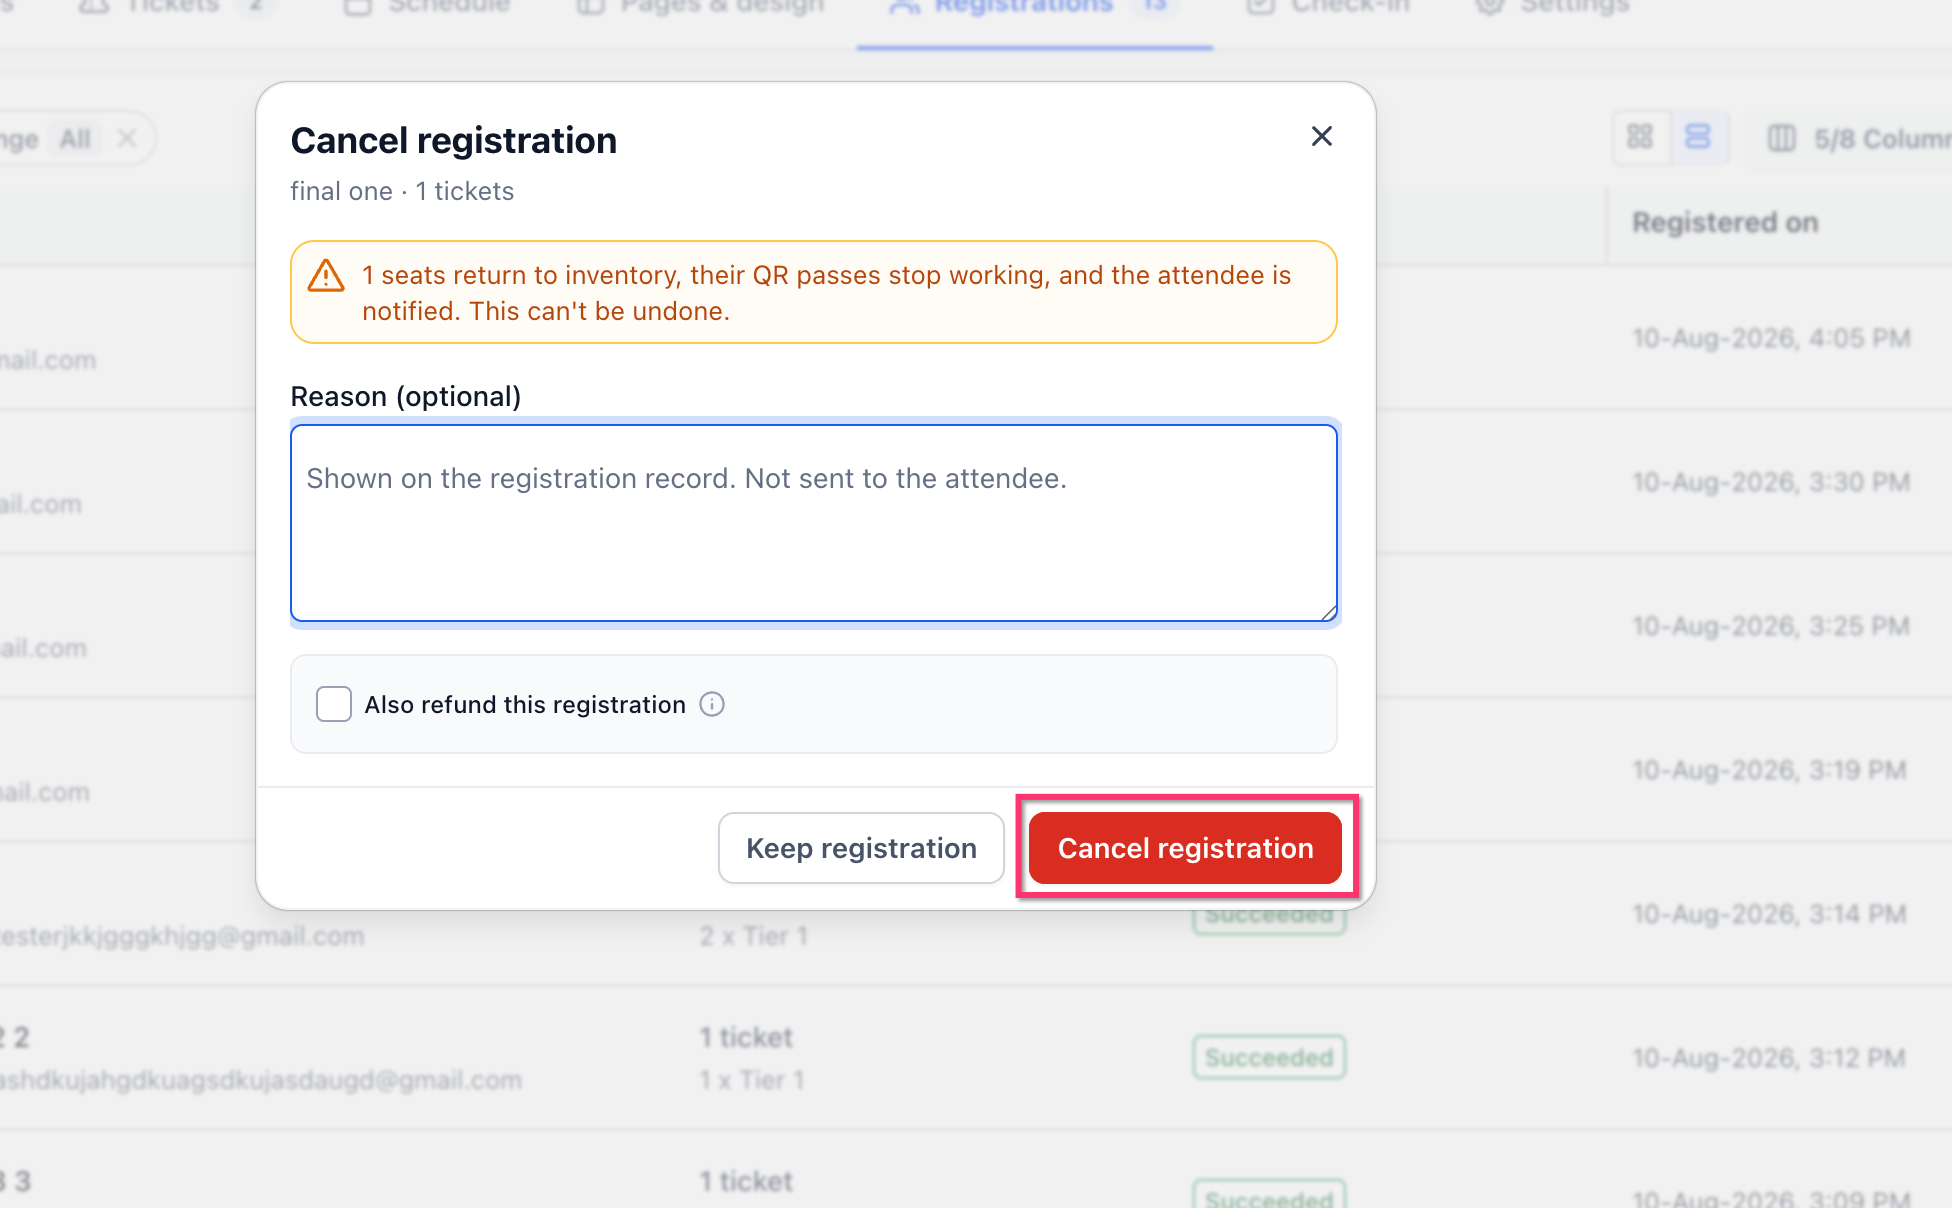
- Select Cancel registration.
- Enter an optional reason for internal use.
- Leave Also refund this registration unchecked.
- Confirm the cancellation.
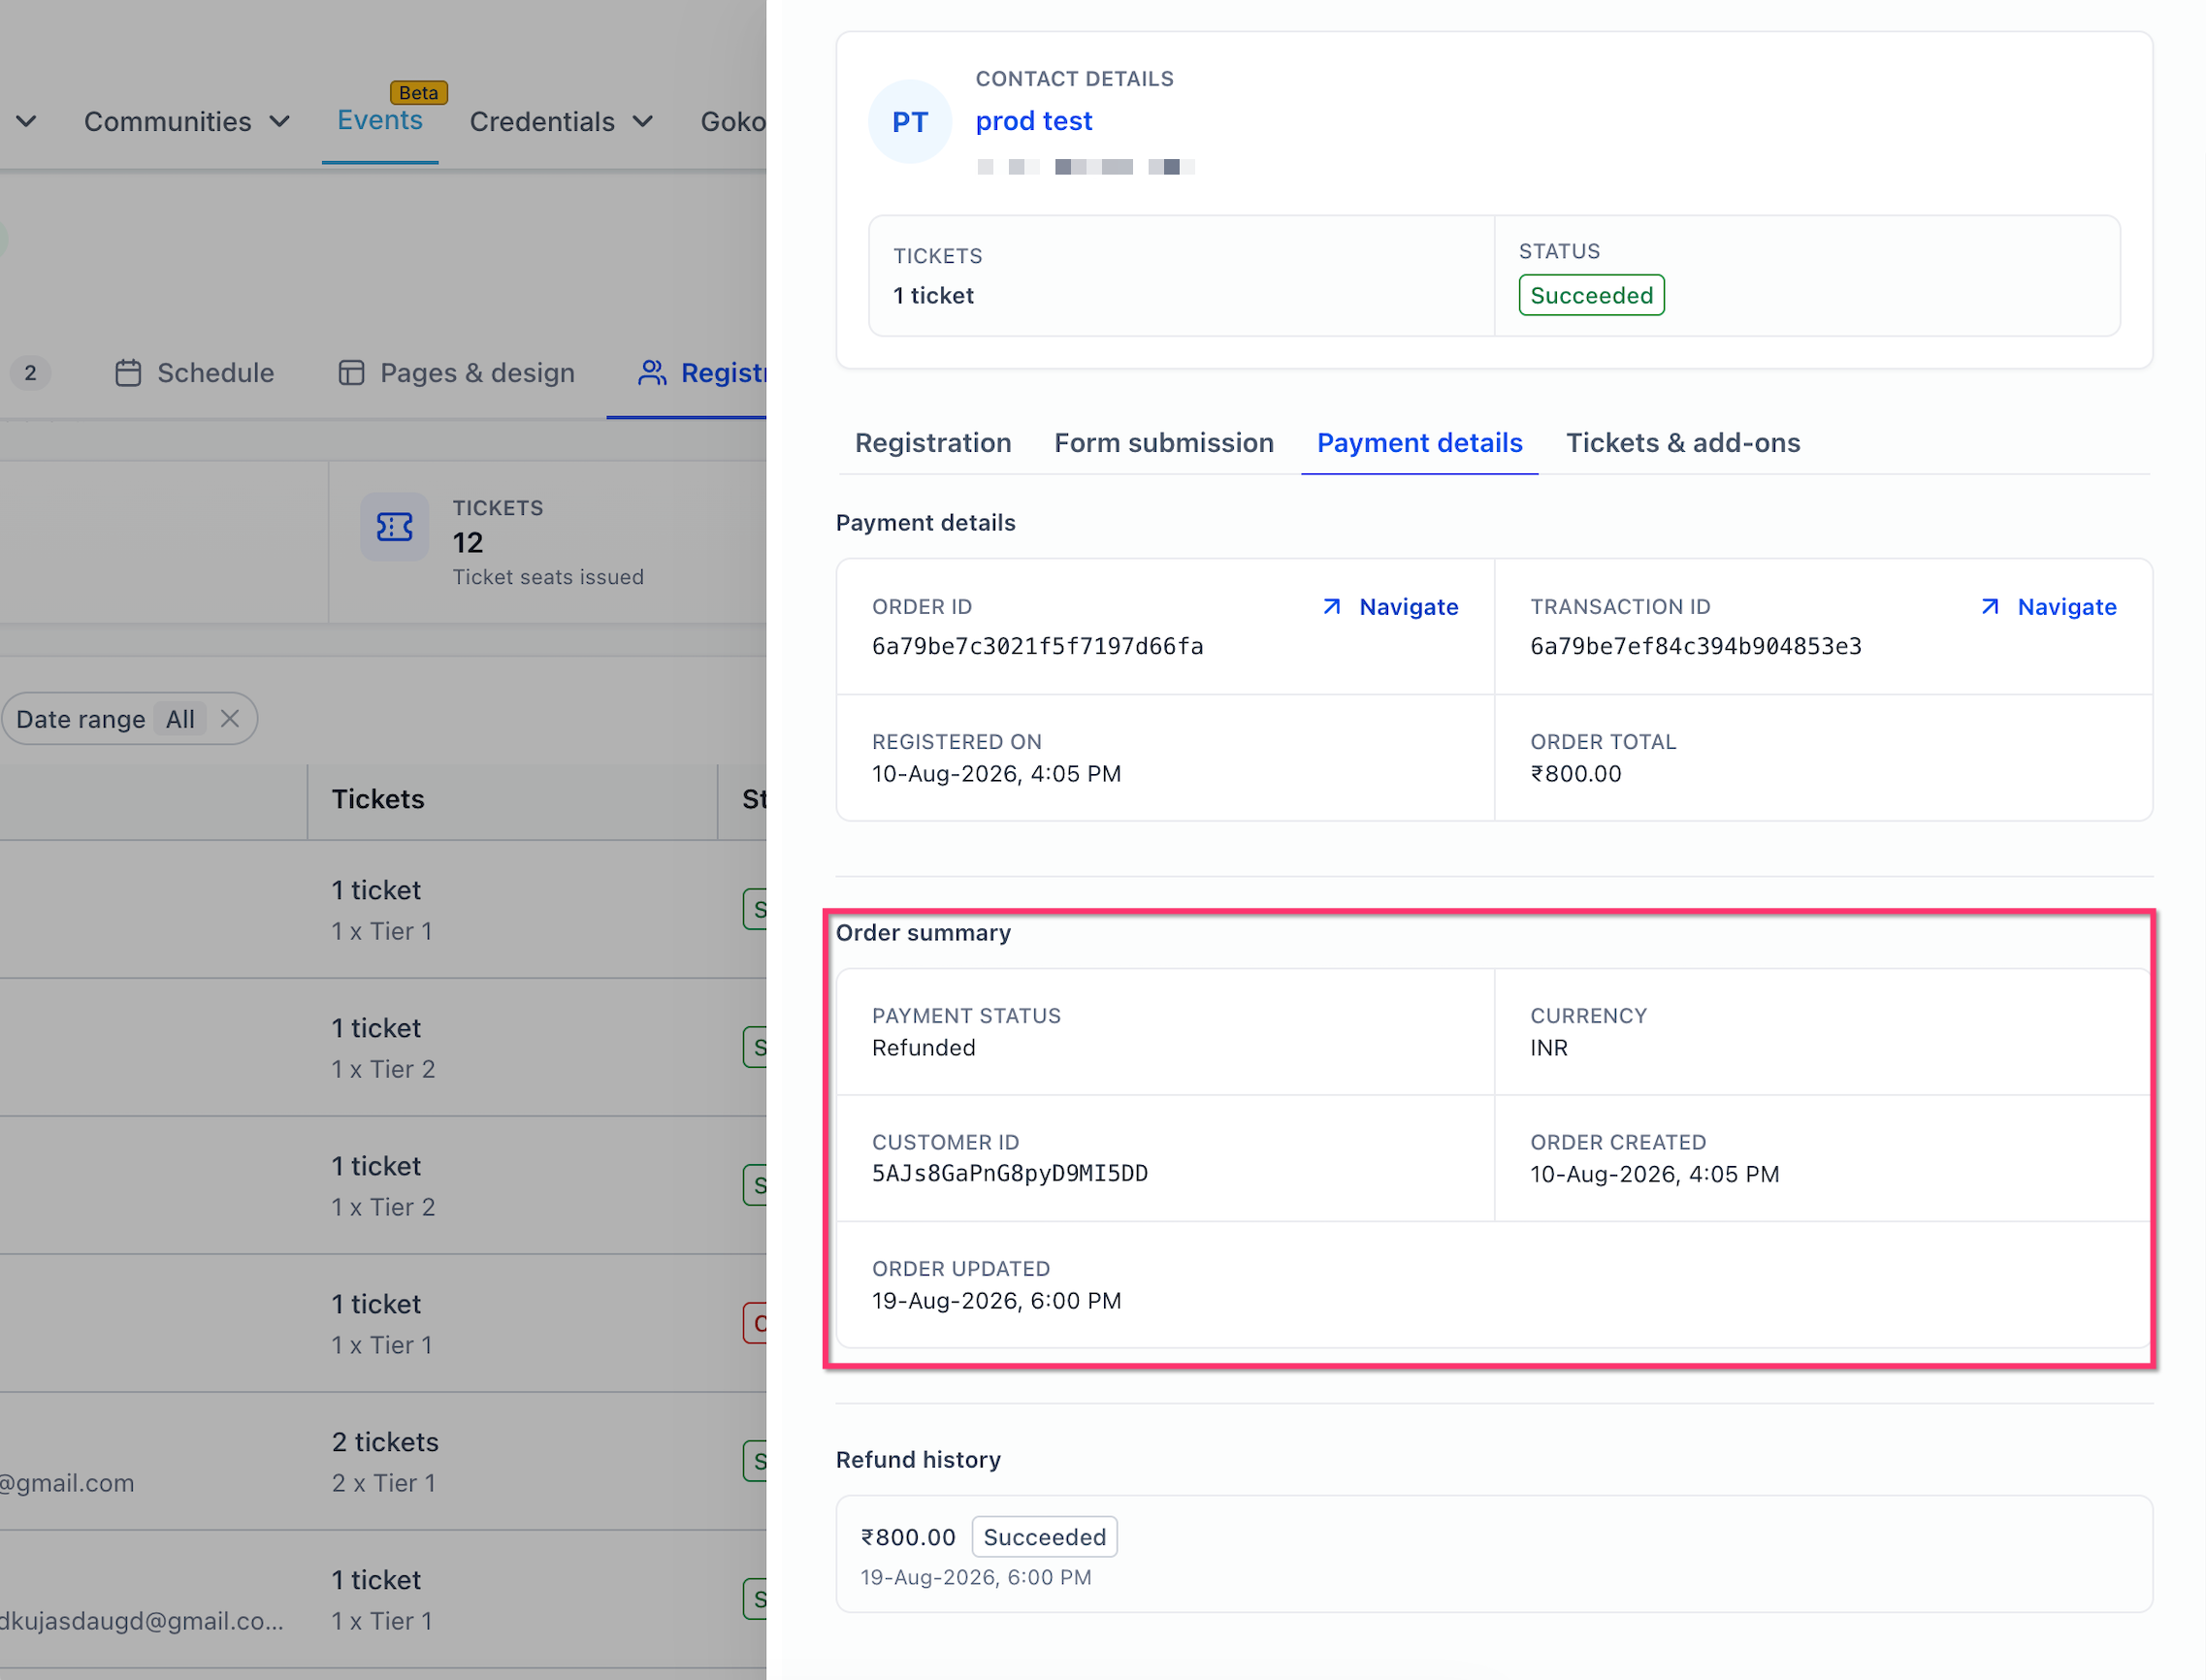
Verify the refund
- Open the attendee’s registration details.
- Go to the Payment details section.
- Review the Payment status field.
- Check the Refund history area for amount and status.
Configure QR check in eligibility
- Open the event you are editing.
- Go to Settings.
- Select Registration.
- Find the Payment statuses allowed for check in option.
- Select the payment statuses that should be permitted to use QR code check in.
- Save your changes.
06What it looks like in HighLevel
07Settings that matter
- Payment statuses allowed for check, in. Determines which payment states, such as Succeeded, Partially refunded, or Refunded, are permitted to scan a QR code for event entry.
08Things to know before you rely on it
- Cancellation cannot be undone; seats return to inventory and QR passes stop working.
- Refund timing depends on the payment processor and may show an estimate of 4 to 6 business days.
09How it connects to the rest of HighLevel
- Create and manage events in HighLevel Event creation guide
- Check in attendees with the HighLevel event app QR check in guide
- View HighLevel pricing and plans Pricing overview
Michael's take

The refunds & cancellations feature puts refunds, cancellations and check in settings all in one place, which can simplify event management.
If you rarely offer tickets or your events are free, the extra steps to set up payment status check in may feel like overhead, and handling refunds manually outside of HighLevel could be a reasonable alternative.