
01Who this is for
- Founders who manage outbound marketing and need confidence their emails reach inboxes.
- Marketing managers in small agencies looking to reduce client spam complaints.
- Ecommerce owners who send promotional newsletters and want to avoid deliverability issues.
02Presend spam checks, explained
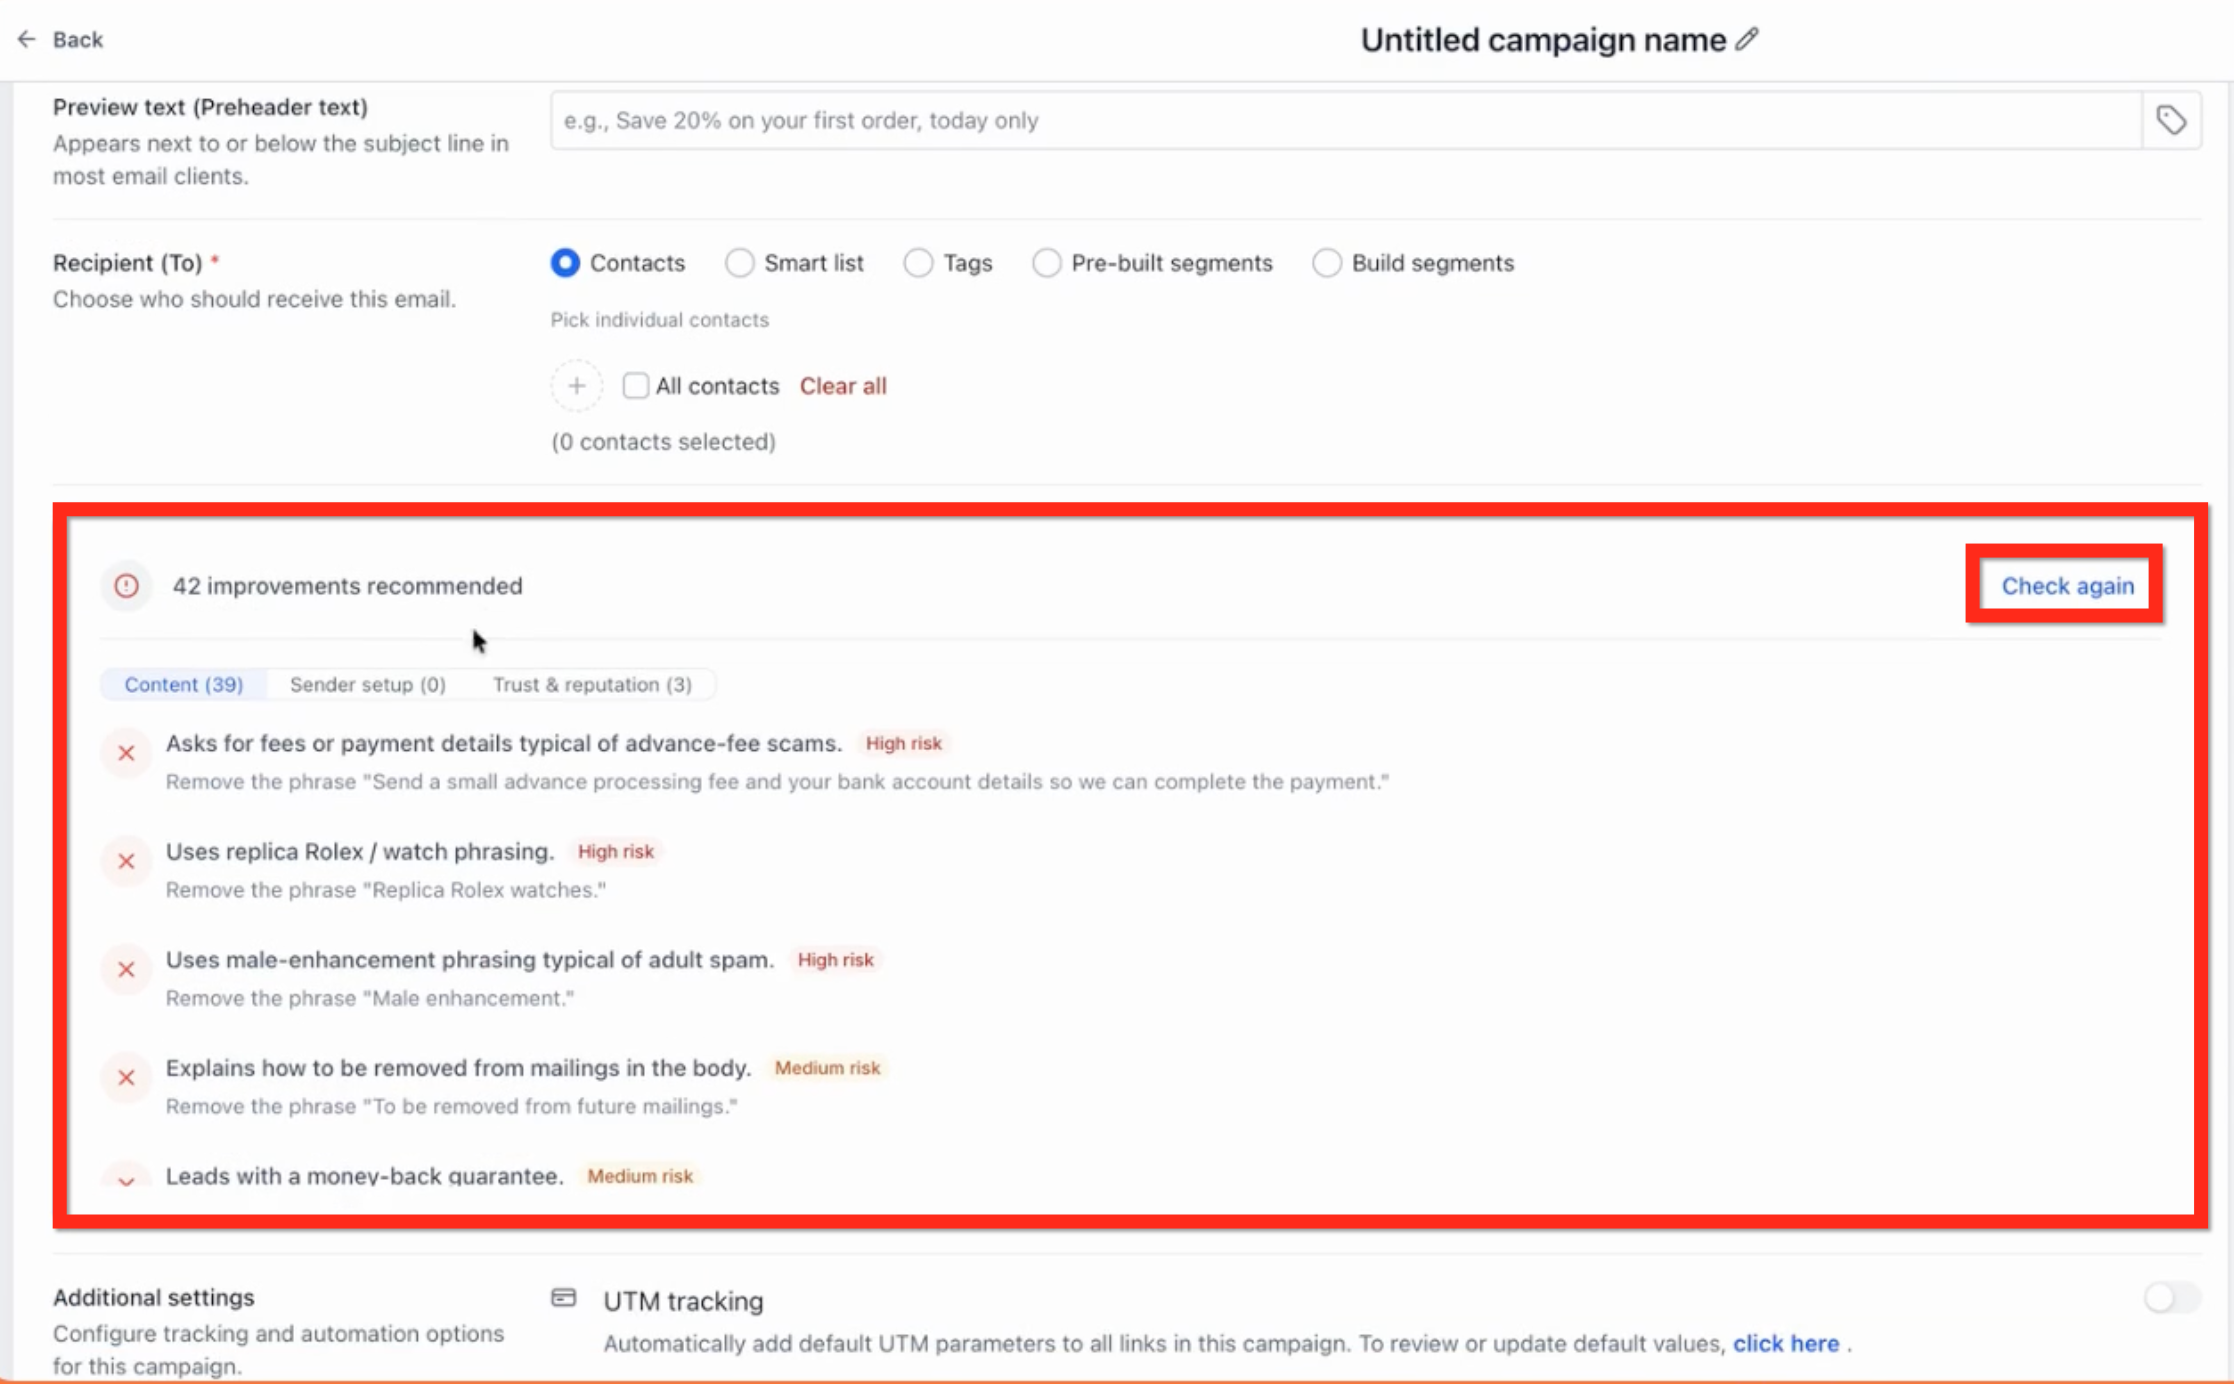
The Pre Send Spam Check evaluates three areas of an email campaign: the message content for trigger words, the sender configuration such as domain and address, and the overall trust and reputation signals that mail providers use. After analysis, the tool shows a count of recommended fixes and labels each issue as High risk, Medium risk, or No improvements needed. The results appear directly in the campaign editor, and you can adjust the email and run the check again as many times as needed.
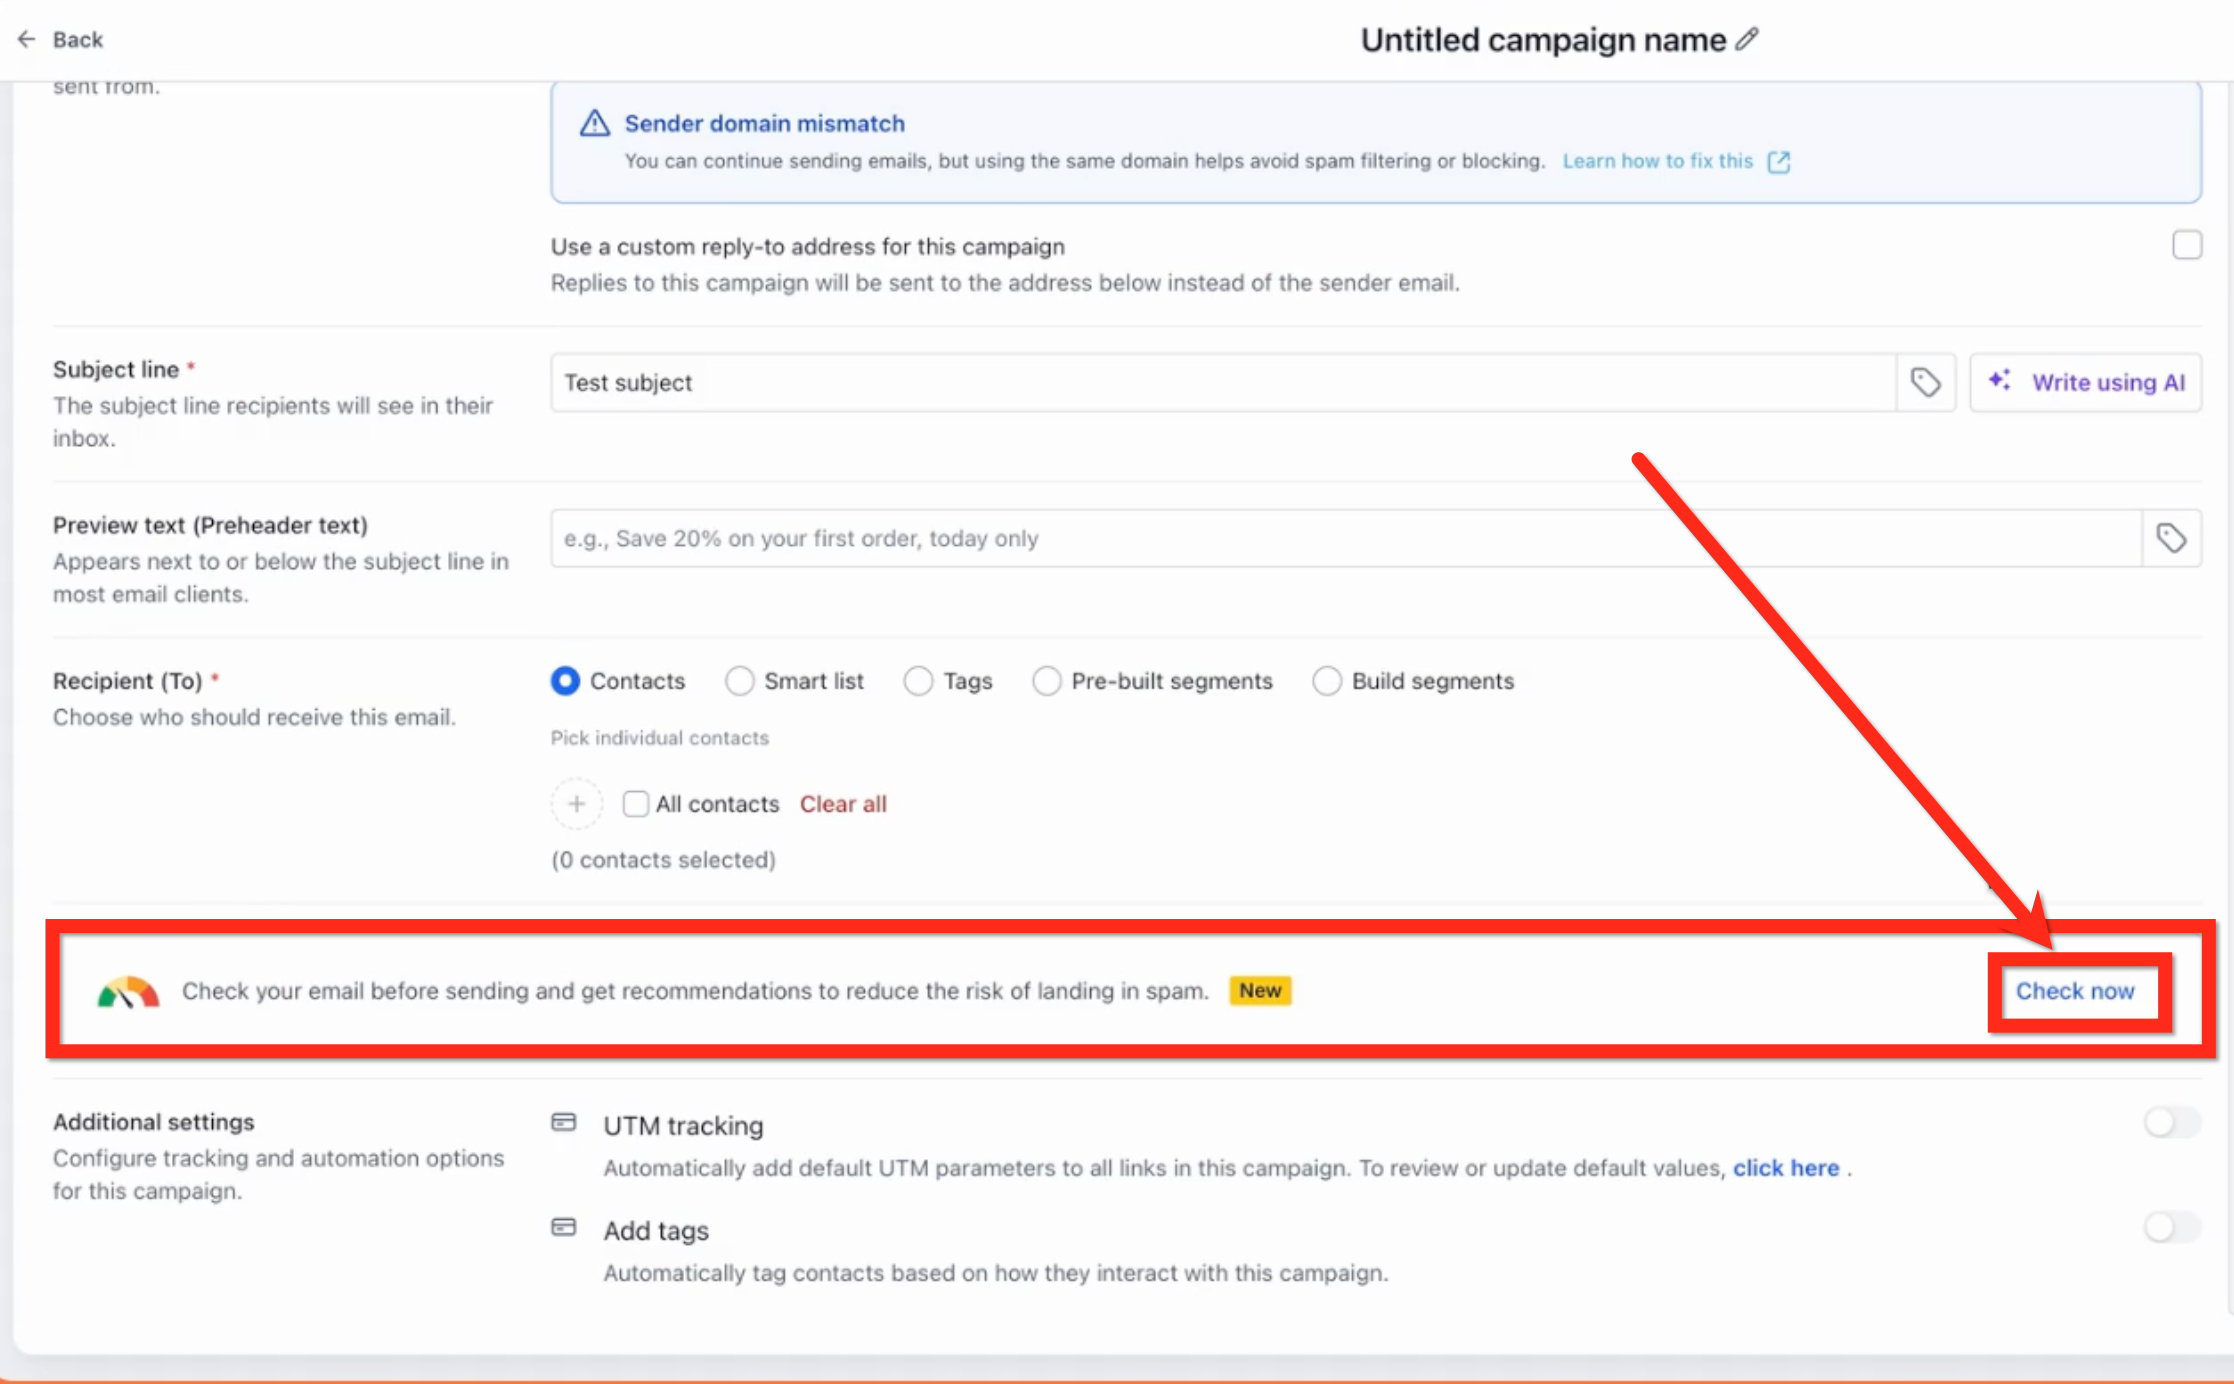
You access the feature from the campaign draft screen. After filling out sender details and the subject, a “Check now” button appears beneath the recipient field. Clicking it launches the analysis, then a results pane lists the risk categories and suggestions. When you are satisfied, you continue with the standard Review and Send workflow.
03How businesses use presend spam check
- Digital marketing agency. After drafting a client newsletter, the agency opens the campaign, clicks the Check now button, reviews any high risk wording flagged, edits the copy, and re runs the check until the risk level is acceptable before scheduling the send.
- Online retail store. The store prepares a promotional email, inputs its verified sender domain, runs the spam check, follows recommendations to adjust subject line phrasing, then proceeds to send the campaign to its mailing list.
- Consulting firm. Before sending a monthly update, the firm uses the spam analysis to verify that its sender email and domain are correctly set, addresses any trust related warnings, and confirms the email passes with no high risk flags.
04How to set up and use presend spam check in HighLevel
Run pre send spam check
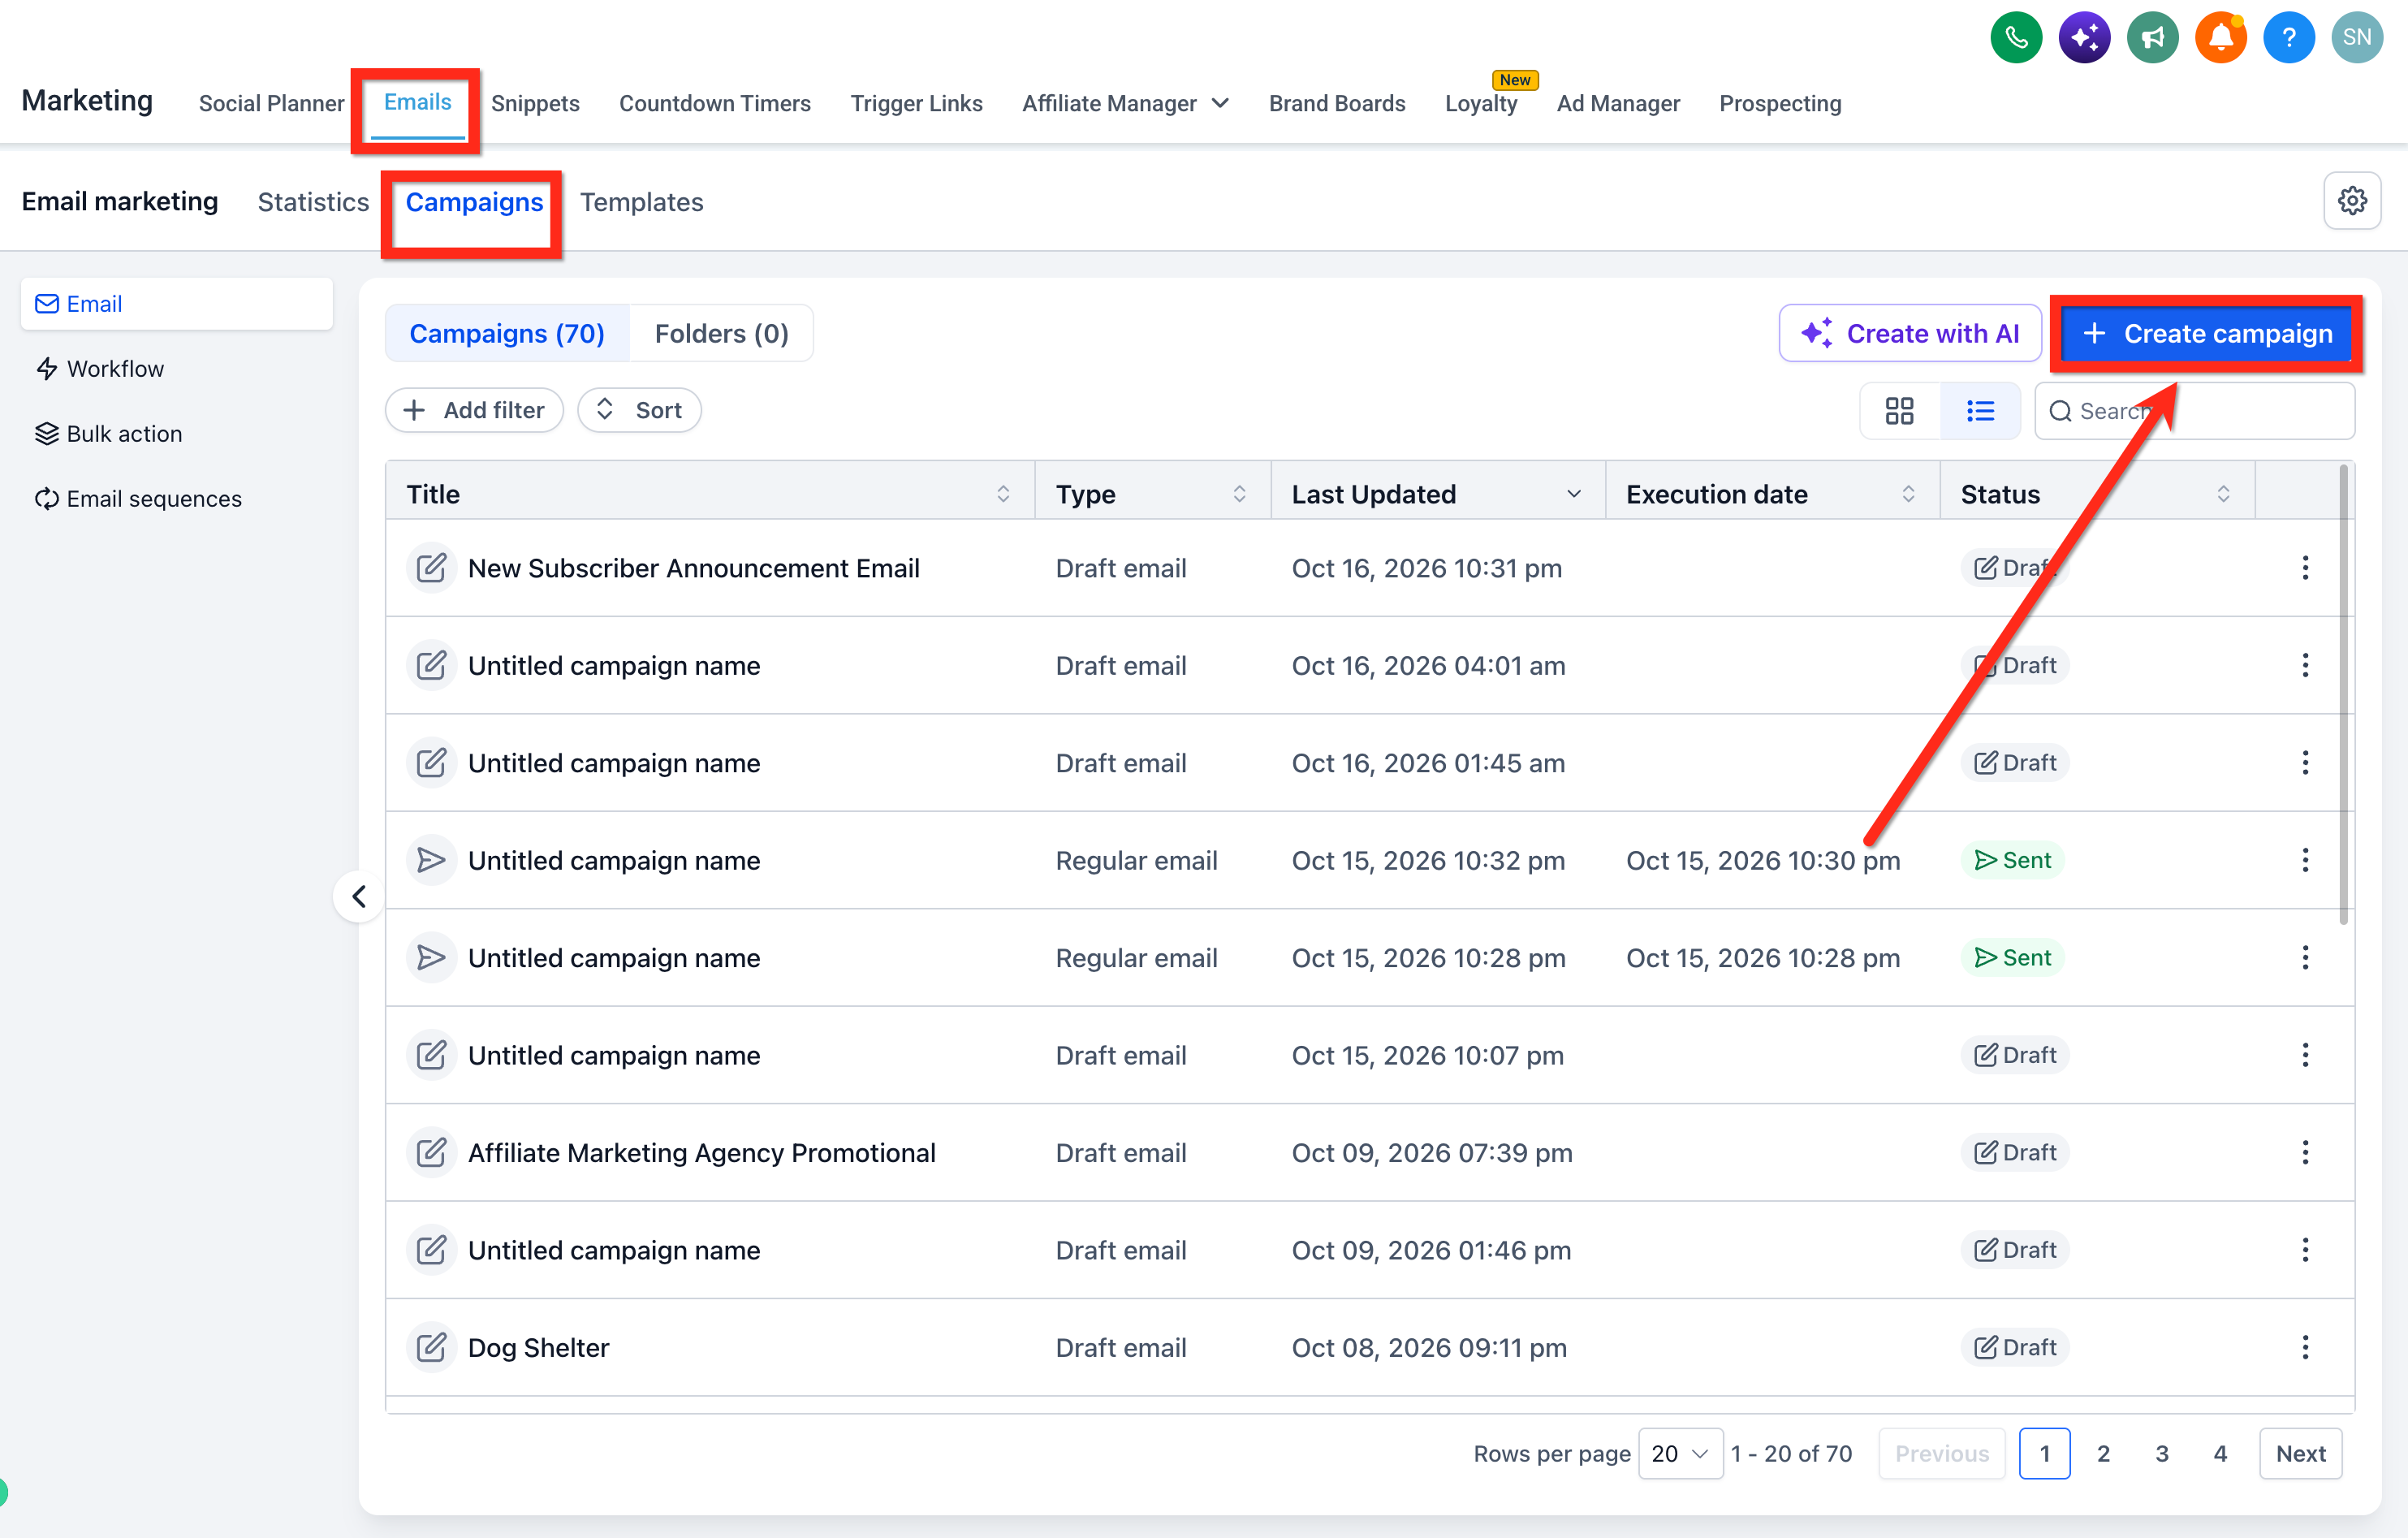
- Navigate to Marketing > Emails > Campaigns and open an existing campaign or create a new one.
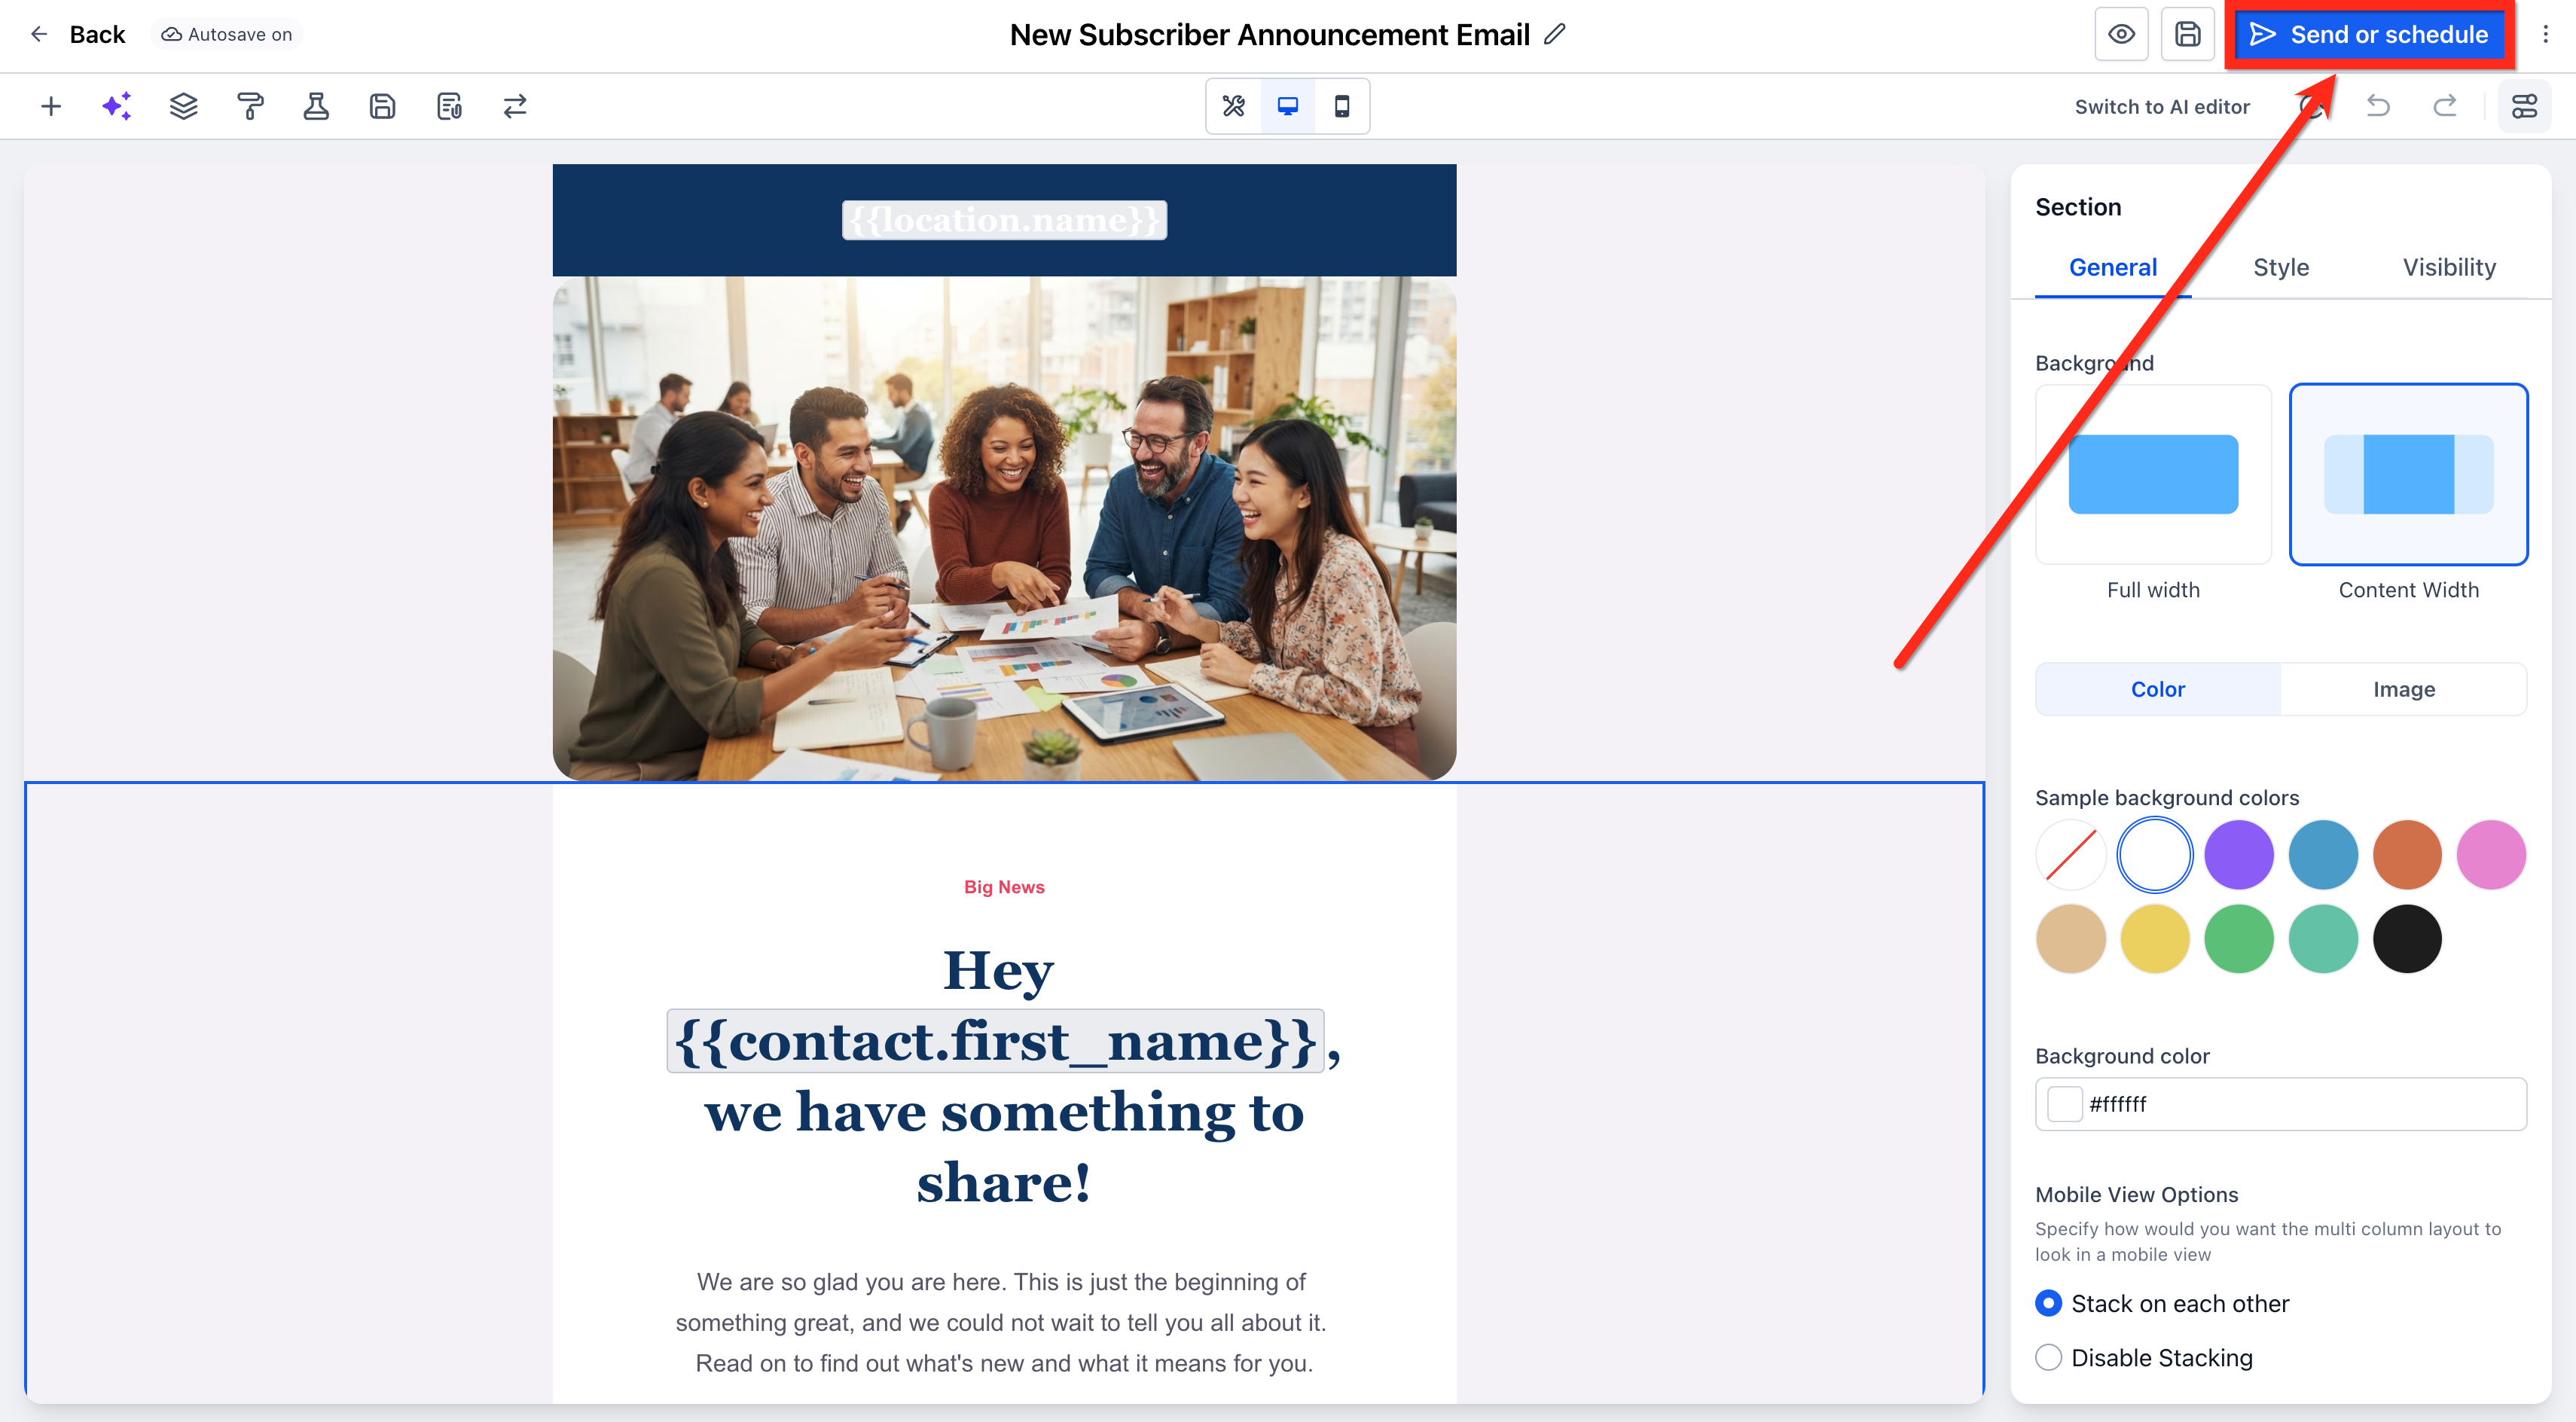
- Compose the email body and design the layout as needed.
- Click the Send or Schedule button to open the sending dialog.
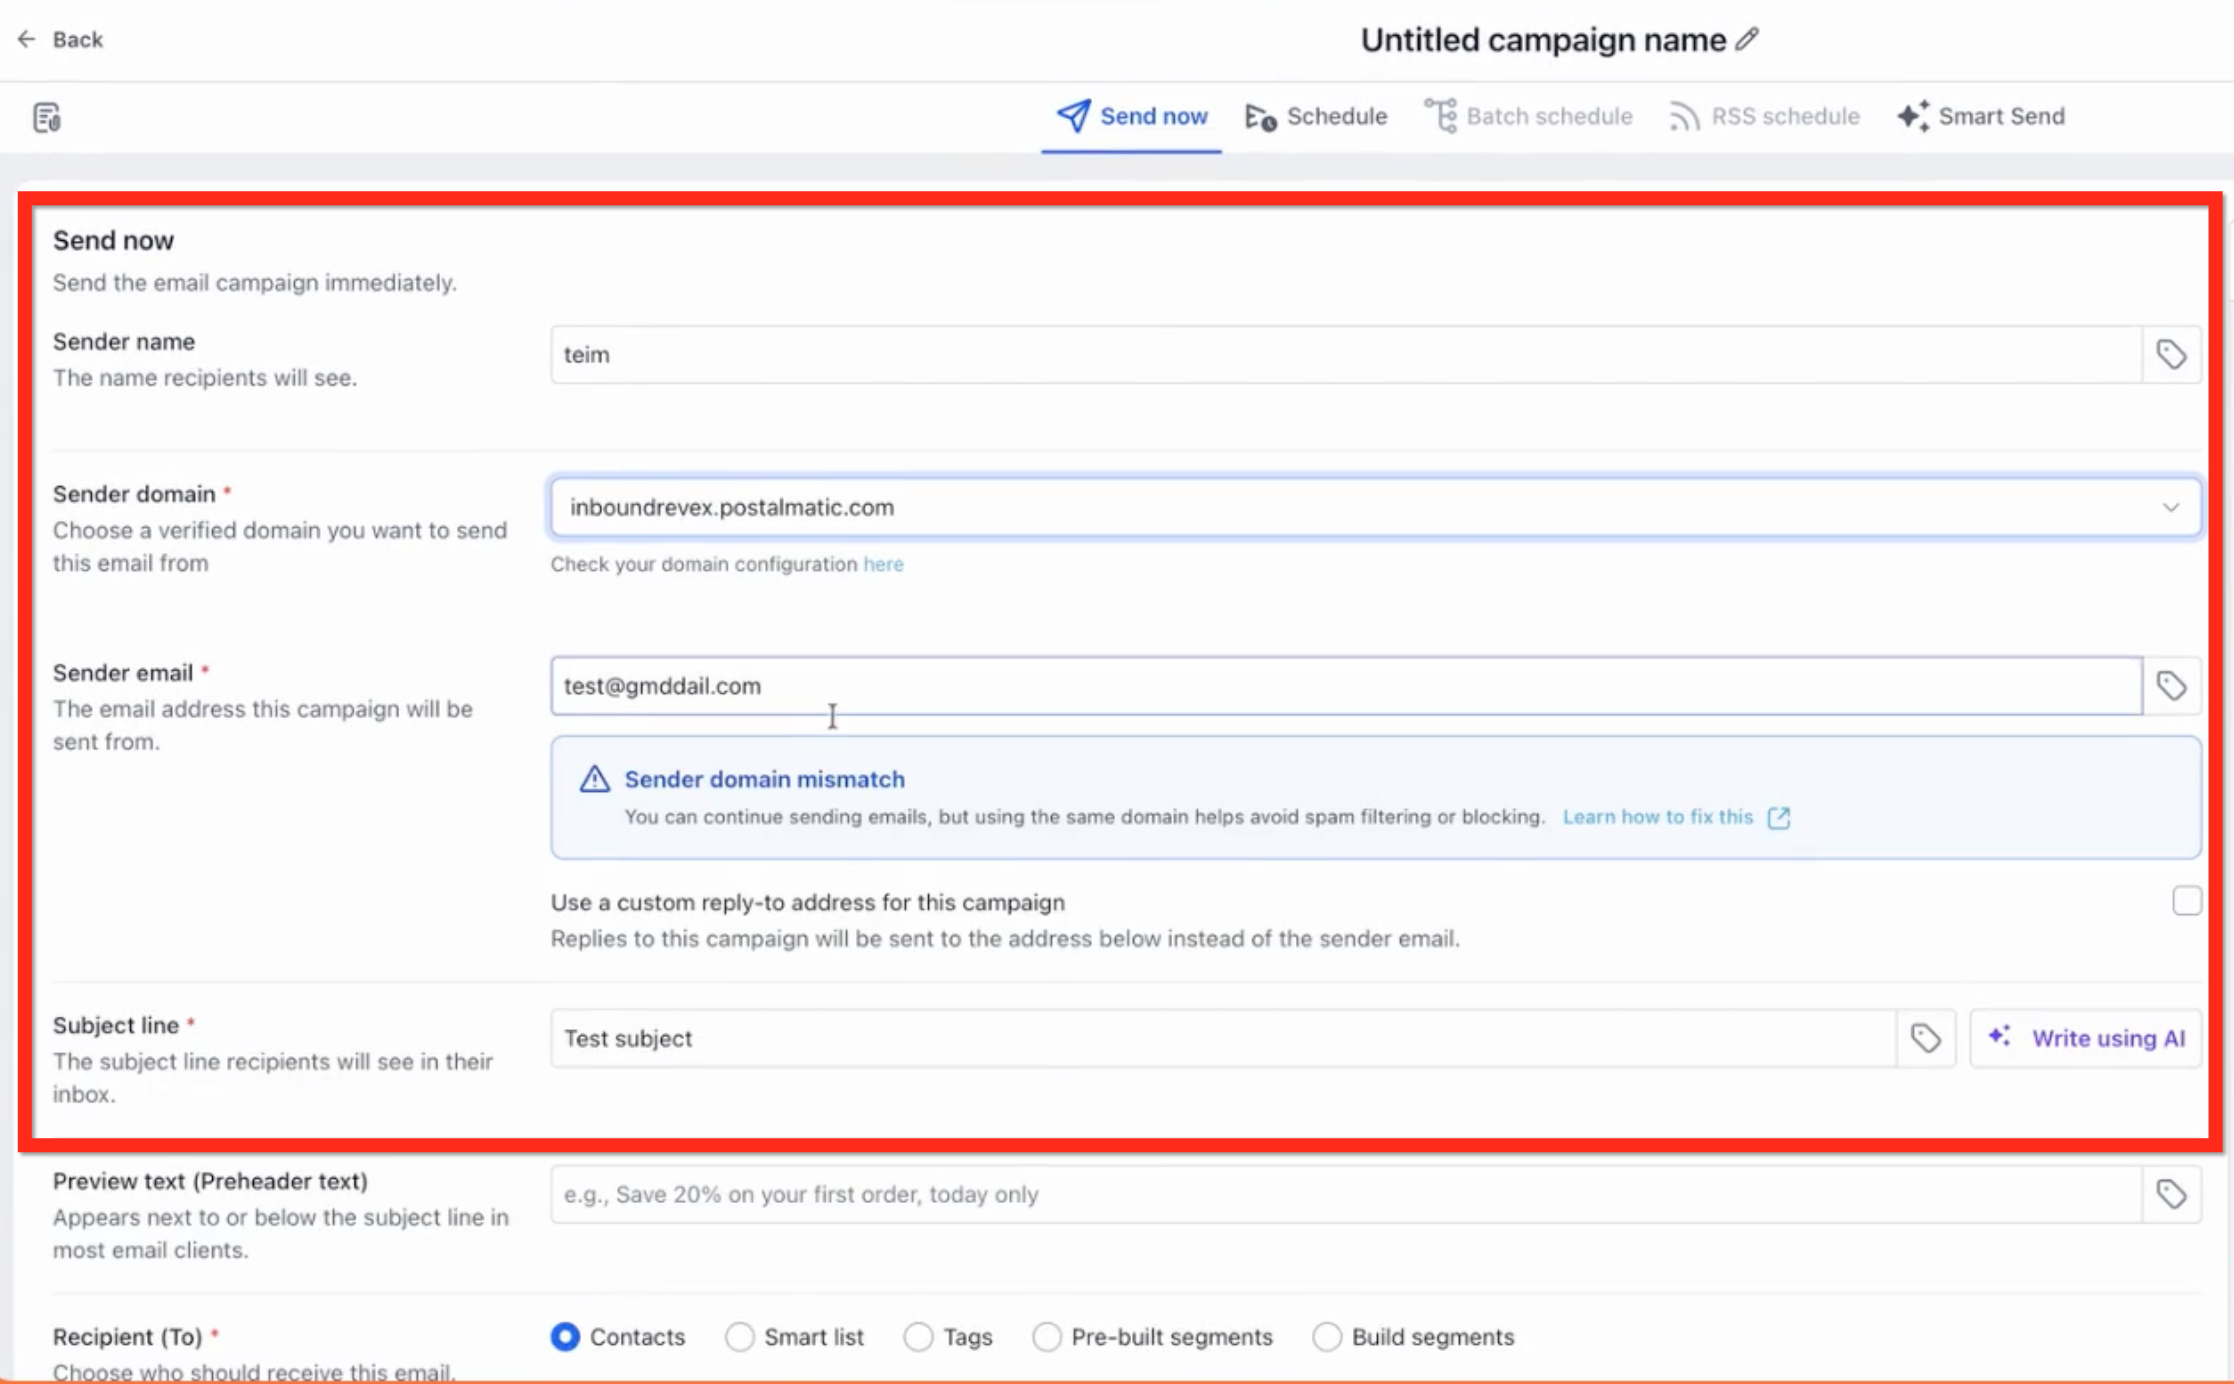
- Enter the sender name, domain, sender email address, and the subject line.
- Scroll down below the Recipient (To) field and press the Check now button.
- Examine the displayed risk levels and the list of recommended improvements.
- Address each recommendation, then click Check again; repeat until the results are satisfactory and continue with Review and Send.
05What it looks like in HighLevel
06Things to know before you rely on it
- A category marked as No improvements needed does not guarantee the entire email is free of spam risks; all three categories should be reviewed.
- Risk levels are labeled High risk or Medium risk to indicate priority of the issues found.
07How it connects to the rest of HighLevel
- Send or schedule a regular email campaign in HighLevel Email campaign setup
- How to set up and use the HighLevel template library Template library
- HighLevel pricing and plans Pricing information
Michael's take

When you send email campaigns regularly, the spam check can help you catch high risk issues before a campaign goes out. The time spent tweaking wording or fixing a sender setting is small compared with the effort of a failed blast.
If you only send occasional internal updates or very small lists, you might decide the extra step isn’t worth the effort, since the risk of hitting a spam filter may be lower.