
01Who this is for
- Founders who run multiple brand pages and need one place to schedule content, reducing the time spent switching apps.
- Marketing managers handling several social channels and looking for a single calendar to keep posts consistent.
- Small business owners who want to reuse template posts and monitor basic performance without separate tools.
02Social Planner, explained
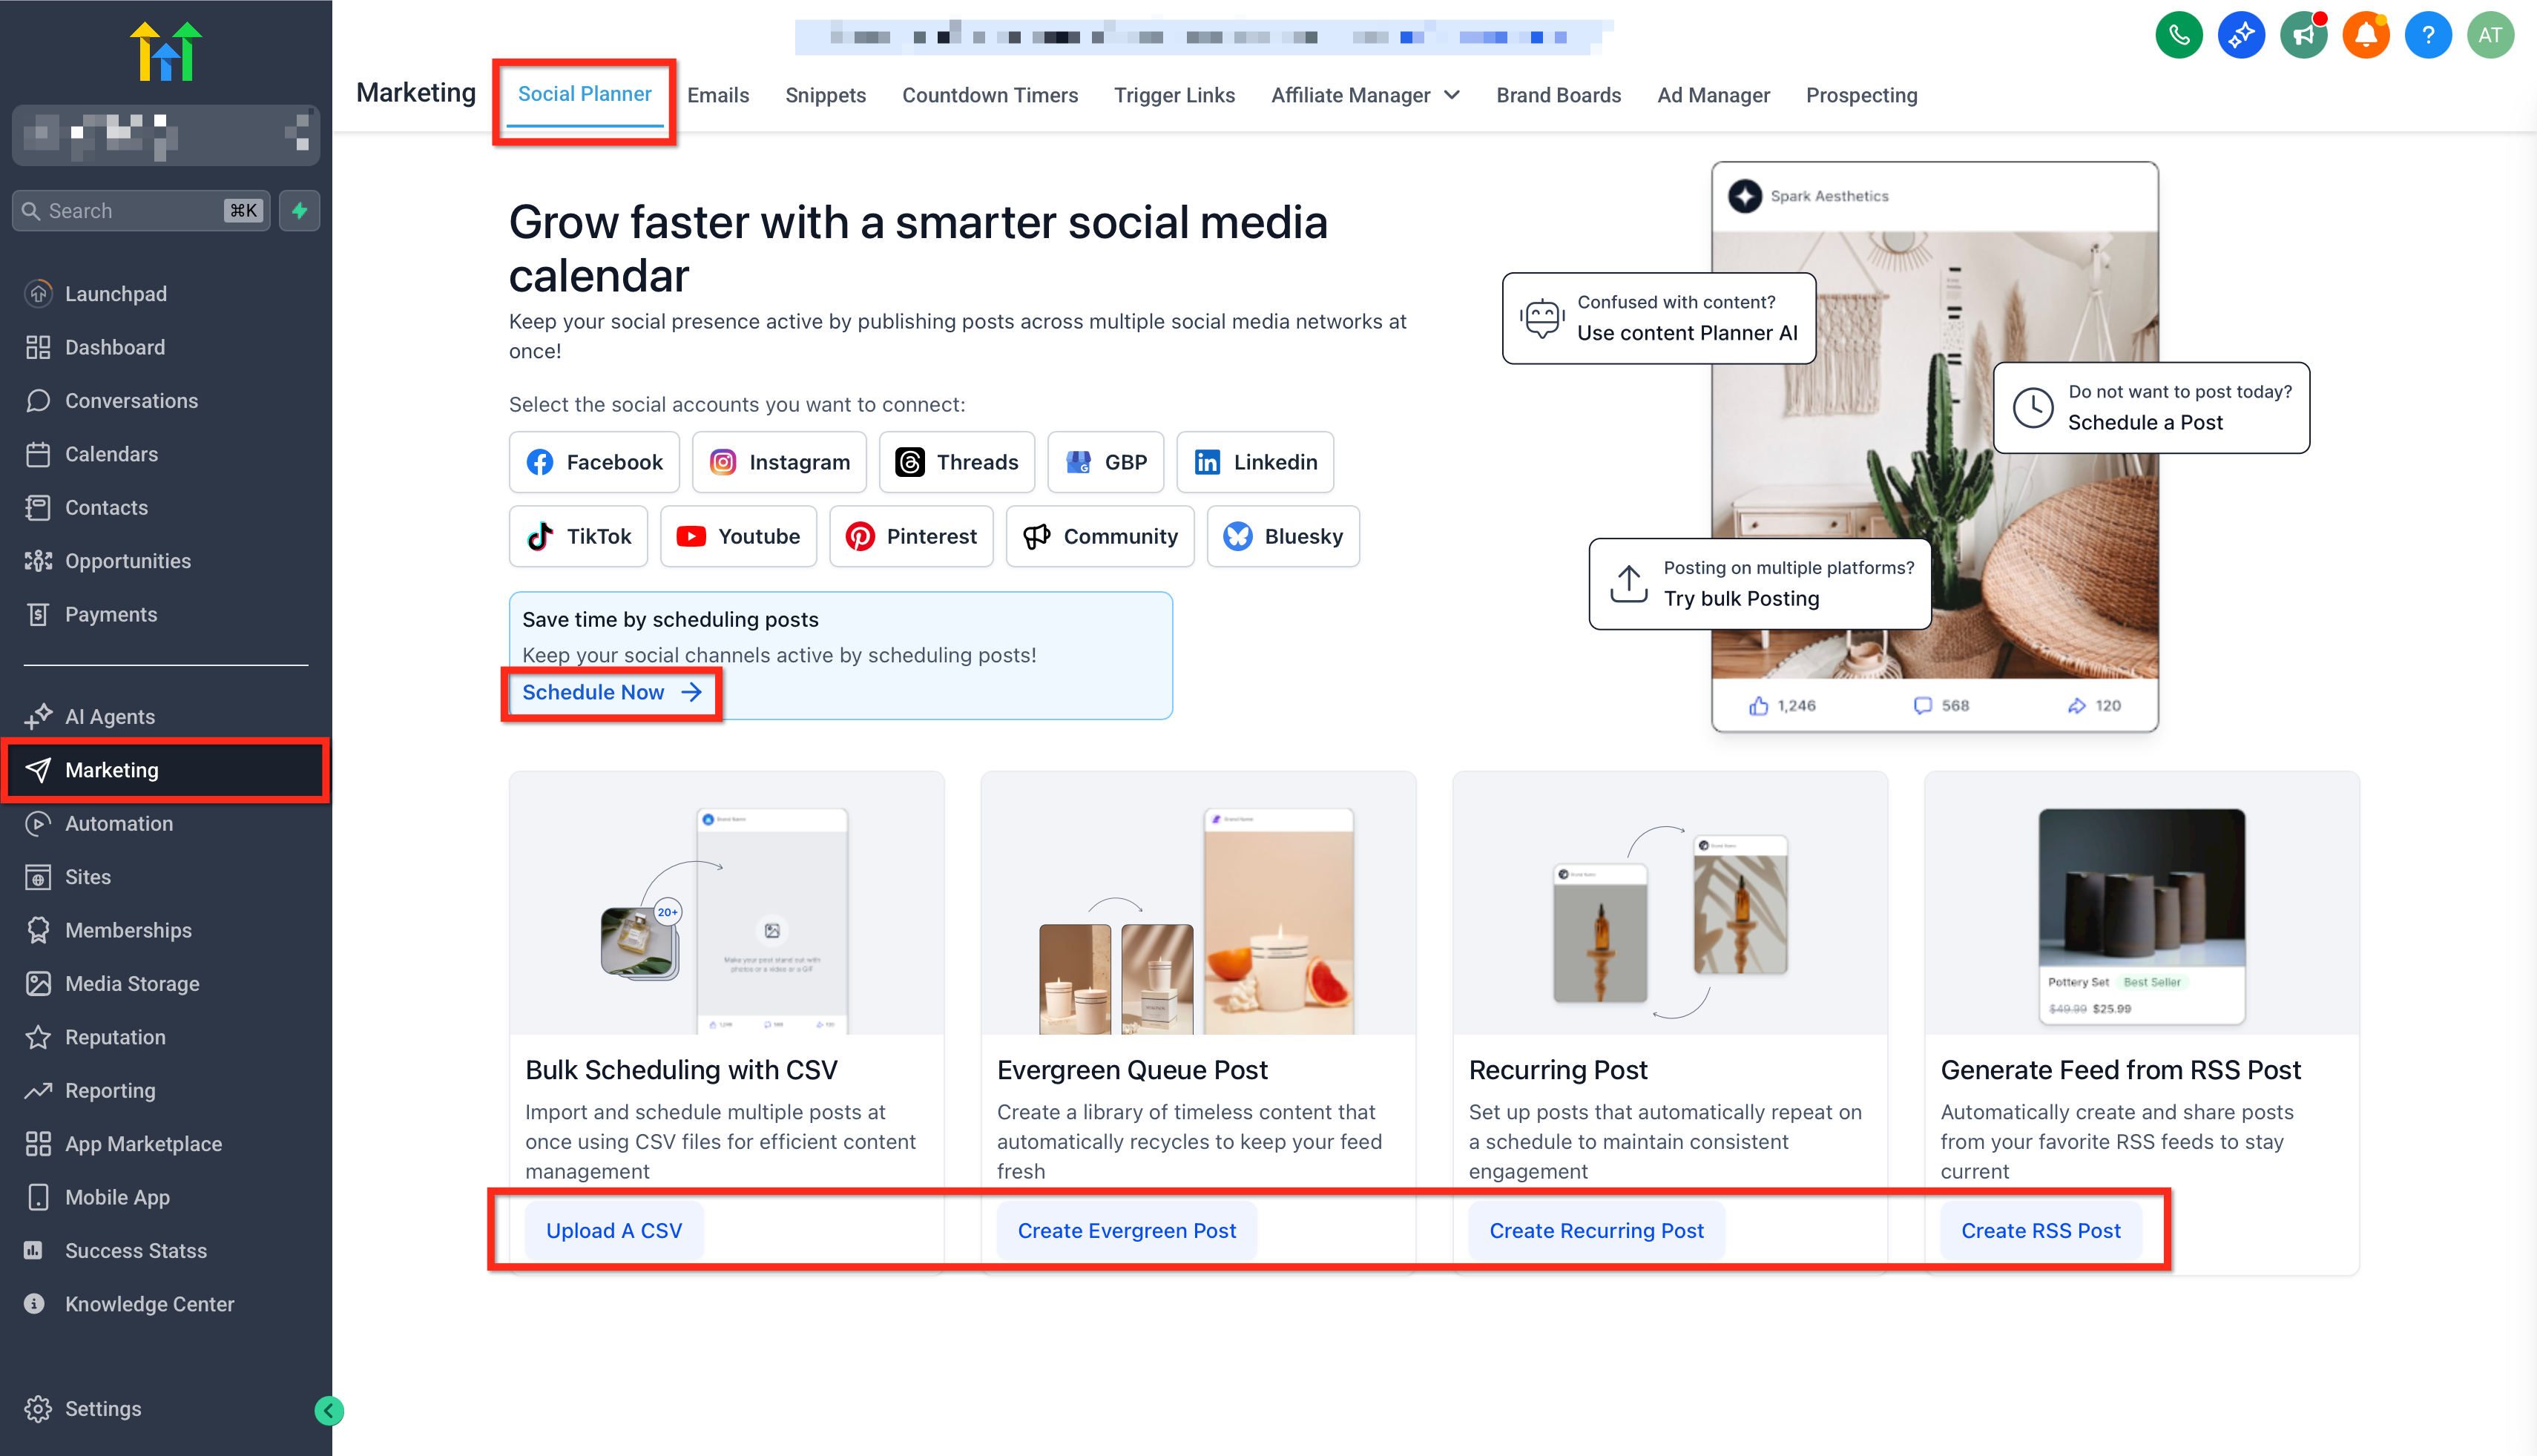
Social Planner lives in the Marketing section of HighLevel. From the welcome screen you can start a single post, upload a bulk file, build a reusable queue, set recurring posts or turn RSS items into social updates. The tool supports Facebook, Instagram, Threads, Google Business Profile, LinkedIn, TikTok, YouTube, Pinterest, HighLevel Community and Bluesky, though each platform offers its own post types and analytics.
When you add a post, you choose the accounts, write a caption, attach images or video, and decide whether to publish immediately, schedule for later, save as a draft, request approval, or make the post recur. The post preview panel shows how the content will appear on each selected channel. After scheduling, the Statistics tab provides the available engagement metrics for each platform.
All actions happen inside HighLevel; no external services are required. Permissions must be granted for each account before HighLevel can publish on your behalf. If an account loses authorization, scheduled posts pause until you reconnect the account.
03How businesses use Social Planner
- Dental practice. The practice connects its Facebook Page and Instagram profile, selects a template for patient reminders, customizes the caption for each channel, and schedules the posts for the upcoming month. The preview panel ensures the image fits both platforms before publishing.
- Real estate agency. Agents link their LinkedIn and YouTube channels, upload a video tour, edit the video thumbnail, and enable Media Optimization so HighLevel resizes the file to meet each platform's limits. They then set the post to publish at peak viewing times.
- Restaurant. The owner creates a custom post with the day's special, enables Customize for Each Channel, and writes a shorter caption for Twitter while keeping a longer description for Facebook. The post is saved as a draft until the manager approves it.
04The numbers and rules that matter
- Supported platforms: Facebook, Instagram, Threads, Google Business Profile, LinkedIn, TikTok, YouTube, Pinterest, HighLevel Community, Bluesky.
- Bulk upload limit: Up to 90 posts per CSV or XLSX file.
05Before you start
- Sign in to each social platform you plan to connect.
- Ensure you have admin or publishing rights for the page, profile, channel, board or location.
- Prepare captions, links, images or videos you intend to use.
- Verify that media files meet the requirements of the chosen platform.
- Check the location timezone before setting a schedule.
06How to set up and use Social Planner in HighLevel
Connect your first social account
- Open Marketing and select Social Planner.
- Choose the social platform you wish to add.
- Log in to the platform and grant the requested permissions.
- Pick the specific page, profile, channel, board or location to manage.
- Finish the authorization workflow.
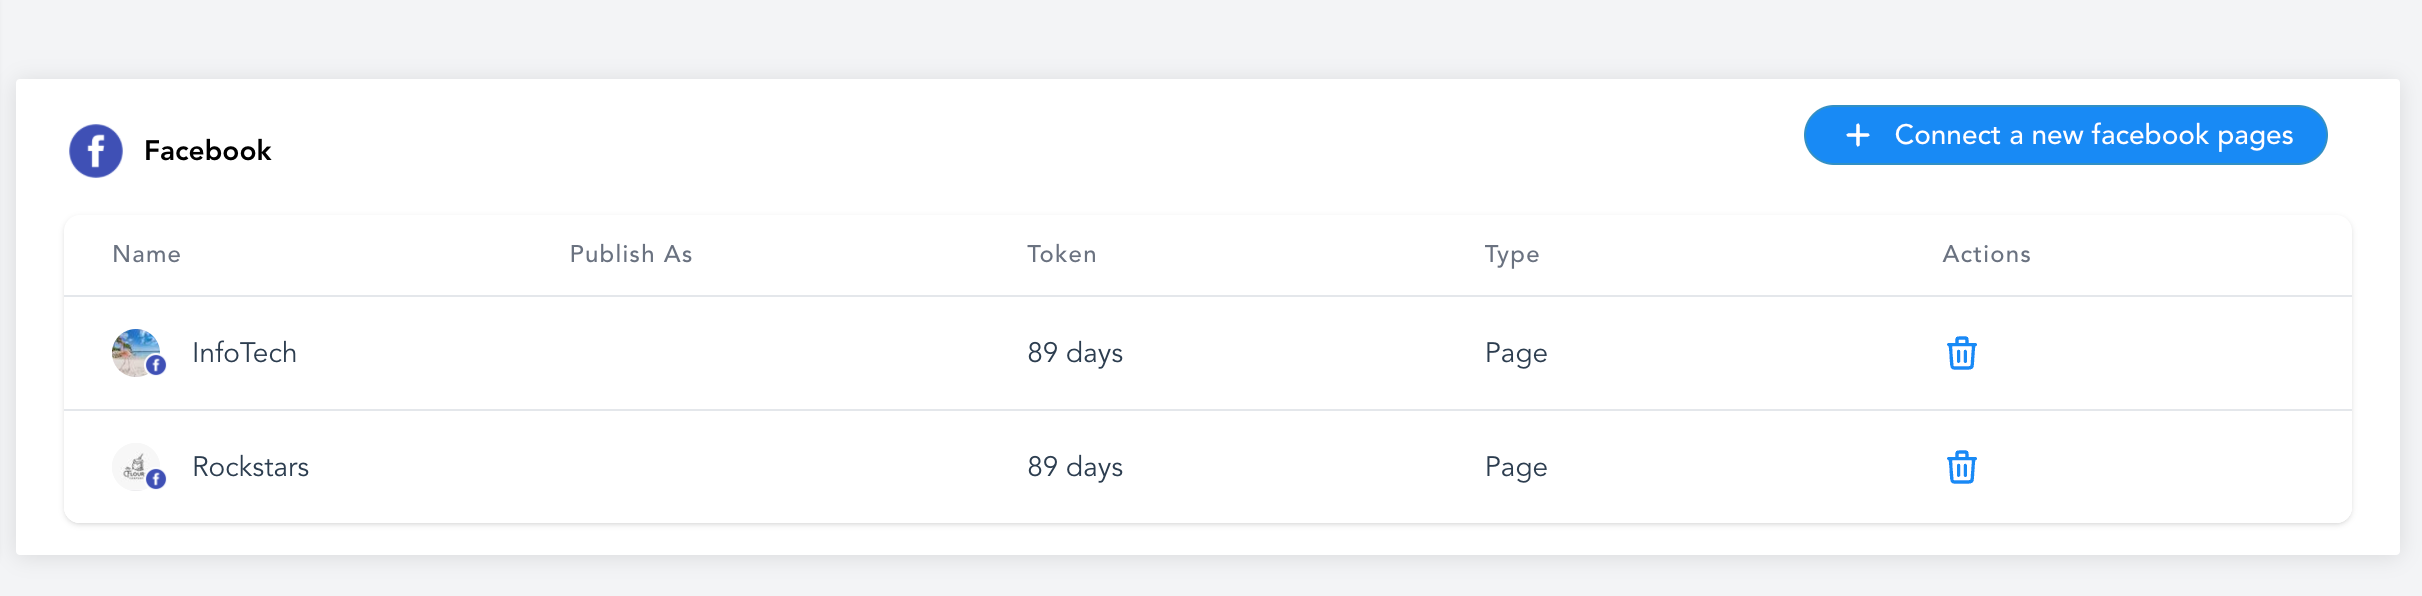
- Confirm the new account appears in the Social Planner list.
Create posts from Social Planner templates
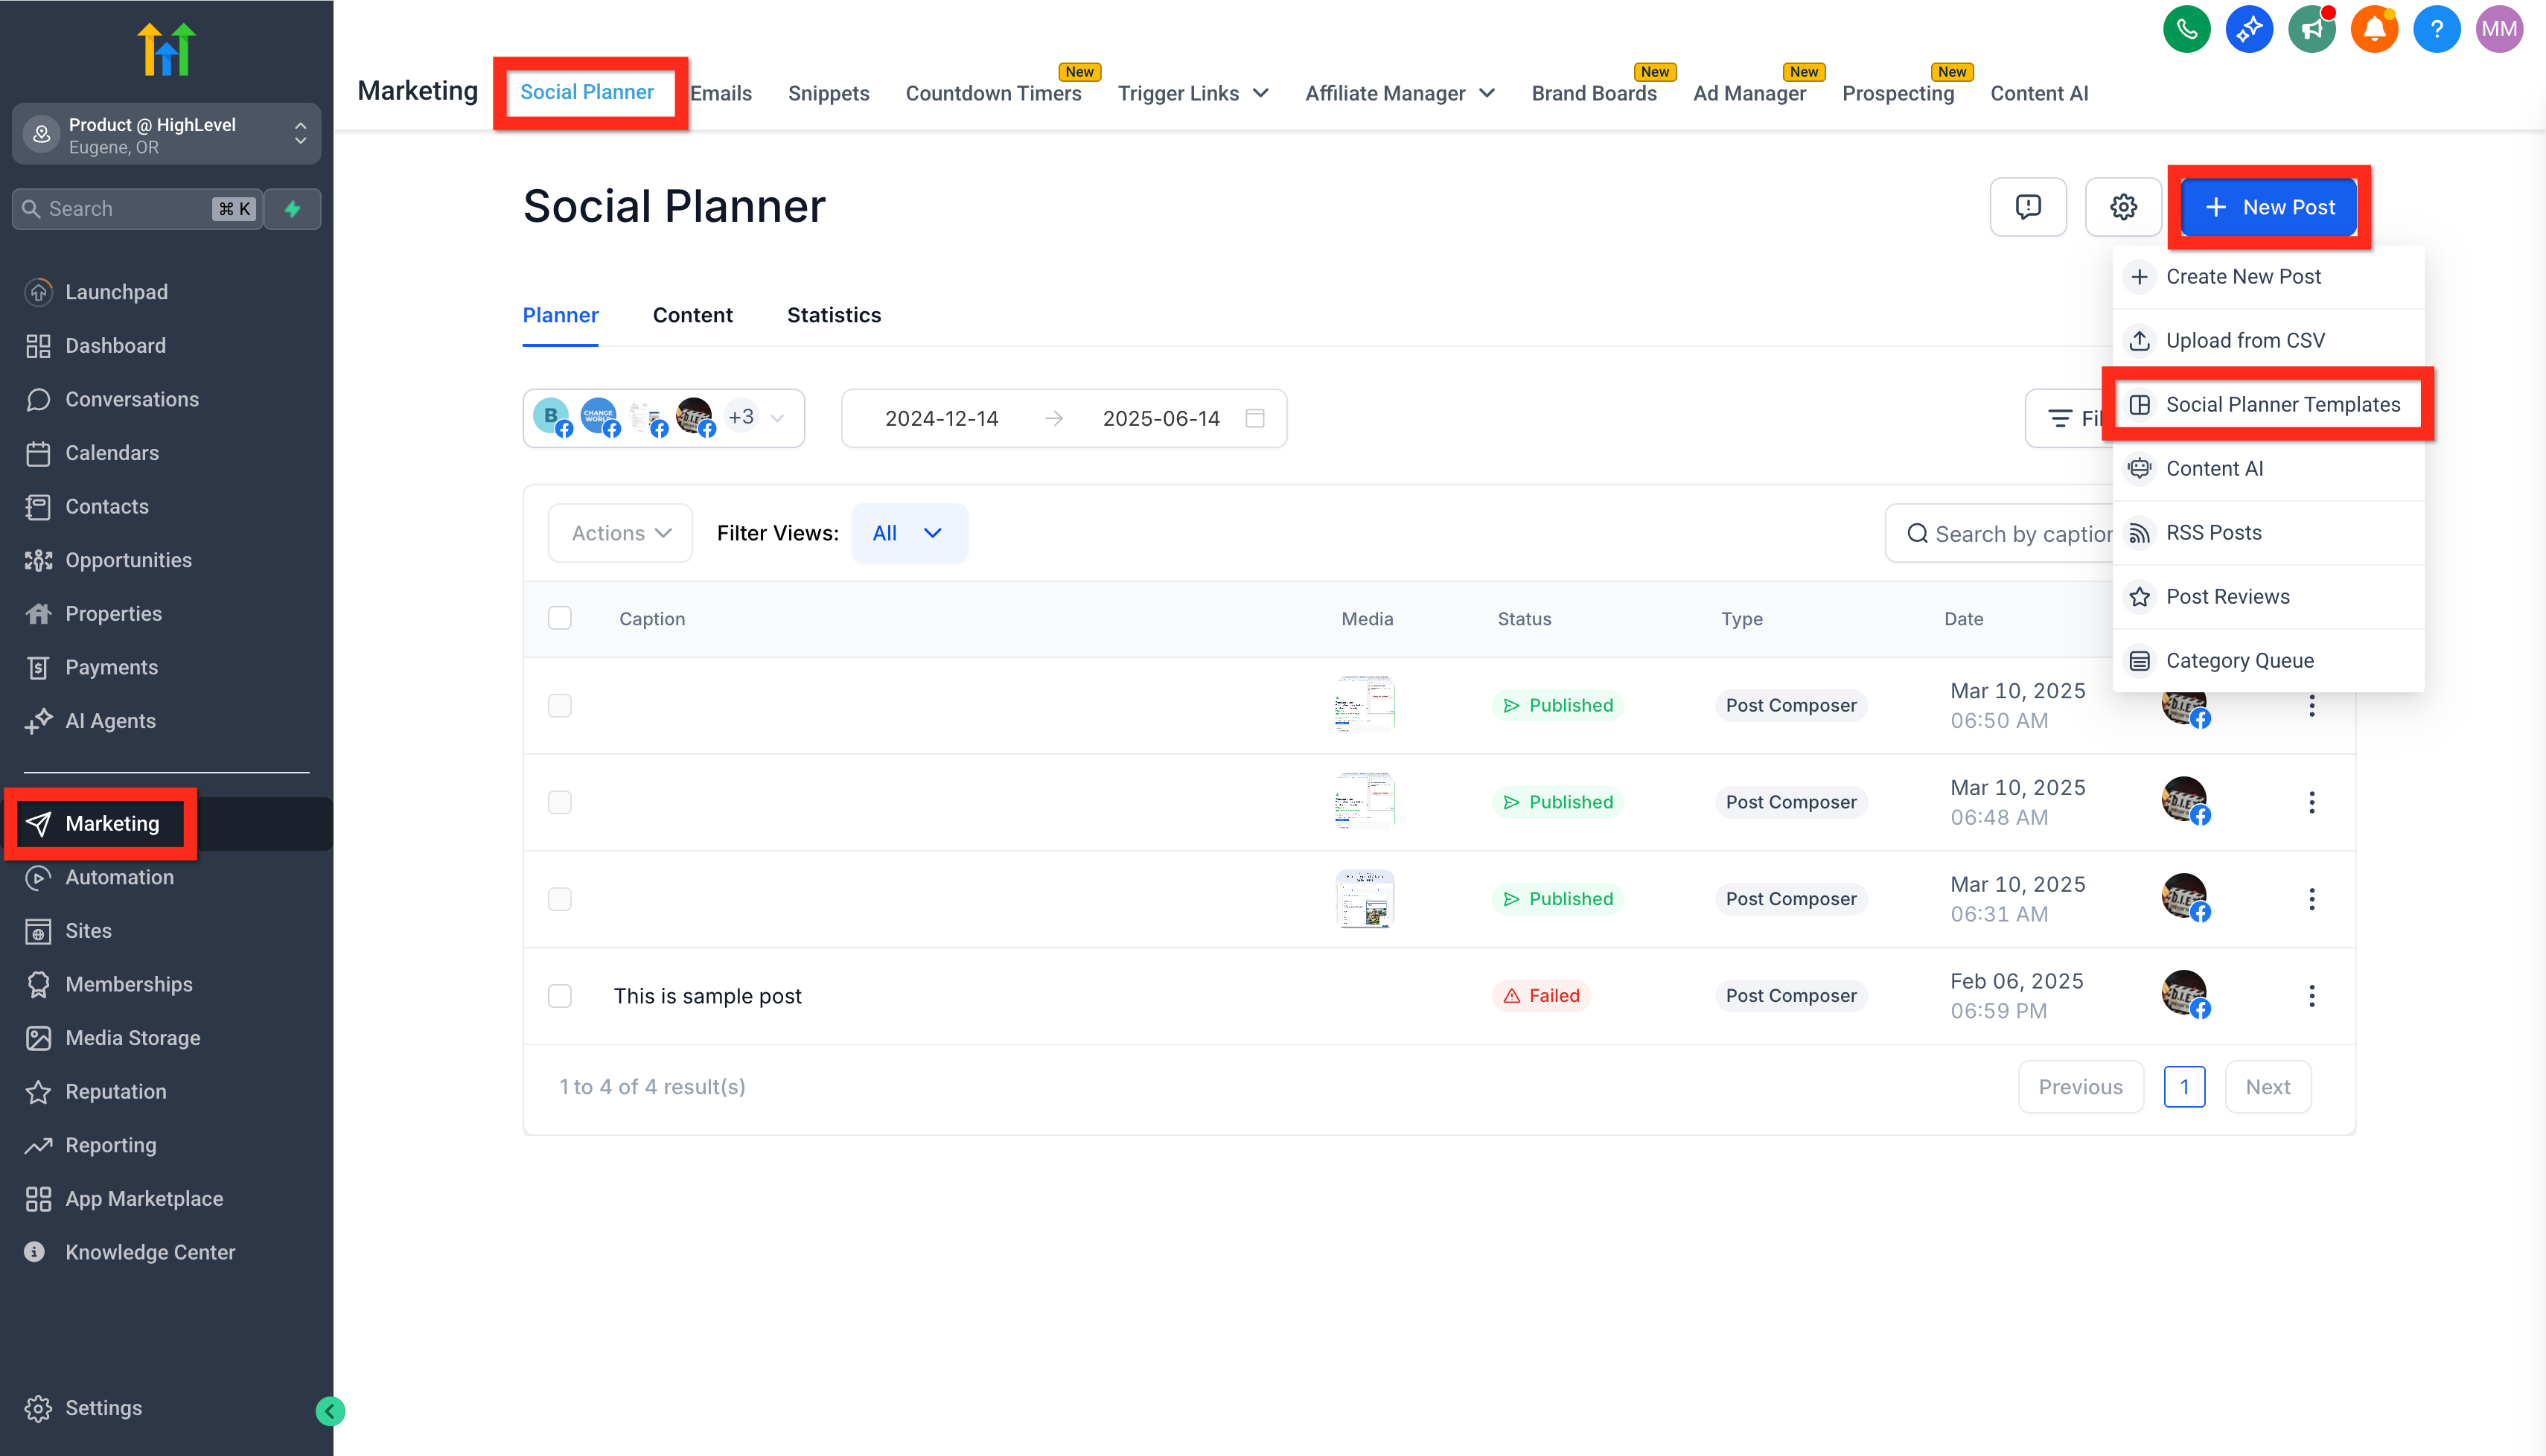
- Navigate to Marketing > Social Planner.
- Click the + New Post button.
- Select Social Planner Templates.
- Search, browse or filter the template library.
- Choose a template and press Continue.
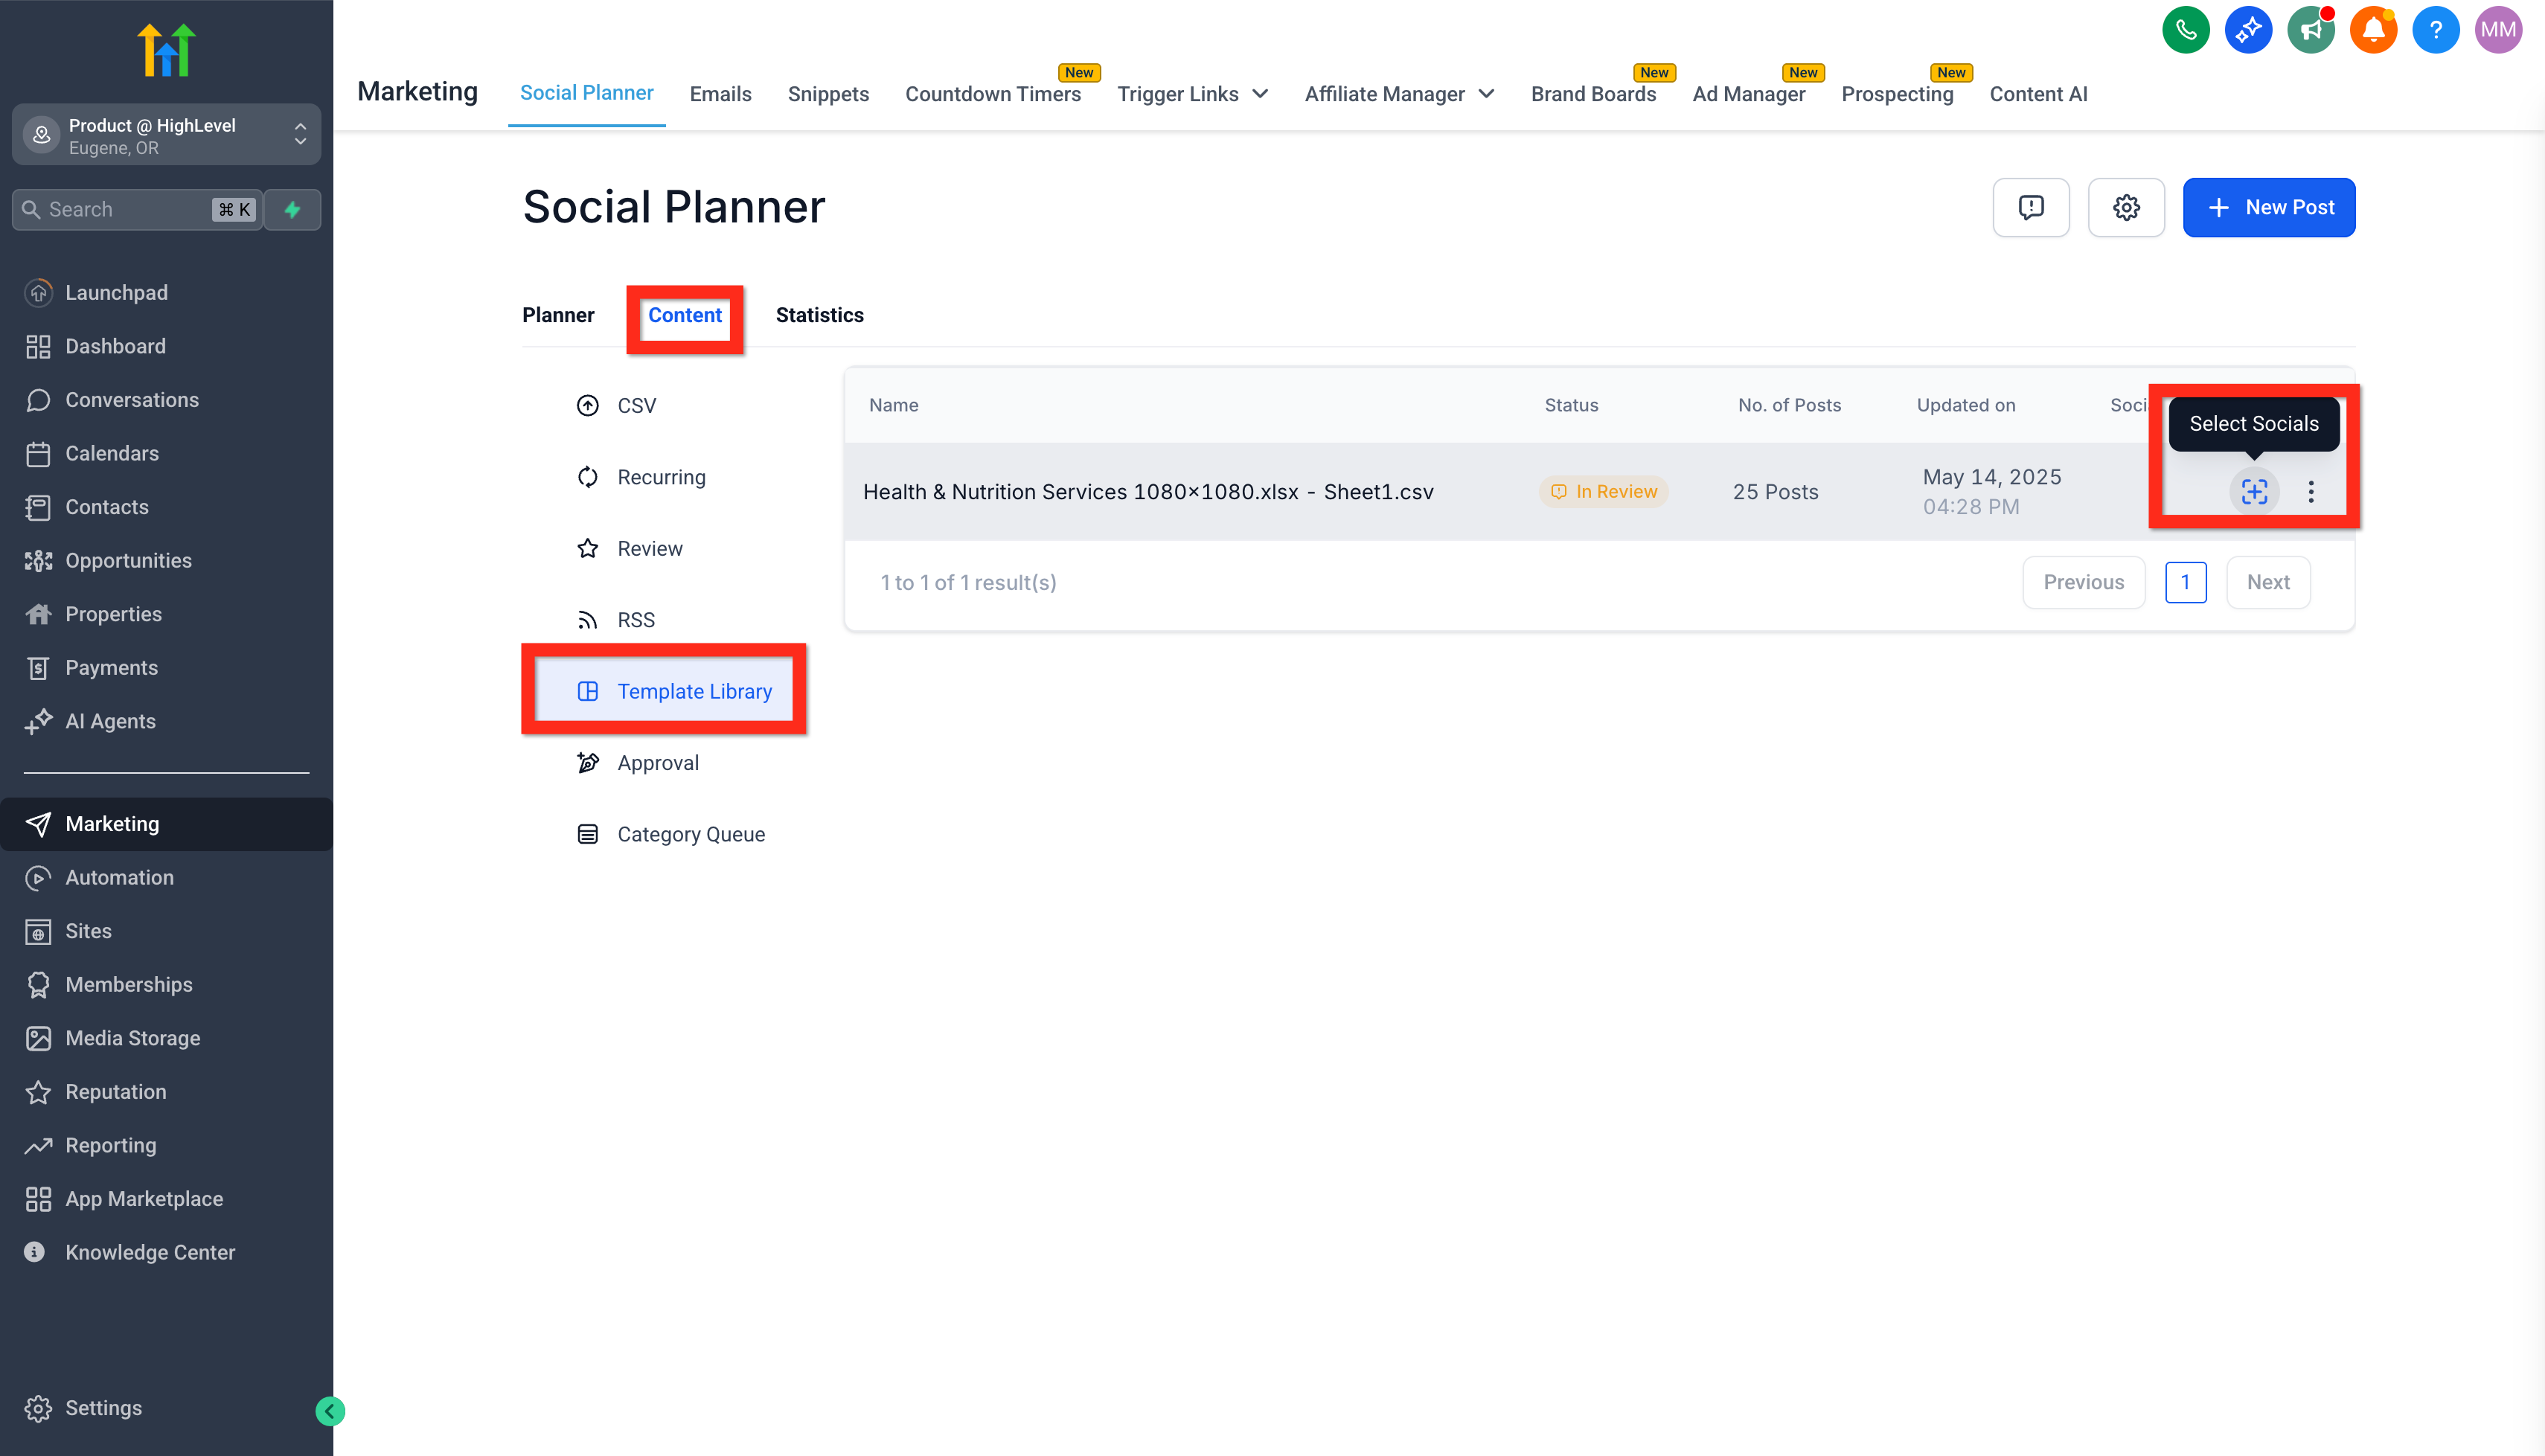
- When prompted, open Content > Template Library.
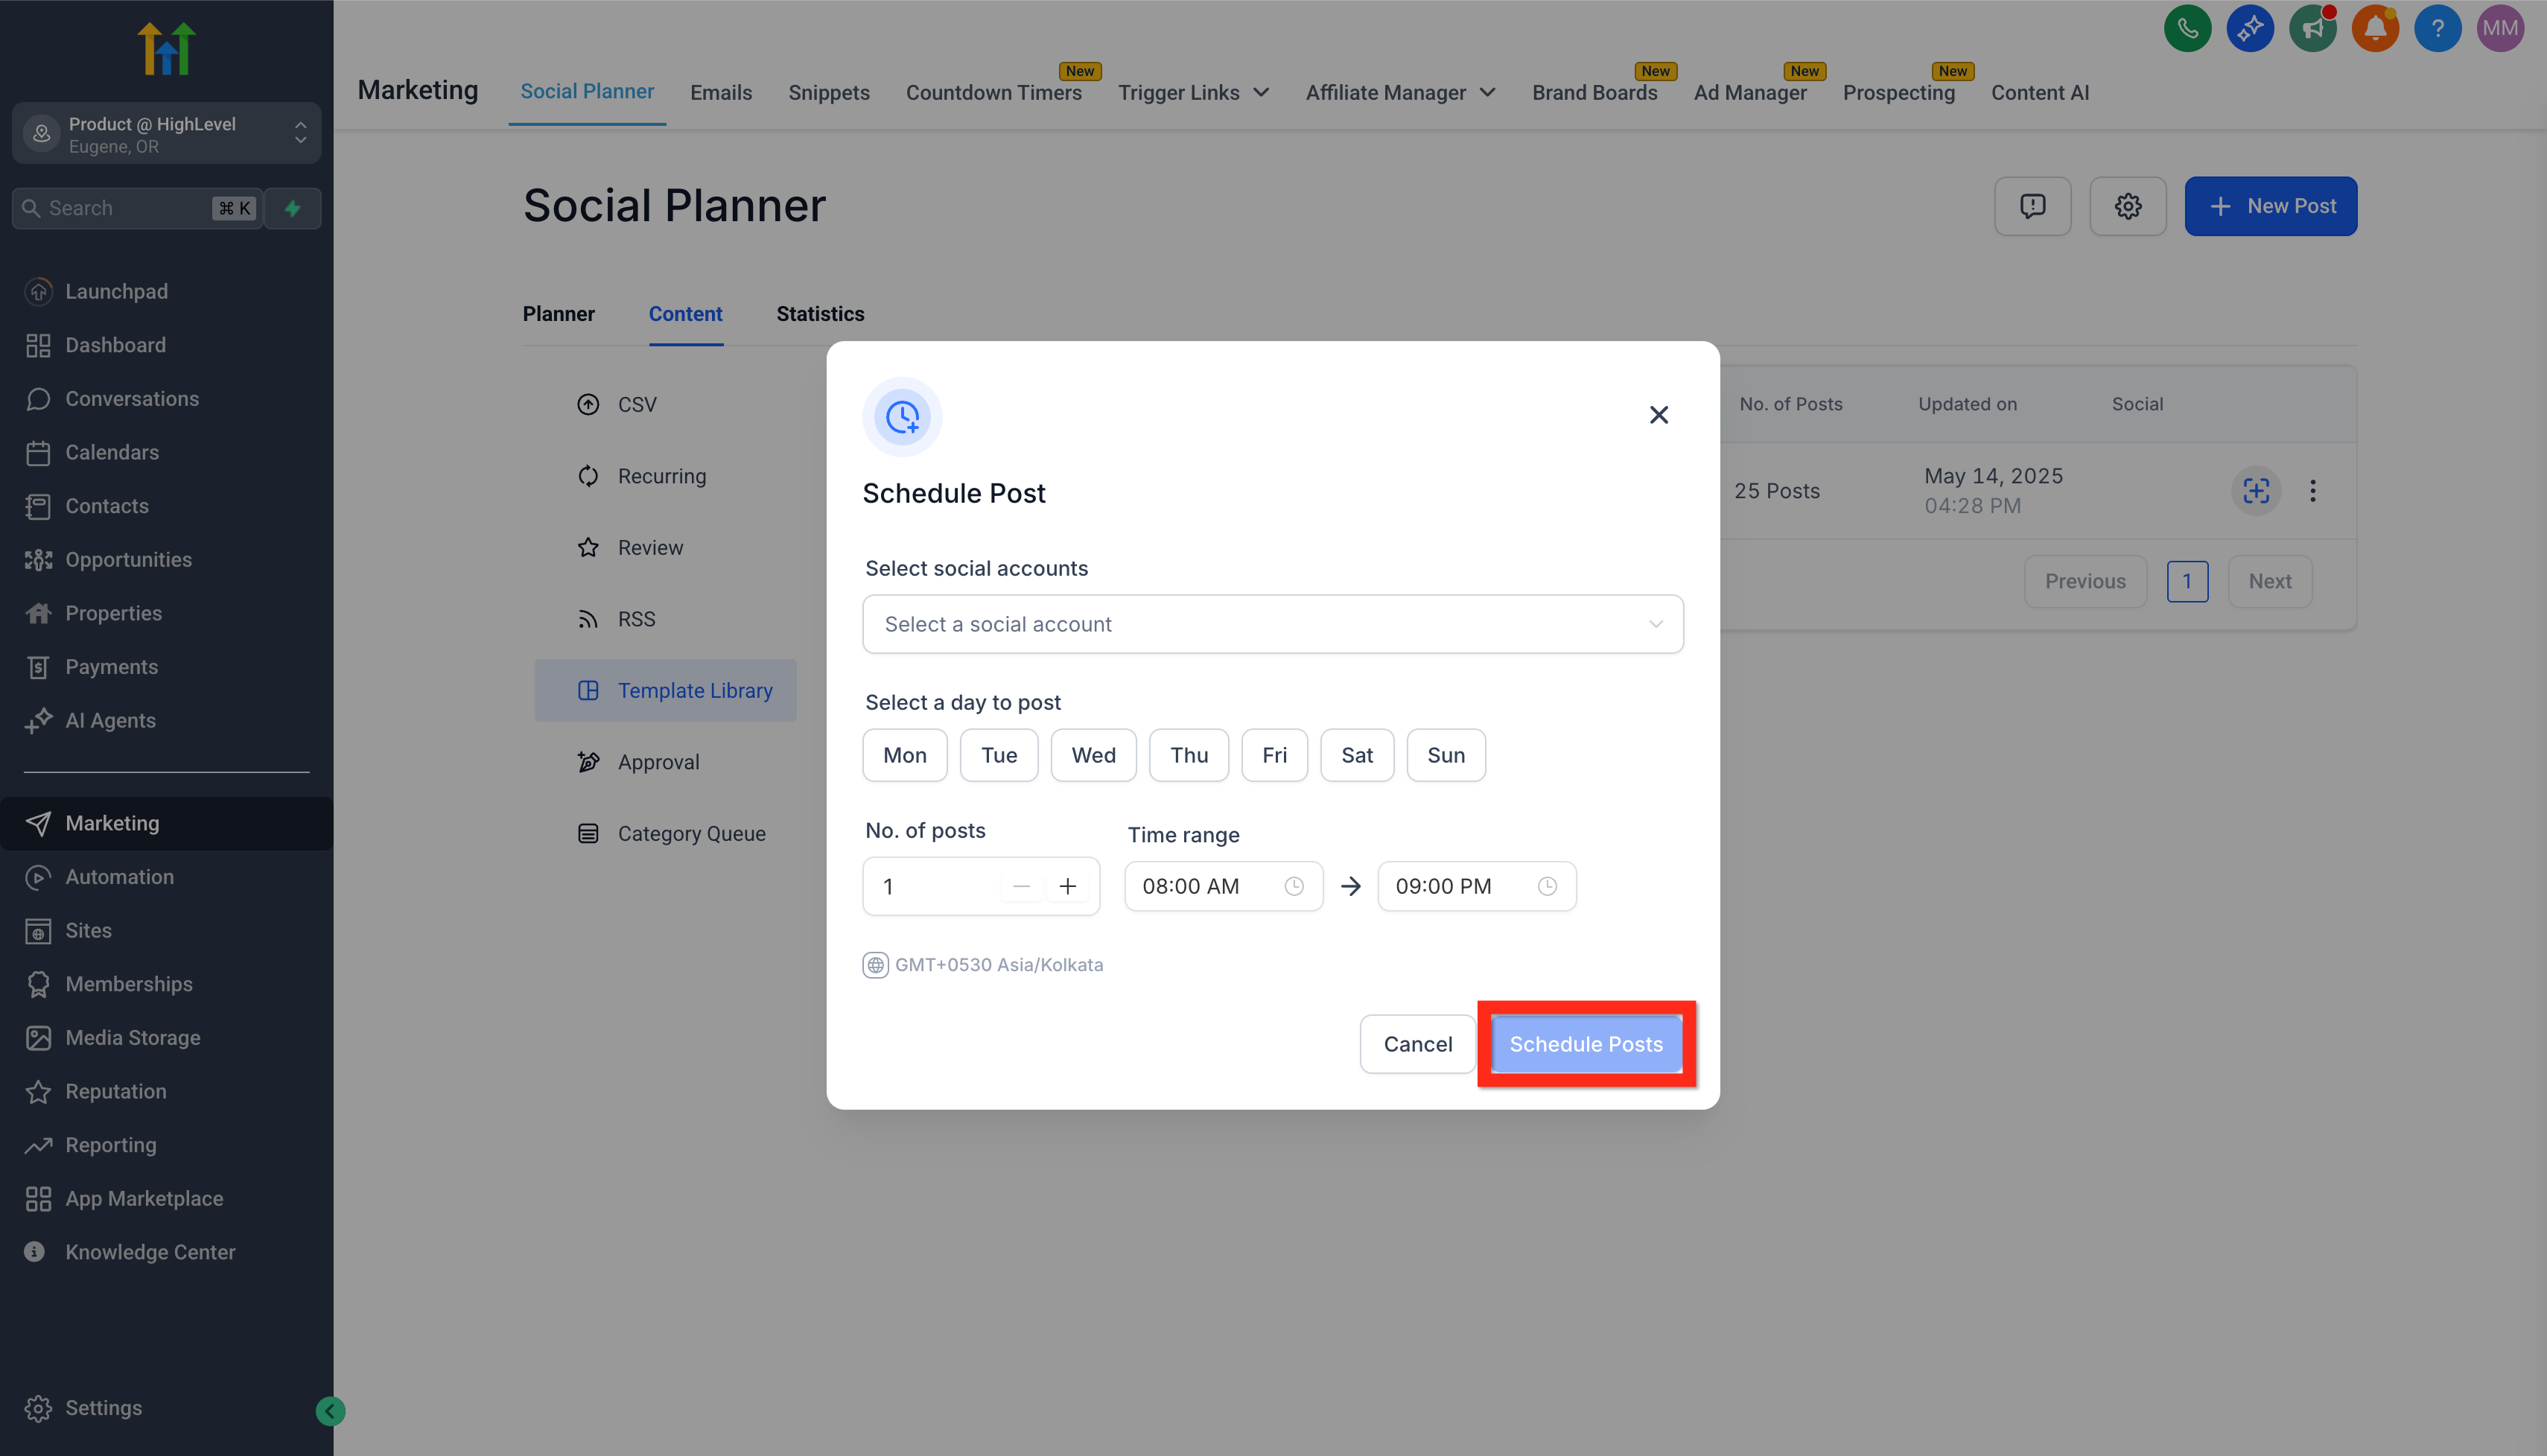
- In the library, click the plus icon to Select Socials for the template.
- Select the social accounts that will receive the posts.
- Set the posting days, number of posts and time range.
- Check the timezone displayed in the scheduling window.
- Click Schedule Posts.
- After processing, open Review & Schedule.
- Review captions, media, accounts and scheduled times.
- Fix any flagged errors.
- Click Import to add the approved posts to the planner.
Create a custom post
- Go to Marketing > Social Planner.
- Click + New Post and then Create New Post.
- Select the social accounts that should receive the post.
- Enter the caption, links, hashtags and any other text.
- Activate Customize for Each Channel to edit captions or media per platform.
- Look at each platform in the Post Preview panel.
- Choose to publish now, schedule later, save as a draft, request approval or make the post recurring.
Add media and edit a video thumbnail
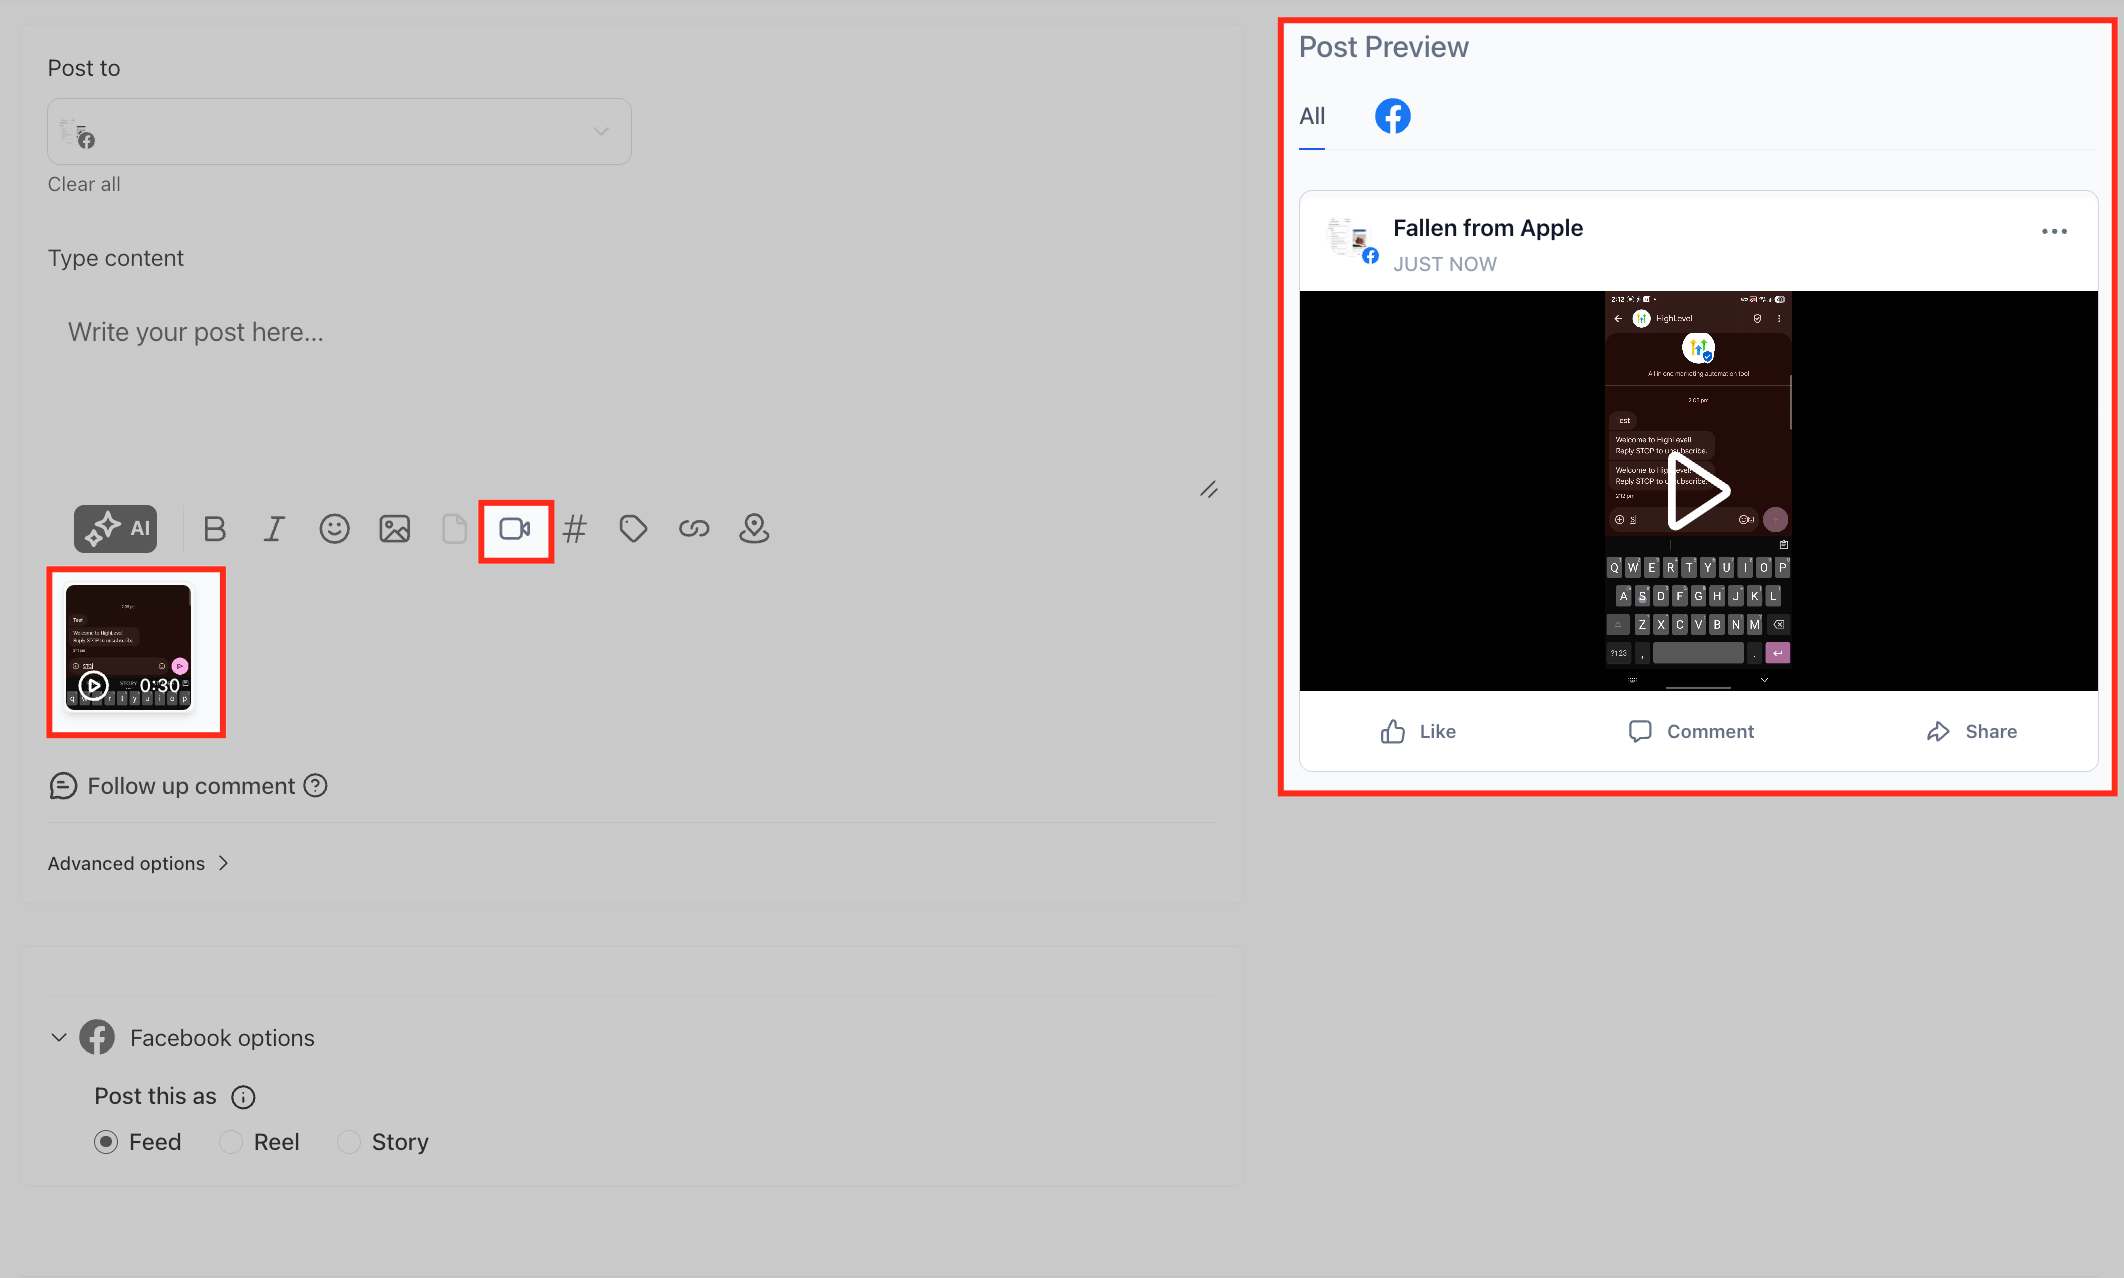
- Click the Image or Video icon in the post composer to attach media.
- Wait for the upload to complete before changing accounts or enabling channel specific customization.
- View the media in the Post Preview panel.
- Leave Media Optimization turned on if you want HighLevel to adjust the file for each platform.
- Hover over an uploaded video.
- Select the pencil icon to open the edit options.
- Choose Edit Video Thumbnail.
- Upload a new thumbnail or pick one from the library.
- Check the updated preview to confirm the new thumbnail.
Connect additional social accounts
- Click the Settings gear icon inside Social Planner.
- Open the Social Accounts section.
- Press + Connect Social.
- Select the platform you want to add.
- Sign in, approve permissions and choose the account.
- Verify that the new account is listed as connected.
Monitor posts and social performance
- Use the Planner tab to view drafts, scheduled posts, published items and any failures.
- Navigate to Marketing > Social Planner > Statistics to see metrics for each connected platform.
- Apply filters to narrow results by platform or social account.
- If an alert shows a permission or authentication problem, reconnect the affected account.
07What it looks like in HighLevel
08Settings that matter
- Customize for Each Channel. Allows different captions or media to be set for each selected social platform when posting to multiple accounts.
- Media Optimization. When enabled, HighLevel automatically adjusts uploaded images or videos to meet the size and format rules of each connected platform.
09Things to know before you rely on it
- CSV or XLSX bulk uploads support up to 90 posts per file.
- Thumbnail editing is only available for platforms and post types that support custom video thumbnails.
- If a connected account loses authorization, scheduled posts will not publish until the account is reconnected.
- Template posts are not added to the calendar until Review & Schedule is completed and Import is clicked.
10If something goes wrong
- Cannot publish because only a draft is created.. Select at least one active social account, then confirm the connection in Social Planner Settings.
- Facebook Page does not appear during setup.. Make sure the Facebook profile used for login has admin access, then reconnect Facebook and approve all permissions.
- Scheduled posts fail after a social account disconnects.. Reconnect the account promptly; HighLevel will display an in app alert and may send an email notification.
- Edit Video Thumbnail option is missing.. Check that the selected platform and post type support custom thumbnails and review the current media guidelines.
11How it connects to the rest of HighLevel
- How to connect Facebook pages in Social Planner Connect Facebook
- Set up and use the HighLevel template library Template library
- HighLevel pricing and plans Pricing
Michael's take

I find Social Planner useful when I’m managing multiple locations or client accounts because it lets me draft, schedule and track everything from one calendar.
If I only post on a single platform once a week, I might wait until my posting volume grows before setting up Social Planner.