
01Who this is for
- Marketing managers who need a consistent place for legal and contact information across campaigns.
- Small ecommerce owners who want to brand every newsletter with a footer that matches their site design.
- Agencies creating templates for multiple clients and requiring a reusable, editable footer component.
02Footer element, explained
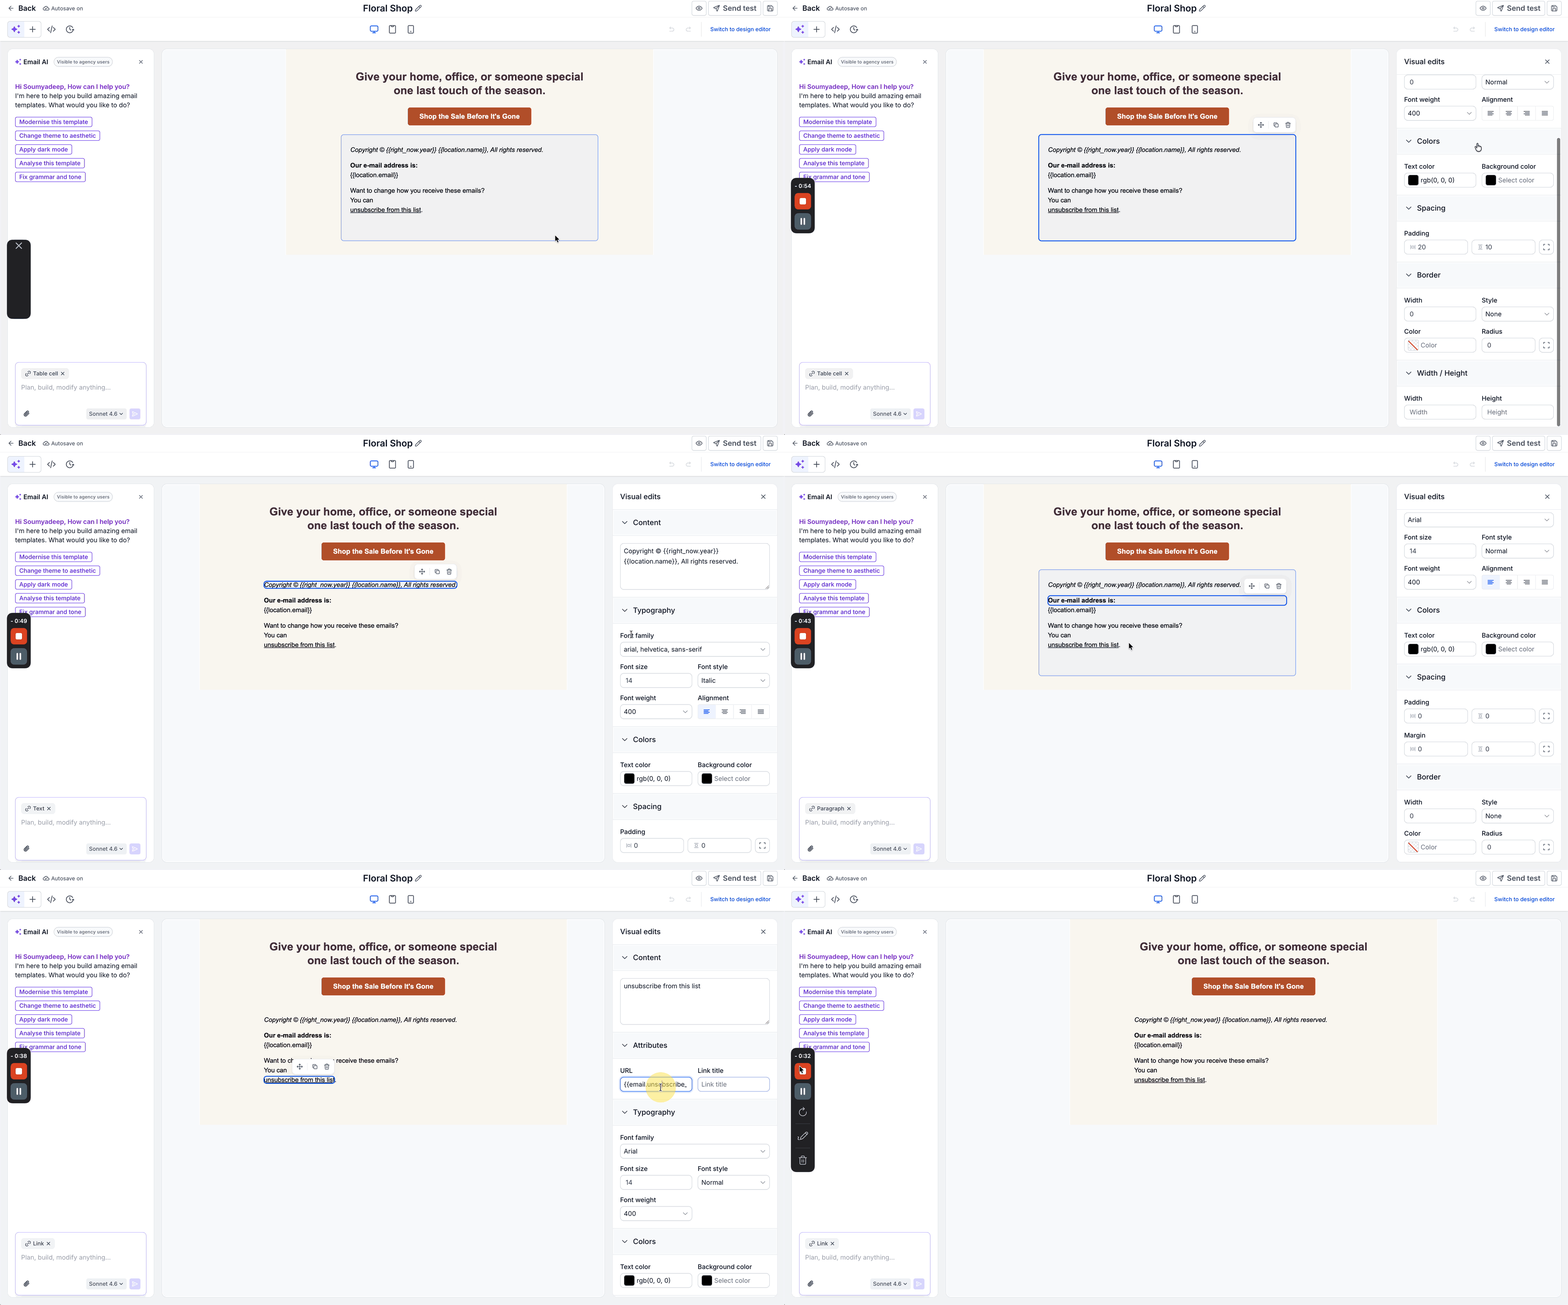
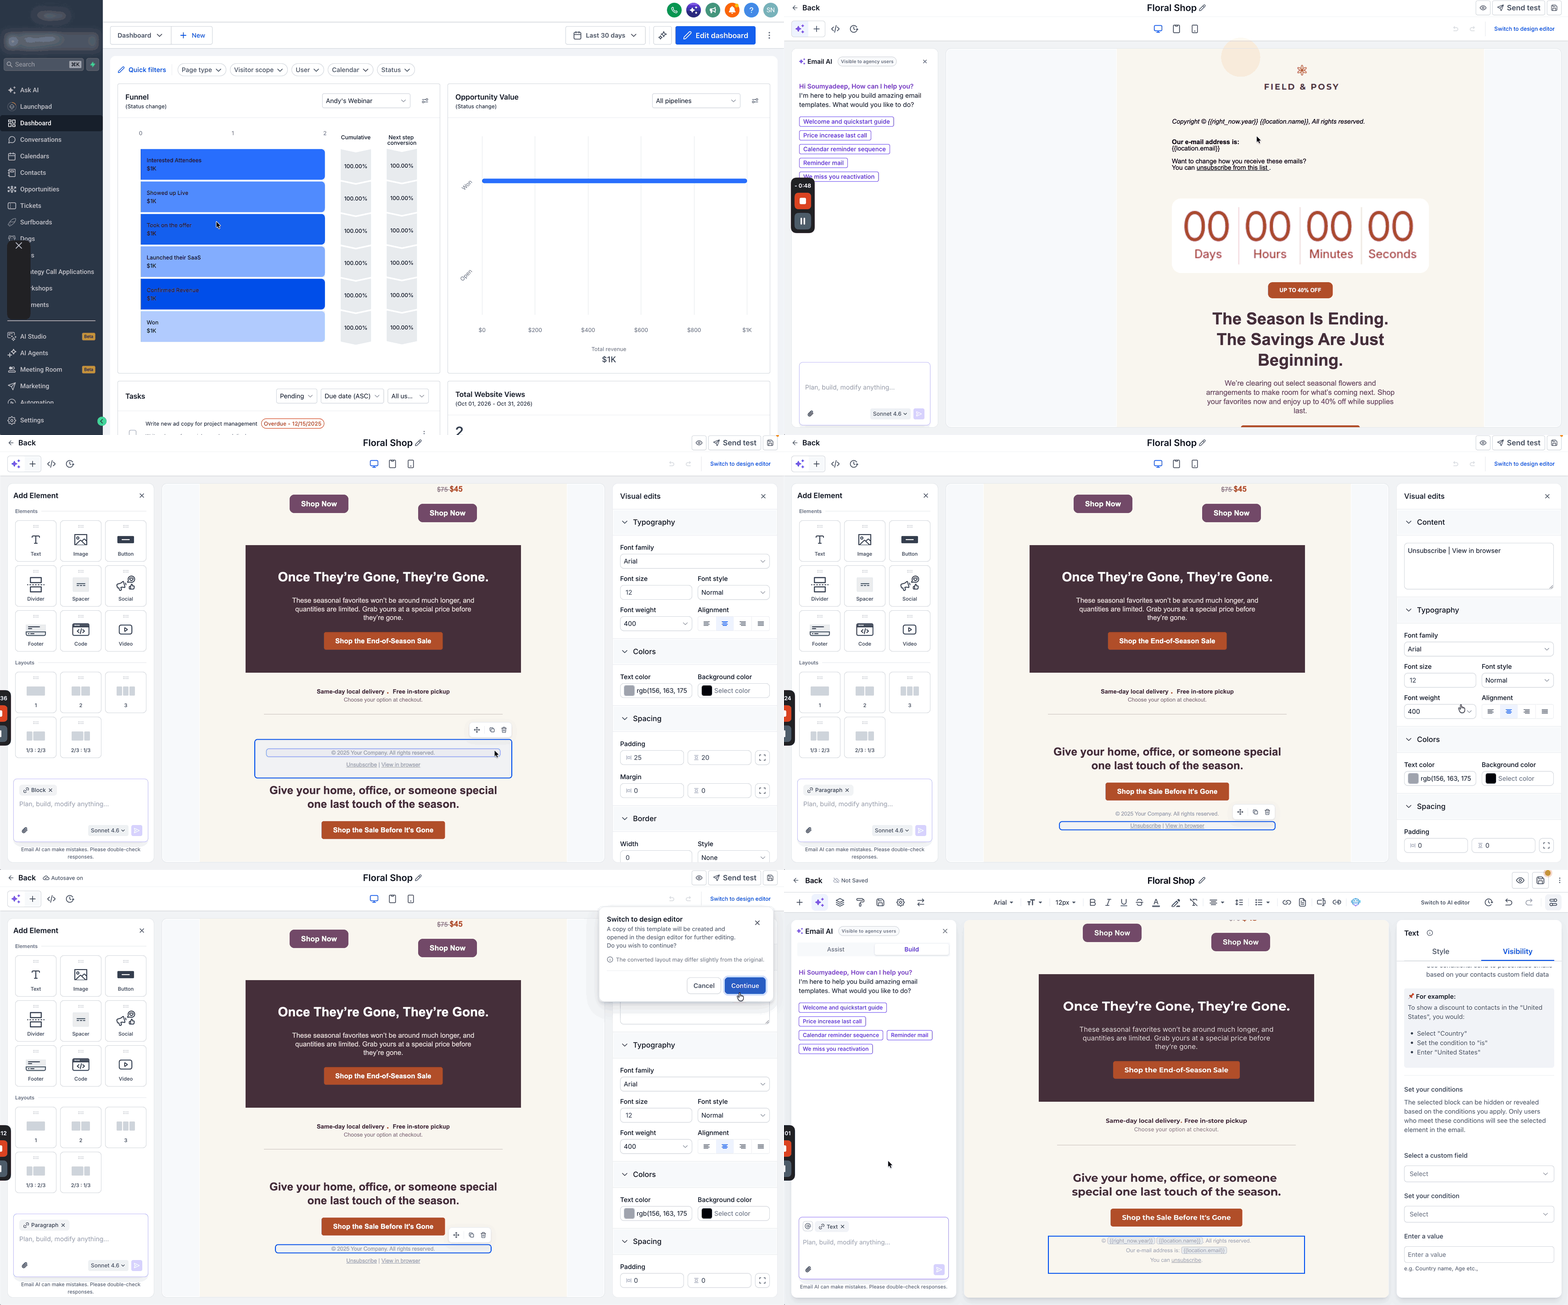
The Footer element appears in the Email Builder’s Elements panel. After you drag it into a template, you can modify its text, add hyperlinks, and change typography such as font size and color. Styling controls let you set background shades, padding, spacing, borders, and the block’s height and width.
Visibility options let you decide if the footer shows on desktop, mobile, or both, and you can apply Conditional Sending so the block only appears when a contact field matches a rule. The element itself does not generate an unsubscribe link; that must come from LC Email settings or be added manually with the {{unsubscribe}} tag.
03How businesses use the Footer element
- Dental practice. The practice adds the Footer element to appointment reminder emails, fills in the clinic address, phone number and a link to the online portal, then sets the block to appear on both desktop and mobile devices.
- Online retailer. The retailer customizes the footer with brand colors, adds social media links, and uses Conditional Sending to show a special loyalty program link only for contacts whose country field equals United States.
- Consulting agency. The agency creates a branded footer in a template, saves the element in the Design Editor’s Saved Items, and reuses it across client email campaigns without rebuilding the block each time.
04How to set up and use the Footer element in HighLevel
Add and customize a footer in an email template
- Sign into your HighLevel subaccount and go to Marketing > Emails > Templates.
- Open a current template or click + New to start a fresh one, choosing blank, library, campaign, import, or AI options.
- In the Email Builder, press the + Add Elements button.
- Find the Footer block in the Elements list and drag it to the bottom of the email.
- Select the Footer block and adjust its overall styles such as background, padding, spacing, borders, height and width.
- Click inside the text areas of the footer to change the copy, links, fonts, colors, and alignment.
- Optional: Open Visibility settings to set desktop or mobile display and, where allowed, add a Conditional Sending rule like Country Is United States.
05What it looks like in HighLevel
06Settings that matter
- Content and Typography. Controls the text, hyperlinks, font family, size, color and alignment inside the footer.
- Colors and Spacing. Sets background color, text color, padding and spacing to shape the footer’s appearance.
- Borders and Dimensions. Allows customization of border style, height, width and related size properties.
- Device Based Visibility. Determines whether the footer is shown on desktop, mobile, or both.
- Conditional Sending. Enables the footer to appear only when a contact field meets a specified condition.
07Things to know before you rely on it
- Customization options may differ slightly between the Standard, AI and Design editors.
- The Footer element does not automatically create an unsubscribe link; that must be added via LC Email settings or the {{unsubscribe}} tag.
- Applying Conditional Sending to the entire footer can hide required business information or the unsubscribe link for contacts that do not meet the rule.
- Saved Items are supported only in the Design Editor; they cannot be used in the AI Editor.
08If something goes wrong
- Footer not appearing for certain contacts or devices. Check the Device Based Visibility and Conditional Sending settings, and verify the footer is not placed inside a hidden parent layout.
09How it connects to the rest of HighLevel
- Hide email elements on mobile view Mobile visibility
- Personalize campaigns with conditional elements Conditional elements
- Use custom fonts in the Email Builder Custom fonts
Michael's take

The first setting I would tighten is the Device Based Visibility to make sure the footer shows on both desktop and mobile, then I would verify the unsubscribe link is being added correctly through the Business Profile or the {{unsubscribe}} tag.