
01Who this is for
- Marketing managers can keep visual branding uniform across campaigns.
- Founders of small businesses can quickly apply a refreshed logo to all new marketing assets.
- Design teams can manage font and color updates without altering existing content.
02Design kits, explained
The Design Kit stores a set of brand colors, logos, and typography inside a Brand Board. When you edit the kit, the new assets become available in the pickers of websites, funnels, and email editors that use the default Brand Board.
These changes affect only future creations. Pages or emails that were built before the edit keep the original styling. The kit lives within the Brand Boards section of the platform and is referenced by the default board setting.
03How businesses use design kits
- Real estate agency. The agency uploads a new office logo in the Design Kit so that all upcoming property listing pages automatically show the updated branding. It also adds a brand color to match the new signage.
- Fitness studio. The studio adds a fresh font to its Design Kit, then creates new class schedule emails that pull the new typography from the picker without manually adjusting each template.
- Online coaching program. The program updates its brand palette in the Design Kit, ensuring that new landing pages and sales funnels display the revised colors without recreating style rules.
04The numbers and rules that matter
- Up to 5 fonts can be added; at least 1 font is required.
05How to set up and use design kits in HighLevel
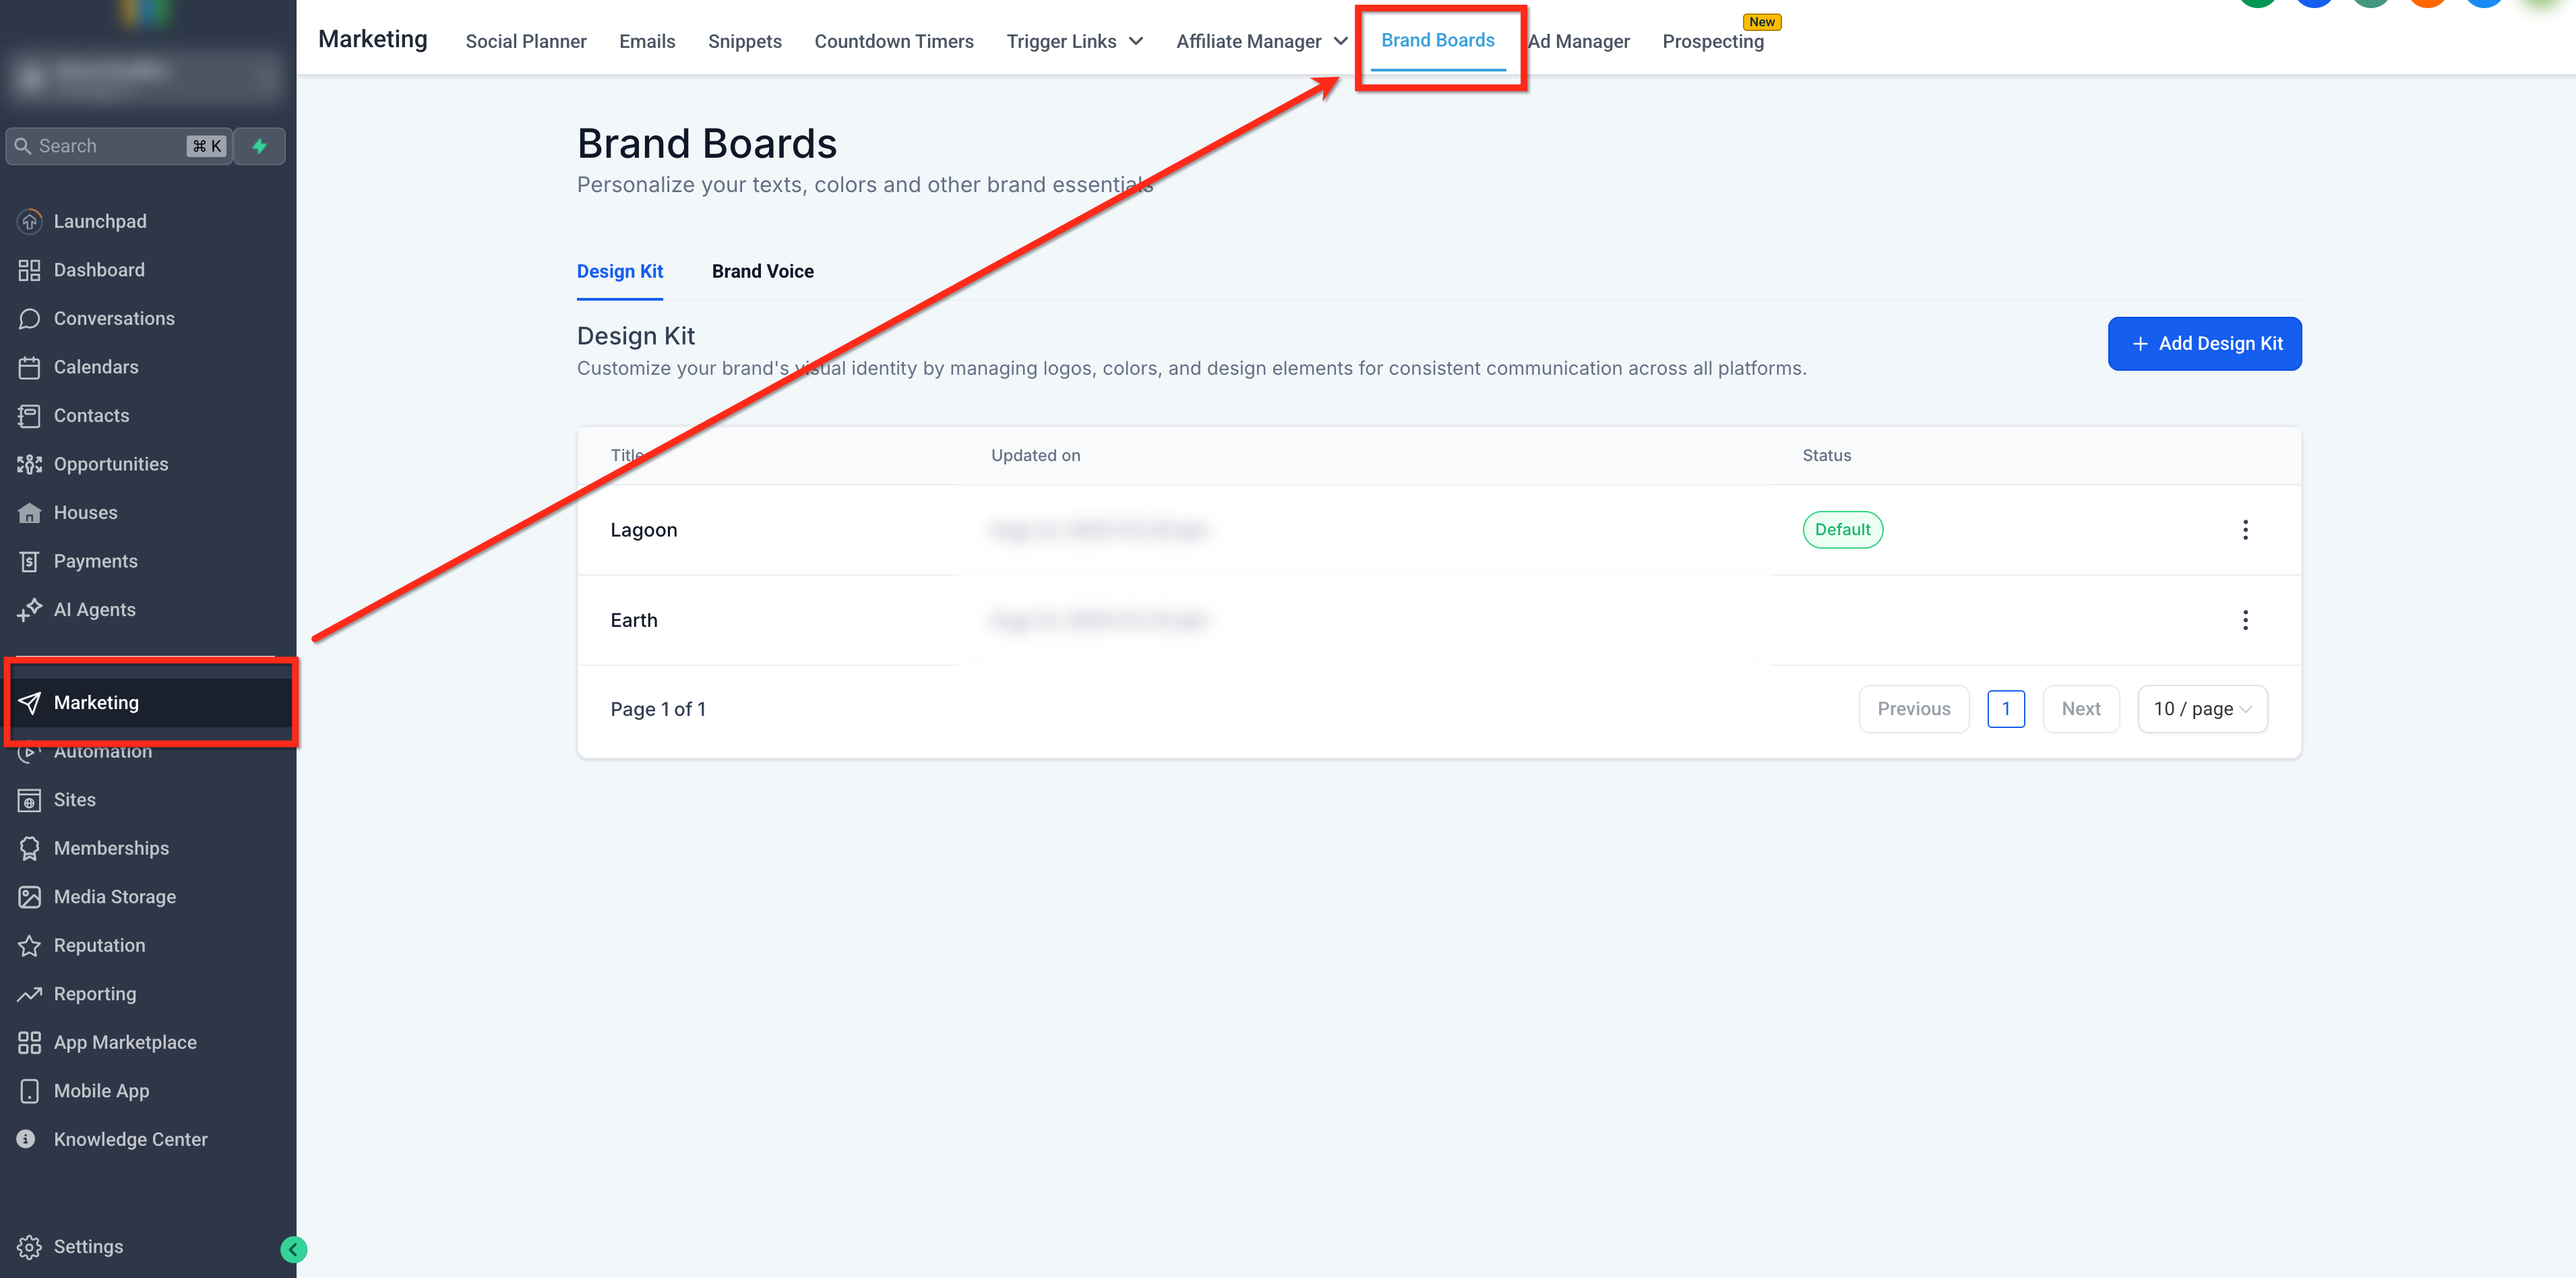
Step 1: Navigate to Brand Boards
- Go to Marketing > Brand Boards or Settings > Brand Boards.
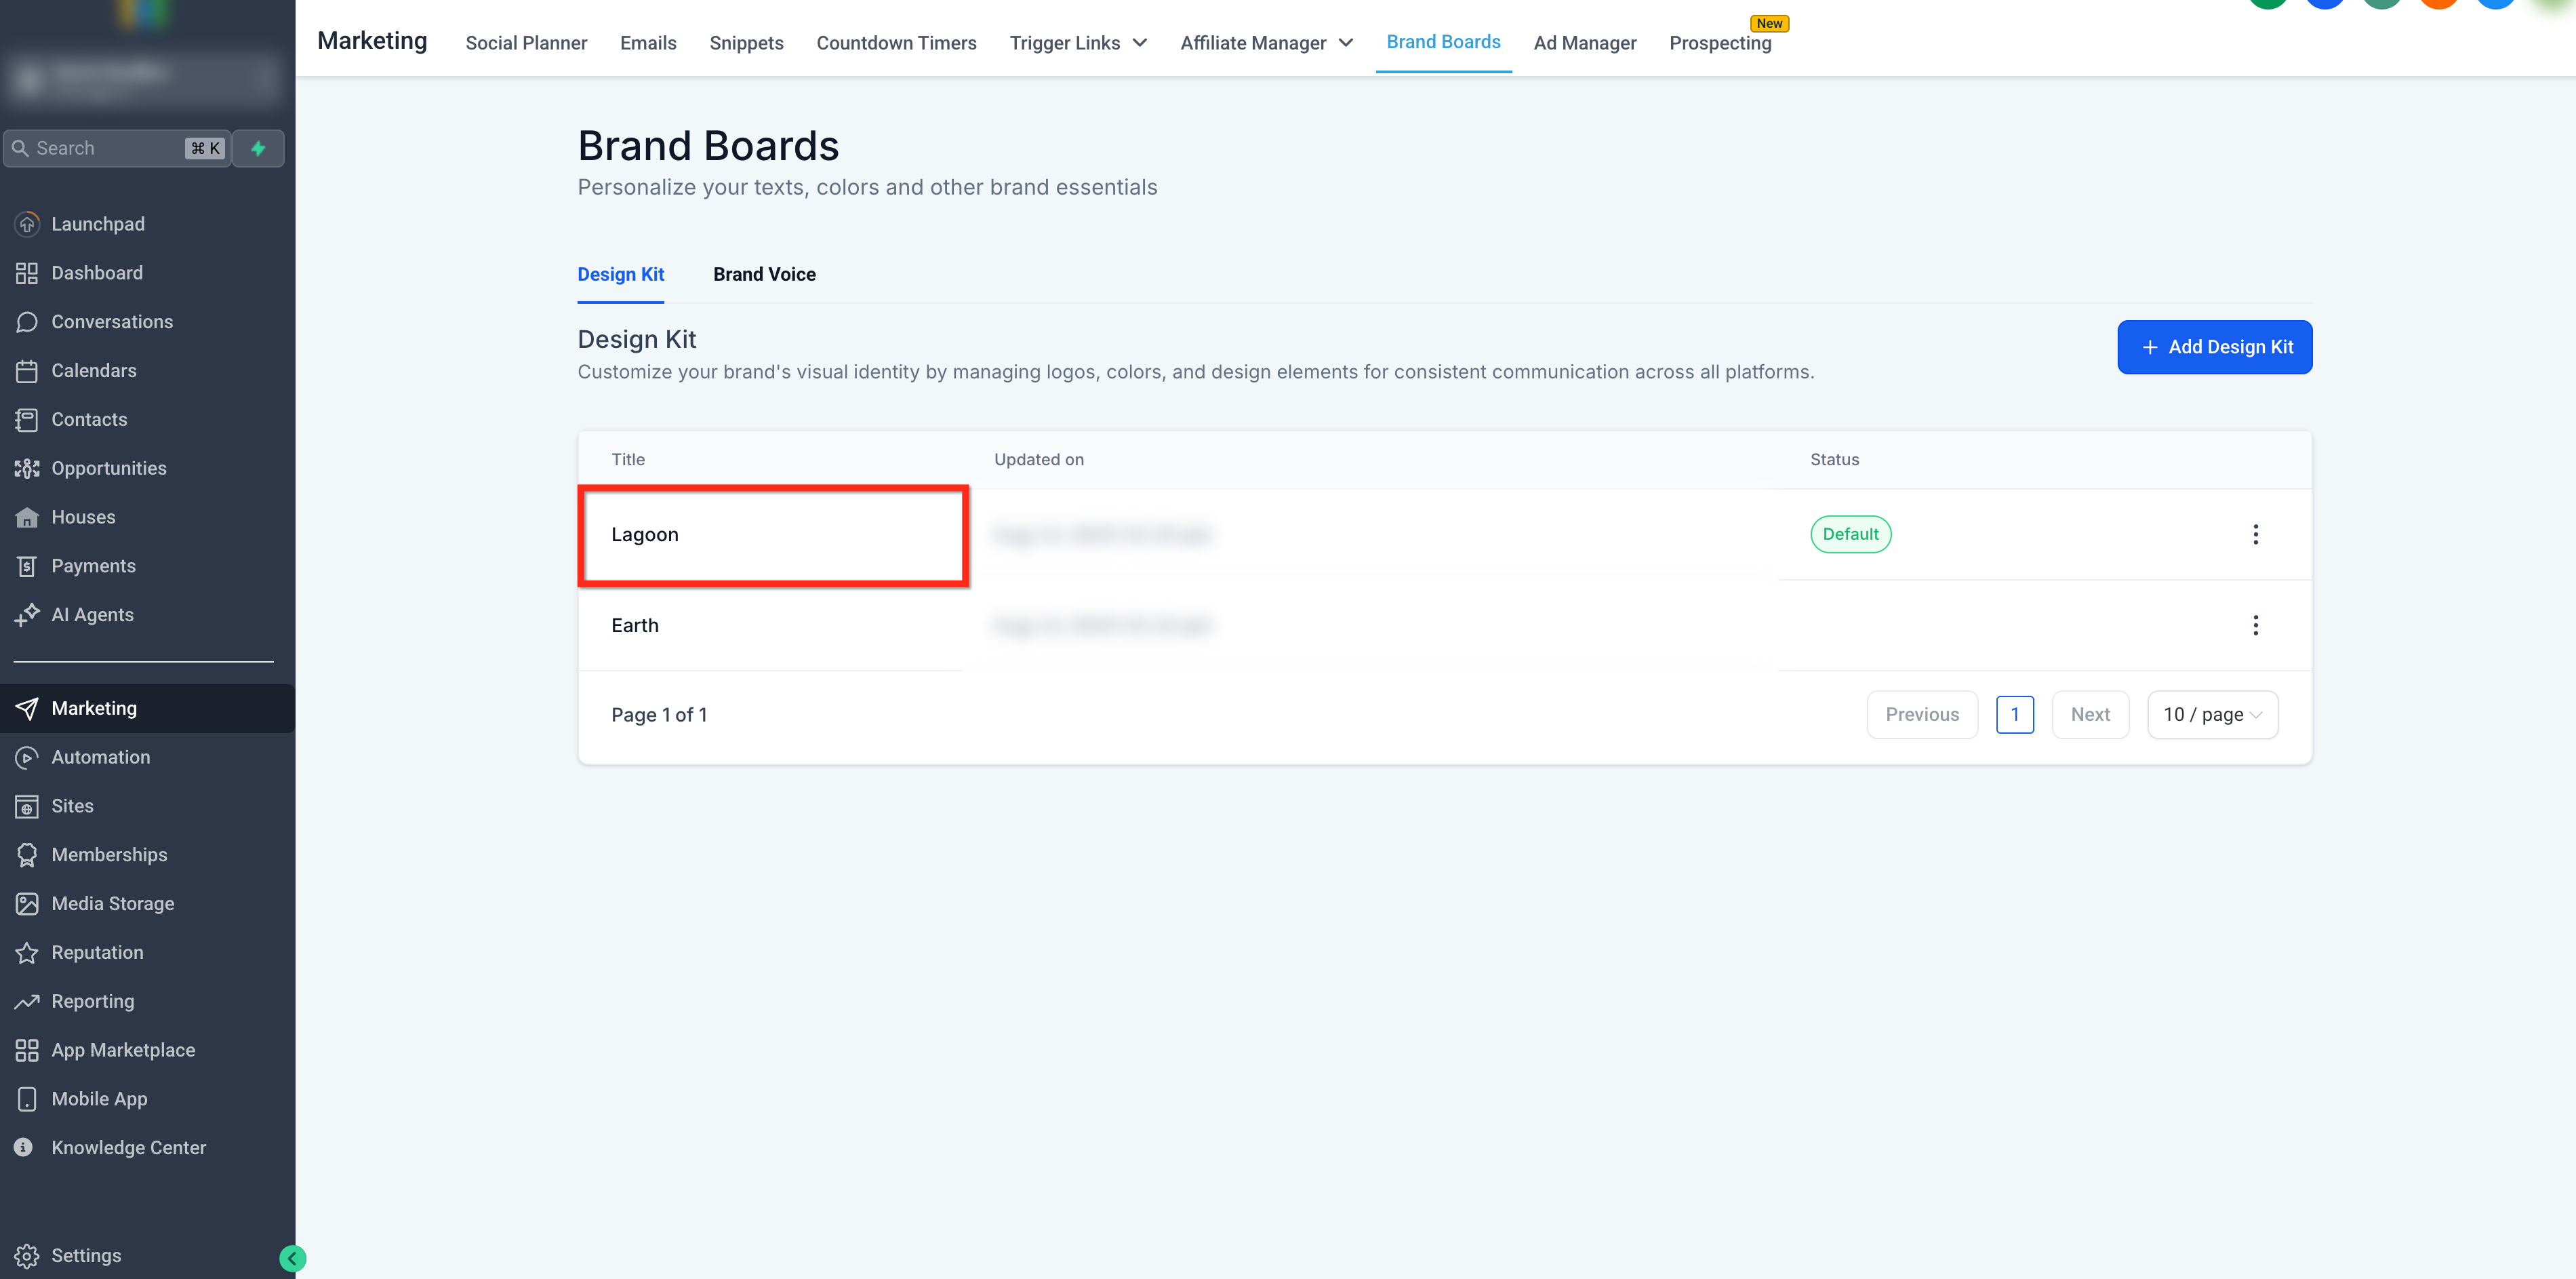
Step 2: Open the Brand Board
- Click the Brand Board you want to edit.
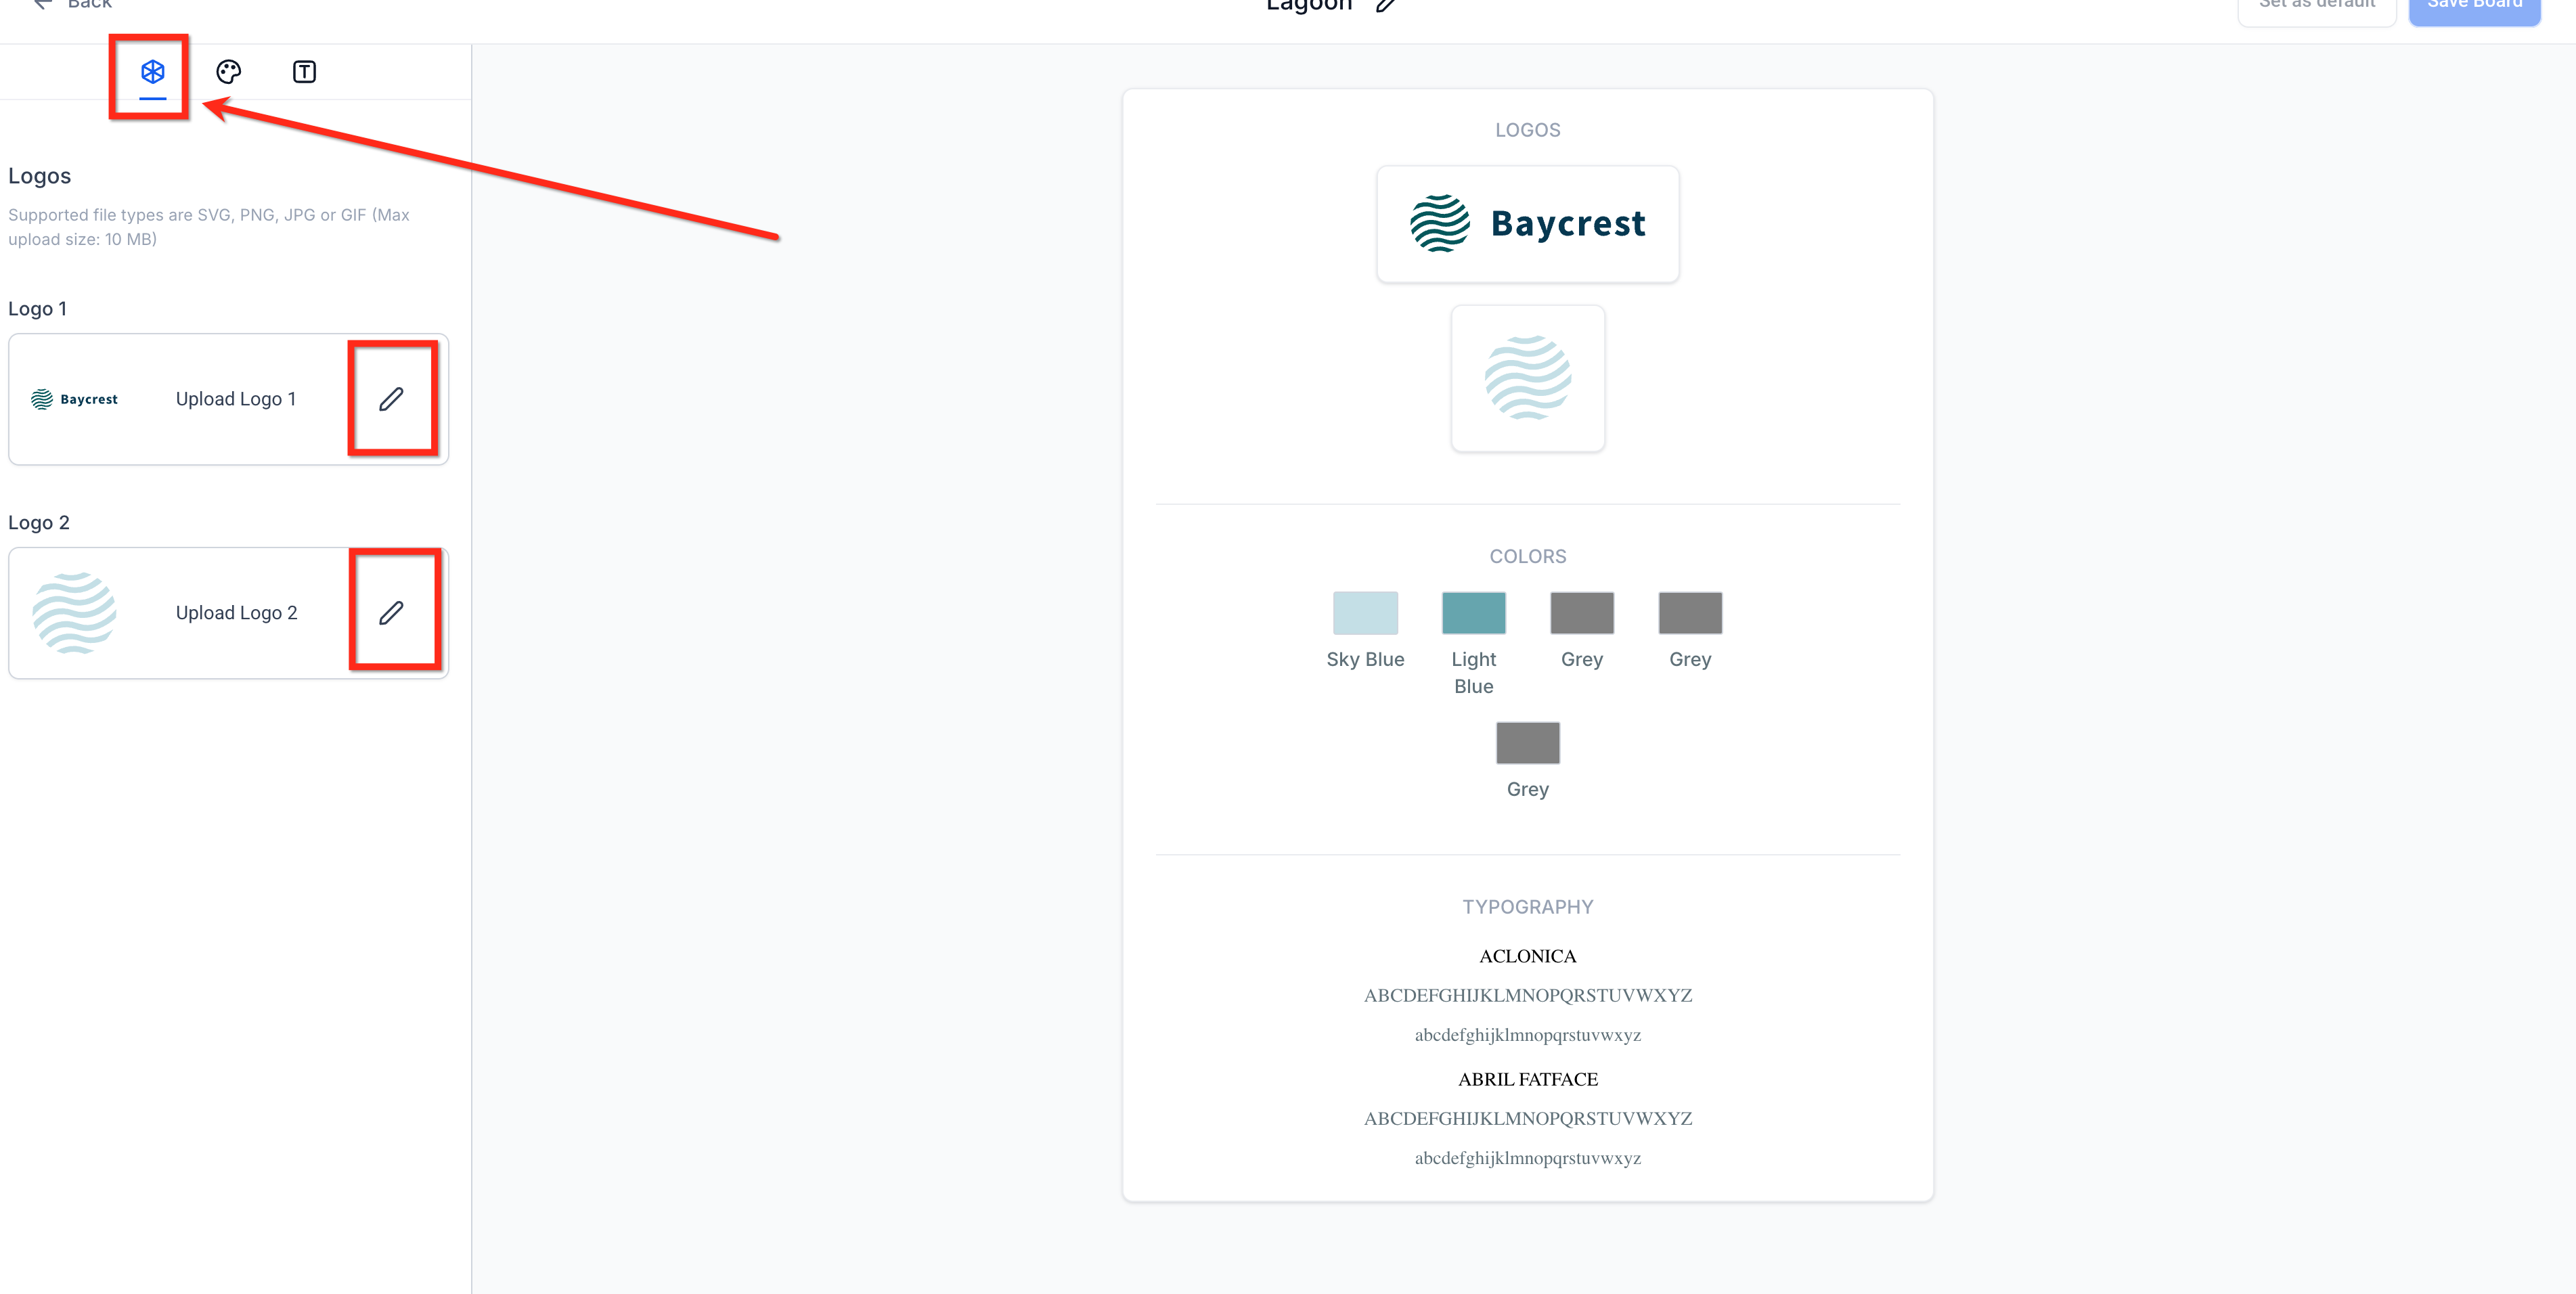
Step 3: Update Logos
- Select the Logos tab in the editor.
- Click the pencil icon next to Logo 1 or Logo 2 to upload a replacement.
- To delete a previous logo, remove it from the Media Library directly.
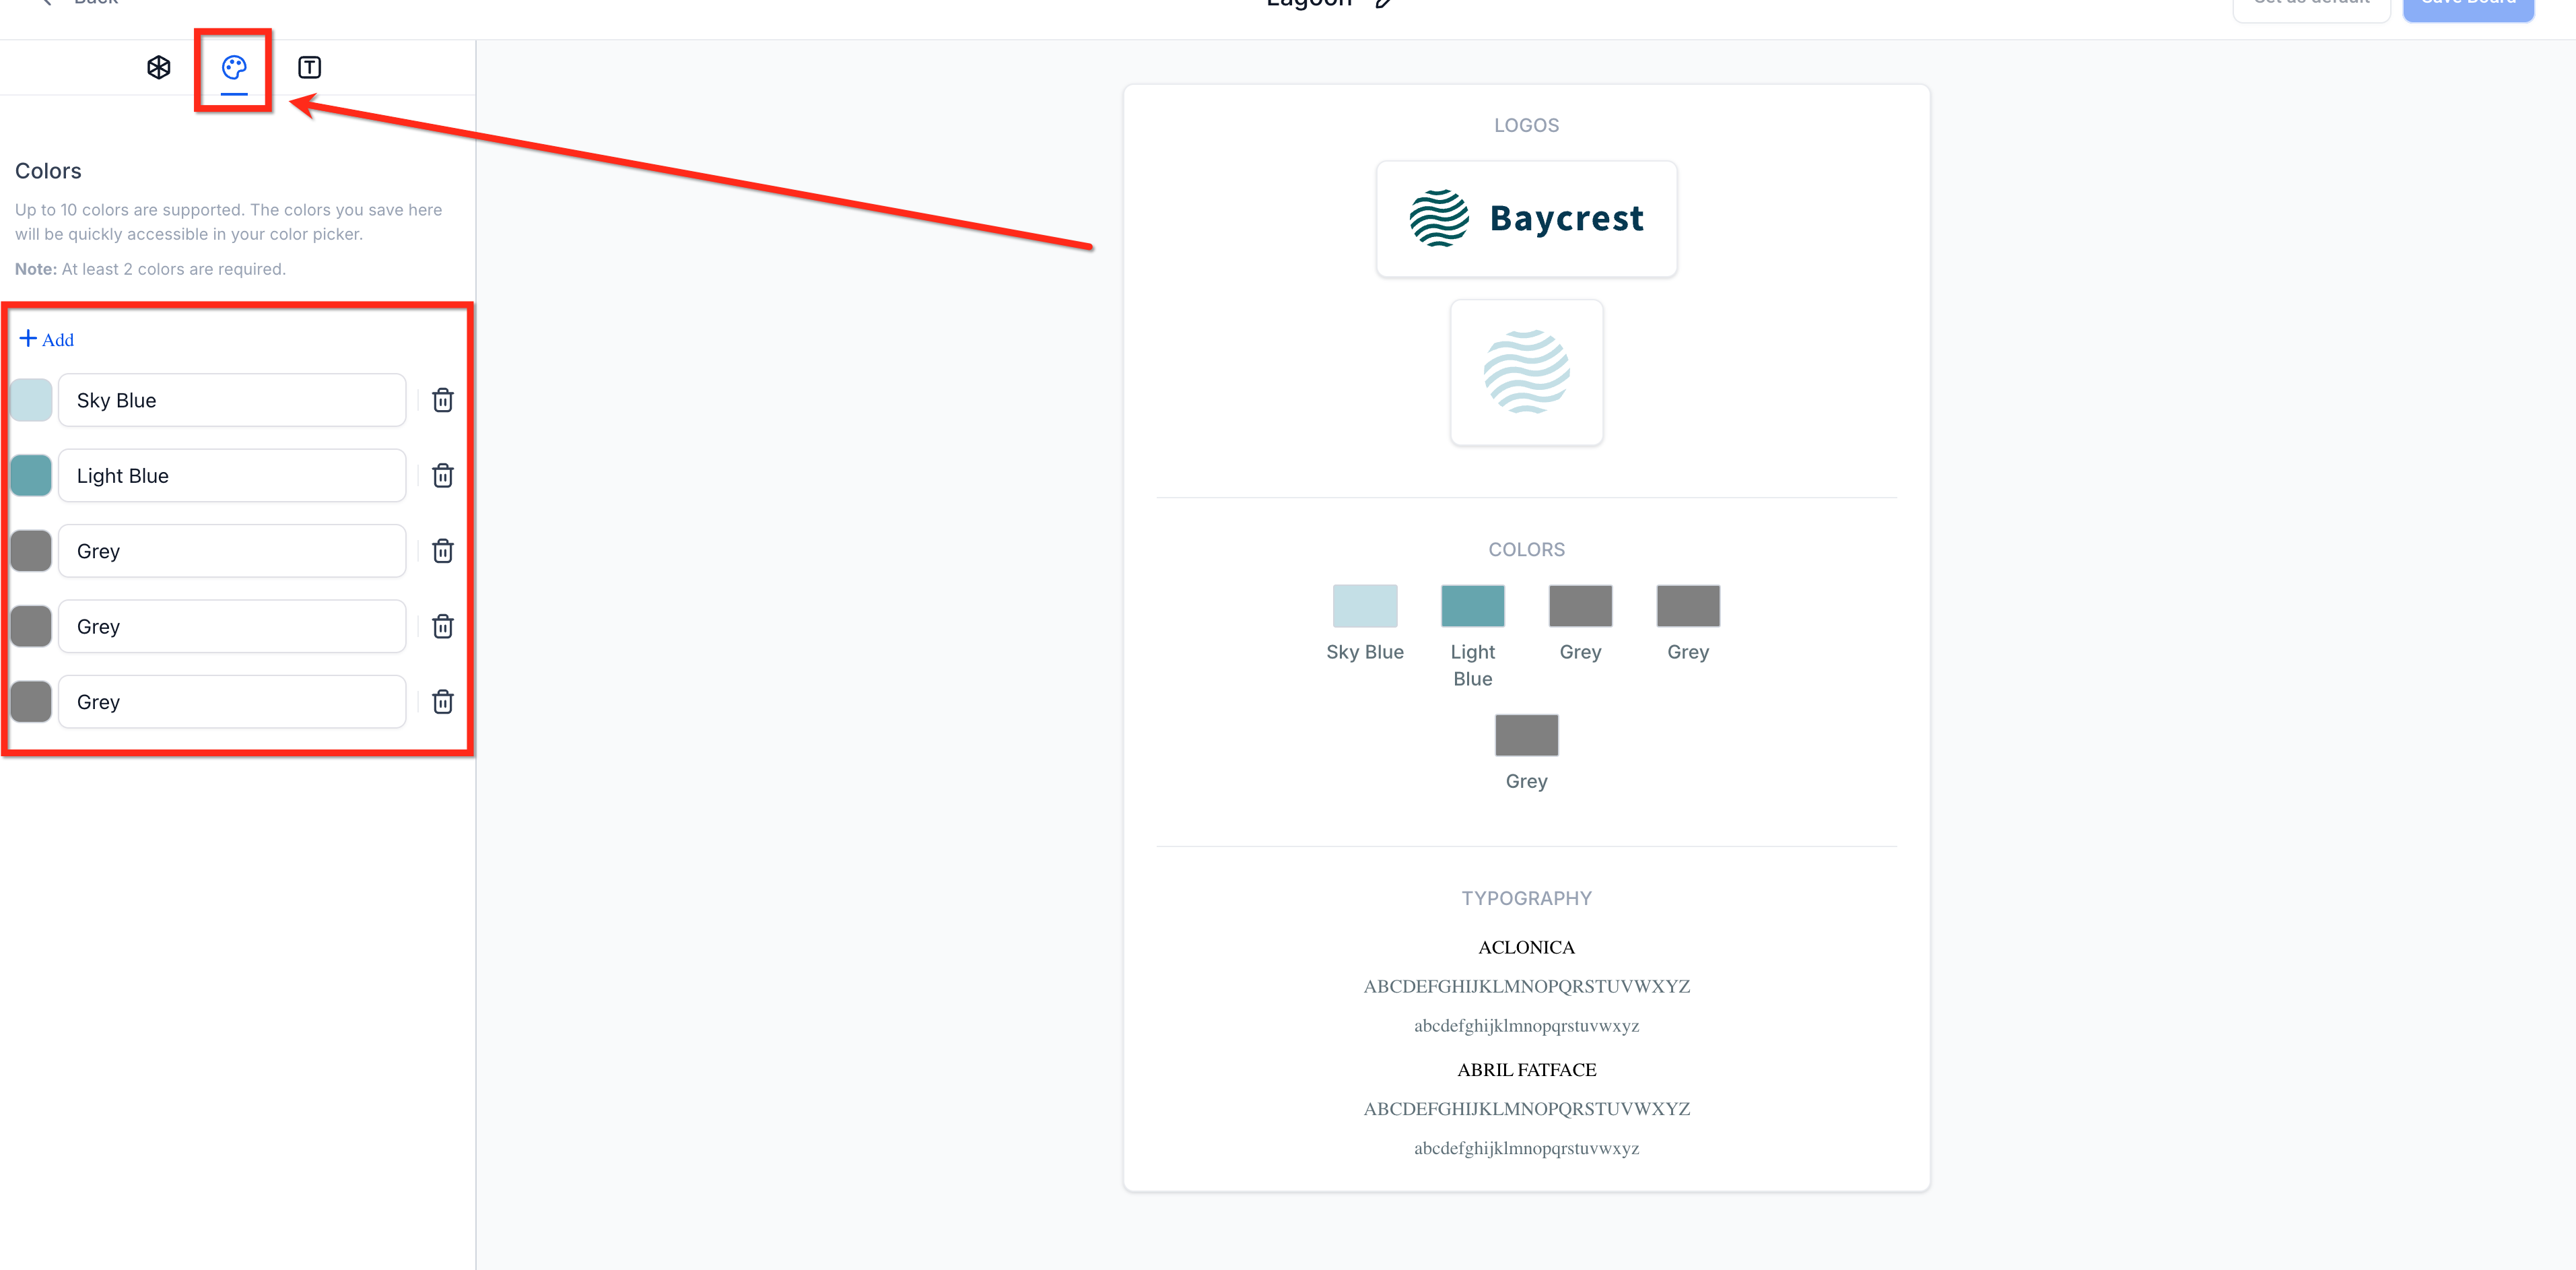
Step 4: Update Colors
- Select the Colors tab in the editor.
- Click + Add to create a new color.
- Click the existing color square and choose a new hue to change it.
- Click the name field of a color to rename it.
- Click the trash icon of a color to delete it.
Step 5: Update Fonts
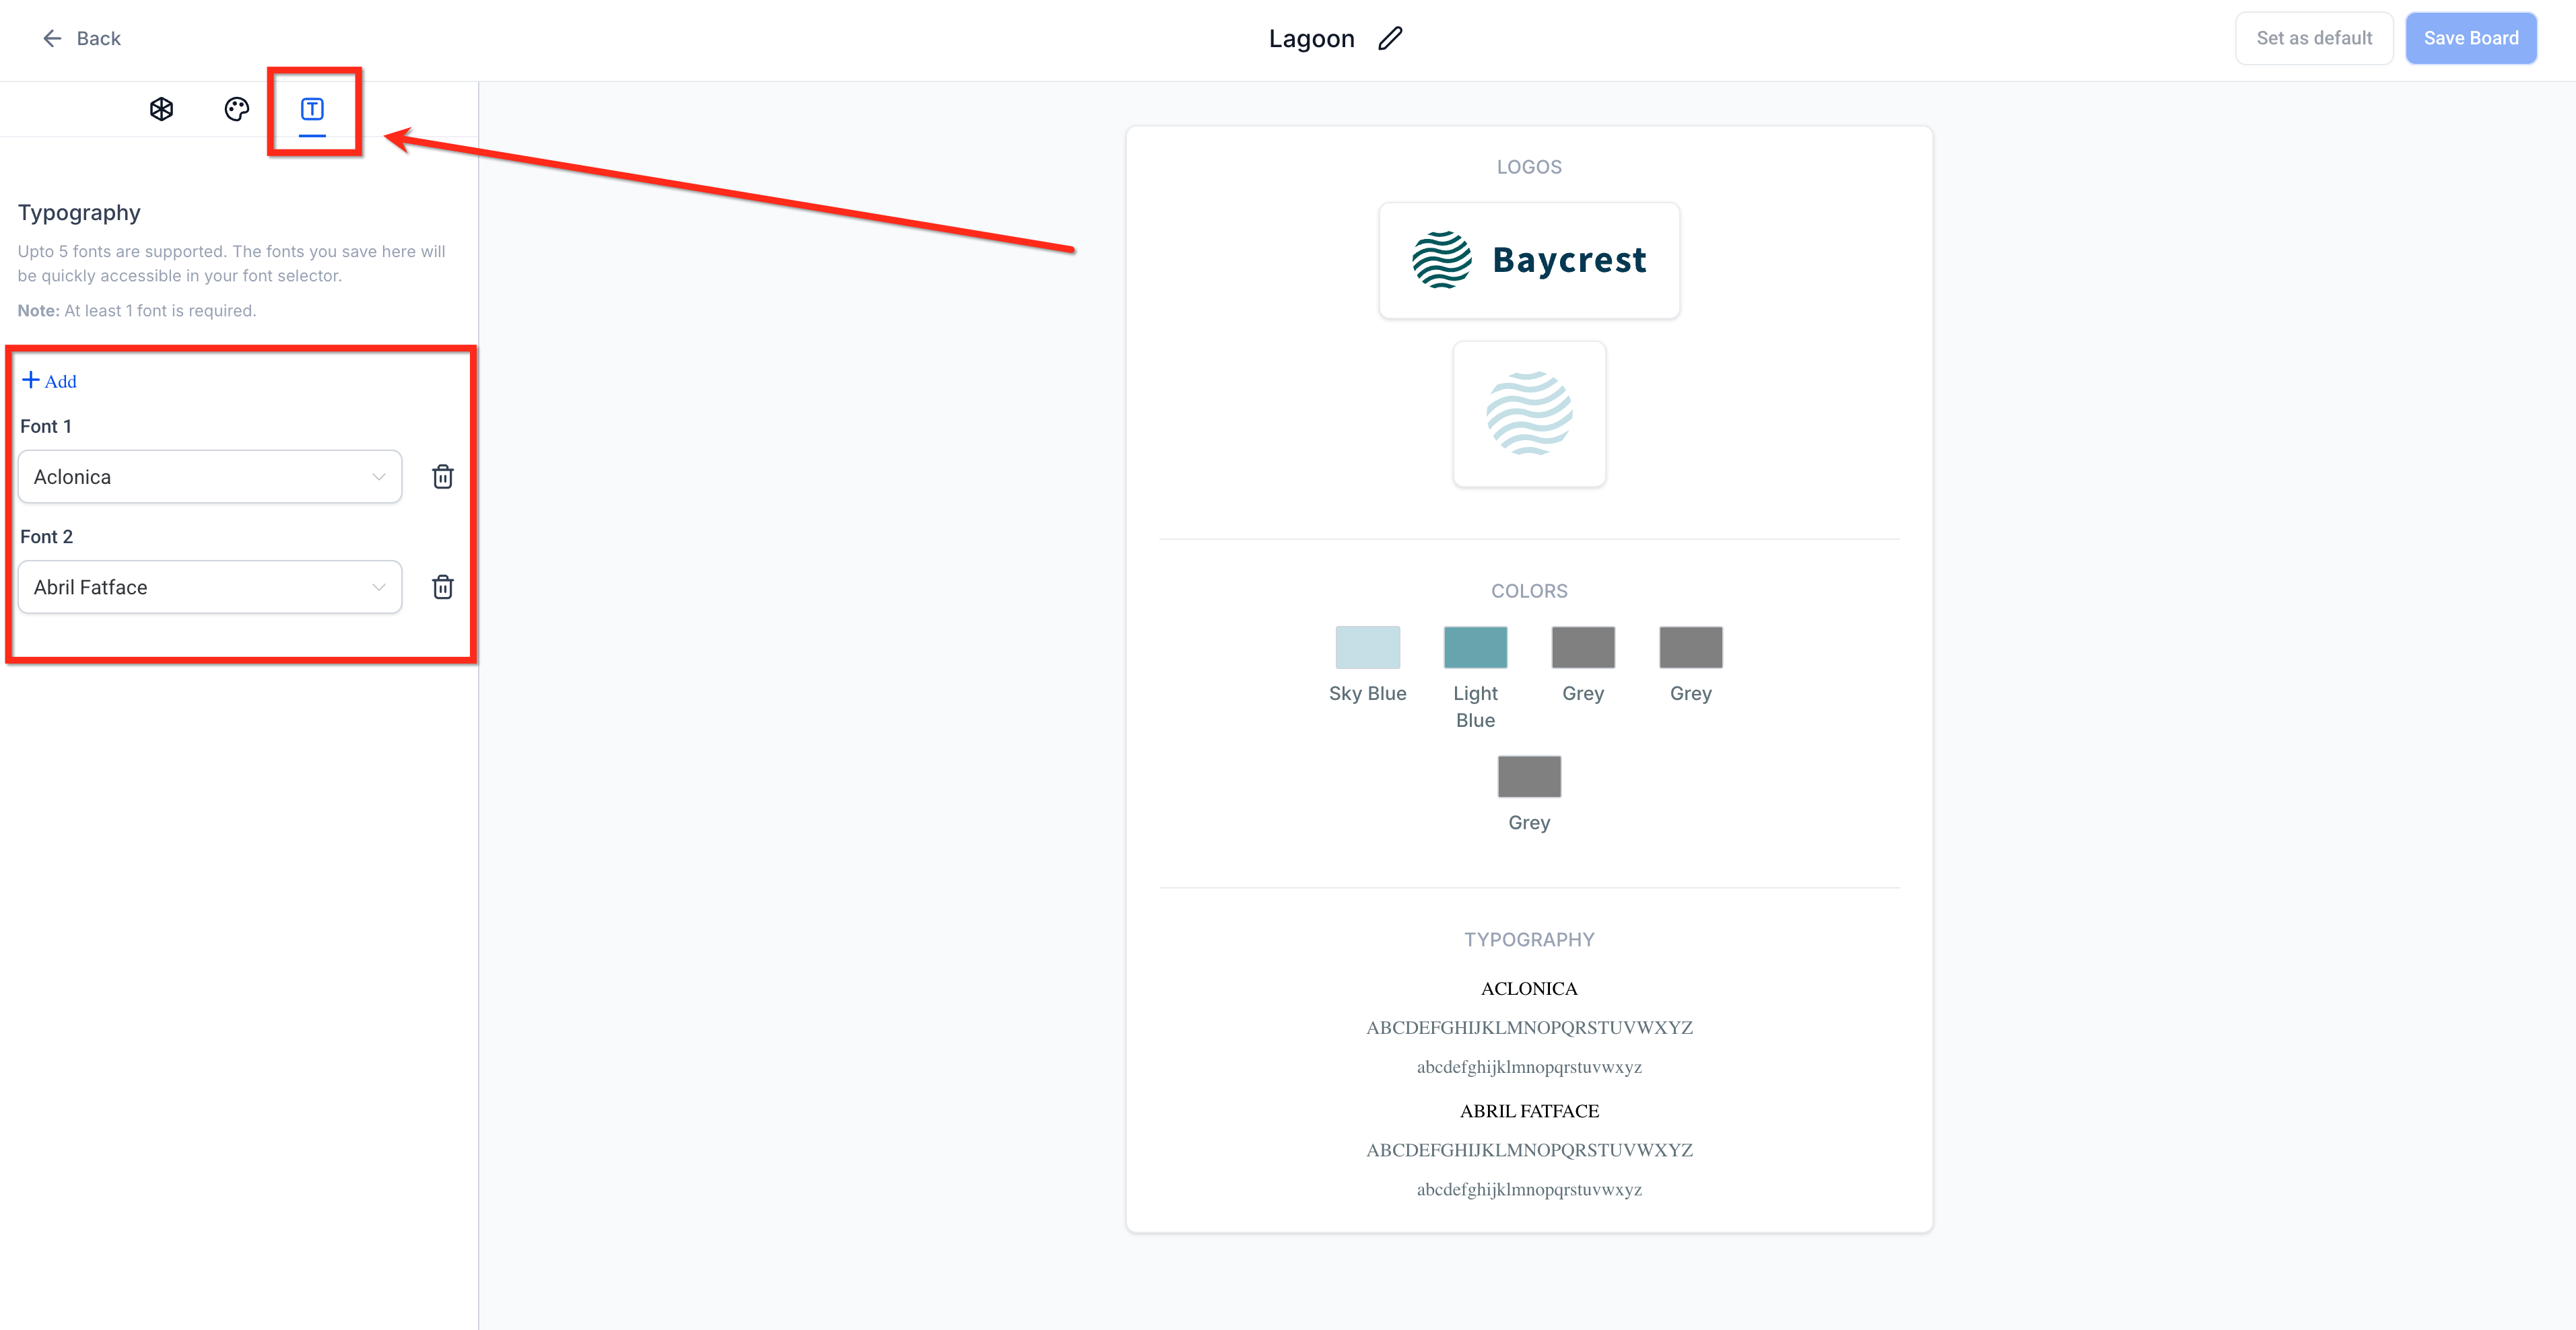
- Select the Typography tab in the editor.
- Click + Add to add a new font, up to five total.
- Choose a font from the dropdown to set it as active.
- Click the trash icon next to a font to remove it.
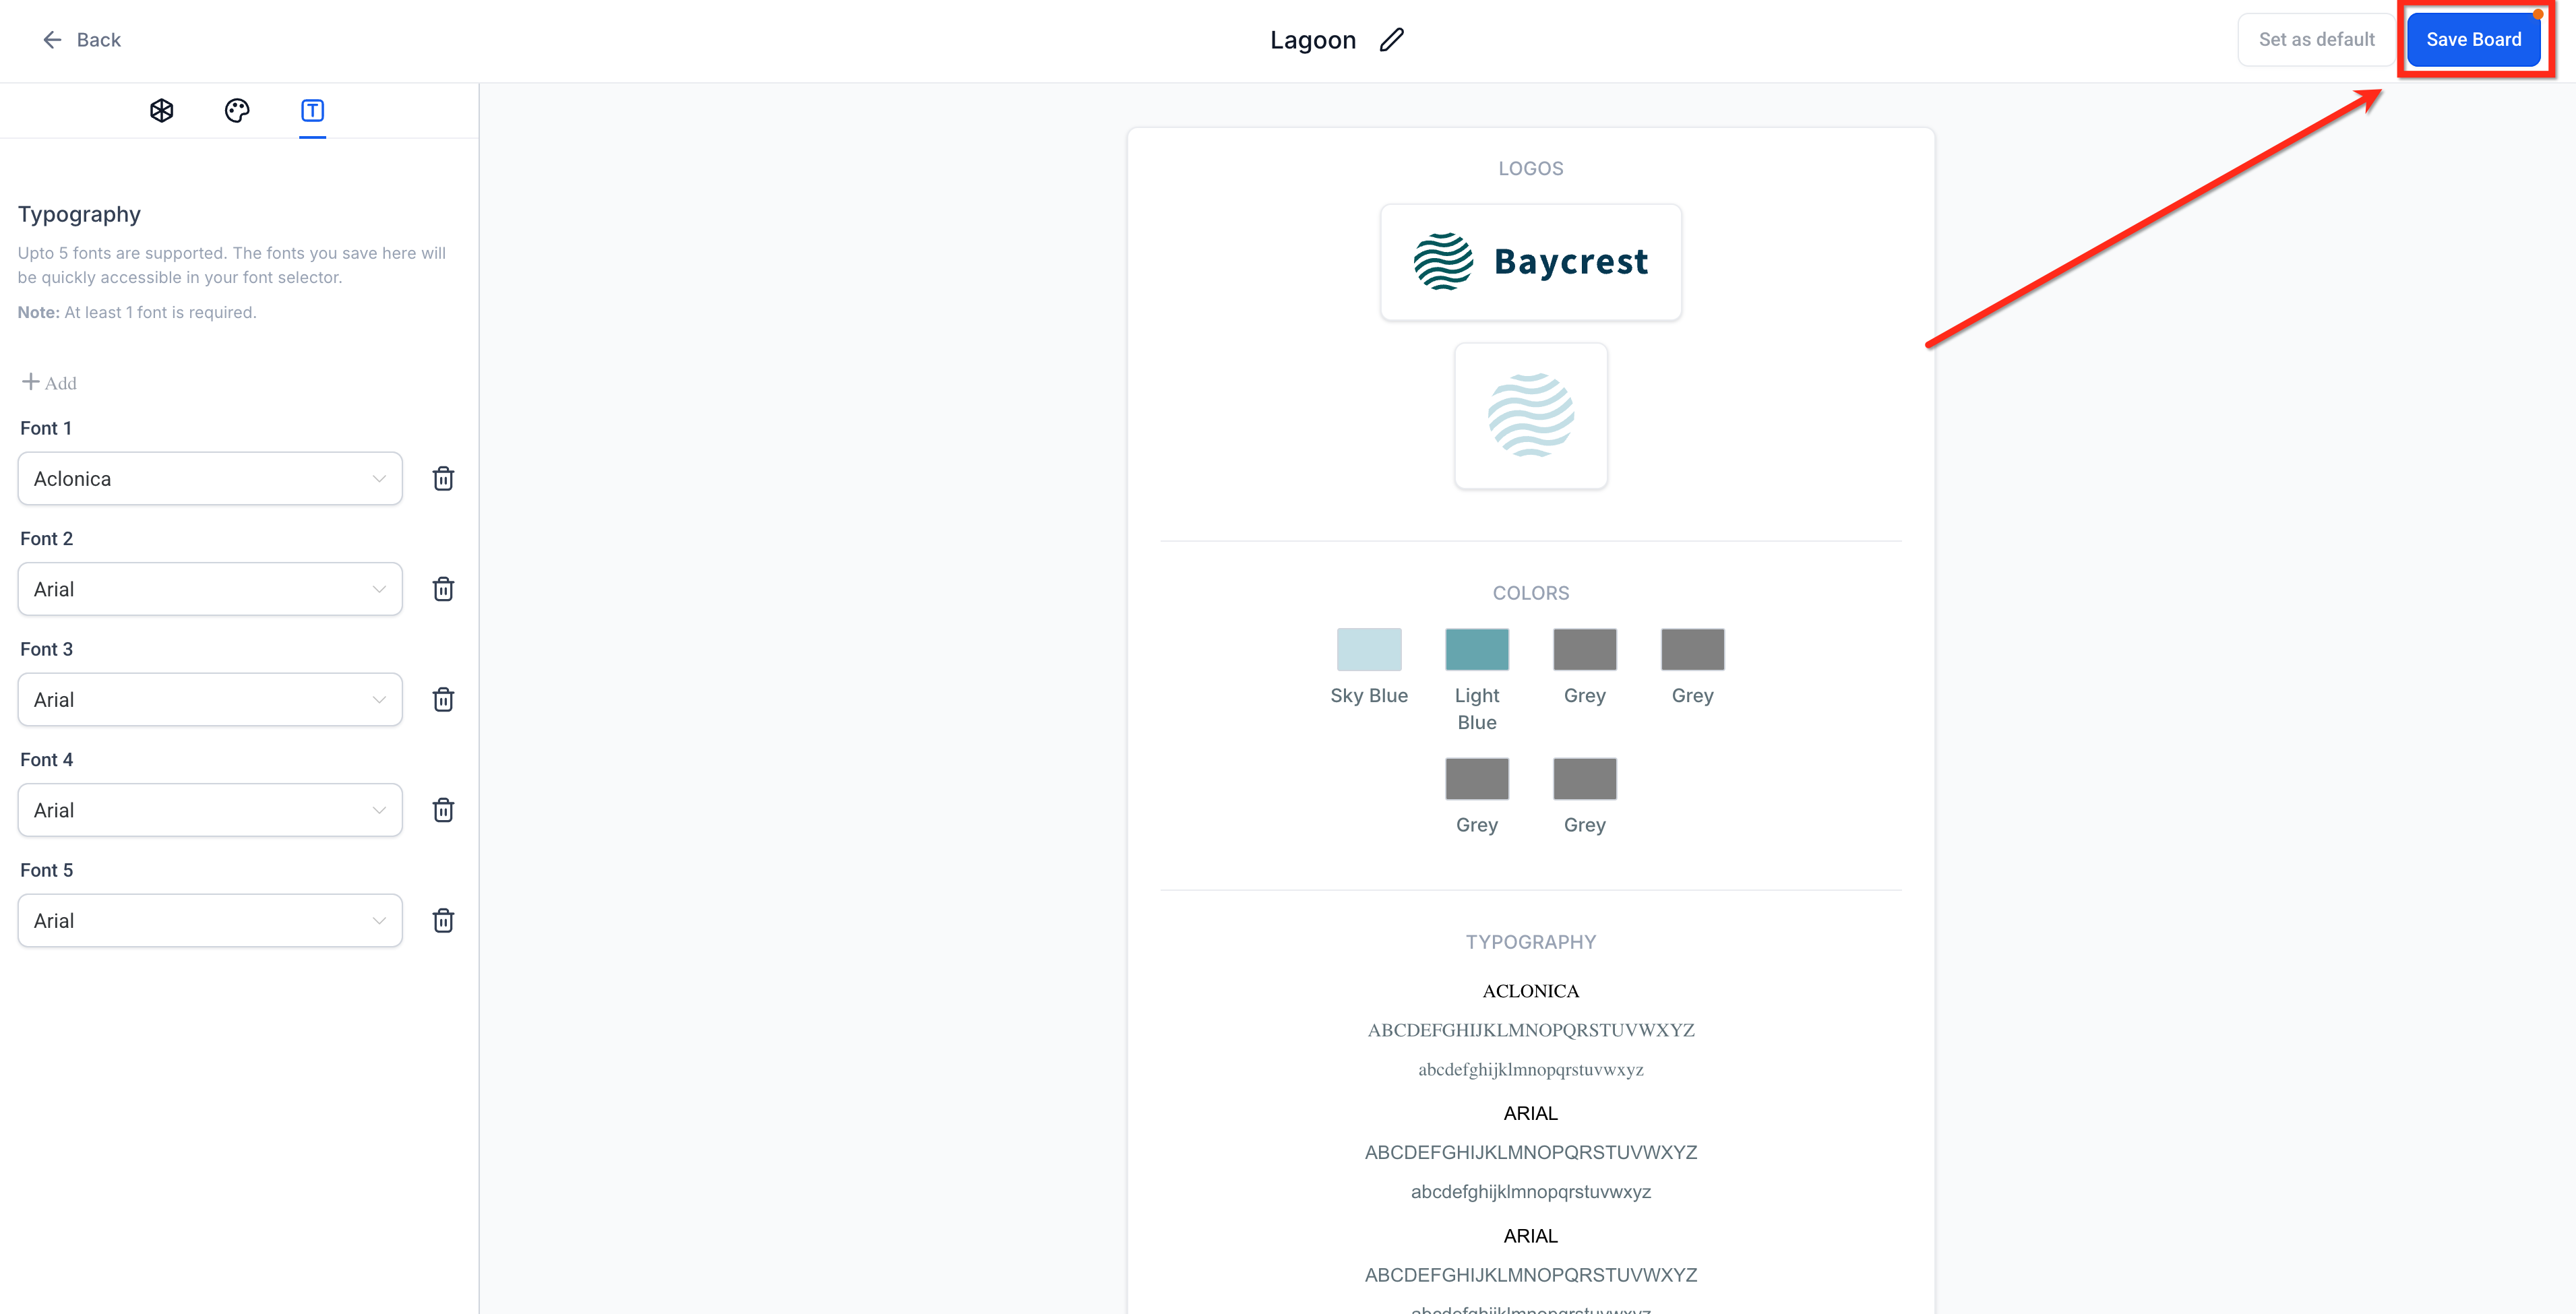
Step 6: Save Changes
- Click the blue Save Board button in the upper right corner.
06What it looks like in HighLevel
07Settings that matter
- Logos tab. Opens the section where you can replace or upload Logo 1 and Logo 2.
- Colors tab. Provides controls for adding, editing, renaming, and deleting brand colors.
- Typography tab. Allows you to add, select, and remove up to five fonts for the kit.
08Things to know before you rely on it
- A maximum of five fonts can be stored; at least one font is required.
- Only HEX and RGB color formats are accepted.
- Only the default Brand Board supplies colors to pickers; set the correct board as default to see new colors.
- Design Kit edits do not automatically change existing pages or emails.
09If something goes wrong
- Design Kit edits do not update existing pages or emails automatically.. Understand that edits only affect pickers for new content; existing assets remain unchanged.
- Colors do not appear in the page or email color picker.. Set the desired Brand Board as the default and verify that the colors are saved in the kit.
10How it connects to the rest of HighLevel
- Learn how to set a default Brand Board so pickers use the correct Design Kit. Set default Brand Board
- See how Brand Boards apply to funnels and websites. Brand Boards in funnels
- Explore global custom colors for consistent branding everywhere. Global custom colors
Michael's take

Wondering if you really need to mess with your Design Kit every time the logo changes? The short answer is yes. Keeping the kit current means every new funnel, website or email you spin up pulls the right brand assets without you hunting for files.
If I were tweaking a brand, I’d start by updating the logo and colors in the kit, then save the board. From there the pickers in all the builders show the new look, so you stay on brand without extra effort.