
01Who this is for
- Ecommerce Founders who need precise control over product presentation can place key information exactly where shoppers look.
- Store managers who rely on brand consistency can style each product element without affecting other pages.
- Marketing teams that experiment with different layouts can quickly rearrange elements to test visual impact.
02Product detail page layouts, explained
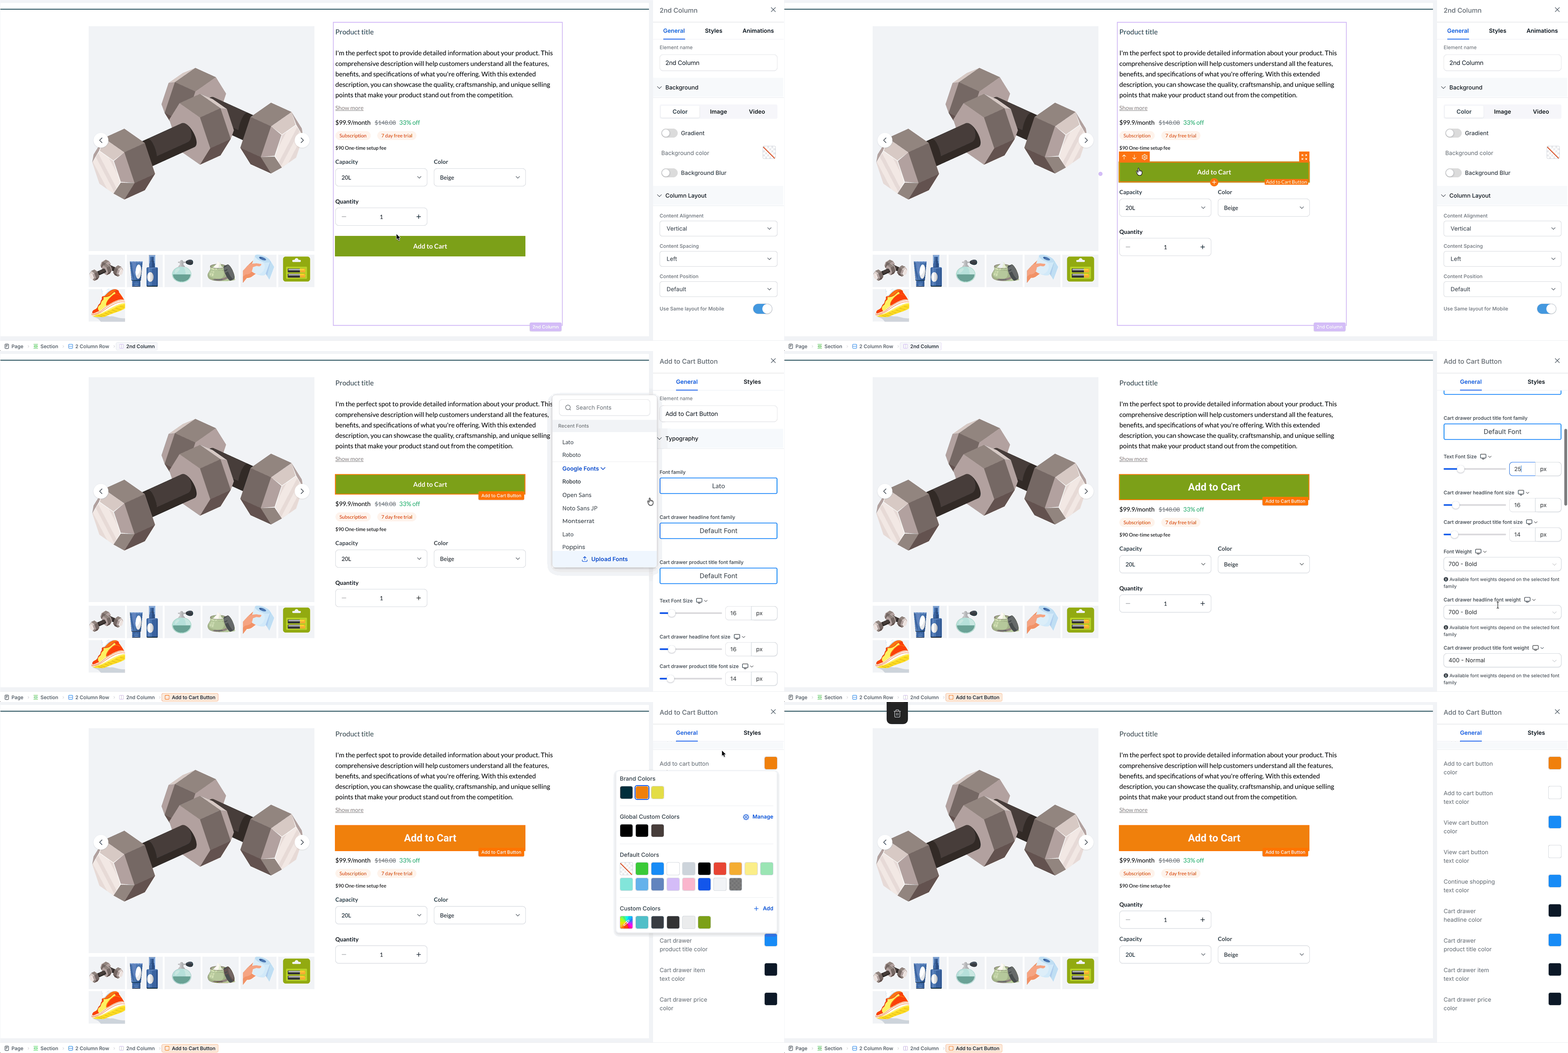
The Product Detail Page now consists of individual elements rather than a single fixed block. Each element, such as the product image, title, price, or Add to Cart button, can be positioned anywhere on the page and styled independently.
Styling options include typography, colors, spacing, alignment, backgrounds, borders, corner radius, shadows, and device visibility. These settings are accessed from the element’s right hand panel in the builder.
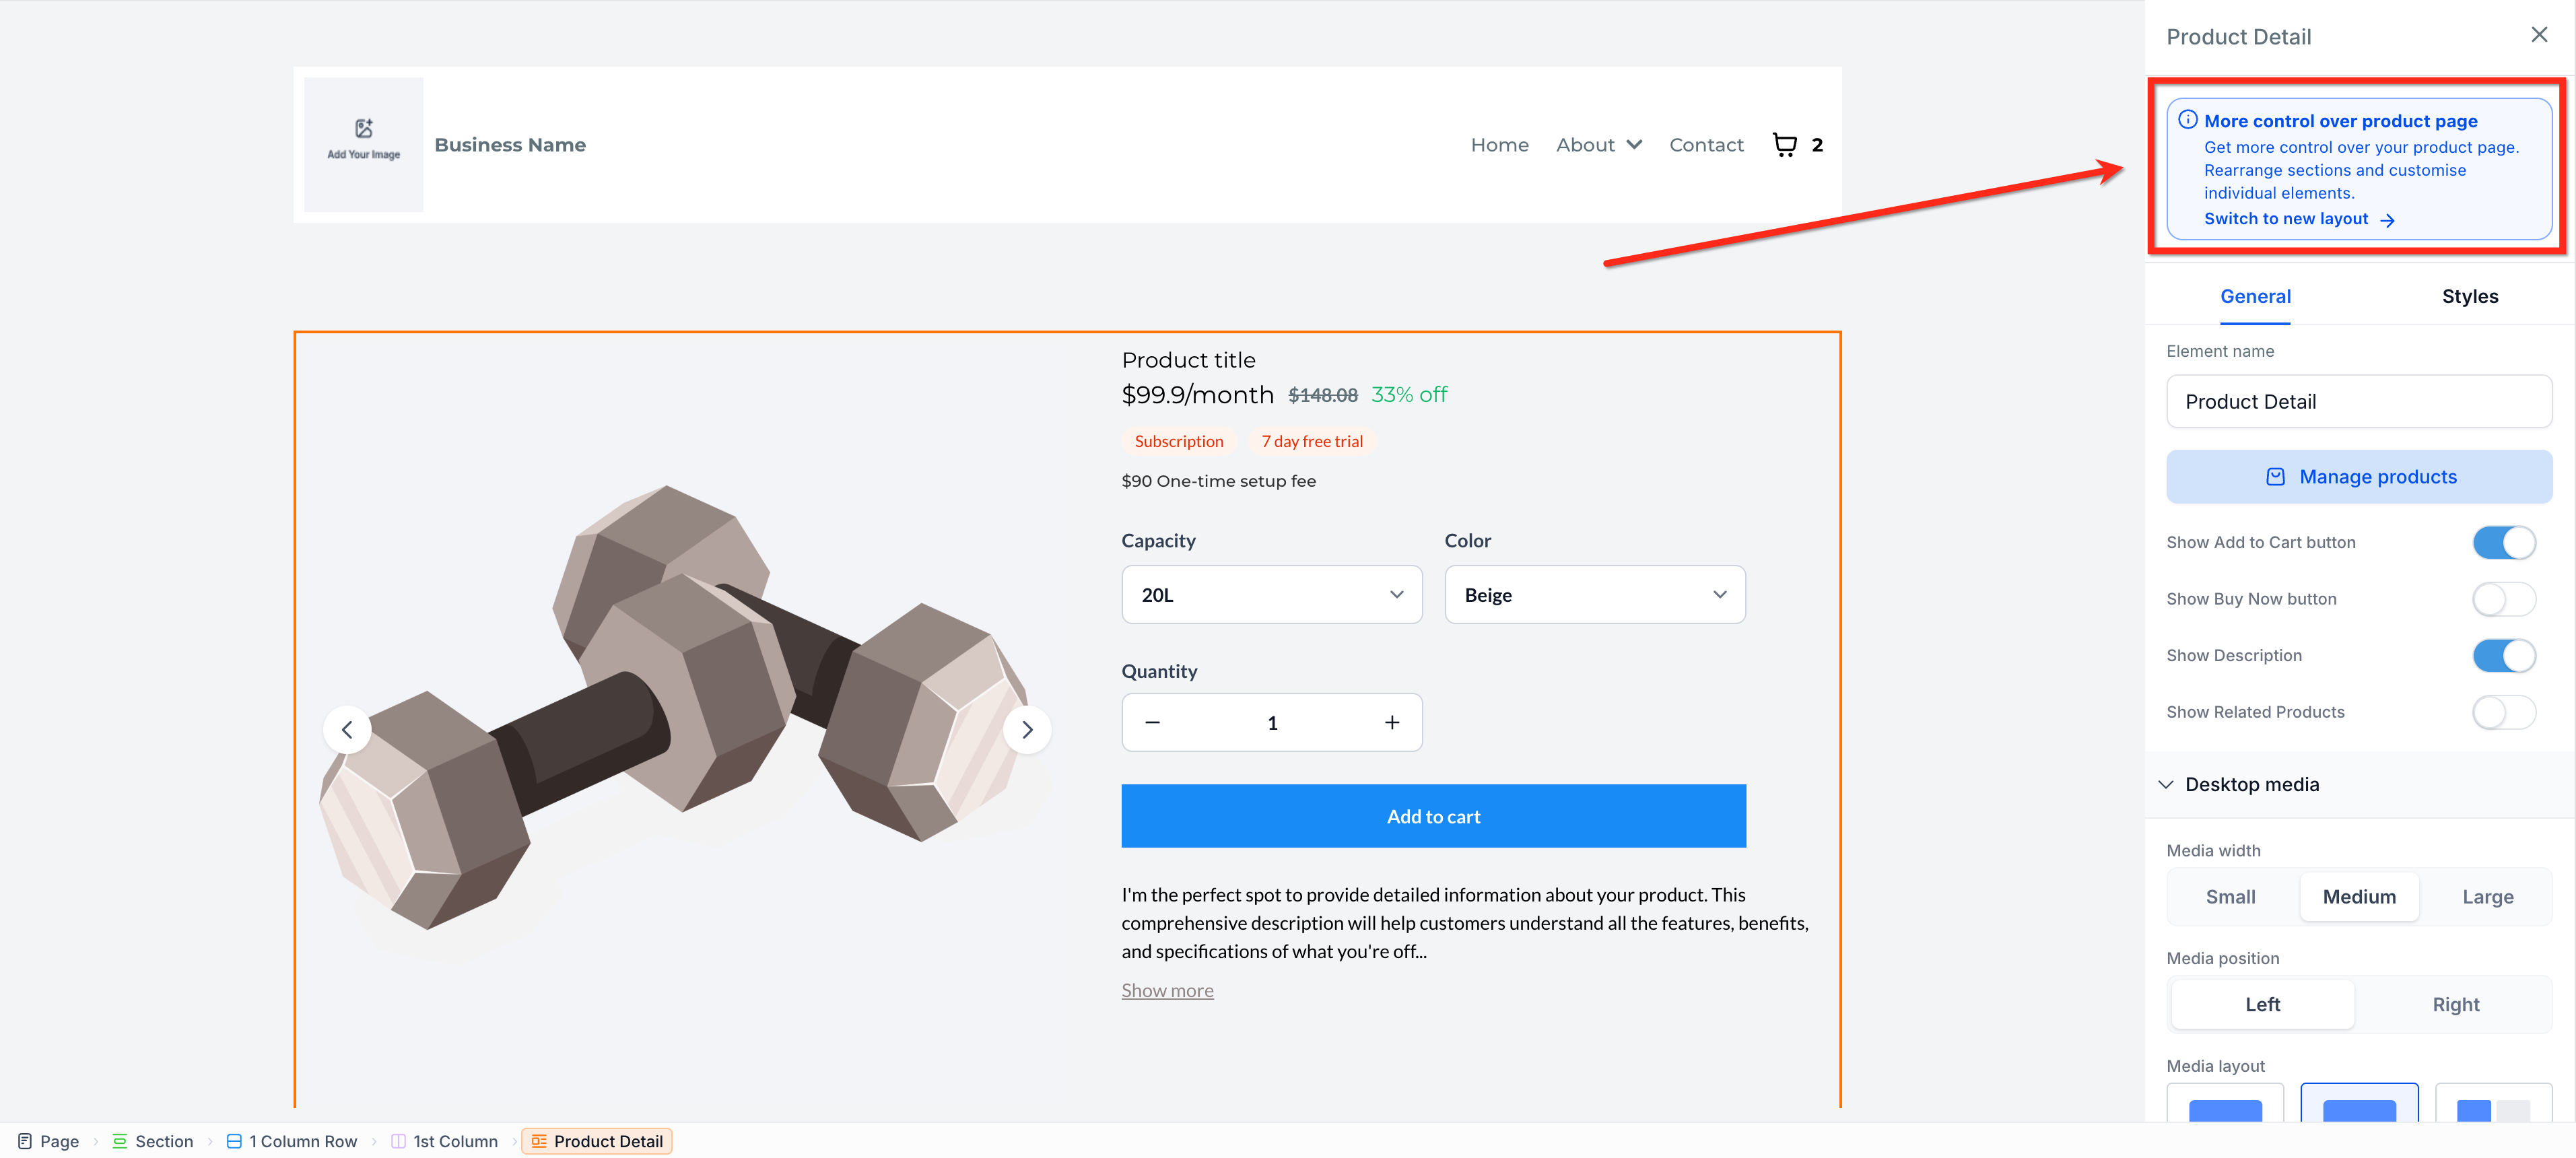
The layout editor lives inside the store builder. Open the store’s Product Details Page, select the overall Product Detail element, and switch to the new layout. After the switch, the page preserves supported styling, but custom CSS classes from the classic layout are removed.
03How businesses use the Product Detail Page layouts
- Clothing boutique. The boutique can move the product title above the image to catch the eye, then place size variant selectors beside the price. Each element’s colors and fonts are tuned to match the store’s visual brand.
- Electronics retailer. The retailer can position the specification table next to the product photo, add a highlighted review block higher on the page, and set independent shadow effects for the Add to Cart button.
- Handmade crafts store. The crafts seller can arrange a large product image on the left, put the description on the right, and style the Buy Now button with a custom background that reflects the handmade theme.
04How to set up and use the Product Detail Page layouts in HighLevel
Switch an existing store to the new layout
- Open the store’s Product Details Page in the builder.
- Select the Product Detail element on the canvas.
- In the right hand panel, click the Switch to new layout button.
- Note: The upgrade is one way and cannot be reverted directly; you must use Version History to restore a previous version if needed.
Update a saved store template to use the new layout
- Upgrade the Product Details Page in the store that originally created the template.
- Refresh the saved template from the template library so it includes the updated layout.
05What it looks like in HighLevel
06Settings that matter
- Typography. Controls the font family, size, weight, and style for the element’s text.
- Colors. Sets the text, background, and border colors for the element.
- Spacing. Adjusts margins and padding around the element.
- Alignment. Positions the element’s content left, center, or right.
- Backgrounds. Applies a solid color or gradient behind the element.
- Borders. Defines width, style, and color of the element’s border.
- Corner radius. Rounds the corners of the element’s border.
- Shadows. Adds drop shadow effects to give depth to the element.
- Device visibility. Shows or hides the element on desktop, tablet, or mobile devices.
07Things to know before you rely on it
- Switching to the new layout is a one way action; you cannot revert back directly.
- Custom CSS classes from the classic layout are not carried over during the upgrade.
- Only styling that is supported in the new system is transferred automatically.
- Version History can be used to restore an older saved version of the page if needed.
08How it connects to the rest of HighLevel
- Integrate your store with WooCommerce to populate product data. WooCommerce integration
- Use HighLevel media storage to manage product images and videos. Media storage guide
- Explore all LevelUp 2026 enhancements, including this layout update. LevelUp 2026 features
Michael's take

Switching to the independent element layout can feel risky because the change is permanent and any custom CSS you built into the old layout disappears. That loss of code can bite you if you rely heavily on those custom classes.
The independent element layout provides granular control over each piece of product information.