
01Who this is for
- Agency users can confirm that client emails are delivered before launching campaigns, ensuring confidence in bulk sends.
- Subaccount users can validate that onboarding or transactional emails reach recipients and that reply handling works within the Conversation view.
02Test emails, explained
The test email workflow creates a dummy contact, sends a single email from the Conversation view, and checks that the platform records both the outgoing message and any inbound reply. The process uses the same sending path you would use for real campaigns, whether Mailgun or an SMTP provider powers the delivery.
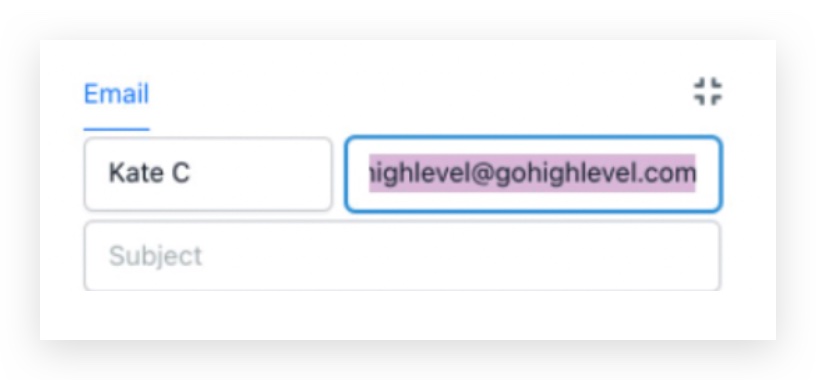
The sender address field in the Conversation tab defaults to the logged in user’s email. You can replace it with a custom address that matches your verified domain, or with the address supplied by your SMTP integration. Mailgun also supports a masked sender that routes replies through a subdomain, keeping tracking intact.
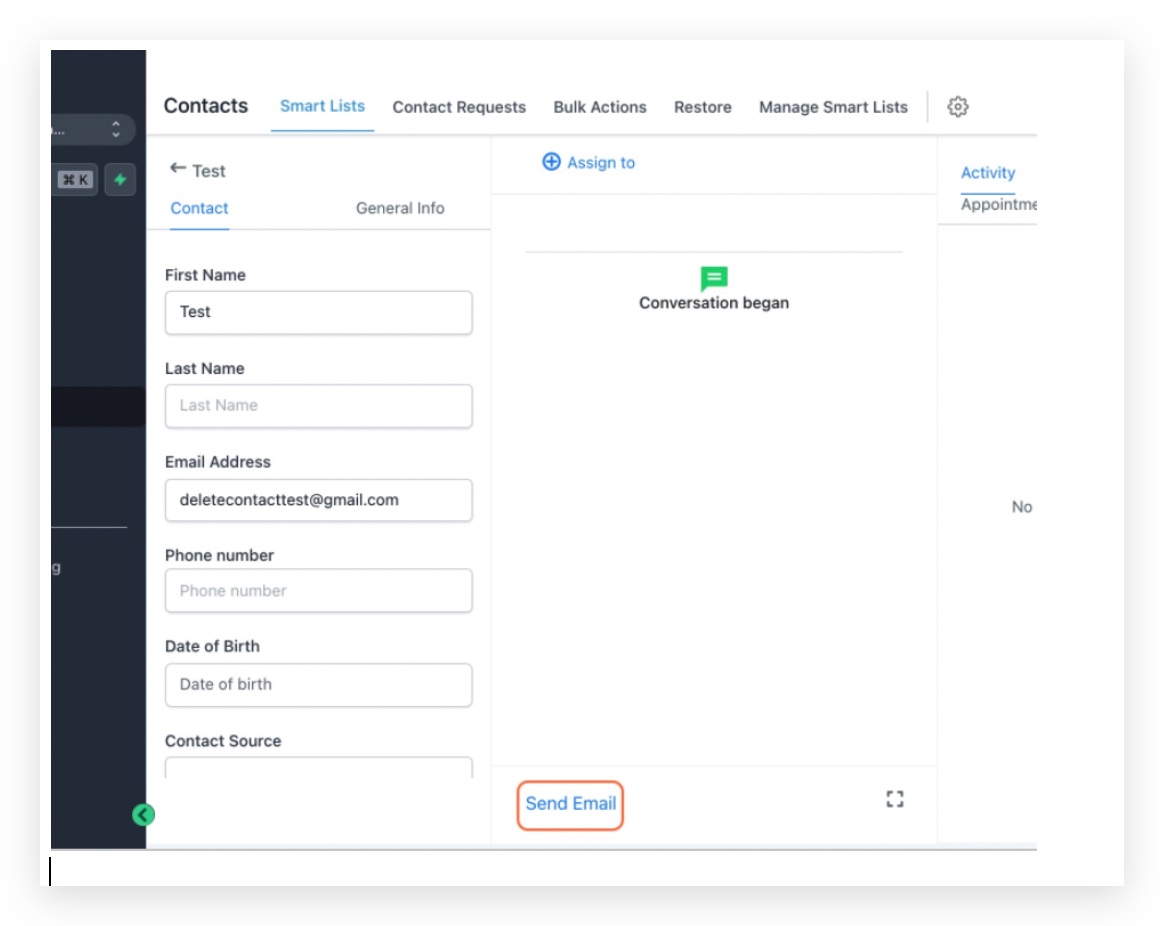
All controls live inside the subaccount you are testing. Contact creation is under Contacts, sending occurs on the Conversation page, and sender configuration is found in the highlighted email field. Error details appear as an icon next to the failed message, pulling information from Mailgun or your SMTP server.
03How businesses use test email
- Digital marketing agency. Create a test contact using a team mailbox, send a test email from a campaign conversation, and verify that the reply appears in the same conversation tab before launching client blasts.
- SaaS startup. Set the sender address to a verified domain address, send a welcome email to a test contact, and confirm that reply handling works for in app support tickets.
- Medical clinic. Configure the SMTP sender alias for the clinic’s Google Workspace, send a test appointment reminder, and ensure the patient’s reply is captured in the patient’s conversation record.
04How to set up and use test email in HighLevel
Create a test contact
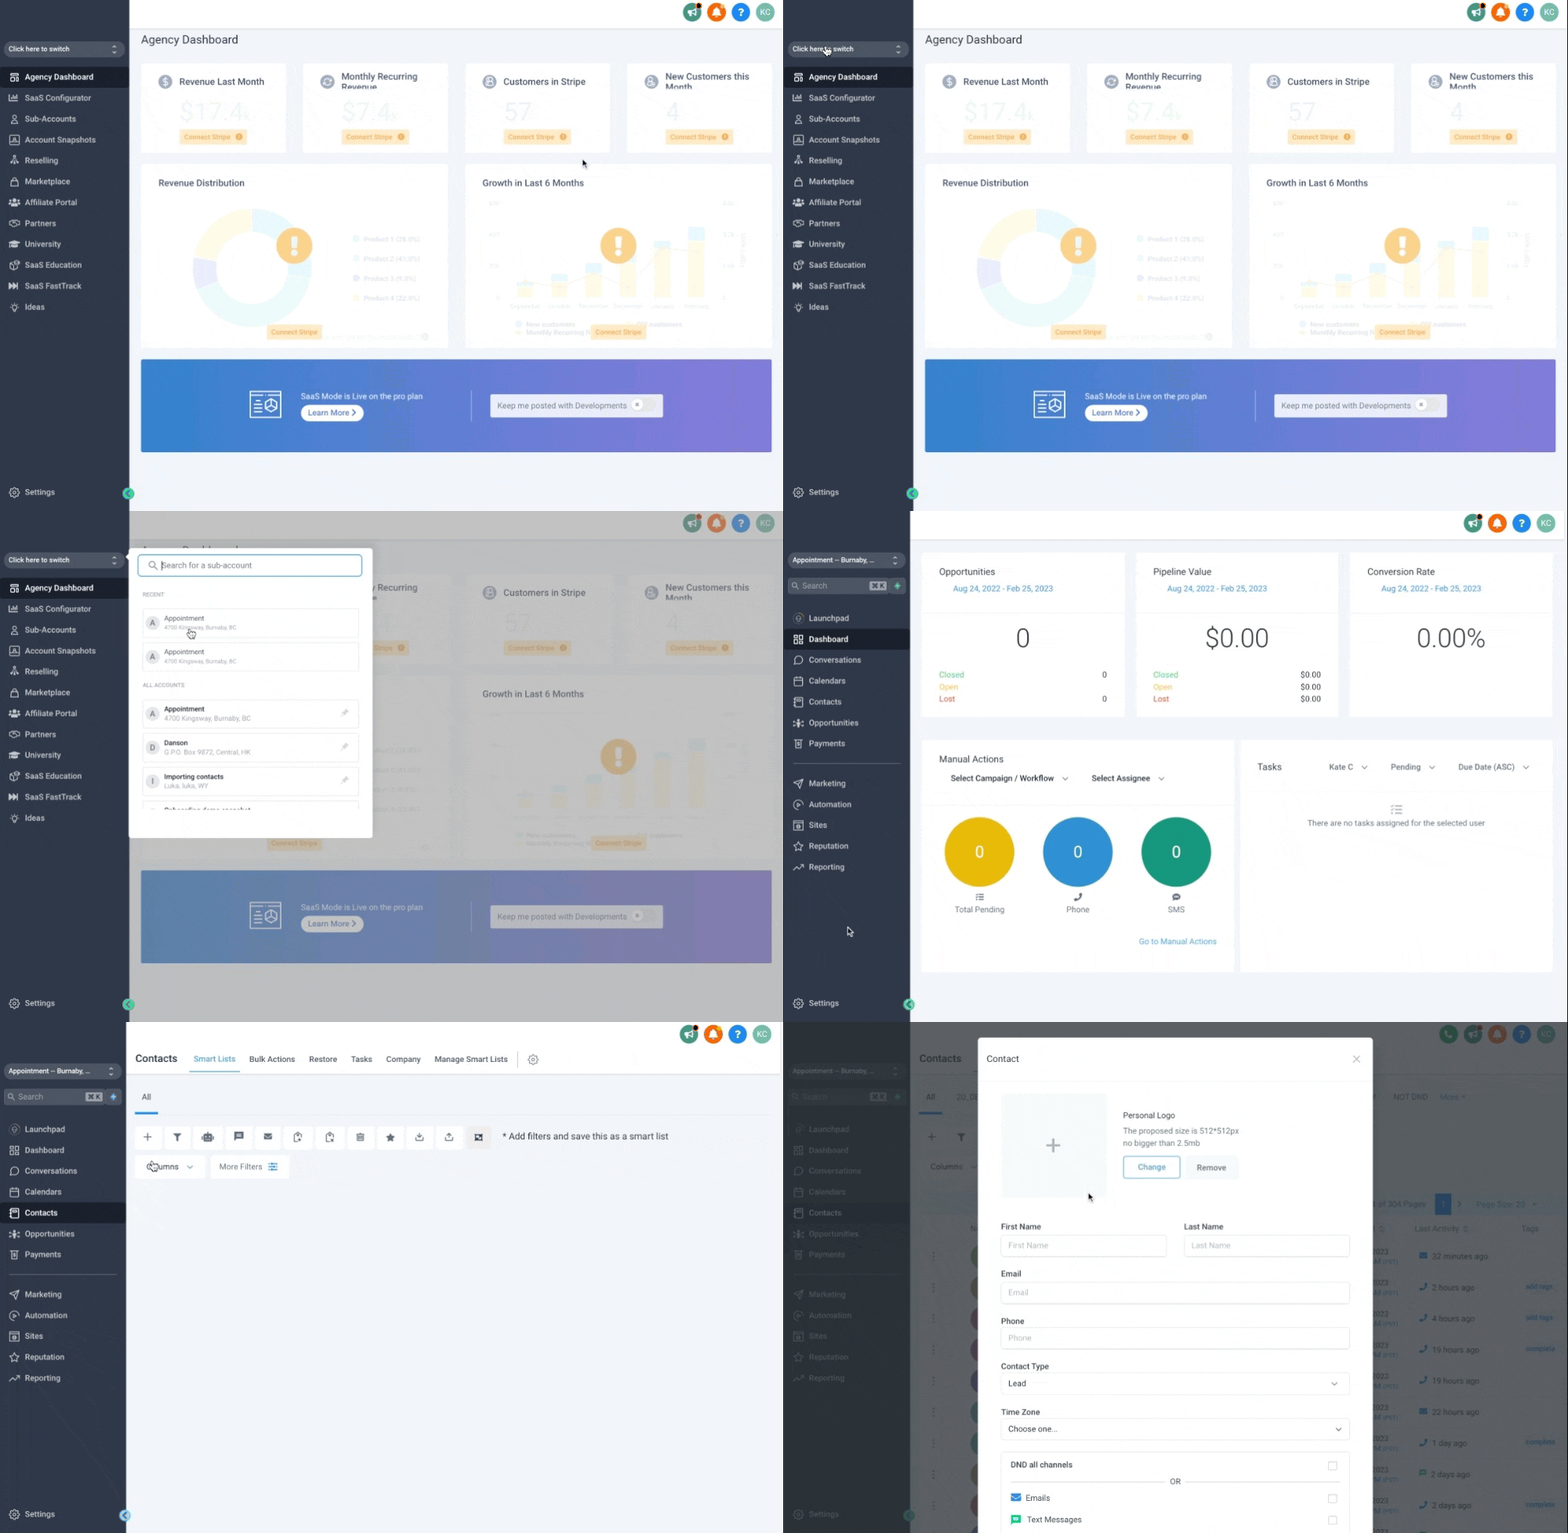
- Switch to agency view by clicking the top left switch link.
- Select the subaccount you intend to test.
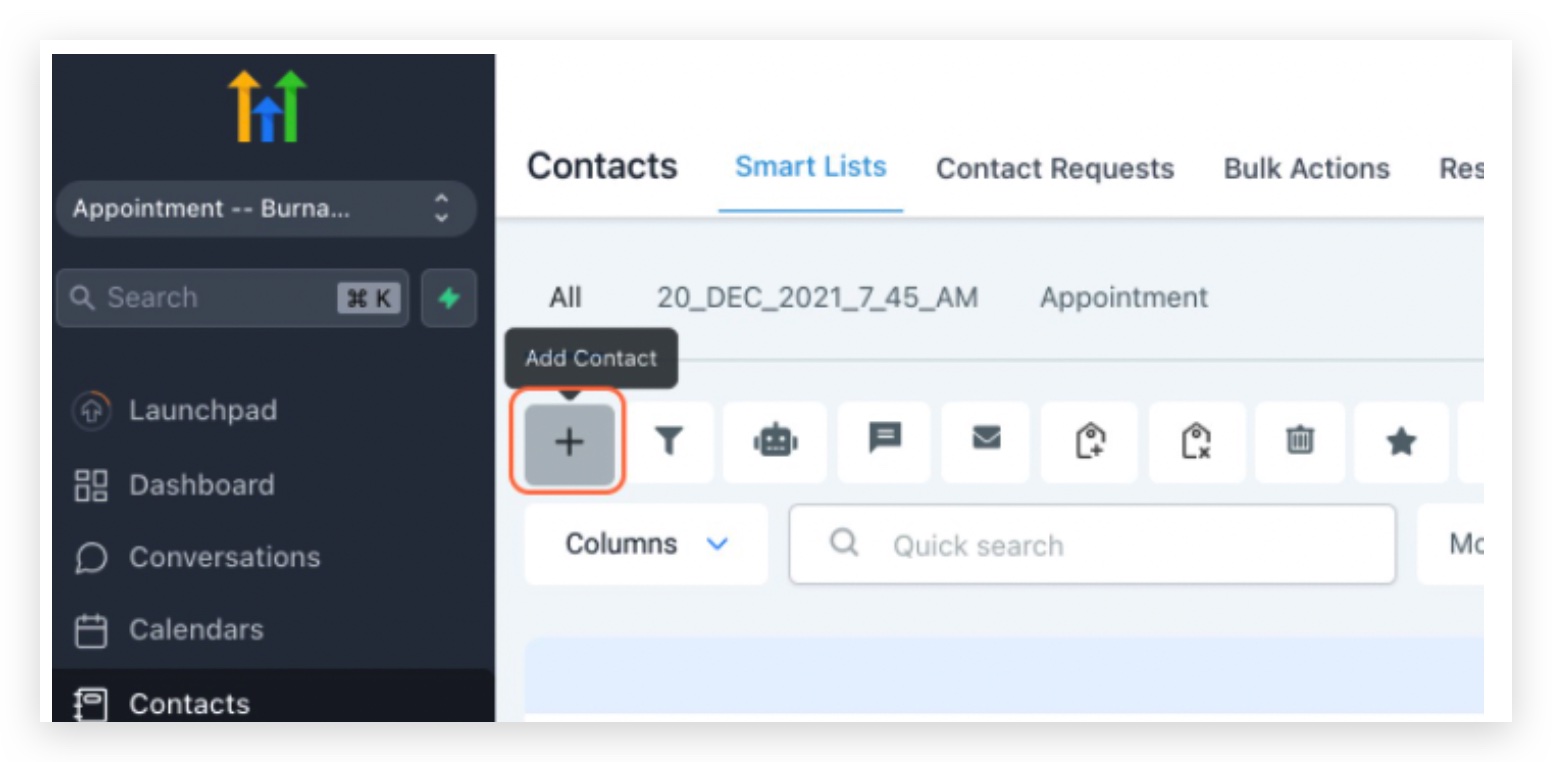
- Open the Contacts section.
- Click the Add Contact button.
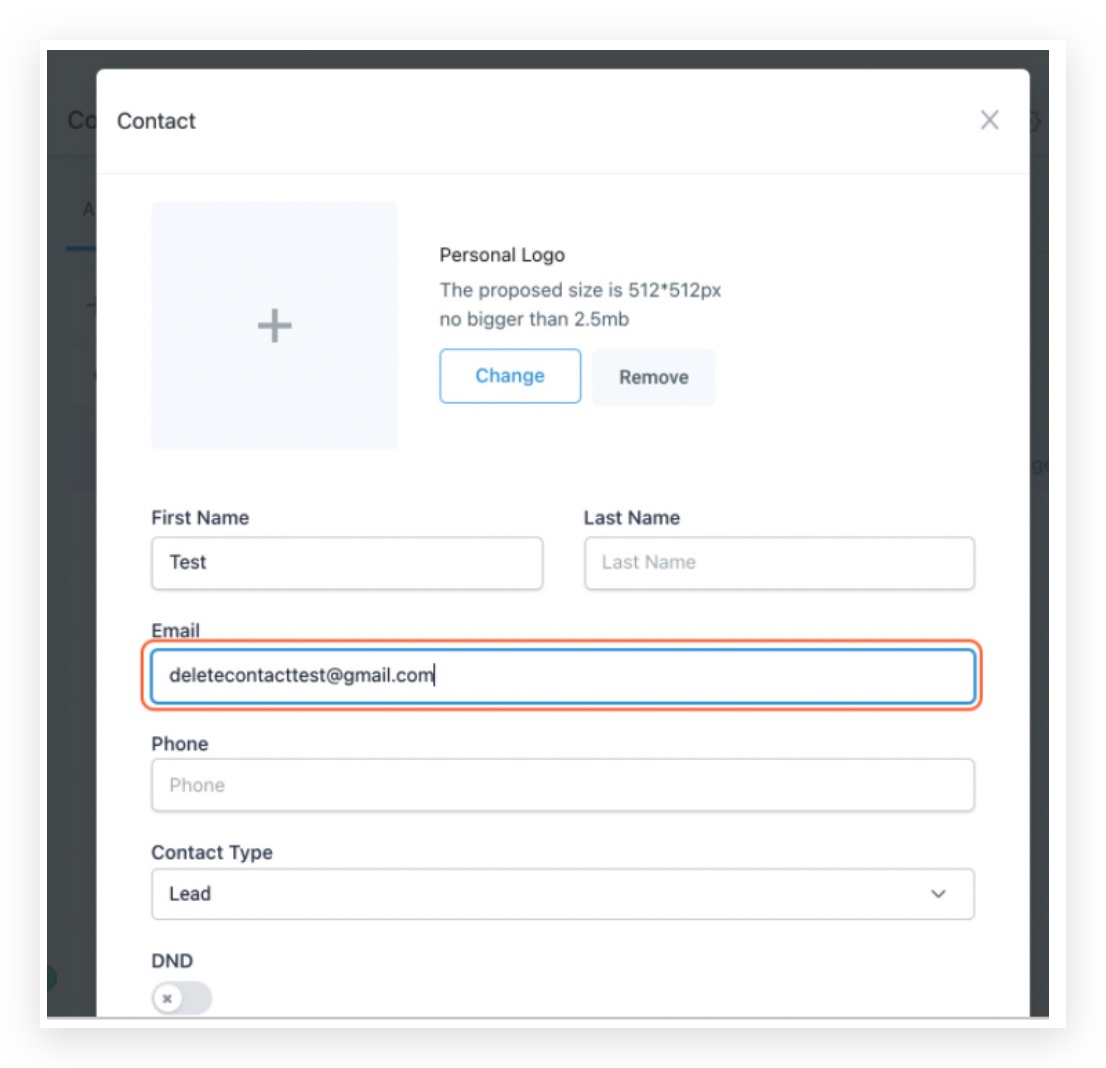
- Enter a first name and a reachable email address, then save.
Configure the sender email for Mailgun
- Enter the desired sender address in the highlighted field, optionally masking it (e.g., testing@gmail.com).
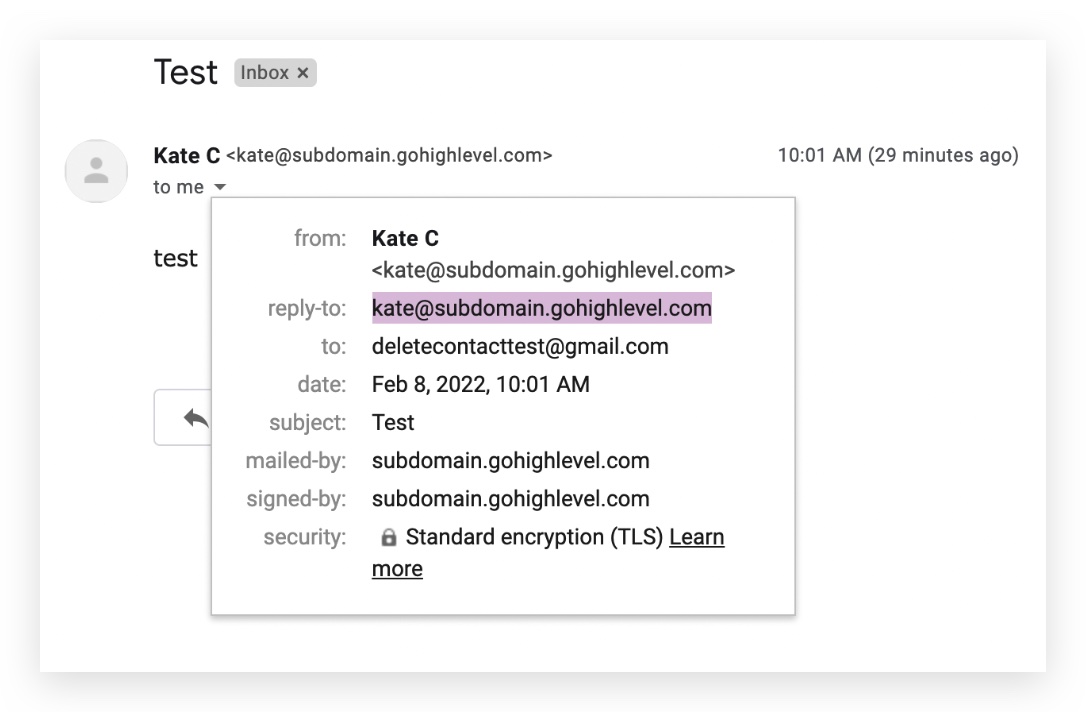
- Note that the reply to address will appear as testing@replies.subdomain.com based on the Mailgun subdomain set under Agency Settings > Email Services > Location Settings.
- Optionally set a sender address that matches the subdomain (e.g., testing@subdomain.com) to improve deliverability and set up cold inbound capture for @replies.subdomain.com addresses.
Configure the sender email for SMTP
- Navigate to Subaccount Settings > Email Services.
- Locate the highlighted SMTP sender address supplied by the integration.
- Copy that address and paste it into the sender field in the Conversation tab.
- If needed, configure an alias or verified sender for Google, Zoho, or SendGrid as described in the SMTP settings.
Troubleshoot email delivery
- Check the recipient’s spam or junk folder for the test email.
- Click the error icon next to the failed message to view the full error message from Mailgun or the SMTP server.
- If the error does not explain the problem, open a support ticket with your SMTP provider for delivery status details.
- When using Mailgun, review the Mailgun logs and consult the email not sending help documentation.
Handle missing replies
- Open the test email and send a reply from the recipient’s inbox.
- Return to the Conversation tab and verify that the reply appears.
- If the reply is absent, consult the “When email replies are not coming back to the Conversation” guide.
05What it looks like in HighLevel
06Settings that matter
- Sender's email address. Controls which email appears as the From address for the test message and determines the domain used for reply to routing.
- Location Settings (Mailgun subdomain). Defines the subdomain that Mailgun uses for reply tracking and inbound capture.
07If something goes wrong
- Test email not received. Check the spam folder, view the error icon for detailed failure information, contact your SMTP provider if needed, and review Mailgun logs when applicable.
08How it connects to the rest of HighLevel
- Set up a dedicated sending domain for Mailgun Dedicated sending domain
- Learn how to check Mailgun logs for a specific email Mailgun log check
- Review email warm up and DMARC best practices Email warm up guide
Michael's take

When you need to be sure an email campaign will land in inboxes, sending a test email helps verify deliverability and reply tracking.
If you’re only sending occasional one off messages, the effort of setting up a test contact and checking logs may outweigh the benefit. In those cases, a quick send from your personal address might be enough, but for any bulk or automated flow you’ll want the extra confidence a test provides.