
01Who this is for
- Agency owners can limit Eliza configuration to specific team members, keeping access secure.
- Customer support managers can prevent certain clients from reaching Eliza by applying a bypass tag.
- Marketing automation specialists can tag only qualified leads for Eliza handling, improving workflow precision.
02Eliza agent platform settings, explained
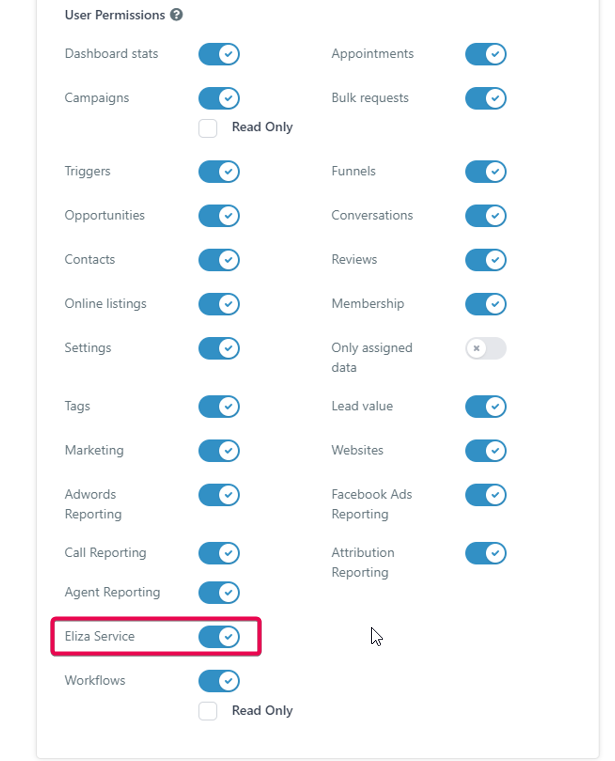
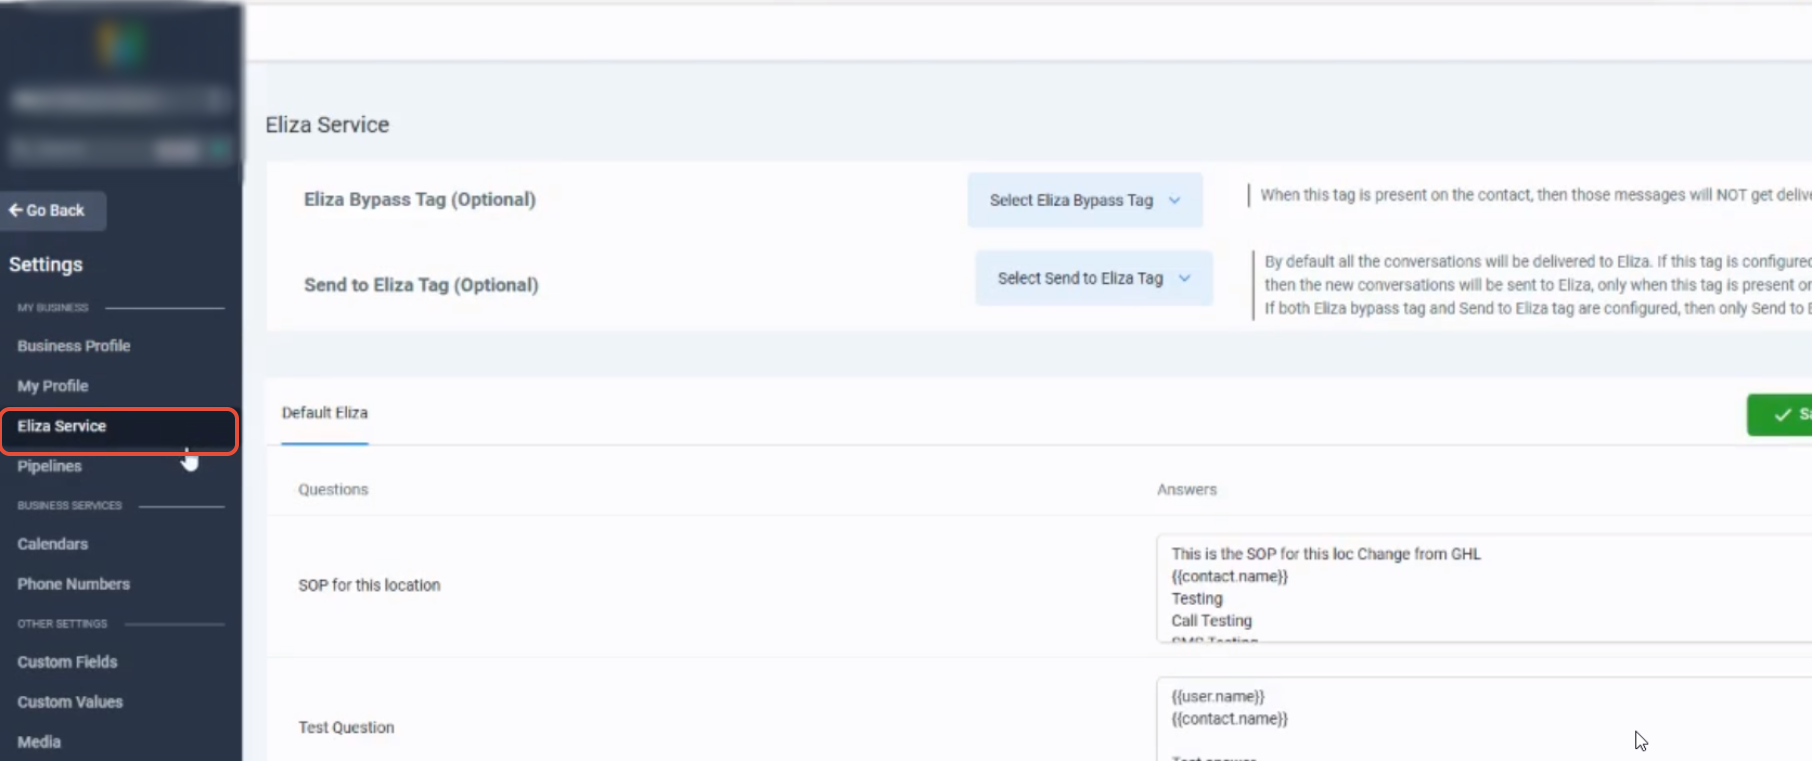
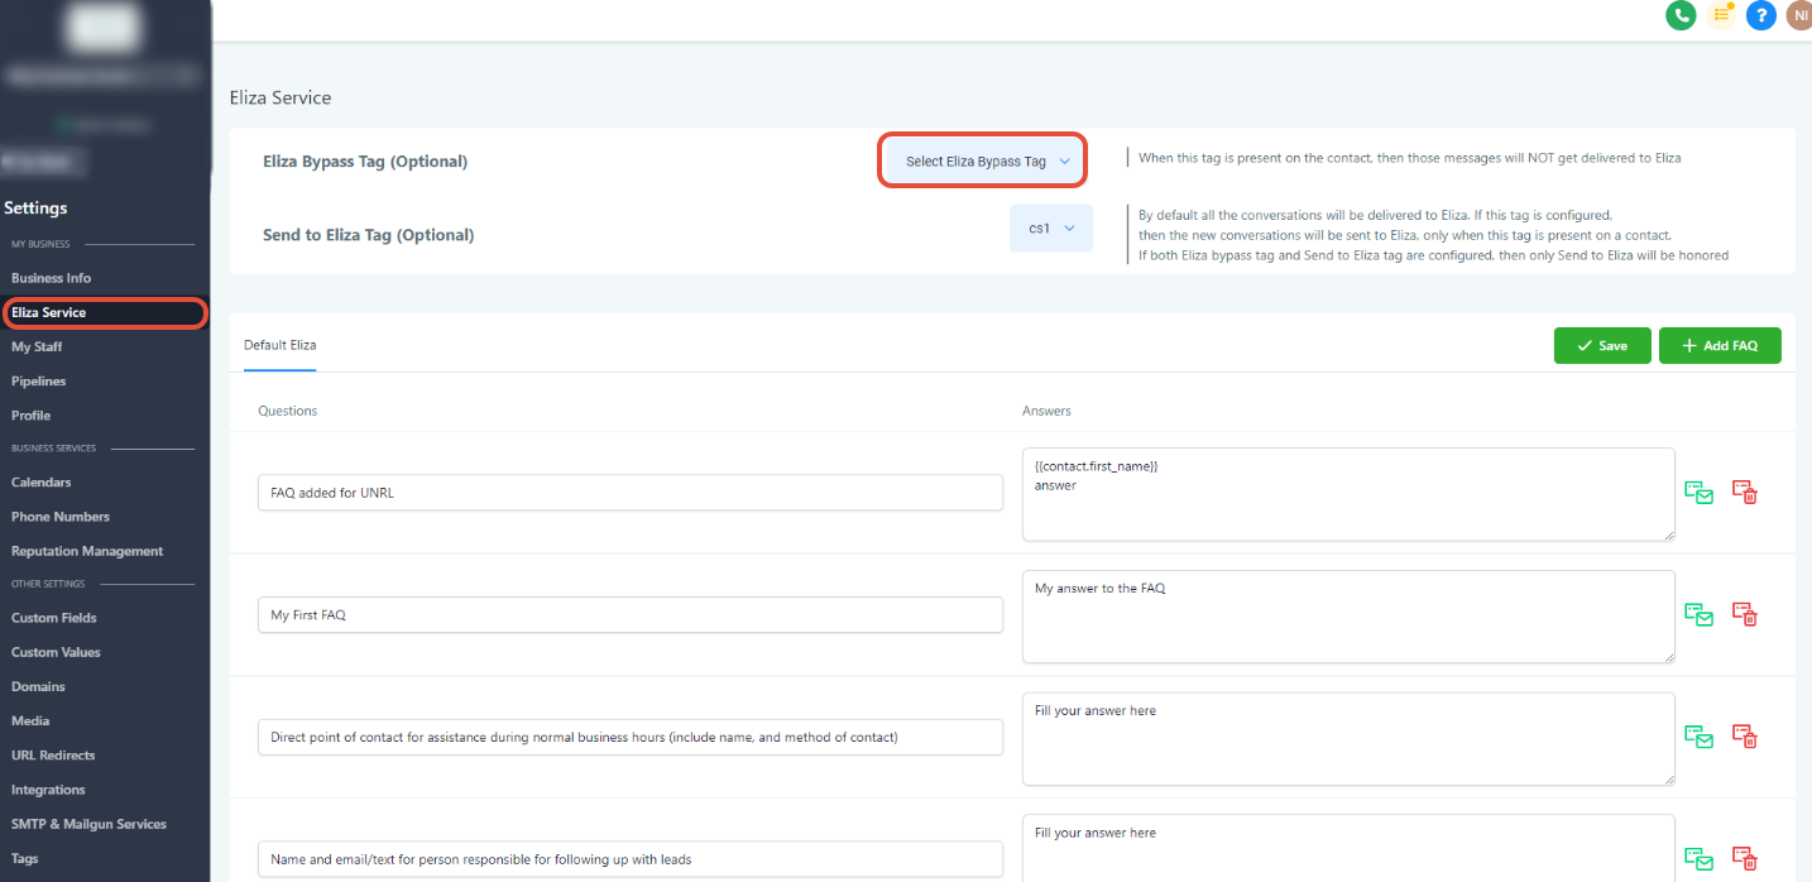
The settings reside in the subaccount’s Settings section under Eliza Service. Here you can turn on the Eliza Service permission for individual users, which unlocks the Eliza configuration options for those users. The same area also contains fields for two contact tags, the Eliza Bypass Tag and the Send to Eliza Tag, that determine how inbound messages are routed.
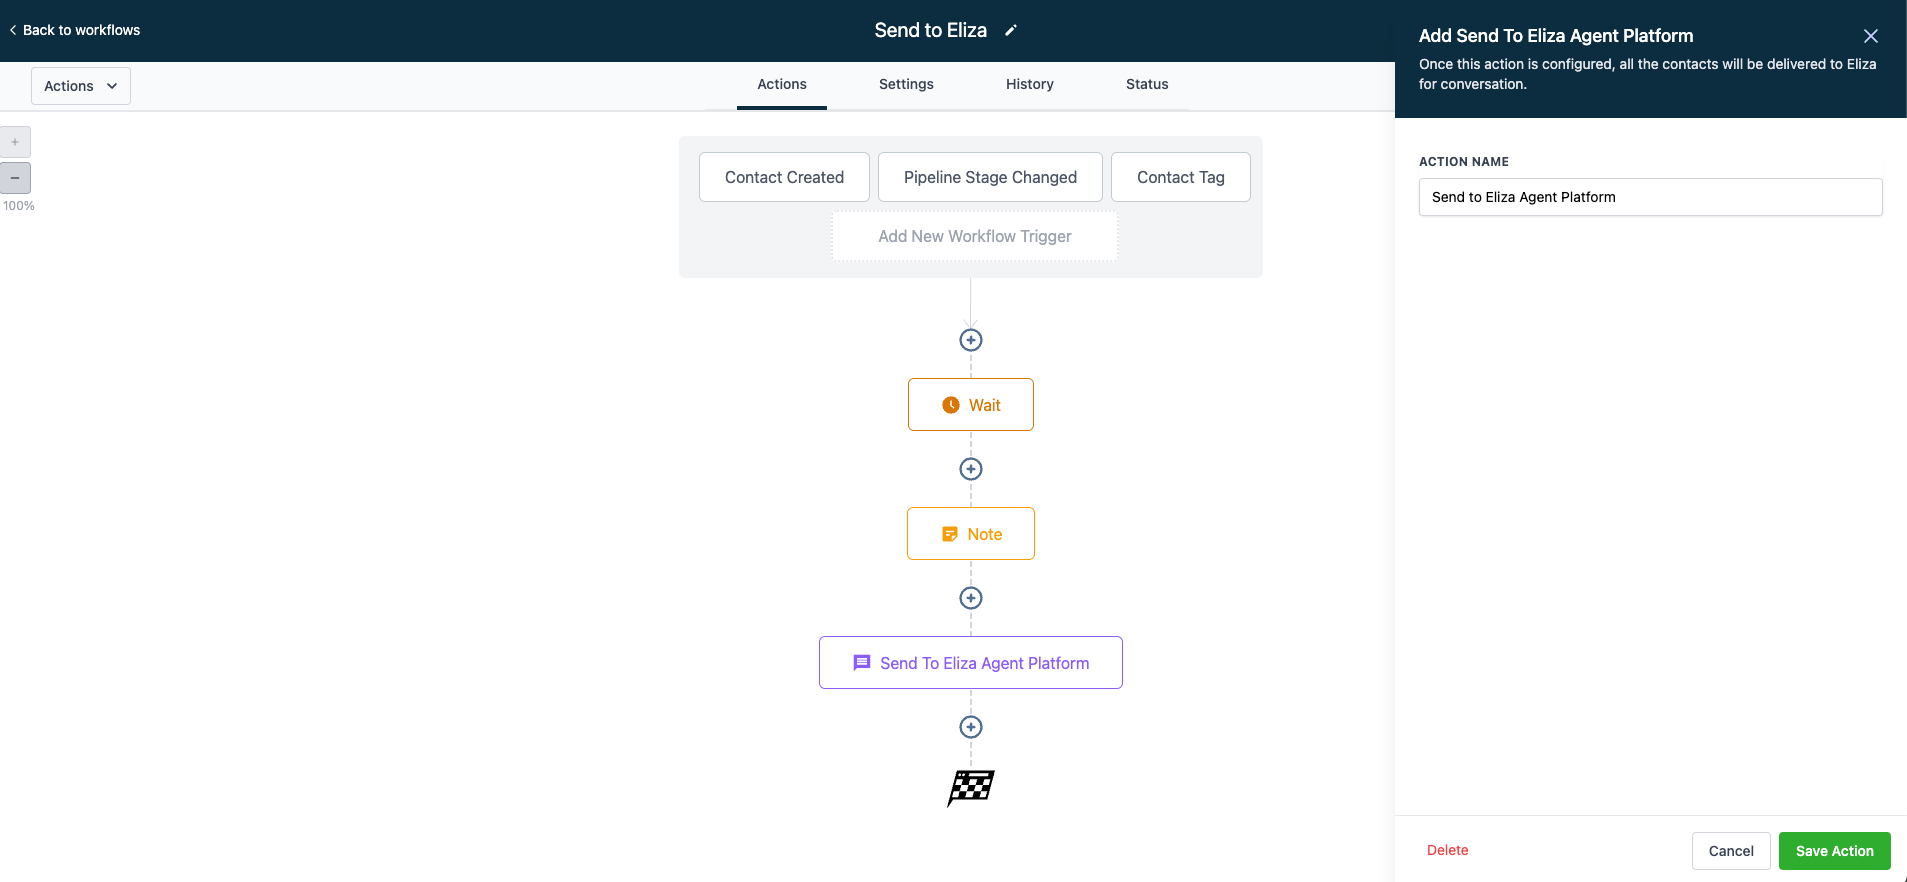
When a new inbound message arrives, HighLevel checks the contact’s tags. If the Bypass tag is present, the conversation is not forwarded to the Eliza Agent Platform. If the Send to Eliza tag is present, the contact is queued for Eliza once the next inbound message is received. Alternatively, a workflow can use the Send to Eliza Agent Platform action to push a contact to Eliza immediately, without waiting for a new inbound message.
03How businesses use Eliza agent platform settings
- Digital marketing agency. The agency enables Eliza Service permission for senior strategists, sets a Bypass tag for high value clients who need human handling, and applies a Send to Eliza tag to leads that meet qualification criteria. This ensures only targeted leads reach the AI assistant.
- Tech support firm. Support supervisors grant Eliza Service access to the bot manager, configure a Bypass tag for premium accounts, and use the workflow action to automatically send critical tickets to Eliza as soon as they enter the queue.
- E learning platform. The platform’s admin creates a Send to Eliza tag for students who ask enrollment questions, then adds that tag via a workflow when a student meets the enrollment trigger, routing the conversation to the AI tutor without delay.
04Before you start
- The subaccount must already be connected to the Eliza Agent Platform.
- The user must have access to that subaccount in HighLevel.
- The user’s email address must be set up for the relevant location in Eliza.
- Contact tags for bypass and Send to Eliza must be created or identified before configuring routing.
05How to set up and use Eliza agent platform settings in HighLevel
Enable Eliza Service access
- Switch to Agency View.
- Click Settings.
- Select Team.
- Find the user you want to edit and open their settings.
- Open Roles & Permissions.
- Locate the Eliza Service permission.
- Turn the permission on.
- Save the changes for the user.
- Open the subaccount, then go to Settings > Eliza Service to verify access.
Configure the Eliza Bypass Tag
- Open the subaccount where routing will be set.
- Click Settings.
- Select Eliza Service.
- Find the Eliza Bypass Tag field.
- Choose the tag you created for bypassing.
- Save the configuration.
Configure the Send to Eliza Tag
- Open the appropriate subaccount.
- Click Settings.
- Select Eliza Service.
- Locate the Send to Eliza Tag option.
- Pick the tag you want to use for routing.
- Save the setting.
- Apply the chosen tag to contacts that should be sent to Eliza.
Send contacts to Eliza using a workflow
- Open the subaccount that holds the workflow.
- Click Automation.
- Select Workflows.
- Open an existing workflow or create a new one.
- Set the trigger that decides which contacts enter the workflow.
- Click the plus icon where you want to add an action.
- Open the list of workflow actions.
- Find the Eliza Actions section.
- Choose Send to Eliza Agent Platform.
- Configure any required parameters for the action.
- Save the action.
- Save or publish the workflow.
06What it looks like in HighLevel
07Settings that matter
- Eliza Service permission. Controls whether a user can see and edit Eliza configuration options inside the subaccount.
- Eliza Bypass Tag. Determines which contacts are excluded from having inbound conversations forwarded to the Eliza Agent Platform.
- Send to Eliza Tag. Specifies contacts that should be routed to Eliza when they receive a new inbound message.
08Things to know before you rely on it
- The Send to Eliza tag only routes a contact after a new inbound message arrives; it does not trigger immediate routing.
- The workflow action sends a contact to Eliza as soon as the step runs, regardless of tags.
- If both Bypass and Send to Eliza tags are present on a contact, HighLevel gives priority to the Send to Eliza tag.
- All routing settings operate only for subaccounts that have already been added to the Eliza Agent Platform.
09If something goes wrong
- Eliza Service does not appear in Settings. Verify the subaccount is linked to Eliza, ensure the user can access the subaccount, confirm the user’s email is set for the location in Eliza, and check that Eliza Service permission is enabled for the user.
- A tagged contact is not appearing in Eliza. Remember that the Send to Eliza tag requires the contact to receive a new inbound message before it is forwarded; use the workflow action for immediate routing.
- A contact is still being sent to Eliza despite a Bypass tag. Check that the Bypass tag is actually applied to the contact and verify whether the contact also meets the Send to Eliza tag criteria, which takes precedence.
10How it connects to the rest of HighLevel
- Read the Eliza Agent Platform introduction and FAQs for an overview of the service. Eliza Agent Platform: Introduction
- Learn how to set locations, teams, and webhooks for the Eliza platform. Configure Eliza Platform
- View pricing options and start a trial if you need access to the Eliza platform. HighLevel pricing
Michael's take

Why would I spend time setting up Eliza routing in HighLevel? Because agencies that handle many client conversations need precise control over who sees the Eliza configuration and which messages actually get handed off. Without these settings, every inbound message could end up in Eliza, creating noise and extra work.
If I were an agency owner, I would first enable the Eliza Service permission for the team members who need to adjust routing, then create clear bypass and send tags. After that I’d test a simple workflow that uses the Send to Eliza Agent Platform action to confirm contacts move when I expect them to.