
01Who this is for
- Team members who need a quick way to view specific subsets of custom object records.
- Managers who share filtered lists with collaborators to coordinate daily tasks.
- Administrators who control access and permissions for SmartLists across the account.
02SmartLists for Custom Objects, explained
SmartLists are saved configurations of filters, column selections, and sorting applied to a custom object. They appear as named lists that can be opened directly from the Manage Smart Lists screen. Each list preserves the view settings, so users see the same data layout every time they open it.
The feature lives inside the Custom Objects area. After selecting a custom object such as Jobs, you can build a SmartList using Advanced Filters, choose which columns to display, set the sort order, and then save the configuration with a name. Once saved, the list can be edited, duplicated, exported, deleted, or shared with specific users and permission levels.
03How businesses use smartLists for Custom Objects
- Filtering records. Users apply Advanced Filters to show only the records that meet certain criteria and save that view as a SmartList.
- Sharing data. A SmartList can be shared with teammates, assigning view only or edit permissions so everyone works from the same filtered dataset.
- Exporting information. After creating a SmartList, users can export the list data to a file for external analysis or reporting.
04Before you start
- A custom object (for example, Jobs) must already exist in the account.
05How to set up and use smartLists for Custom Objects in HighLevel
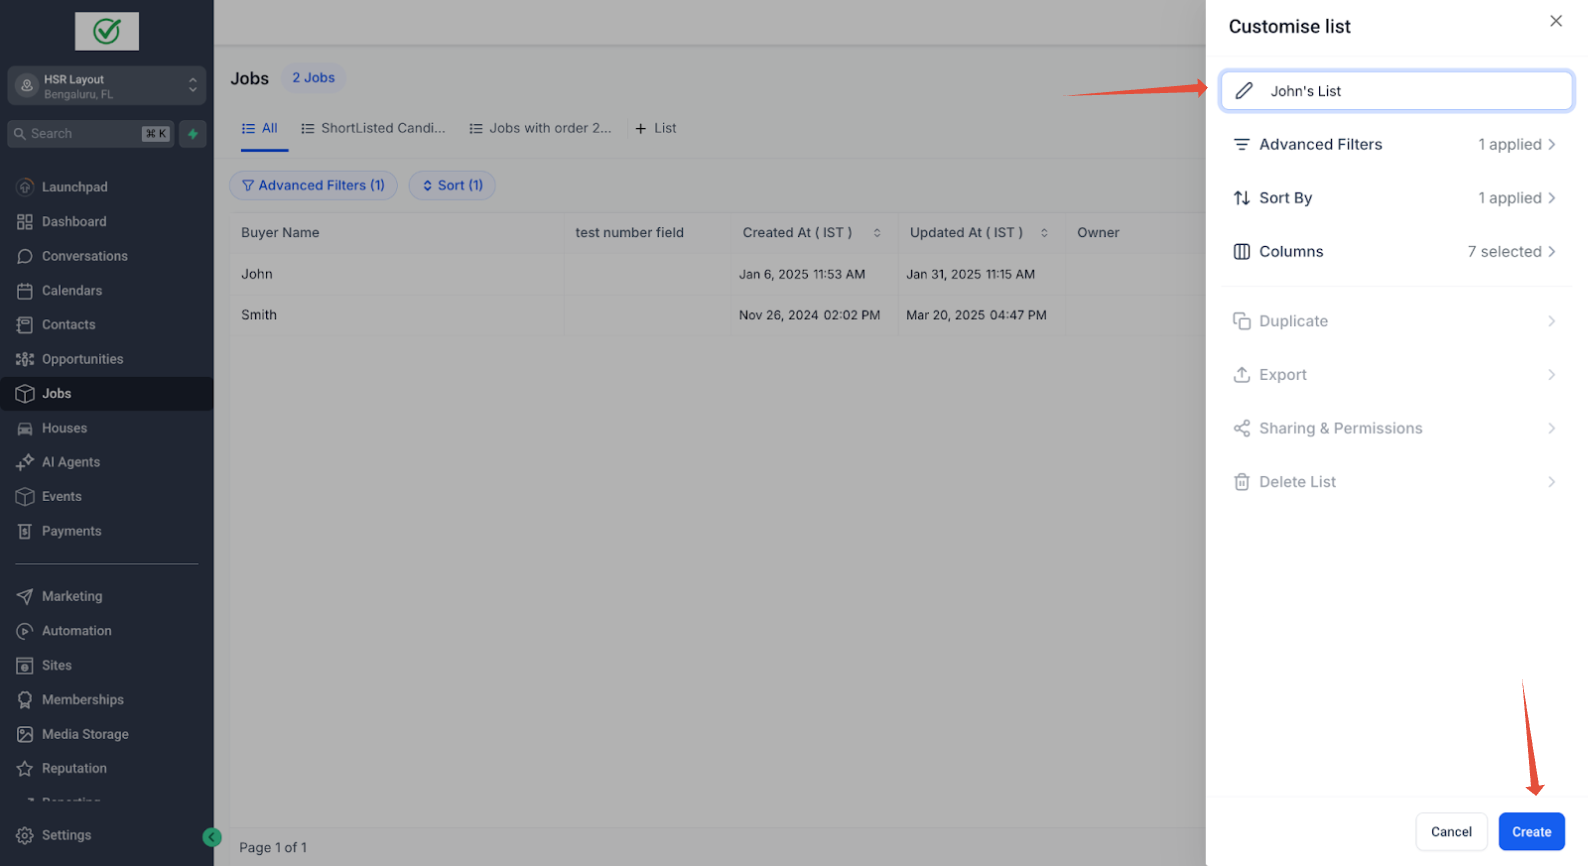
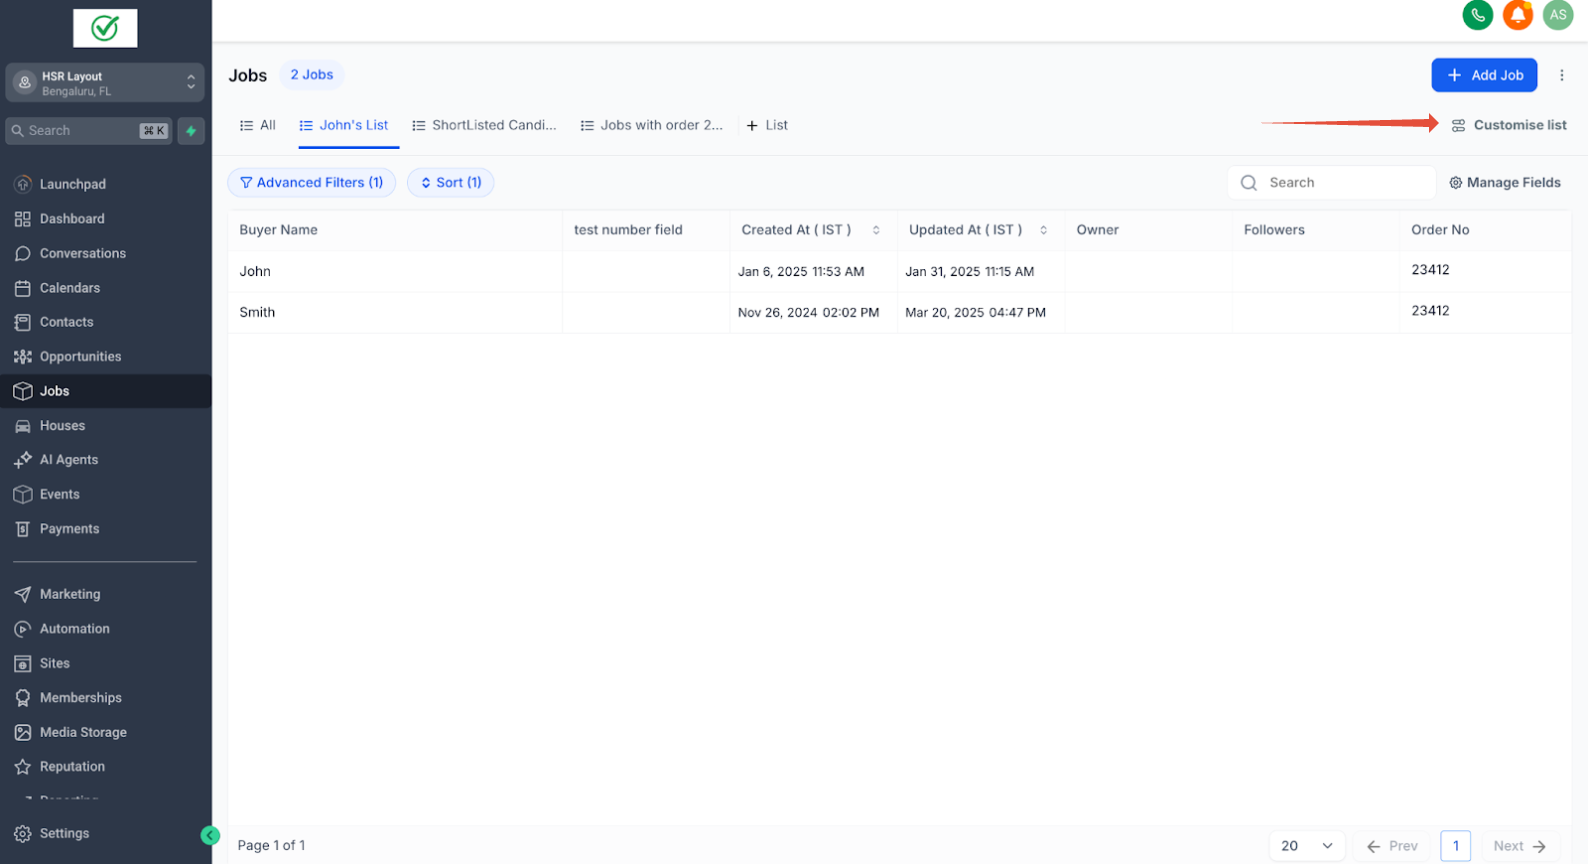
Create a SmartList
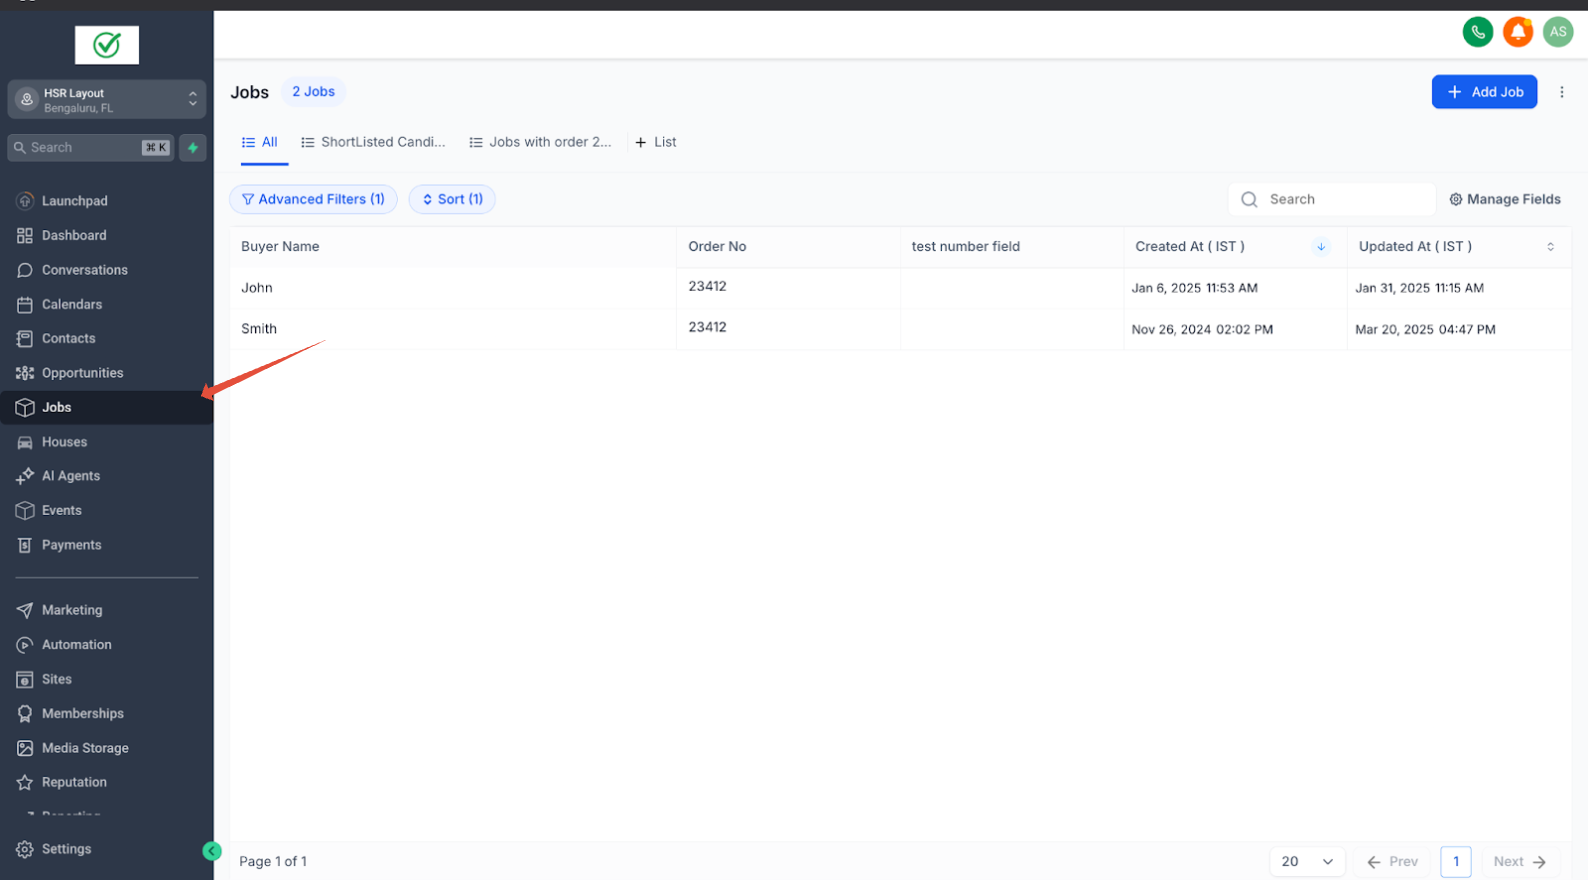
- Open the desired custom object, such as Jobs.
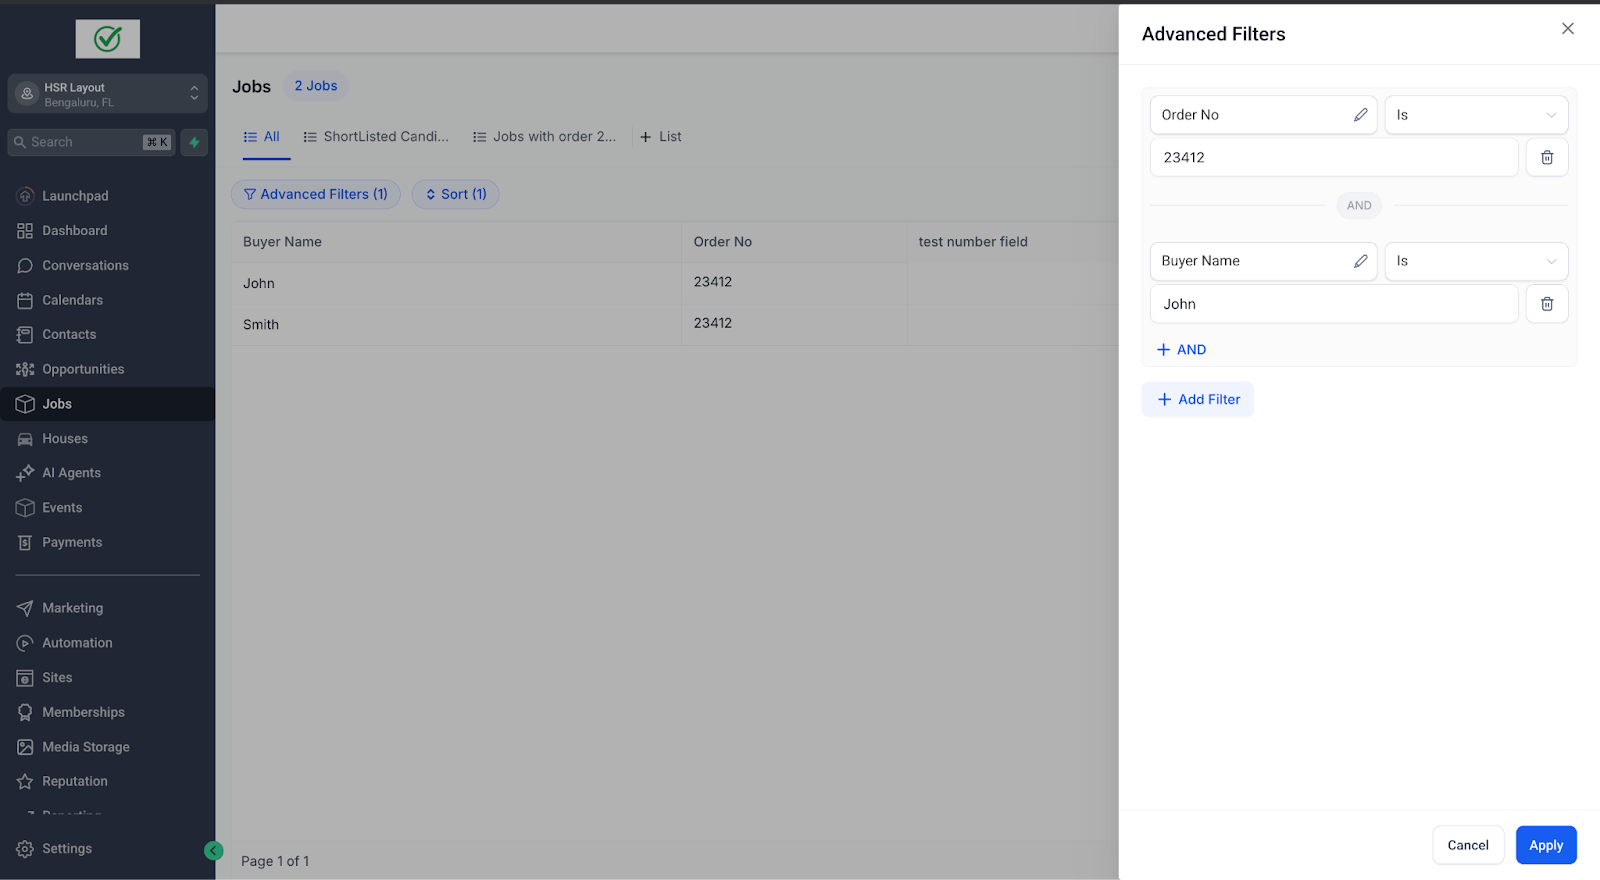
- Open Advanced Filters and pick the filter criteria you need.
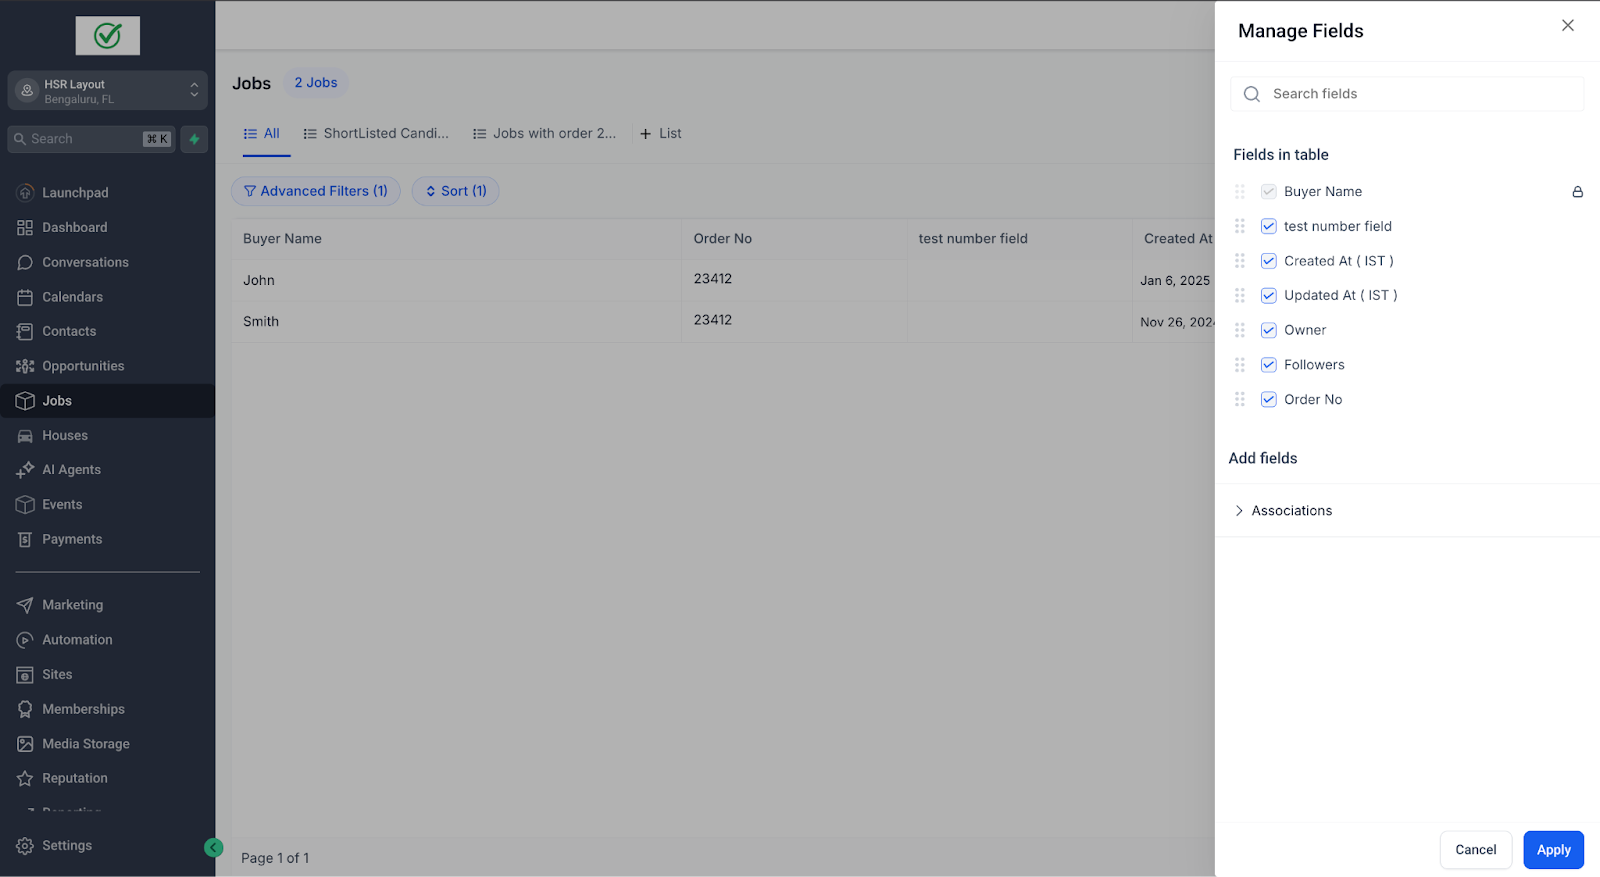
- Select the columns to display and set the desired sort order.
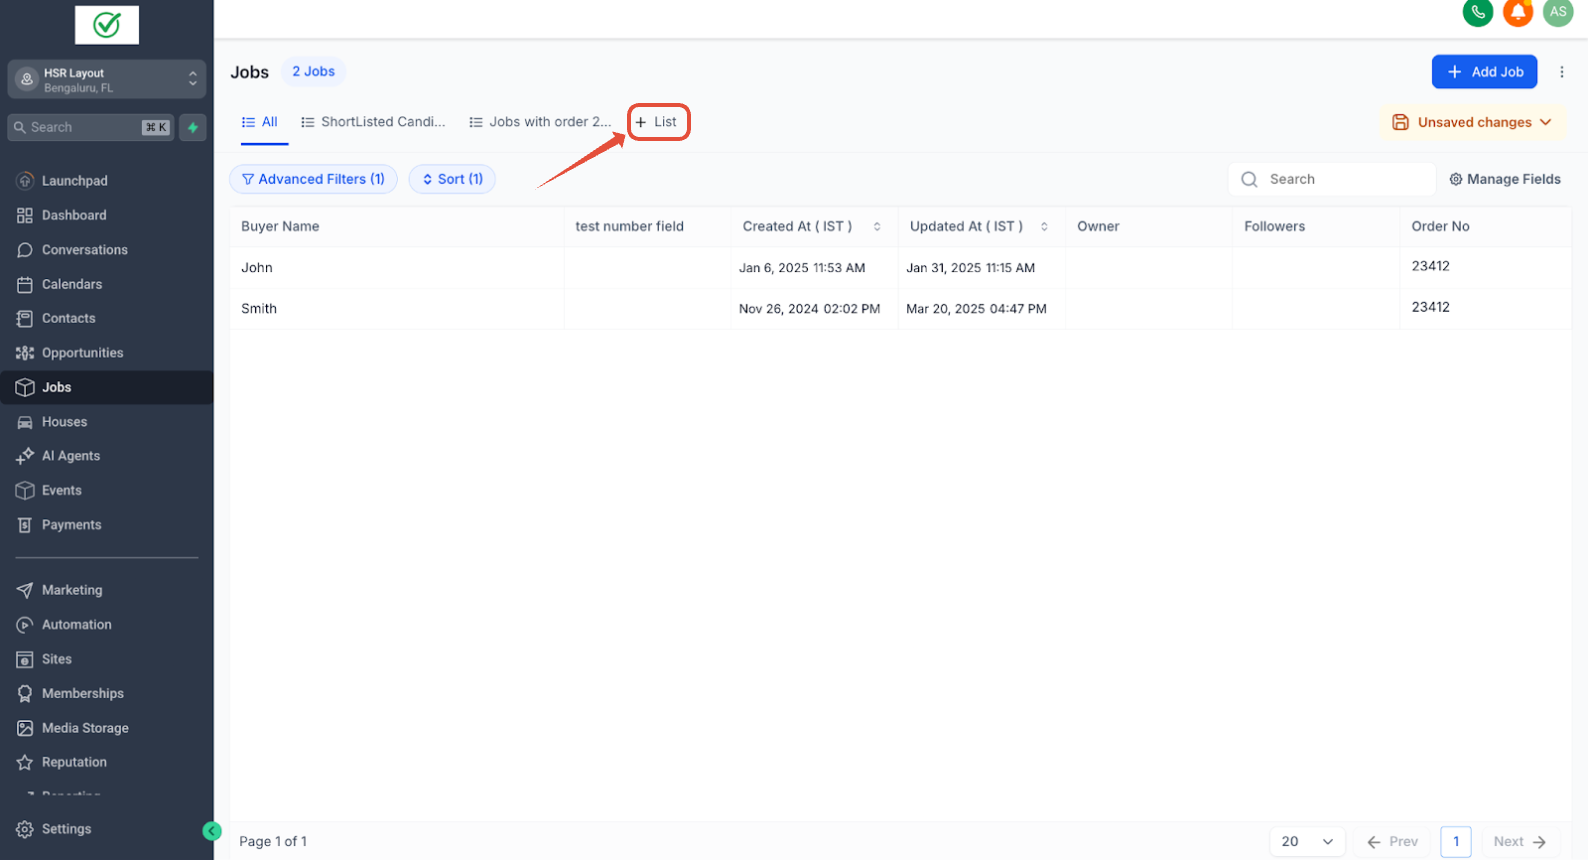
- Click the ‘+ List’ icon to start a new SmartList.
- Enter a name for the list, review the settings, and confirm creation.
Manage a SmartList
- Go to Manage Smart Lists and select the list you want to work with.
- Click Customize List to modify filters, columns, or sorting.
- Use the Duplicate option to copy the list and give the copy a new name.
- Choose Export to download the list data or Delete to remove the list.
Quick SmartList creation
- Apply any Advanced Filter directly on the custom object view.
- Click the Unsaved Changes button at the top right of the screen.
- Select Save as New SmartList and confirm the name.
Search across SmartLists
- Click the ••• menu and choose Manage Smart Lists.
- Enter a keyword in the Search placeholder to locate the desired SmartList.
06What it looks like in HighLevel
07Settings that matter
- Advanced Filters. Controls which records appear in the SmartList based on defined criteria.
- Columns. Determines which fields are shown in the SmartList view.
- Sort Order. Sets the sequence in which records are displayed within the SmartList.
- Share. Enables the list owner to give other users access with view or edit rights.
- Permissions. Specifies whether shared users can only view the SmartList or also edit its configuration.
08Things to know before you rely on it
- The article does not list any numeric limits or usage caps for SmartLists.
09How it connects to the rest of HighLevel
- Getting started with Custom Objects Custom Objects intro
- Create, edit, delete and automate Custom Objects Custom Objects basics
- HighLevel pricing and plans Pricing
Michael's take

When I need the same filtered view of a custom object repeatedly, I find SmartLists convenient because they let me reuse the configuration without rebuilding the filters each time.
If I only need occasional ad hoc filters, I sometimes prefer using the standard filter options instead of creating a SmartList.