
01Who this is for
- Founders who want to reduce bounce rates before launching email campaigns, because early validation saves time.
- Marketing teams that import large lead lists and need a single workflow to both add contacts and verify their emails.
- Small business owners managing newsletters who prefer a built in method to spot invalid addresses without extra tools.
02Email verification during contact import, explained
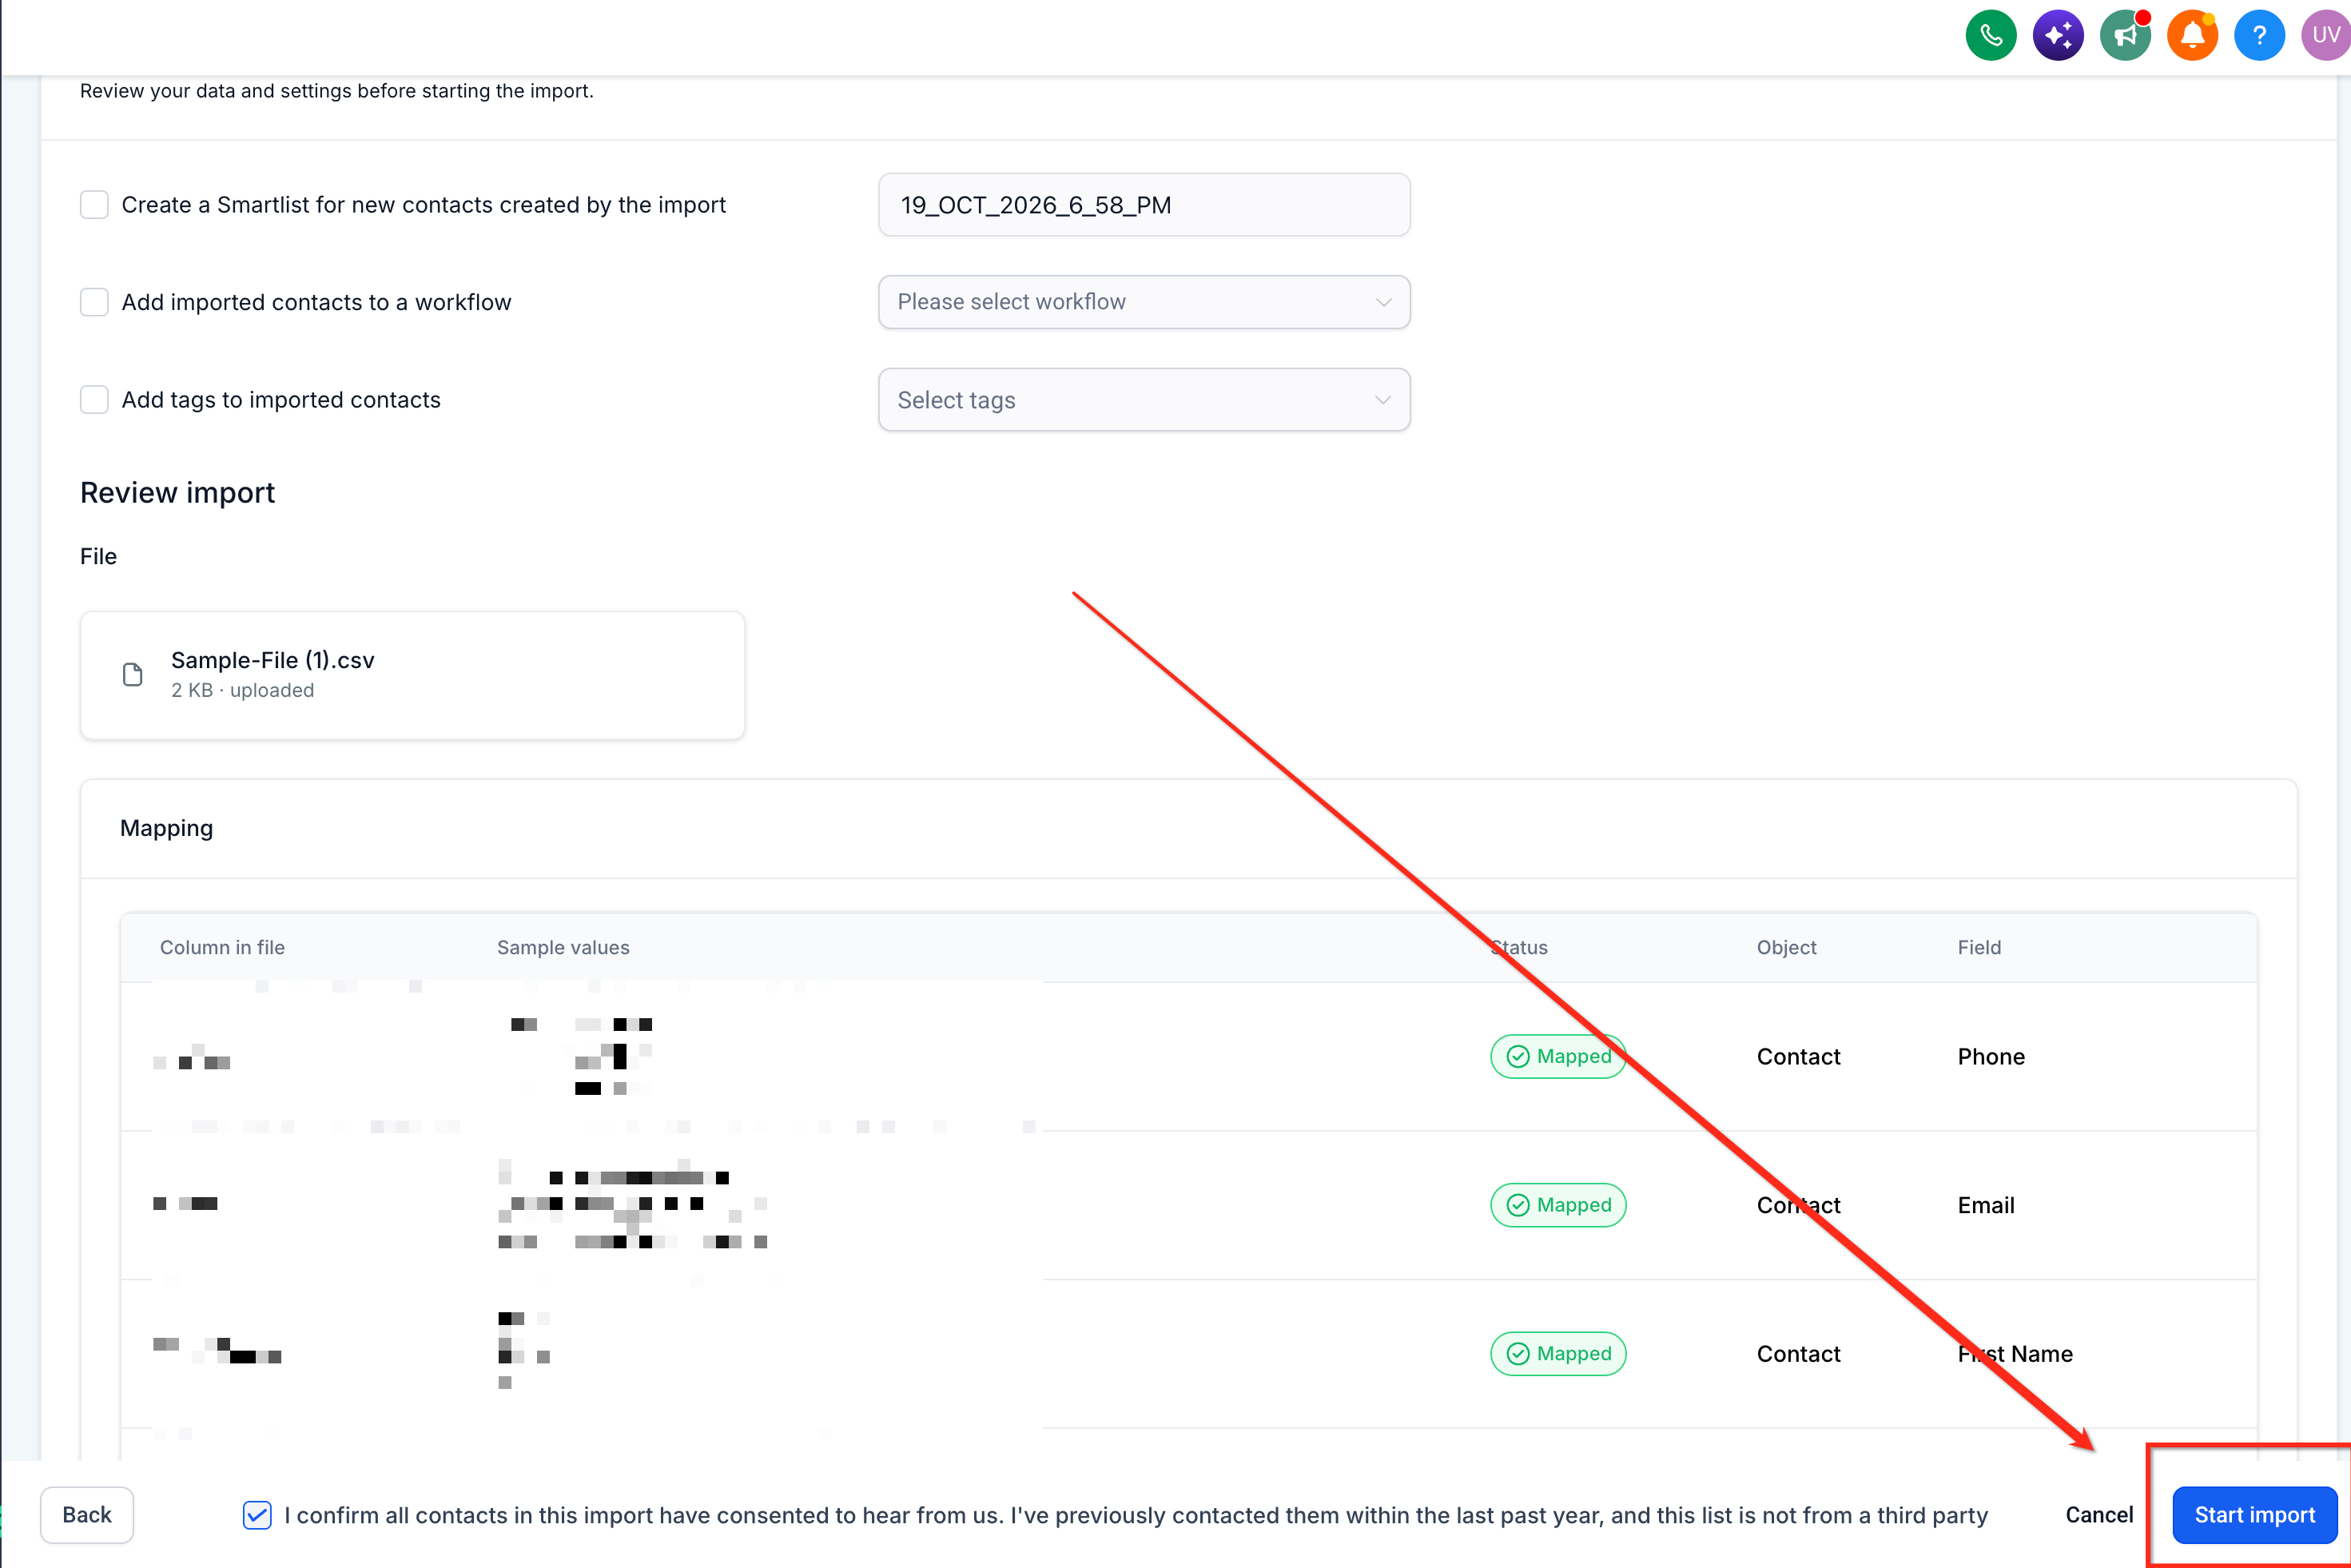
The feature inserts an optional checkbox on the last step of the existing contact import wizard. When selected, HighLevel runs an email verification service as part of the same bulk import job. The verification runs in the background and does not require a separate action after the import finishes.
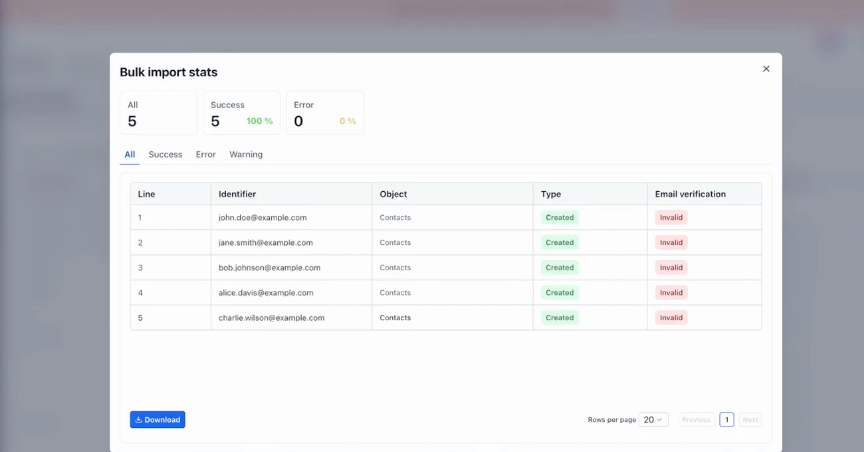
Progress can be followed in the Bulk Actions area under Contacts. Each job shows a status of Processing while the check is running and changes to Completed when the verification stage ends. The interface also offers standard Bulk Actions tools such as filtering, statistics, and error log downloads, though verification specific reports may vary.
03How businesses use email verification during contact import
- Real estate agency. The agency uploads a CSV of new leads, checks the email verification box on the final import screen, and then watches the job in Bulk Actions until it reaches Completed. This ensures the lead list contains only addresses that pass the platform’s validation before any drip campaigns are scheduled.
- Dental practice. When adding patient contact details from an external system, the practice selects the verification option during import. After starting the import, staff go to Contacts > Bulk Actions to confirm the job status, allowing them to address any invalid emails before sending appointment reminders.
- Ecommerce startup. The startup imports a bulk list of newsletter subscribers, enables the email verification checkbox, and monitors the operation in Bulk Actions. By confirming the Completed status, they know the verification step has run, helping maintain a higher sender reputation for future promotional emails.
04Before you start
- A CSV file containing the contacts to be imported must be ready.
- The CSV must include a column with email addresses that can be mapped to the Email field.
- You need to be logged into a HighLevel subaccount with access to the Contacts section.
05How to set up and use email verification during contact import in HighLevel
Enable email verification during contact import
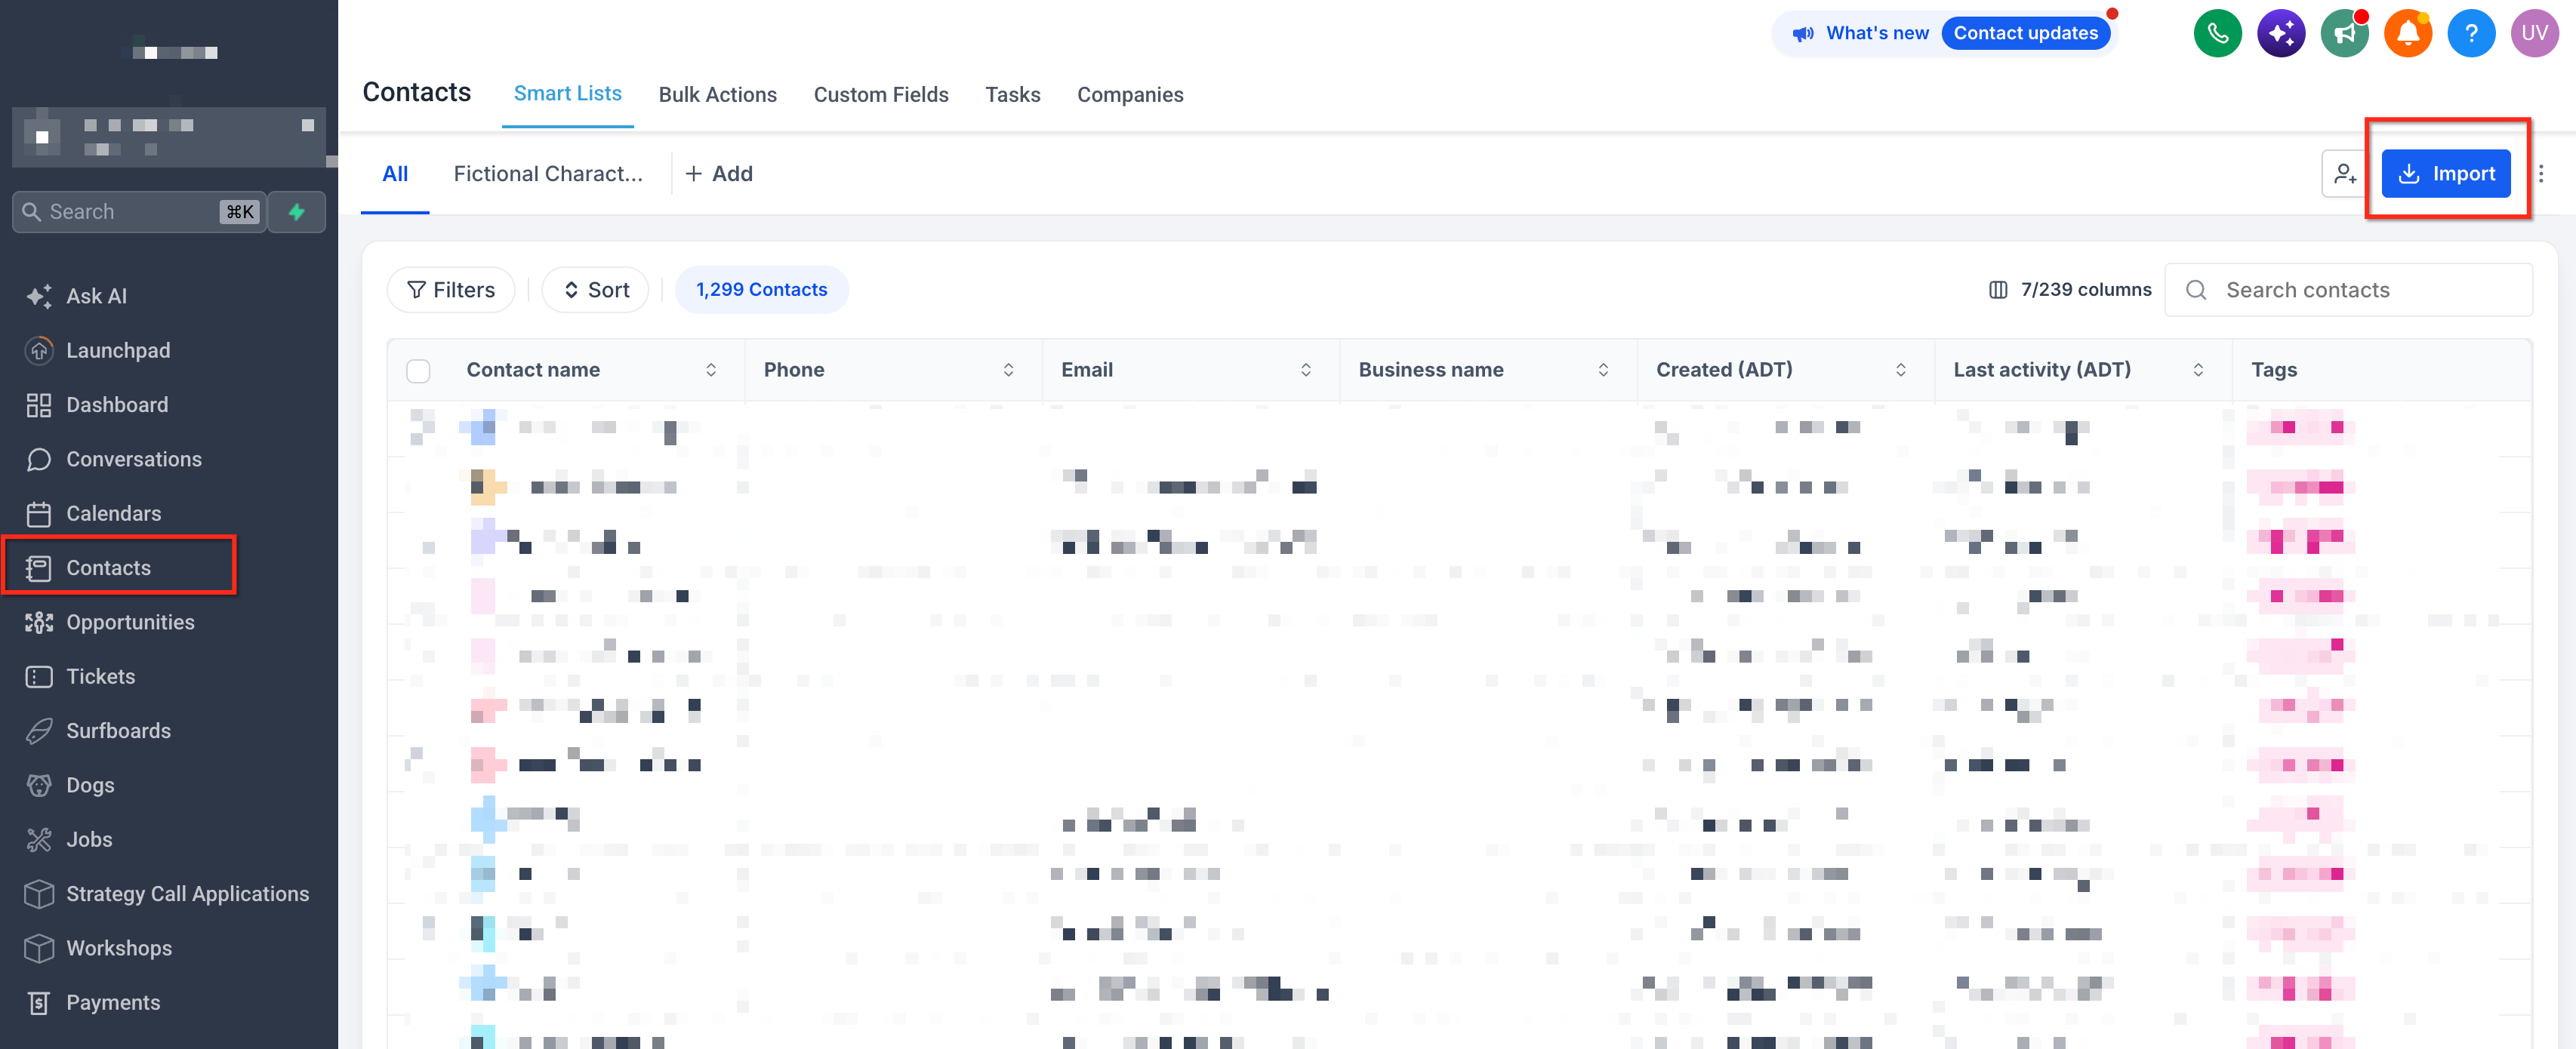
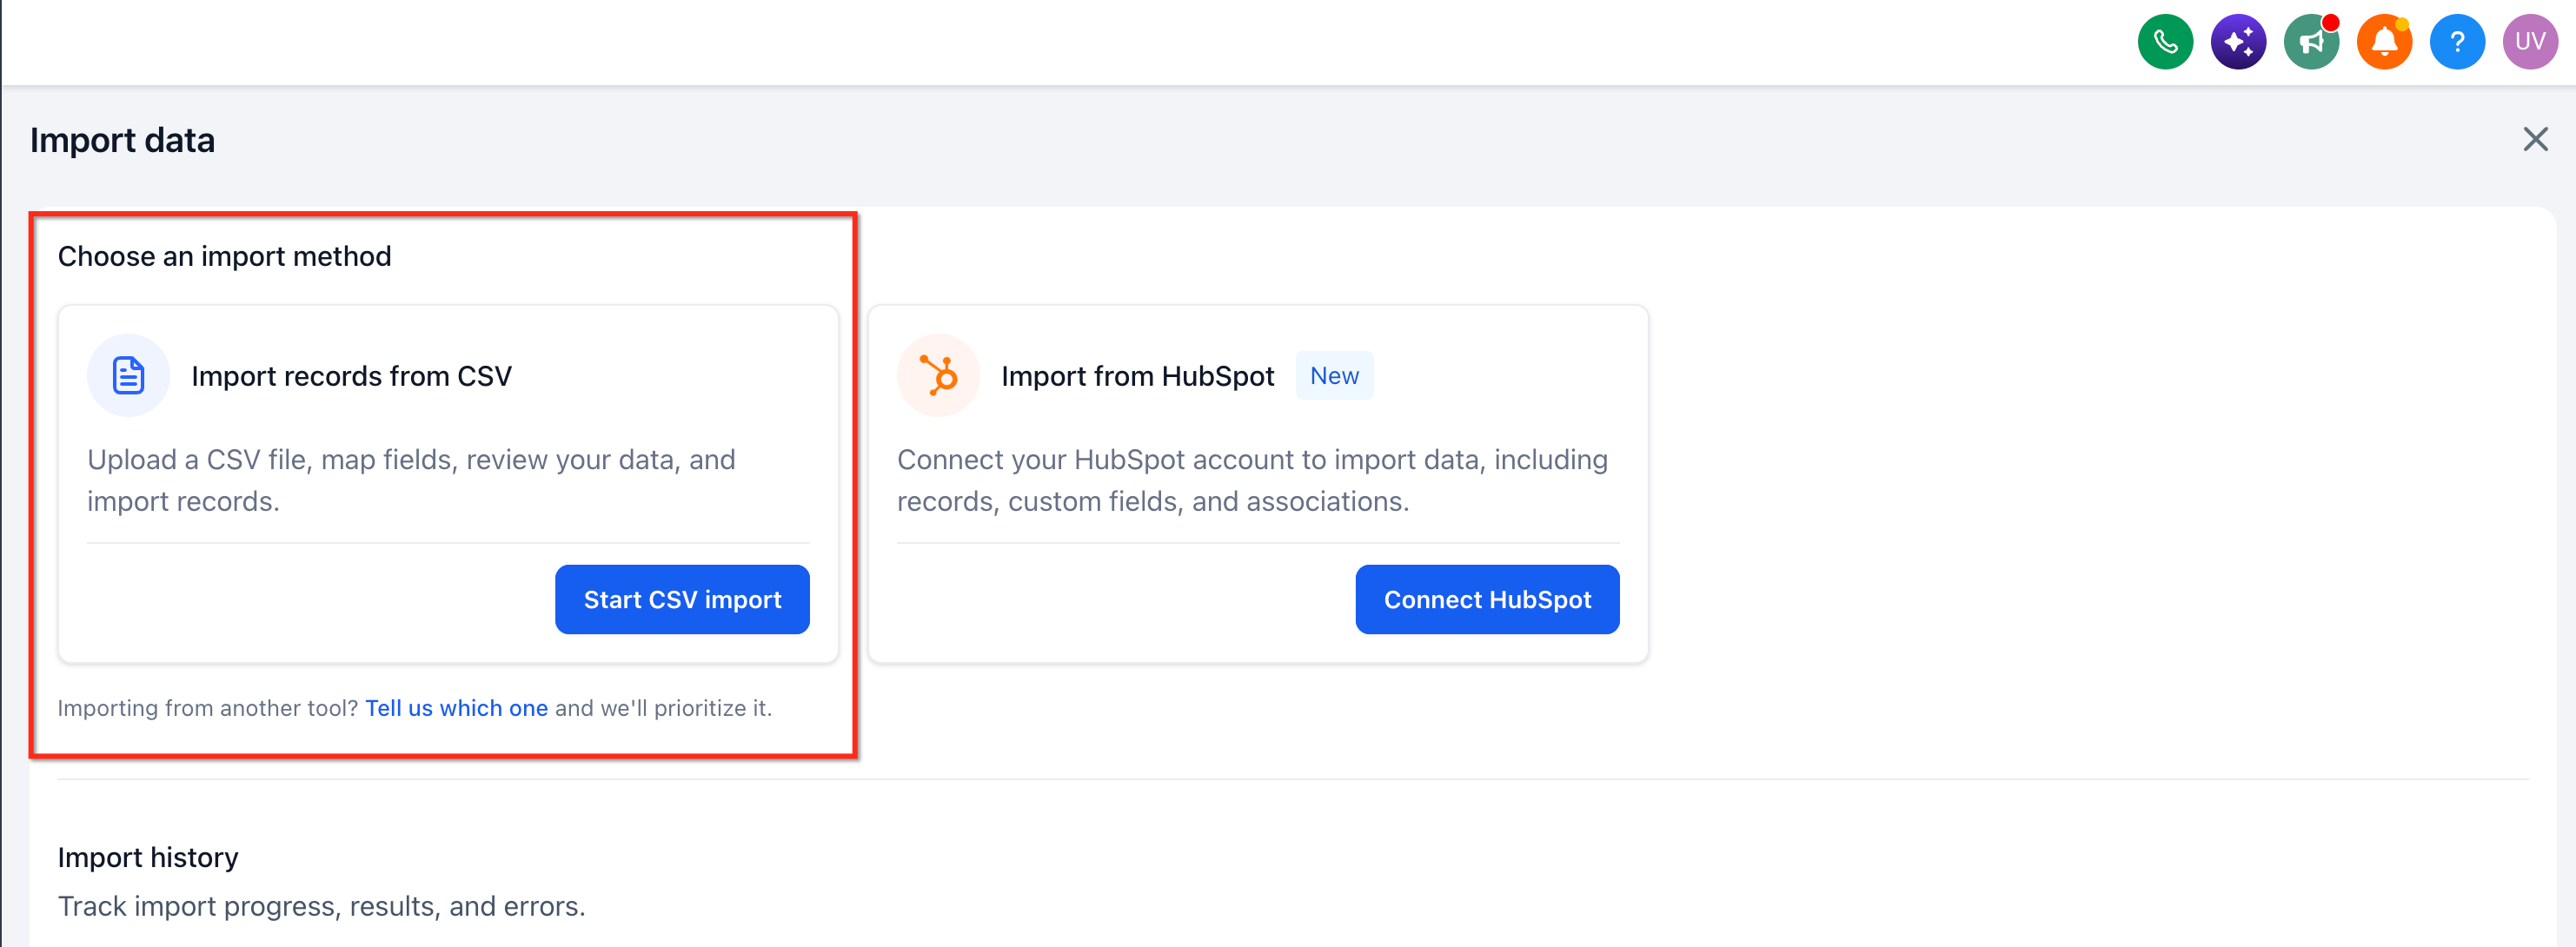
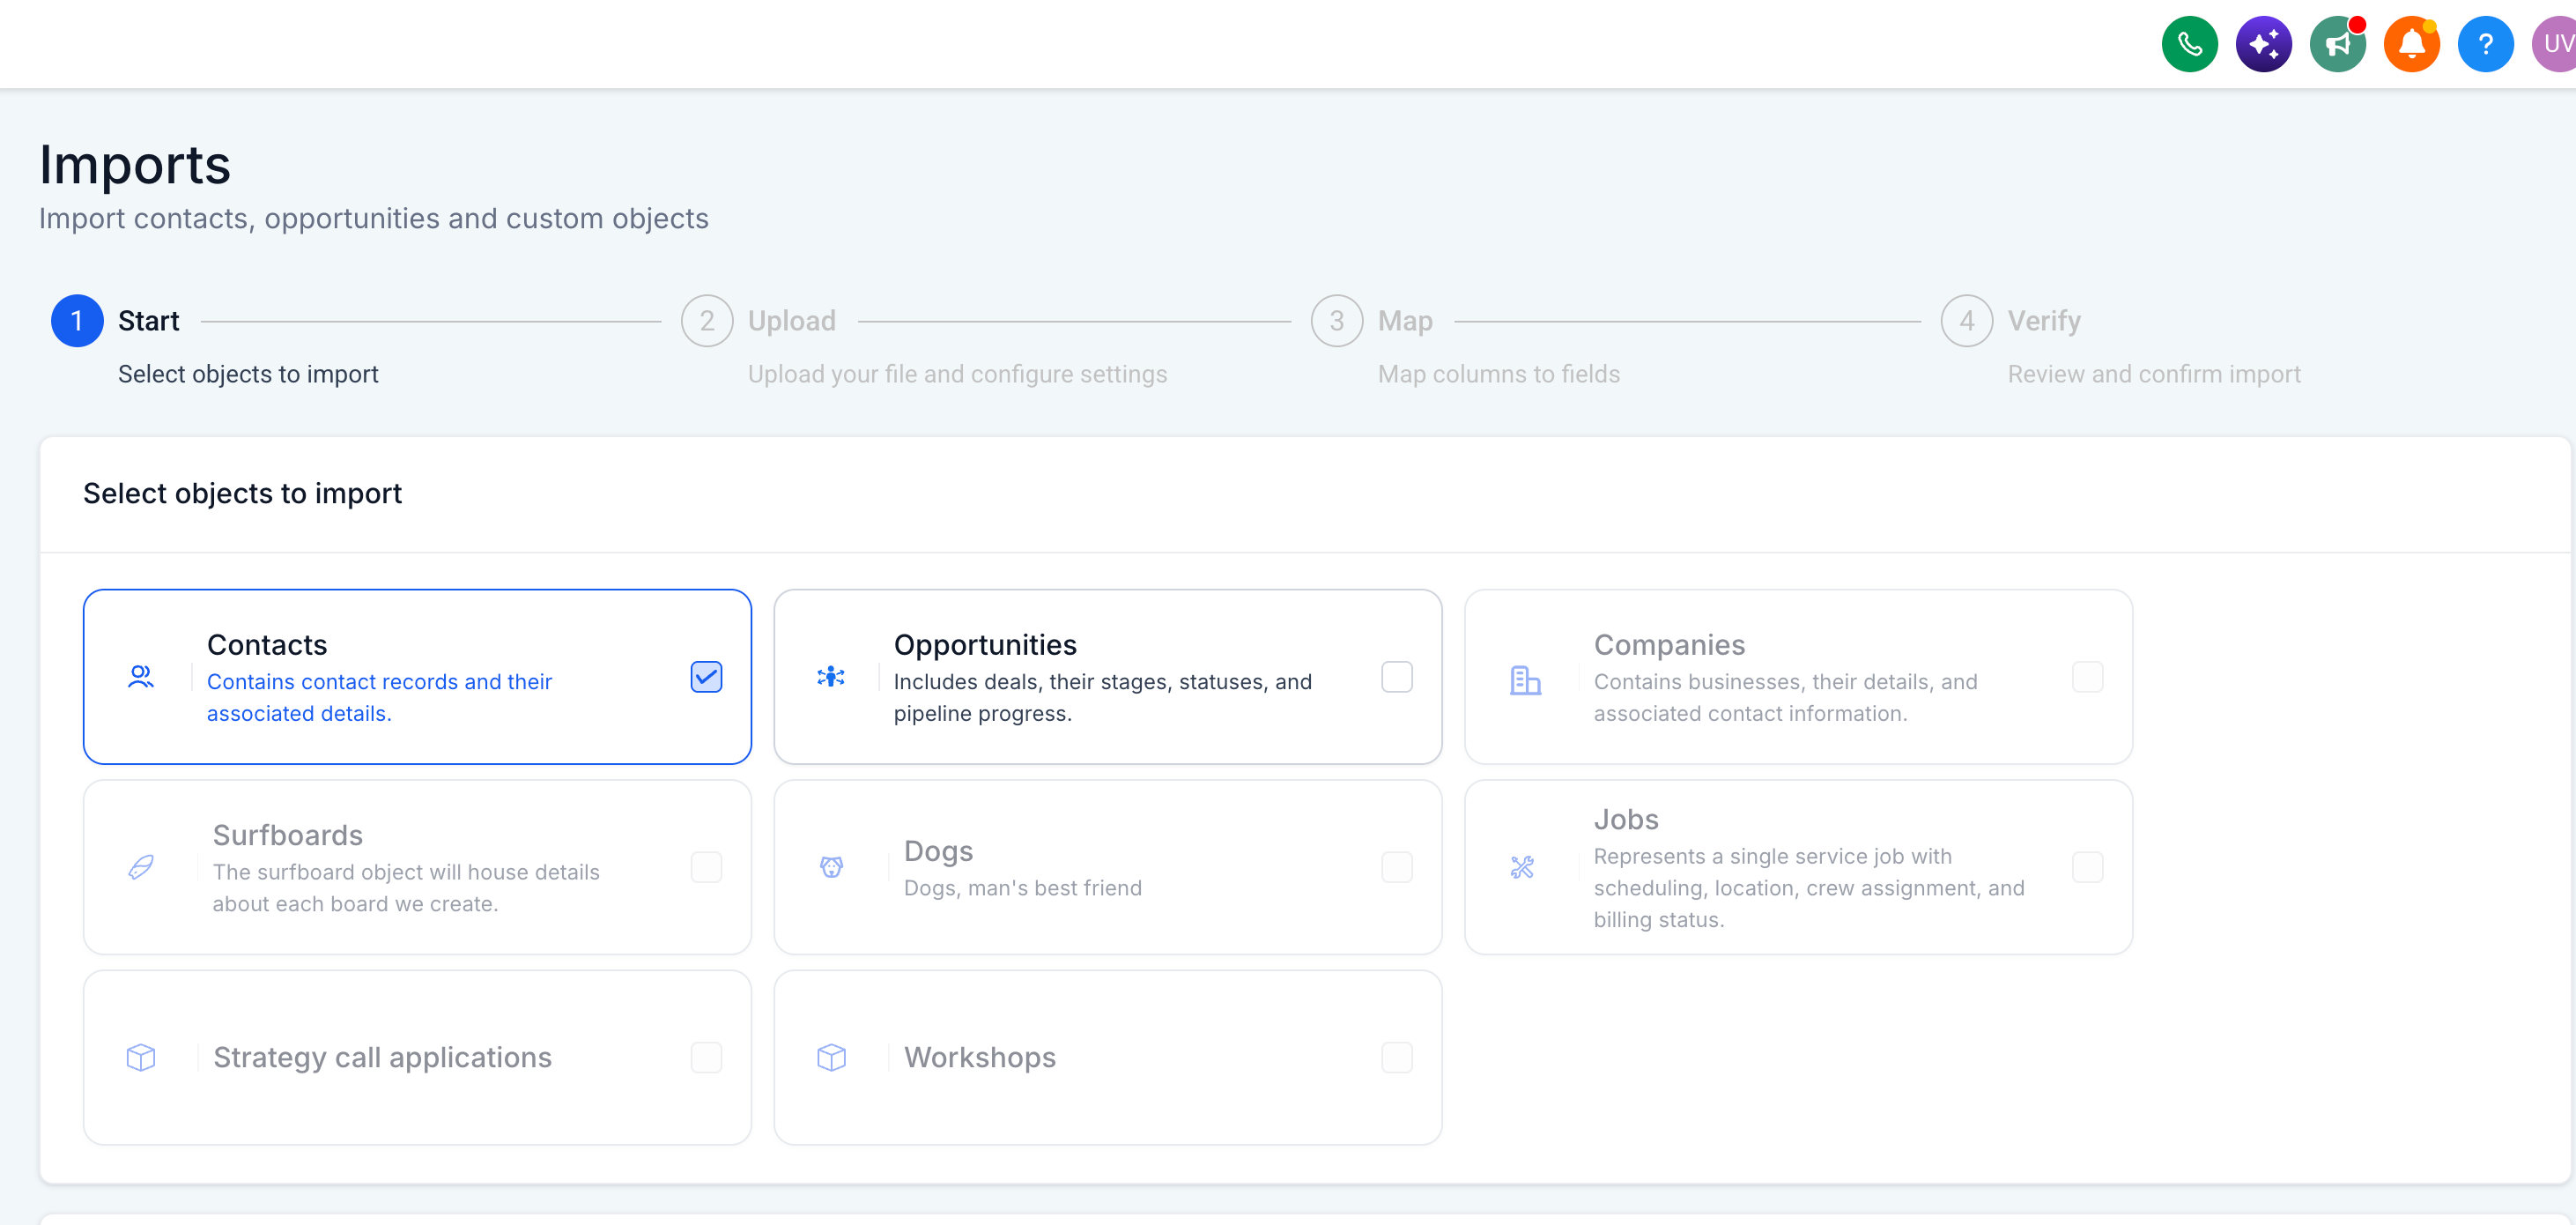
- Open the Contacts area from the left navigation and click Import.
- Upload the prepared CSV file and choose whether to create new contacts or update existing ones.
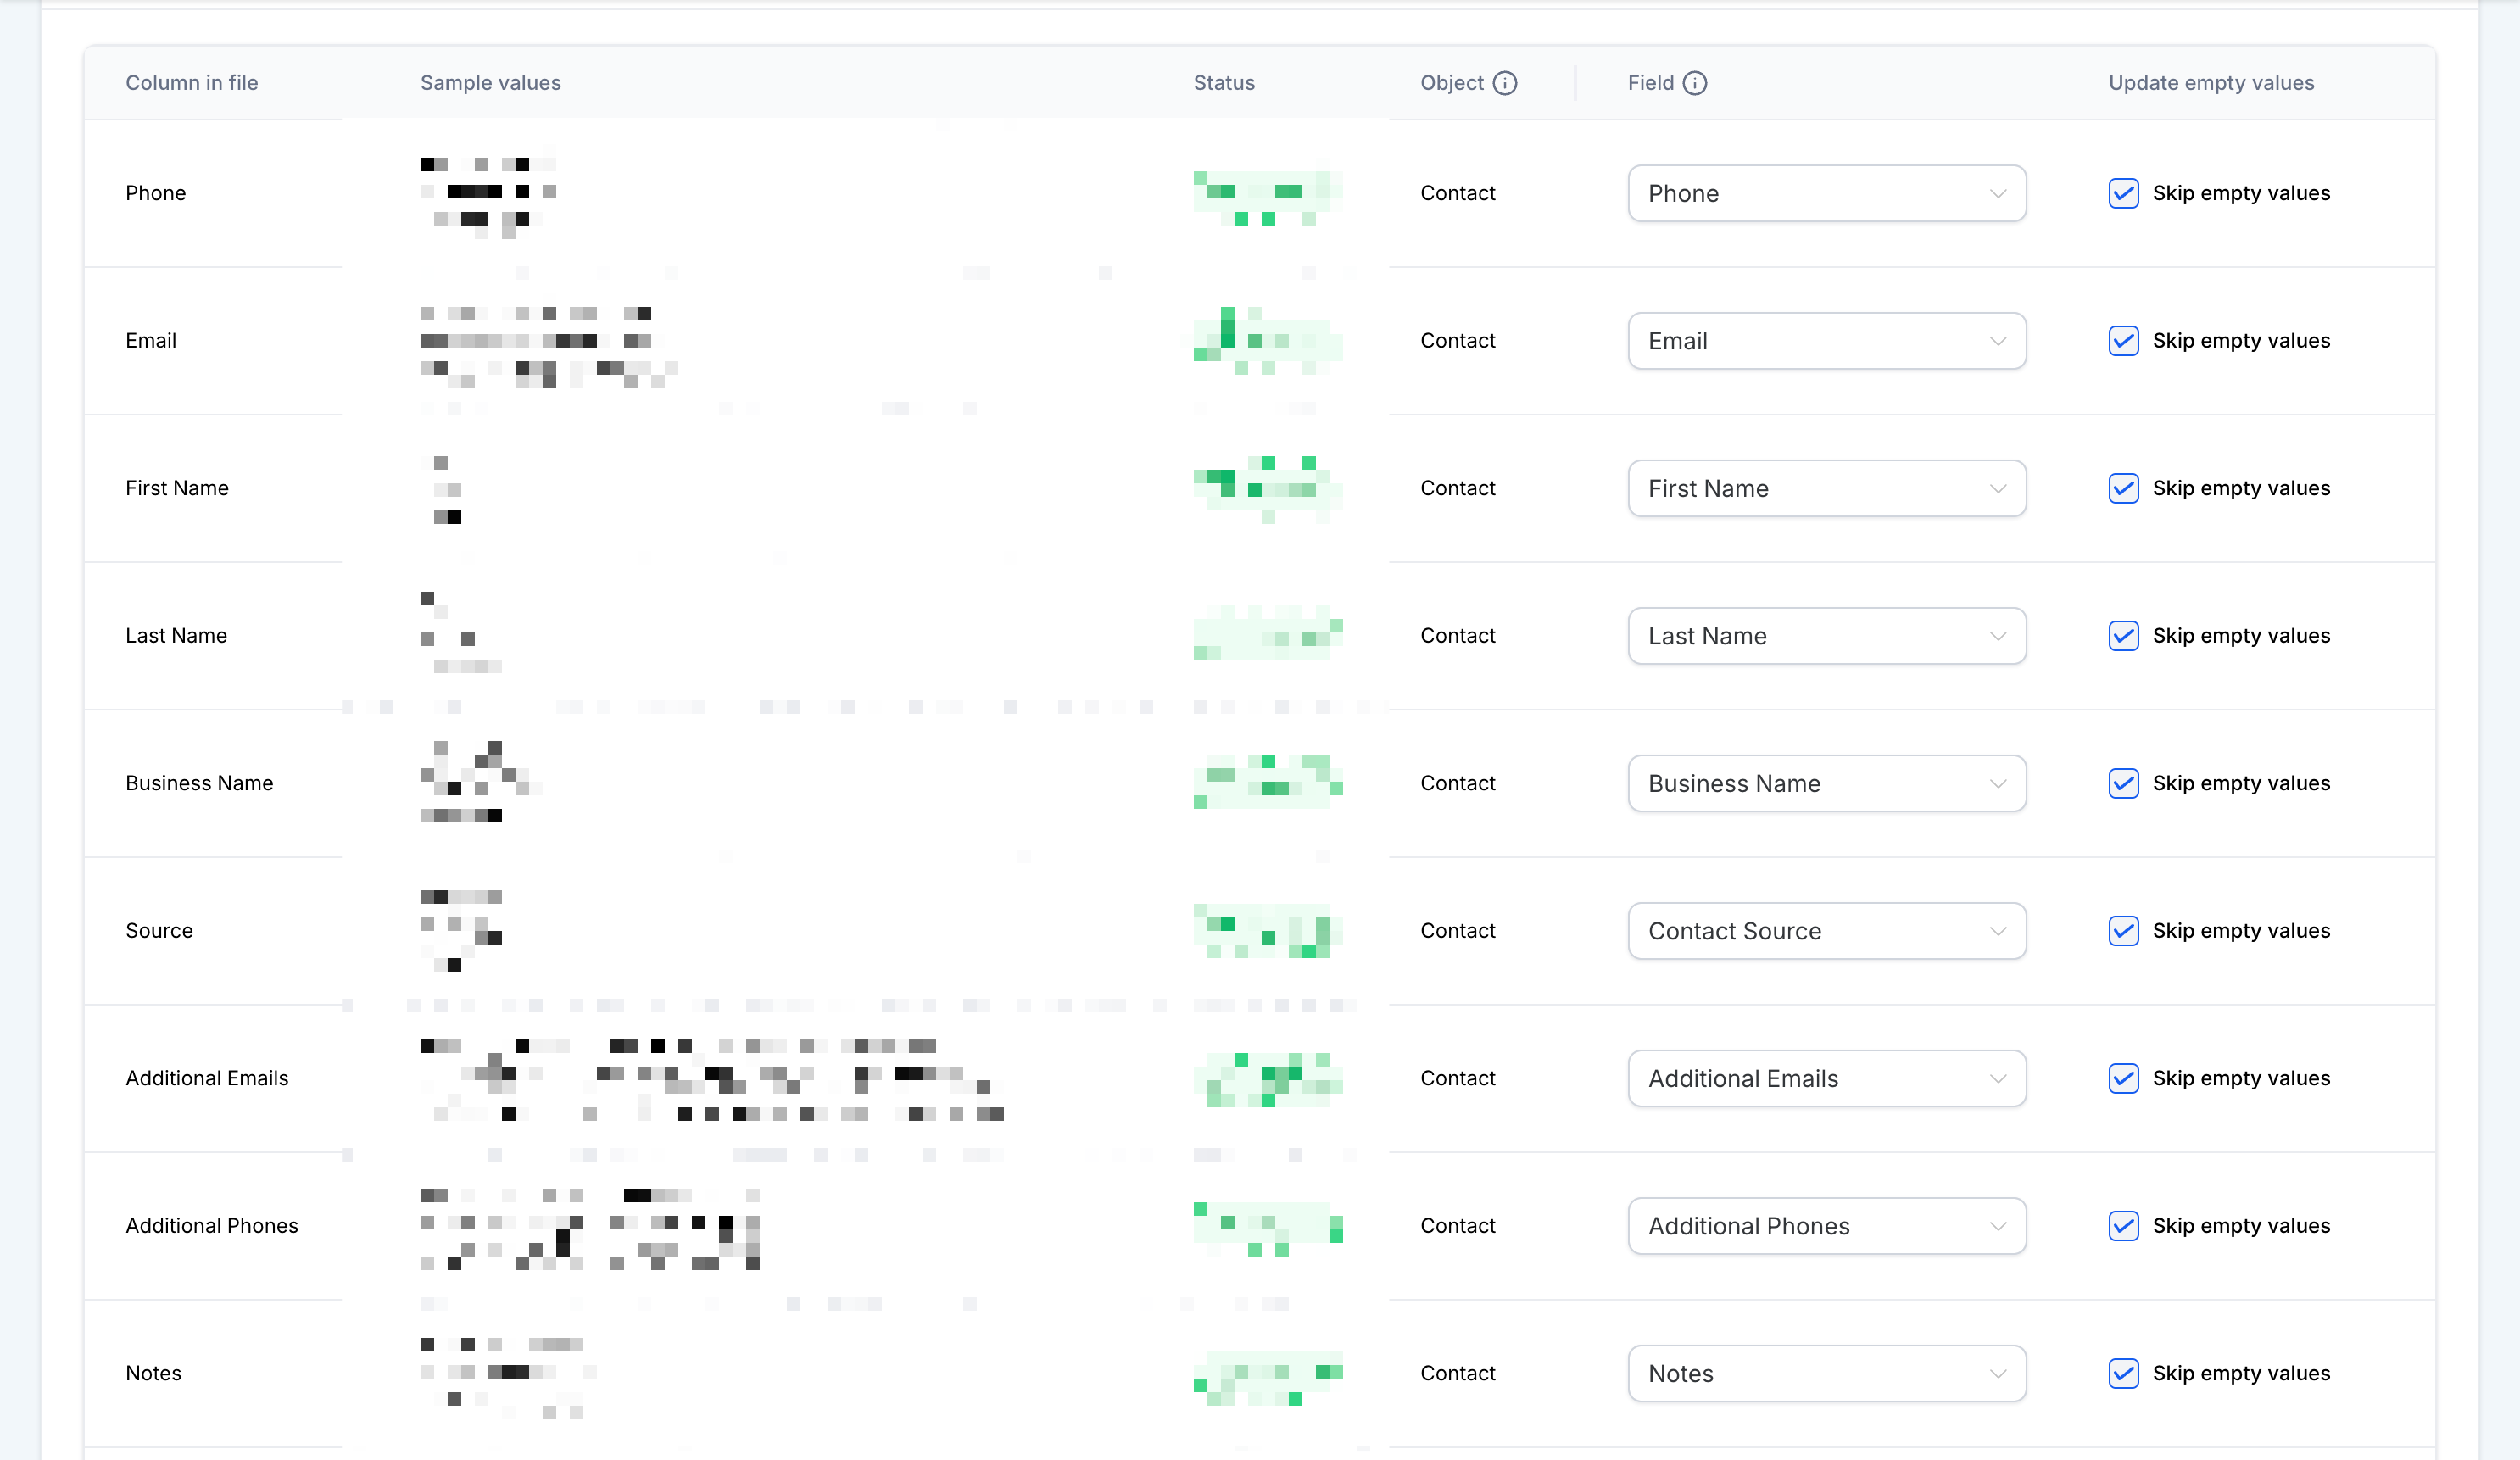
- Map each CSV column to the appropriate HighLevel field, ensuring the email column maps to Email.
- On the final review screen, tick the email verification checkbox.
- Confirm all settings and start the bulk import by clicking the import button.
- Go to Contacts > Bulk Actions, locate the import job, and watch the status move from Processing to Completed.
06What it looks like in HighLevel
07Settings that matter
- Email verification checkbox. Controls whether HighLevel runs an email validation check on each address as part of the CSV import process.
08Things to know before you rely on it
- Verification does not guarantee that every address will successfully receive email.
- Enabling the option does not automatically delete contacts with invalid emails; they remain in the system with verification results.
- A dedicated report of valid versus invalid addresses may not be available after the import.
09How it connects to the rest of HighLevel
- Learn how to prepare a CSV file for contact imports Import contacts guide
- View bulk action tools for tracking import jobs Bulk Actions overview
- Start a free trial to test email verification during import 30 day trial
Michael's take

This is a small convenience that can turn a noisy import process into a cleaner one. Adding the verification checkbox means you catch bad addresses before they ever hit a campaign, saving a few clicks and a lot of bounce headaches.
Imagine a boutique real estate team that pulls leads from a third party source each week. By turning on verification during the CSV import, they get a quick pass/fail view in Bulk Actions and can prune the list before the next email blast. I’d give it a quick run on a test file first, just to see how the status updates look in Bulk Actions.