
01Who this is for
- Anyone who has existing contacts and wants to bring them into HighLevel for outreach.
- Teams that need a single place to store and manage imported contact records.
02Import existing contacts, explained
The import tool accepts CSV files up to 50 MB. After you select Contacts and start the import, you confirm the file format, upload the file, and map its columns to HighLevel’s standard fields. If a column does not match any standard field, you can create a custom field or ignore the column.
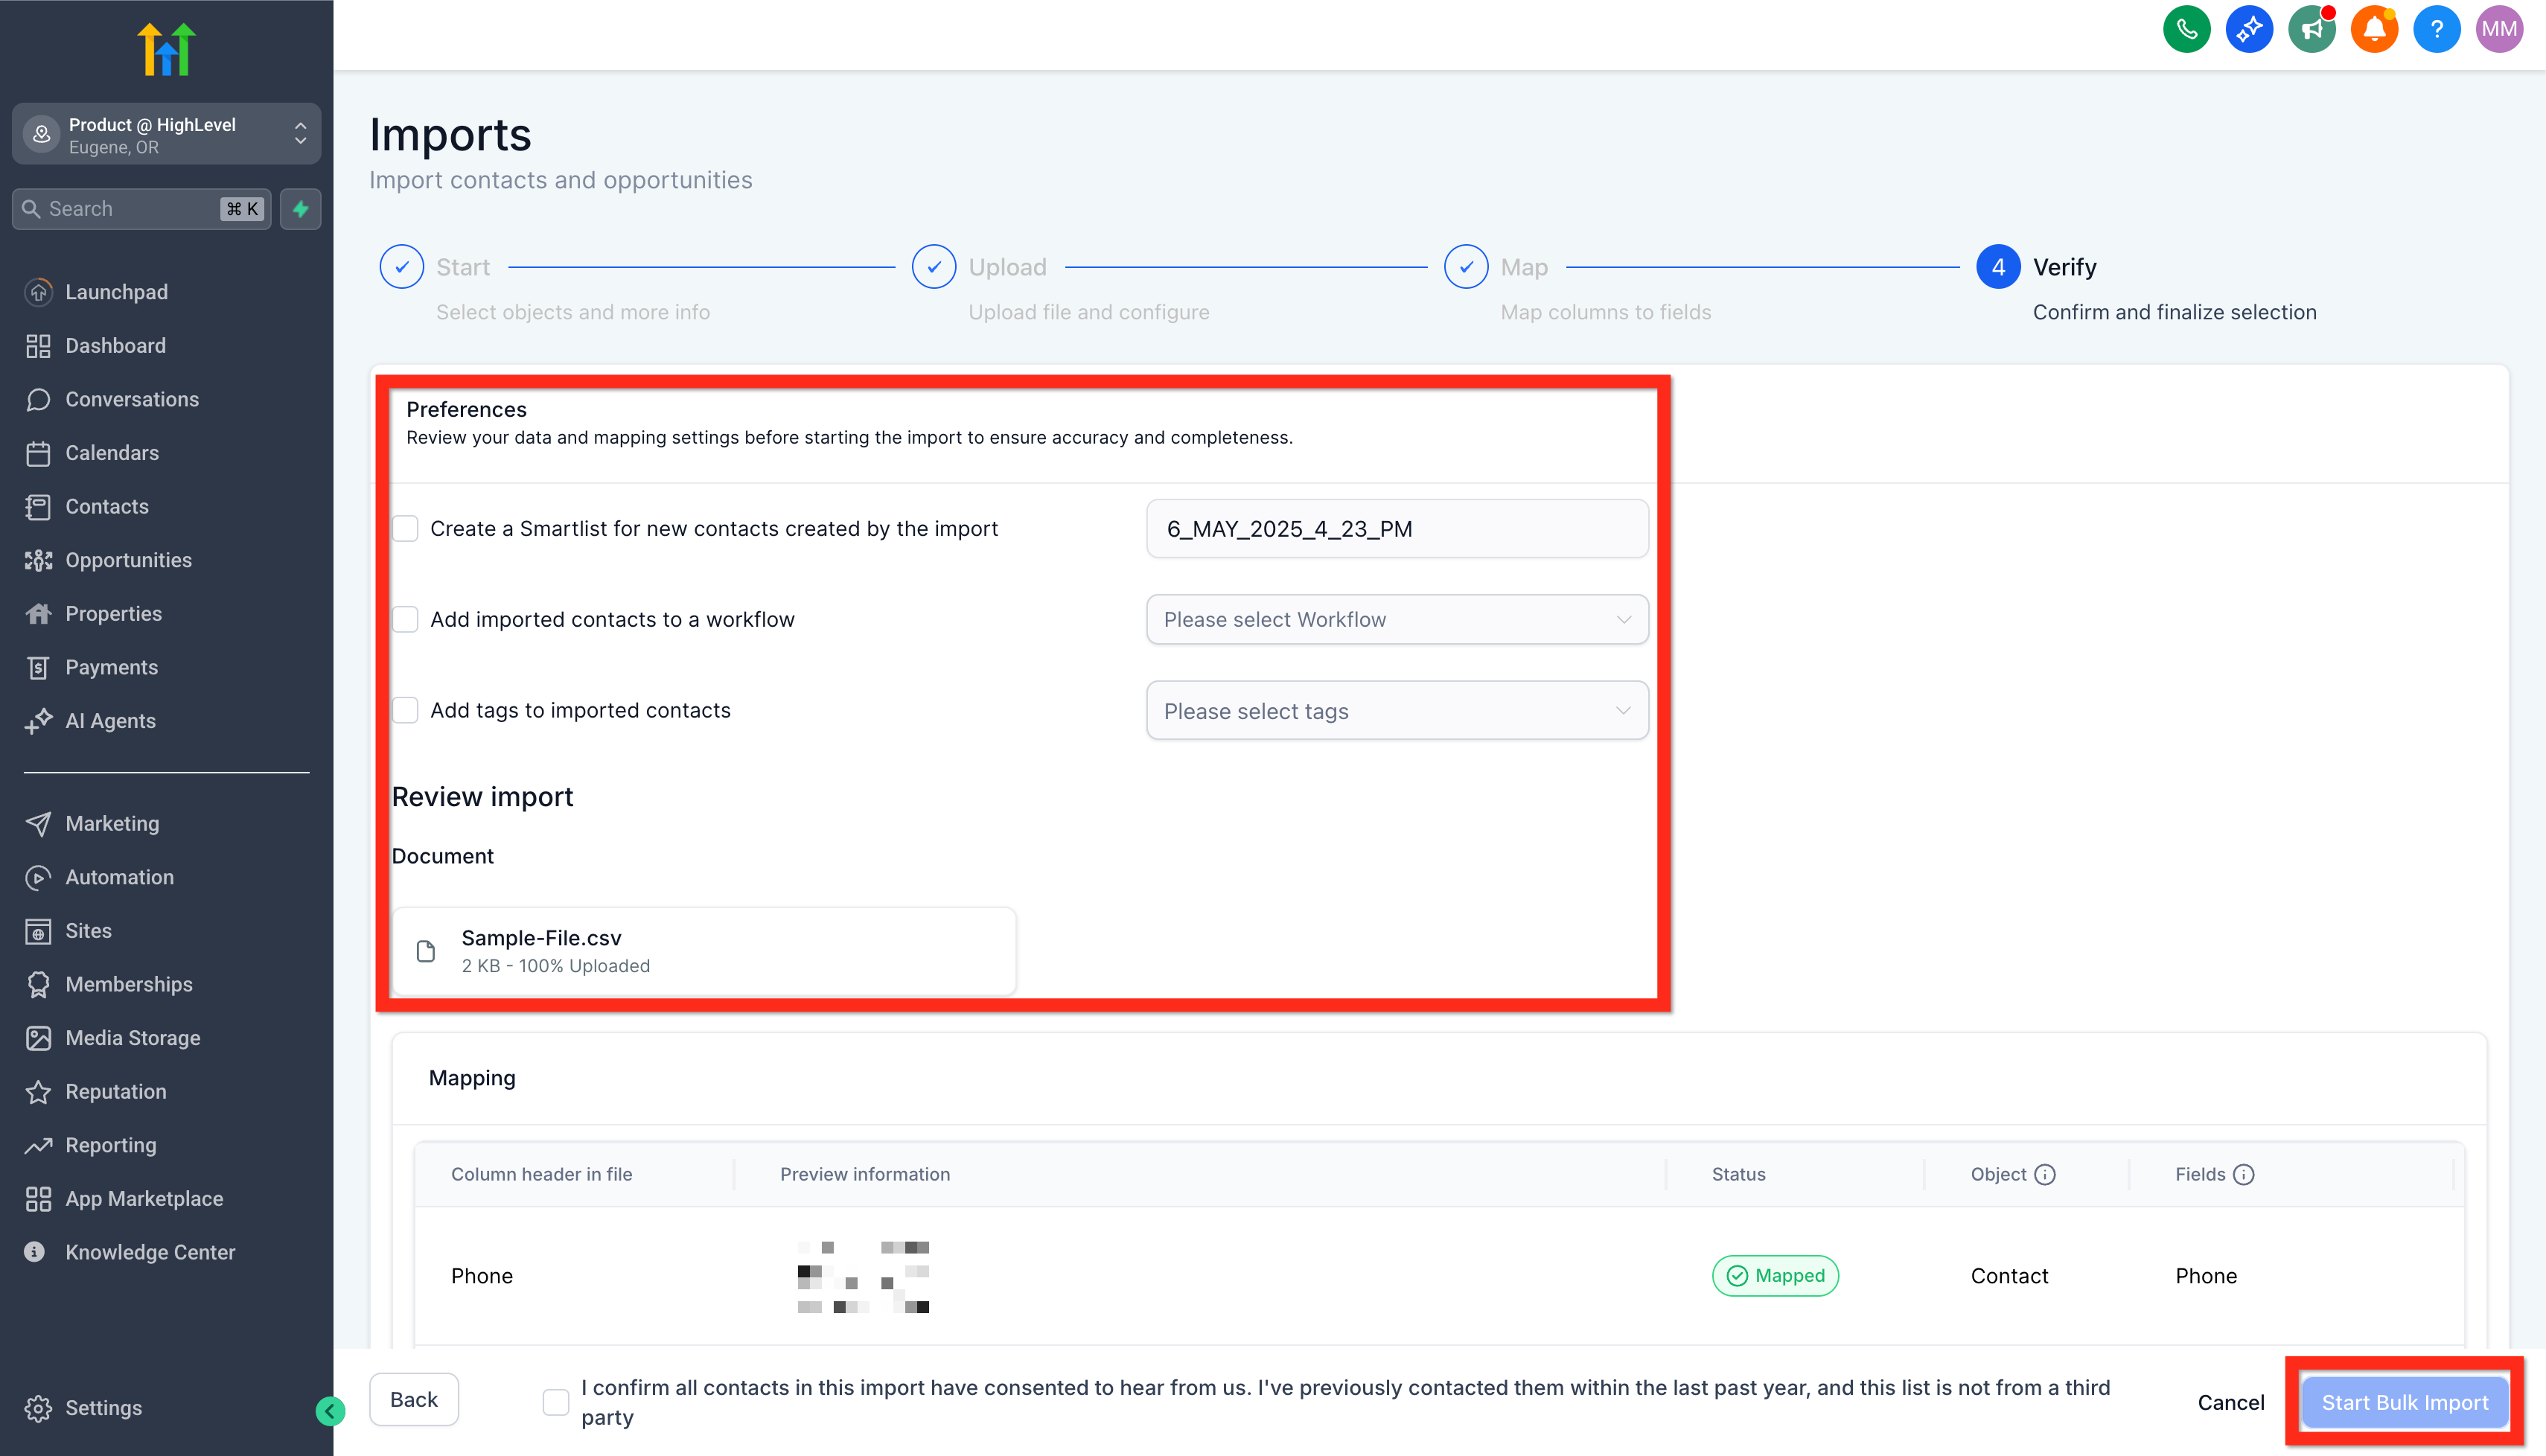
Import details let you name the import, assign the contacts to lists, and set consent preferences before you launch the bulk import. The system processes the file and adds each row as a new contact record.
Custom fields are managed in Settings > Custom Fields, where you define additional data points for contacts. Bulk actions let you filter contacts, select many at once, and run operations such as adding tags, sending SMS, email, or starting automations.
03How businesses use import existing contacts
- Email campaign building. Upload a CSV of leads, map the columns to contact fields, and then segment the imported contacts for targeted email sequences.
- Sales outreach preparation. Import prospect information, create a custom field for sales stage, and use bulk actions to tag contacts for follow up calls.
- Customer support onboarding. Bring in client records from an old system, map standard fields, add a custom field for support tier, and use bulk actions to assign tags for priority handling.
04The numbers and rules that matter
- CSV files up to 50 MB.
- Standard contact fields include Contact ID, Name, First Name, Last Name, Date of Birth, Contact Owner, Contact Source, Contact Type, Business Name, Phone, Email, Address, State, City, Postal Code, Country, DND, Time Zone, Website, Additional Email, Additional Phones, Notes.
05How to set up and use import existing contacts in HighLevel
Import contacts from a CSV file
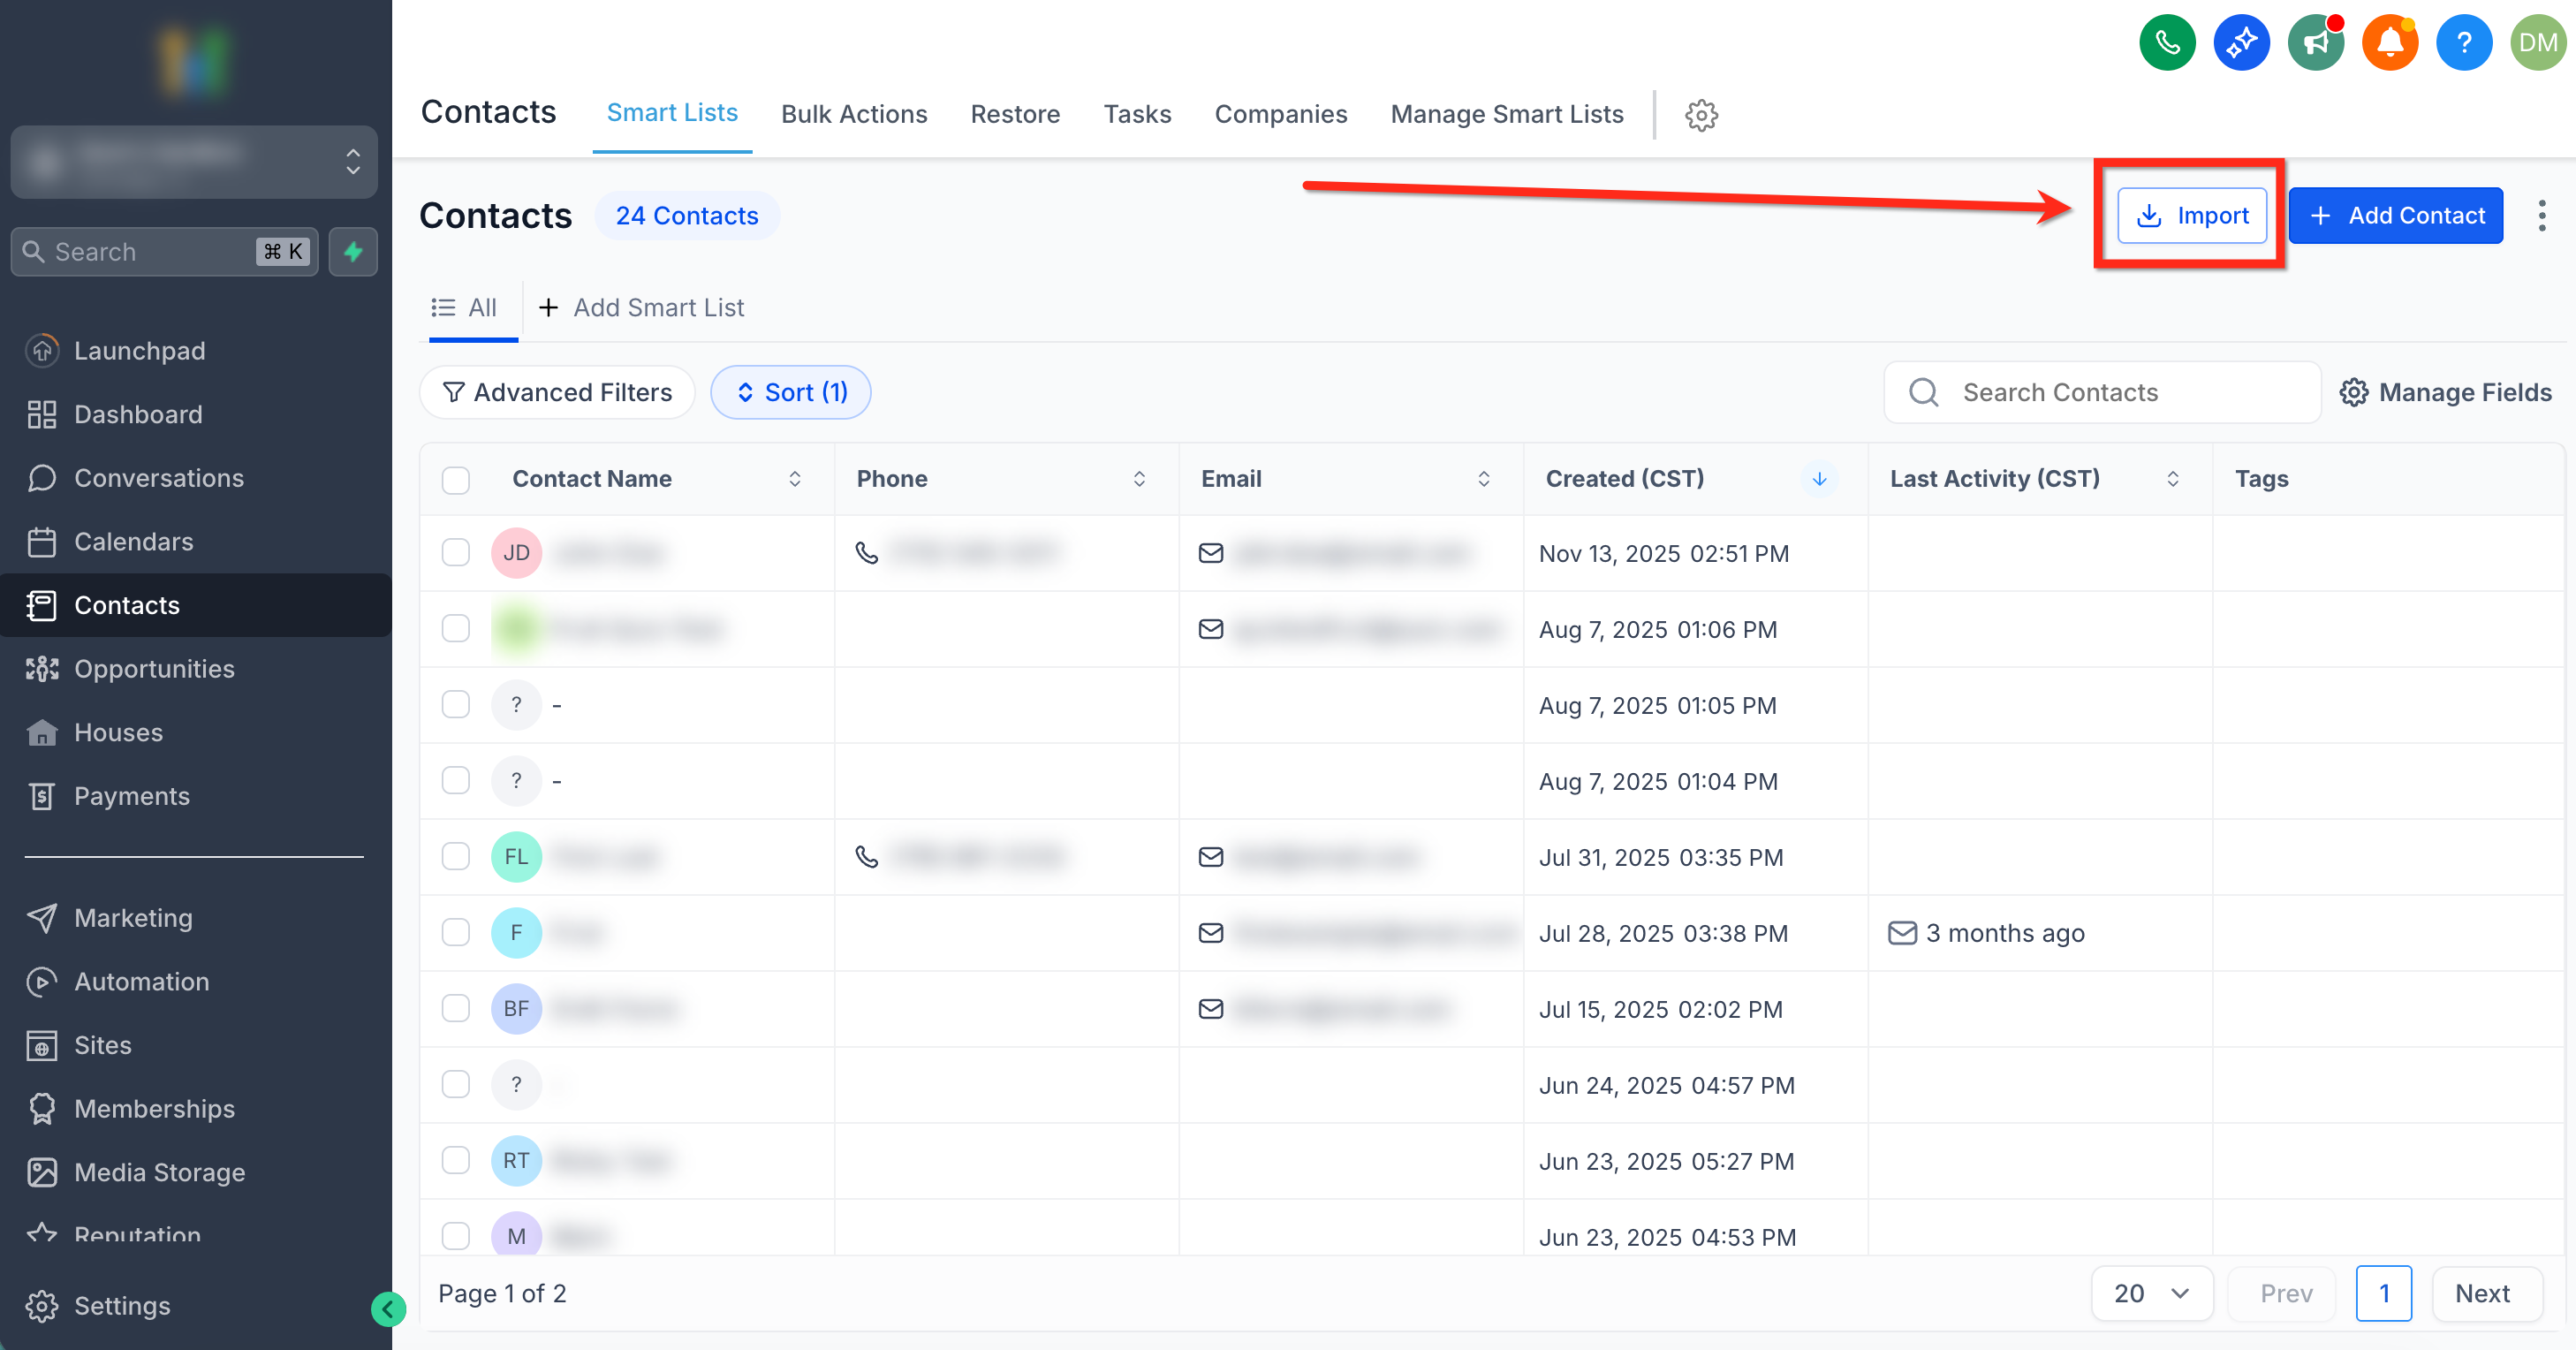
- Navigate to Contacts.
- Click the Import icon that looks like a downward arrow into a box.
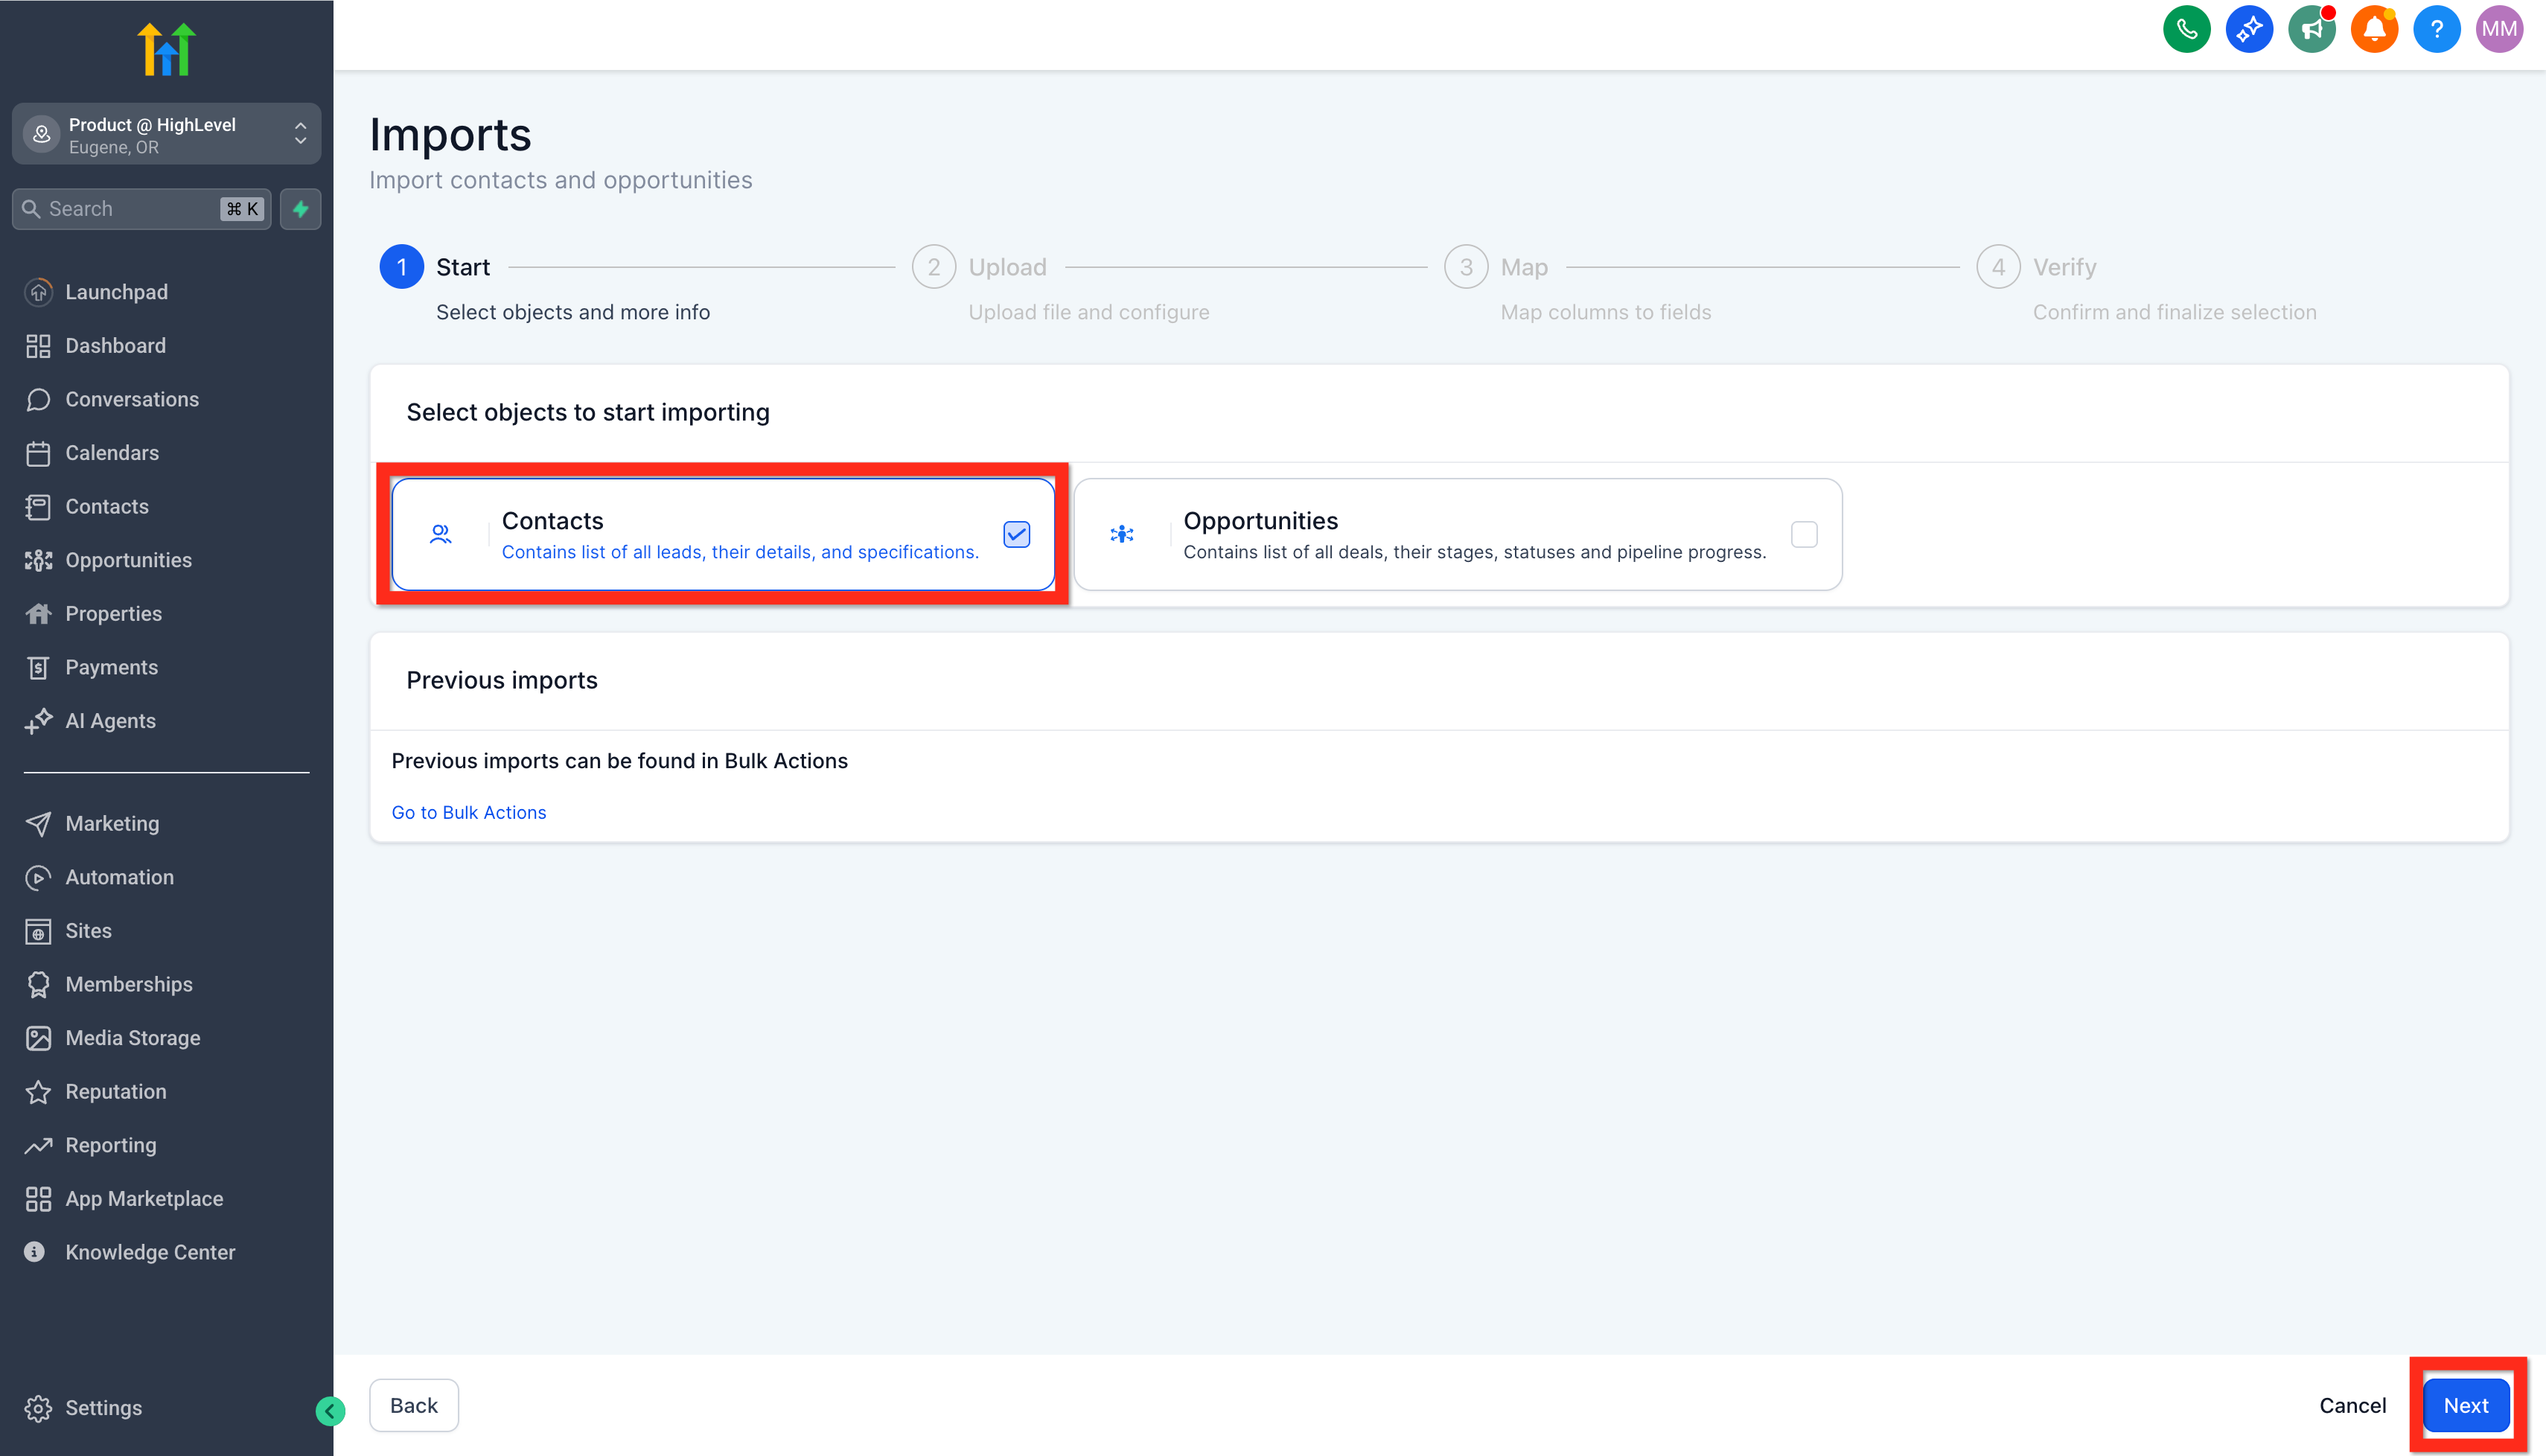
- In the Imports screen, select Contacts and press Next.
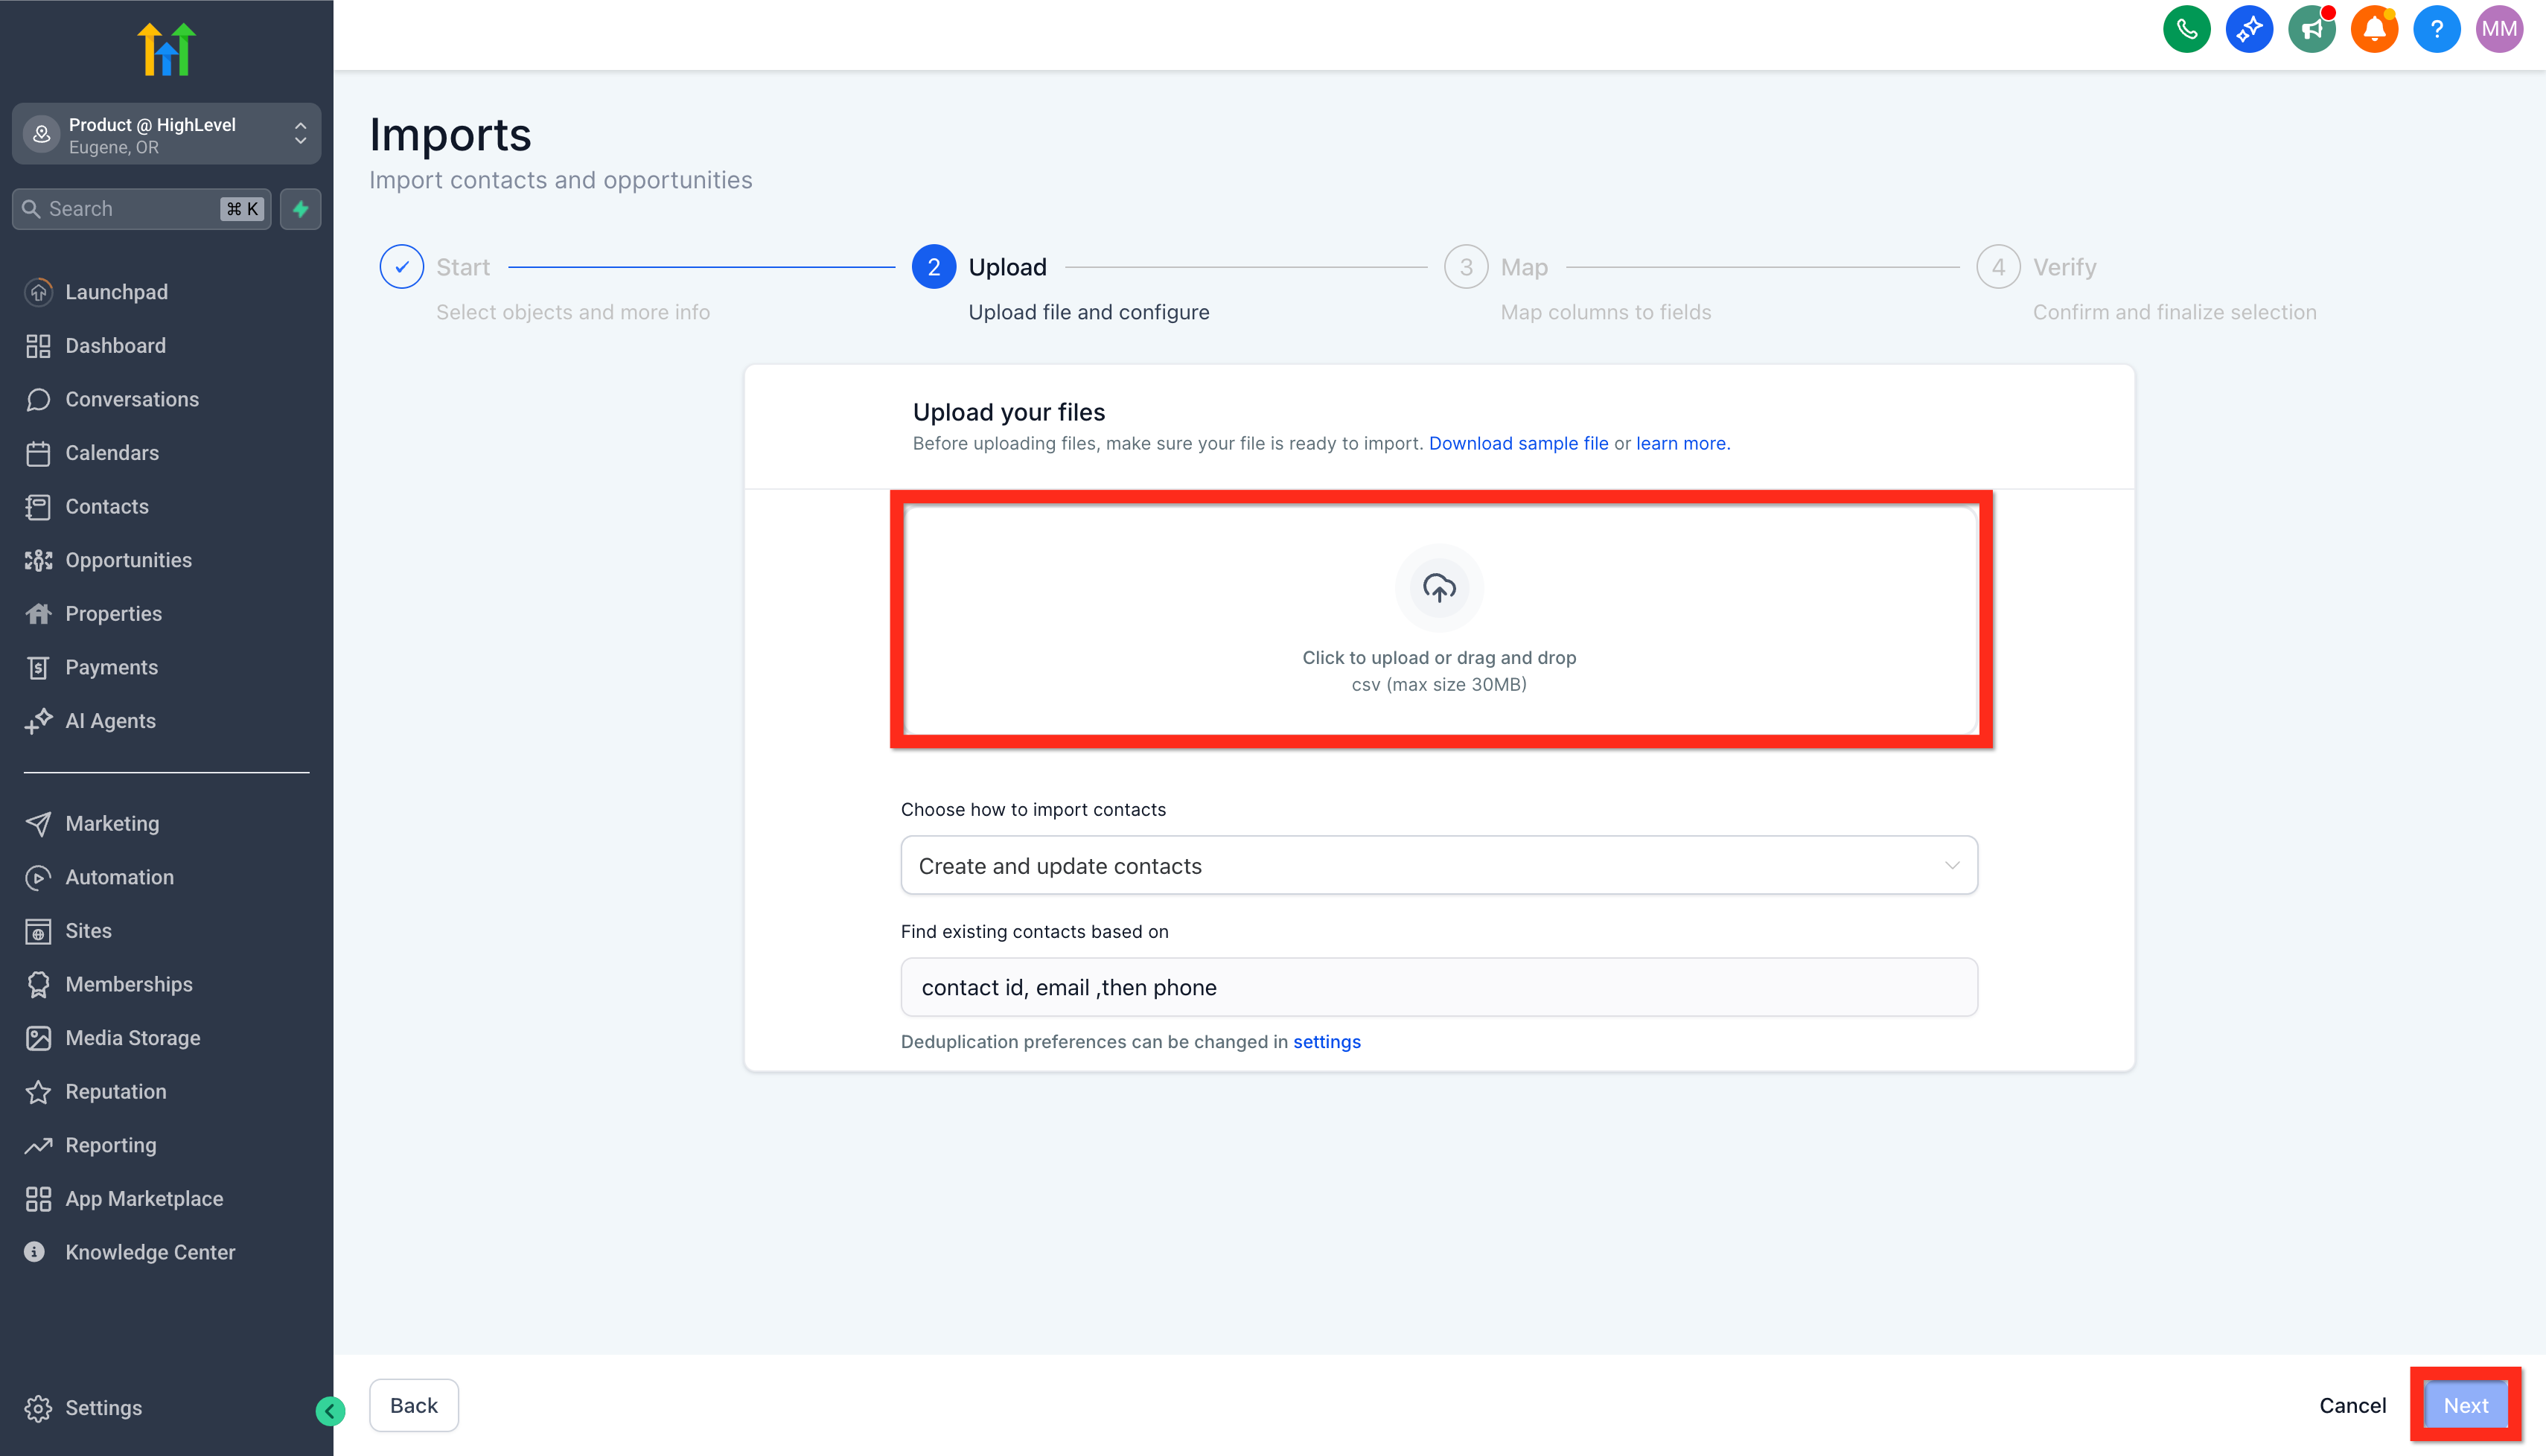
- Confirm that the file you will use is in CSV format.
- Upload the CSV file (maximum size 50 MB) or download the sample file for reference.
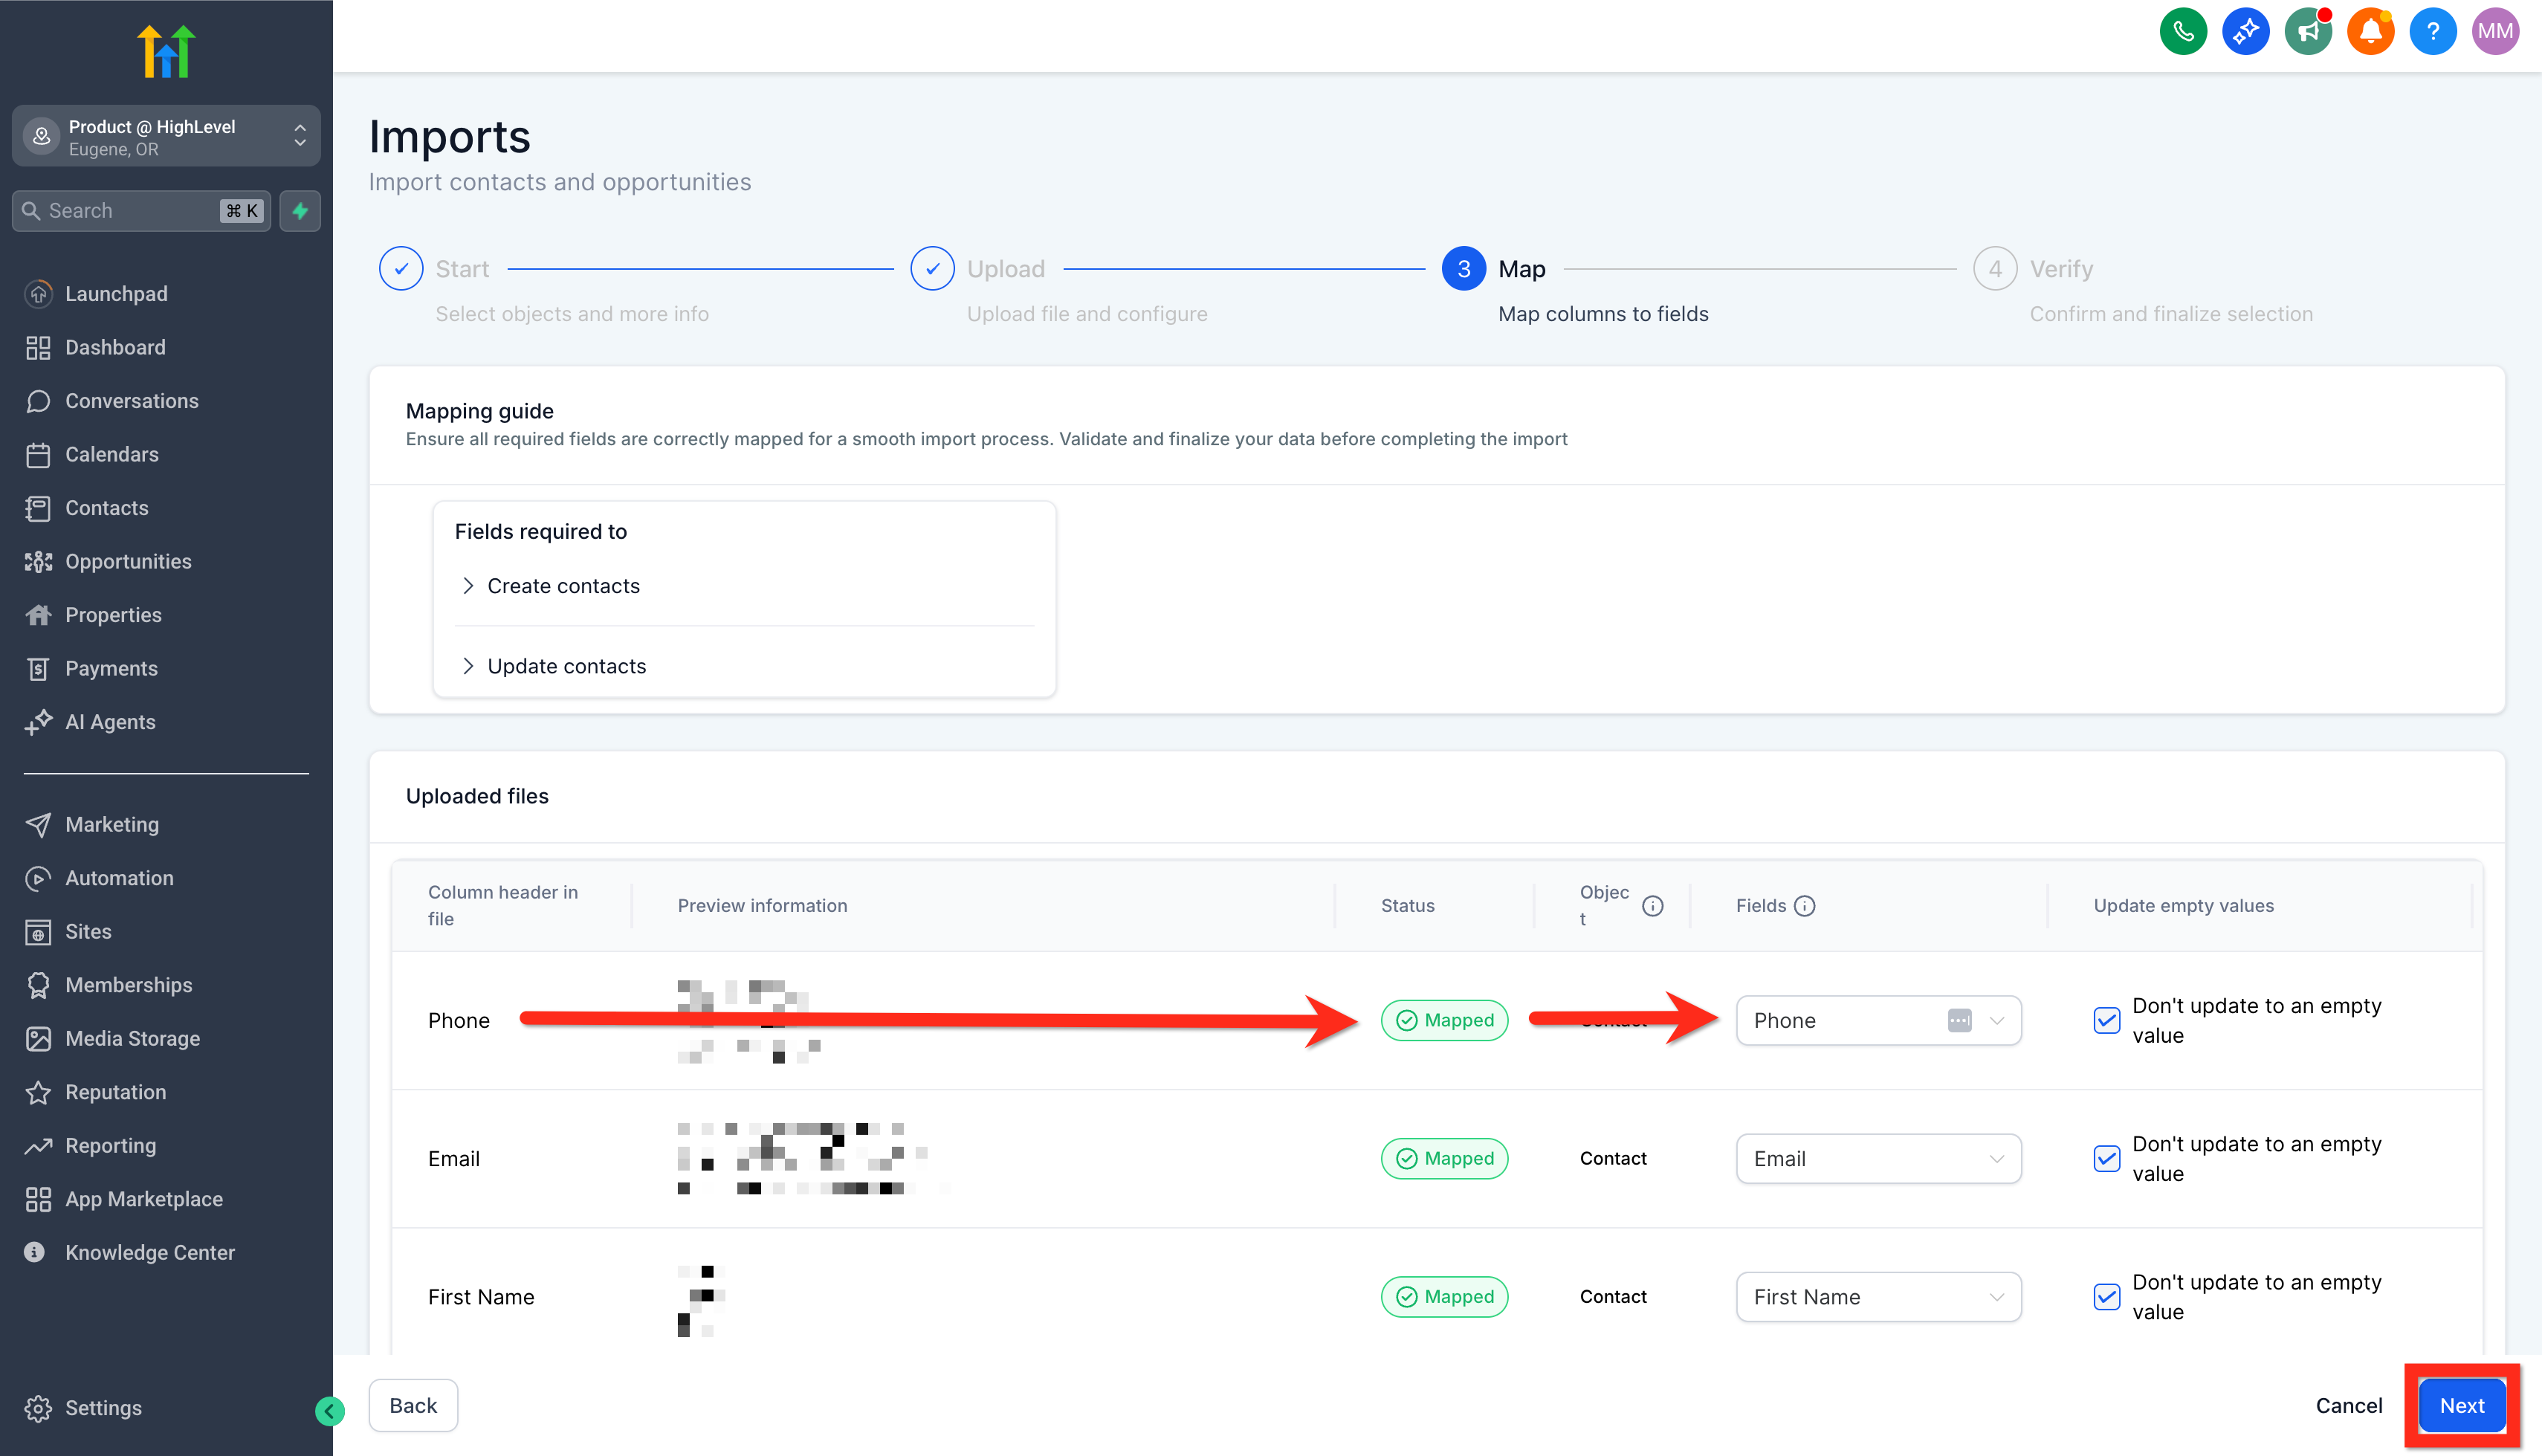
- Map each column from the file to the corresponding HighLevel contact field.
- Either create a new custom field for unmatched data or choose to ignore those columns.
- Enter import details such as a name, target lists, and consent preferences, then click Bulk Import.
- Wait until the platform finishes importing all contacts.
Create new custom fields for contacts
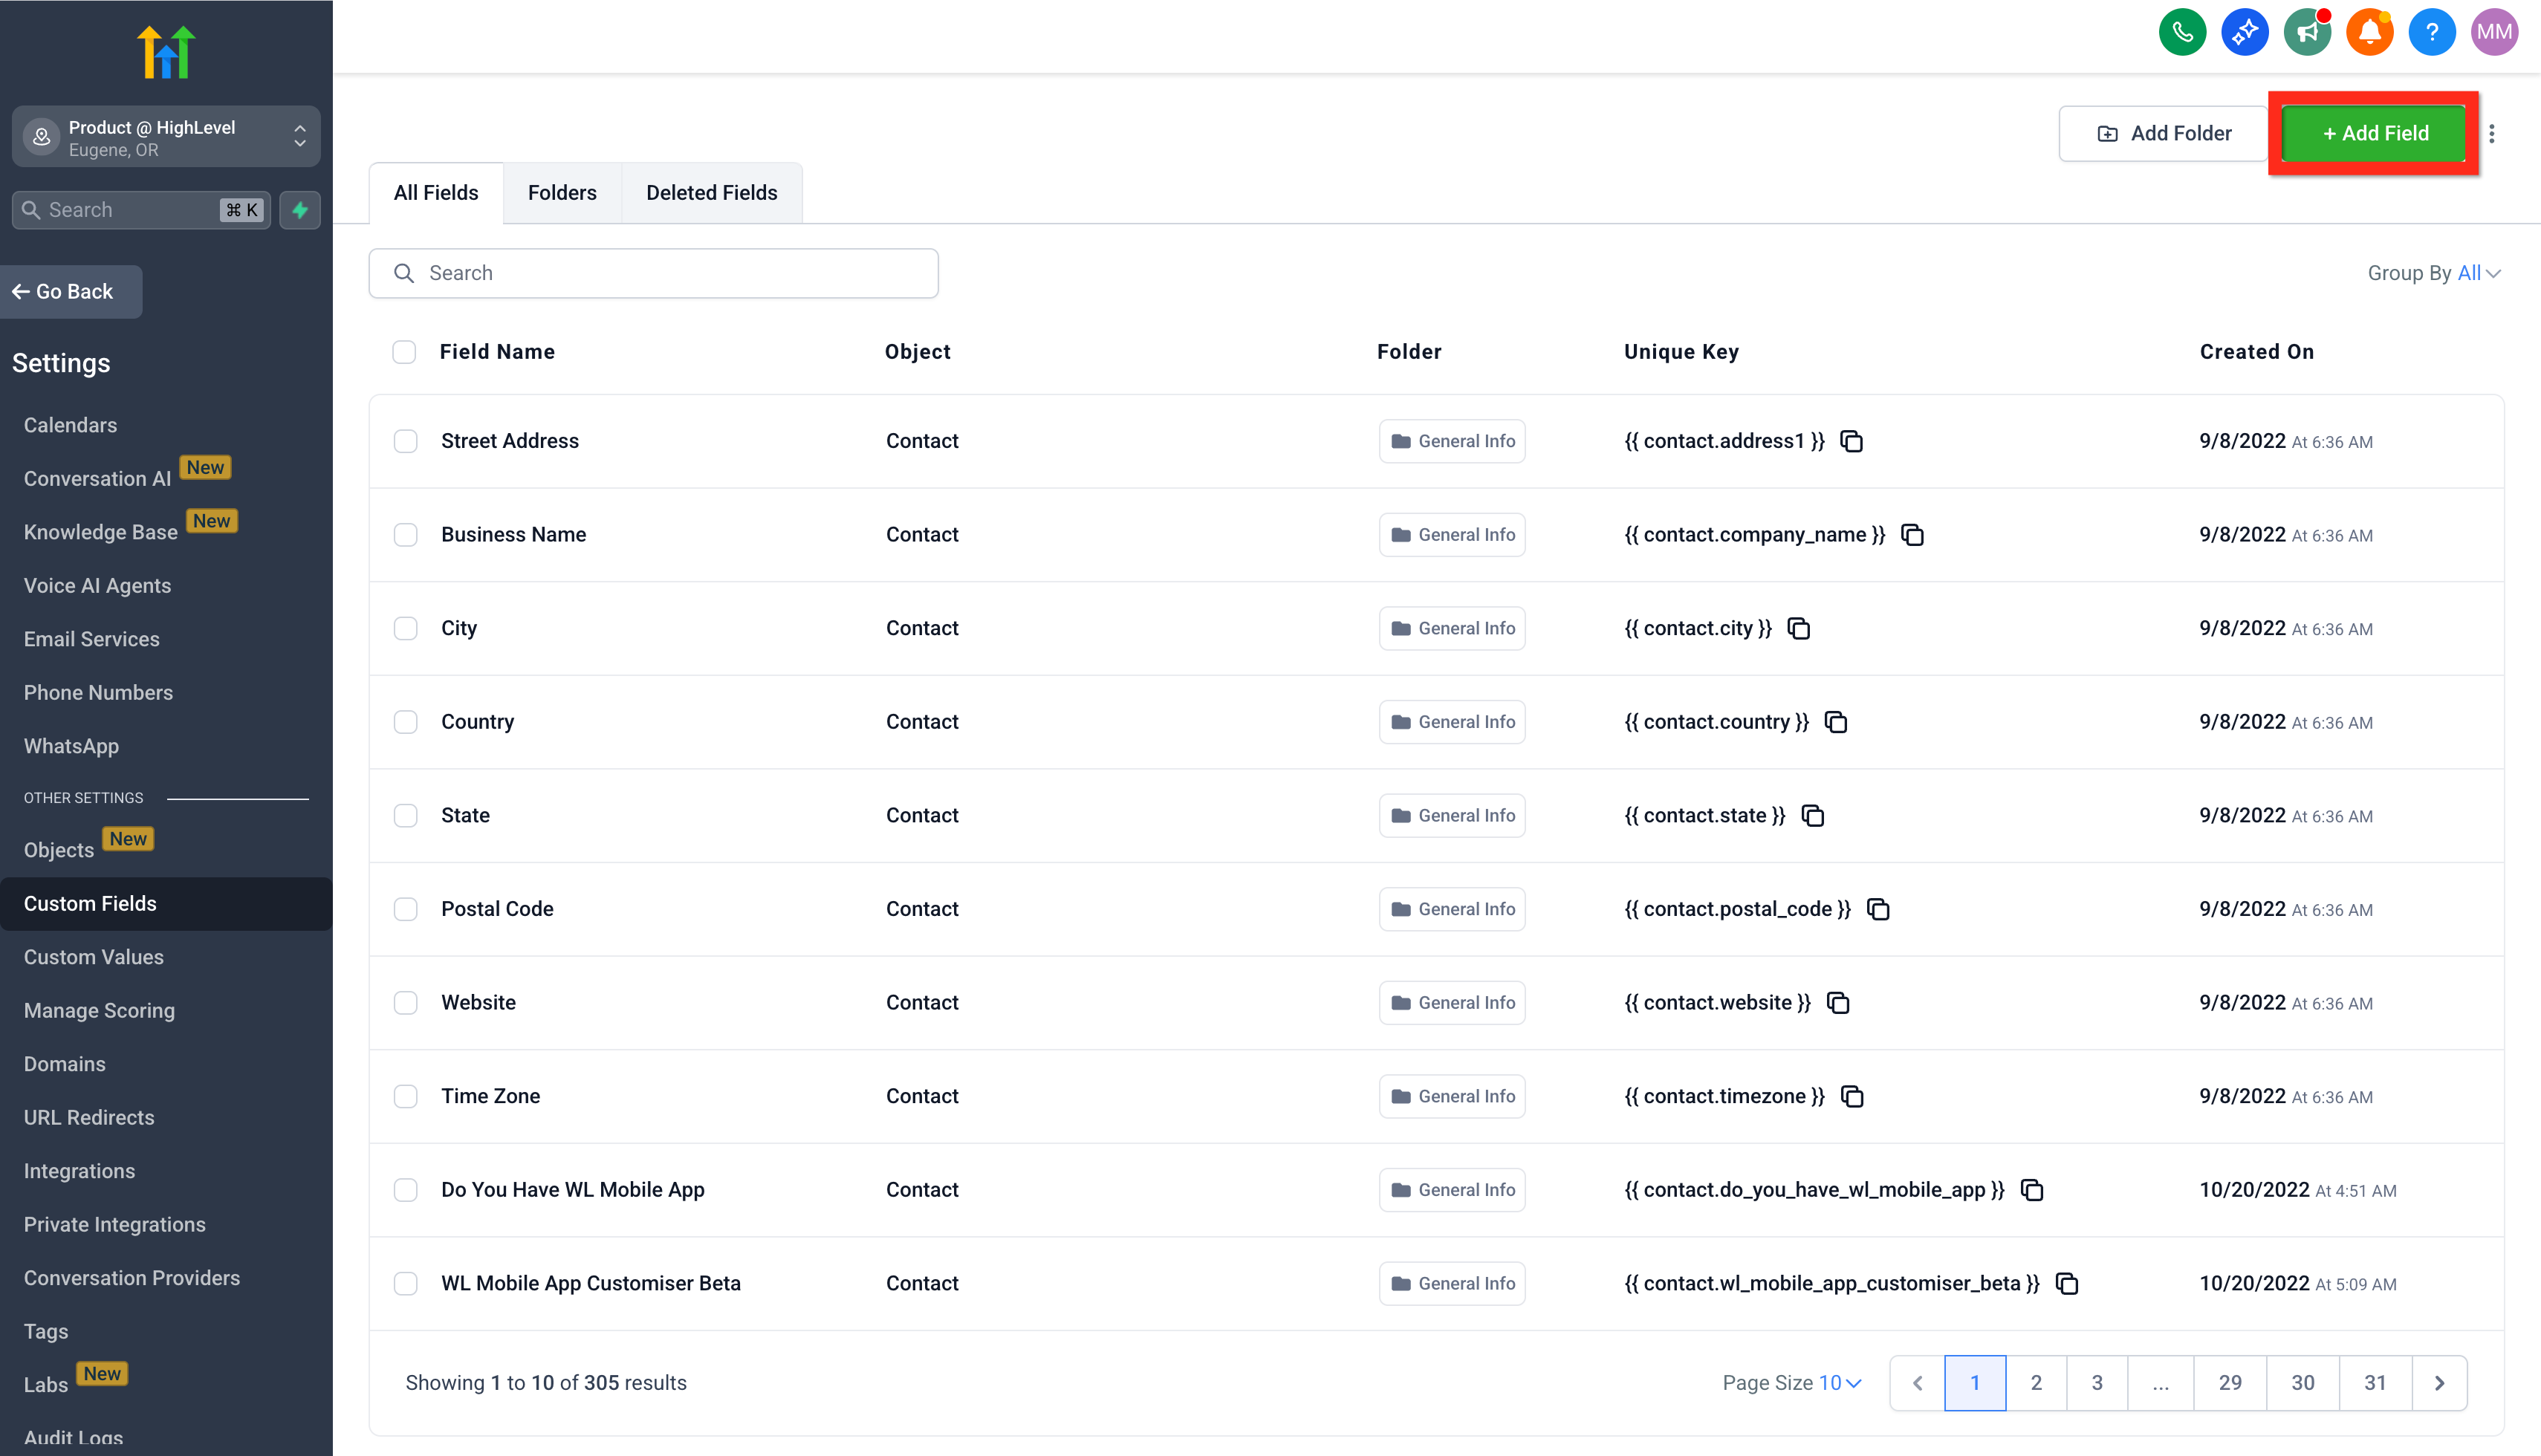
- Navigate to Settings > Custom Fields.
- Click Add Field.
- Select the type of field you need.
- Enter the field details, including name, group, and placeholder.
- Click Save.
Execute bulk actions on selected contacts
- Navigate to Contacts.
- Apply filters to narrow down the audience.
- Select the checkboxes next to the desired contacts.
- Click a bulk action button such as Add to Automation, Send SMS, or Send Email.
06What it looks like in HighLevel
07Settings that matter
- Custom Fields. Controls the additional data points you can add to contact records beyond the standard fields.
08Things to know before you rely on it
- CSV files larger than 50 MB cannot be uploaded for import.
- Only columns that match standard contact fields are imported automatically; unmatched columns must be handled via a new custom field or ignored.
- Duplicate contacts are managed according to the Contact Deduplication Preferences set for the import.
09How it connects to the rest of HighLevel
- Step by step guide for importing contacts with a CSV file. CSV import guide
Michael's take

Import existing contacts is a quick way to get all your leads into HighLevel.