
01Who this is for
- Team members can view contact information while reviewing opportunities without leaving the pipeline view.
- Appointment coordinators can see customer details and recent messages while scheduling appointments.
02Contact overlay, explained
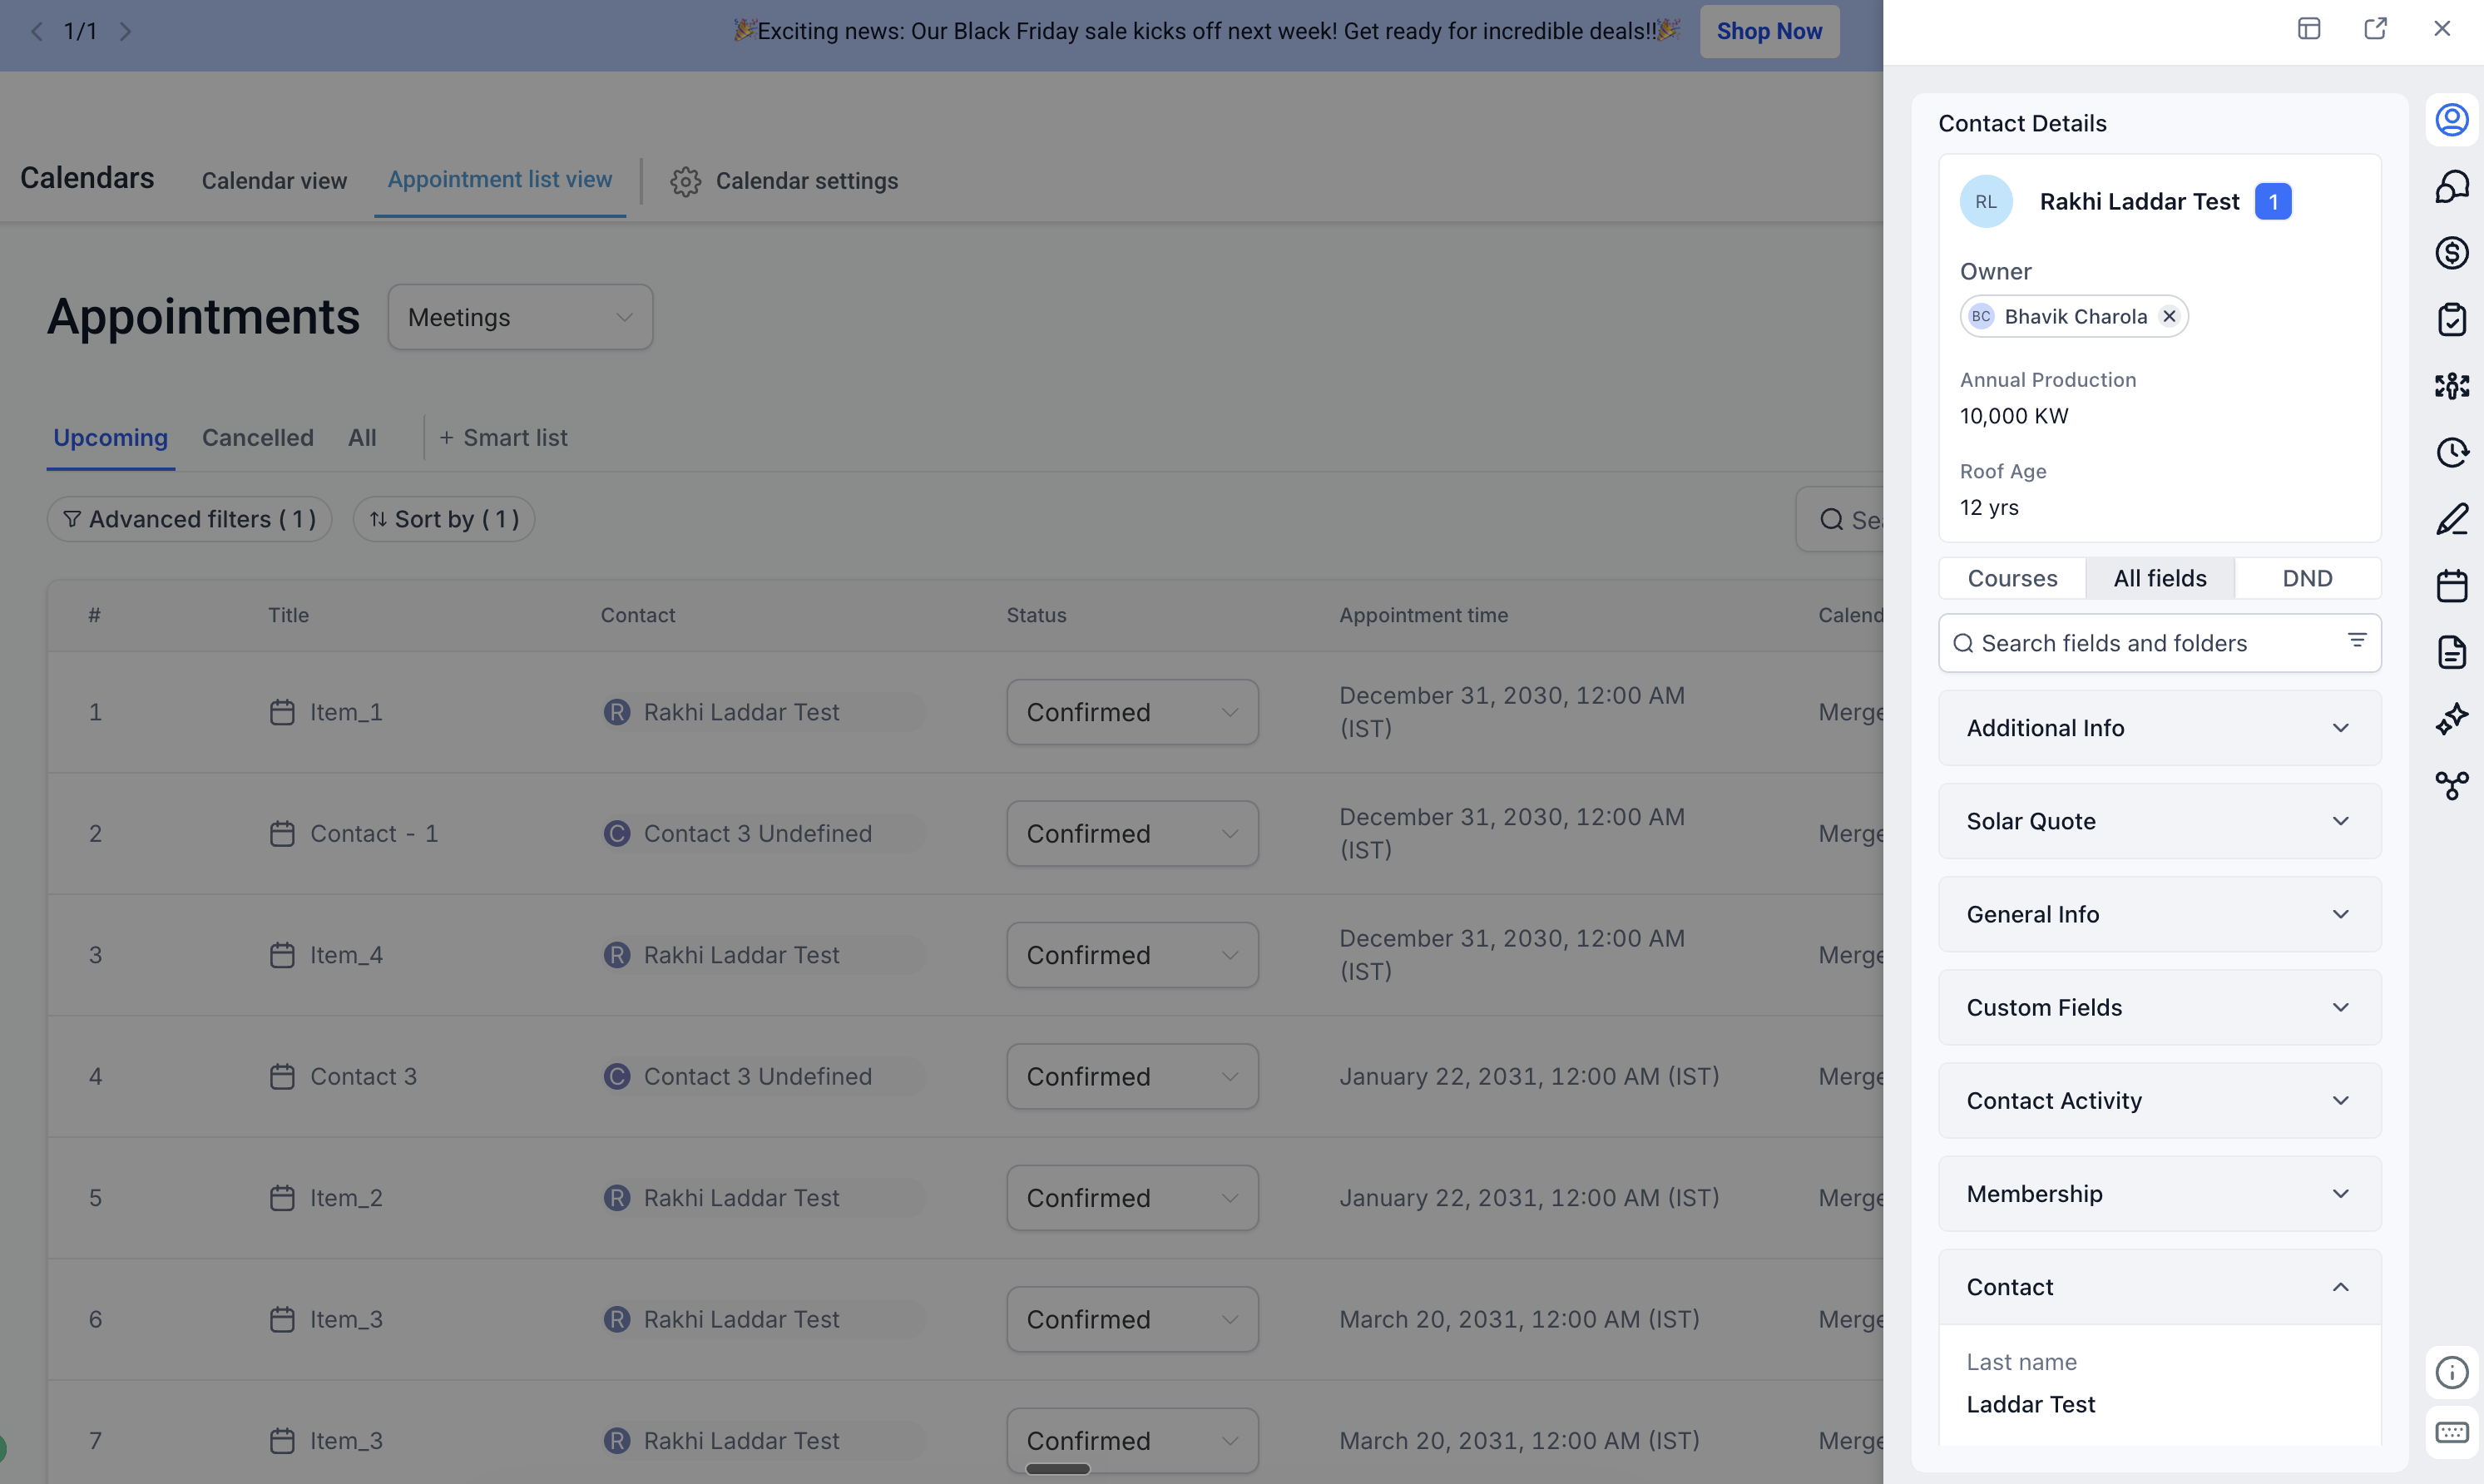
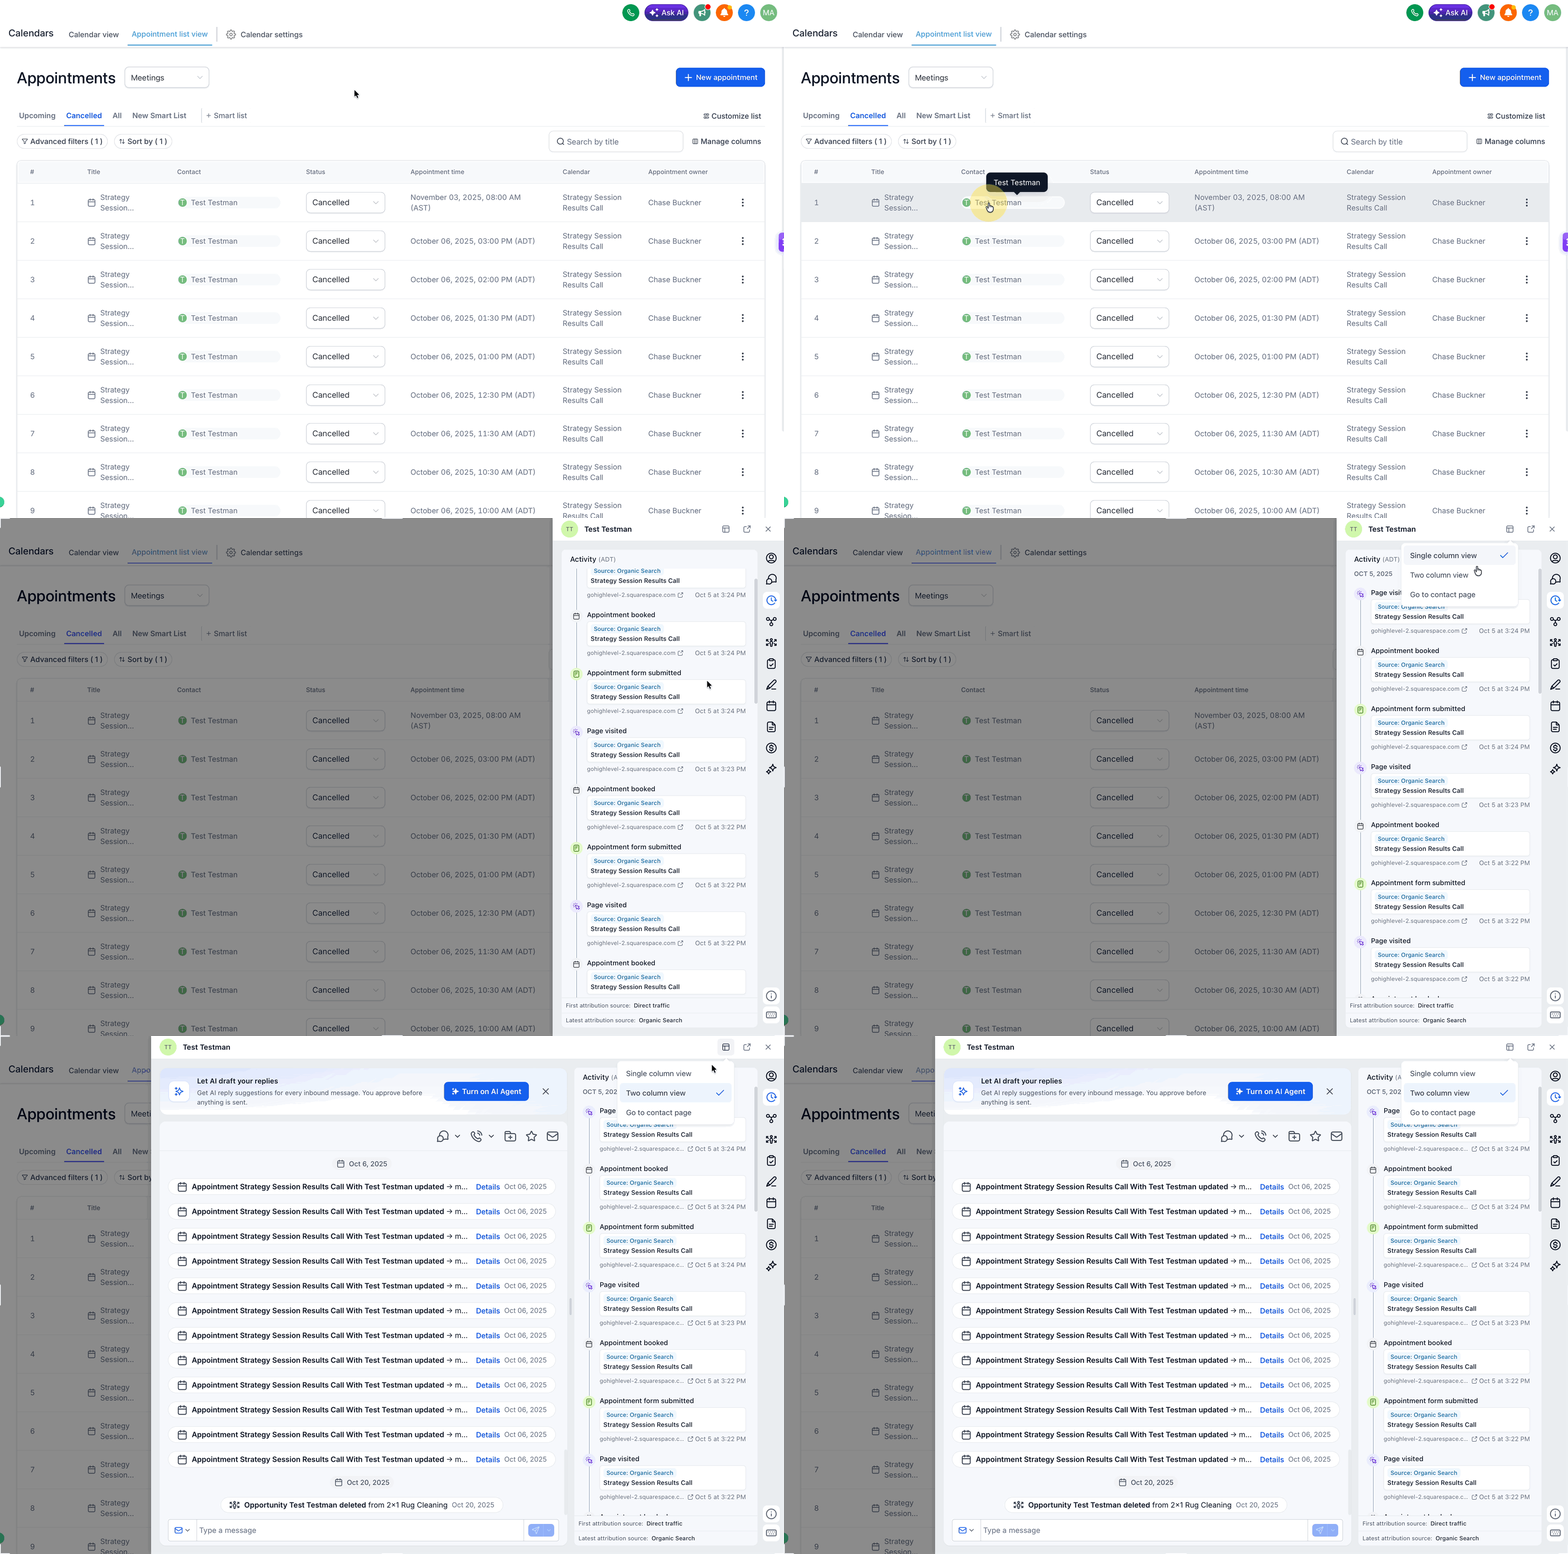
The overlay appears when you click a contact name or icon on an Opportunity or an Appointment list entry. It displays the contact’s profile and recent conversation threads in a pane that sits on top of the current page. You can keep working on the original list while the overlay shows the needed details.
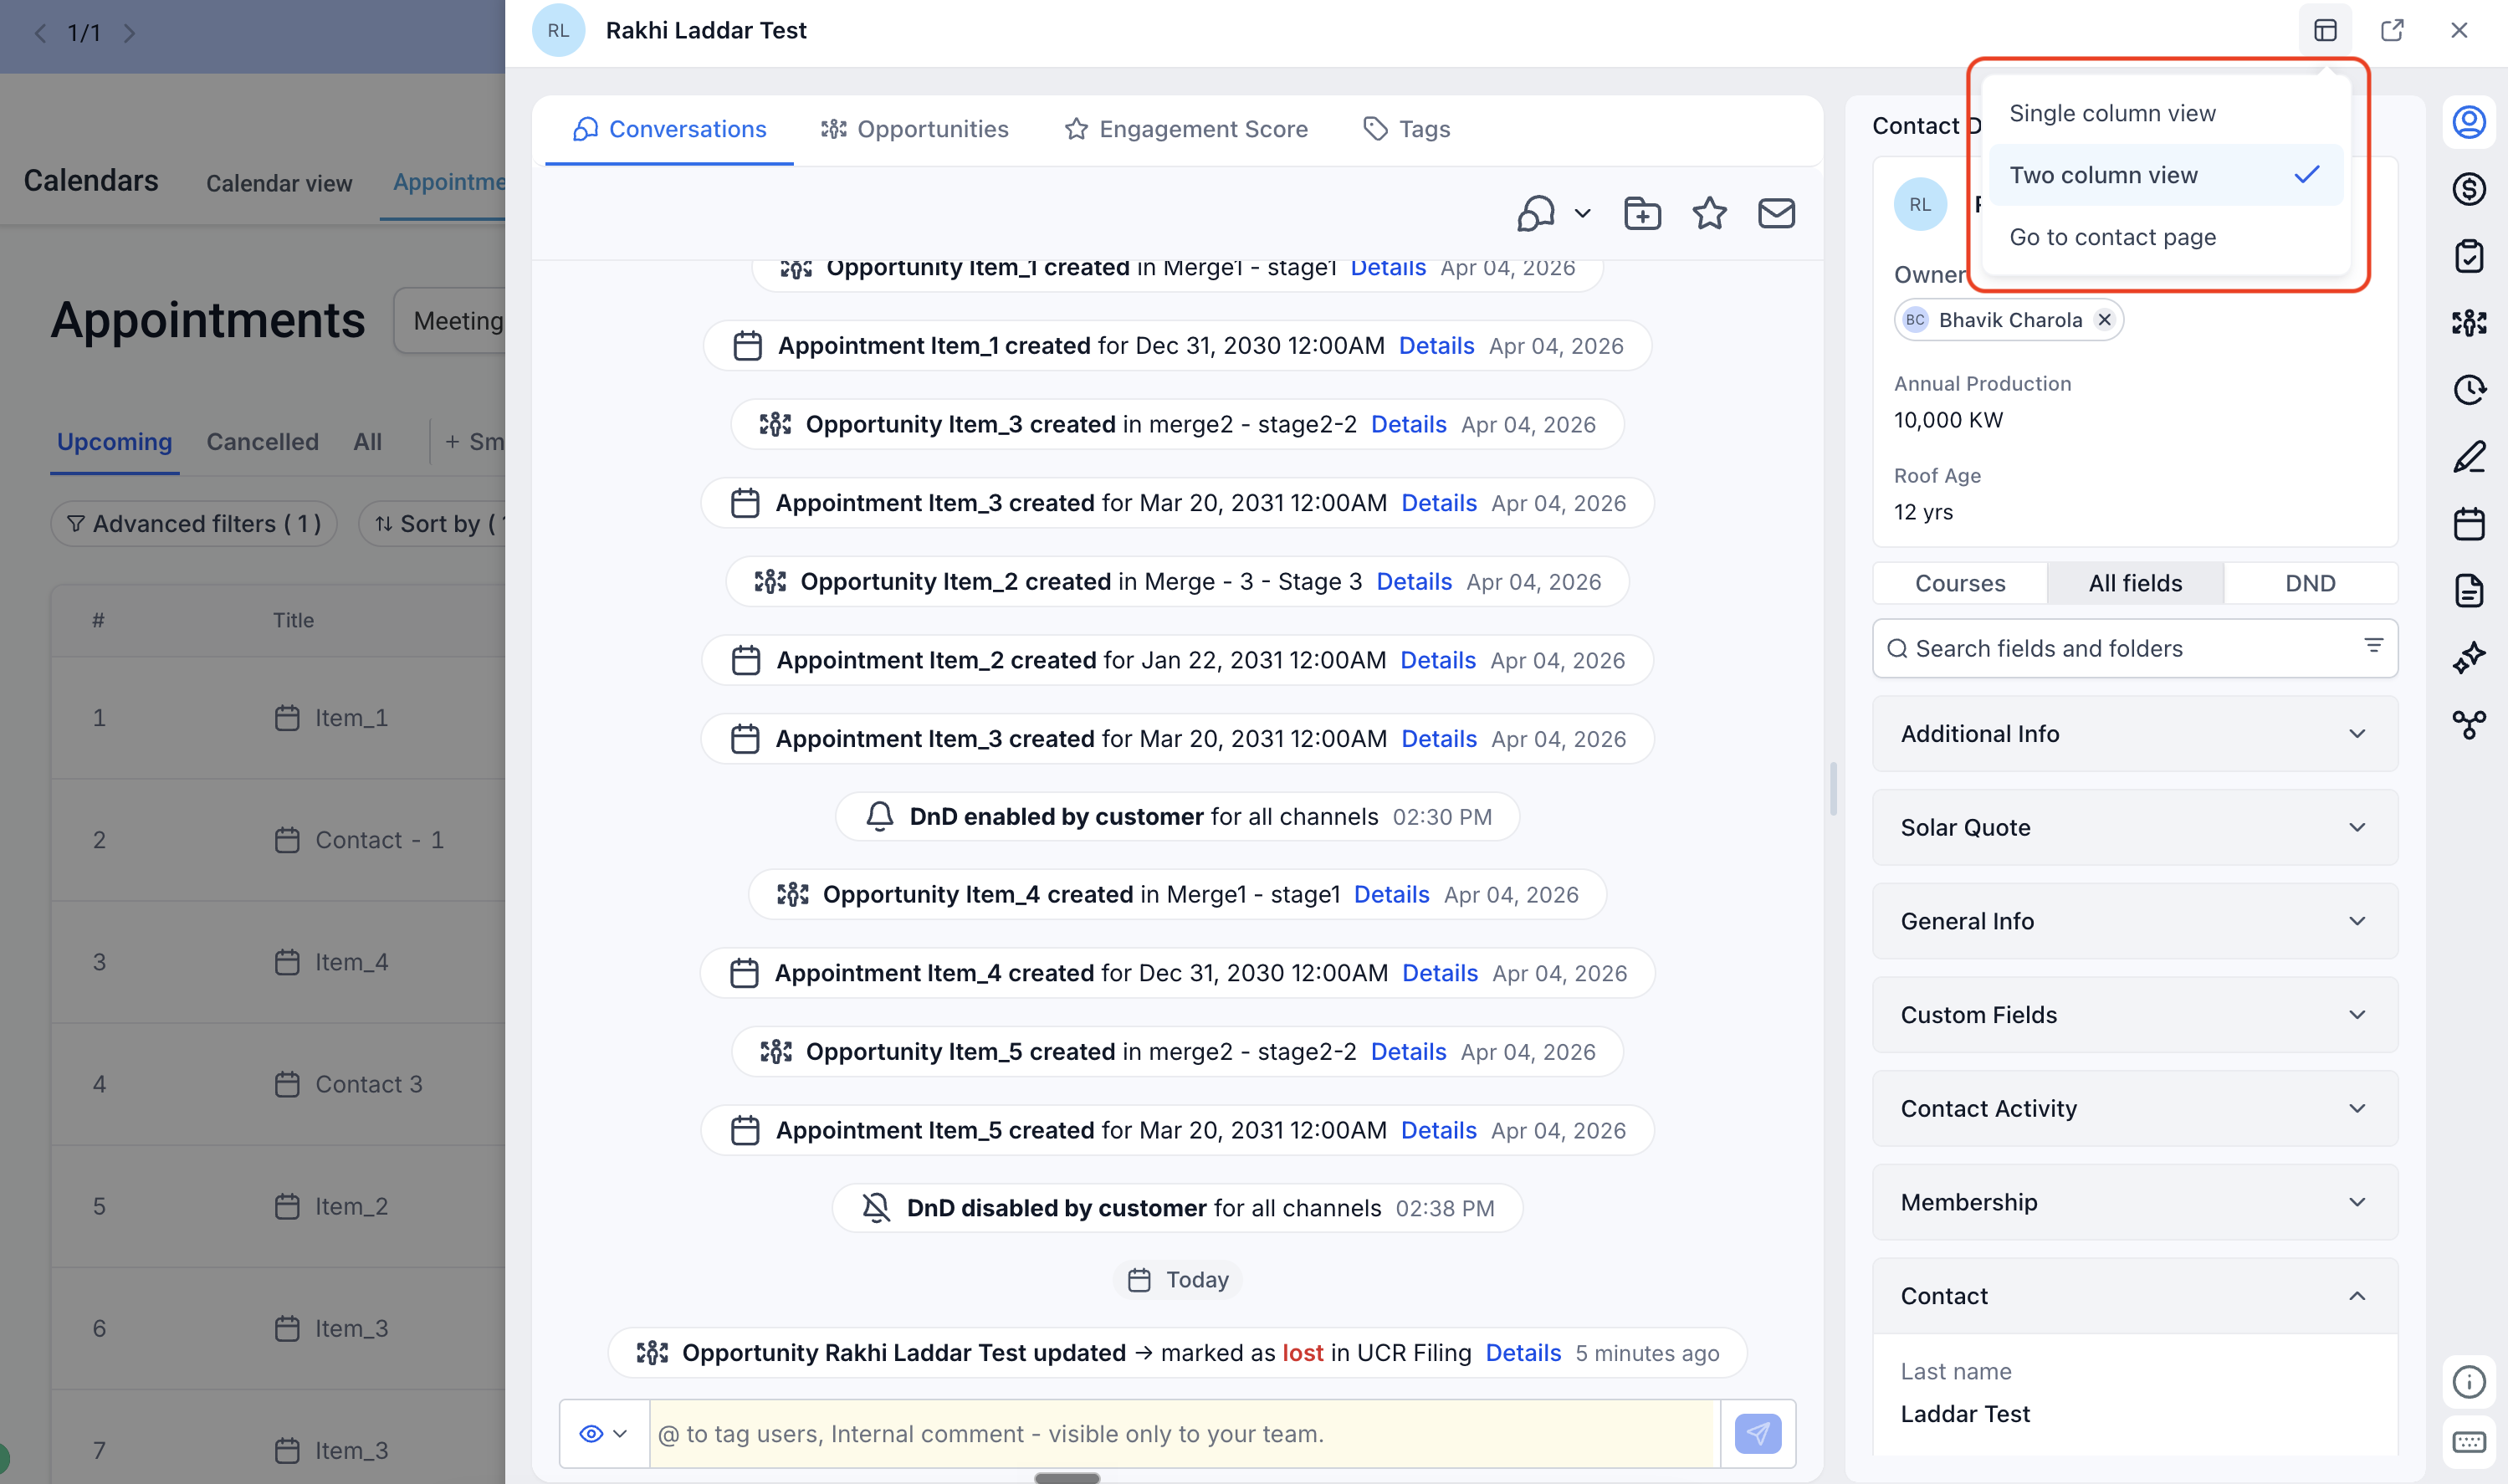
Two layout options control how much information is shown. Single column view presents a compact panel with contact fields and right panel tools. Two column view expands the pane to show contact information side by side with an extended conversation area. A button at the top of the overlay lets you jump to the full Contact Detail Page in a new tab.
03How businesses use the Contact Overlay
- Real estate agency. An agent clicks the buyer’s name on an opportunity, opens the overlay, and reviews recent messages while still seeing the property pipeline. The agent switches to two column view for more context before scheduling a showing.
- Health clinic. A scheduler selects a patient’s name on the appointments list, opens the overlay, and checks contact details and prior communication without leaving the calendar view. The overlay’s single column view provides a quick glance before confirming the appointment.
- Marketing agency. A project manager clicks a client contact on an opportunity, uses the overlay to read recent chat history, and then opens the full contact record in a new tab to edit tags while staying on the opportunity board.
04Before you start
- User must be viewing the Opportunities list or the Appointment list view.
05How to set up and use the Contact Overlay in HighLevel
Open contact overlay from Opportunities or Appointments
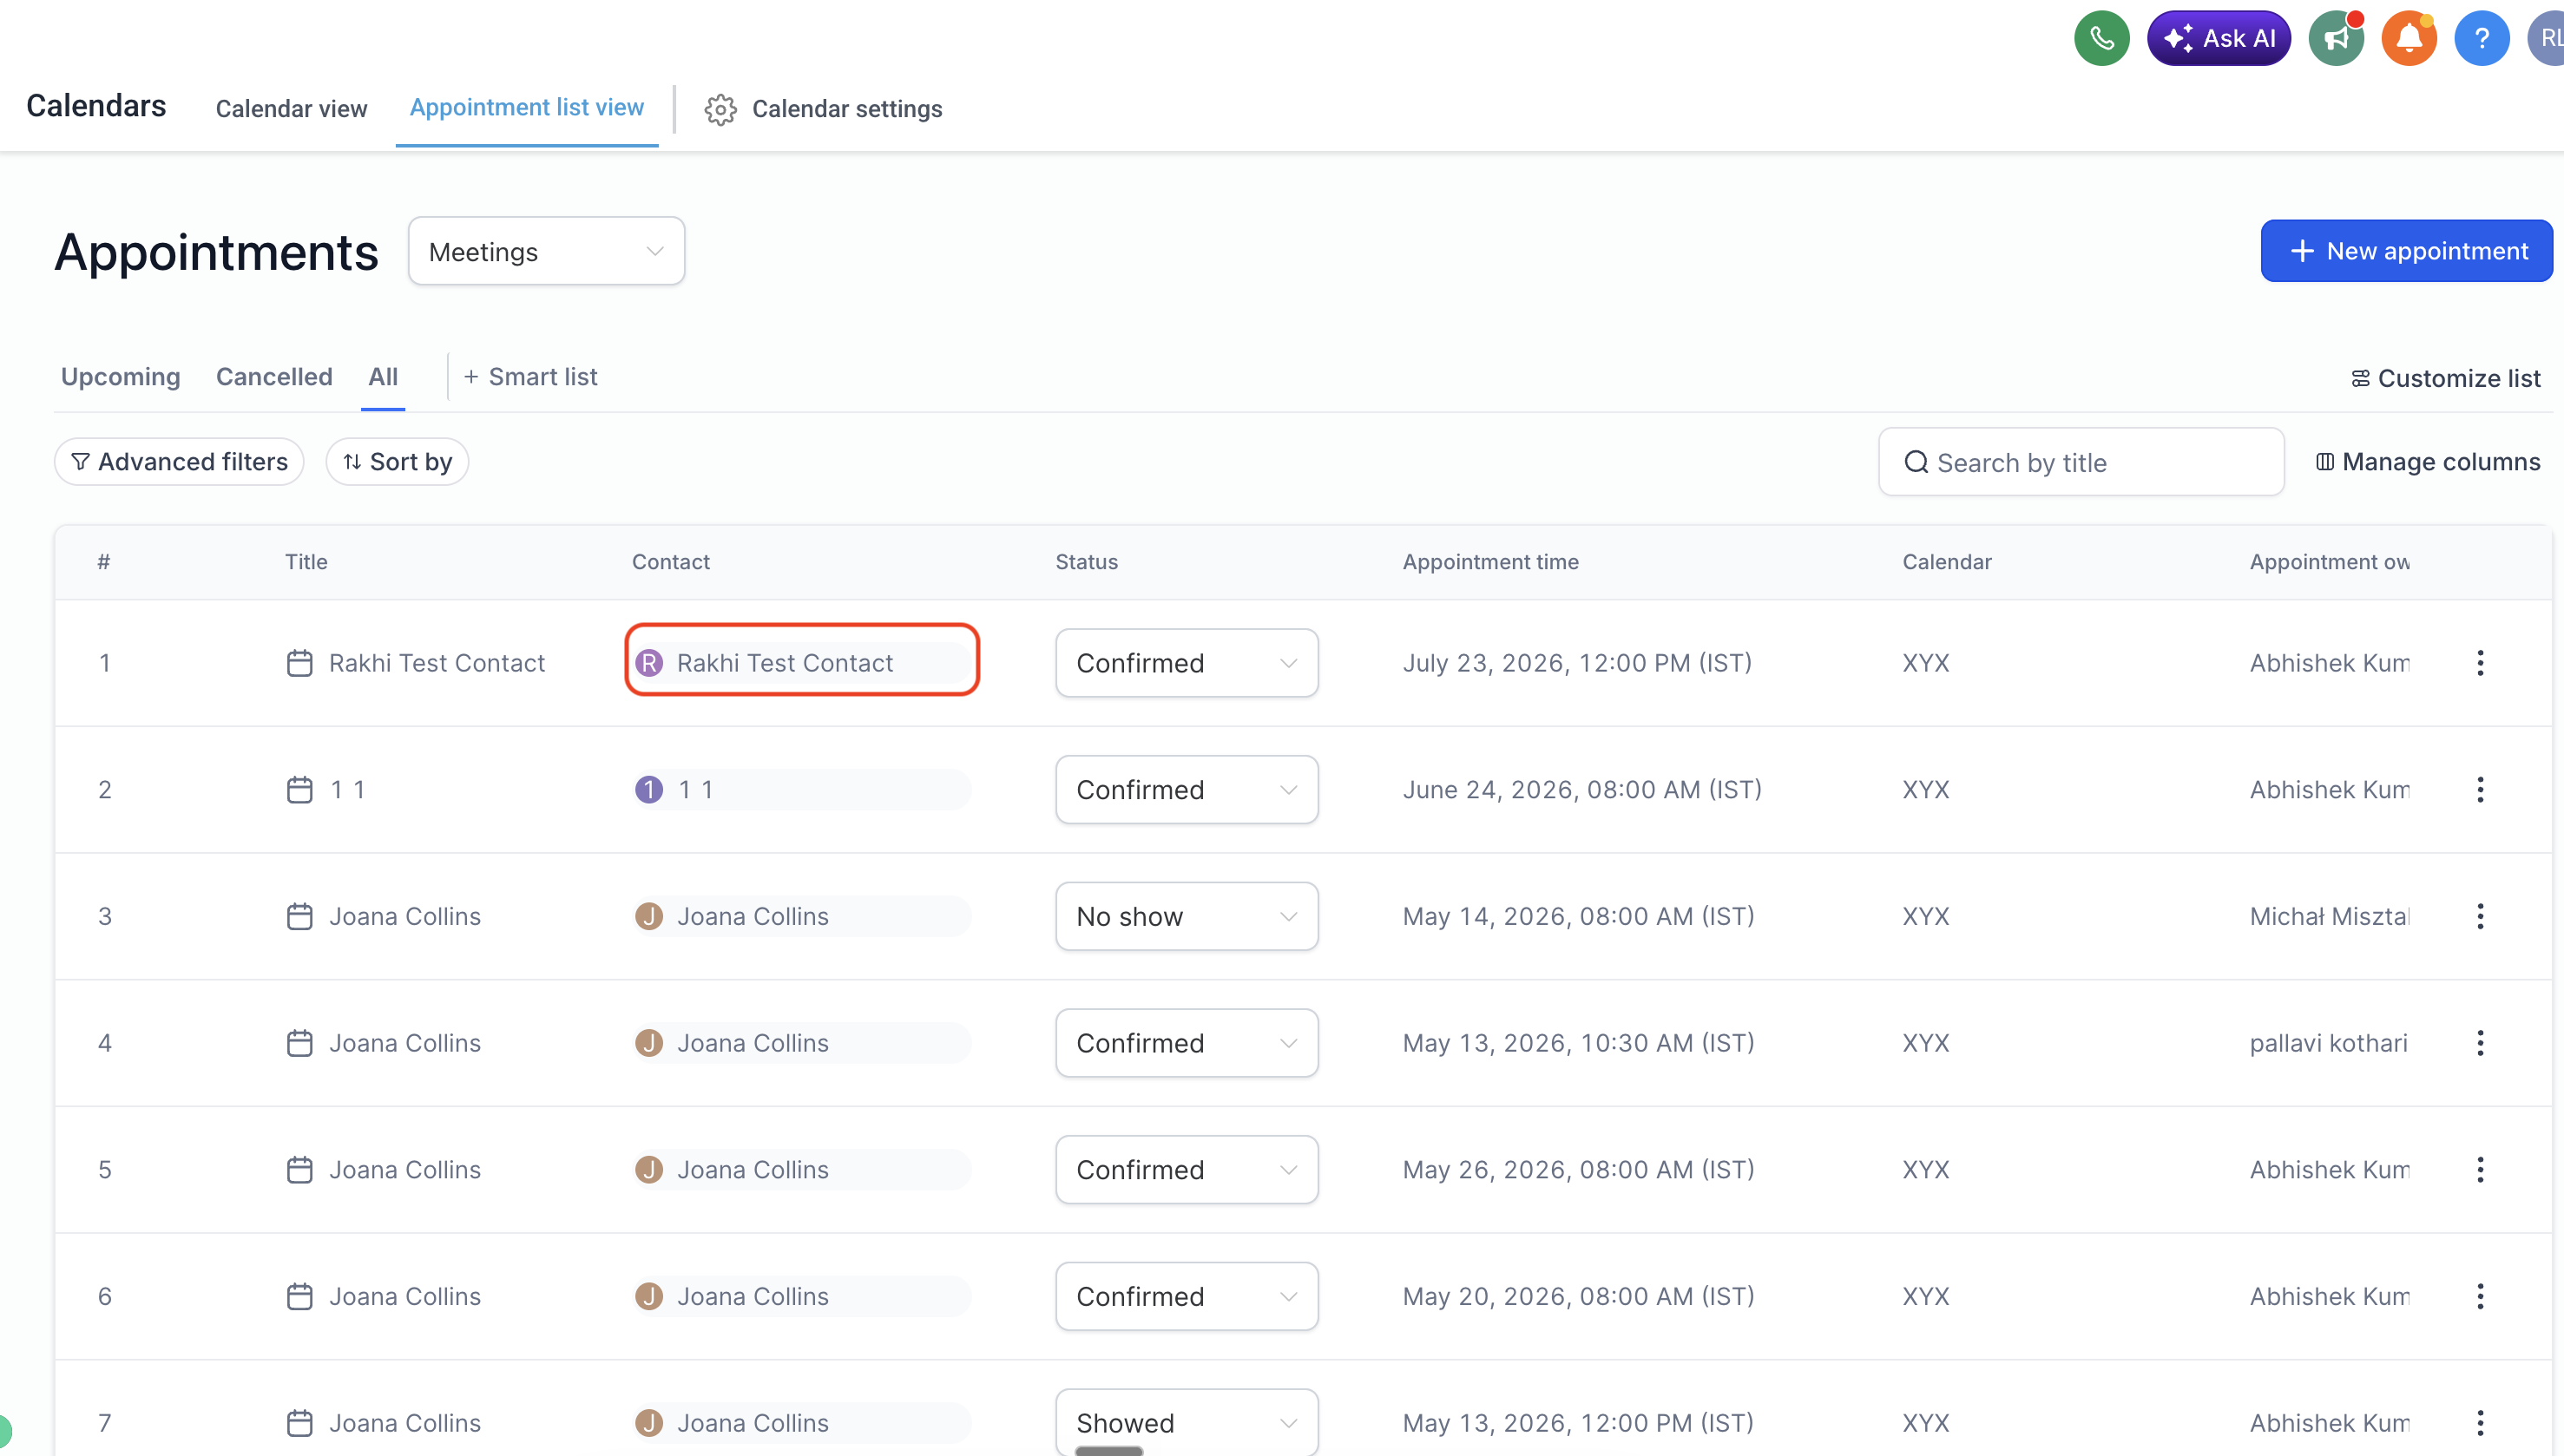
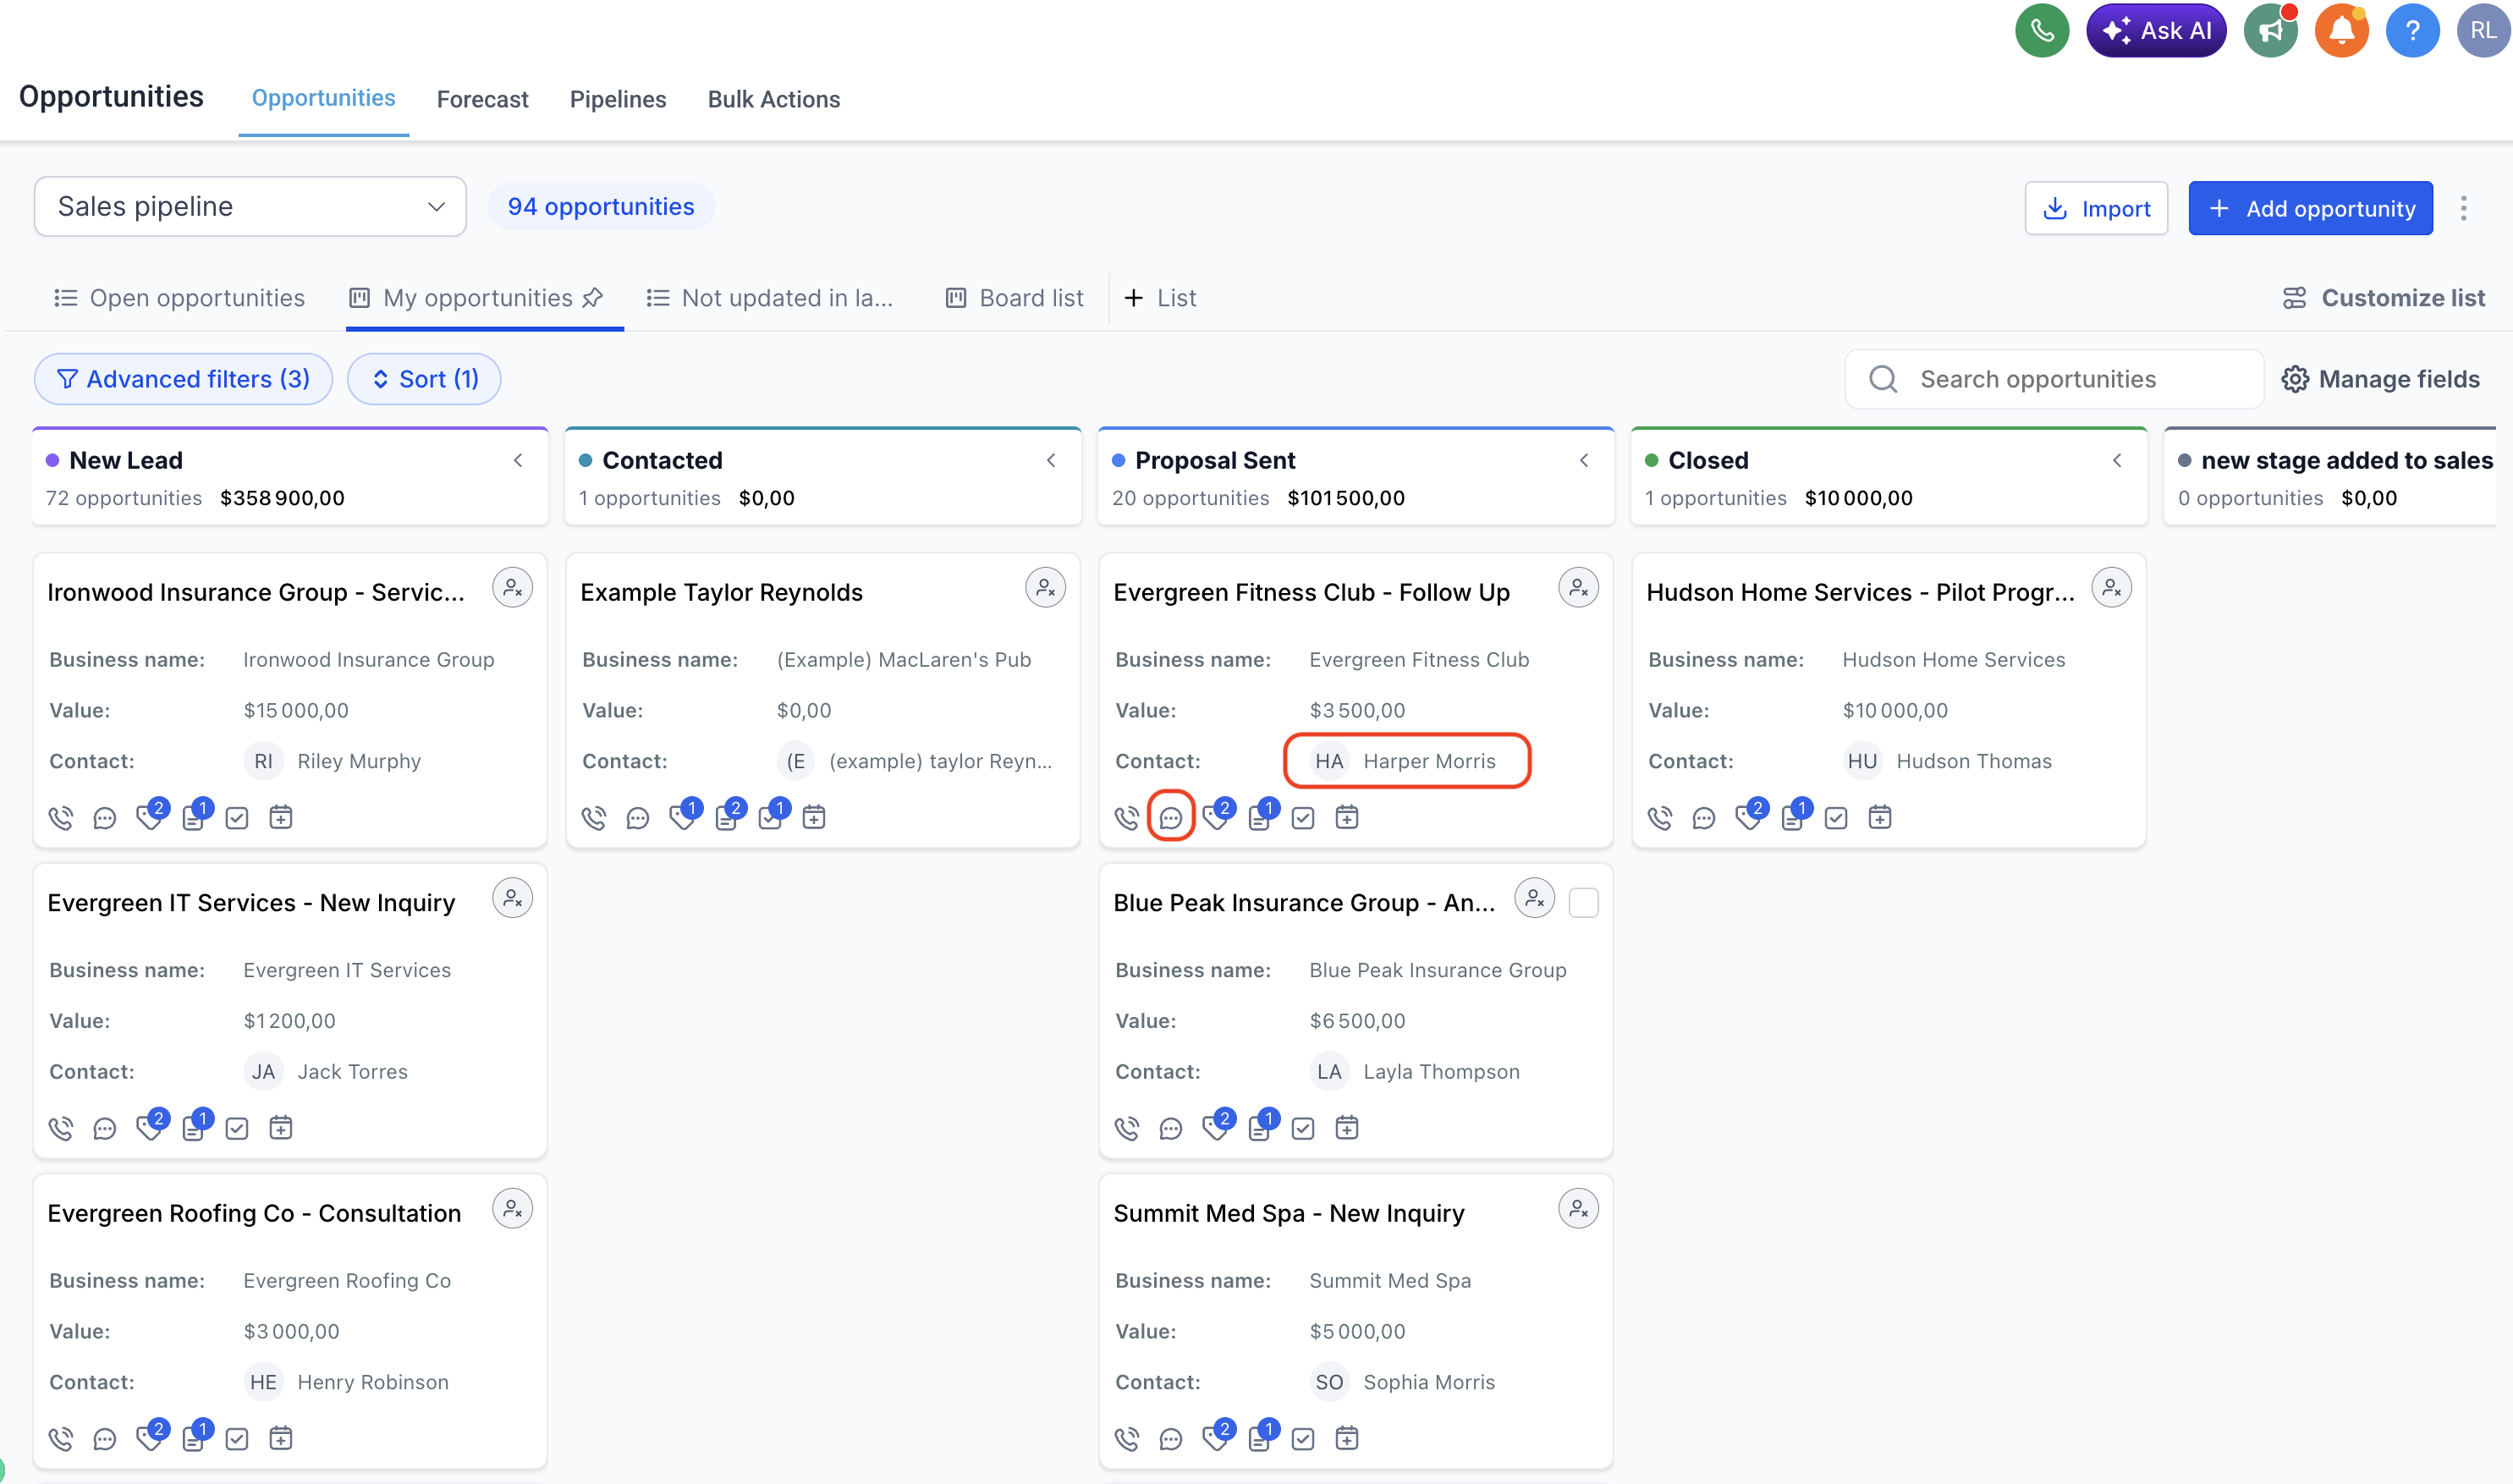
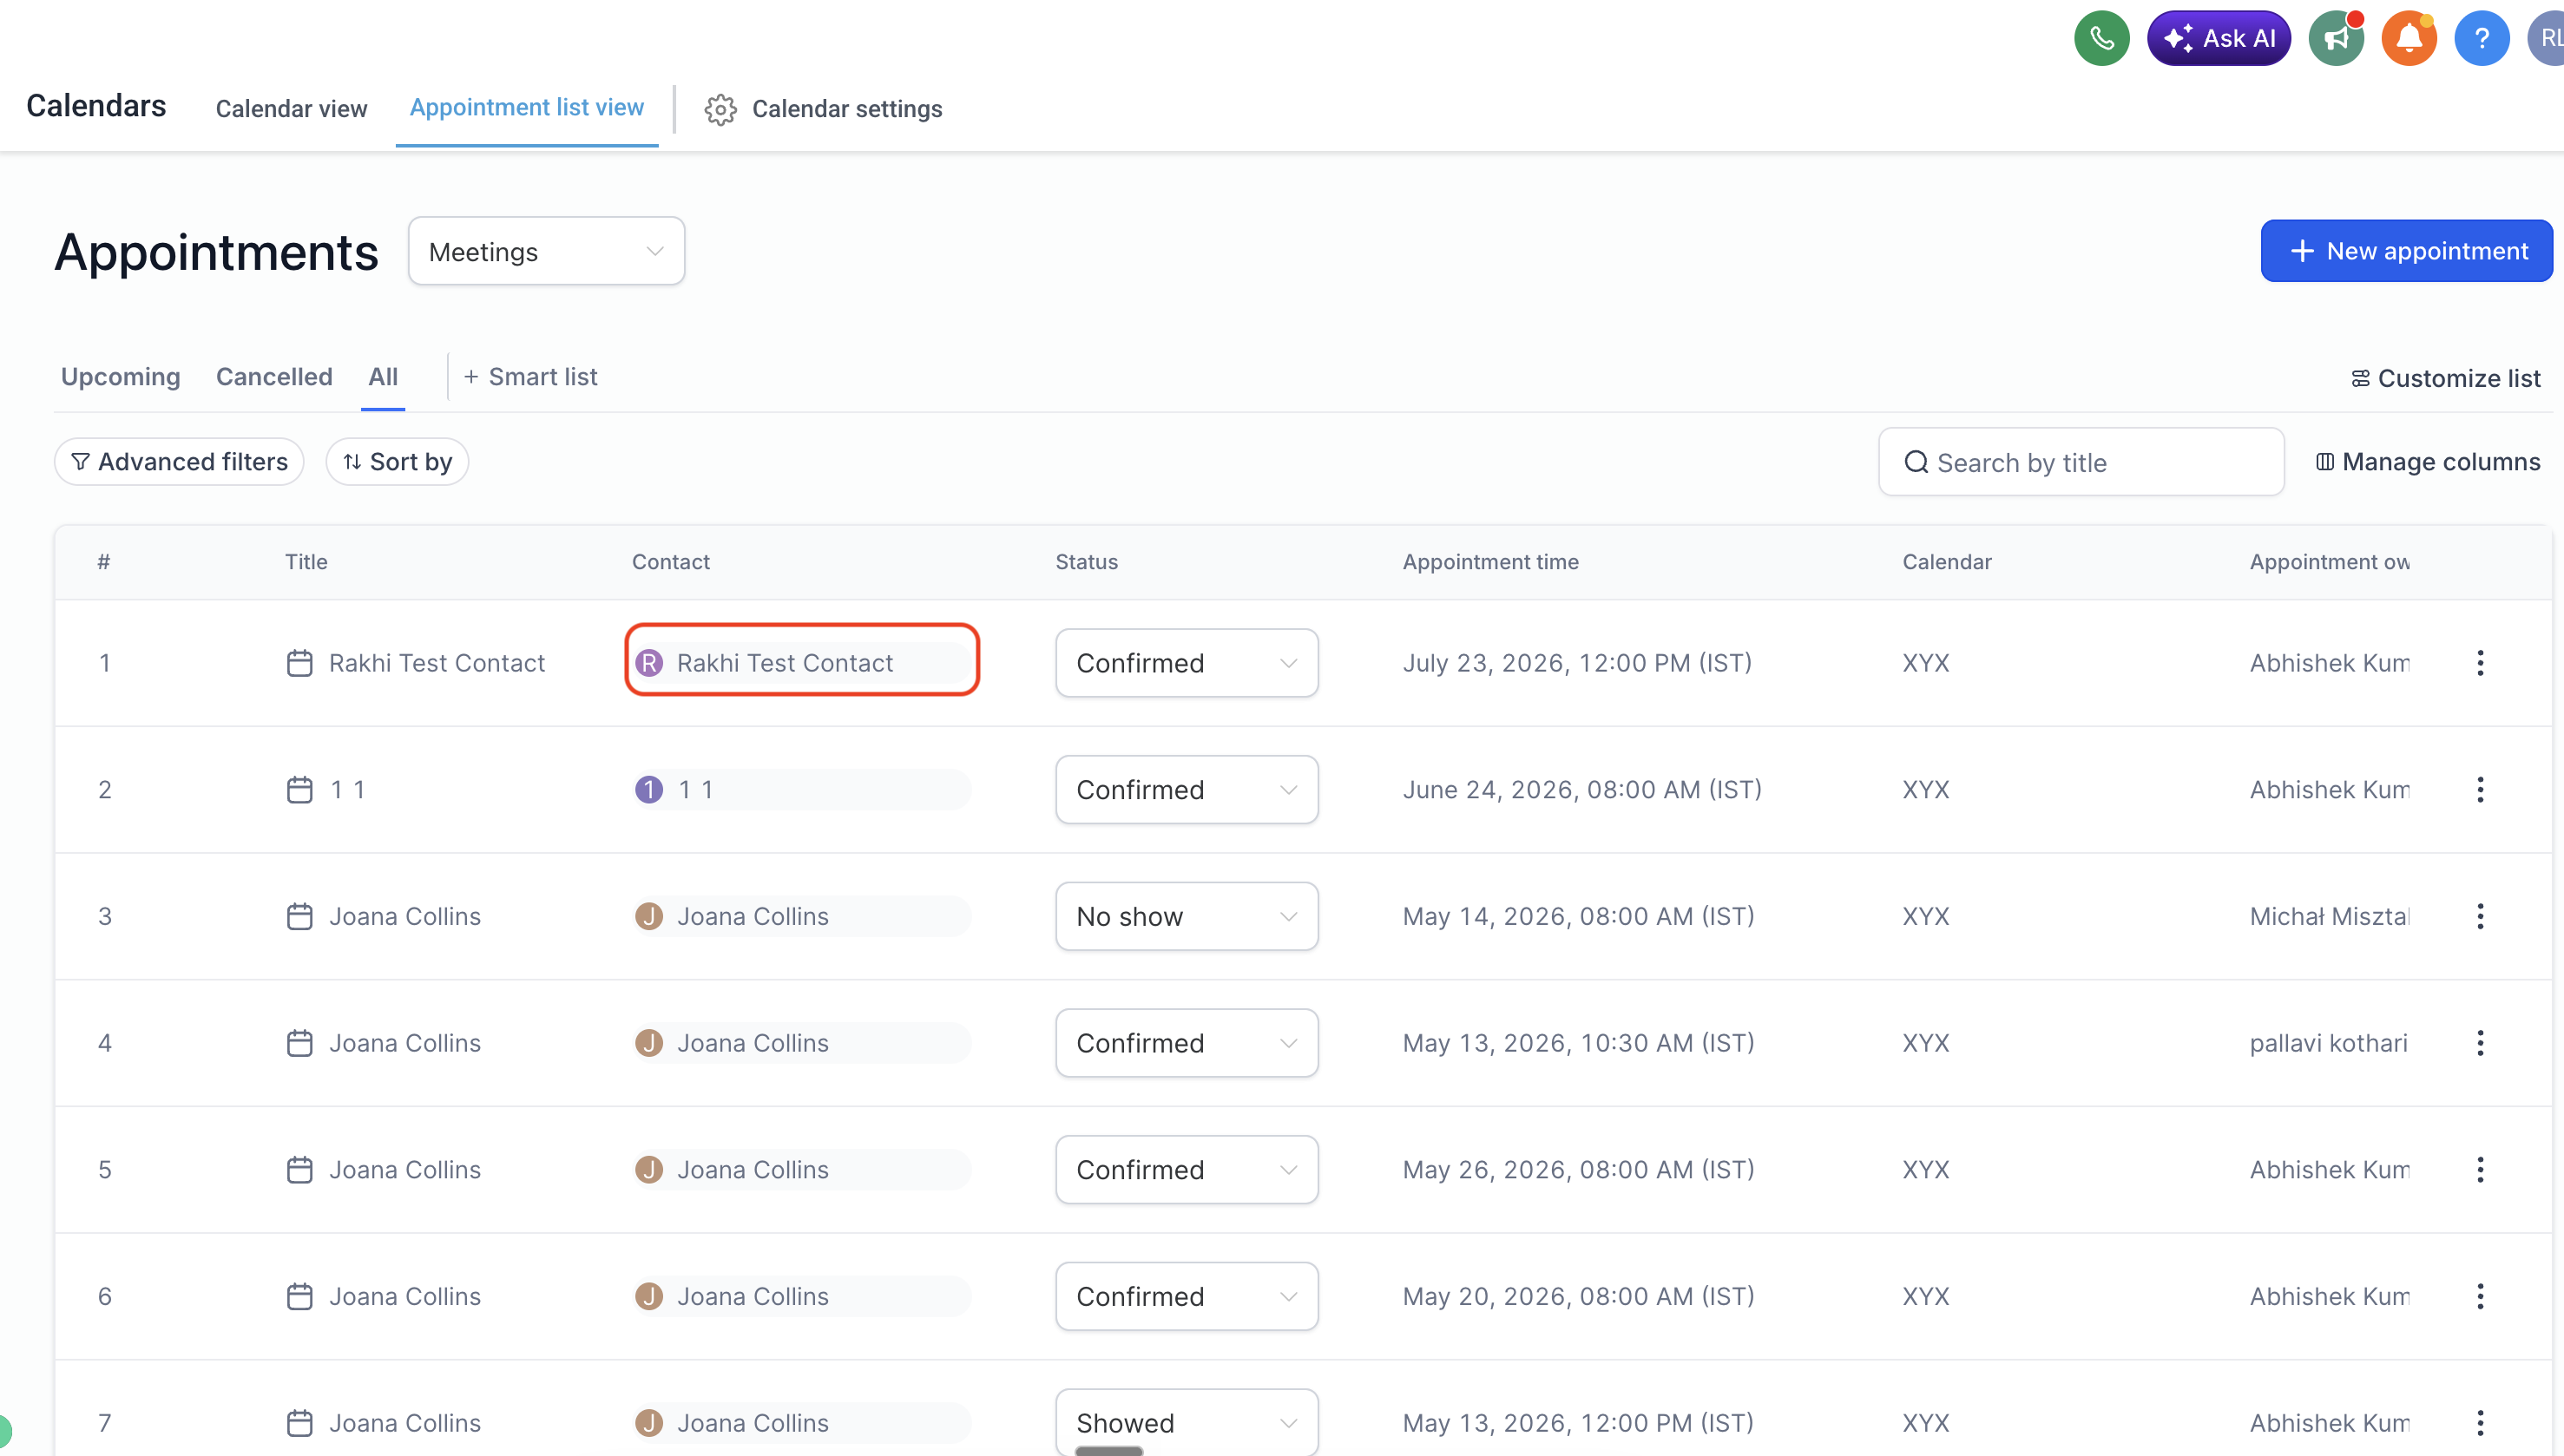
- Navigate to Opportunities or Calendars > Appointment list view.
- Find the opportunity or appointment you need.
- Click the contact name or the contact icon linked to that record.
- Observe the overlay appear while the original page stays visible.
- Read the displayed contact details and conversation history.
- Use the layout control at the top of the overlay to pick Single column, Two column, or Go to Contacts Page.
- Click the icon that opens the contact in a new browser tab for the full record.
- Press the X button to close the overlay and return to the original page.
06What it looks like in HighLevel
07Settings that matter
- layout control. Allows you to switch the overlay between Single column view, Two column view, or open the full Contact Detail Page.
08Things to know before you rely on it
- The overlay is only available when accessing contacts from Opportunities and Appointments.
- It does not appear in other parts of the platform where contact names are shown.
- Single column and Two column options affect only the overlay, not the Contact Detail Page layout.
09How it connects to the rest of HighLevel
- See how customizations on the Contact Detail Page appear in the overlay. Customize Contact Detail Page
- Learn about the all new Contact Detail Page layout and auto save features. All new Contact Detail Page
- Review pricing options for accessing Opportunities and Appointments features. HighLevel pricing
Michael's take

People often forget that staying on the same page can be a double edged sword. If you lose sight of where you started, you might waste time hunting for the right record. The Contact Overlay solves that by anchoring the contact view to your current workflow, so you never have to chase a new window.
When you need a quick glimpse of a client’s info while booking or moving a deal forward, the overlay is a real time saver. It lets you glance at details or conversation history, then snap back to the appointment or opportunity list without missing a beat.