
01Who this is for
- Sales managers, get a view that puts opportunities and client portal modules front and center.
- Support teams, receive a layout that hides sales only fields and highlights ticket and notes sections.
- Admins, control who sees which view and prevent accidental contact deletions.
02Contact detail page customization, explained
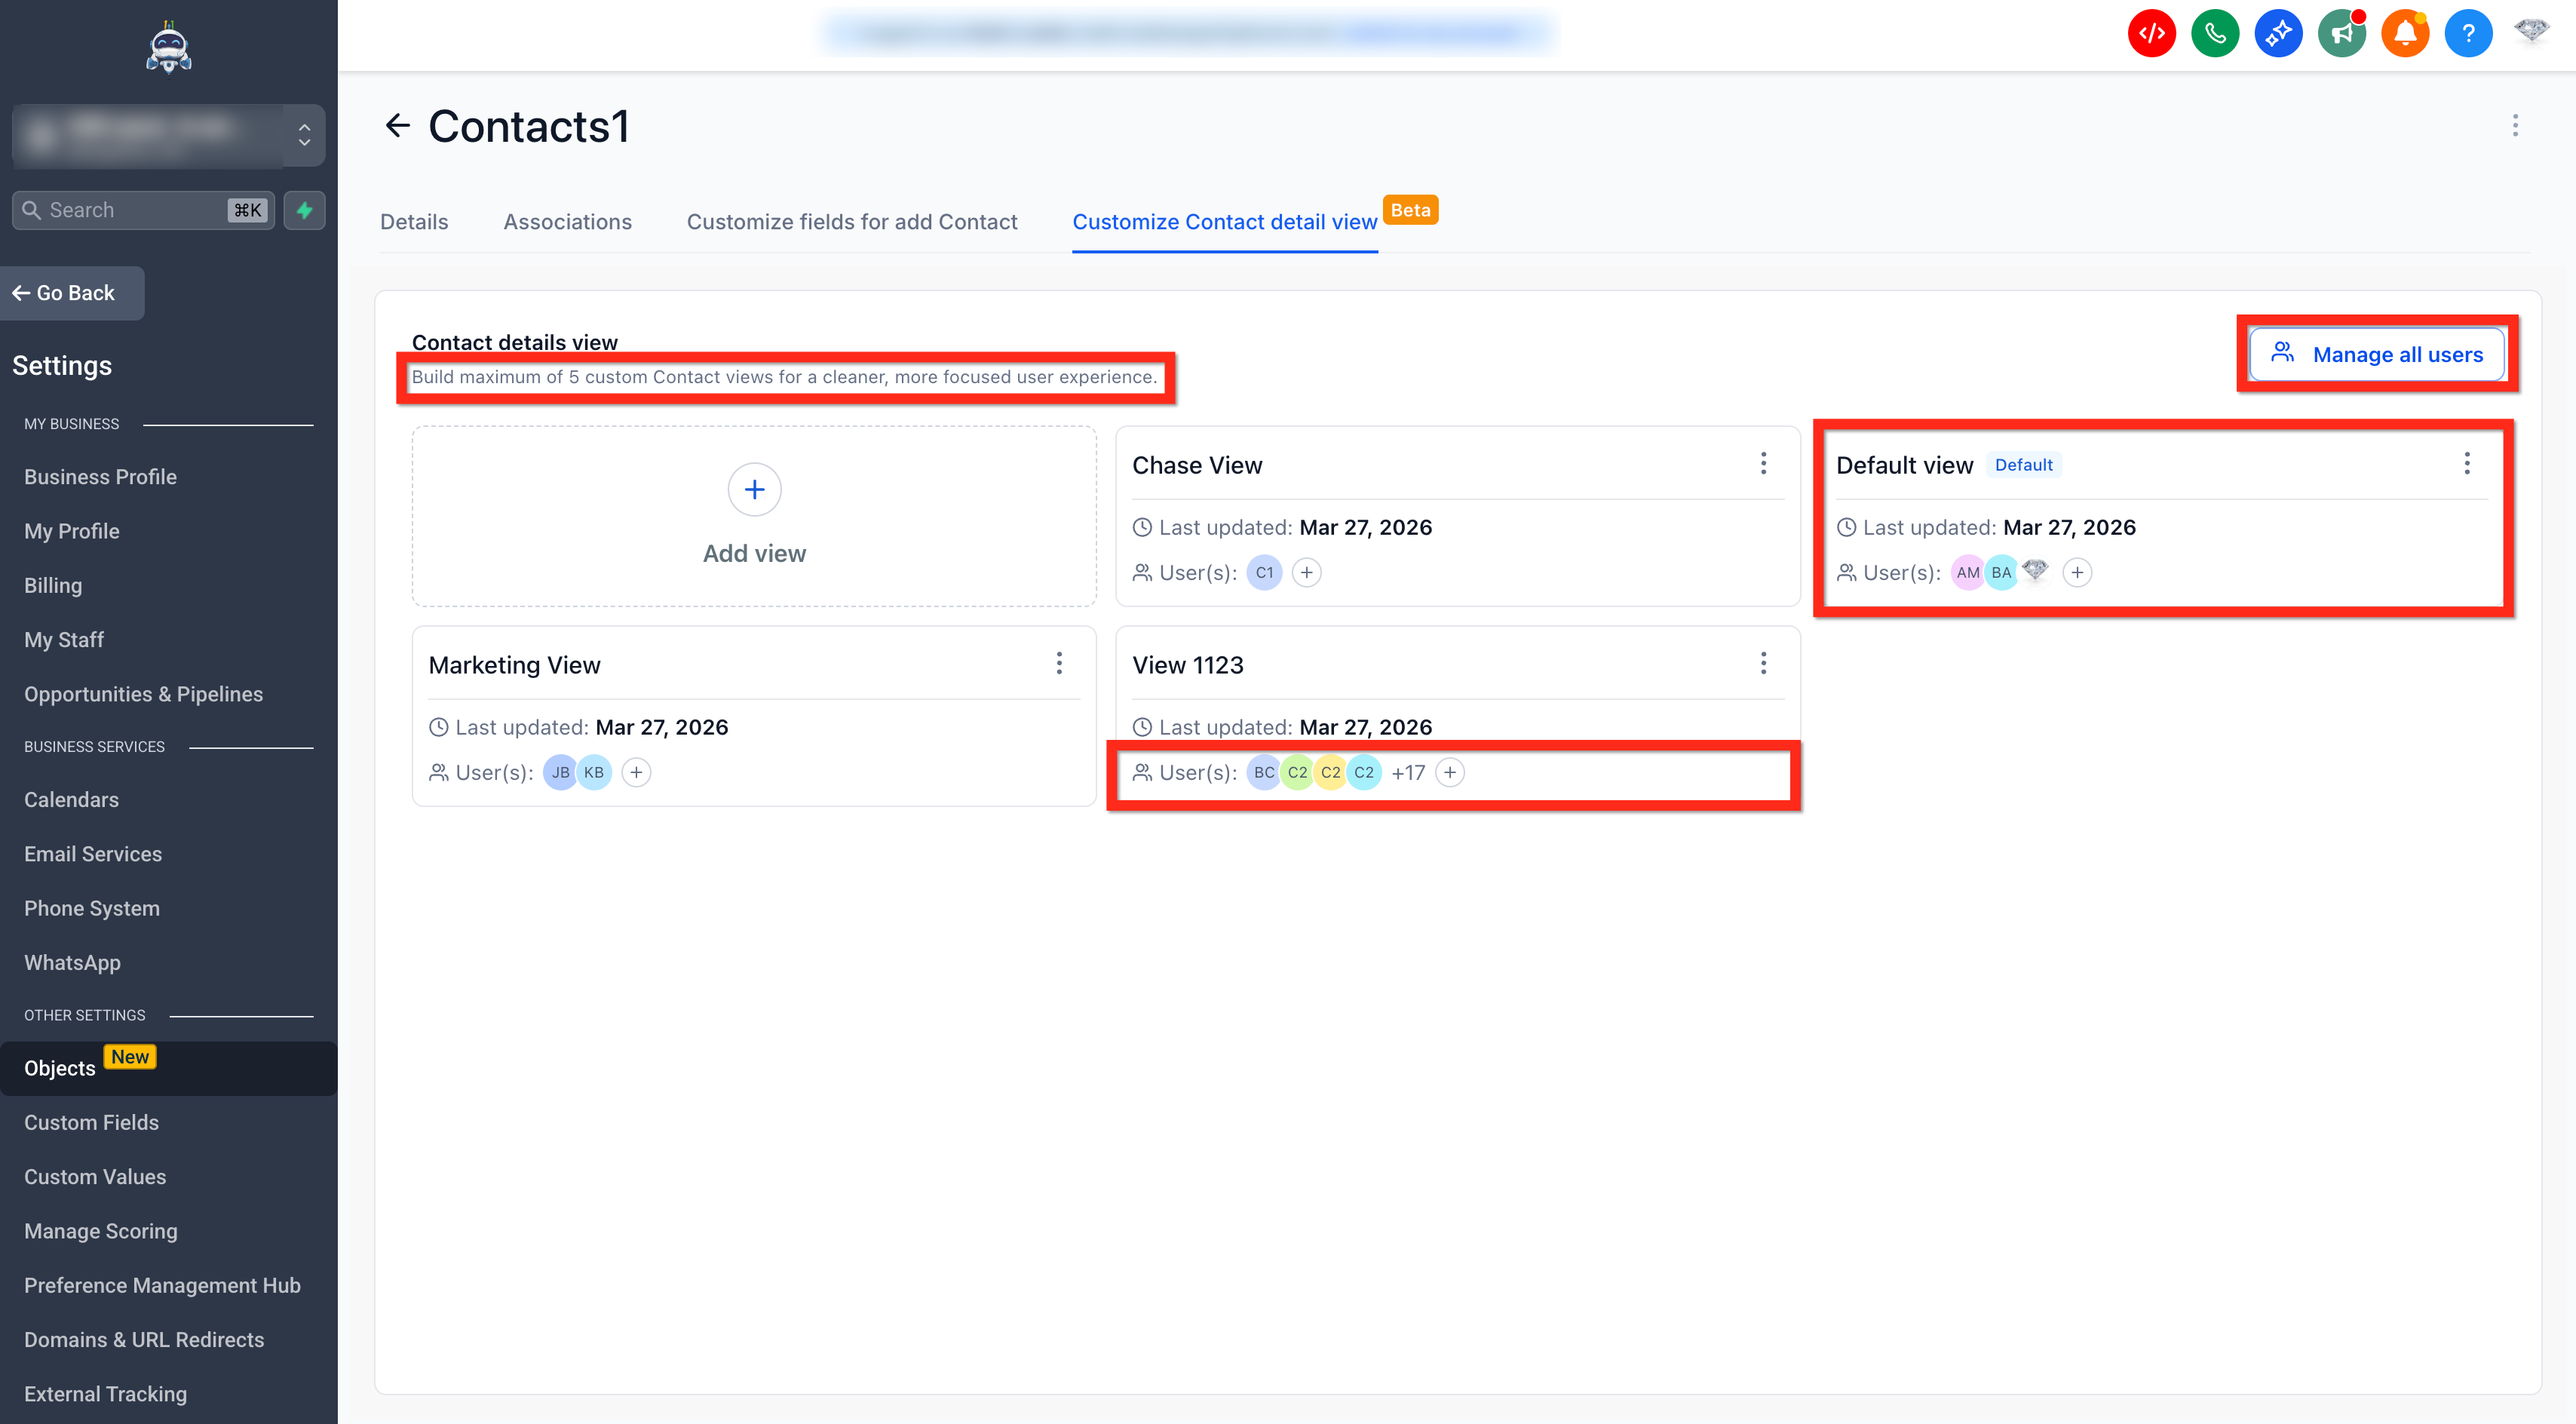
Customizing the Contact Detail Page lets an admin define how a contact record looks for different users. Views determine which panels, modules and fields appear, and the admin can assign each view to individual users through Manage Users.
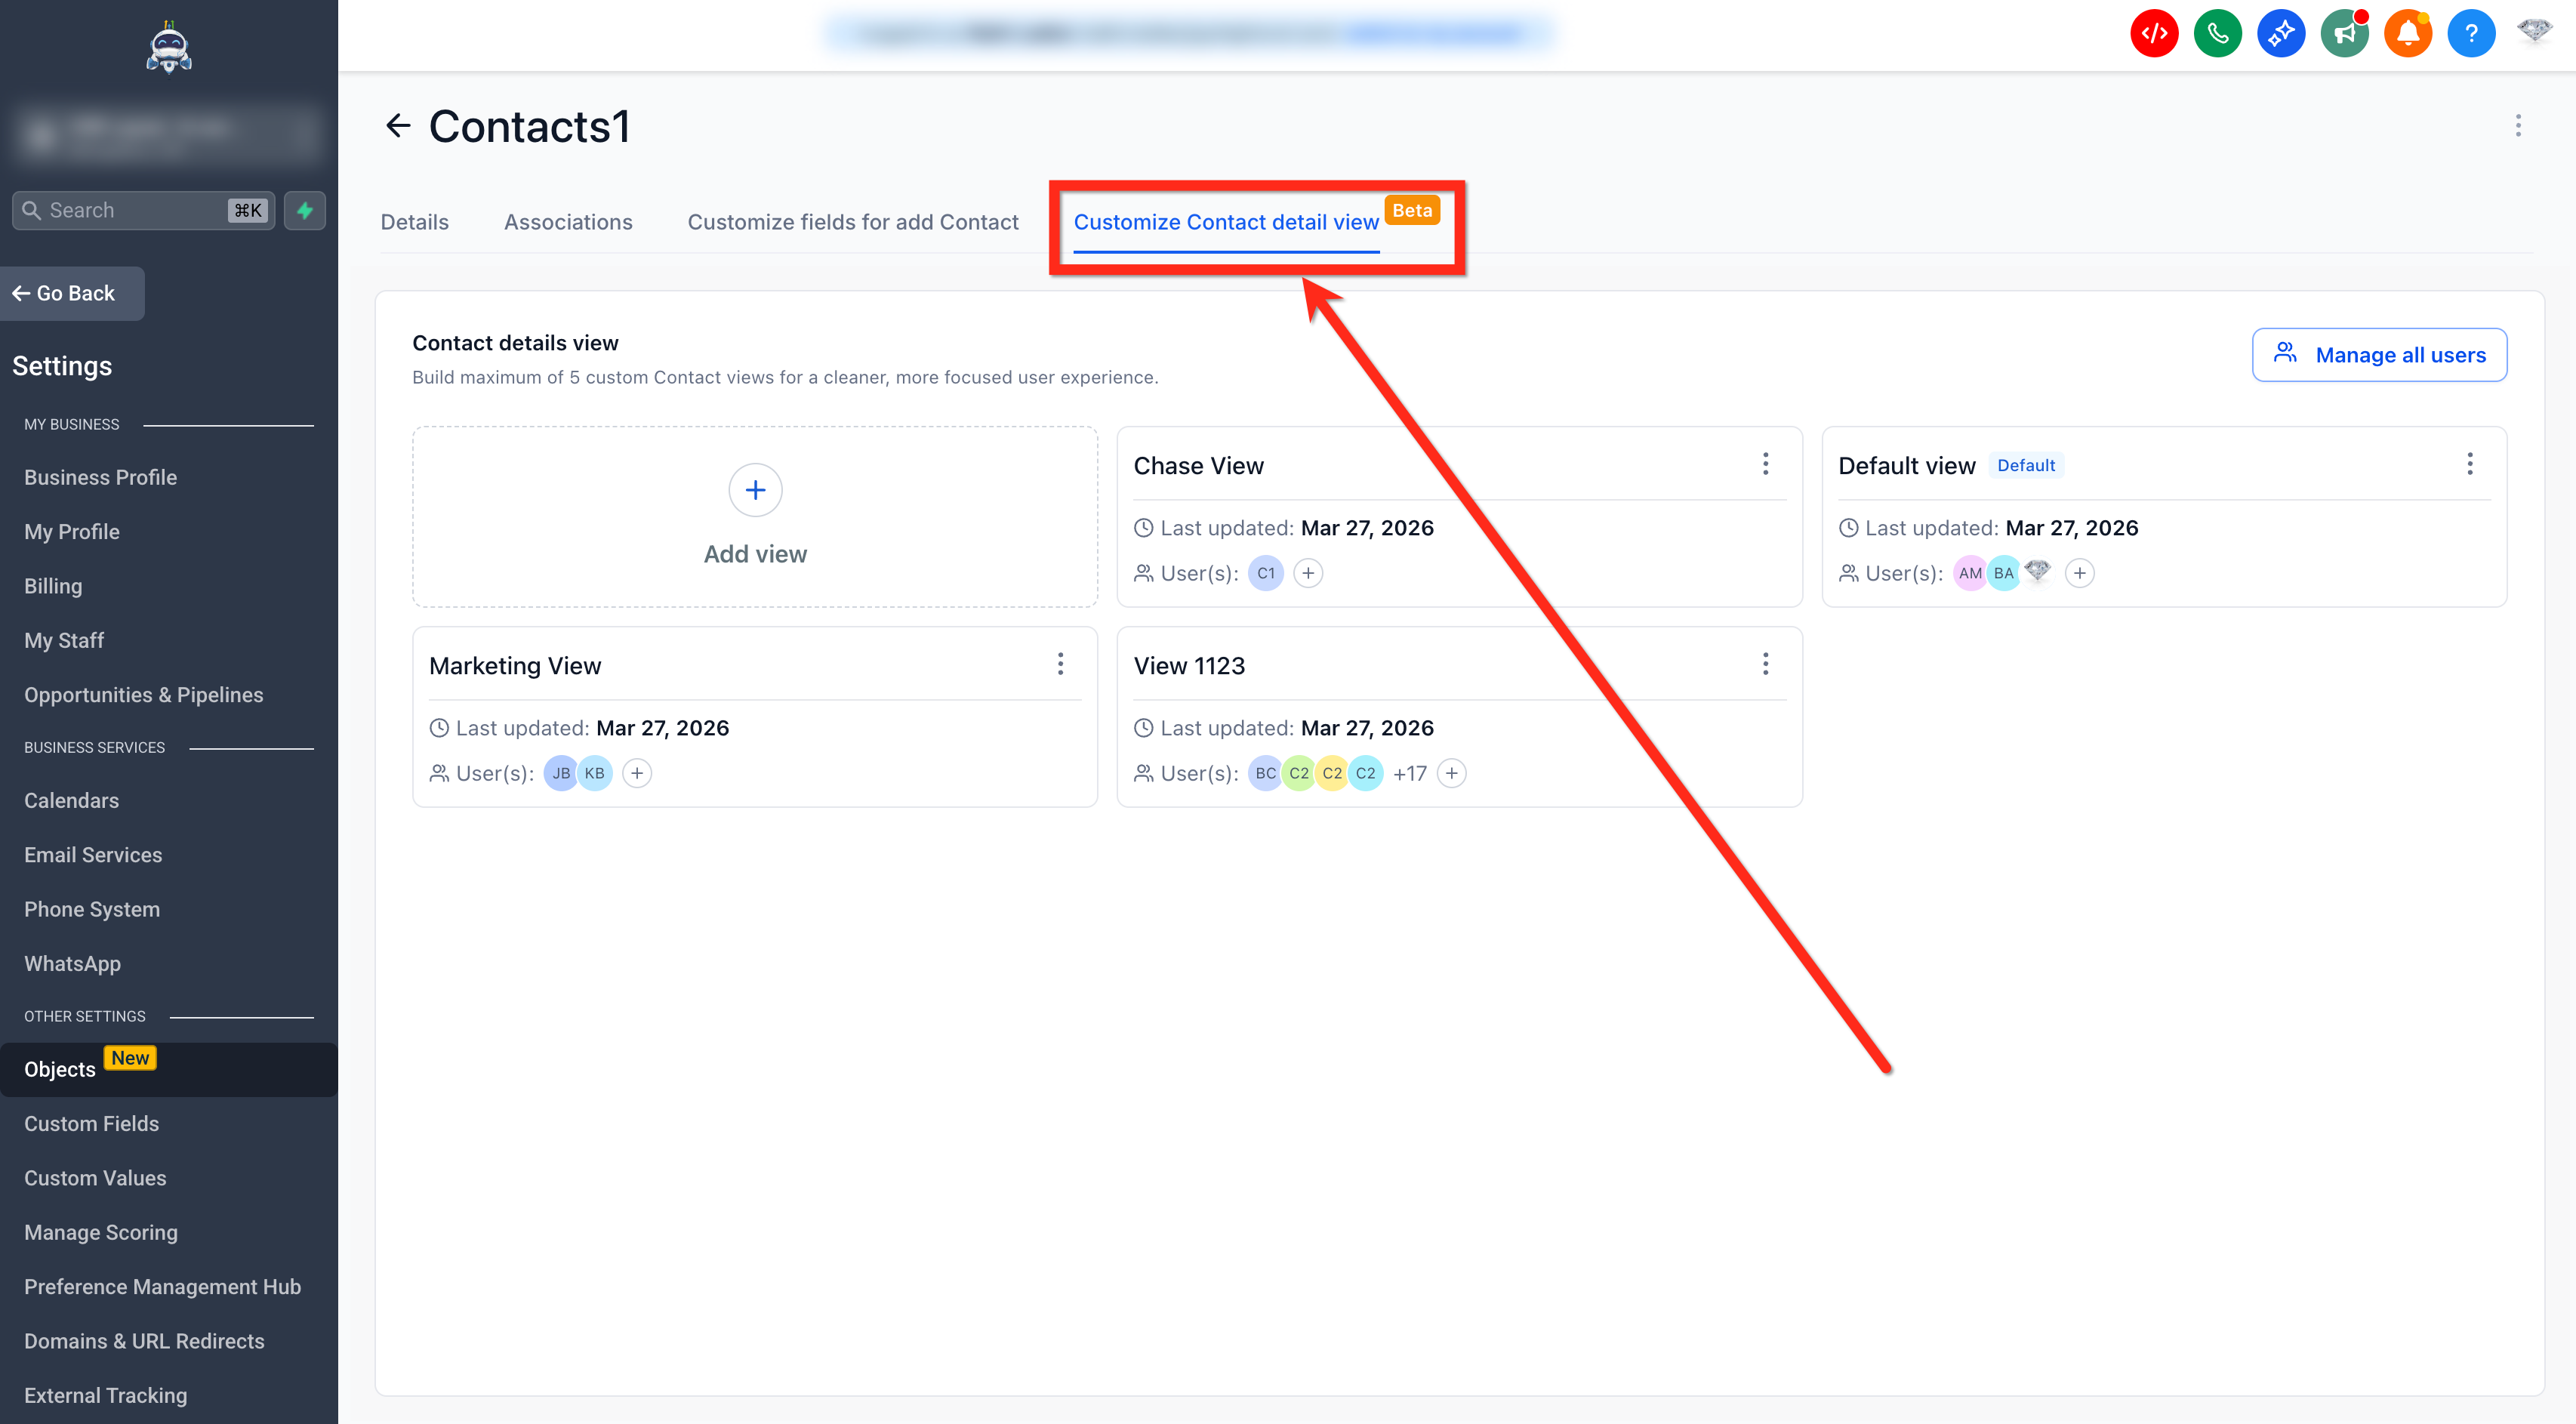
The feature lives under the Contacts area. From Contacts > Smart Lists, open Settings and select the Customize Contact detail view tab. There the admin creates up to five views, edits the Contact Card, panels and Dynamic Tab, and chooses a three panel or two panel layout.
03How businesses use the Contact Detail Page customization
- Real estate brokerage. The broker creates a Sales view that places the Opportunities module in a Dynamic Tab and shows only primary phone and email on the Contact Card. Agents are assigned this view so they can focus on leads without unrelated fields.
- Dental practice. The office manager builds a Support view that hides sales related modules, adds custom fields for patient insurance on the left panel, and disables the Delete button to protect patient records.
- Marketing agency. A marketing lead configures a Marketing view that moves Tags to the center panel, includes two read only custom fields on the Contact Card, and selects a Two Panel layout for a more compact screen.
04The numbers and rules that matter
- Up to 5 views per account.
- Contact Card can show up to two Custom Fields.
05Before you start
- User must have admin permissions.
- The account may have up to five views already created.
06How to set up and use the Contact Detail Page customization in HighLevel
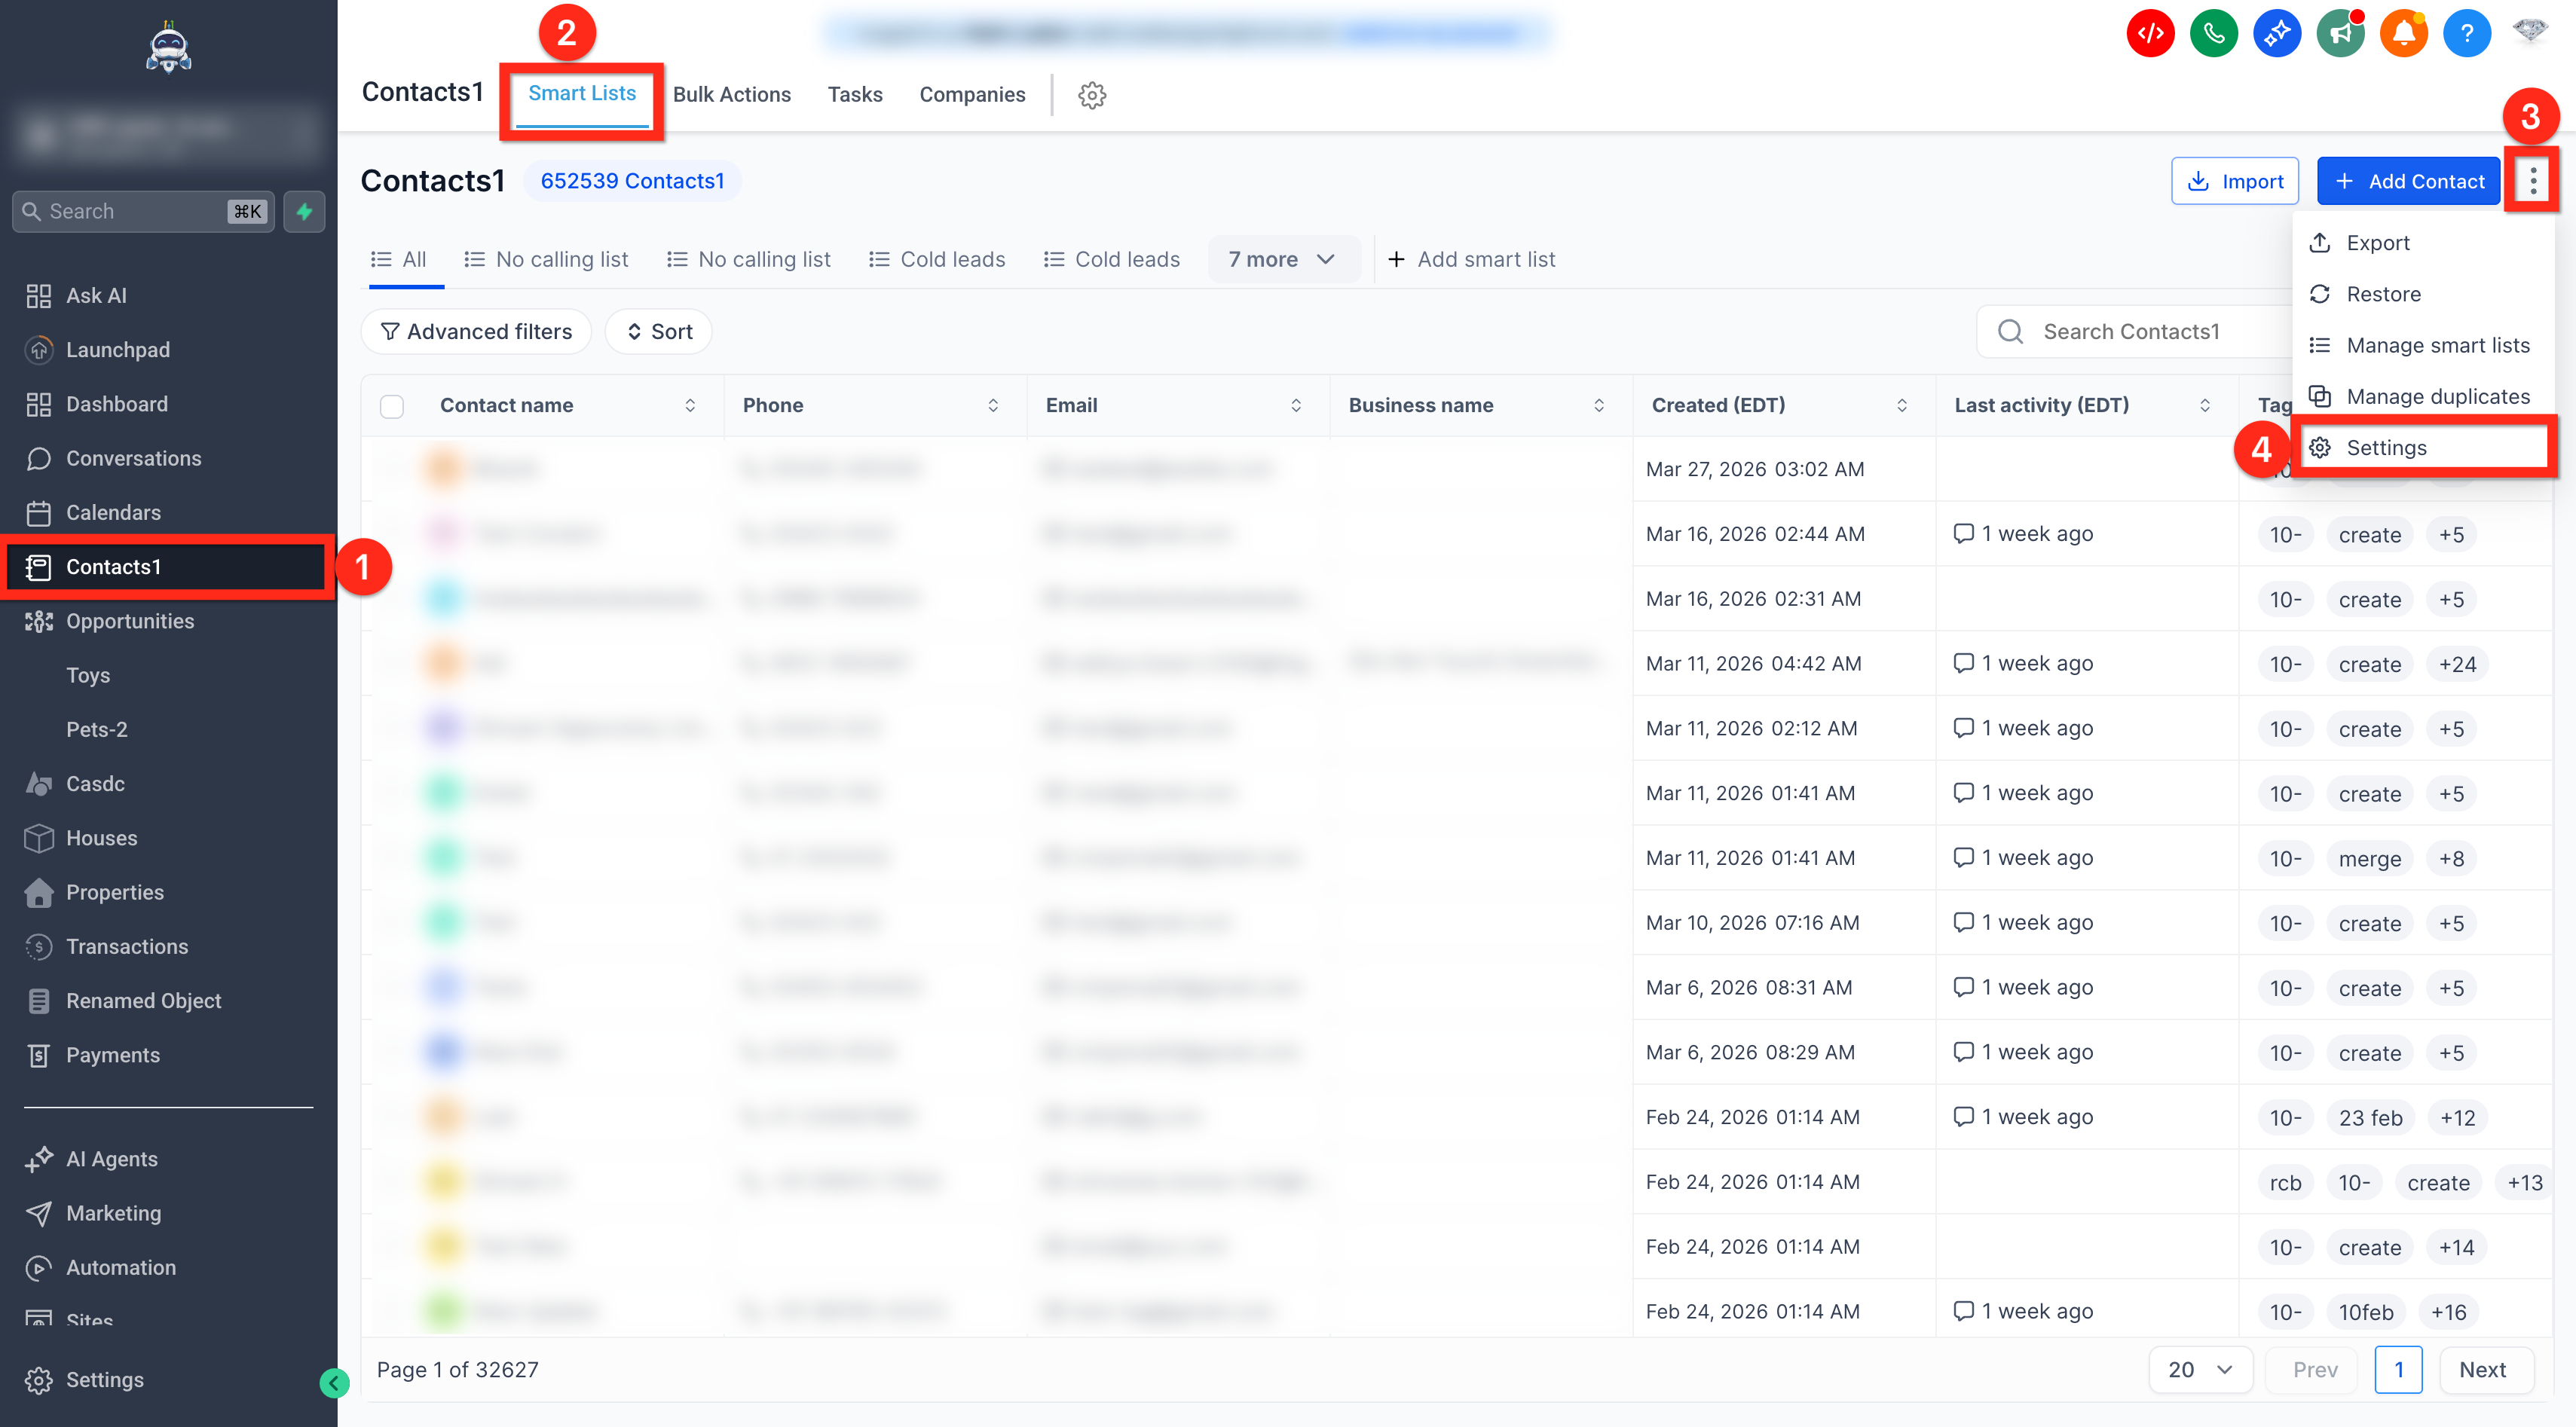
Navigate to the Customize Contact Detail View tab
- Click the Contacts tab in the main navigation.
- Select Smart Lists from the contacts submenu.
- Click the three dot menu next to Smart Lists.
- Choose Settings from the dropdown list.
- Open the Customize Contact detail view tab.
Create and manage views
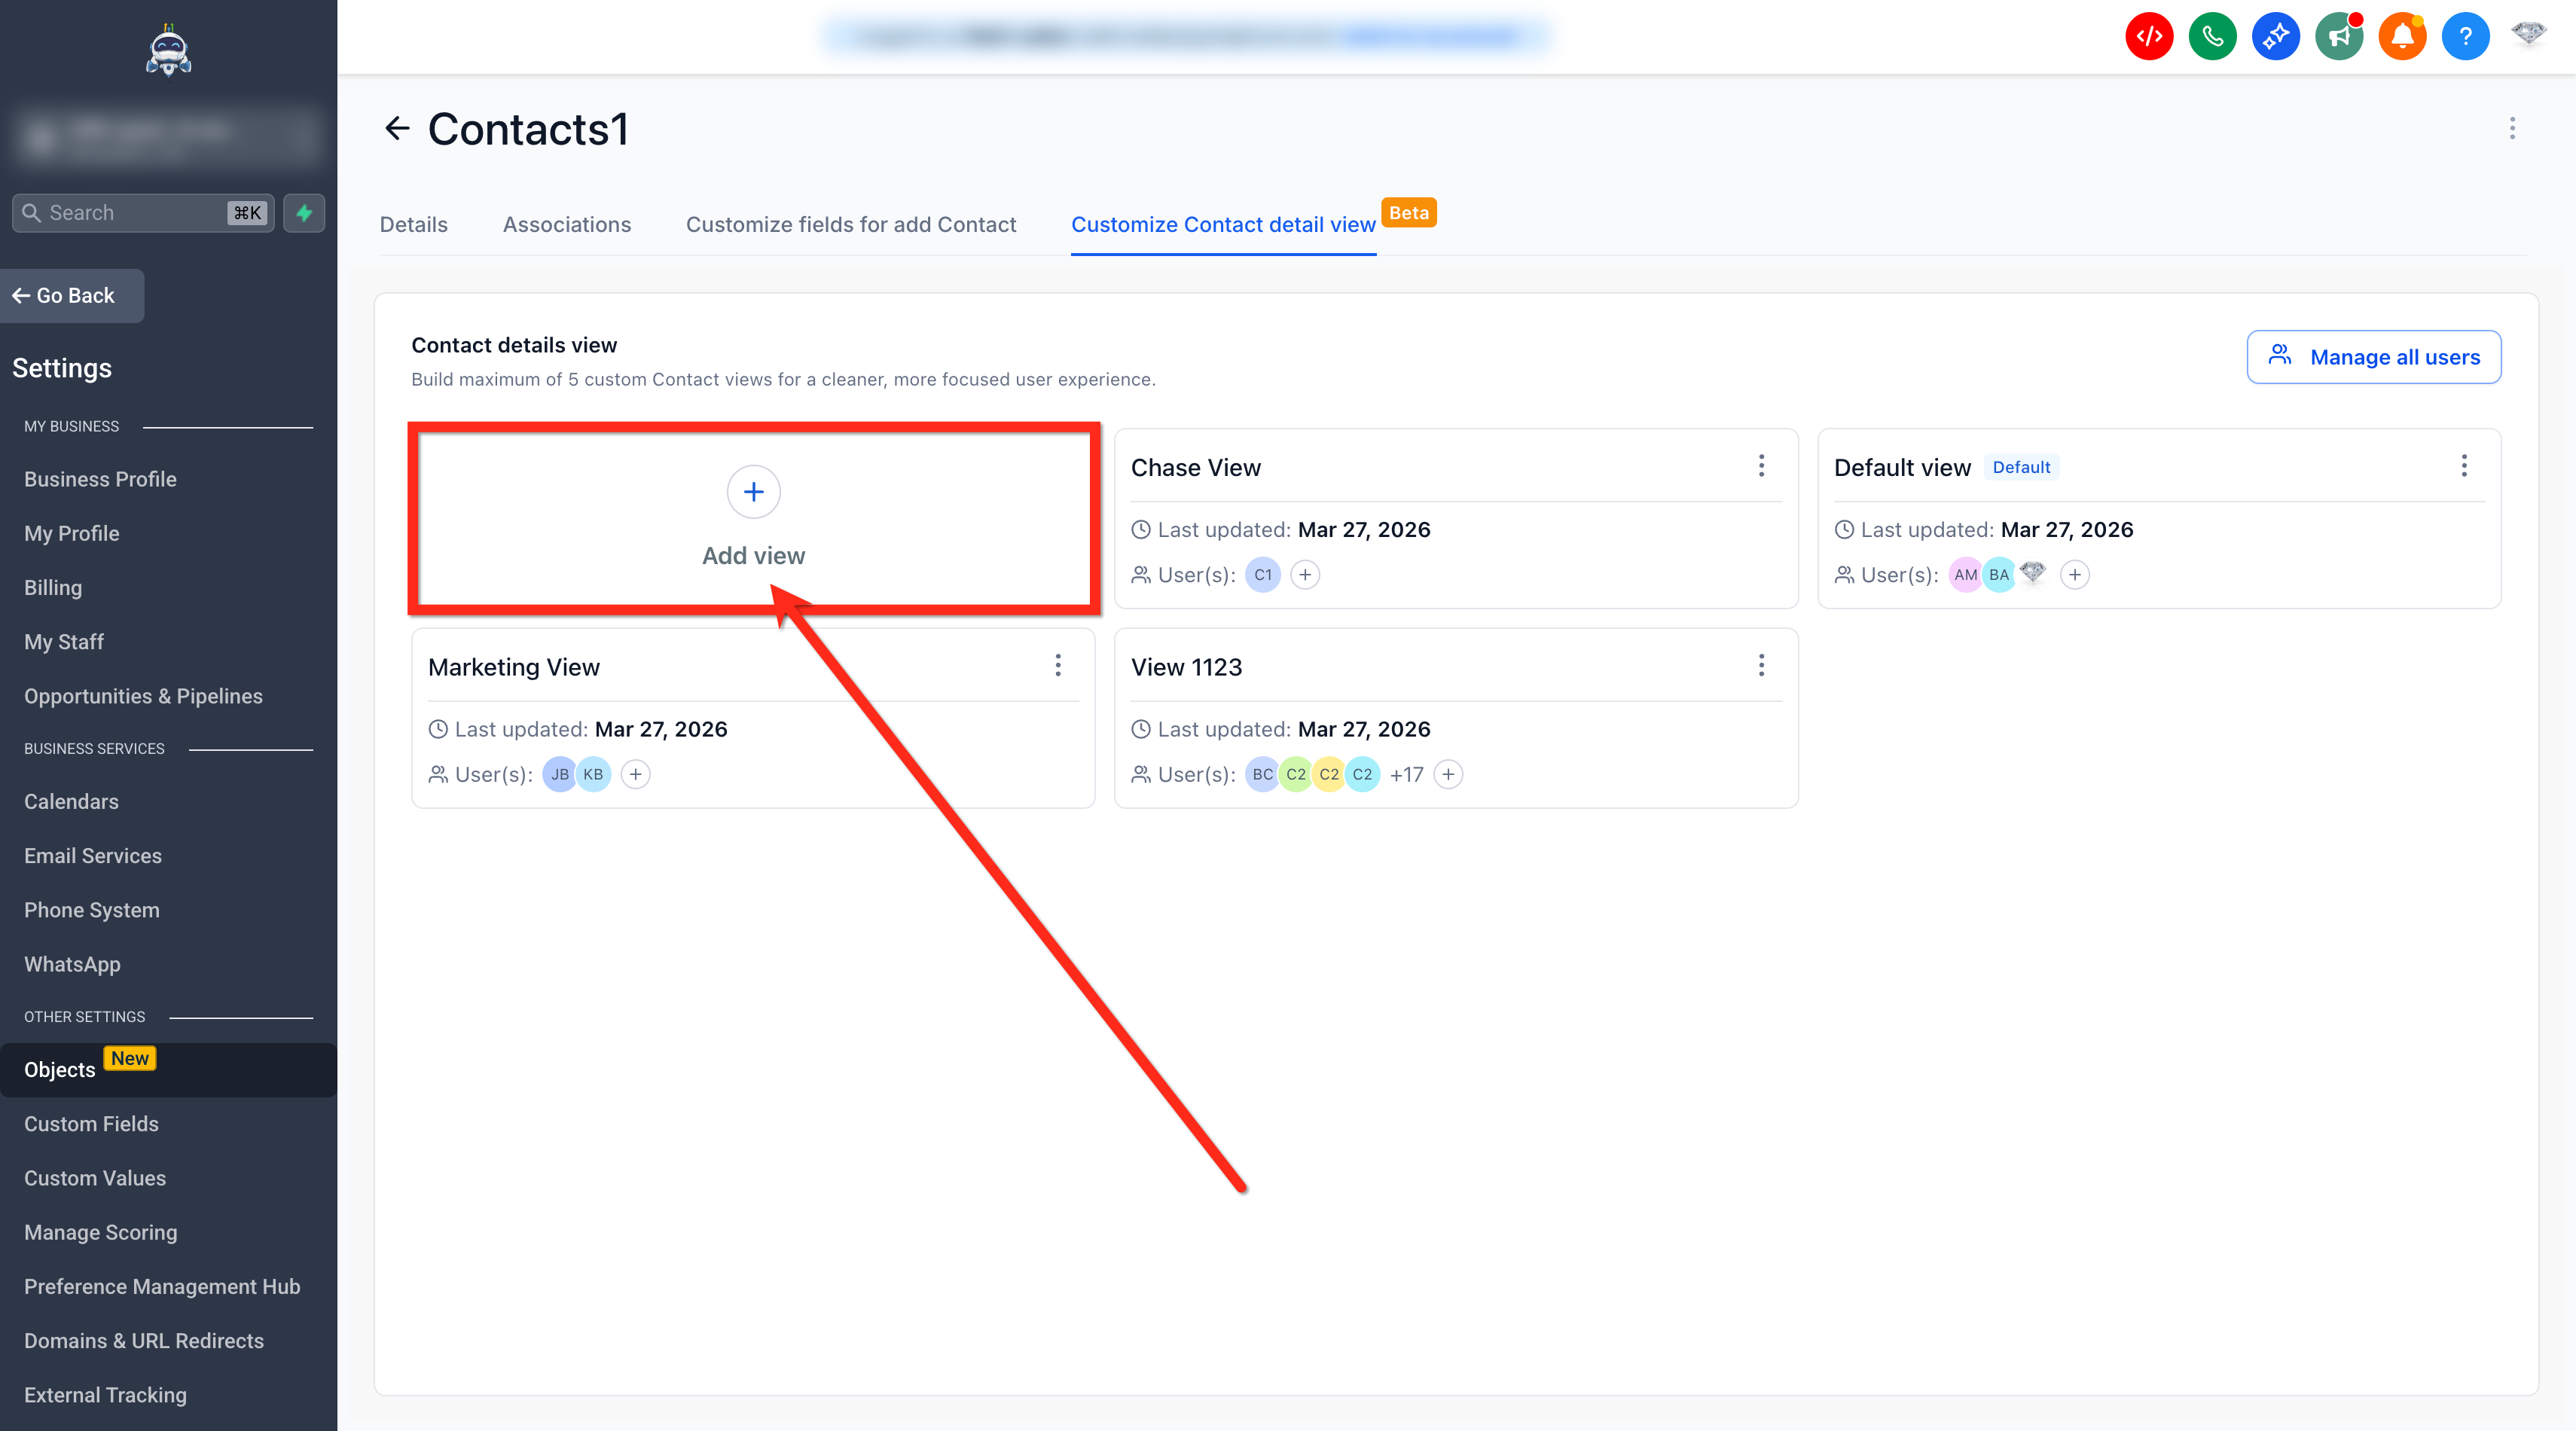
- Press the + Add View button.
- Enter a descriptive View Name.
- Assign the appropriate user(s) to the view.
- Click Create to save the new view.
- Use the three dot menu on the view header to rename, manage users, duplicate or delete the view.
- Open Manage all users to review and reassign user mapping for any view.
Customize the Details Page
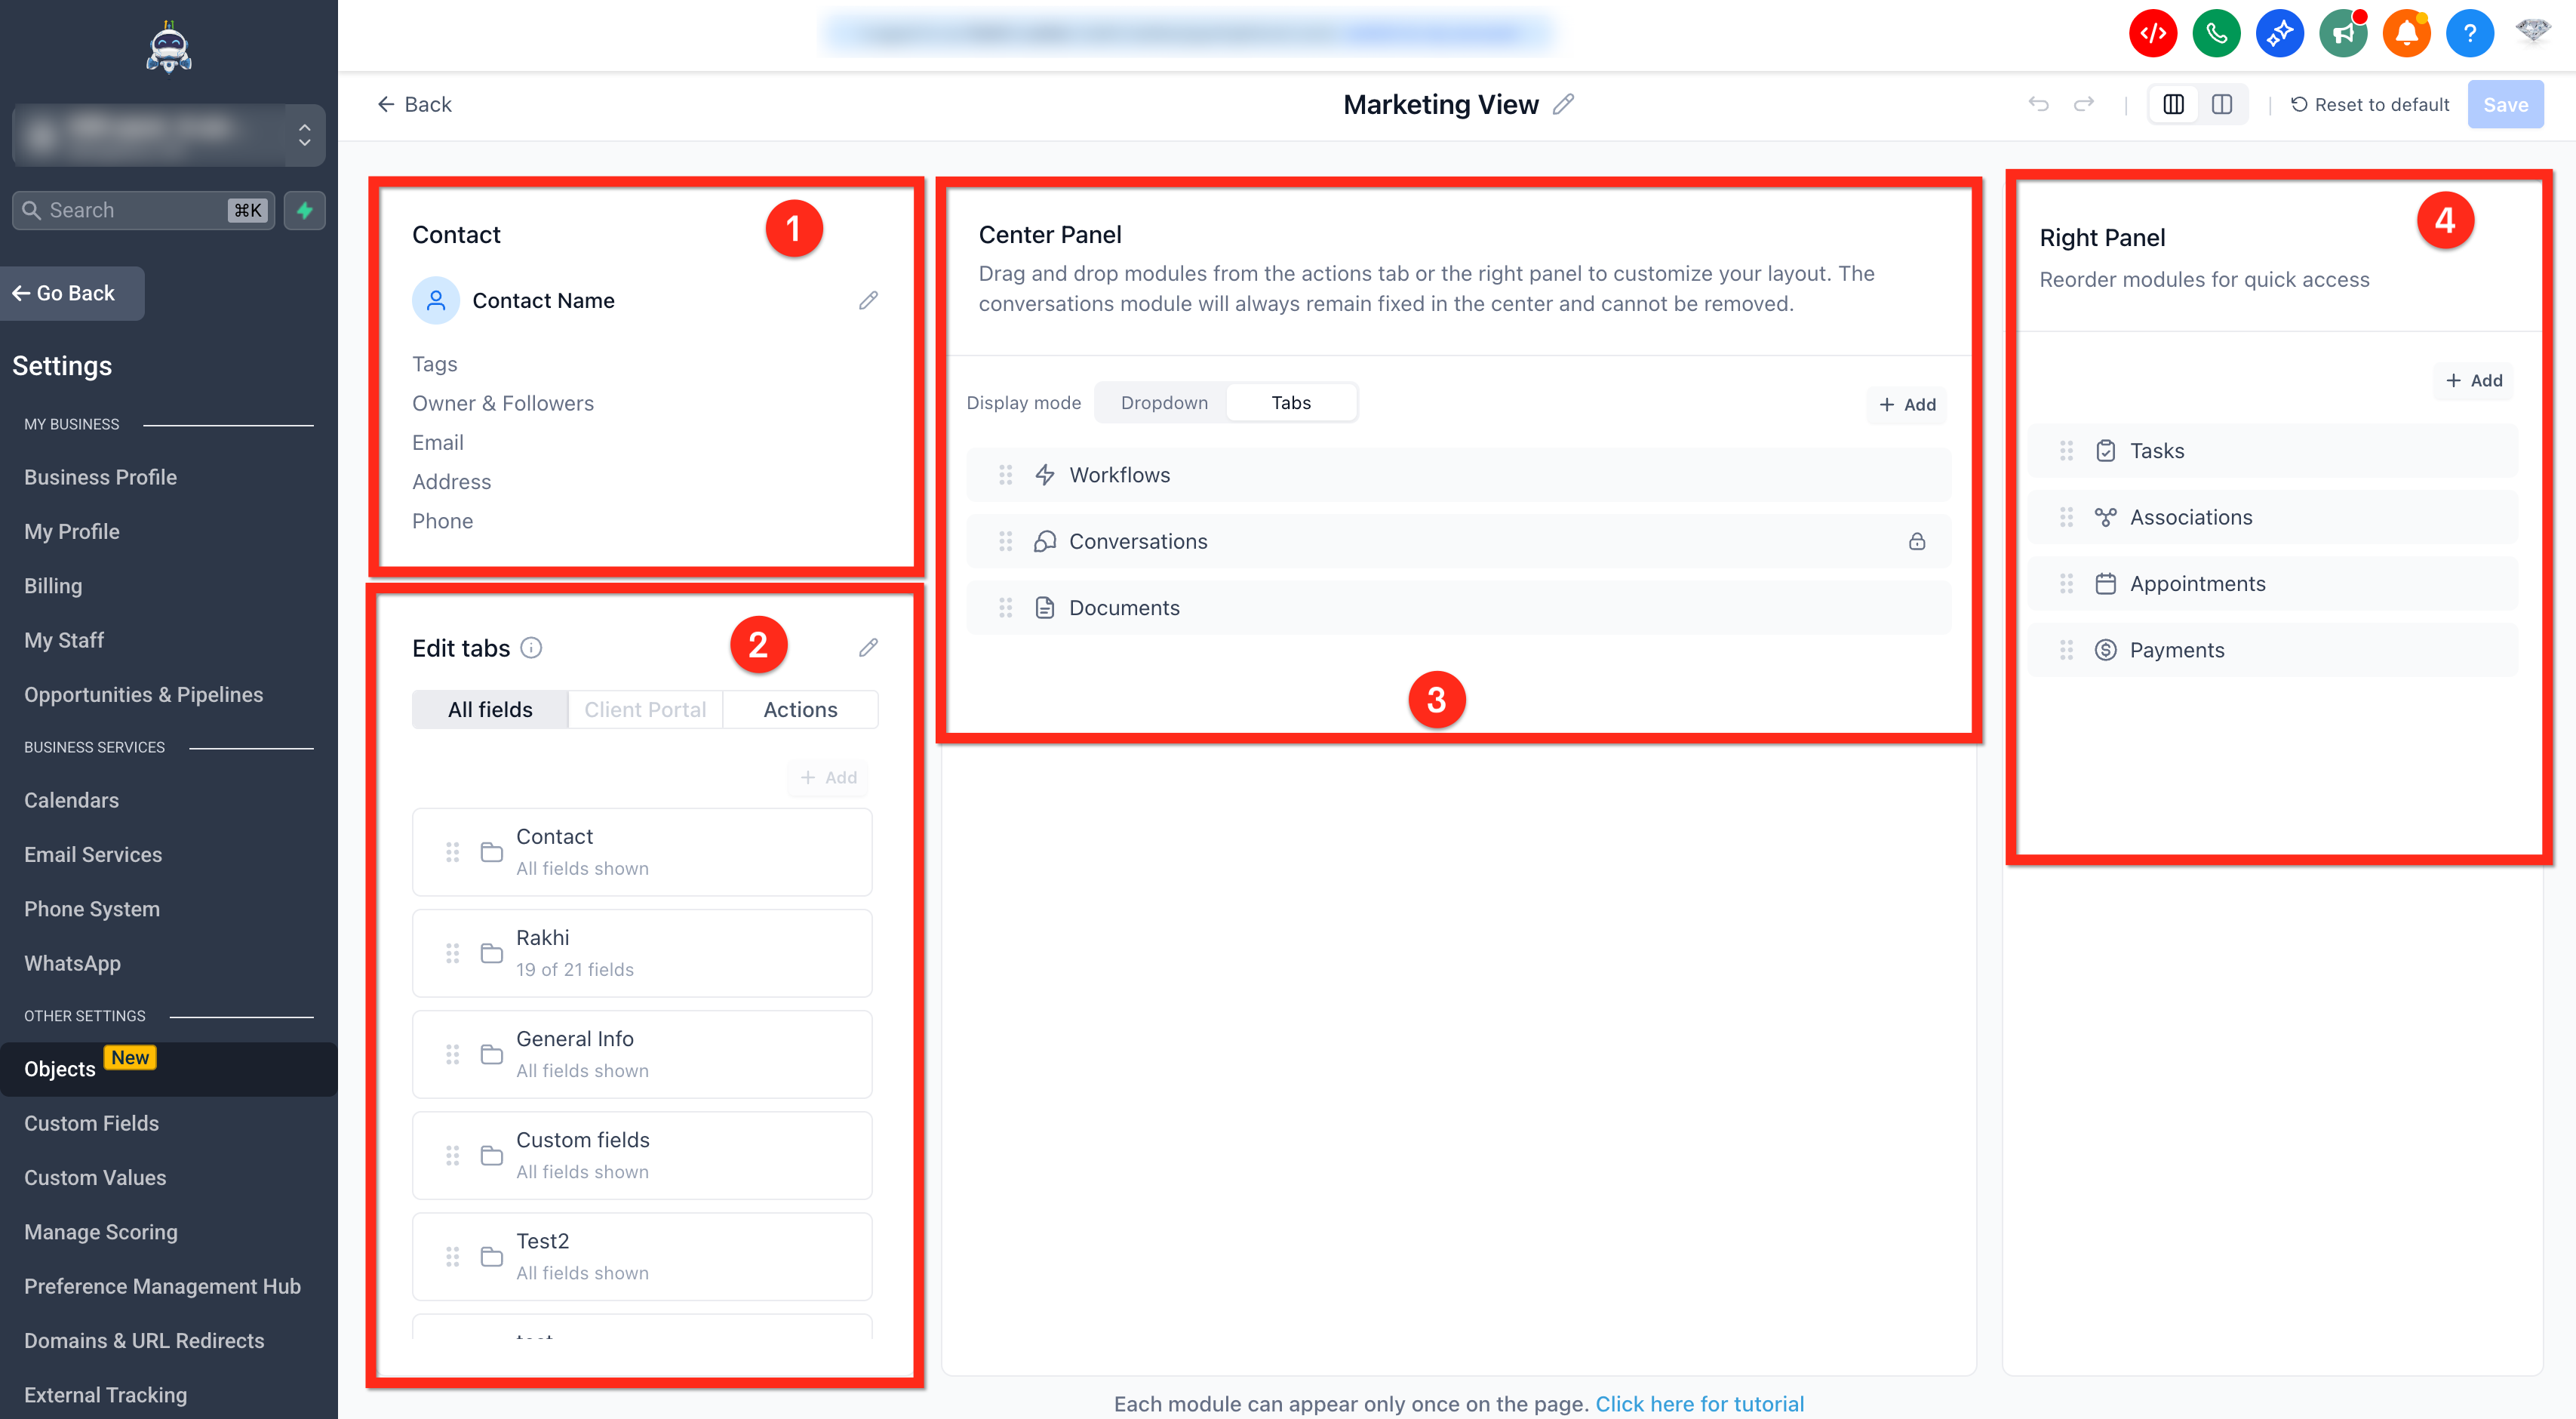
- Edit the Contact Card by adding, reordering or hiding phone, email, address, owner, followers, tags and up to two custom fields.
- Arrange the Left Panel by moving, renaming or hiding custom folders and fields, and add removed fields with the Add button.
- Configure a Dynamic Tab by placing a supported module between All fields and Actions, then rename or reorder the tab as needed.
- Modify the Center Panel by dragging and dropping modules from the Actions or Right Panel, choosing Tabs View or Dropdown View, while keeping the Conversations module fixed.
- Adjust the Right Panel by reordering its modules for quick access.
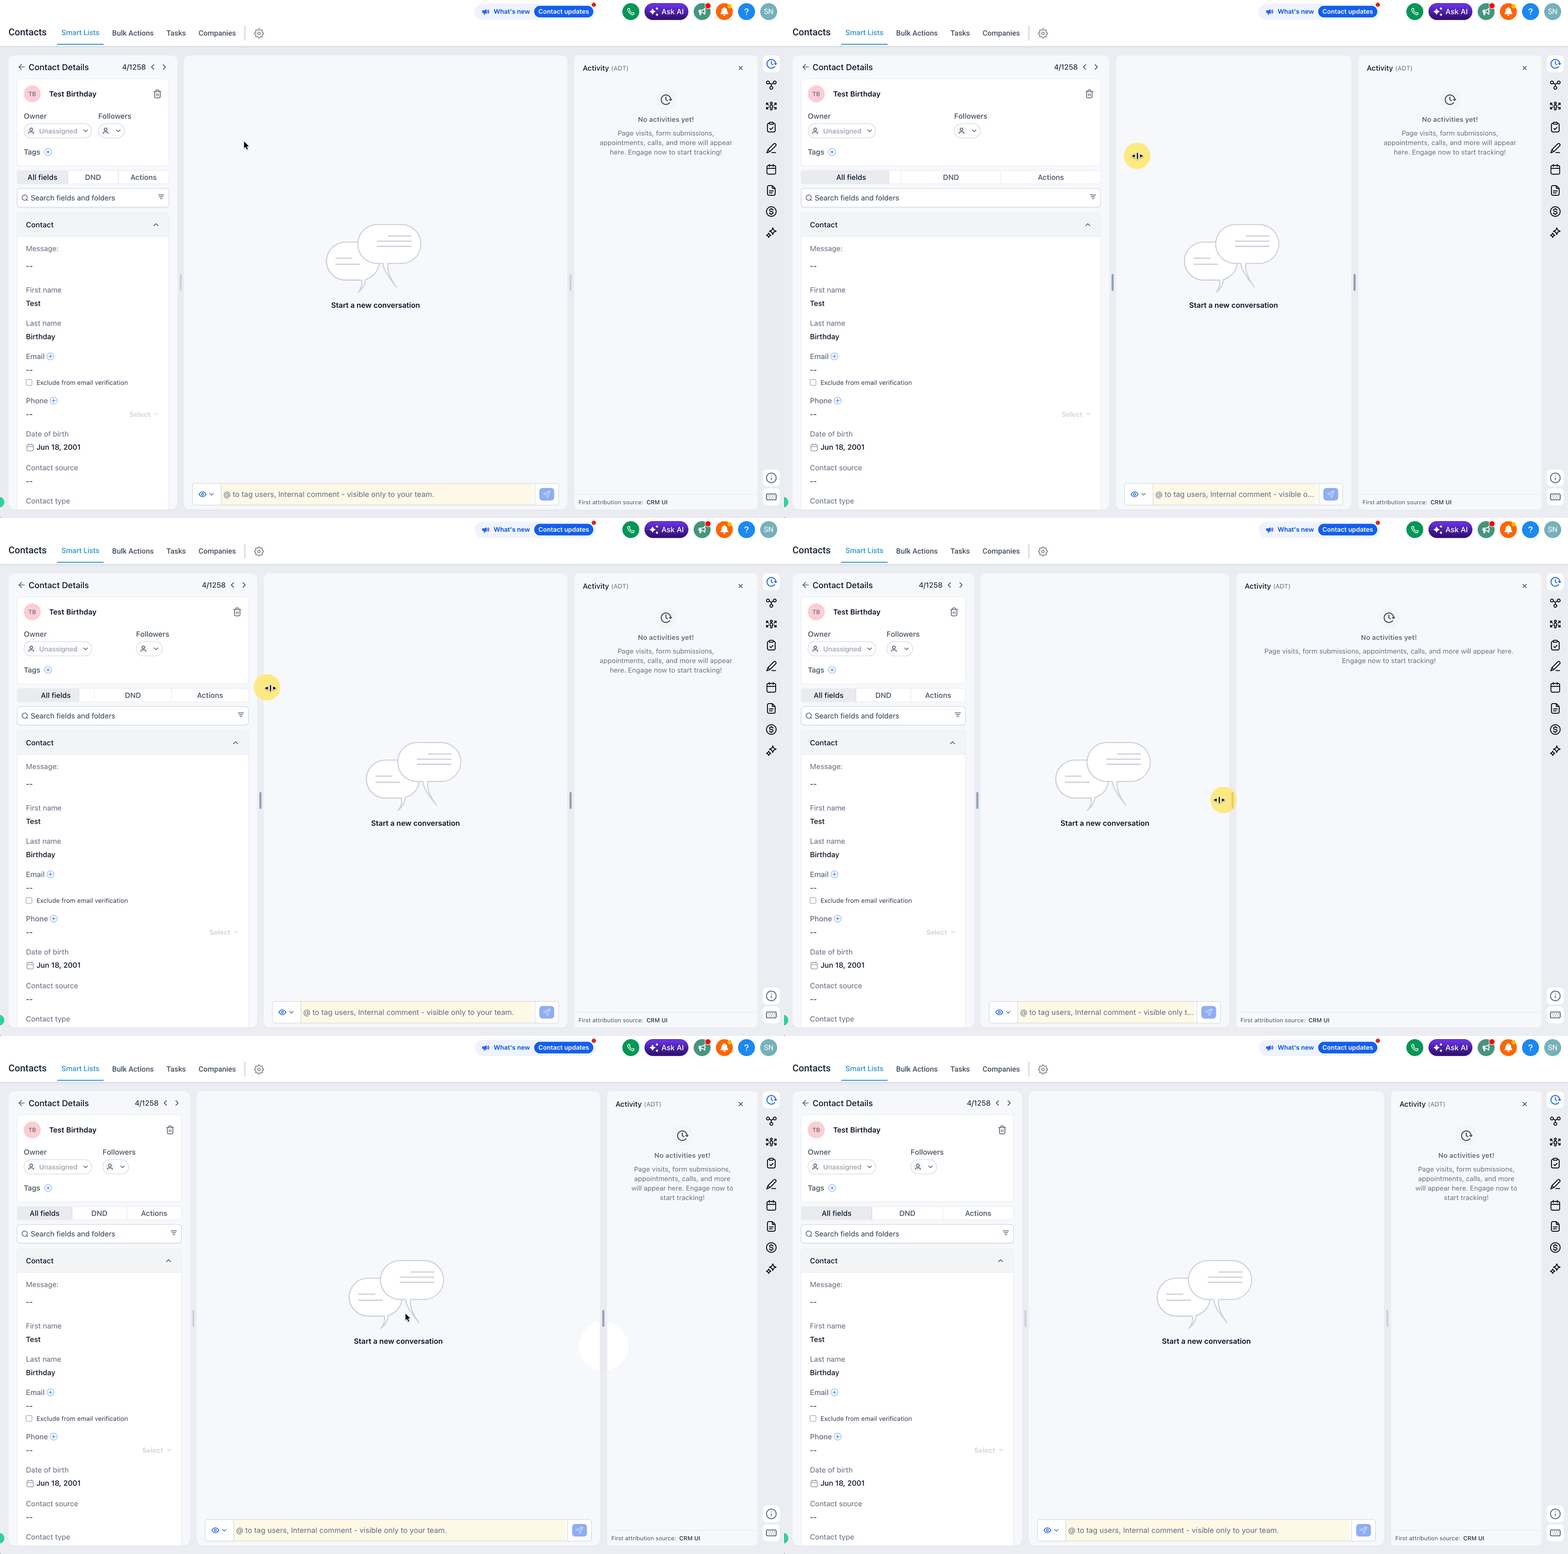
- Select either Three Panel View or Two Panel View to set the overall panel layout.
07What it looks like in HighLevel
08Settings that matter
- Customize Contact detail view tab. Opens the editor where admins can create views, assign users and arrange panels for the Contact Detail Page.
- Contact Card. Controls which key contact items appear at the top of the record, including up to two read only custom fields.
- Dynamic Tab. Allows a chosen module to appear in its own tab between All fields and Actions for immediate access.
- Panel layout options. Switches between Three Panel View (default) and Two Panel View, merging right panel modules into the center when needed.
09Things to know before you rely on it
- A maximum of five views can be created per account.
- Only admins are permitted to create, edit or delete views.
- The default view is preset and cannot be changed.
- Each user can belong to only one view; removing a user returns them to the default view.
- Only the primary phone number and primary email address can be shown on the Contact Card.
- Up to two custom fields may be added to the Contact Card and are read only there.
- The Conversations module is fixed in the center panel and cannot be moved.
- Action modules cannot be moved to the right panel.
10How it connects to the rest of HighLevel
- Explore the all new Contact Detail Page layout and auto save feature. All new contact detail page
- Learn how the Activity Section Upgrade changes the view of contact activity. Activity Section Upgrade
- Read about using the Contact Overlay to quickly view contact information. Contact Overlay
Michael's take

Michael ReimerFounder of CRM Pros, HighLevel Commander and Certified Admin
Contact detail page customization lets admins create role based views for contacts. If you’re just starting out and only need one generic layout, you can skip this feature.
Get More InformationOpens on HighLevelPublished November 2, 2026 · Updated November 17, 2026