
01Who this is for
- Founders who need a clear, high level view of each person's role in the business, so teams can quickly see whether a contact is a lead or a customer.
- Sales managers who want to pull groups of prospects or customers into targeted outreach without sifting through many overlapping tags.
- Operations staff who must separate suppliers and partners from customers to route communications correctly.
02Contact types, explained
Contact Types appear as a dropdown field in each contact record. Only one value can be selected, which keeps the classification simple and mutually exclusive. The field lives in the Contacts module under Custom Fields, and you can also manage it from Settings > Custom Fields.
The values you define, such as Lead, Customer, Supplier, Partner, are used throughout the platform. They drive filters, Smart Lists, and workflow actions. Because the field is single select, changing a contact’s type replaces the previous value.
Automation can keep the type current. A workflow can update the Contact Type field when a contact reaches a milestone, and the Contact Changed trigger can start other workflows when the type changes. Smart Lists treat the field as "Type" for filtering and can save dynamic segments.
03How businesses use contact types
- Real estate brokerage. The brokerage creates Contact Types for Lead, Buyer, Seller, and Partner. When an agent signs a new buyer, they run a workflow that updates the Contact Type from Lead to Buyer. The team then filters the Buyer type to view all active buyer contacts in a Smart List.
- Ecommerce store. The store defines Contact Types as Lead and Customer. After a first purchase, a workflow changes the contact’s type to Customer. Marketing can filter the Customer type to send post purchase emails without affecting leads.
- Manufacturing supplier network. The company adds Supplier and Partner as Contact Types. When a new vendor is added, staff selects Supplier manually. Procurement filters the Supplier type to generate a list of all current suppliers for ordering.
04How to set up and use contact types in HighLevel
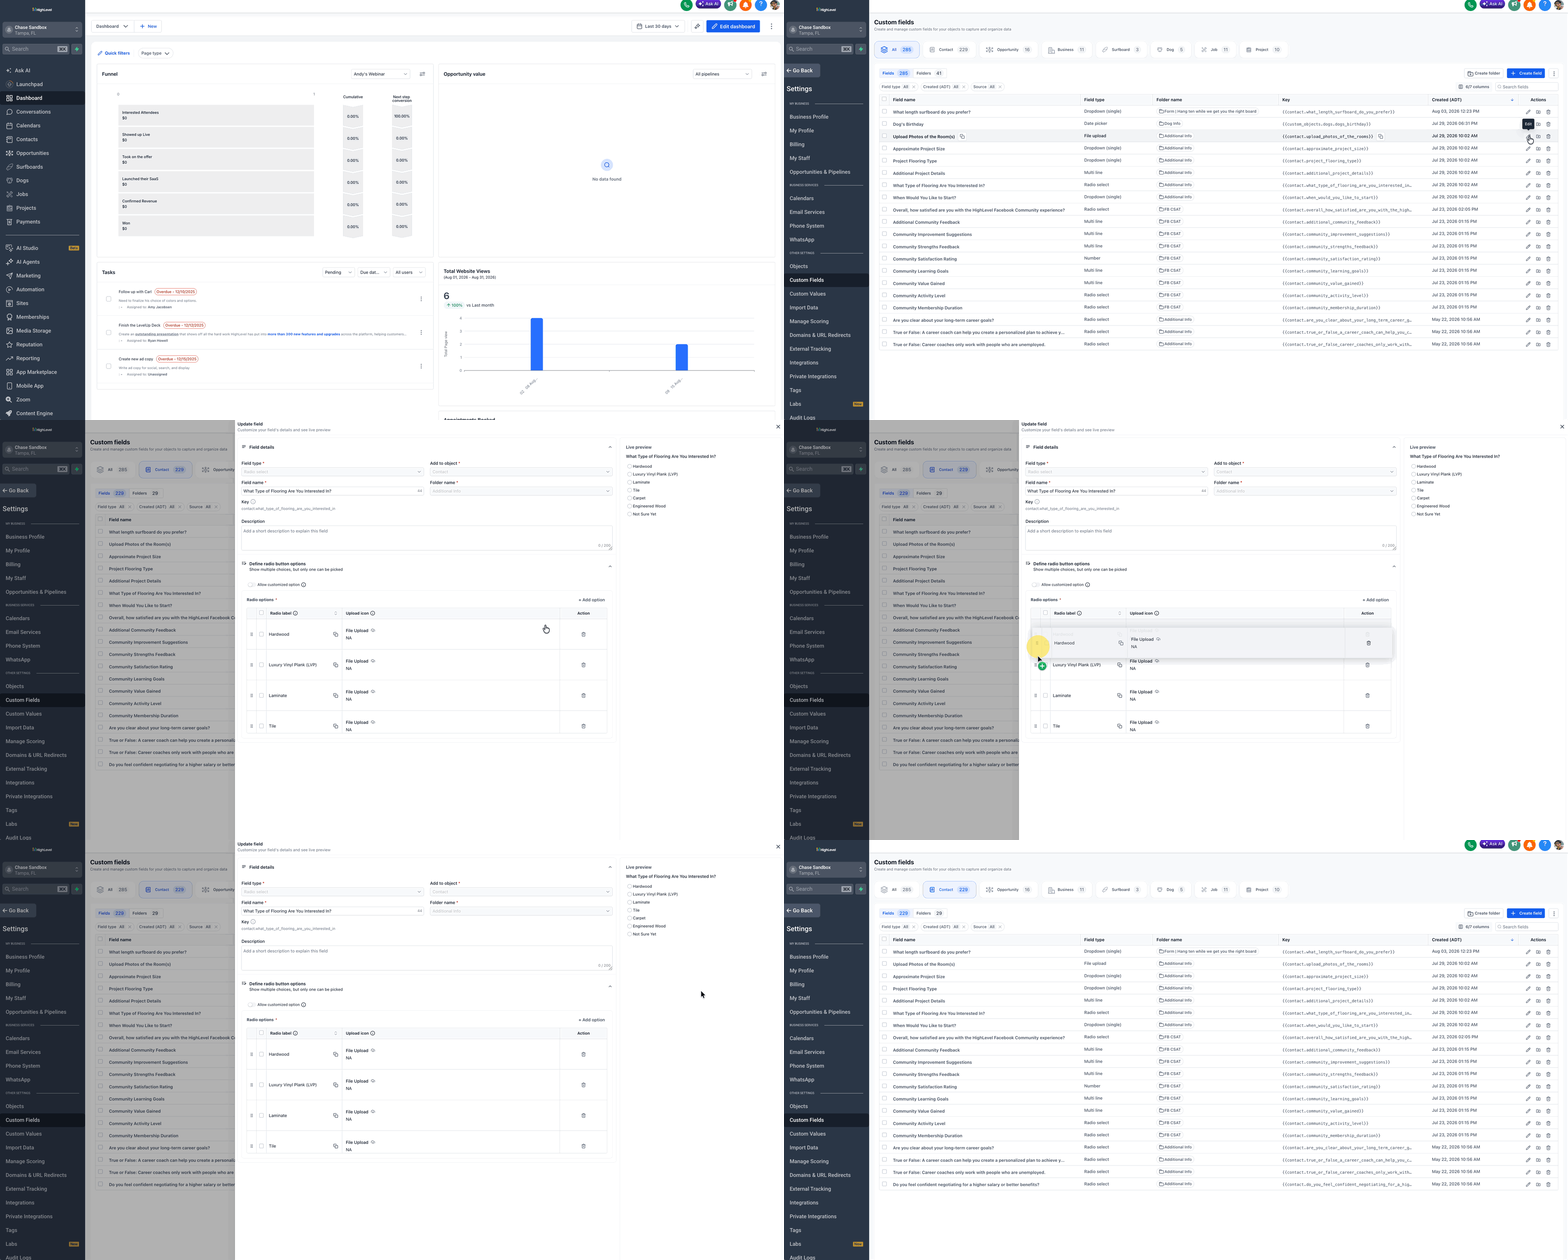
Configure contact types
- Open the Contacts module.
- Select Custom Fields within Contacts.
- Find the Contact Type field.
- Click the Edit button for that field.
- Add, rename, reorder, or delete the type values you need.
- Save the changes.
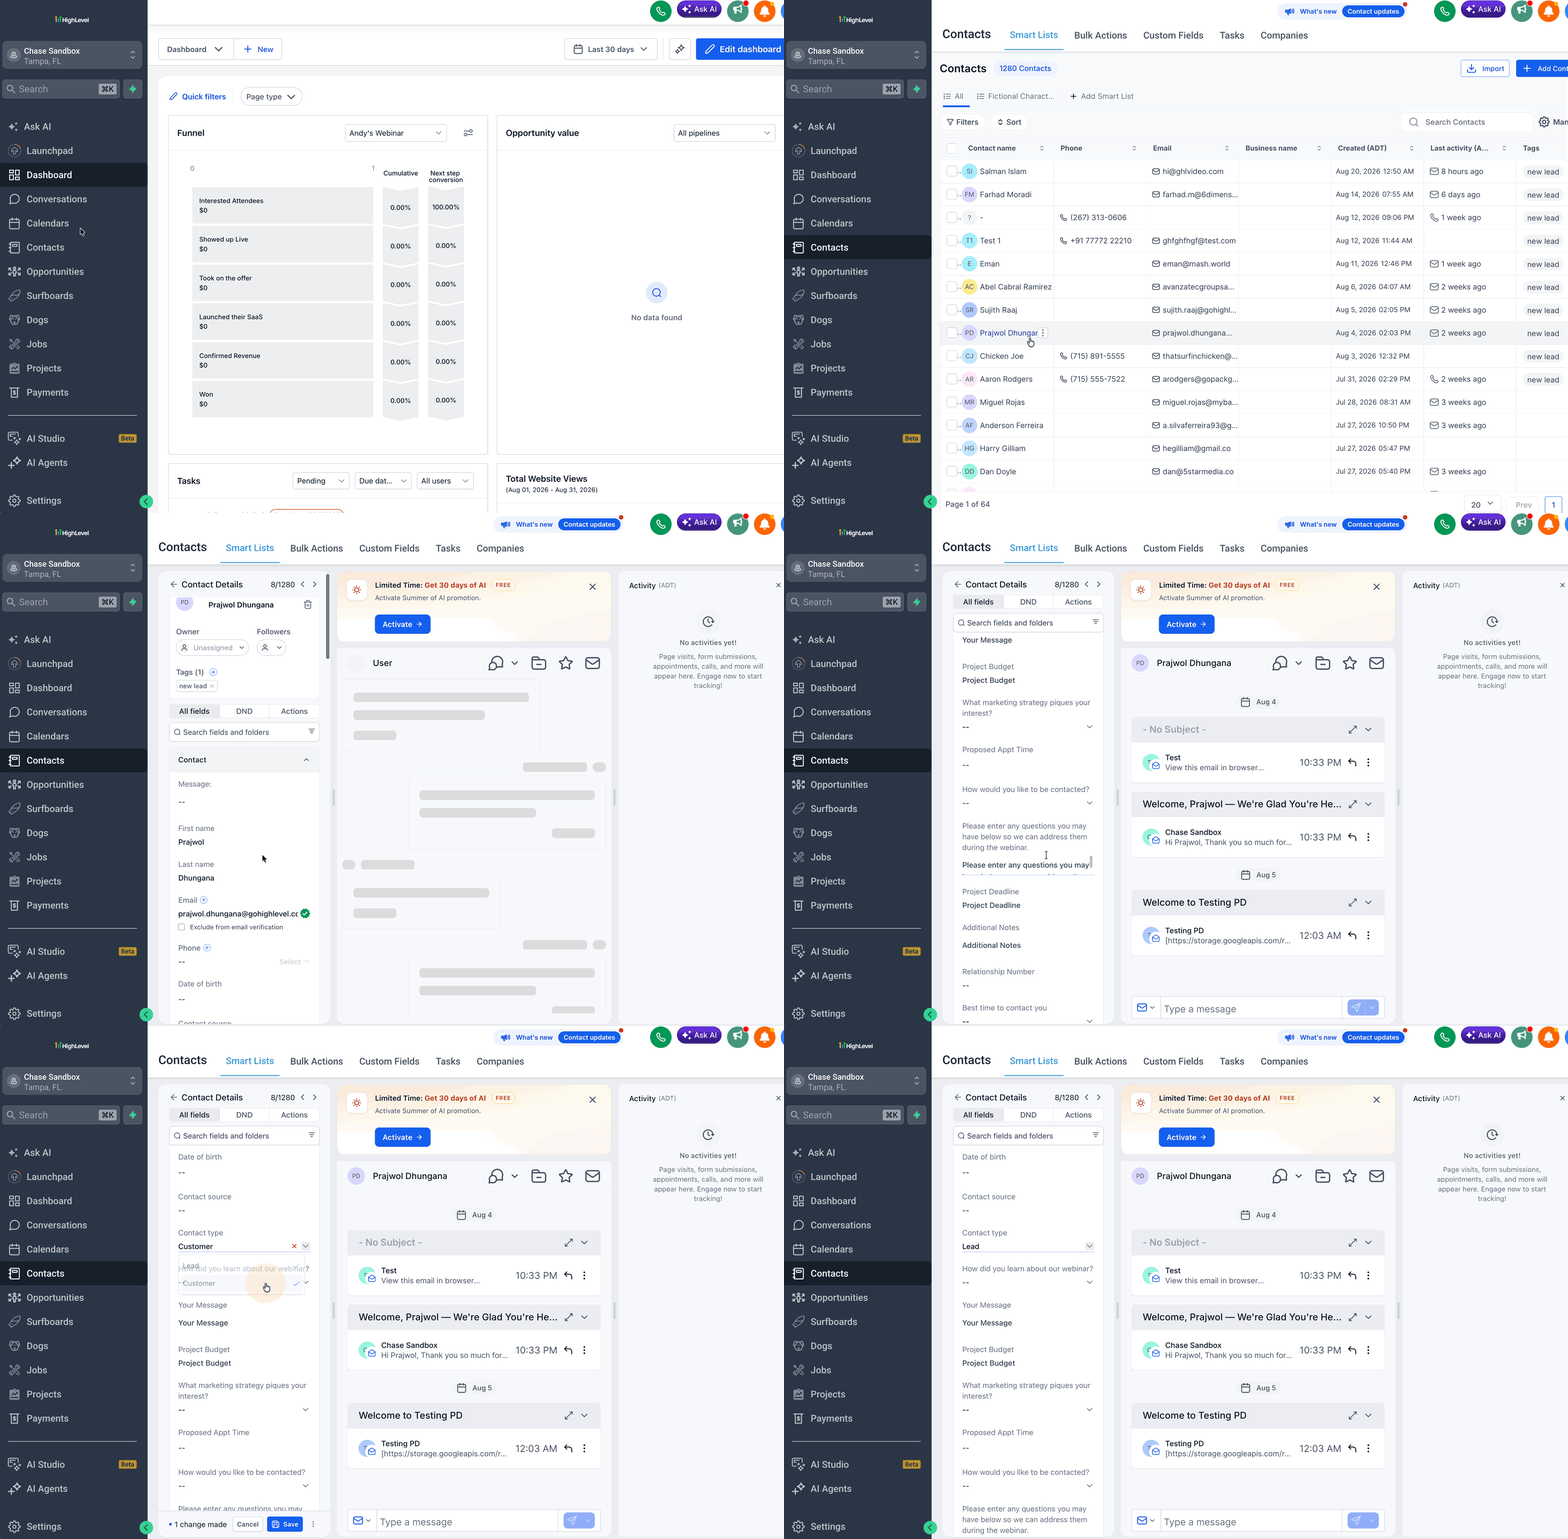
Assign a contact type manually
- Open the Contacts module.
- Open the specific contact record.
- Locate the Contact Type dropdown on the record.
- Click the dropdown to see the list.
- Choose the appropriate Contact Type.
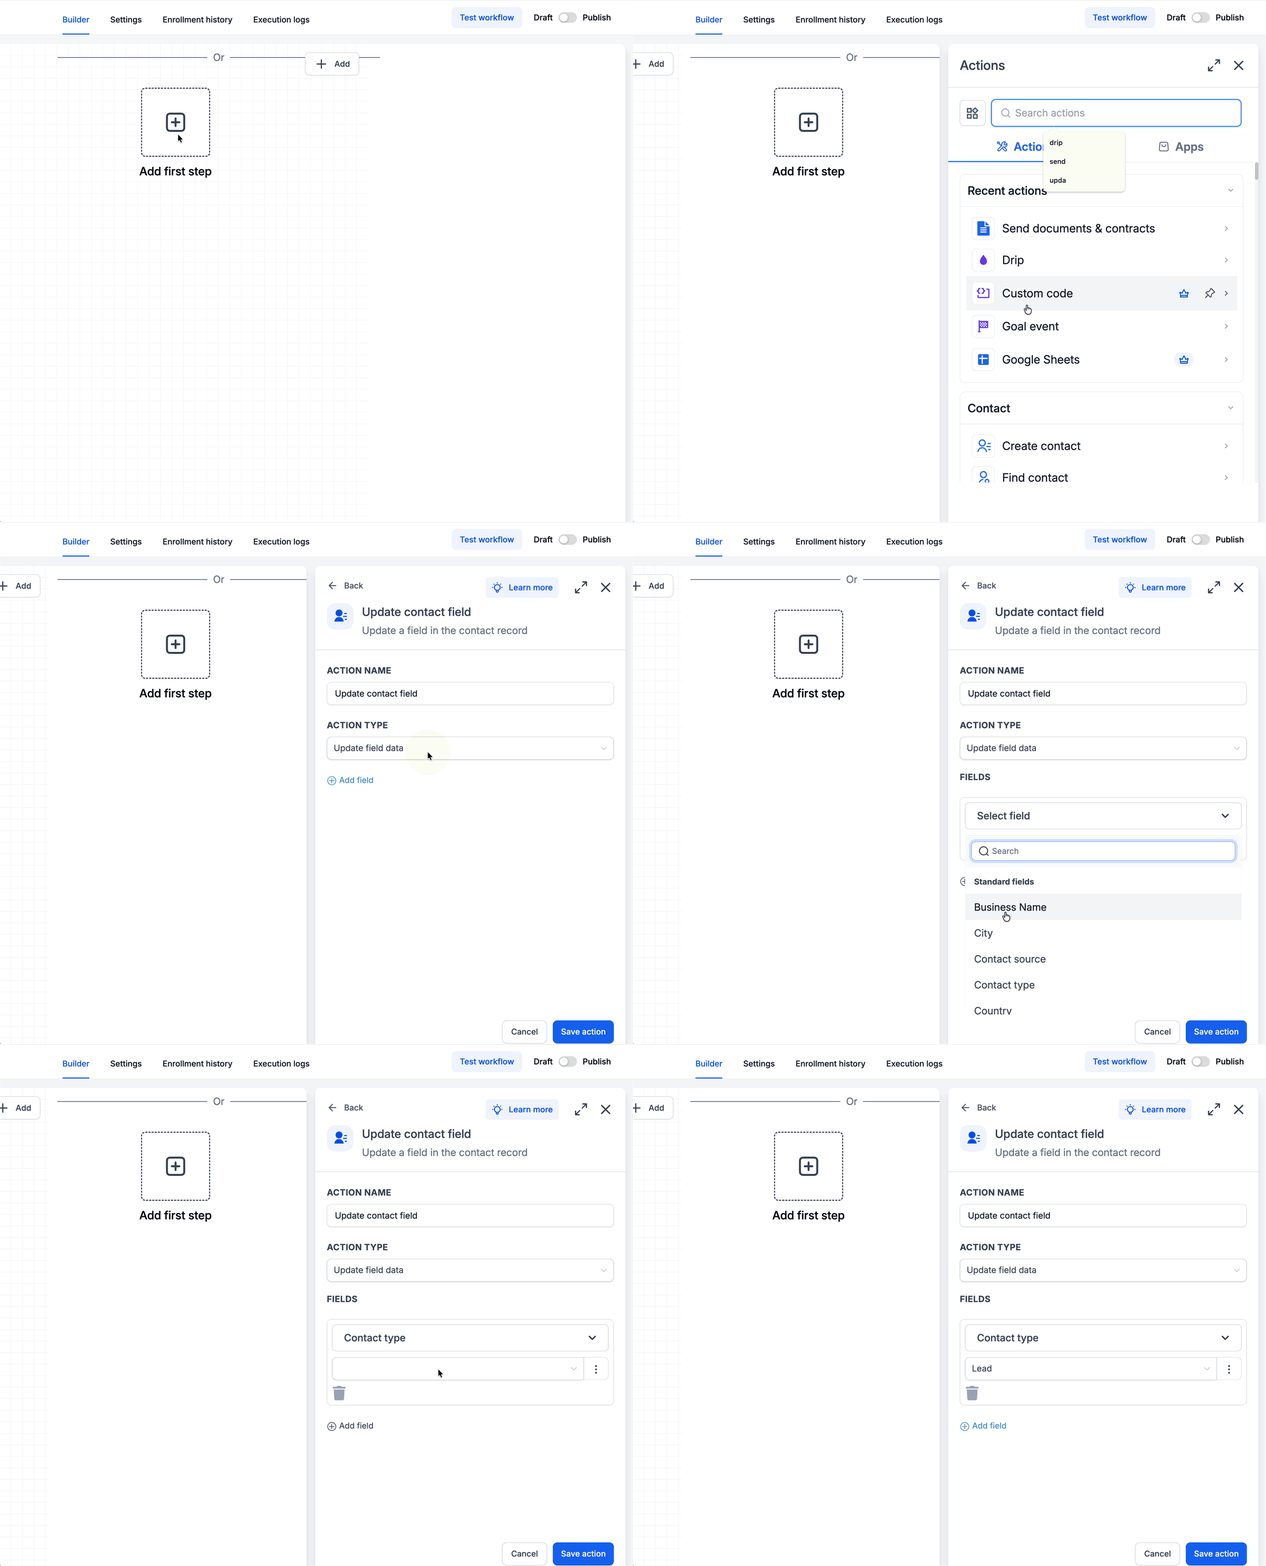
Update contact type with a workflow
- Open the workflow that should change the type.
- Add an Update Contact Field action.
- Set the action to Update field data.
- Under Fields, select Contact Type.
- Pick the Contact Type value to assign.
- Save the action.
- Publish the workflow.
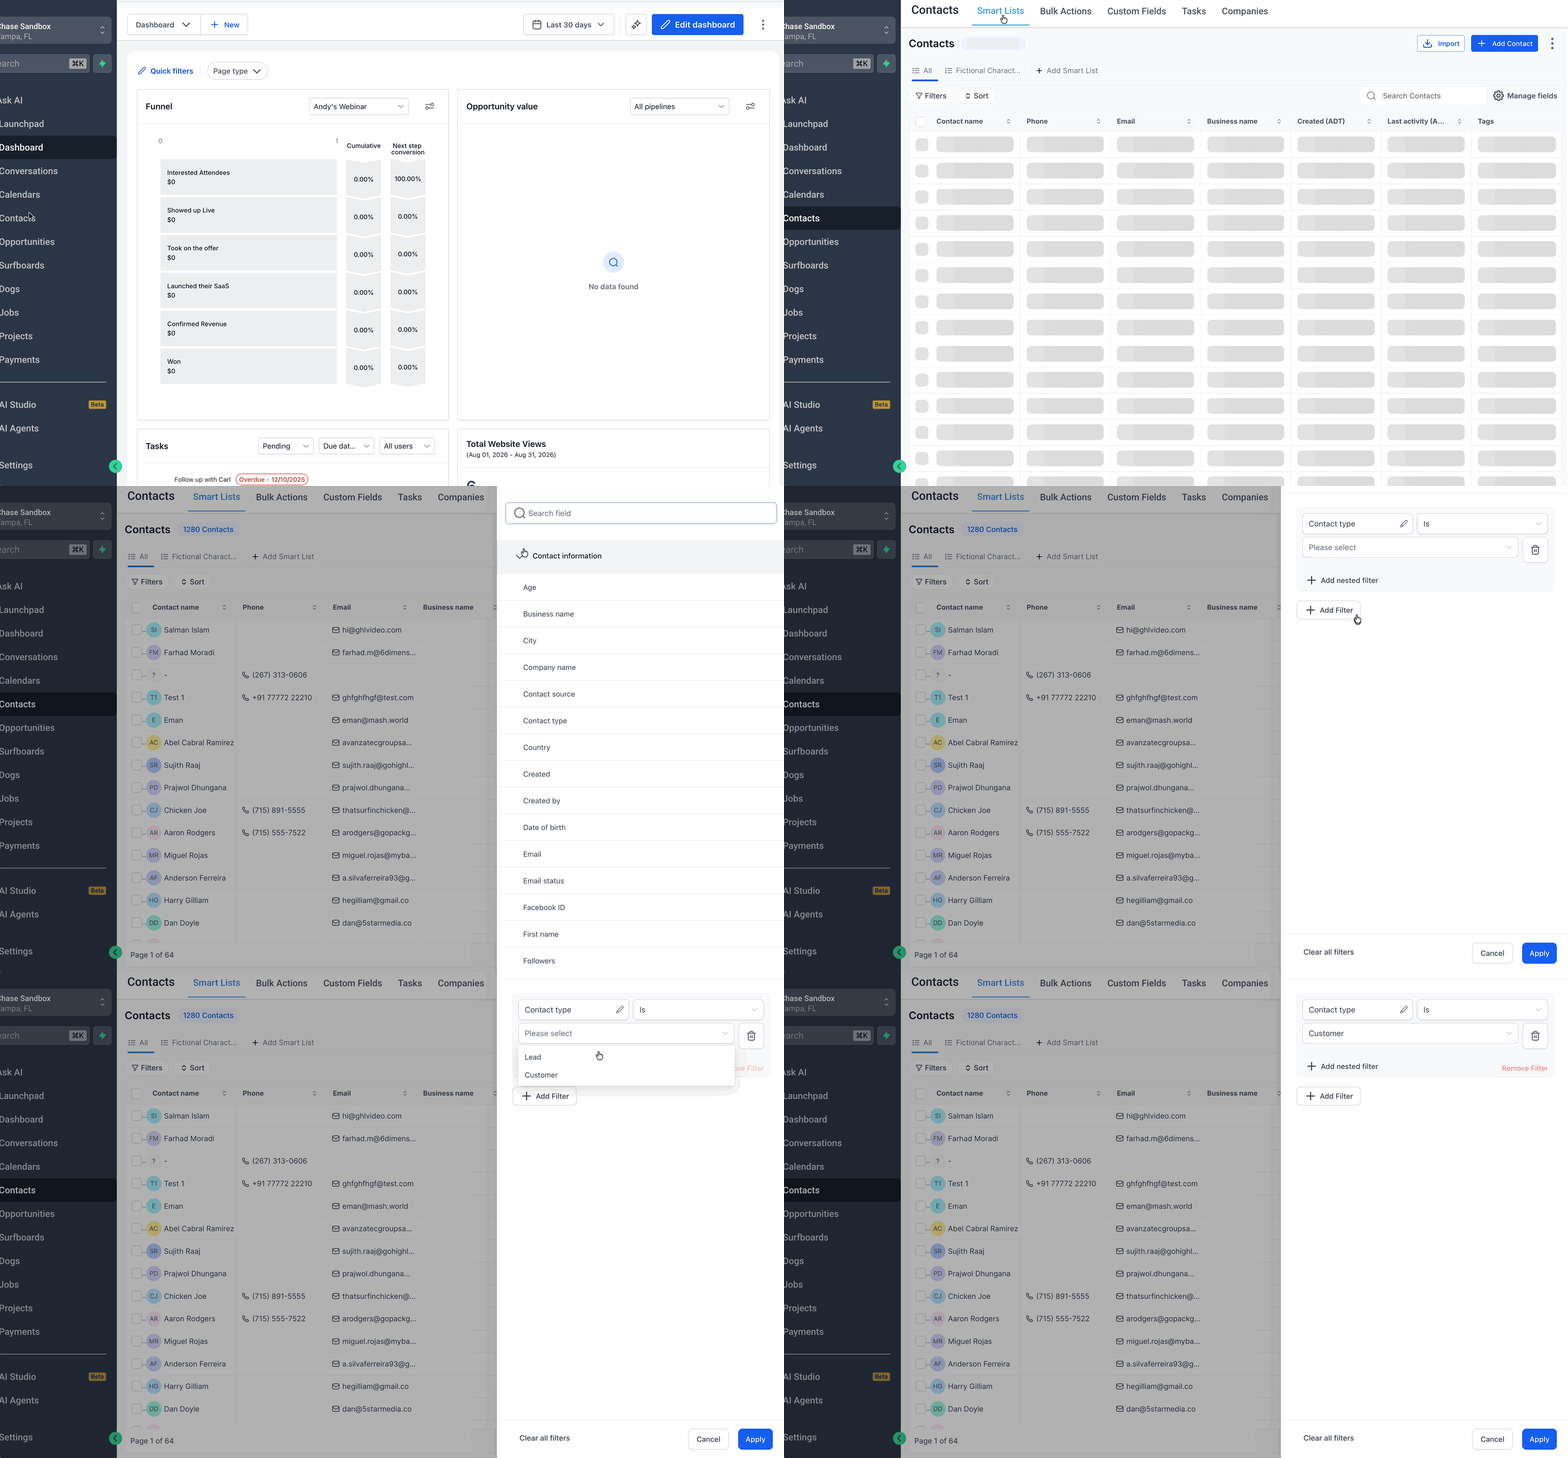
Filter and segment contacts by type
- Go to Contacts > Smart Lists.
- Open the filter panel.
- Select Contact Information as the filter category.
- Choose Contact Type and pick the desired type.
- Apply the filter.
- Save the view as a Smart List if you want to reuse it.
05What it looks like in HighLevel
06Settings that matter
- Contact Type. Defines the single select dropdown that holds the primary classification for each contact.
- Update Contact Field action. Allows a workflow to change the value stored in the Contact Type field for a contact.
- Contact Changed trigger. Starts a workflow when the Contact Type field (or other supported fields) changes.
07Things to know before you rely on it
- A contact can hold only one Contact Type at a time because the field is a single select dropdown.
- Contact Types should be broad categories; using many narrow values can reduce usefulness.
- When filtering in Smart Lists, the field appears as "Type" rather than "Contact Type".
- Contact Type values must match exactly during CSV import; mismatched values will not be assigned.
08How it connects to the rest of HighLevel
- Learn how Smart Lists filter contacts by Type. Smart Lists guide
- Manage the Contact Type field from the Custom Fields settings. Custom fields overview
- See how to update contact fields in workflows. Workflow actions
Michael's take

Many businesses drown in a sea of contacts that all look the same. Contact Types give you a quick way to label each person with their main relationship. Like Lead, Customer, Supplier, or Partner. So anyone on the team can see at a glance where they fit in the process. The first thing I would get right is the list of types themselves; keep it short and make sure each option truly represents a single, primary role.
Once the list is set, I would map the most common lifecycle change. Such as Lead to Customer. To a workflow that updates the type automatically. That ensures the classification stays current without manual effort, and it makes segmenting for emails or reports a breeze.