
01Who this is for
- Founders who need a central location for client files, reducing the time spent locating documents across channels.
- Customer service teams that handle inbound messages and want quick access to attached files while responding.
- Marketing specialists sending emails or SMS with assets and requiring those assets to be stored automatically for future campaigns.
02Sync attachments, explained
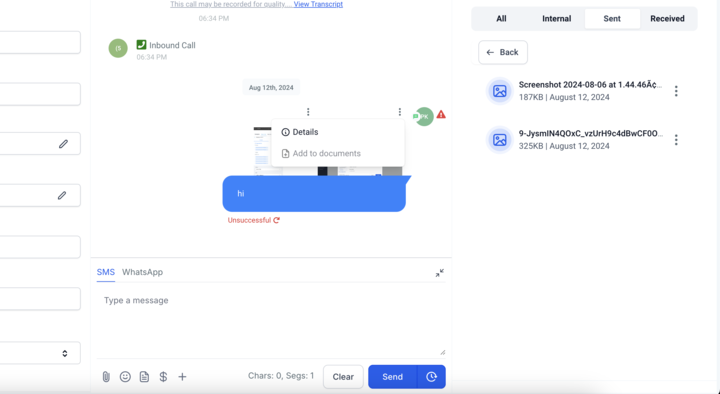
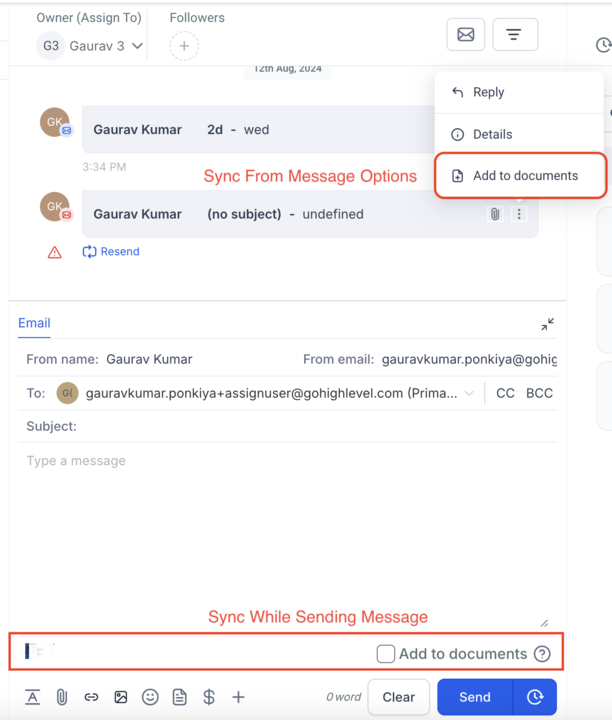
The feature adds a button to message items that contain files. Clicking the three dot menu on a received message and choosing “Add to Documents” copies the attachment into the contact’s Document Management area. The same option appears as a checkbox when composing an SMS or Email, allowing the file to be saved at the moment it is sent.
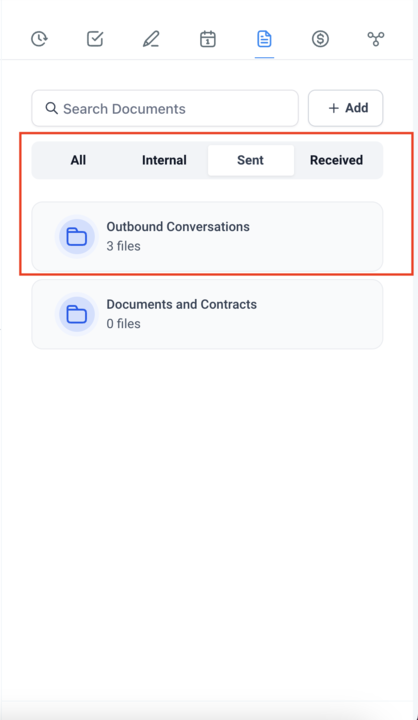
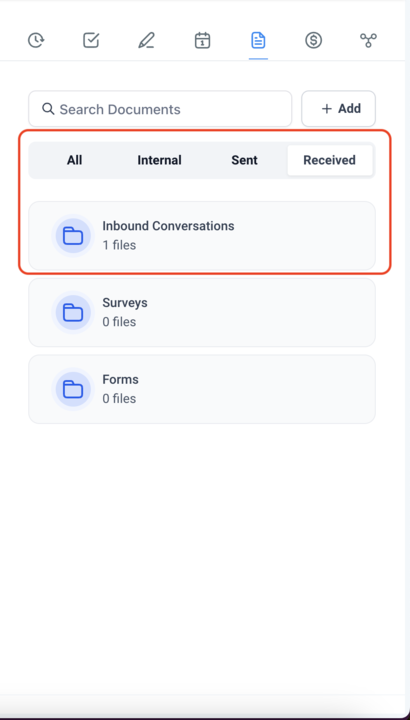
All supported channels, Email, SMS, Instagram, Facebook and integrated WhatsApp, follow the same process. Once stored, the document can be searched, downloaded or previewed from the Documents tab, which offers the platform’s full document handling tools.
The controls are found inside each conversation view for received messages and inside the compose window for outbound messages. No additional configuration is required beyond having the channels linked to the HighLevel account.
03How businesses use sync attachments
- Real estate agency. When a potential buyer emails a property brochure, the agent clicks the three dot menu on that email and selects “Add to Documents.” The brochure then appears in the buyer’s Document Management section for easy reference during negotiations.
- Dental practice. While sending a treatment plan via SMS, the staff attaches the PDF, checks the “Add to Documents” box, and sends the message. The plan is automatically saved to the patient’s Documents tab, ready for future appointments.
- Ecommerce store. A support rep receives a screenshot of an order issue on Instagram, clicks the three dot menu, chooses “Add to Documents,” and the image is stored with the customer’s record, simplifying follow up and dispute handling.
04The numbers and rules that matter
- Supported channels: Email, SMS, Instagram, Facebook, WhatsApp (if integrated properly with your HighLevel account).
05How to set up and use sync attachments in HighLevel
Add attachment from a received message
- Open the conversation that contains the attachment.
- Locate the message with the file you want to save.
- Click the three dot menu next to that message.
- Select “Add to Documents” from the menu options.
Add attachment while sending a message
- Start a new SMS or Email message to the contact.
- Attach the file you wish to include.
- Check the “Add to Documents” checkbox beside the attachment.
- Send the message; the file is saved to the contact’s Documents.
06What it looks like in HighLevel
07Settings that matter
- Add to Documents (checkbox). When checked in the compose window, the attached file is copied to the contact’s Document Management section as the message is sent.
- Add to Documents (menu option). Selecting this option from the three dot menu on a received message moves the attachment into the contact’s Documents tab.
08Things to know before you rely on it
- The preview feature may vary depending on the file type and the channel it originated from.
- Attachments can be added from Email, SMS, Instagram, Facebook and properly integrated WhatsApp channels.
09How it connects to the rest of HighLevel
- Explore all contact related features on HighLevel All Contacts features
Michael's take

People often think the Documents tab is only for files you upload manually, so they forget to pull in the files that already land in a conversation. That habit leaves important PDFs, images or contracts scattered across message threads.
I treat every attachment as a document that belongs with the contact. When a file arrives, I click the three dots and add it to Documents right away. When I send a file, I make sure the “Add to Documents” box is checked so the record stays complete.