
01Who this is for
- Founders who need a single place for contracts and client files, keeping everything attached to the contact record.
- Service providers such as consultants who want to let clients upload required paperwork without email exchanges.
- Small agencies that require a clear view of which files have been shared versus received for each client.
02Documents, explained
The feature lets HighLevel users attach files to an individual contact record and optionally expose them in the Client Portal. When a file is marked for sharing, the contact receives a notification and can download or preview the document from their portal view. Files uploaded by contacts appear under a Received folder linked to the same contact record.
Sharing and revoking are controlled from the document’s action menu. Deleting a file removes it from the contact record entirely and does not affect any prior sharing state. All actions happen inside the Documents tab of the contact’s profile.
03How businesses use documents
- Consulting firm. A consultant uploads a proposal as a new document and enables the Client Portal sharing option, so the client can download it from the portal. The consultant can later revoke access without removing the file from HighLevel.
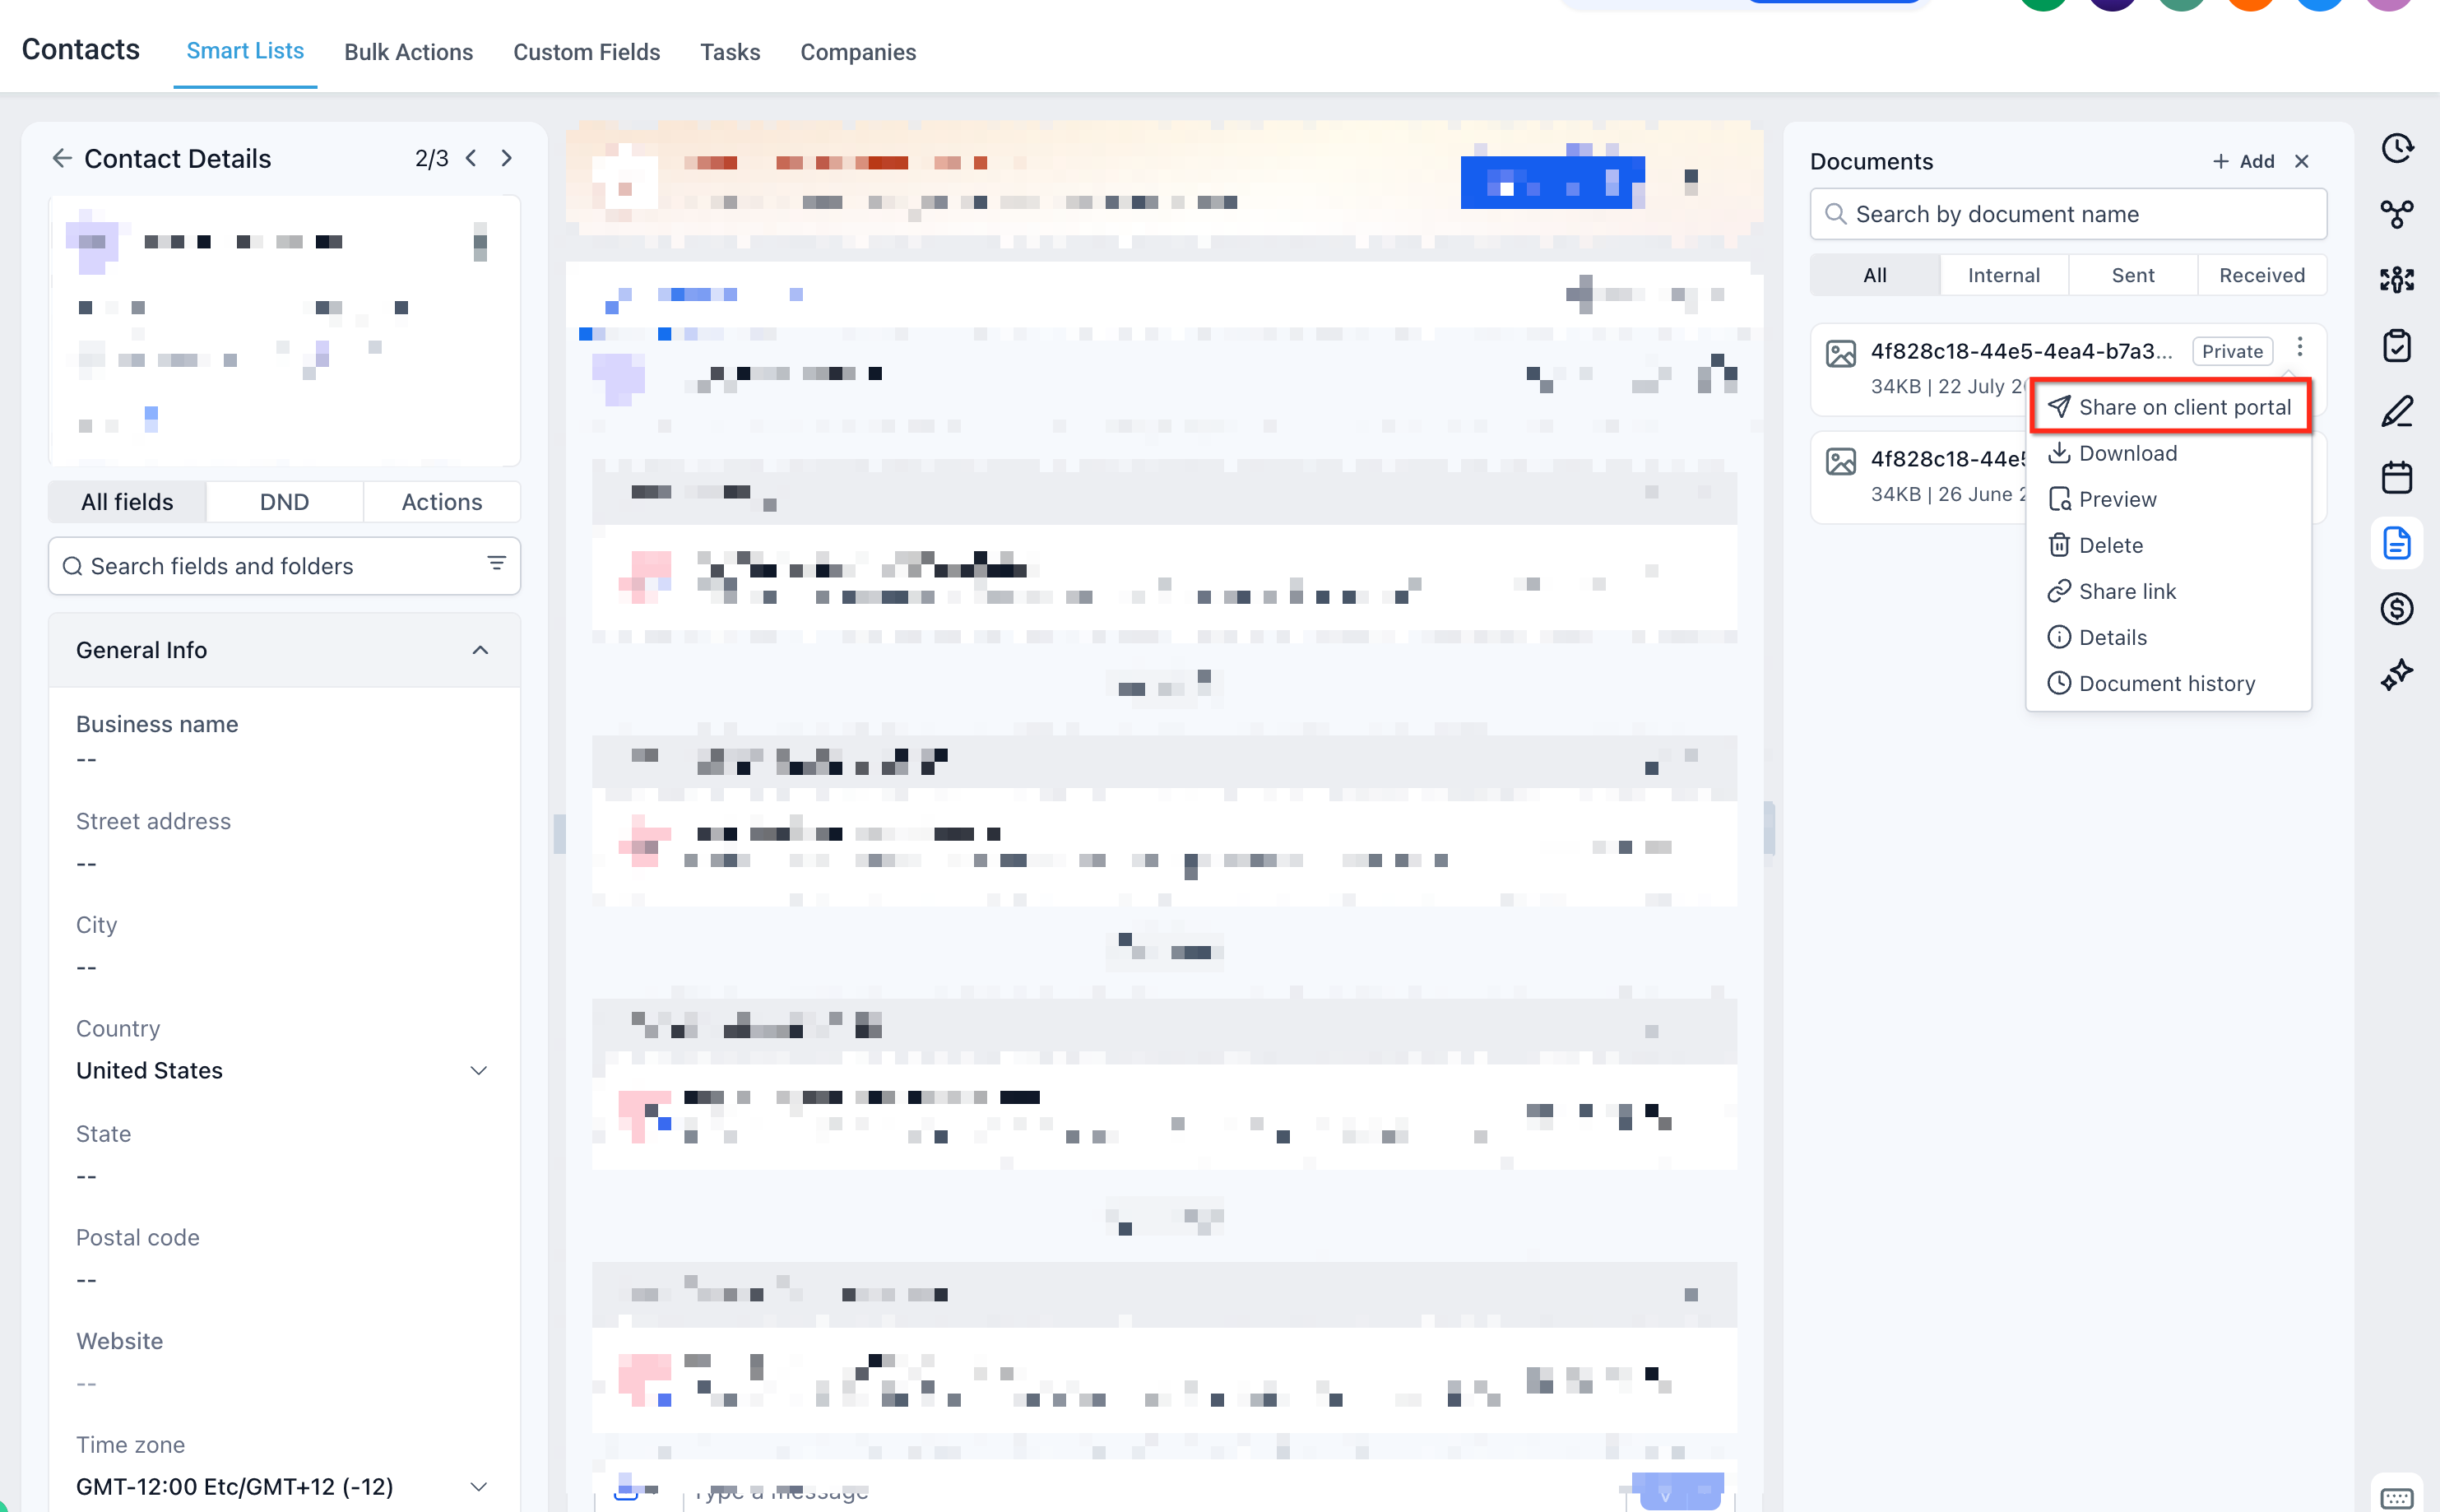
- Real estate agency. An agent shares an inspection report already stored on a contact record by selecting Share to Client Portal from the document’s three dot menu, making the file right away available to the buyer.
- Legal practice. A client logs into the portal, uses the Upload Document button, and submits a signed agreement. The file appears under Documents > Received > Client Portal for the attorney to review.
04Before you start
- Ensure the contact has Client Portal access.
- Confirm you are viewing the correct contact record in HighLevel.
- Have the file you intend to share ready for upload.
- Complete any required Client Portal setup before sharing.
05How to set up and use documents in HighLevel
Share a new document
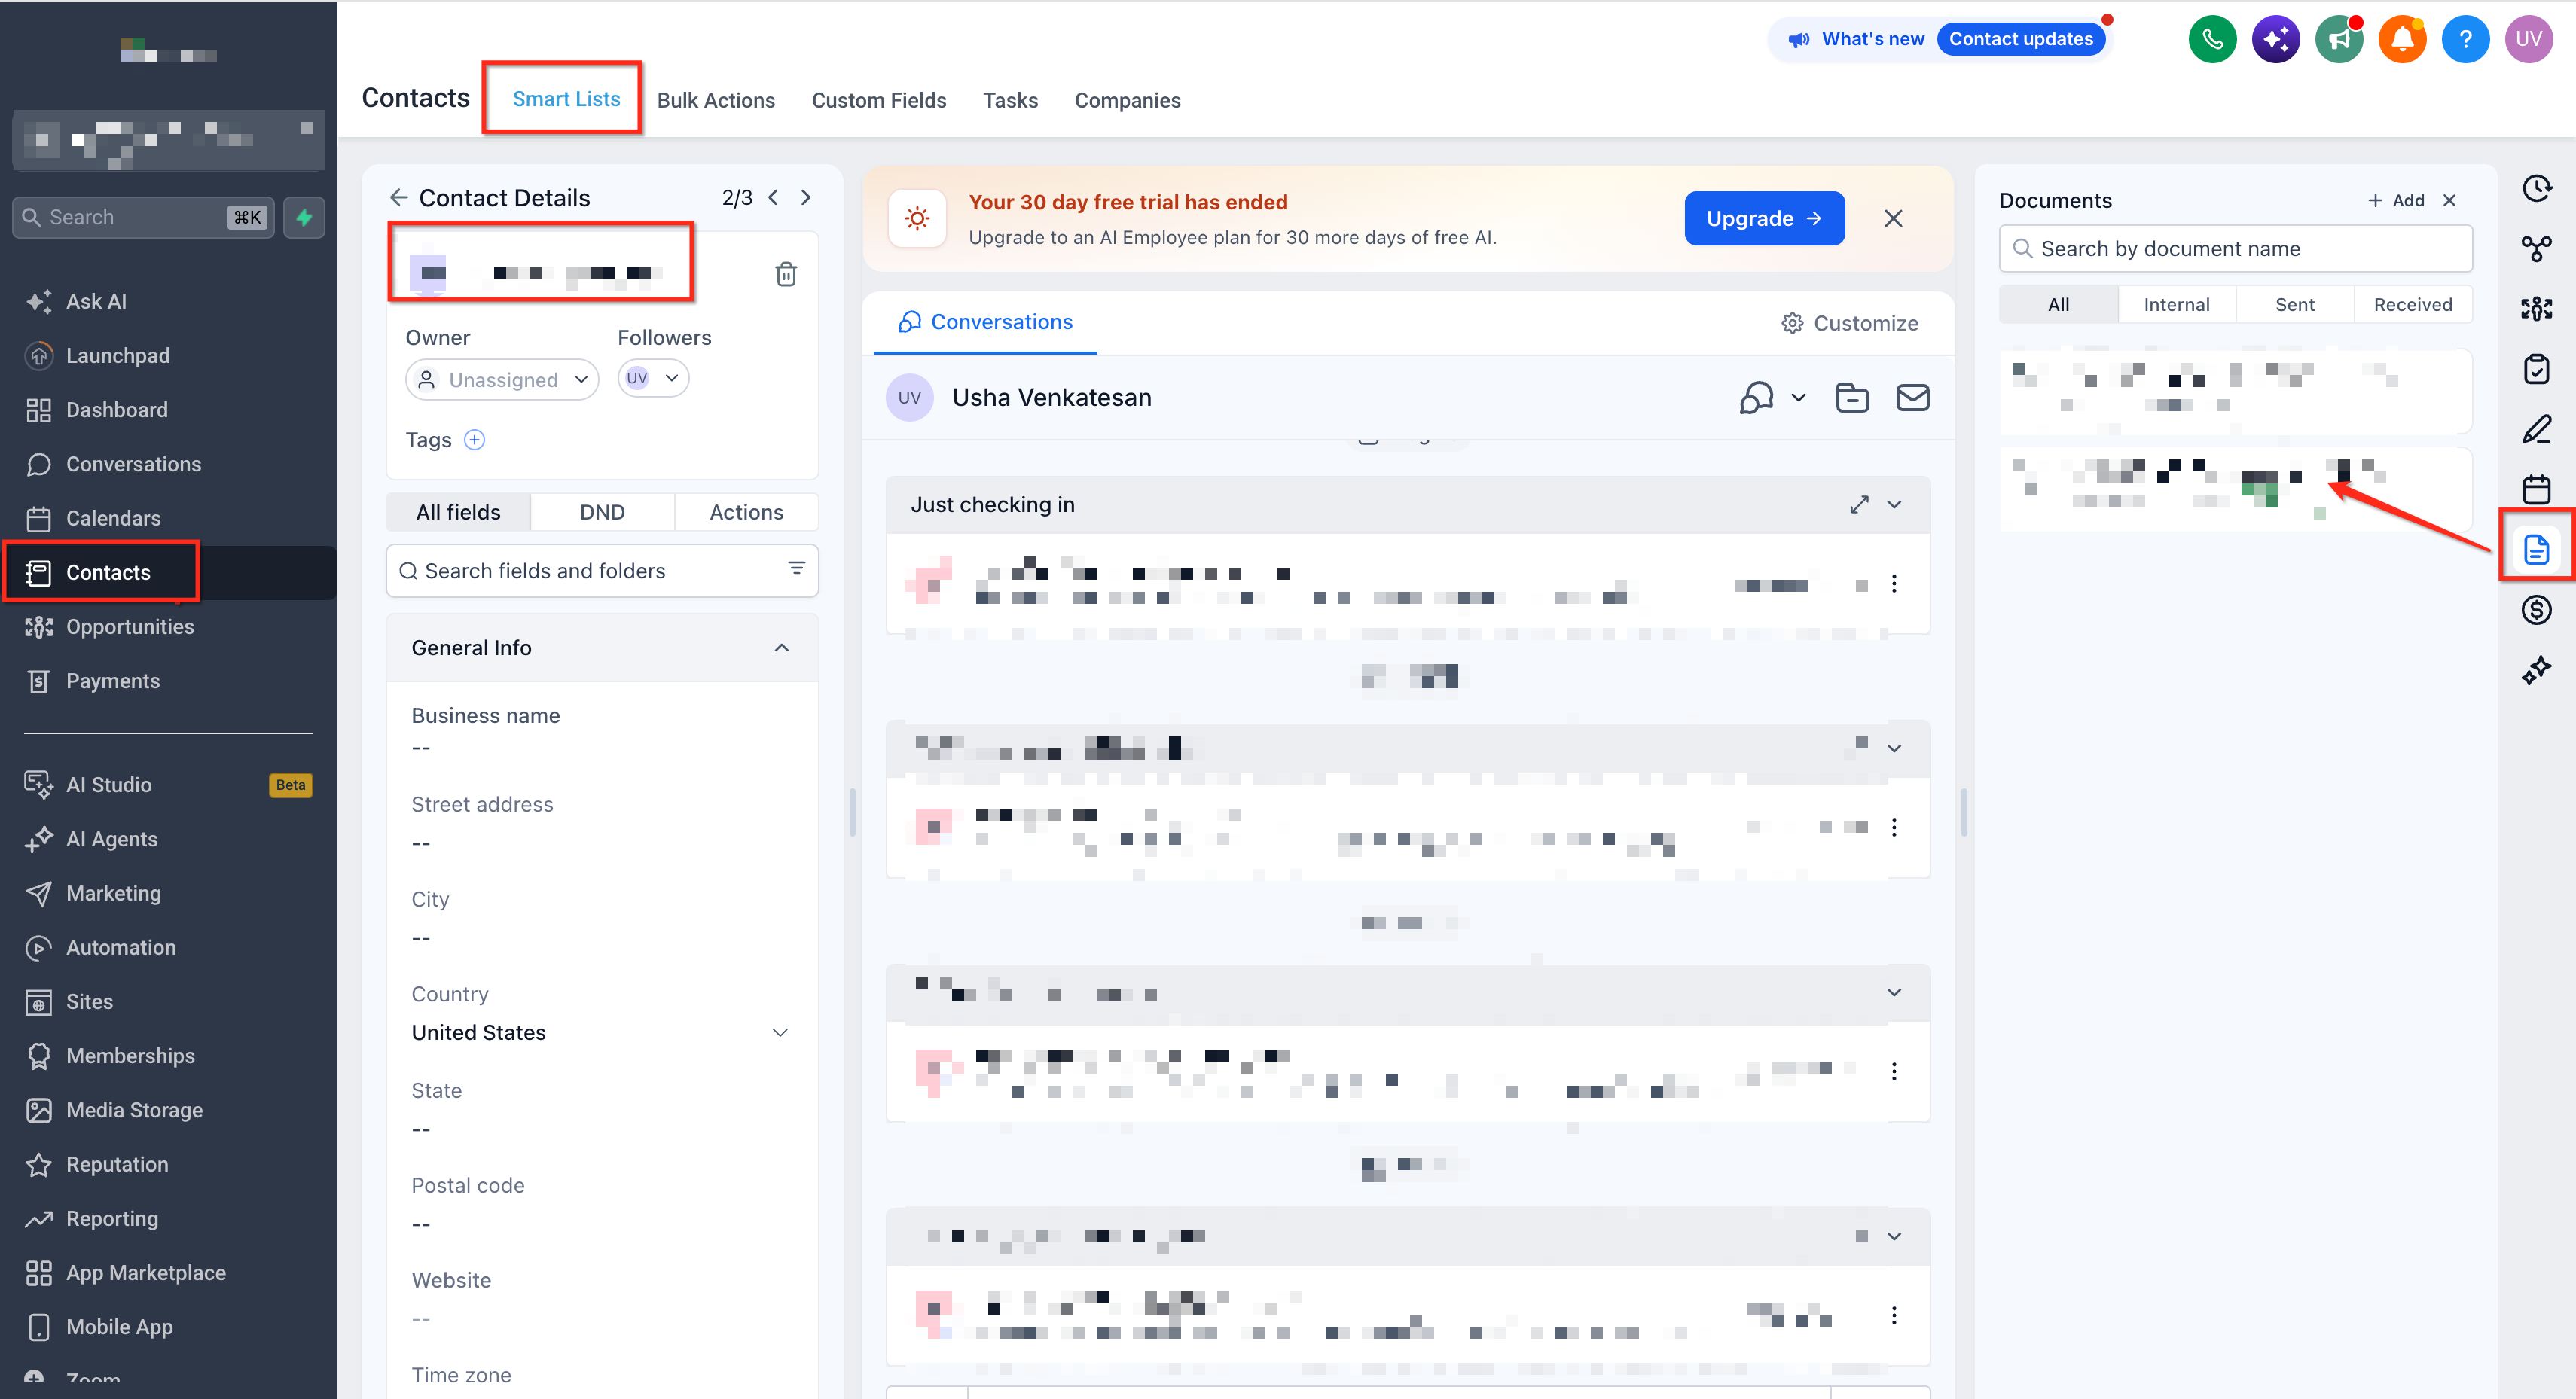
- Go to Contacts in your HighLevel subaccount.
- Open the contact you want to share the document with.
- Open the contact’s Documents area.
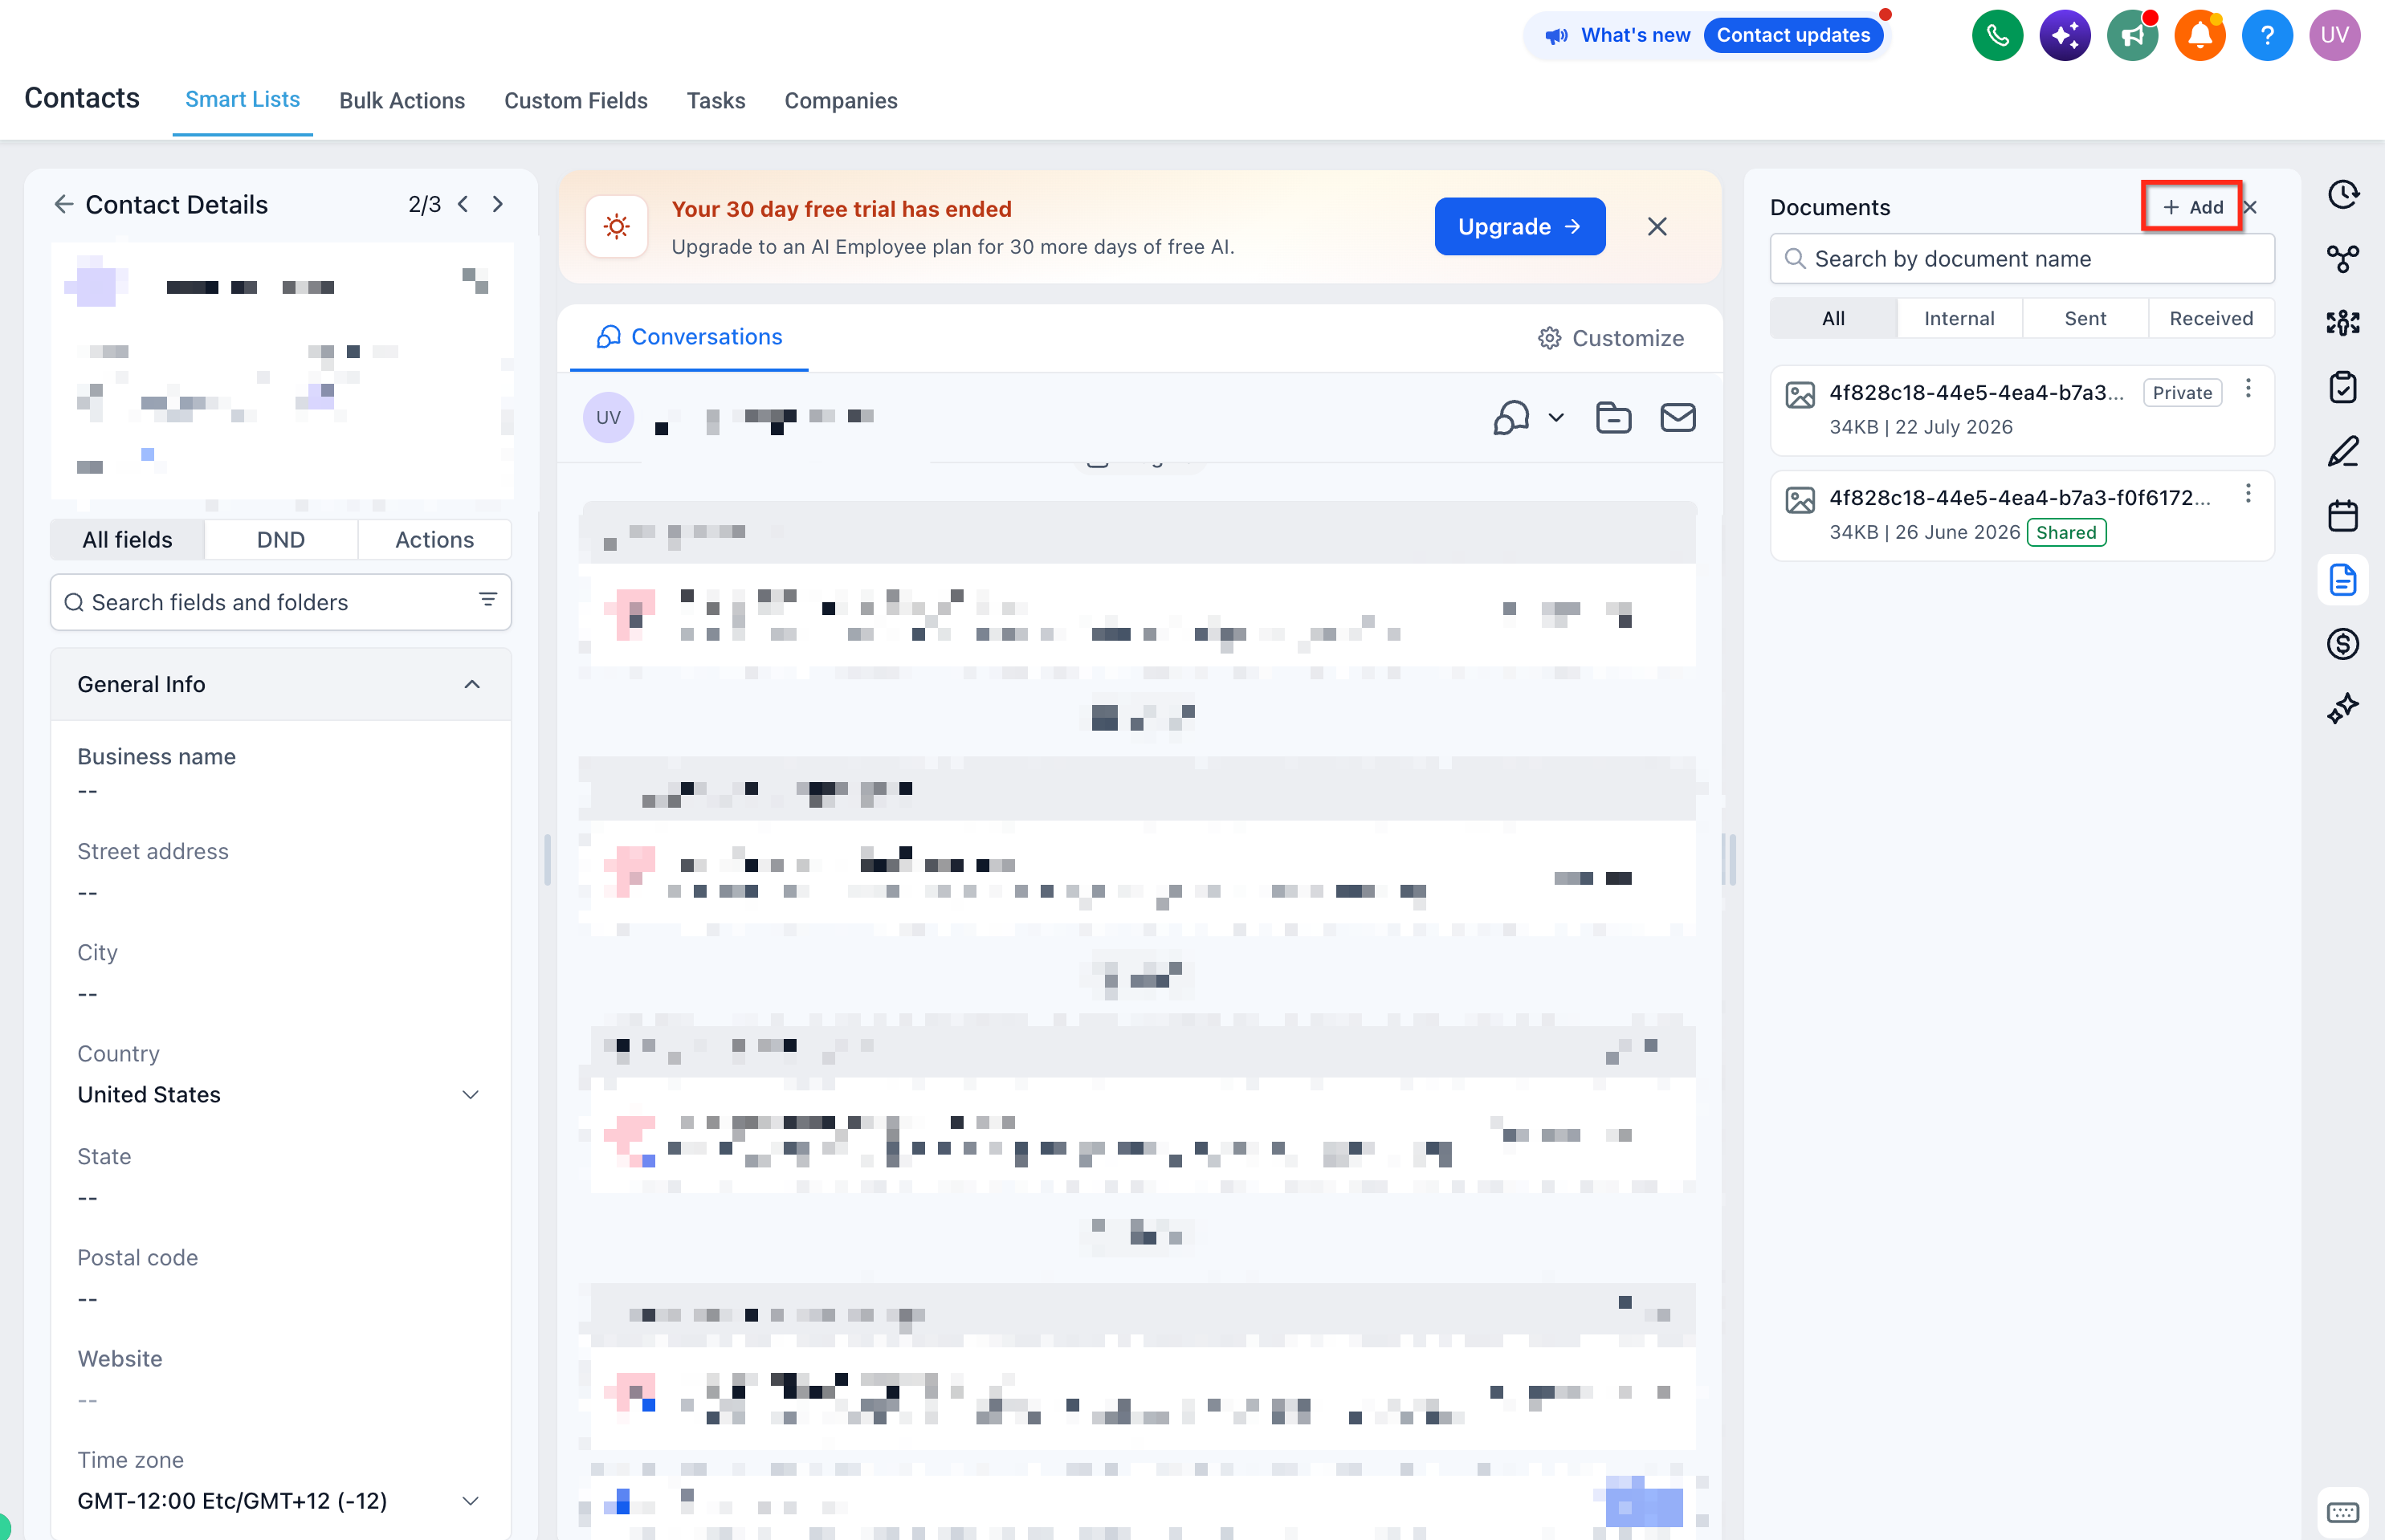
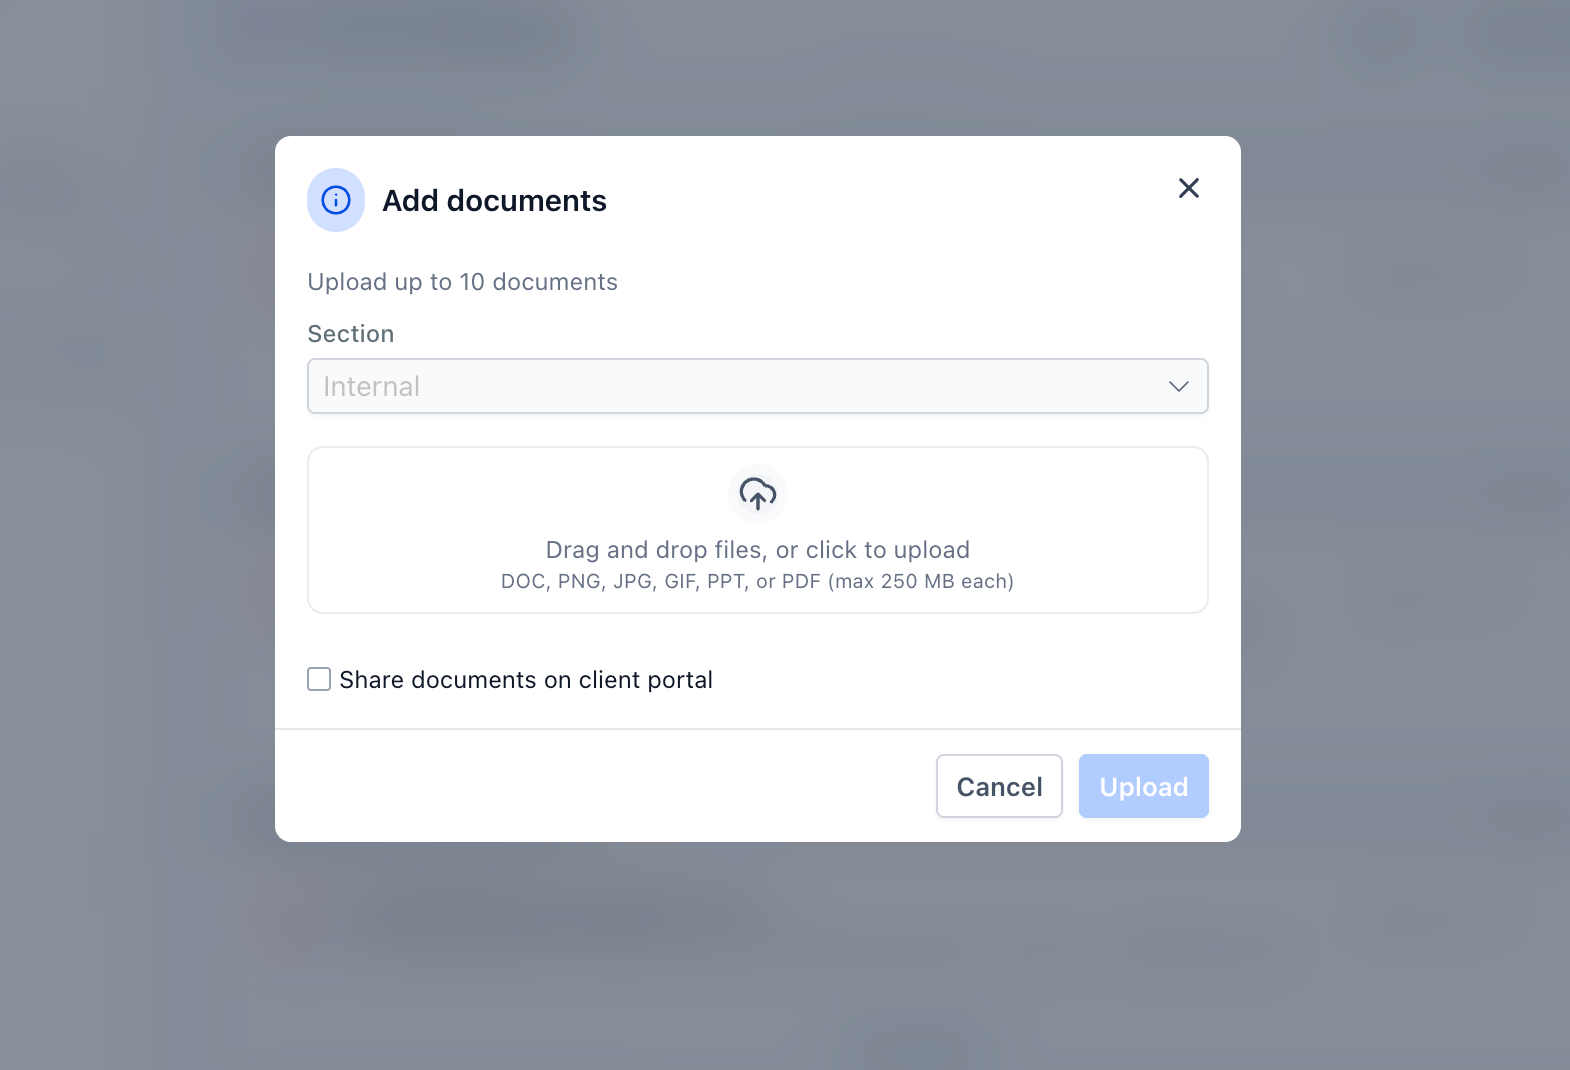
- Click the + Add button (or the add document option).
- Select the file and upload it.
- Enable the Client Portal sharing option for the document.
- Complete the upload and verify the shared status appears.
Share an existing document
- From the contact record, open Documents.
- Locate the existing document you want to share.
- Open the file’s three dot action menu.
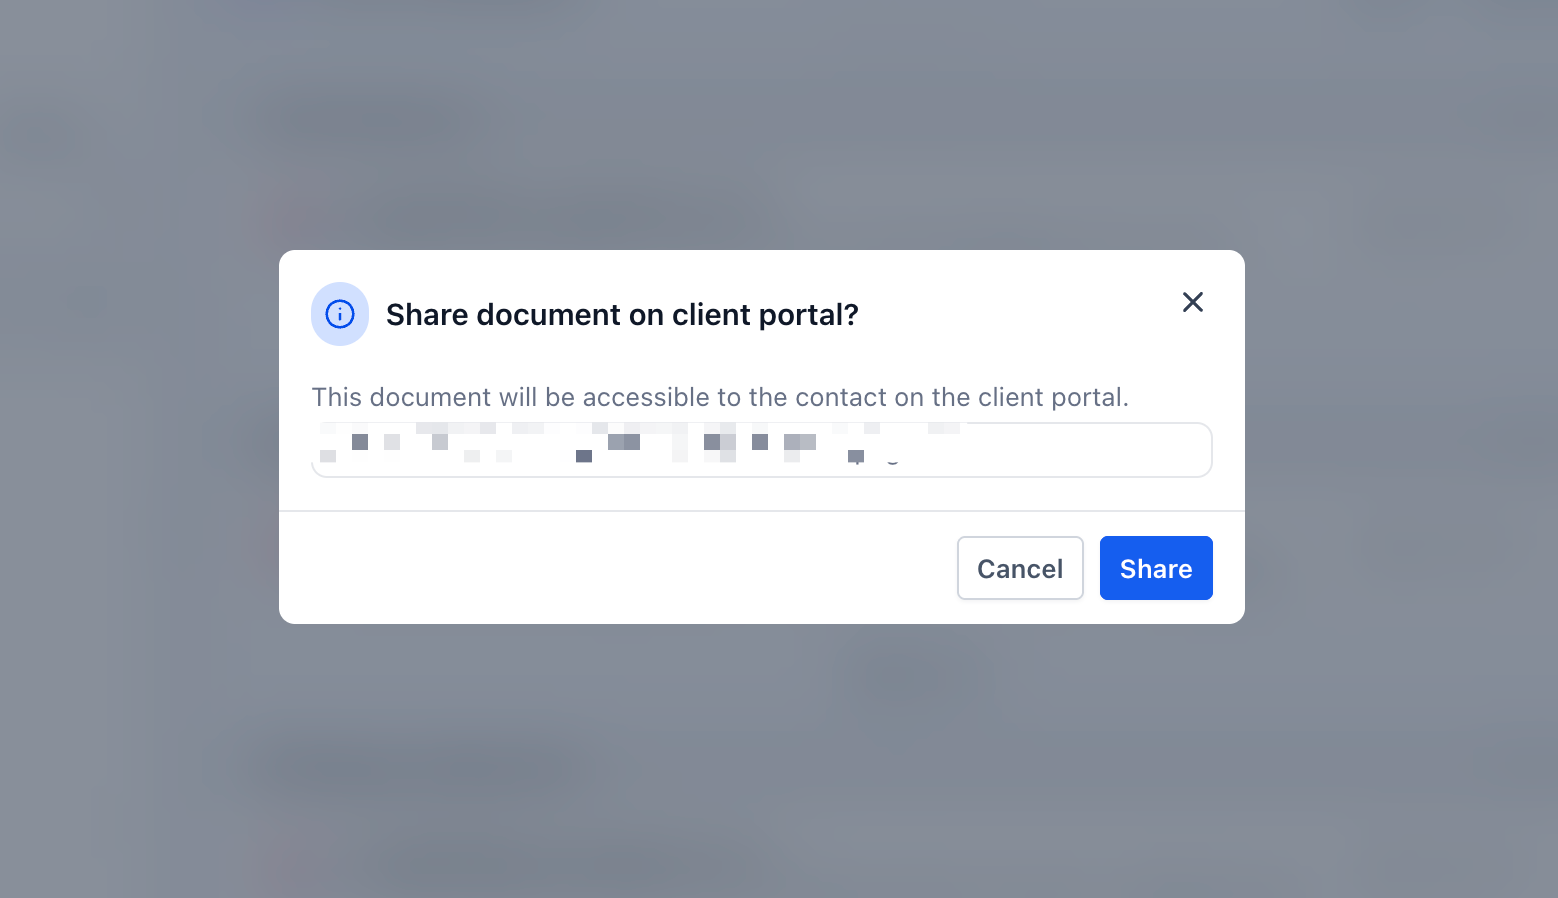
- Select Share to Client Portal.
- Confirm the sharing action when prompted.
- Verify that the document shows the shared status.
Client uploads a document from the portal
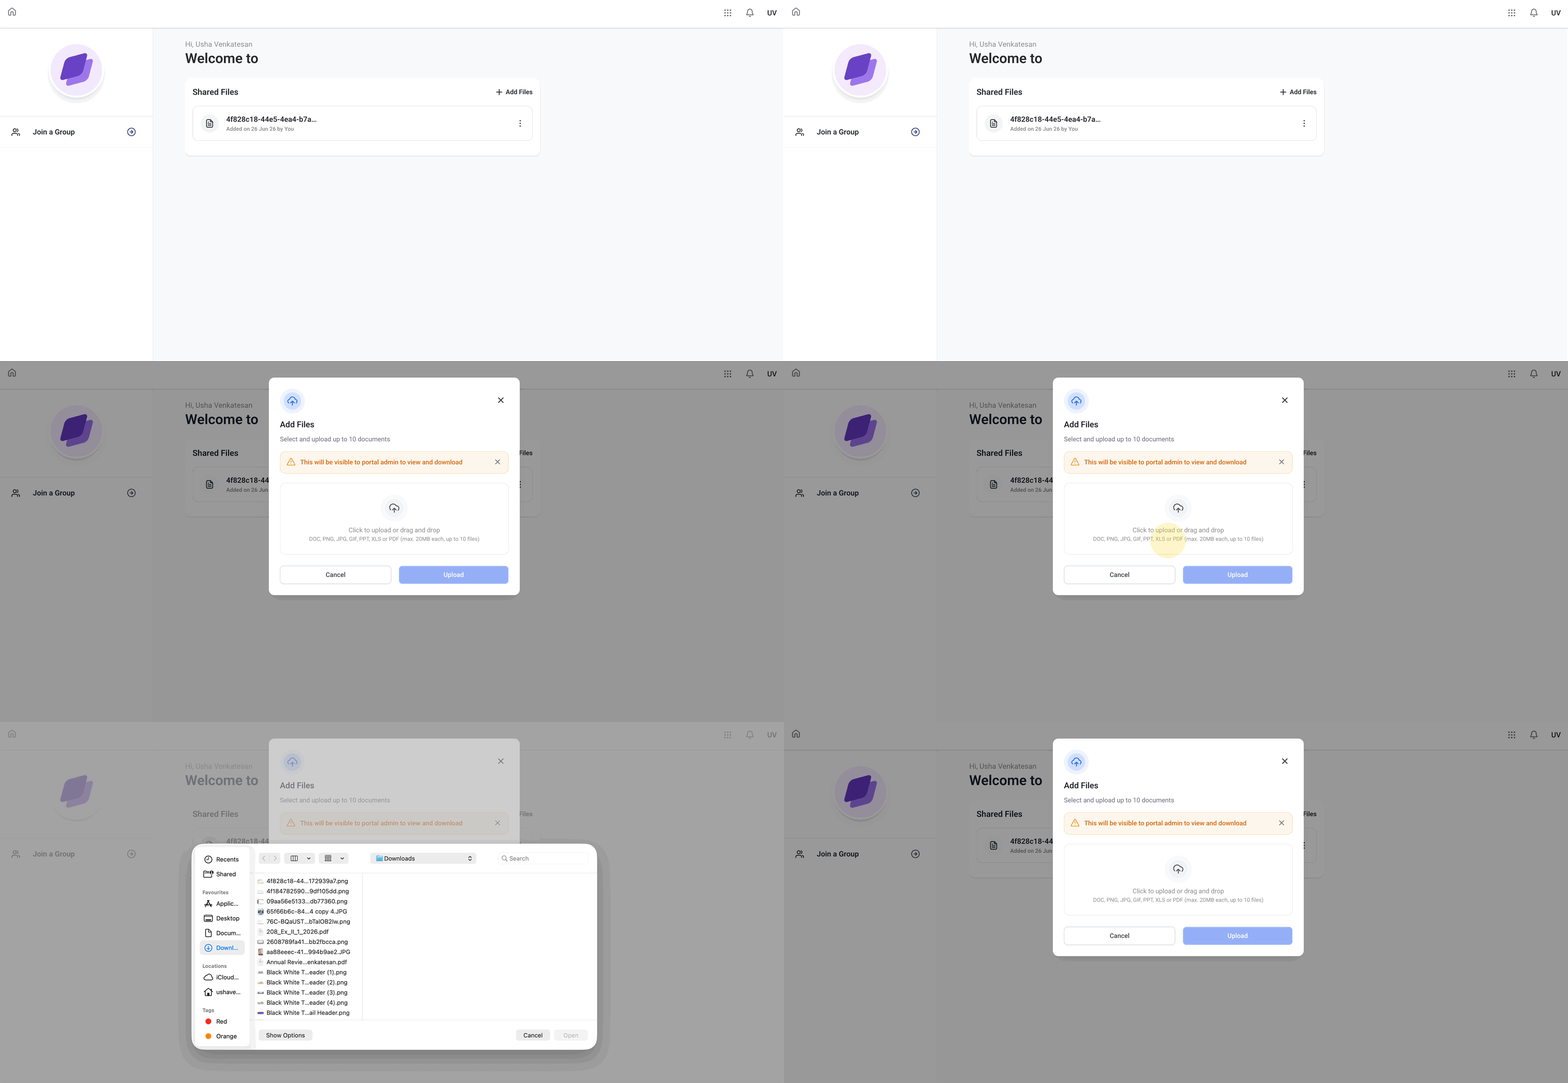
- Sign in to the Client Portal.
- Open the Documents/Shared Files area.
- Select Upload Document (or the file upload option).
- Choose the supported file or files to upload.
- Complete the upload.
Revoke Client Portal access to a document
- Open the contact record.
- Go to Documents.
- Locate the shared file.
- Open the document’s sharing or action controls.
- Use the Client Portal sharing control to remove the file’s shared access.
- Confirm the file no longer displays as shared to the Client Portal.
Delete a document from HighLevel
- Open the contact record and go to Documents.
- Locate the file you want to remove.
- Open the document’s action menu.
- Select Delete.
- Confirm the action when prompted.
06What it looks like in HighLevel
07Settings that matter
- Client Portal sharing option. Controls whether a newly uploaded document is visible to the contact through the Client Portal.
- Client Portal sharing control. Allows removing a document’s shared status so the contact can no longer access it via the portal.
08Things to know before you rely on it
- Only supported file and image formats can be uploaded through the Client Portal.
- Revoking Client Portal access does not delete the document from HighLevel; deleting removes the file entirely.
- External link sharing is handled by the separate Enhanced Document Privacy & Access Controls feature.
09How it connects to the rest of HighLevel
- Creating and managing contacts is the first step before sharing documents. Contact management
- Explore all contact related features to see how document sharing integrates with other tools. All Contacts features
- Review pricing options if you need a plan that includes Client Portal access. Pricing and plans
Michael's take

I find that confirming portal access first avoids uploading into a void. Once the portal is ready, you can keep client facing files tied to the contact record and avoid separate email attachments.
When the portal is ready, you get automatic notifications, two way uploads, and the ability to trigger follow up workflows, which make the exchange more streamlined.