
01Who this is for
- Marketing managers can schedule birthday emails and SMS to increase personal engagement.
- Customer support teams can assign internal tasks on a contact's birthday to ensure a human touch.
02Birthday field, explained
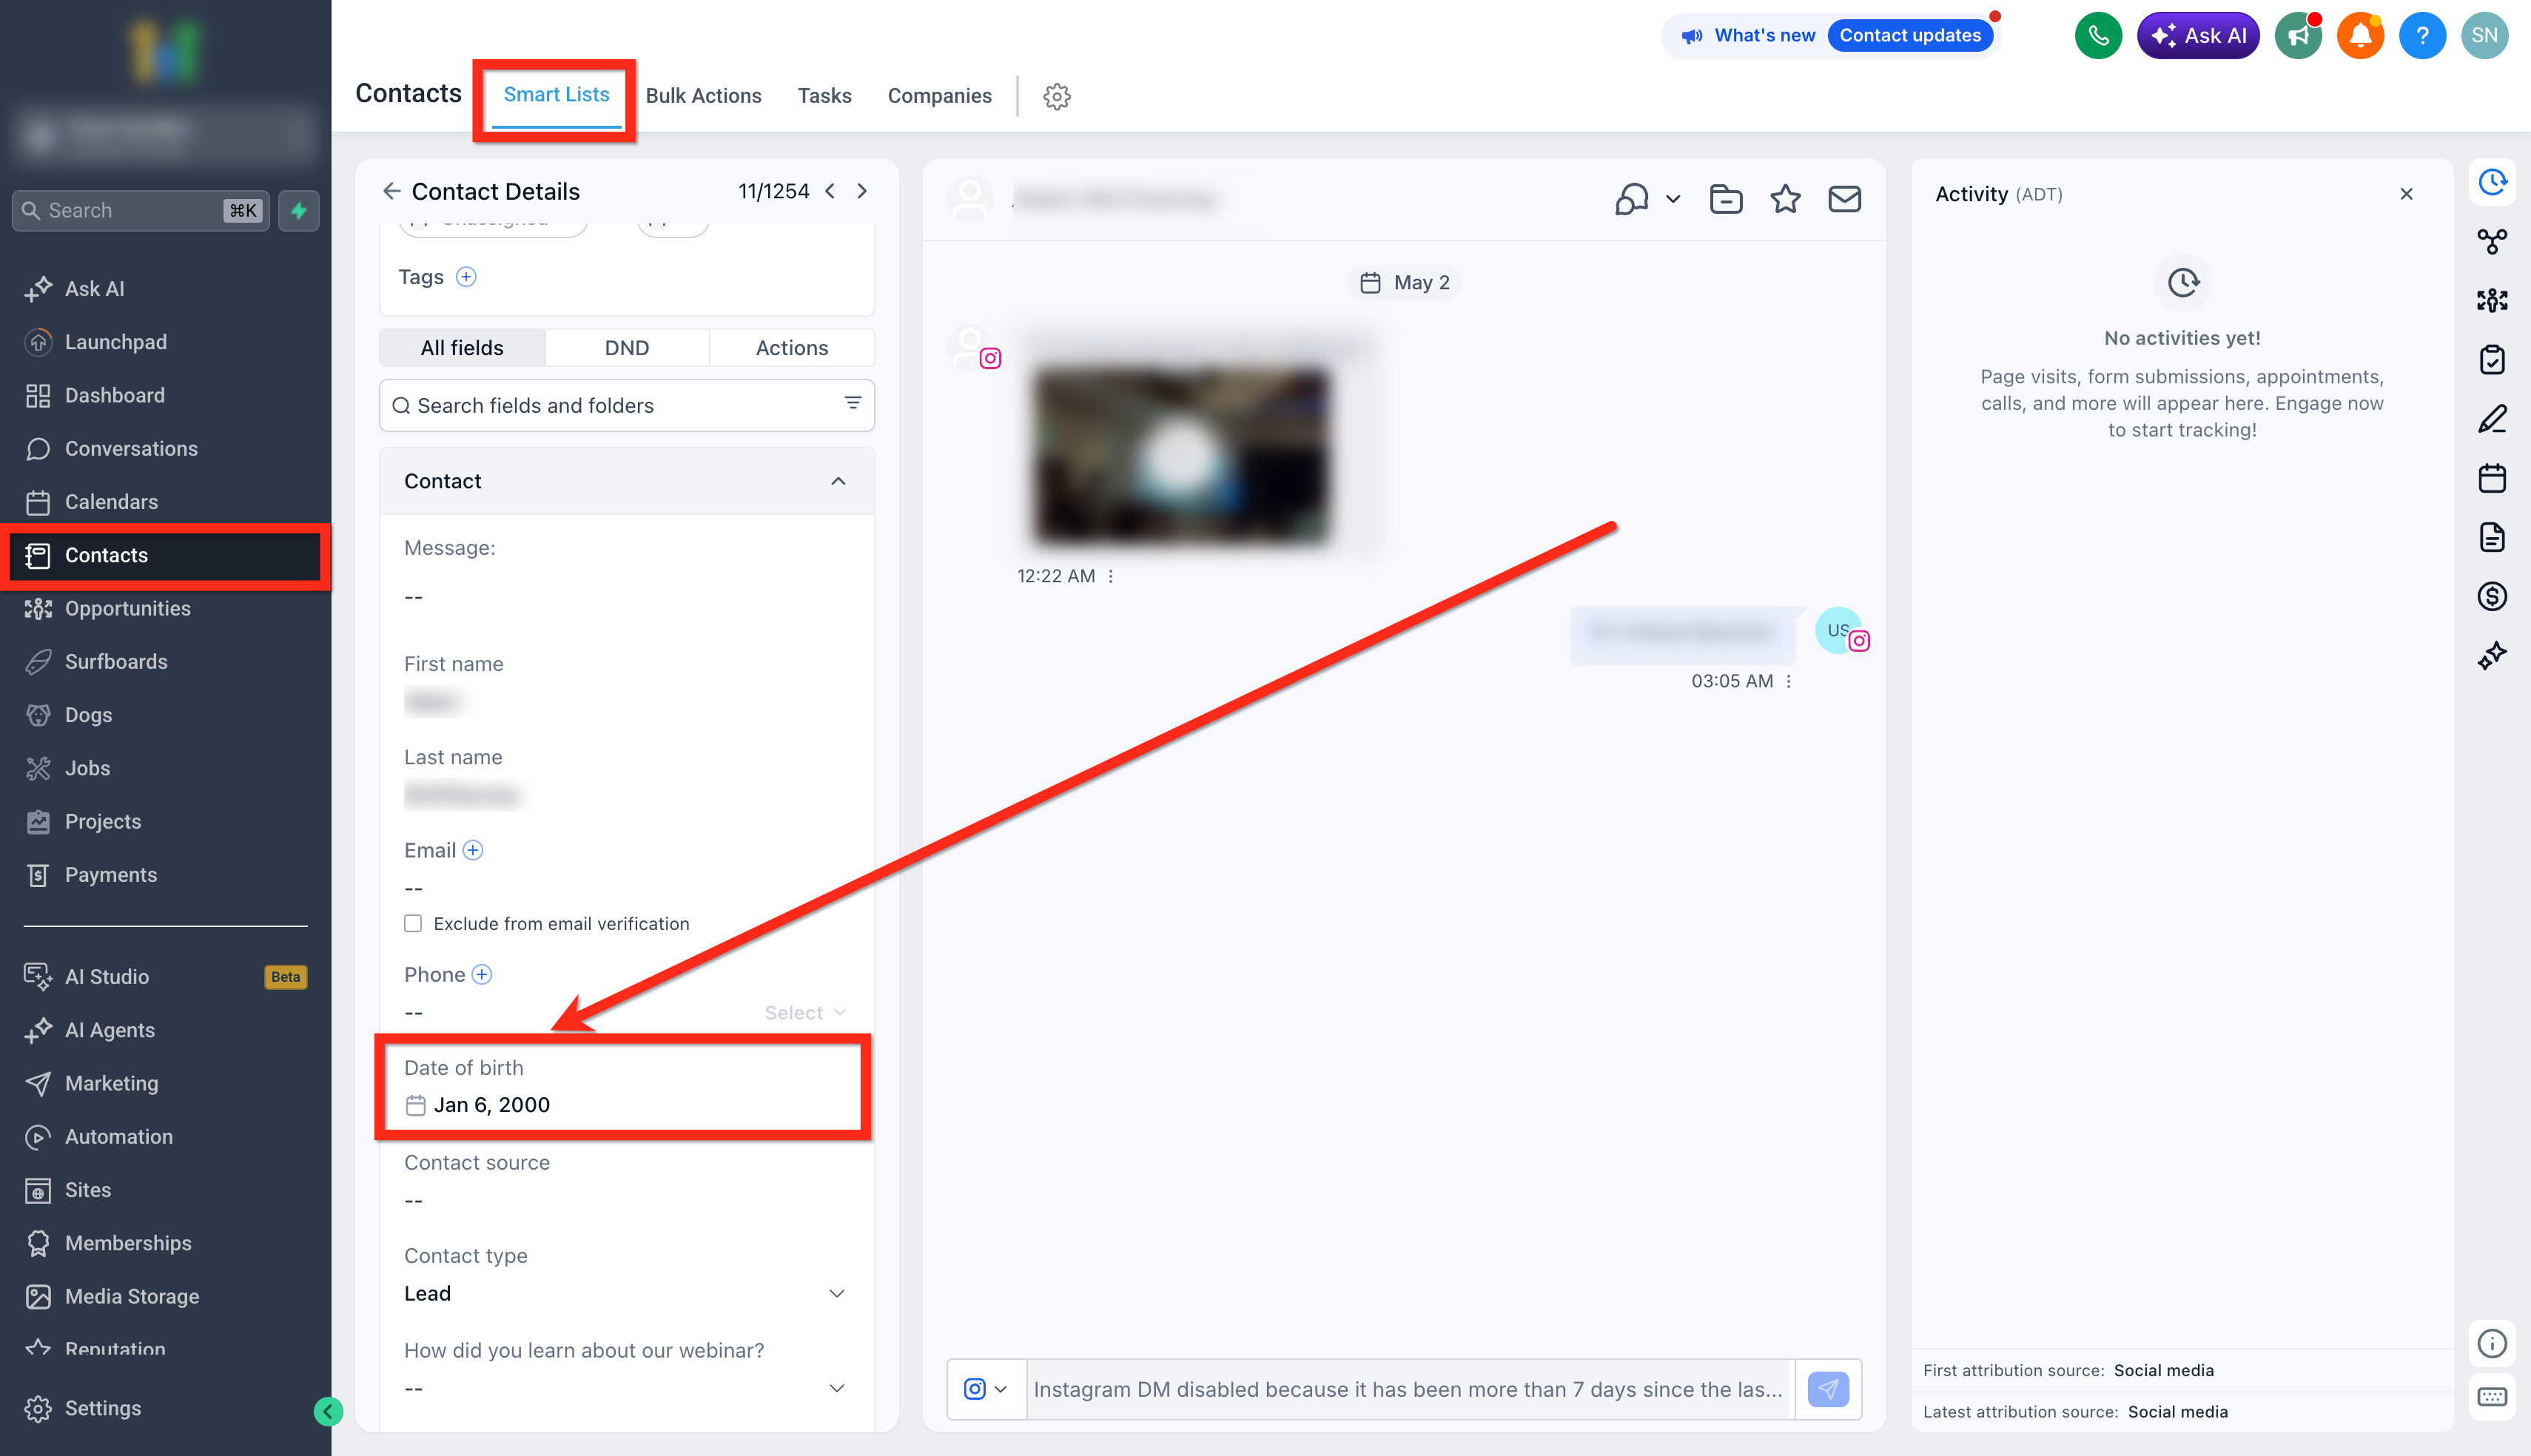
The Birthday field is a custom date field on each contact record. Once the date is entered, manually, via a form, CSV import, or API, it becomes available for workflow triggers and Smart List filters.
Workflows can start on a specific birthday, a set number of days before or after, or on a particular day or month. Actions such as email, SMS, or task creation can be added to the workflow.
Smart Lists let you segment contacts by exact birth dates (today, tomorrow, this month, etc.) or by age using comparison operators. The platform calculates age dynamically from the stored birthday.
03How businesses use birthday field
- Fitness studio. Add a Birthday field to membership sign up forms. Build a workflow that sends a discount coupon SMS two days before each member's birthday. Use a Smart List to see all members turning 30 this year.
- Dental practice. Import patient records with birth dates via CSV. Create an age based Smart List that includes patients over 65 for targeted senior care reminders. Set a workflow to email a birthday greeting on the exact date.
- Ecommerce retailer. Capture birthdays on checkout. Configure a workflow that sends a birthday email offering a special promotion. Filter contacts by those whose birthdays fall in the current month to plan a monthly campaign.
04Before you start
- Contact records must have a valid Date of Birth value in the correct MM/DD/YYYY format.
05How to set up and use birthday field in HighLevel
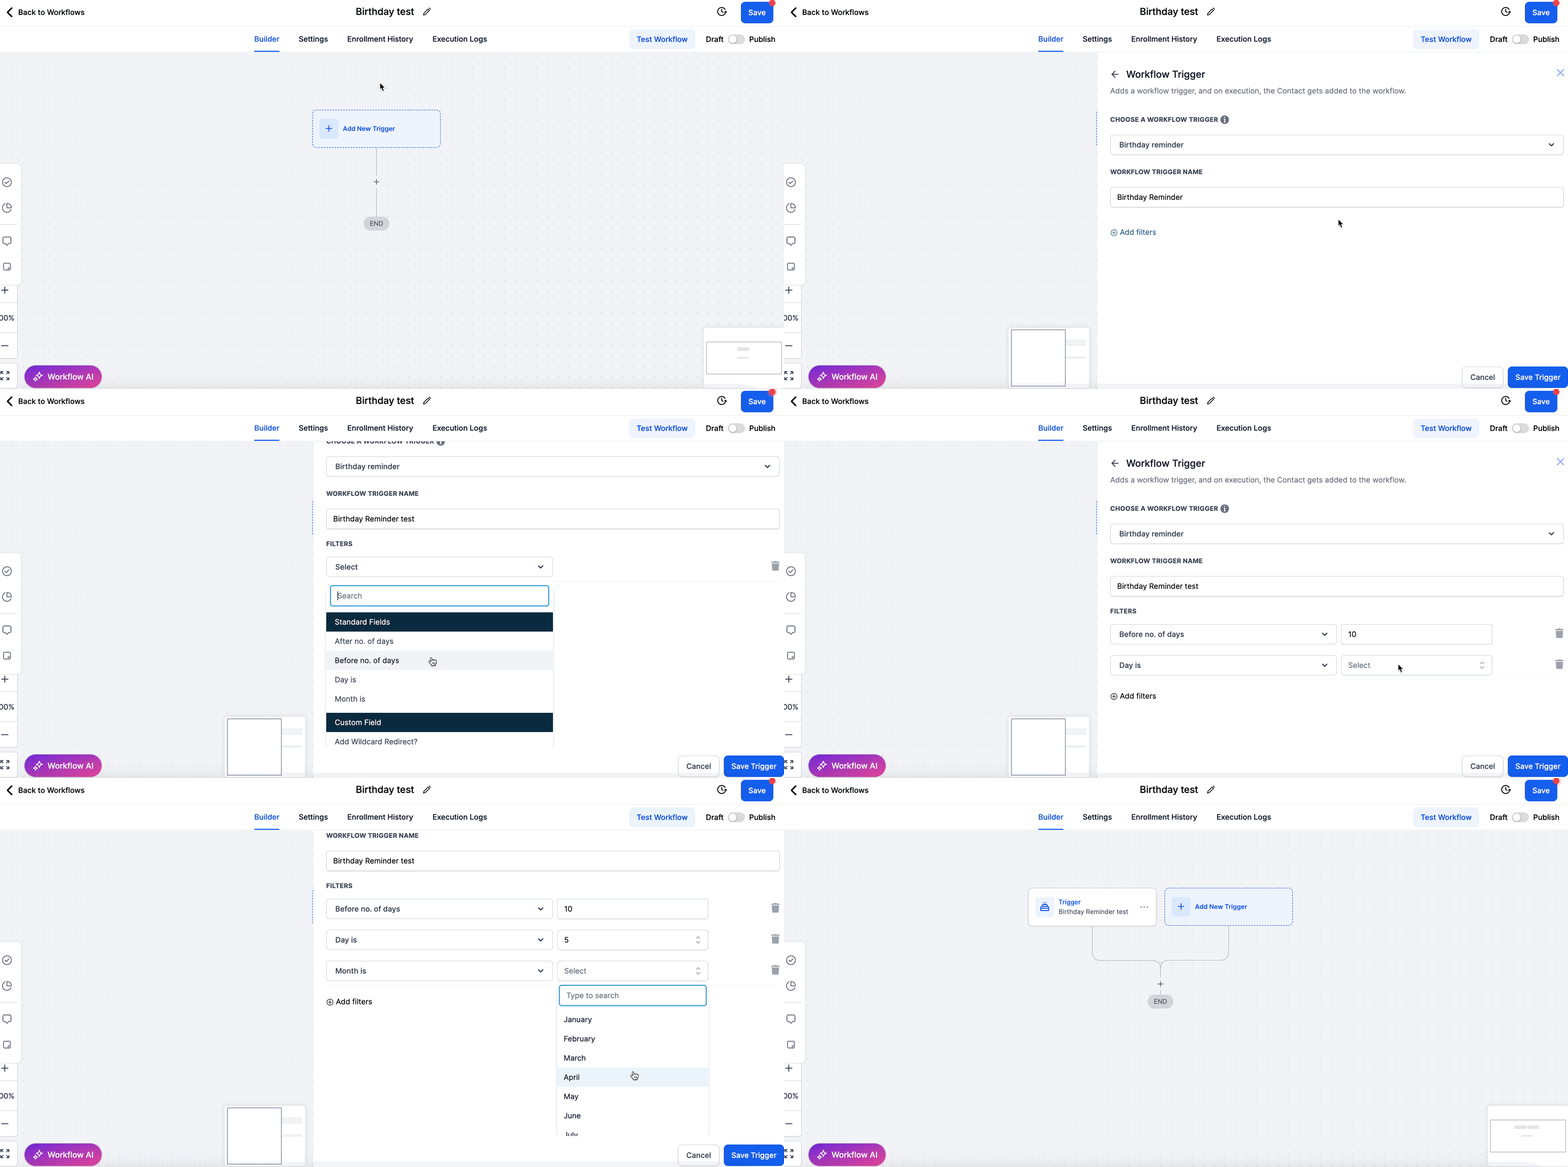
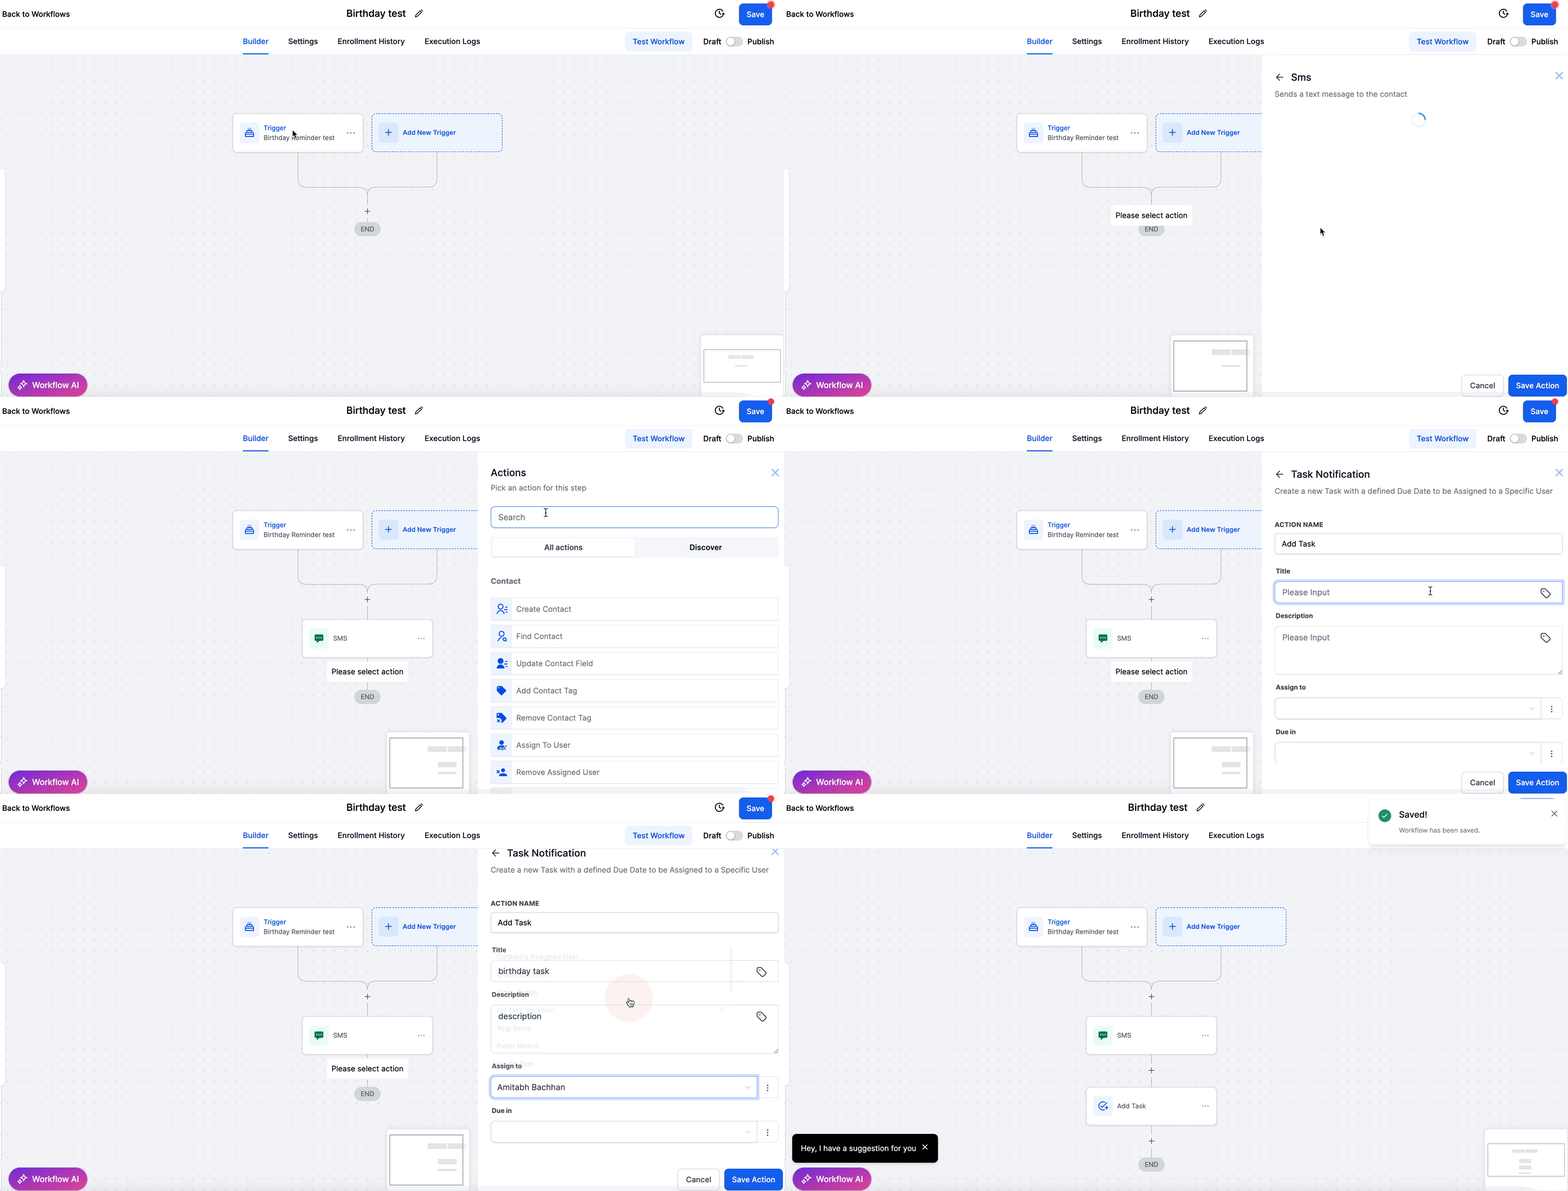
Build birthday reminder workflow
- Open the Workflows section and select Create New Workflow.
- Choose Birthday Reminder as the workflow trigger.
- Pick a trigger condition such as After no. of days, Before no. of days, Day is, or Month is.
- Add the desired actions, email, SMS, or task, to the workflow.
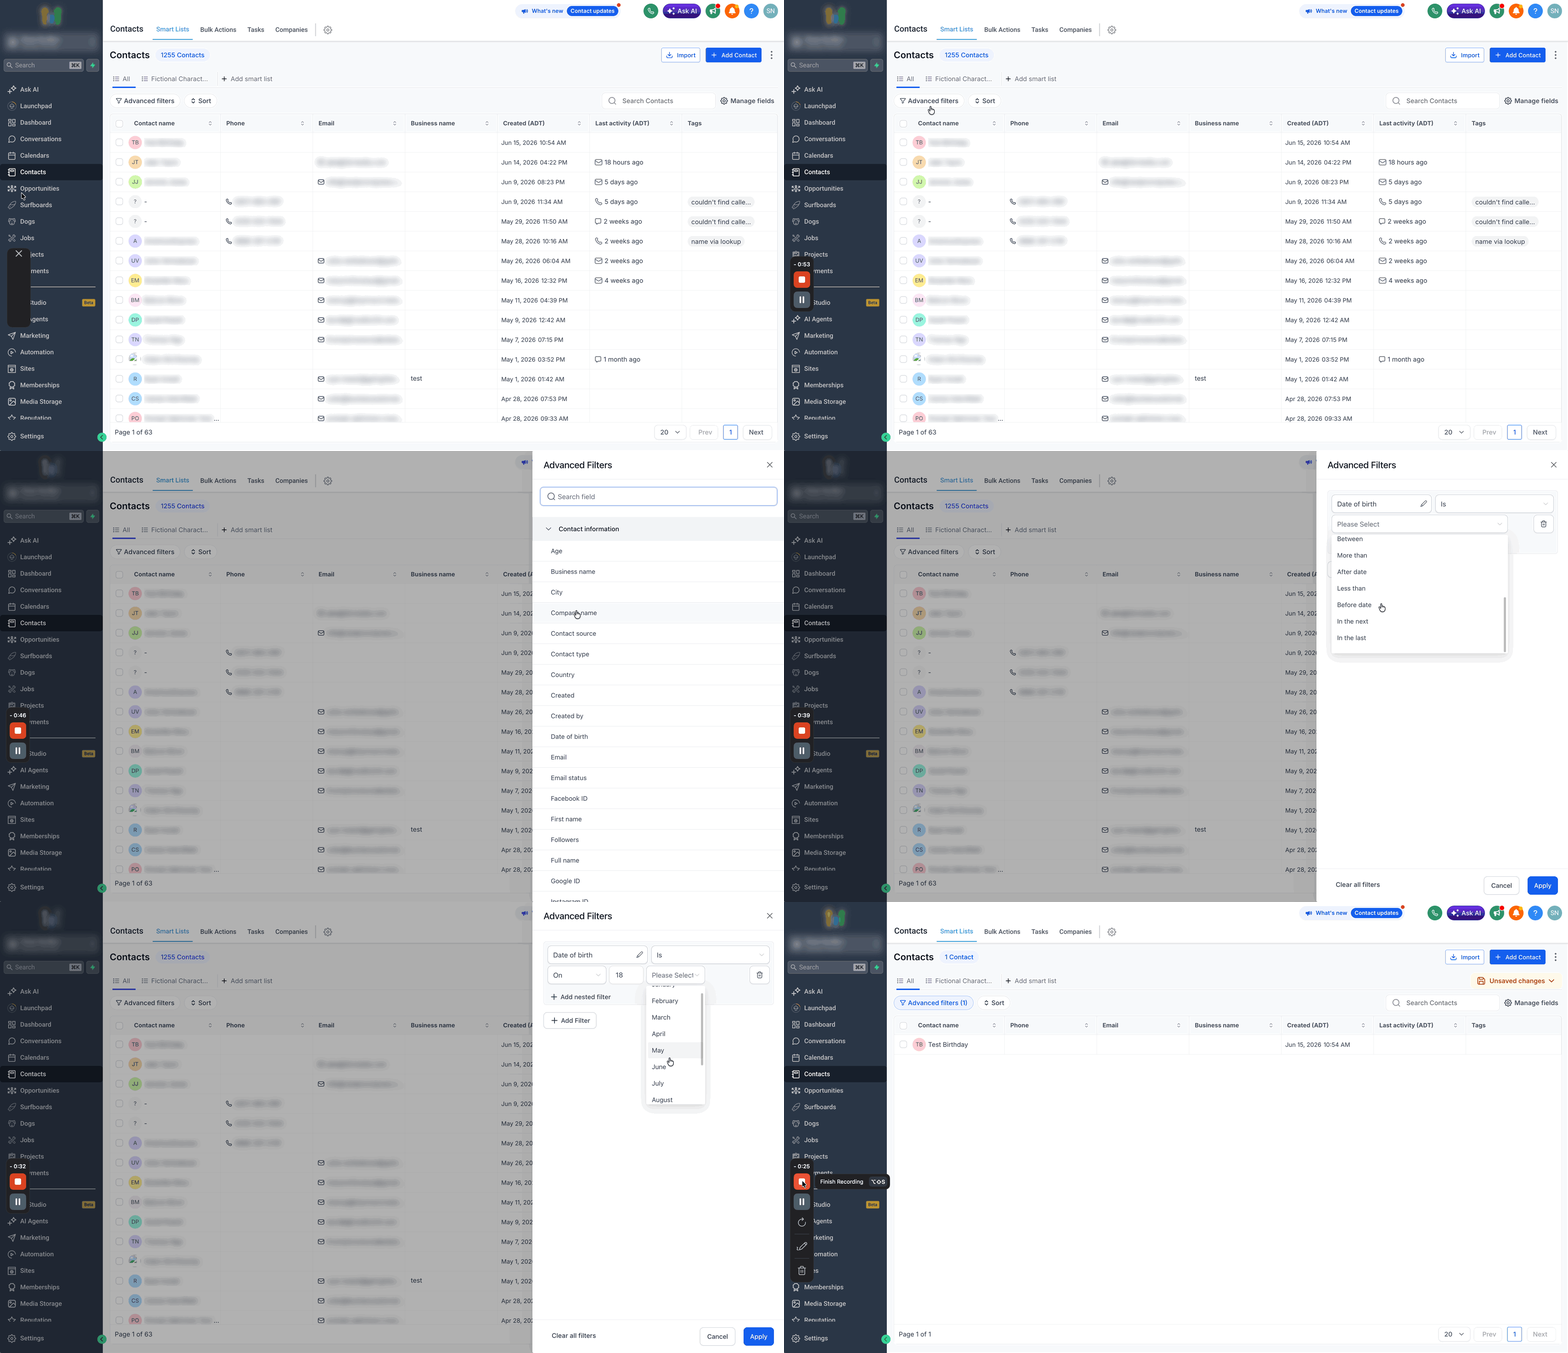
Filter contacts by birth date
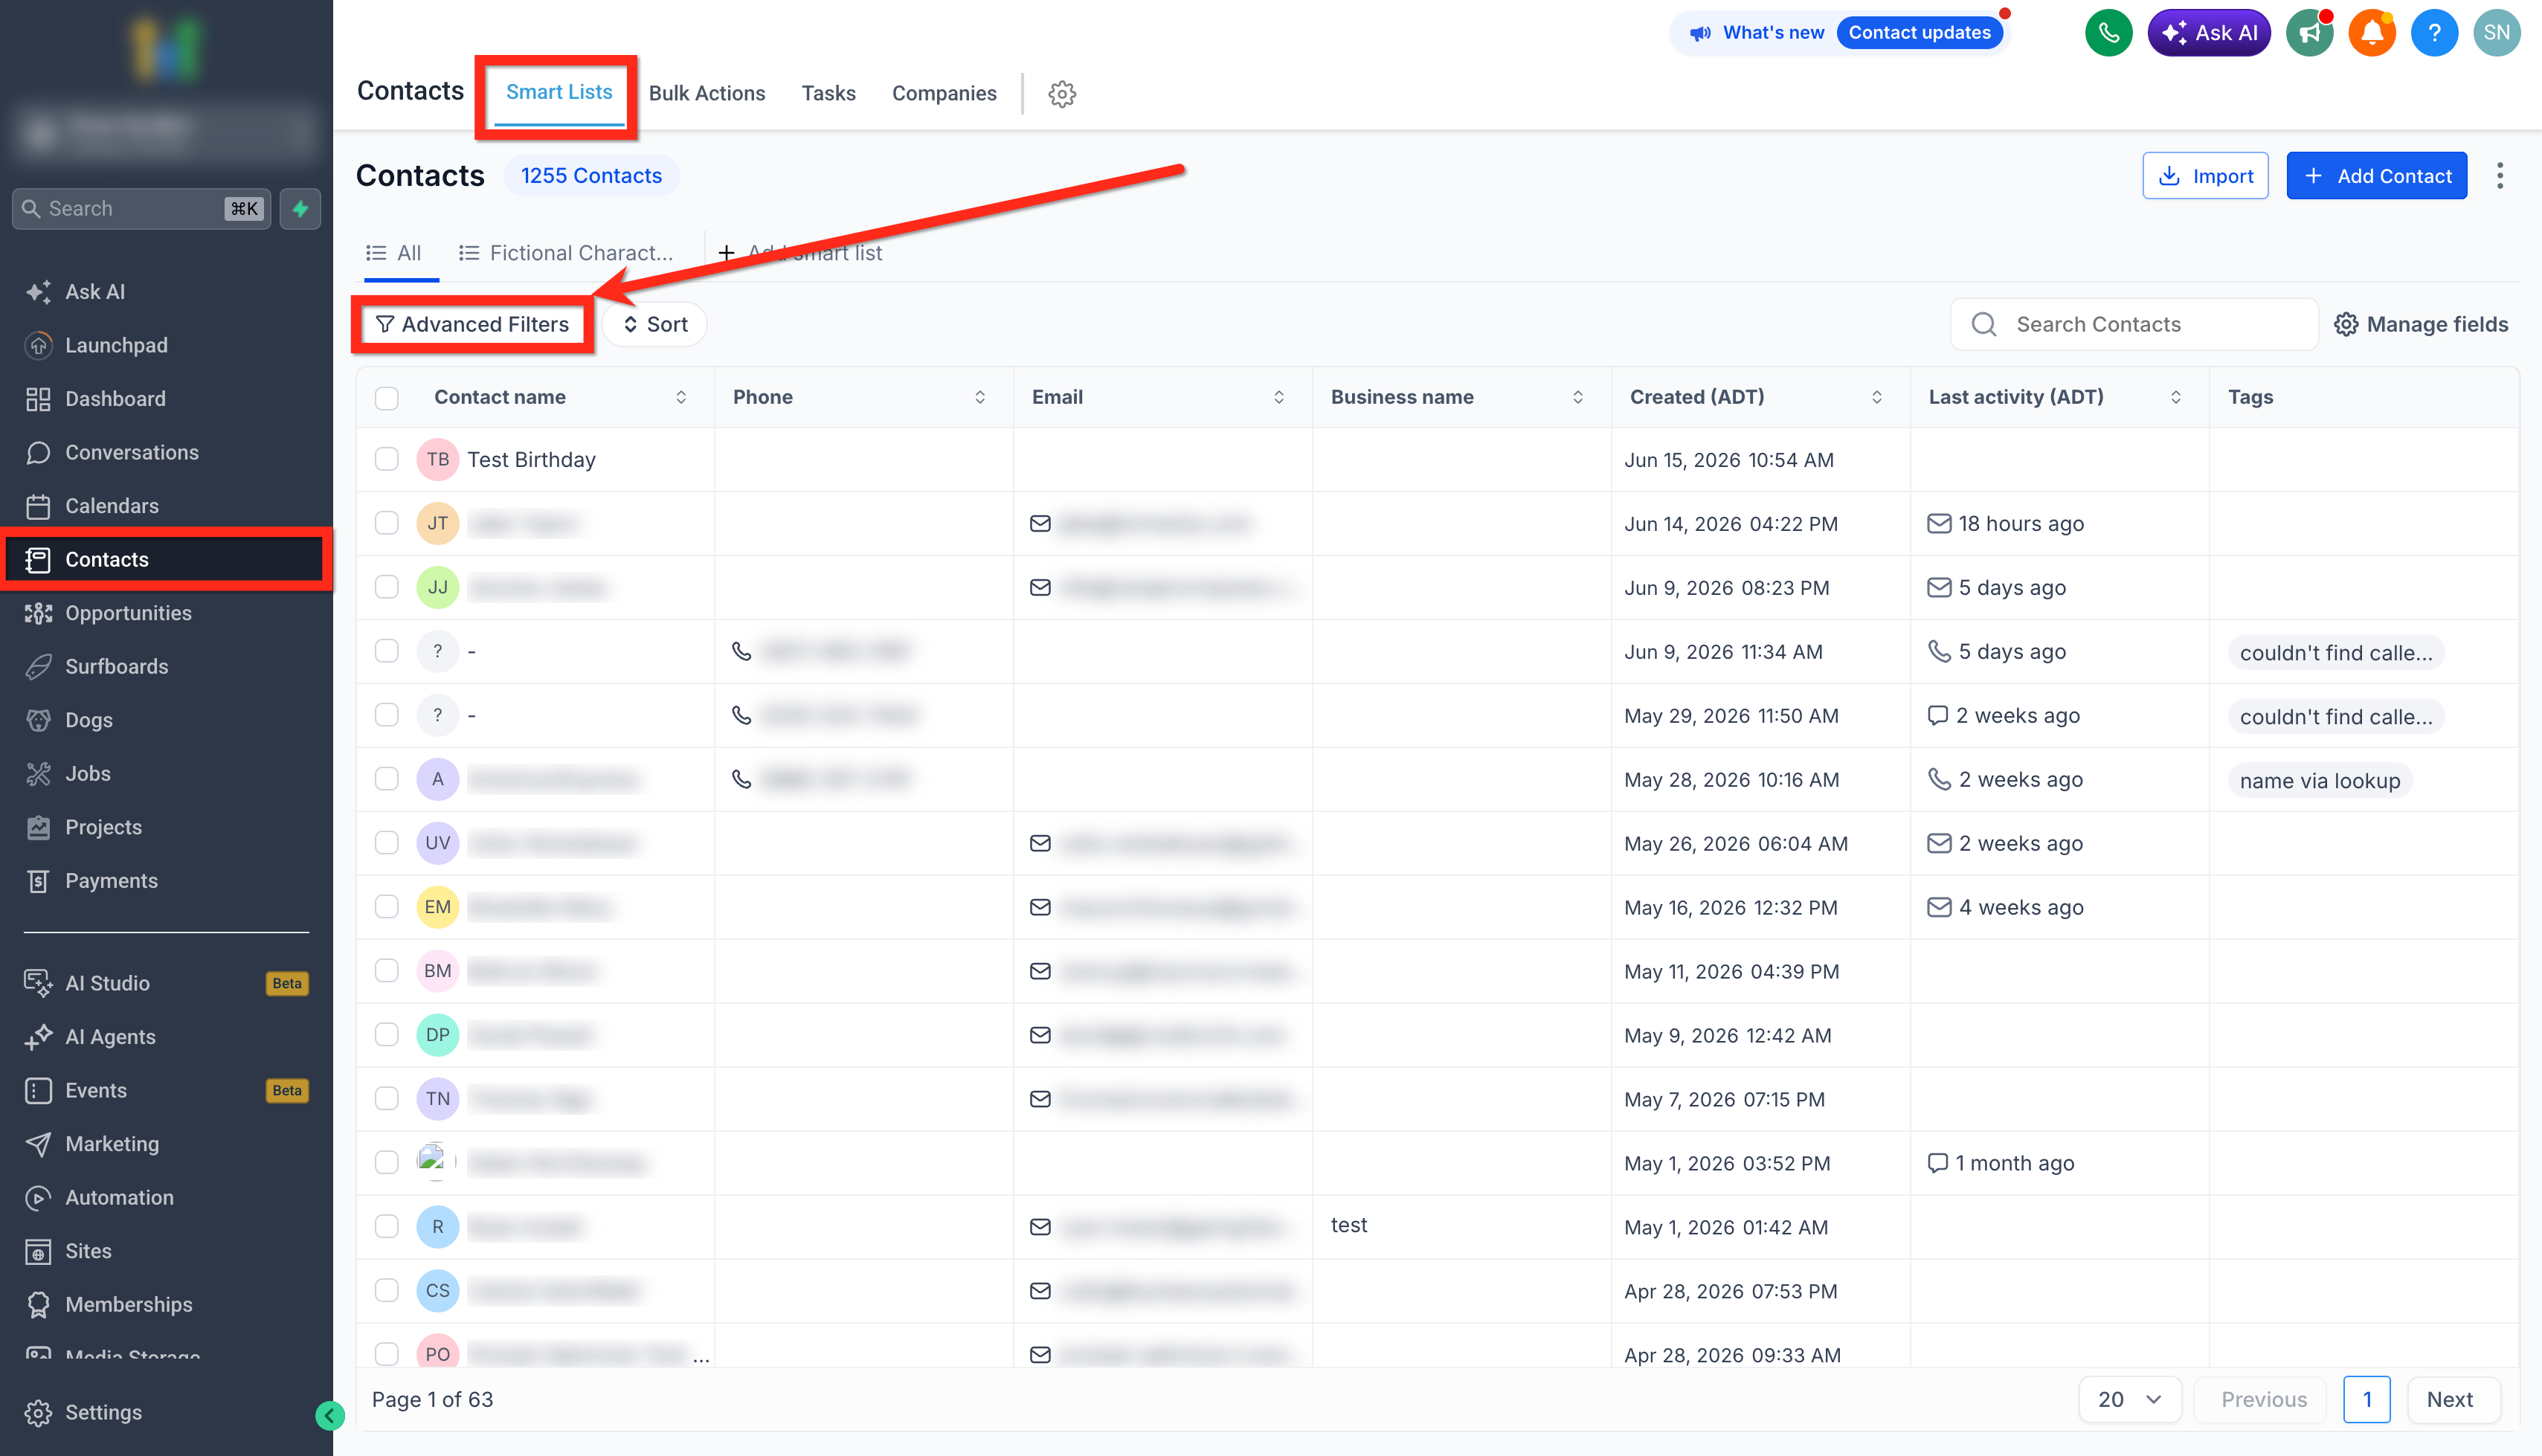
- Navigate to Contacts > Smart Lists.
- Click Advanced Filters.
- Select the Date of birth filter under contact information.
- Choose a filter condition like Today, Tomorrow, This month, etc.
Filter contacts by age
- Navigate to Contacts > Smart Lists.
- Click Advanced Filters.
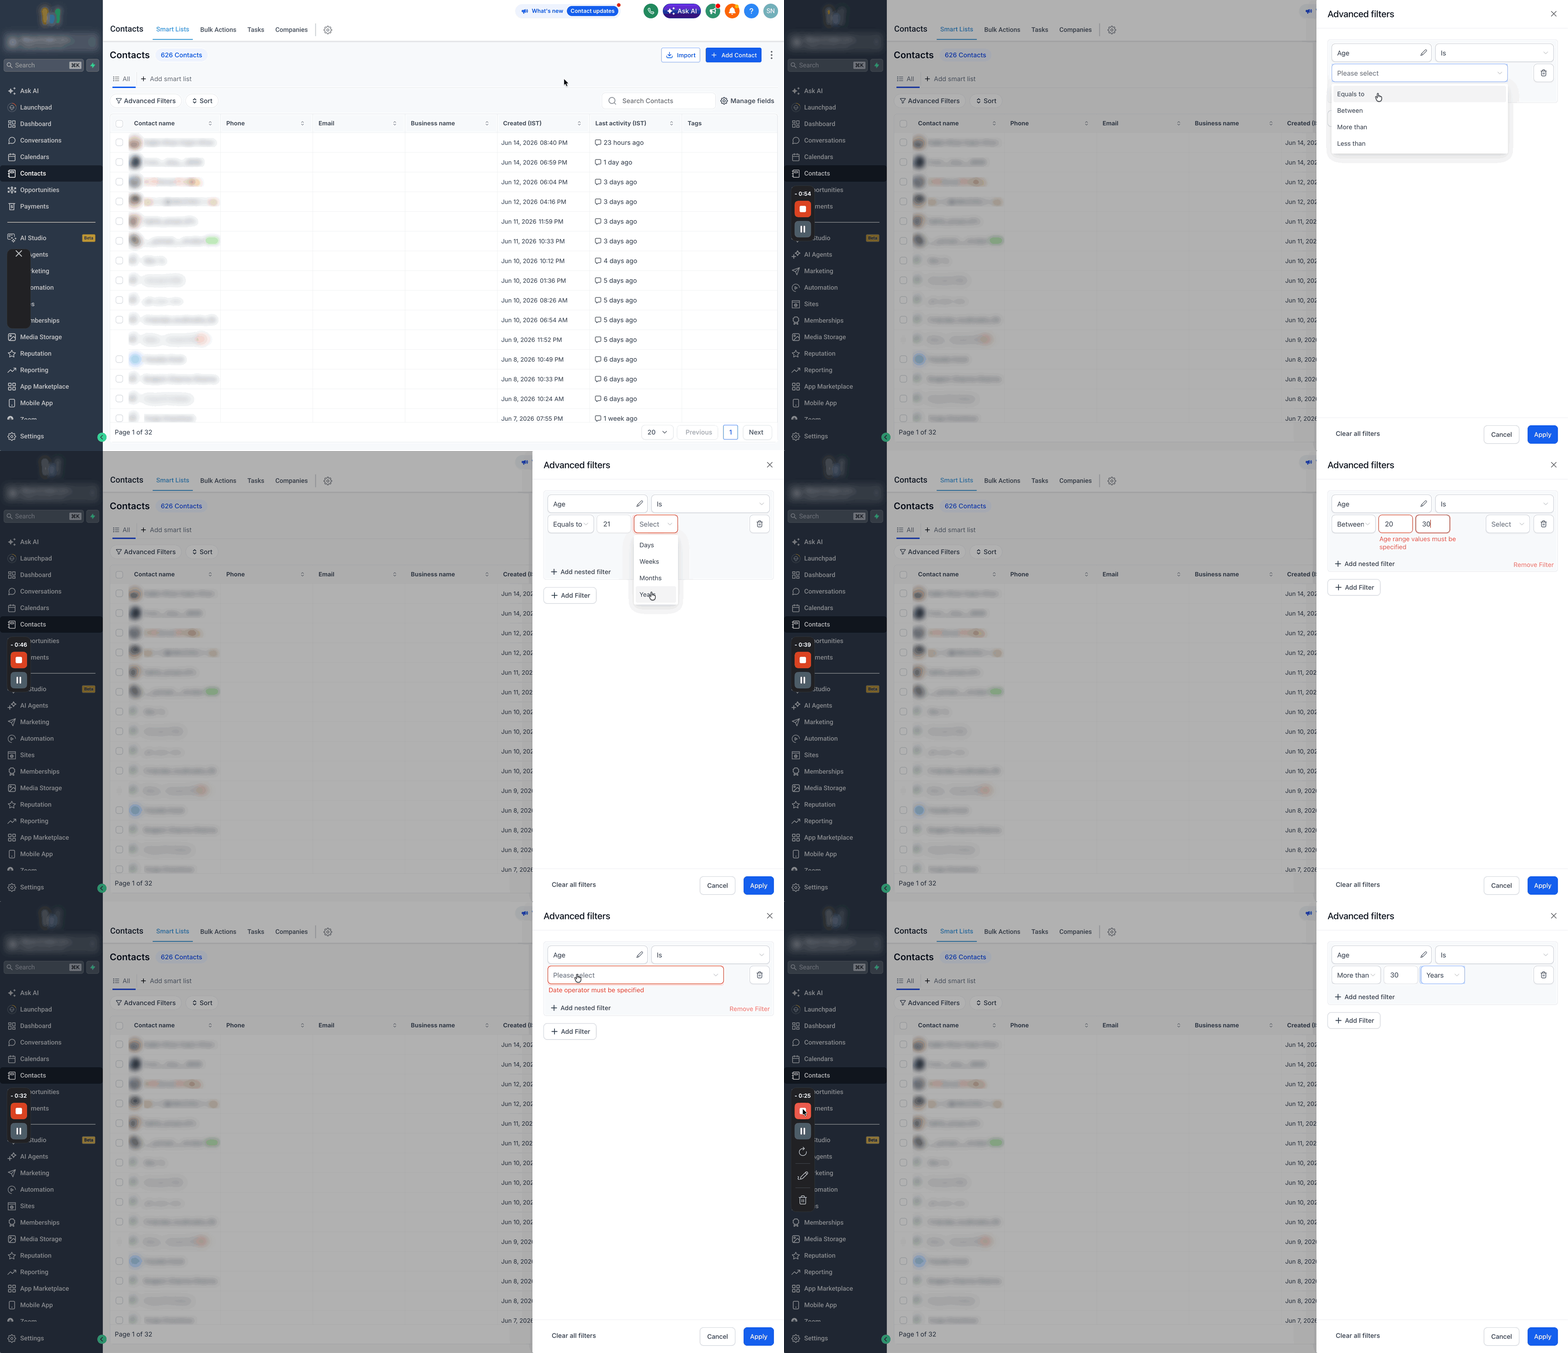
- Select the Age filter under contact information.
- Choose a condition such as Equals to, Between, More than, or Less than.
- Click Save to apply the Smart List.
06What it looks like in HighLevel
07Settings that matter
- Birthday Trigger. Specifies that the workflow should start when a contact's birthday meets the selected condition.
- Trigger condition. Defines the timing relative to the birthday, offering options like After no. of days, Before no. of days, Day is, or Month is.
- Date of birth filter. Allows Smart List creators to limit contacts based on specific birth date criteria using many possible conditions.
- Age filter. Enables Smart List segmentation based on a contact's calculated age with comparison choices such as Equals to, Between, More than, or Less than.
08Things to know before you rely on it
- Birthdays must be entered in MM/DD/YYYY format for automations to work correctly.
- Age is calculated automatically from the stored birthday and the current date.
- Workflows rely on contact specific time zones if those are configured.
09If something goes wrong
- Birthday automation is not triggering. Confirm the Birthday field contains a complete and correctly formatted date.
- Incorrect age calculation. Verify that the birth year is entered correctly; missing or wrong years cause errors.
- SMS or email was not sent on the birthday. Check workflow timing, trigger configuration, and contact timezone settings.
10How it connects to the rest of HighLevel
- Create and manage Smart Lists to use birth date and age filters. Smart Lists guide
- Troubleshoot CSV imports when adding birthday data to contacts. CSV import troubleshooting
- Review how to delete contacts if you need to remove outdated birthday records. Delete contacts
Michael's take

The Birthday field is handy for anyone who wants to add a personal touch without extra manual work.
If you don’t need birthday or age based messaging, you can skip it.