
01Who this is for
- Sales teams benefit from visual cues that speed up identifying leads during outreach.
- Customer support staff can right away see a client’s logo or photo when handling inquiries.
- Marketing managers use the images to keep client communications organized and recognizable.
02Contact profile pictures, explained
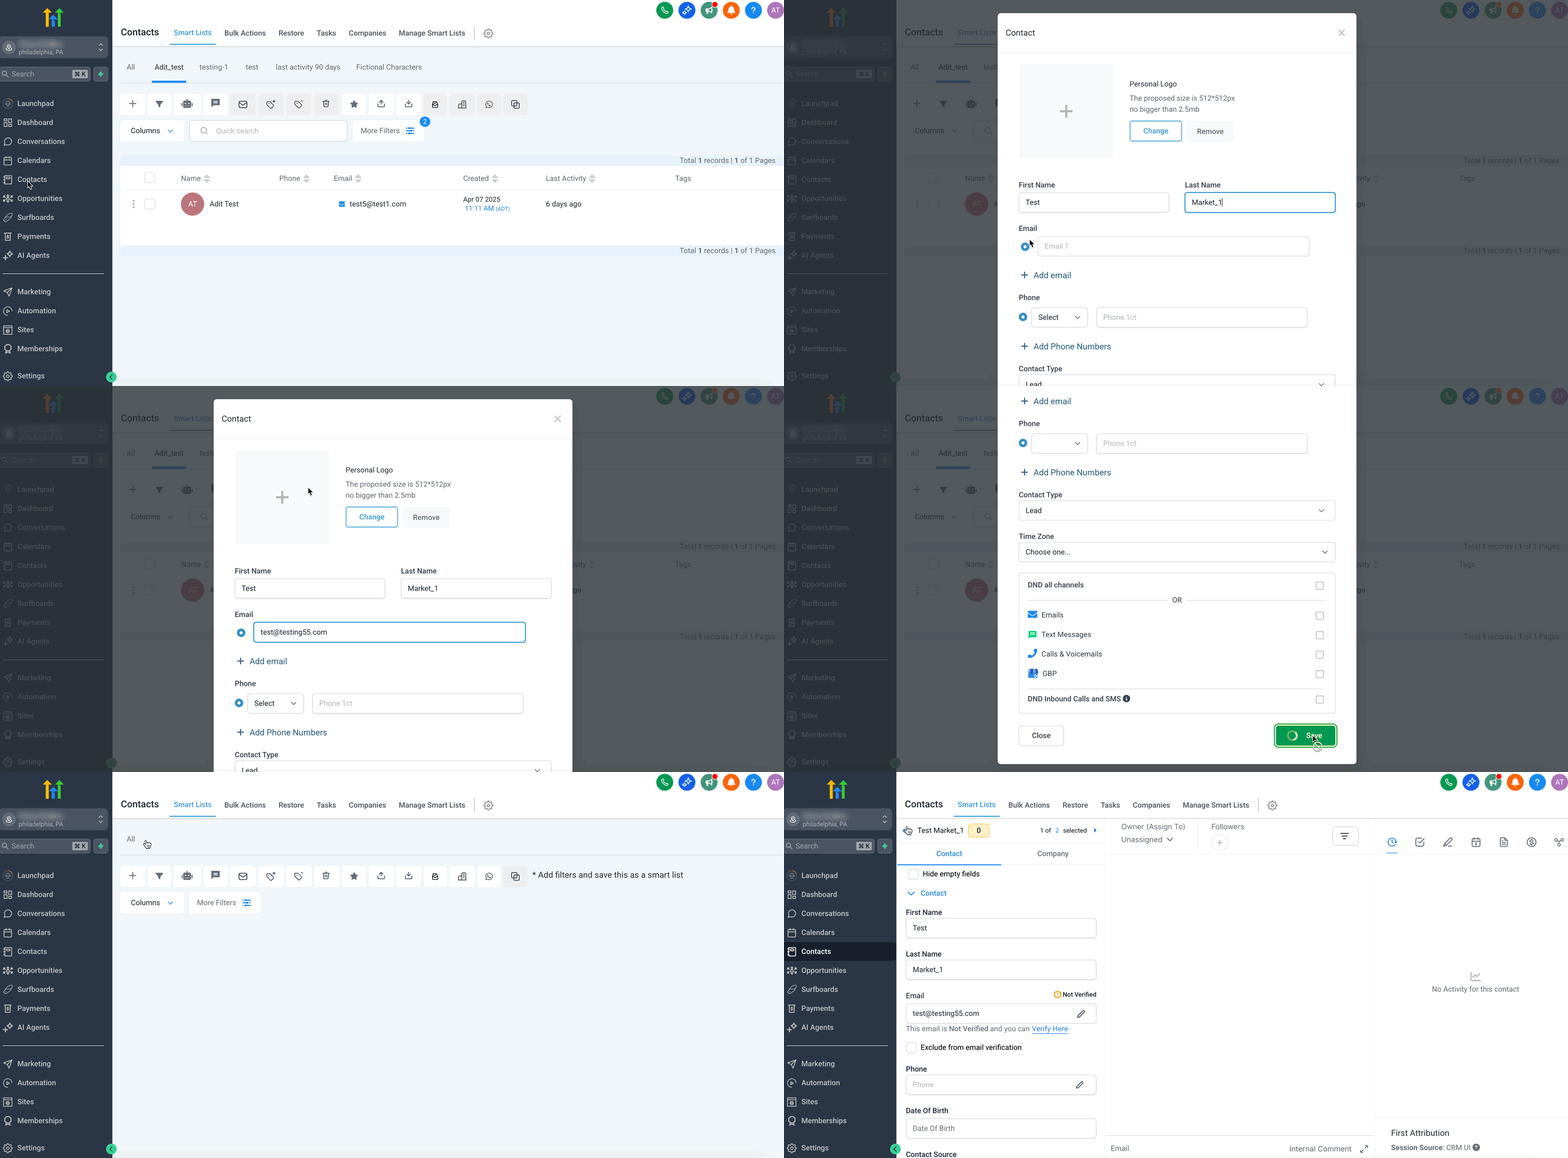
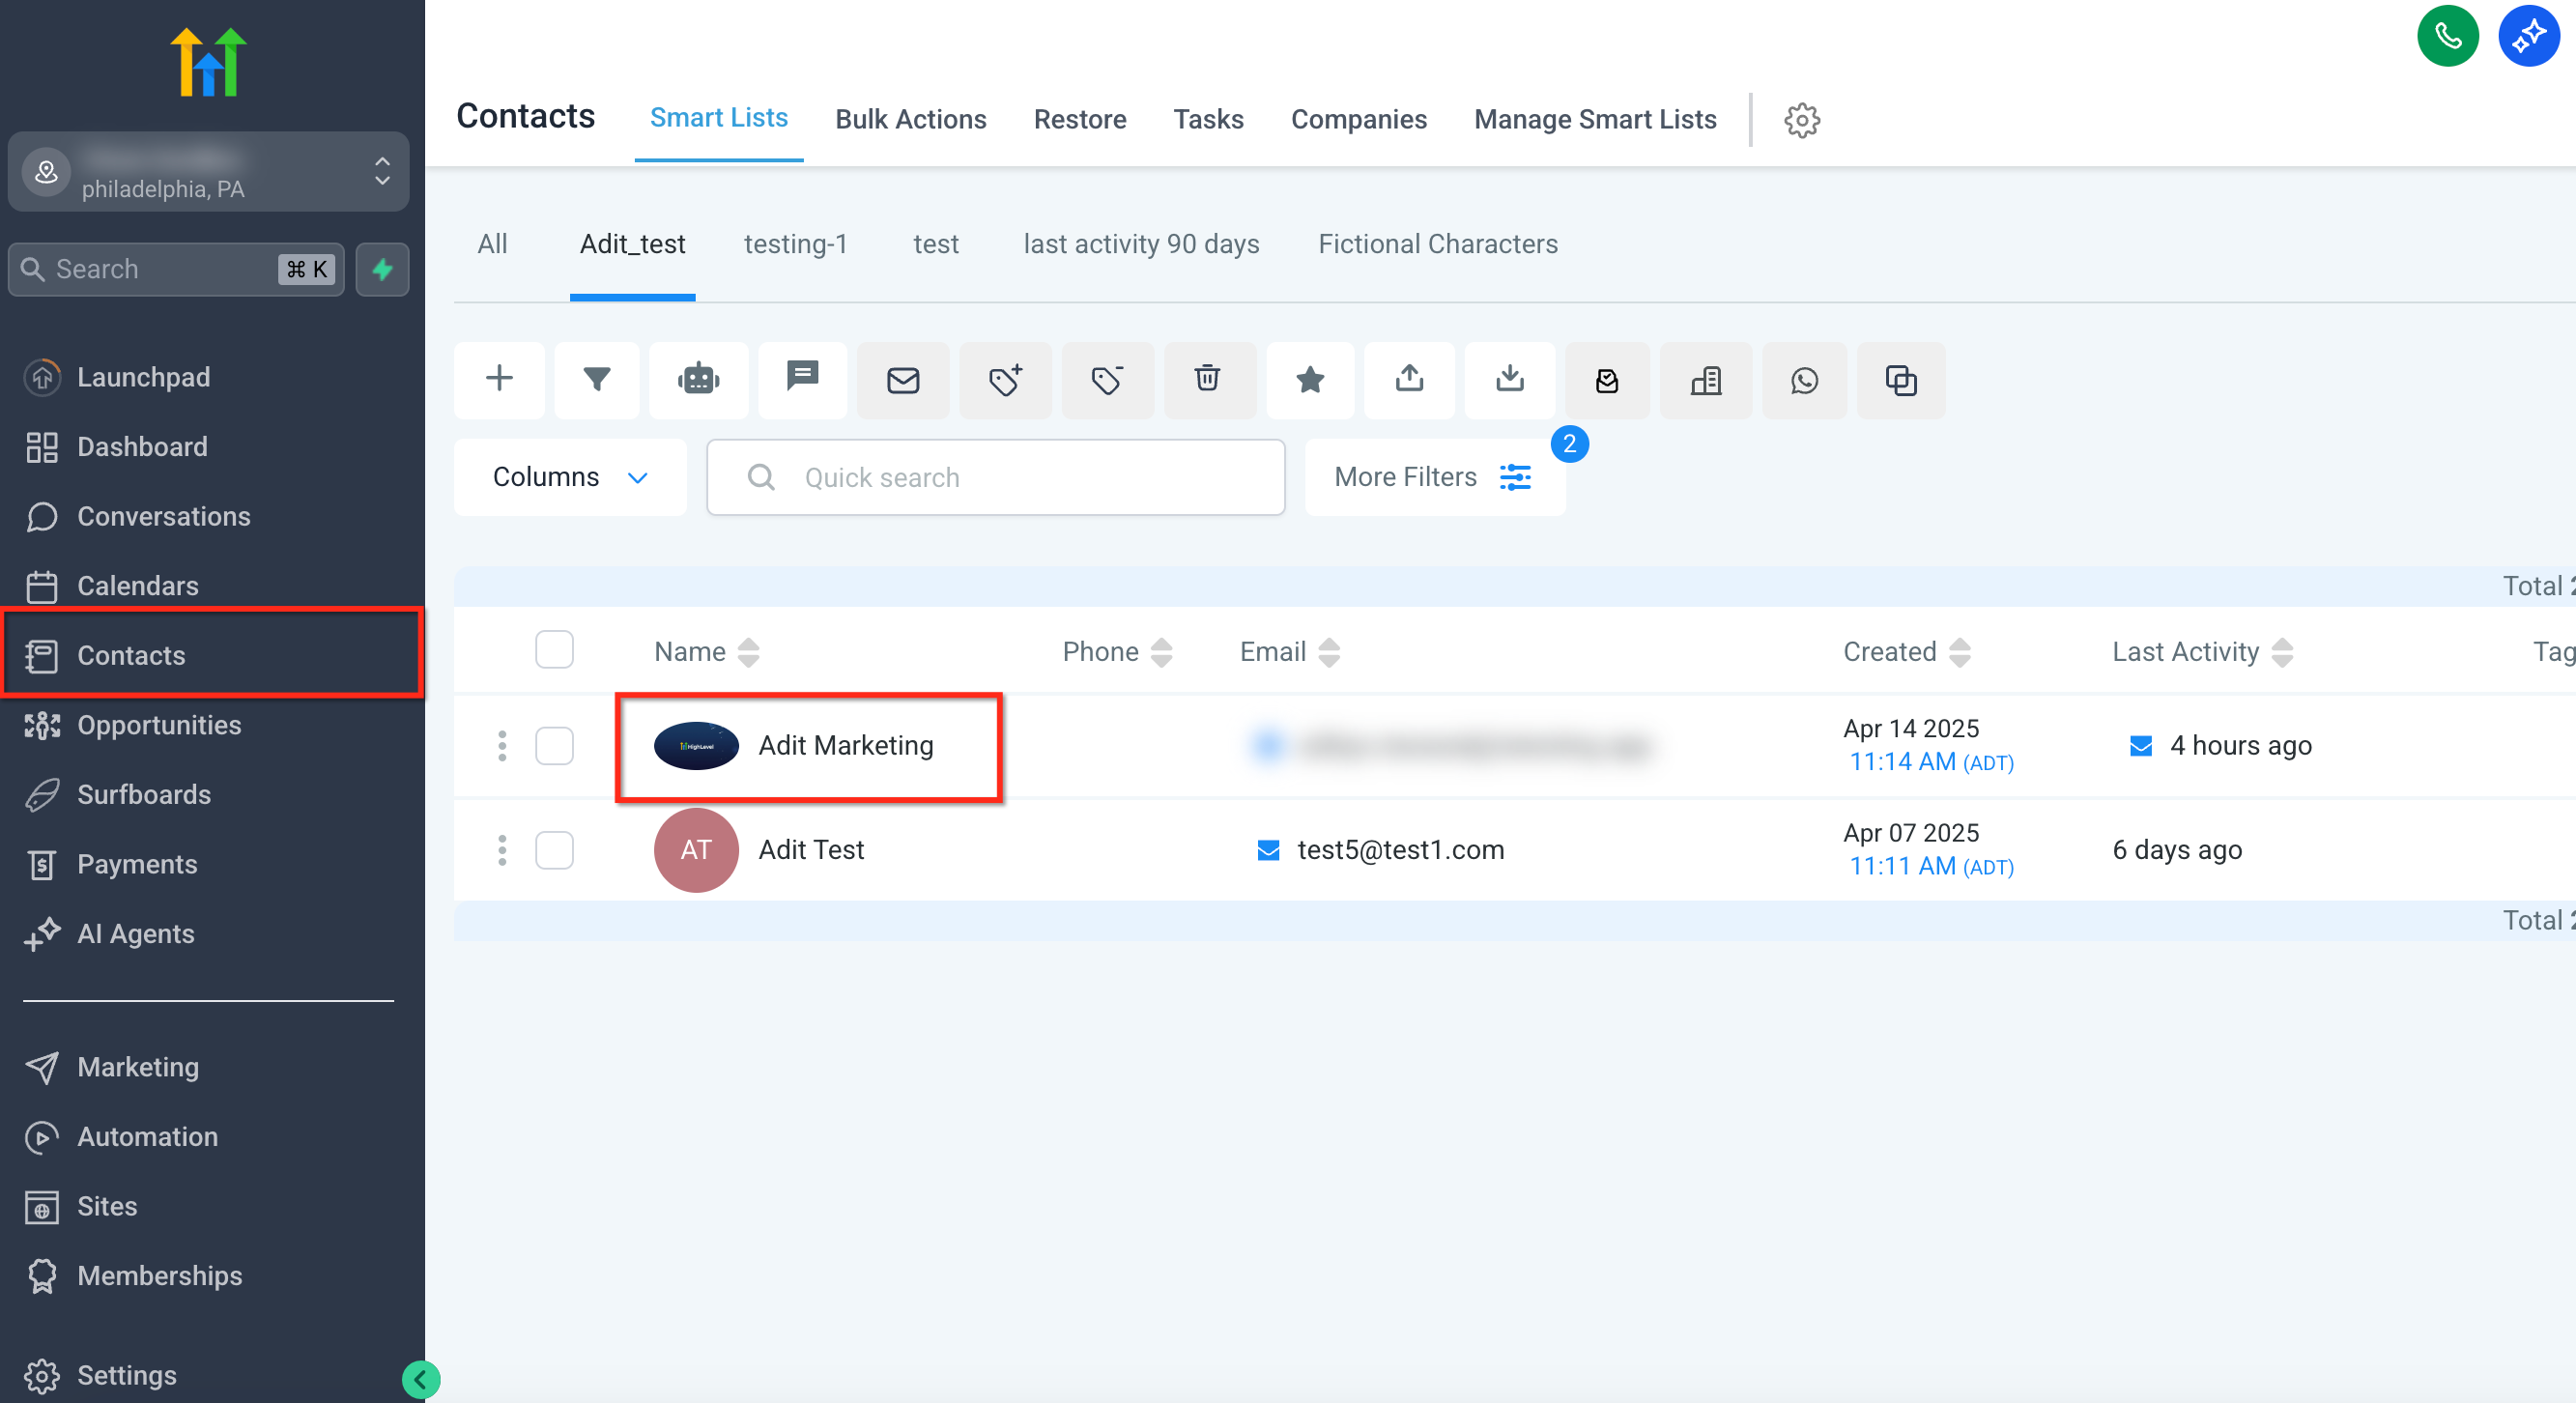
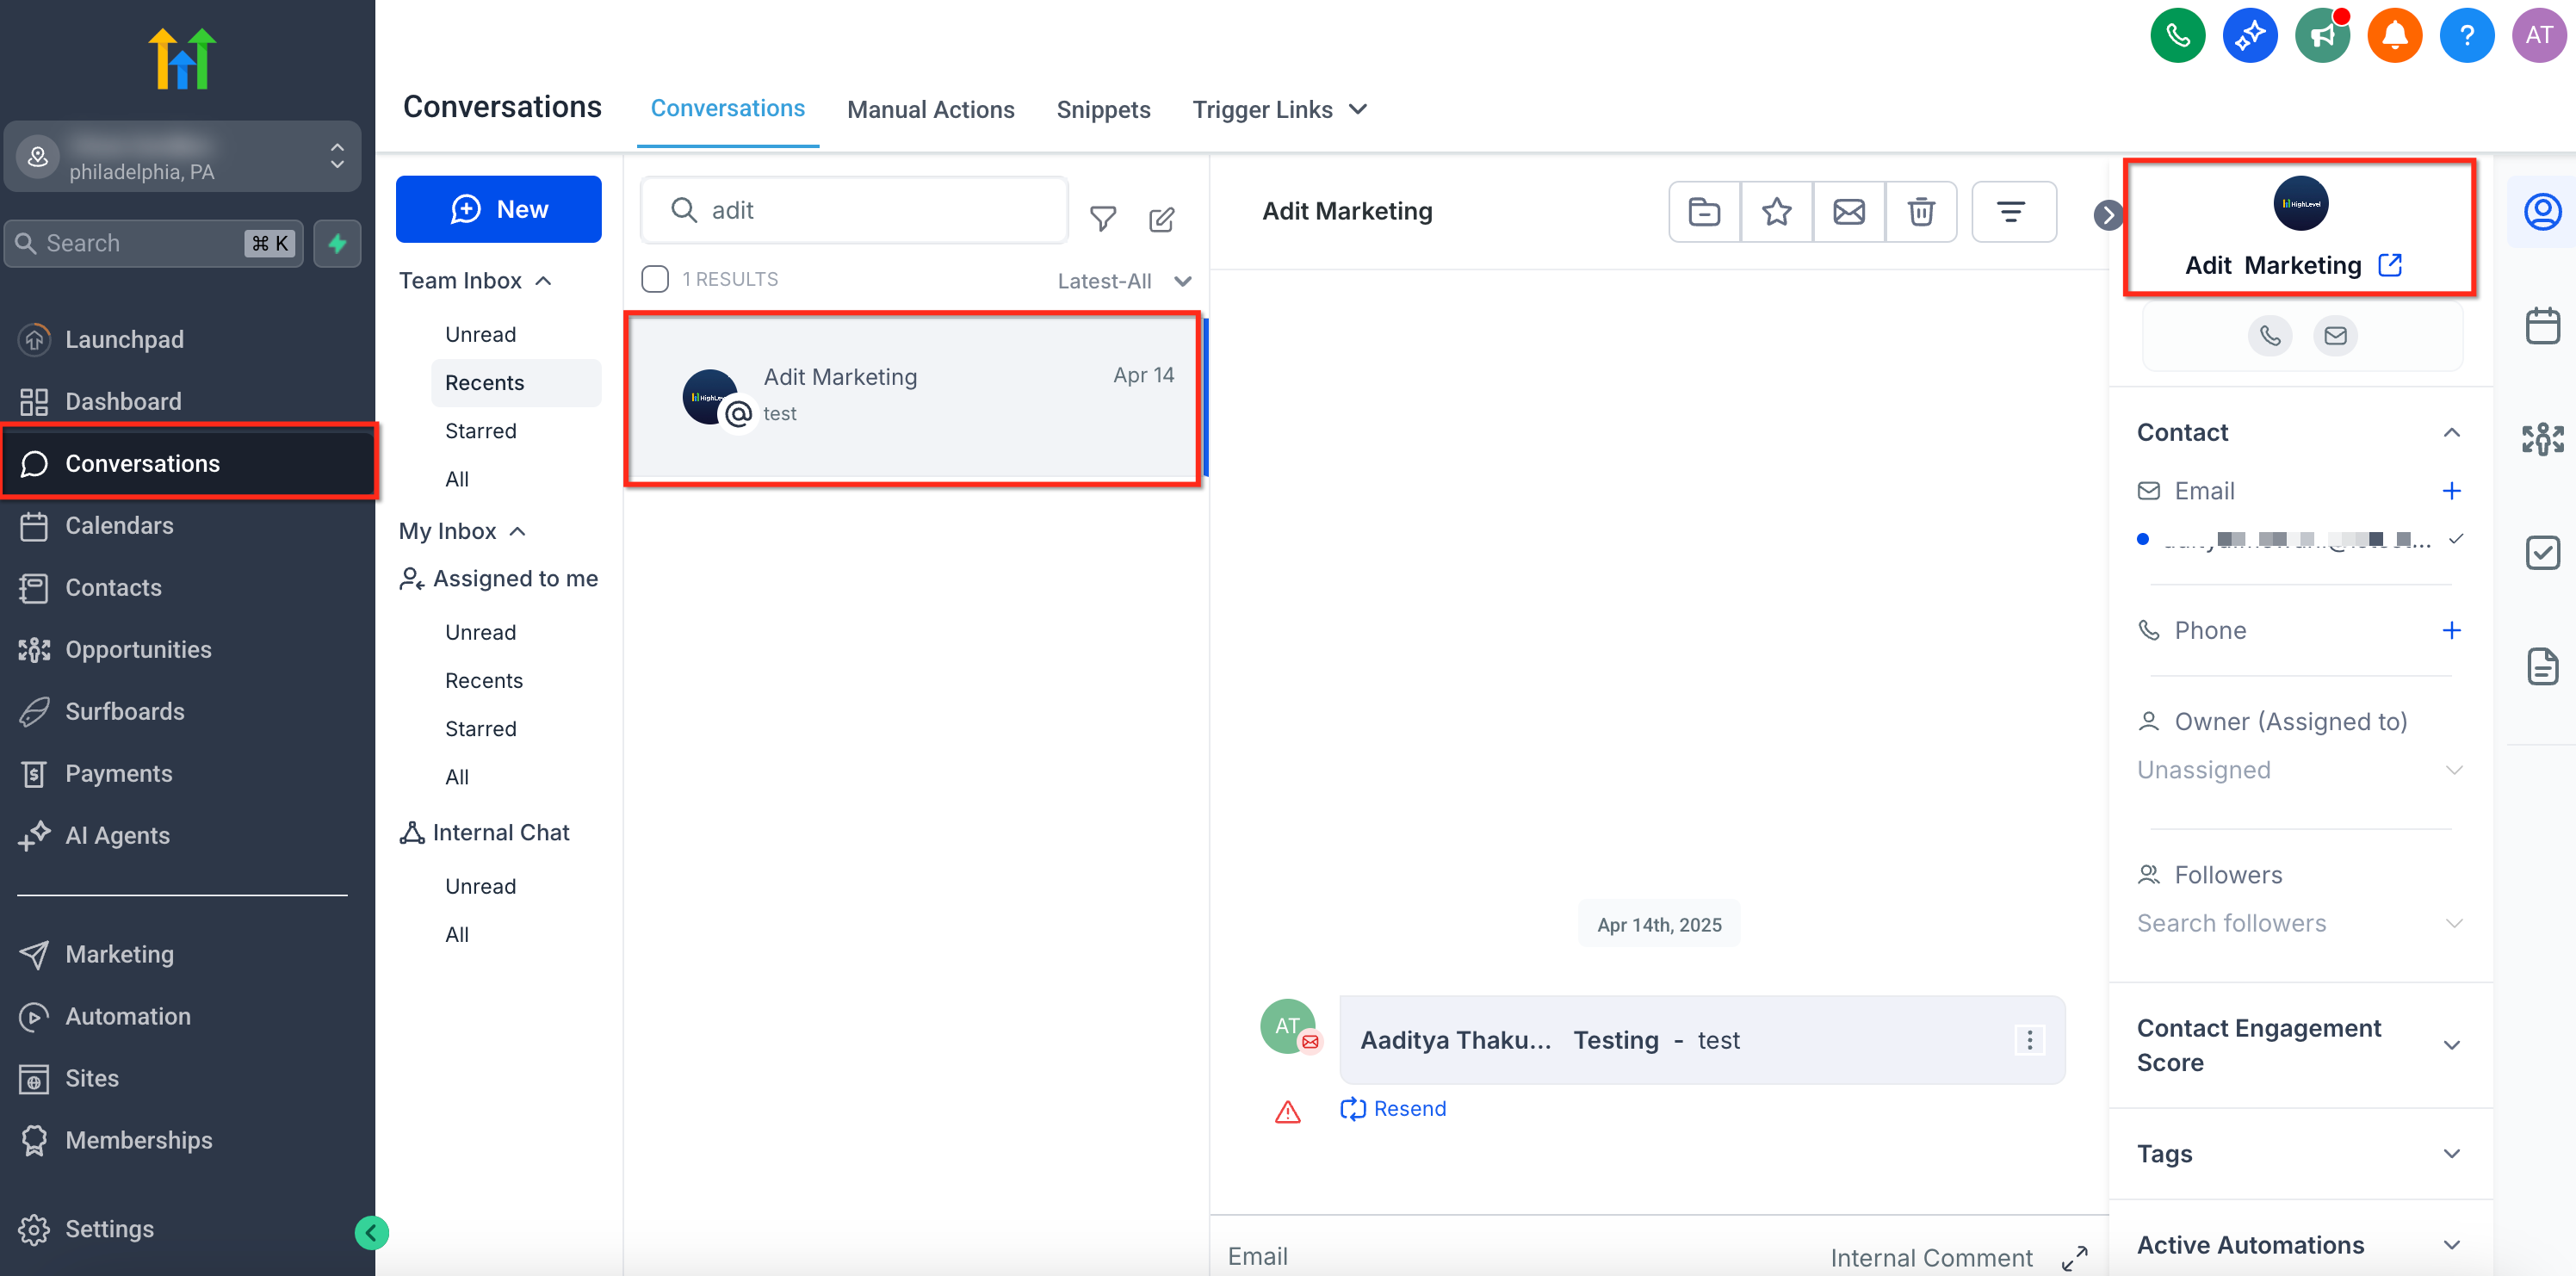
HighLevel lets you attach a visual identifier to a contact record at the moment you create it. The upload area is labeled “Personal Logo” in the contact creation window. After you save the contact, the picture appears beside the name in the Contacts Smart List and in the left hand list of the Conversations inbox. The image also shows in the right hand contact panel when a conversation is opened.
The picture cannot be edited or replaced later, and it does not display inside the full contact profile tab. No cropping or drag and drop tools are provided, and the feature is not reachable through the API. Image files must be under 2.5 MB, with a recommended size of 512 × 512 pixels in JPG or PNG format.
03How businesses use contact profile pictures
- Real estate agency. When adding a new client, the agent uploads a headshot as the profile picture. The photo then appears in the Contacts Smart List and in conversation threads, allowing the team to quickly match a face to a name.
- Dental practice. Staff upload a practice logo for each patient record during creation. The logo shows up in the smart list view, helping receptionists differentiate patients at a glance.
- Marketing agency. Account managers upload a client’s logo when the contact is first entered. The logo appears in the conversation inbox, letting the team recognize client messages without opening the full record.
04The numbers and rules that matter
- Image file max 2.5MB.
- Recommended size 512x512px.
05Before you start
- If you need a picture for an existing contact, you must create a new contact with the picture and then merge the two contacts.
06How to set up and use contact profile pictures in HighLevel
Add a profile picture when creating a new contact
- Open the Contacts tab in the left navigation and press the plus button to start a new contact.
- In the contact creation window, click the image field marked “Personal Logo”.
- Select an image file to upload, ensuring it is under 2.5 MB and ideally 512 × 512 px.
- Enter the remaining contact information in the provided fields.
- Click Save to create the contact with the uploaded picture.
07What it looks like in HighLevel
08Settings that matter
- Personal Logo. The field where you upload an image to serve as the contact’s profile picture during creation.
09Things to know before you rely on it
- Profile pictures can only be added when the contact is first created; they cannot be edited later.
- The image does not appear inside the full contact profile record.
- No drag and drop or cropping tools are provided for the uploaded picture.
- The feature is not currently accessible via the API.
- Uploaded images must be smaller than 2.5 MB; a 512 × 512 px size is recommended.
10How it connects to the rest of HighLevel
- Create and manage contacts in HighLevel Contact management guide
- Merge duplicate contacts after adding a profile picture Merging contacts
- Customize columns in the Contacts Smart List where pictures appear Smart List customization
Michael's take

Don’t forget to upload the picture during creation because you can’t change it later.