
01Who this is for
- Founders of small businesses that need to keep family or employee relationships organized inside HighLevel.
- Real estate agencies that must connect contacts to property custom objects and track ownership relationships.
- Consulting firms that want to map manager employee links and automate follow up tasks based on those connections.
02Contact associations, explained
Contact Associations create structured links between records in HighLevel. A custom label describes how two records relate; the same label can be used on both sides (single label) or different labels can represent each side (pair of labels). Definitions are created in Settings > Objects, after which users can add or remove associations directly on a record’s Associations or Related Objects area. Limits can be configured per label, and supported workflow actions can add, remove or automatically create associations based on those labels.
03How businesses use contact associations
- Real estate agency. Create an association label such as Owner ↔ Property. Link each client contact to the property custom object that represents the home they bought. Use the Add Associated Records to Workflow action to enroll related property records in a post sale workflow.
- Car dealership. Define a single label called Buyer for contact to vehicle associations. Attach each customer contact to the vehicle custom object they purchased. Apply the Remove Associated Records from Workflow action to stop service reminders when a vehicle is sold.
- Consulting firm. Set up a paired label pair Manager ↔ Employee. Associate staff contacts with their manager contact. Use the Associate Records workflow action (beta) to automatically create these links when new employee records match a manager’s criteria.
04The numbers and rules that matter
- Configured association limits are enforced per label.
05Before you start
- Create the necessary records, objects, and association definitions in Settings > Objects before linking records or using them in automation.
06How to set up and use contact associations in HighLevel
Set up contact associations
- Open the subaccount you want to configure.
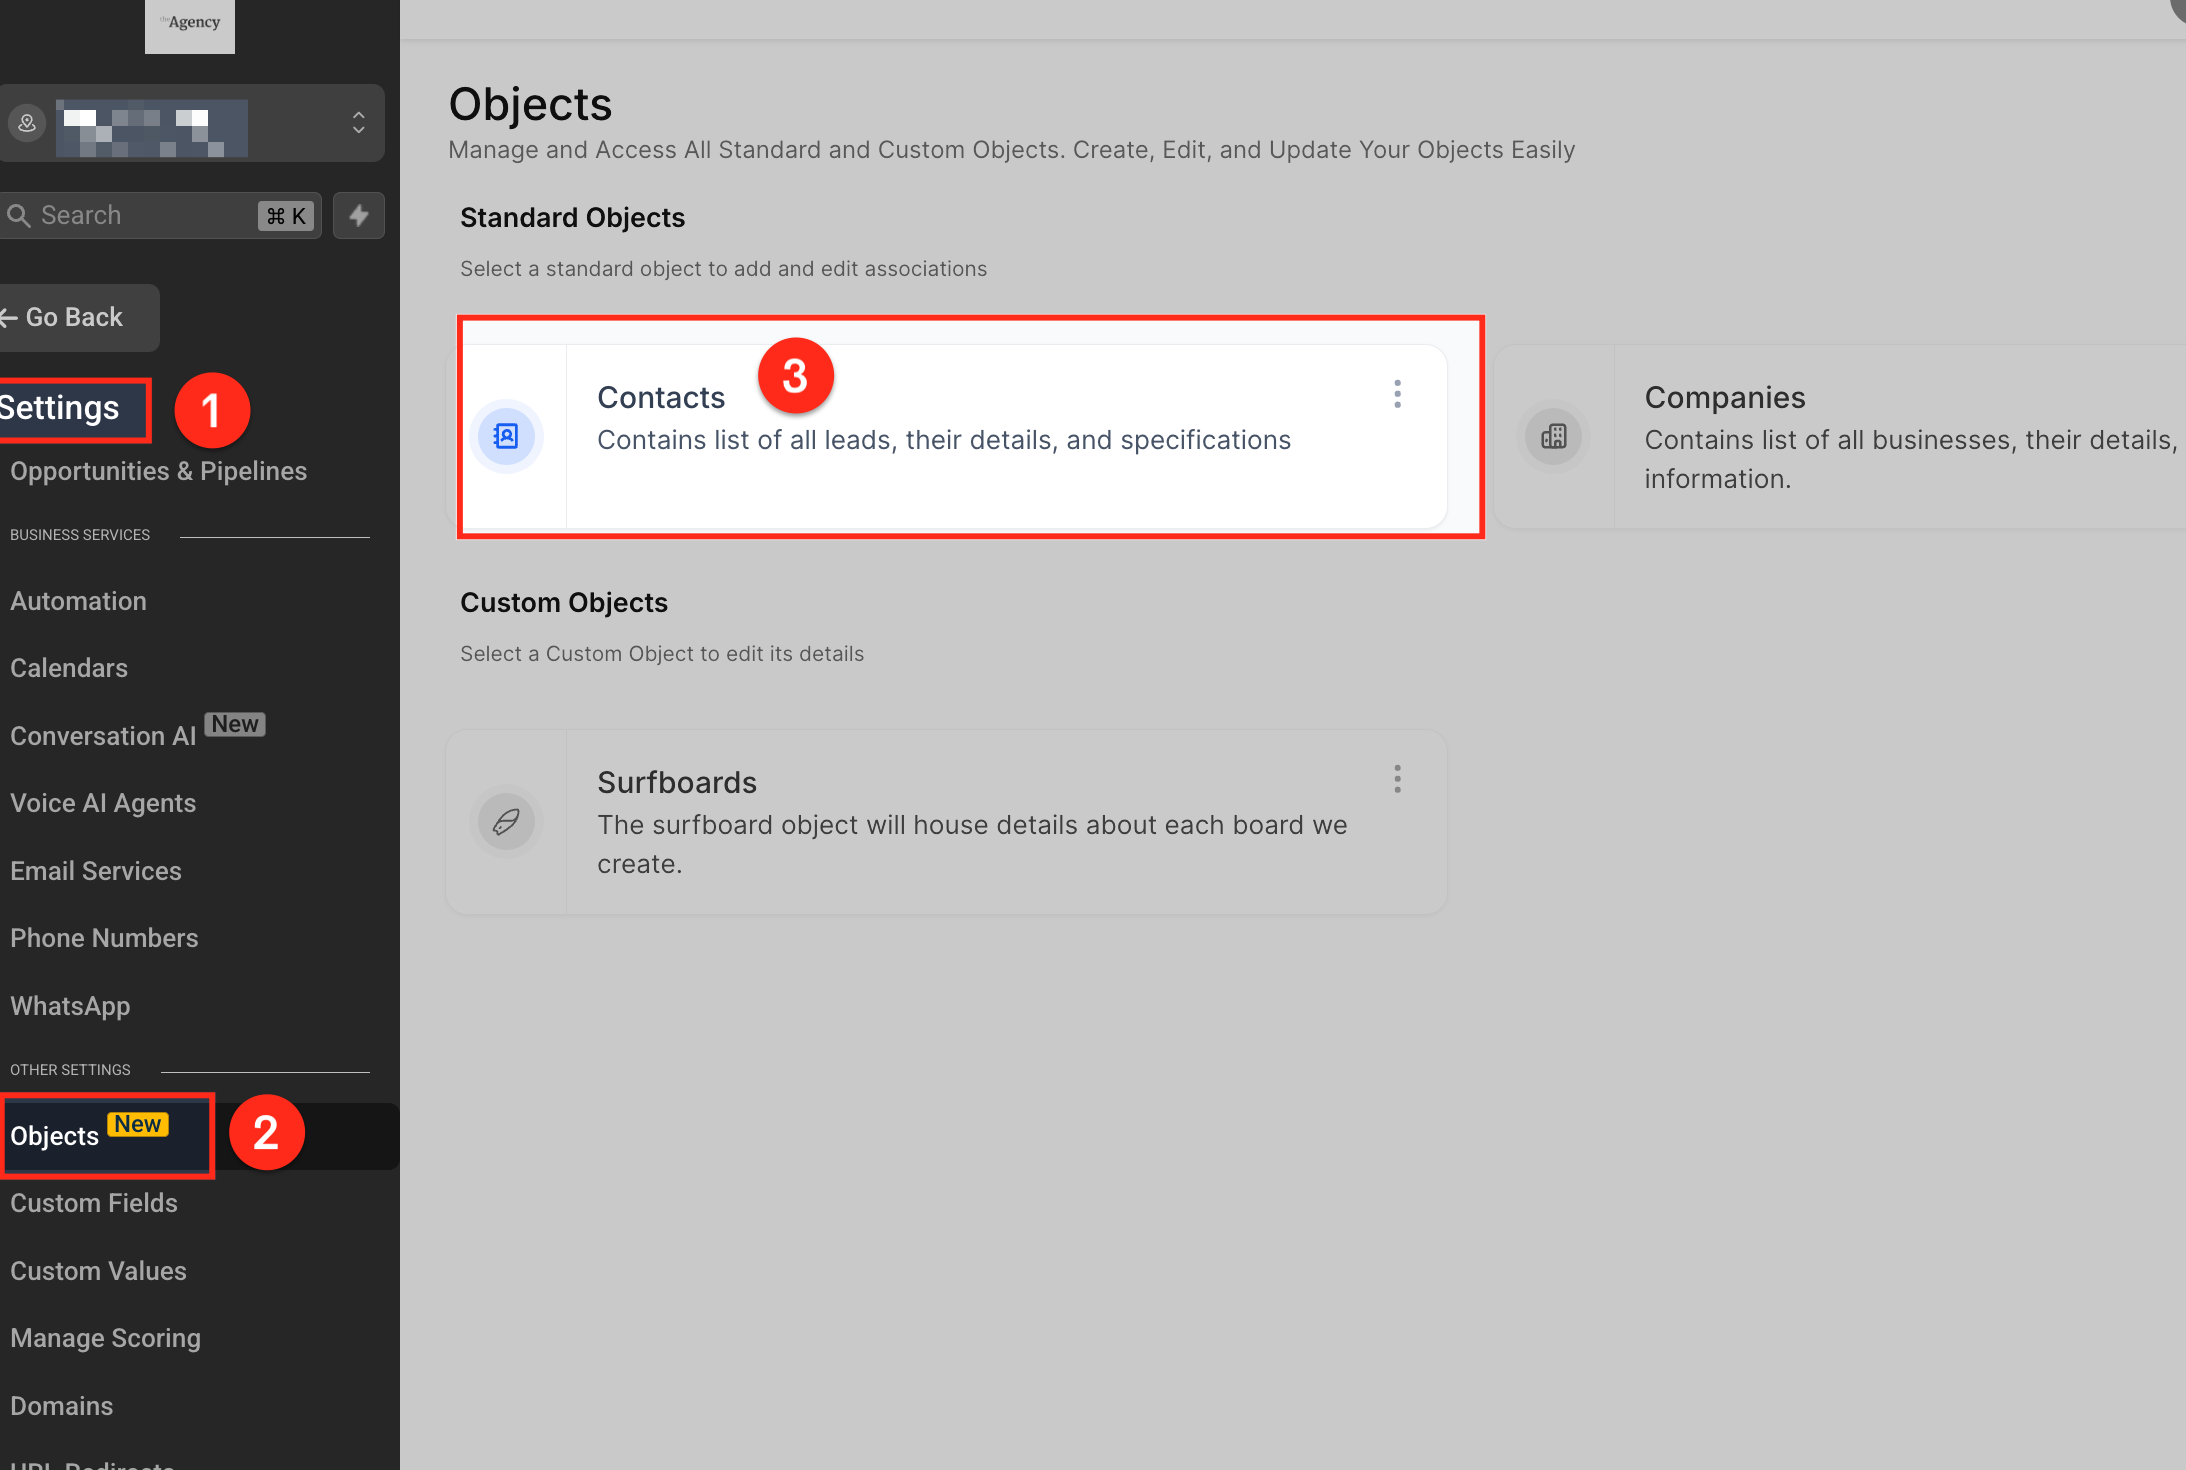
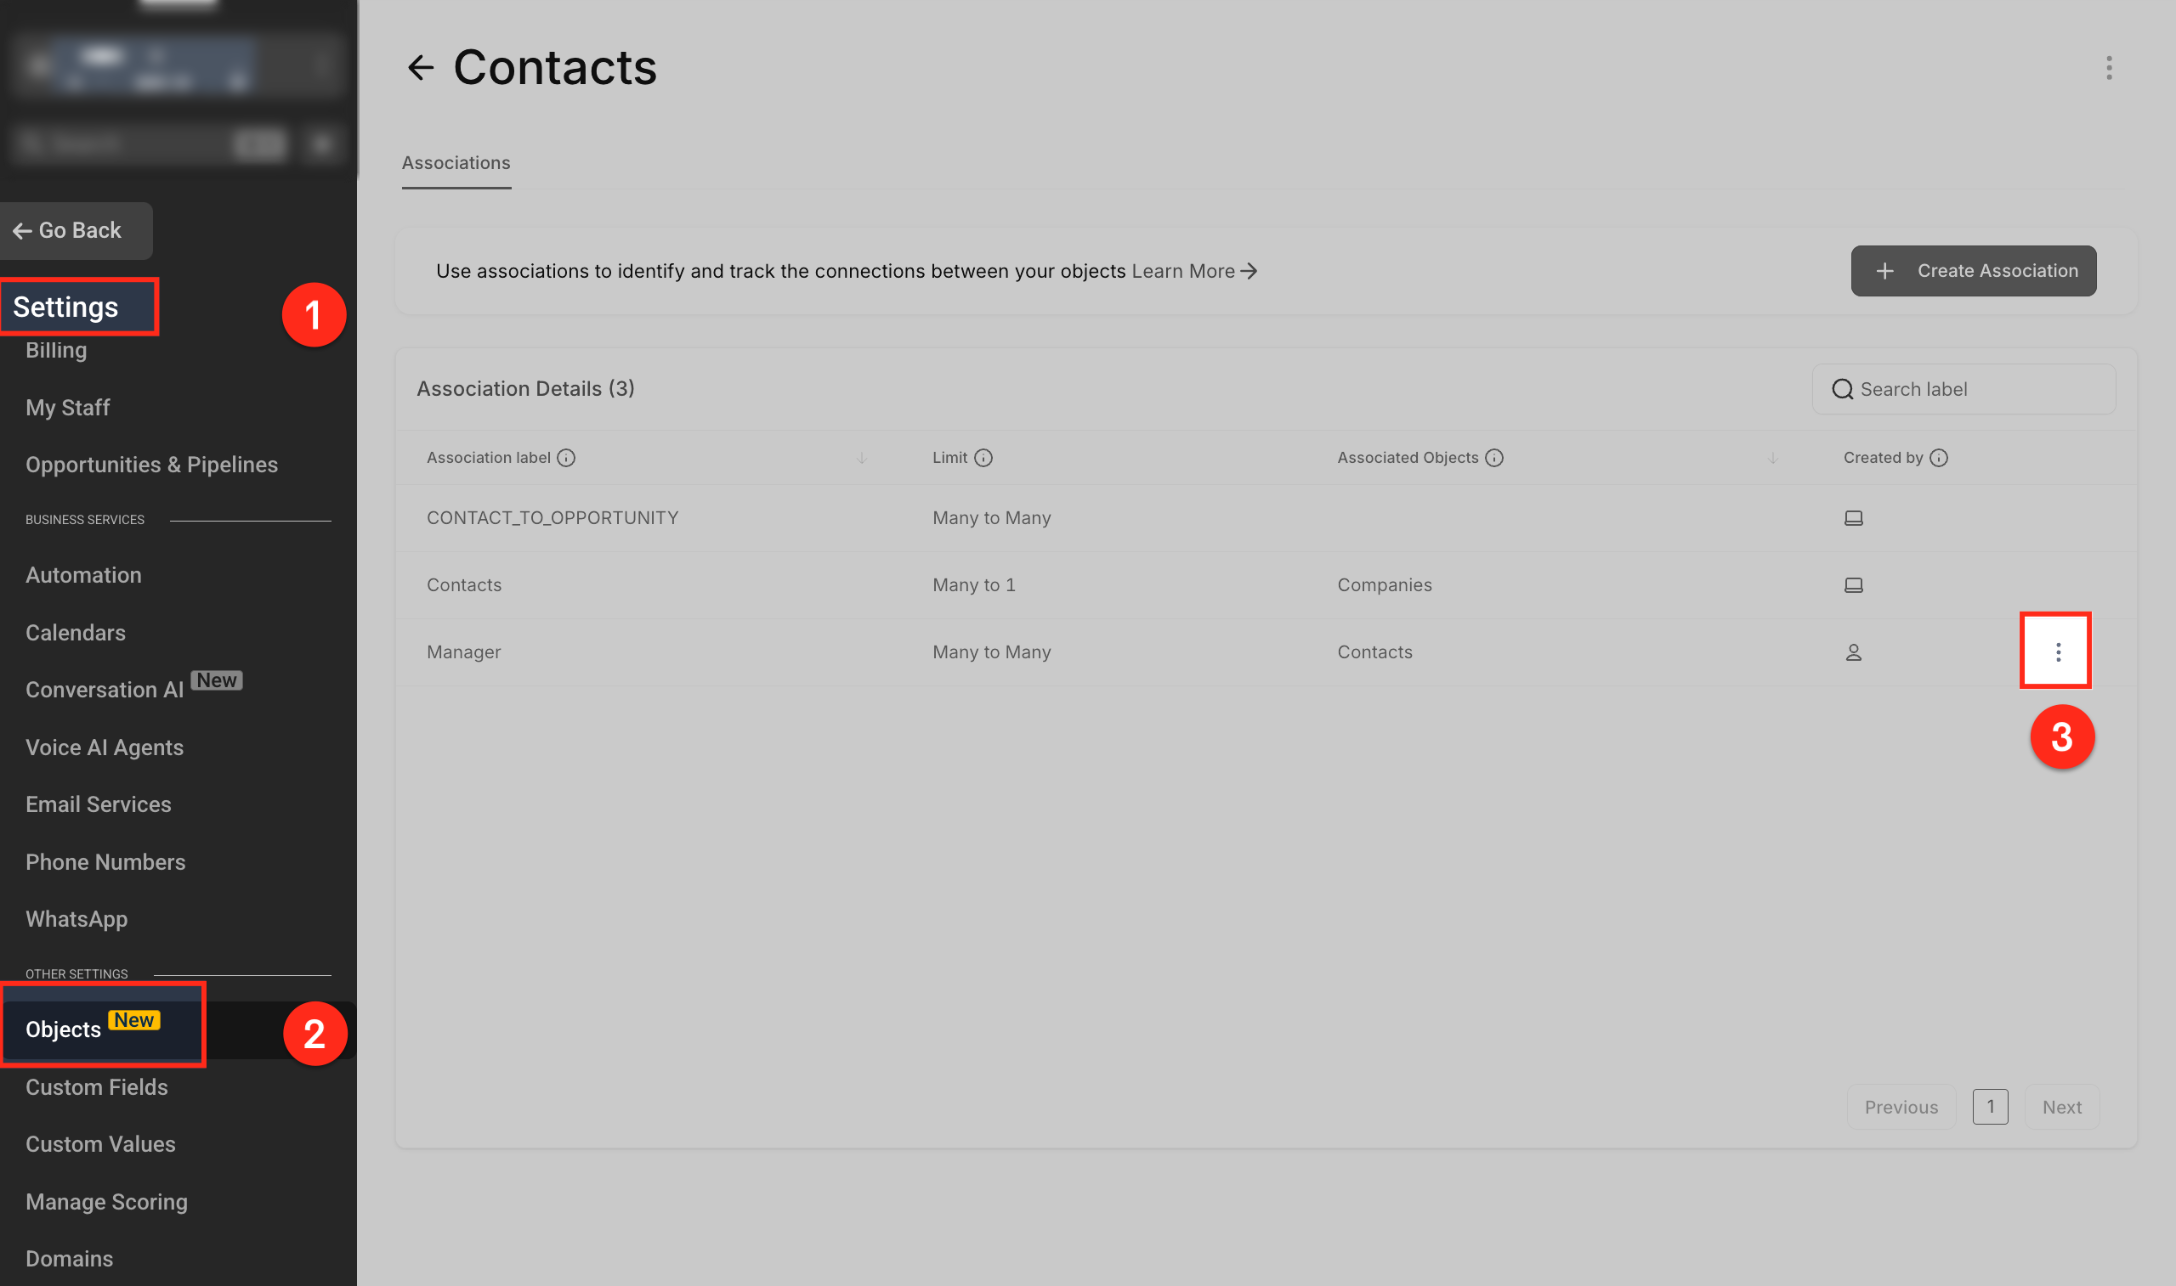
- Navigate to Settings > Objects.
- Find the Contacts object in the list and open its settings.
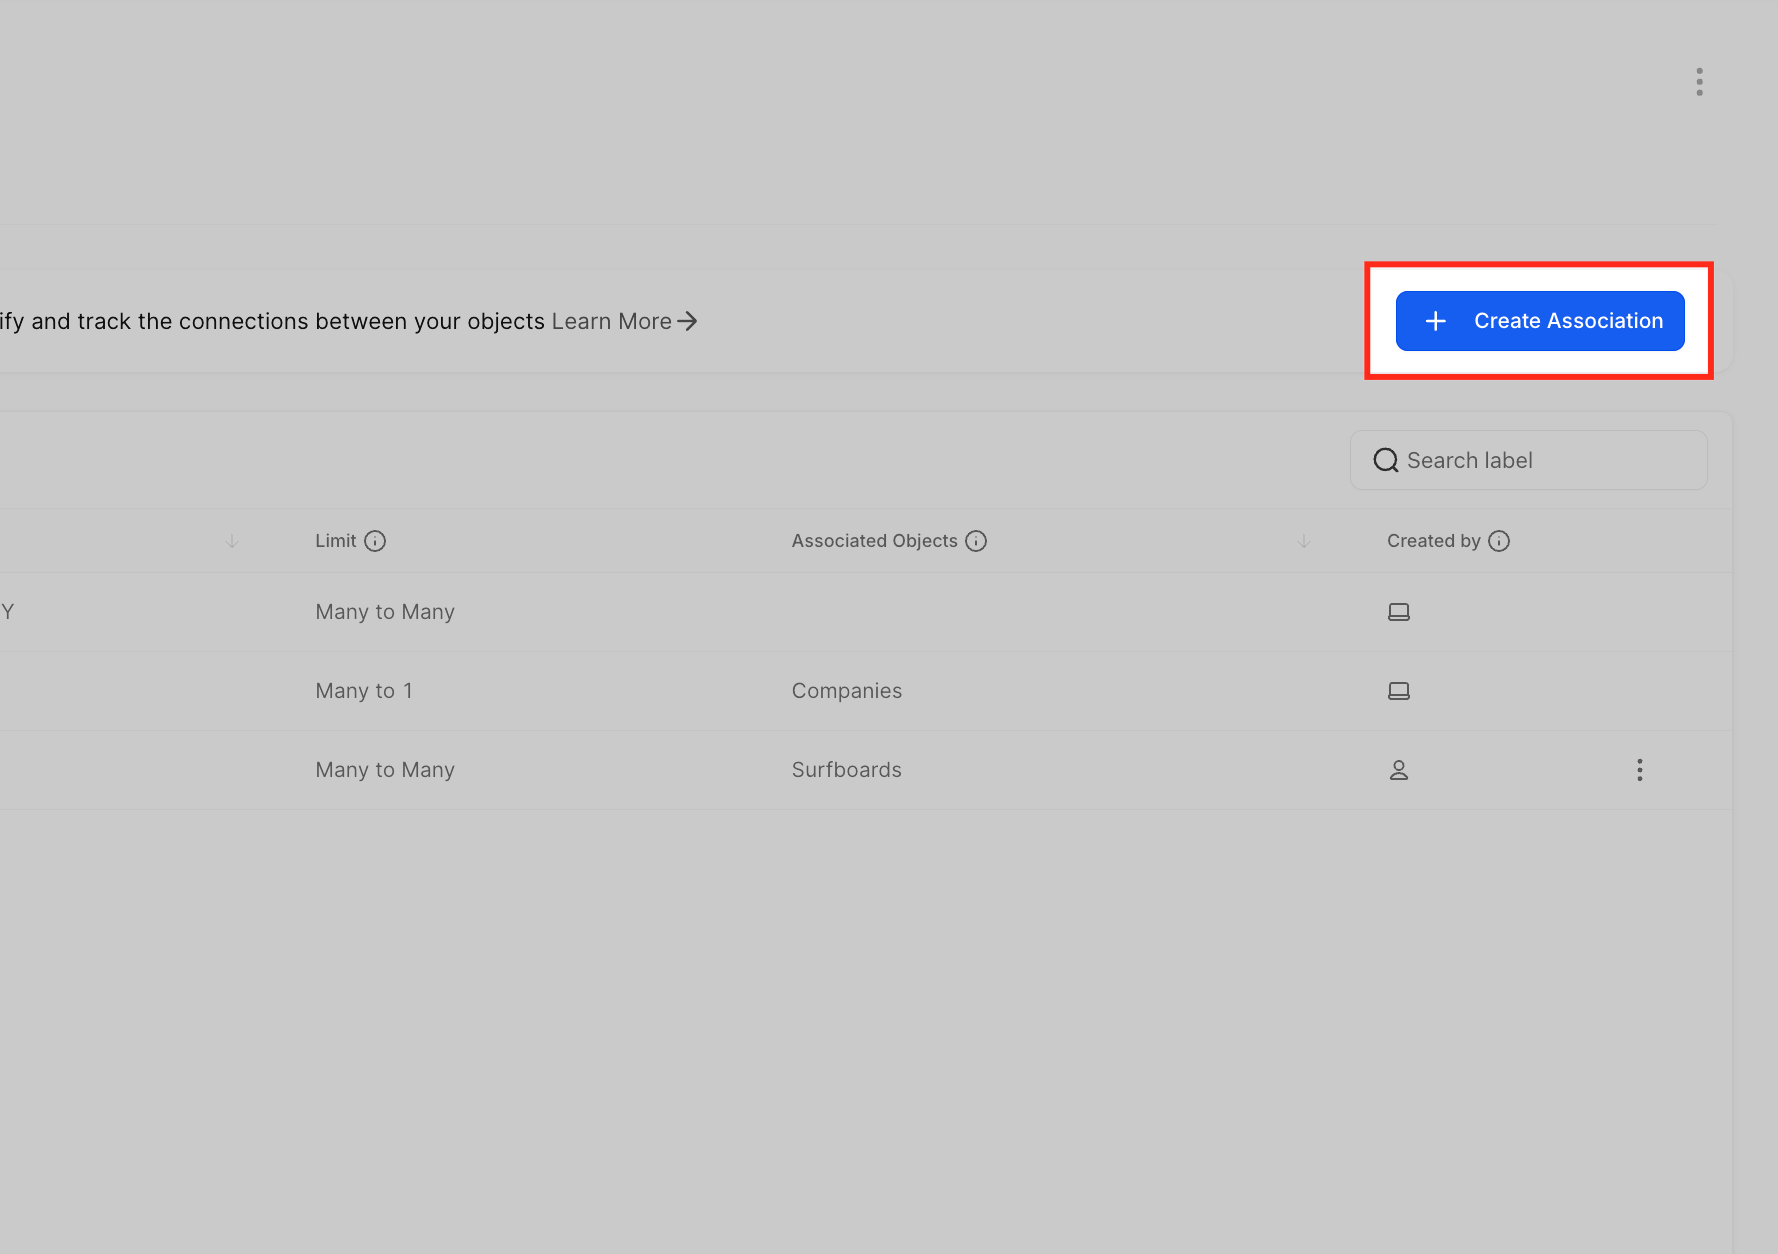
- Select the Associations tab.
- Click the Create Association button.
- Choose the type of record to associate (Contact, Company, Opportunity, or a Custom Object).
- Select whether the label will be a Single Label or a Pair of Labels.
- Under Configure Relationship, pick the relationship type and, if needed, set limits.
- Review the relationship preview to confirm settings.
- Click Save to create the association definition.
Link contacts using associations
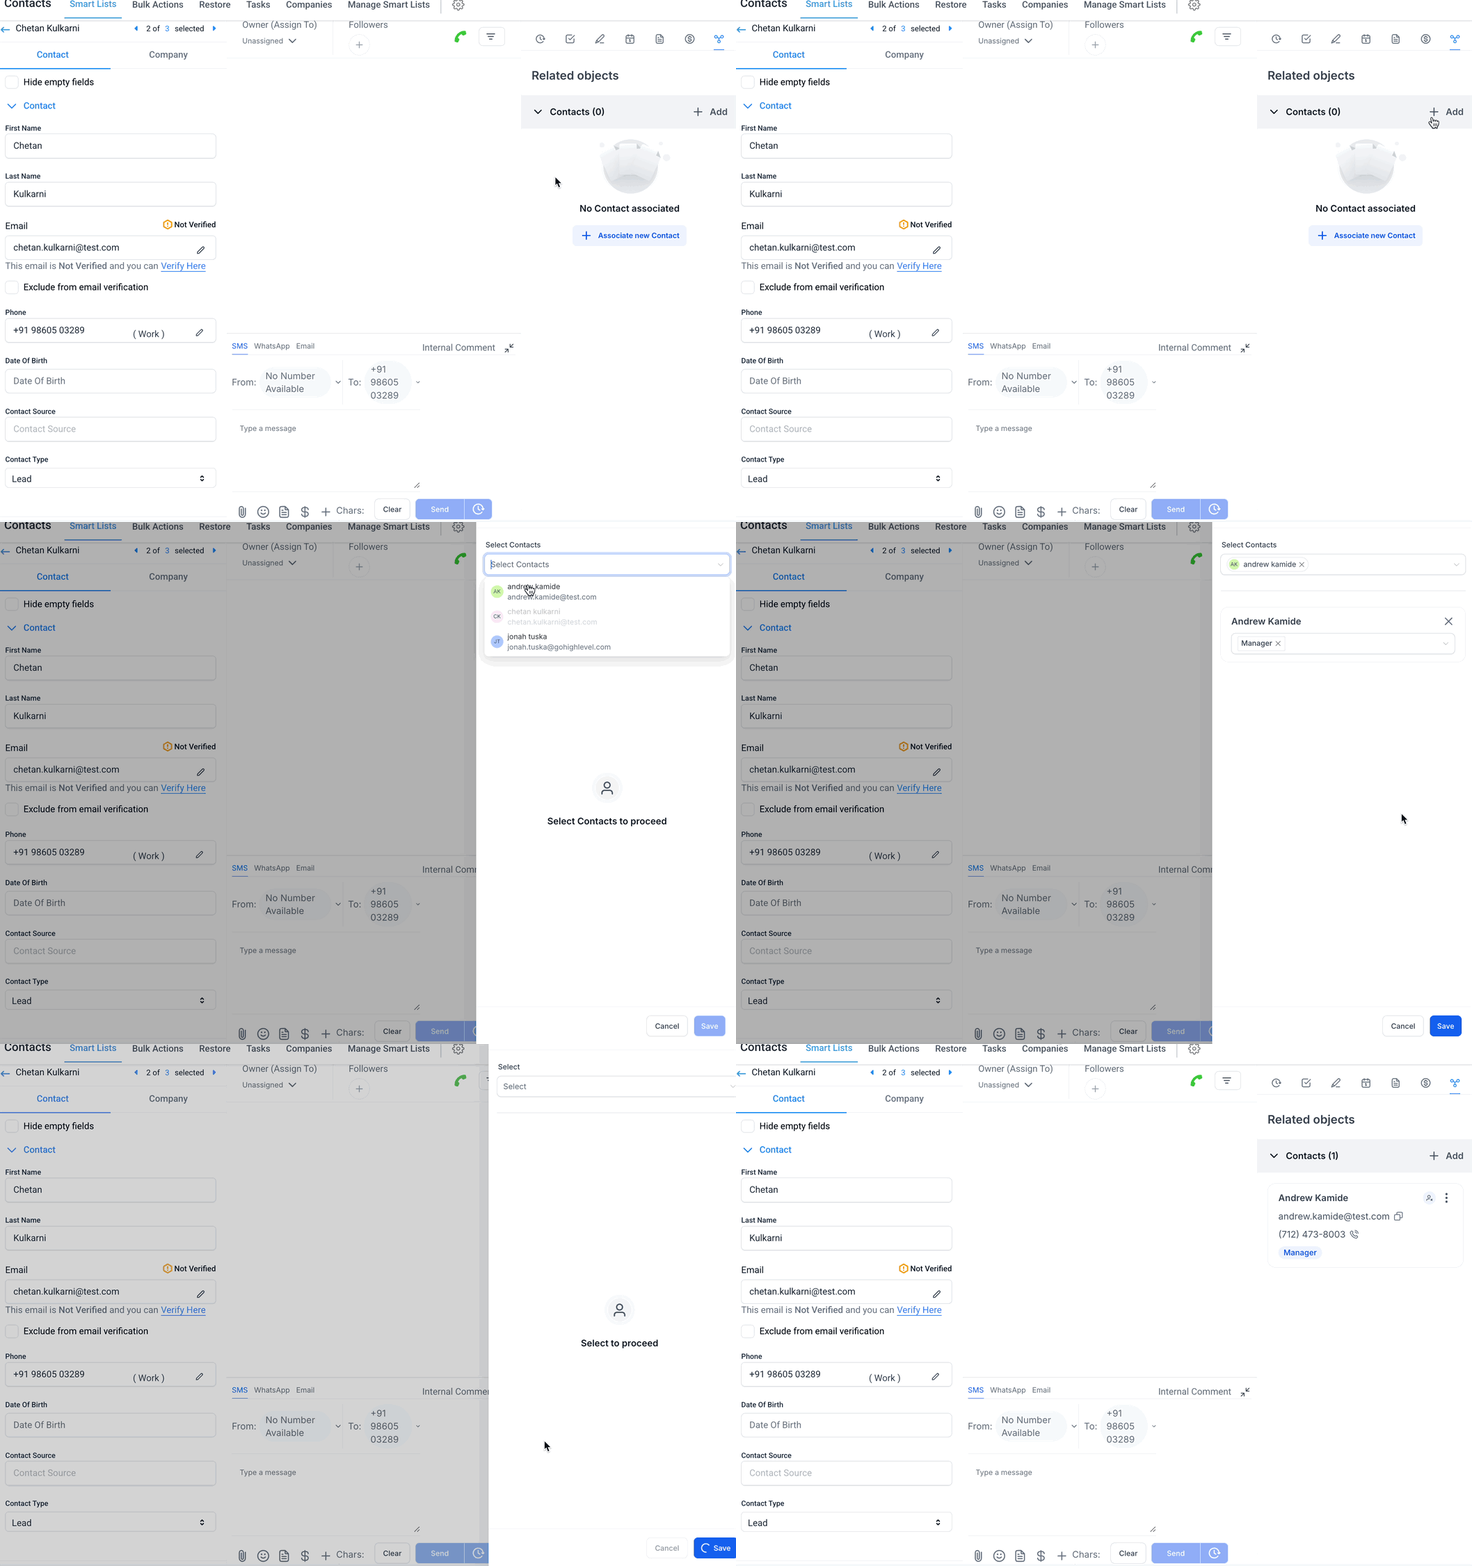
- Open the contact record you want to edit.
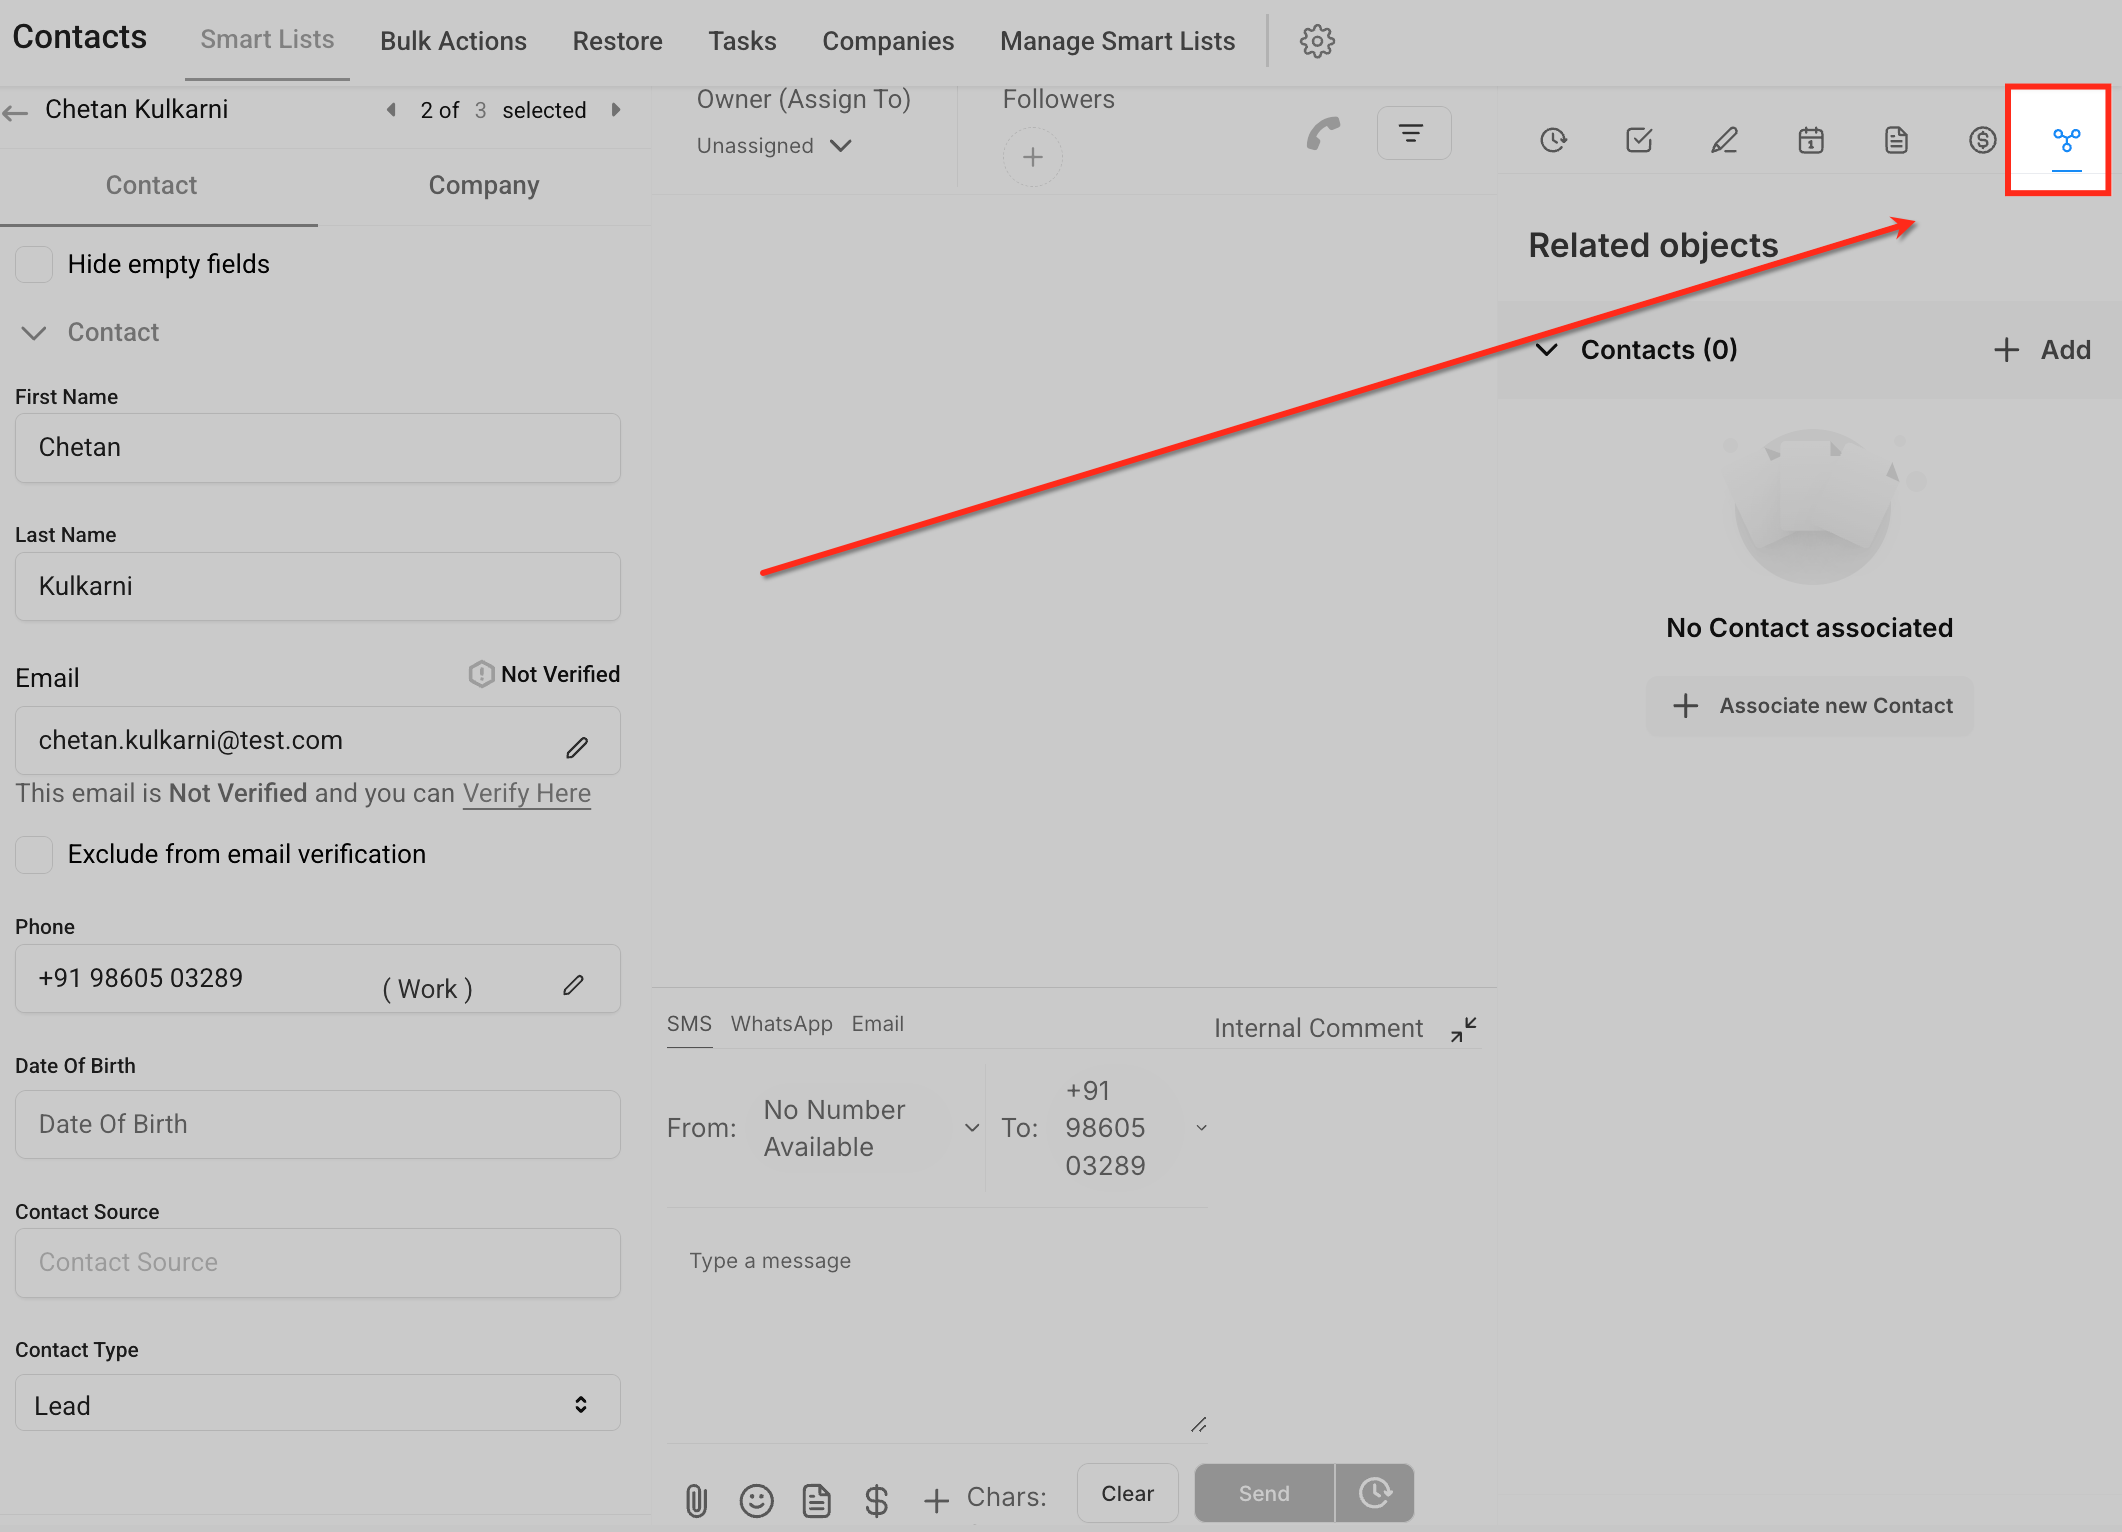
- Open the Associations or Related Objects section.
- Click the Add button for the desired object type.
- Search for the related record and select it.
- Choose the appropriate association label.
- Confirm to create the association.
- The linked record appears in the Associations or Related Objects area.
Configure association limits
- Open the subaccount you are working in.
- Go to Settings > Objects.
- Locate the Contacts object or the relevant Custom Object.
- Open that object and select the Associations tab.
- Create a new association or edit an existing one.
- Choose a Single Label or a Pair of Labels.
- Under Configure Relationship, select the relationship type.
- Define the applicable limits for the label.
- Review the relationship preview area.
- Click Save to apply the limits.
Remove an association between records
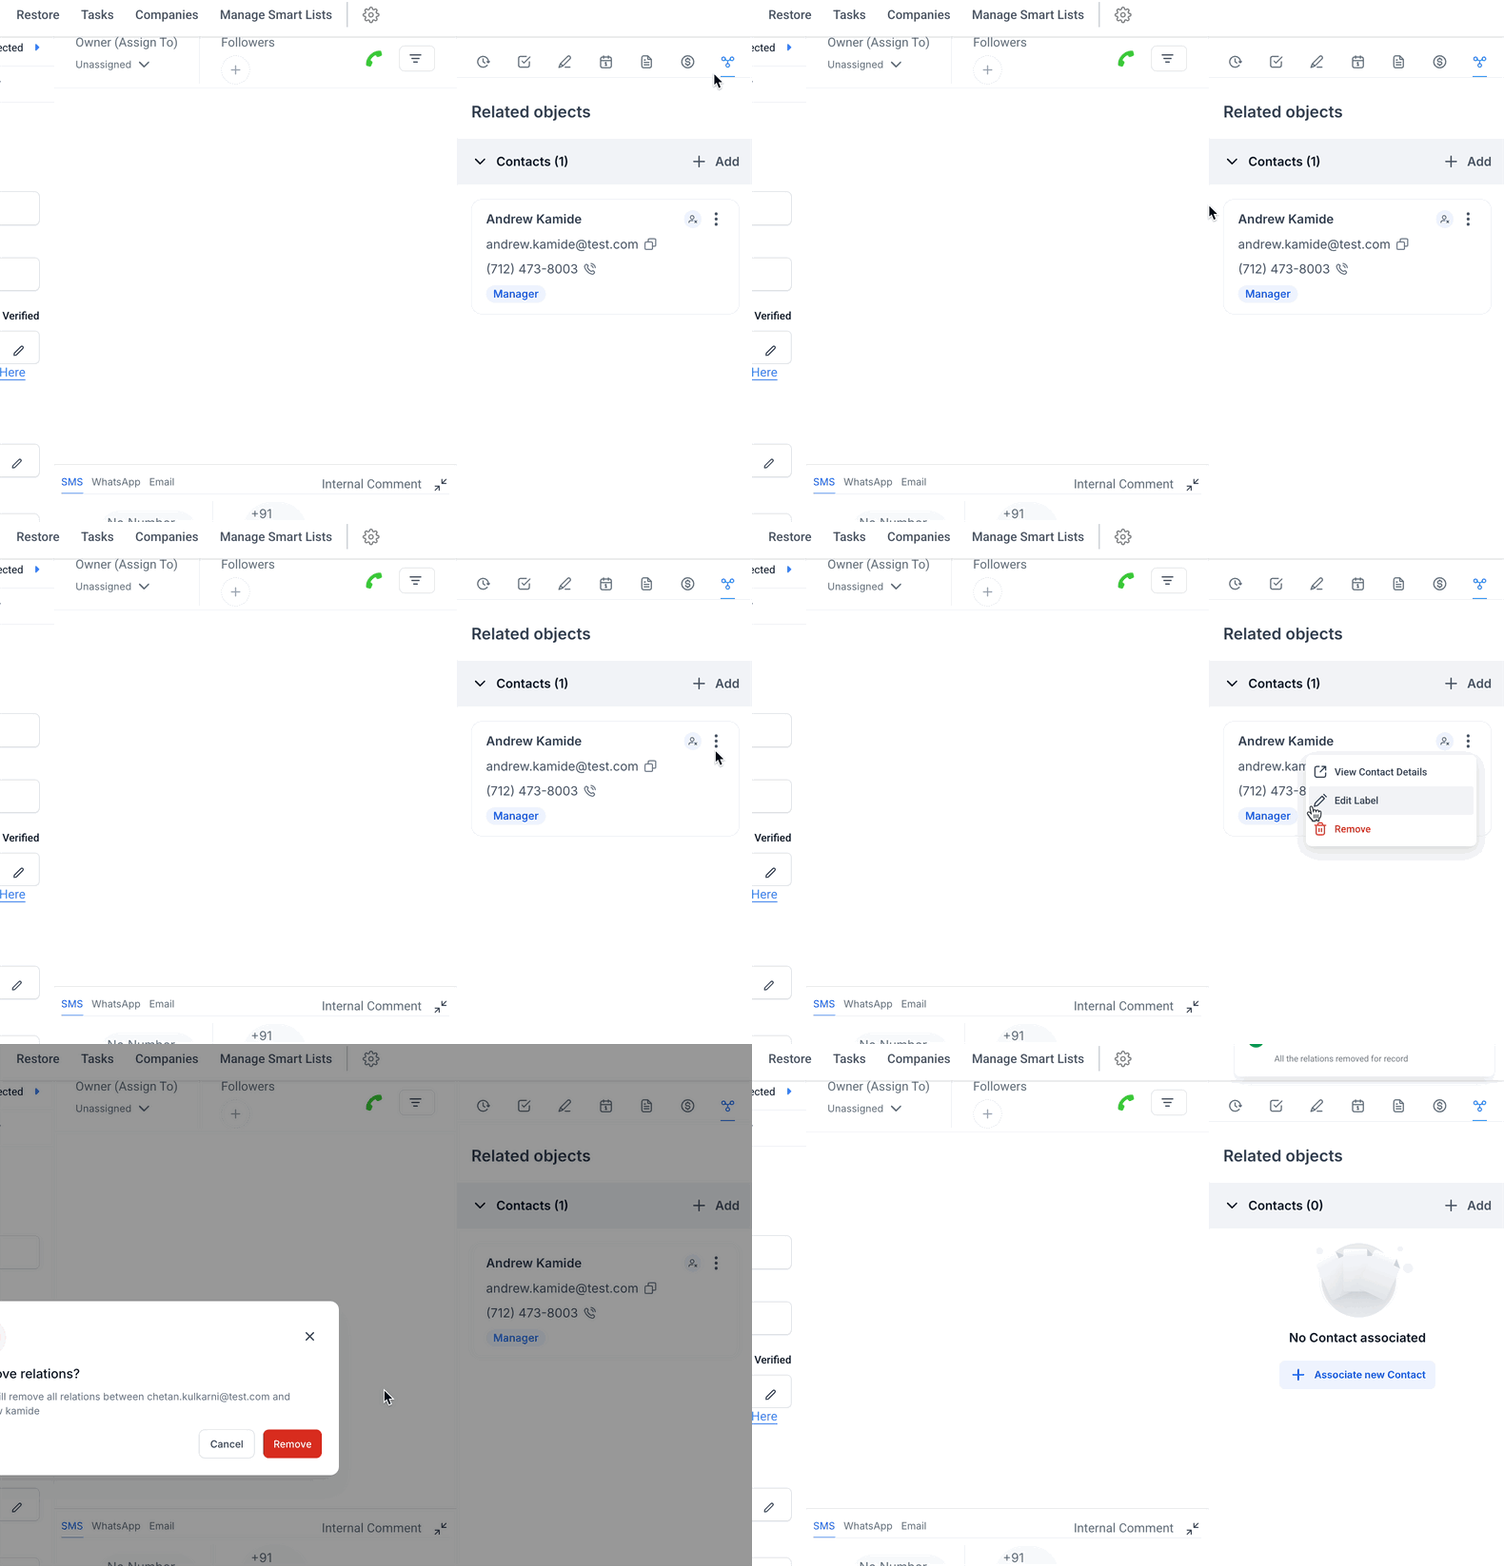
- Open the contact or object record that contains the association.
- Open the Associations or Related Objects area.
- Locate the associated record you want to remove.
- Select the option to remove the association.
- Confirm the change.
- Note: Removing an association only removes the relationship; it does not delete either record.
Use associations in workflows
- Open Automation > Workflows and edit or create a workflow.
- Add a new action and select the desired association workflow action (Add Associated Records, Remove Associated Records, or Associate Records).
- Configure the object type, association label, target workflow if required, and save the action.
07What it looks like in HighLevel
08Settings that matter
- Configure Relationship. Sets the relationship type (e.g., One to One, Many to Many) and any limits for the chosen association label.
- Association Limits. Controls the maximum number of records that can be linked through a specific label; HighLevel blocks additional links once the limit is reached and shows a warning.
- Label Type. Determines whether a relationship uses a Single Label for both sides or a Pair of Labels with distinct names for each side.
09Things to know before you rely on it
- Association definitions are managed from the subaccount's Settings > Objects area.
- Contact to contact associations support both single labels and paired labels.
- Limits are enforced per label, and HighLevel prevents additional records from being associated once a limit is reached, displaying a warning.
- Workflow actions that target associated records require those records and associations to already exist, unless the action itself creates the association.
- The Associate Records workflow action is available only as a Labs beta feature.
10How it connects to the rest of HighLevel
- Explore all contact management capabilities in HighLevel. All Contacts features
- View pricing options to choose a plan that includes associations. Pricing
- Start a free trial to test contact associations. 30 day trial
Michael's take

When contacts in your HighLevel account start to look like a flat list, critical relationships get lost. Adding a label driven association keeps spouses, managers, buyers and sellers visible and usable for follow up and reporting. The first setting I would lock down is the relationship type and limit for each label, so the system enforces your business rules without manual checks.
Once the limits are set, I’d map the most common pair label relationships. Like Manager Employee. So HighLevel fast shows both sides of the connection. That way any automation you build has the right context from day one.