
01Who this is for
- Service oriented businesses that need to see all staff appointments at once, because the unified view groups bookings across team members.
- Agencies that manage multiple calendars and want a distraction free layout, as the dropdown hides when only one scheduling type is active.
- Solo consultants using the calendar for meetings, since they can hide filters to maximize visible slots.
02Calendar view enhancements, explained
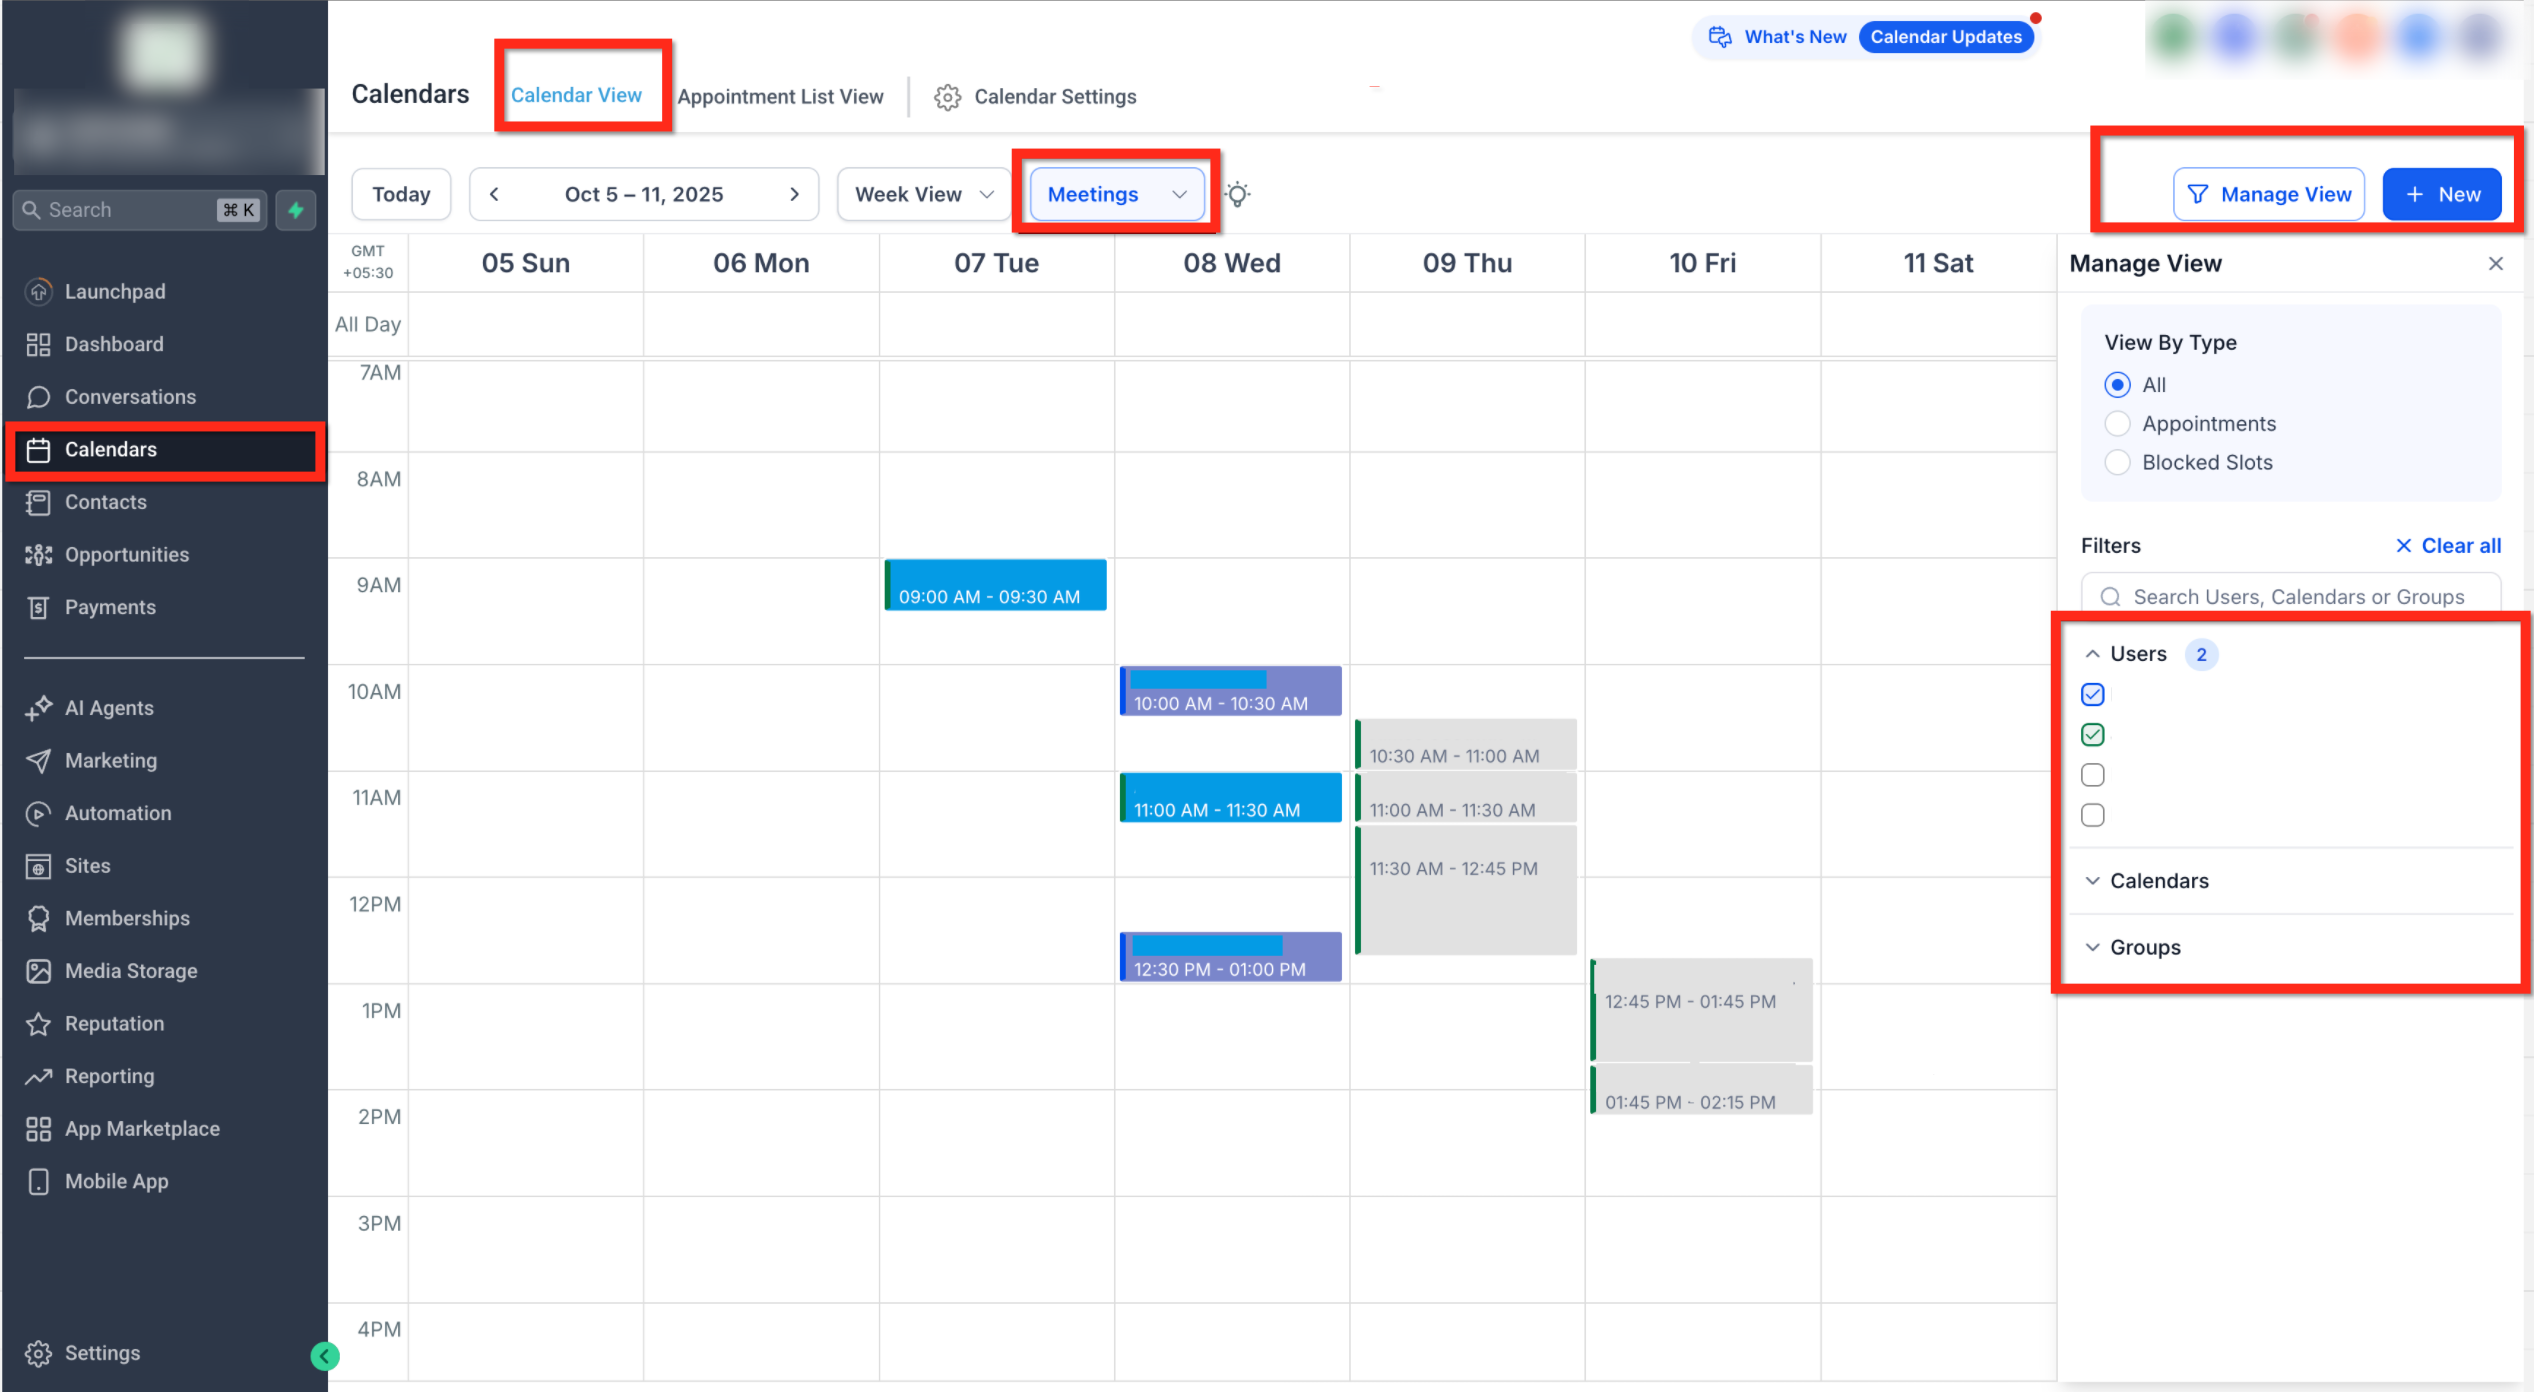
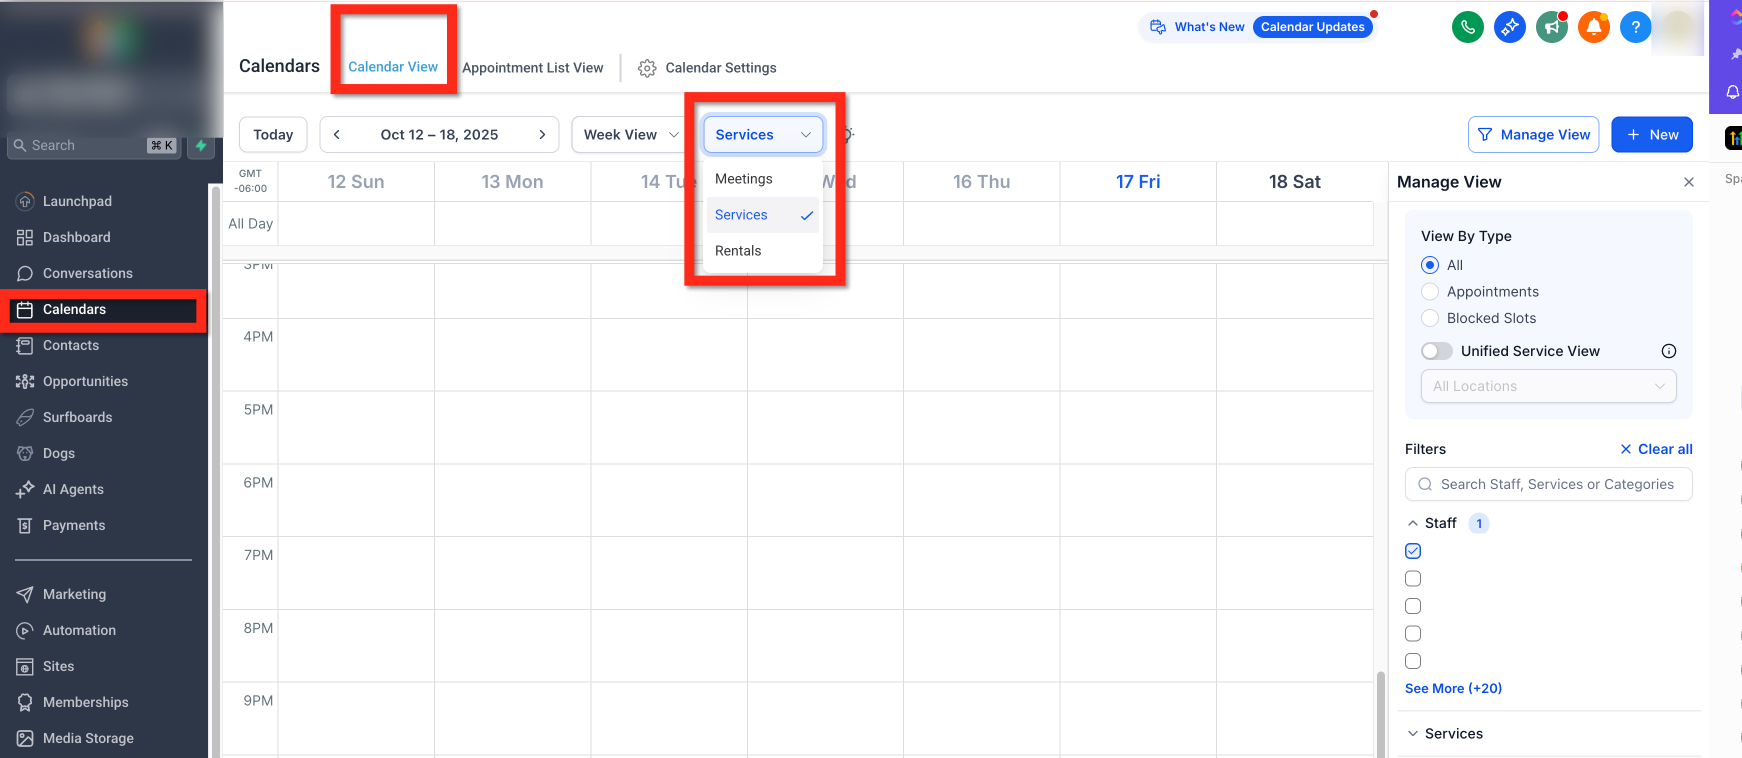
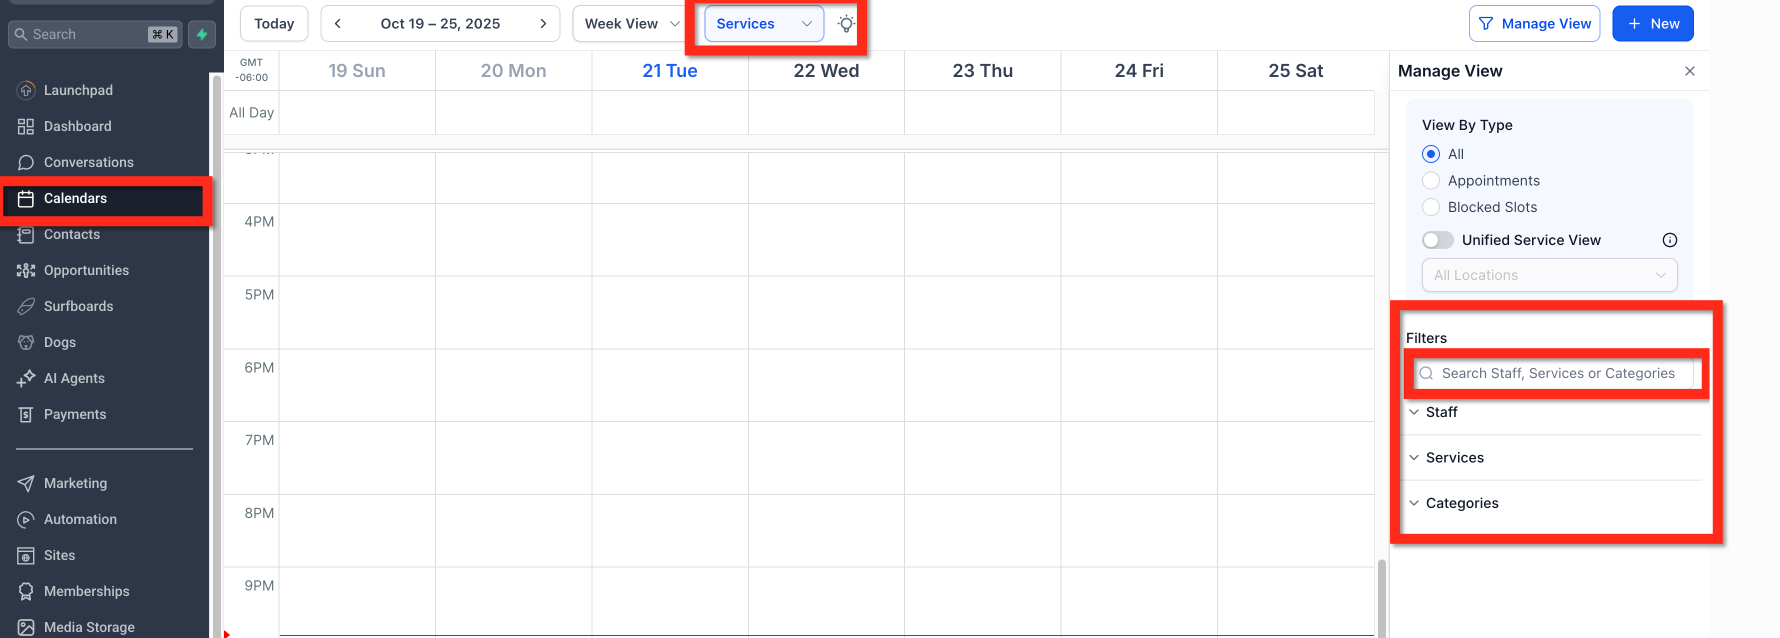
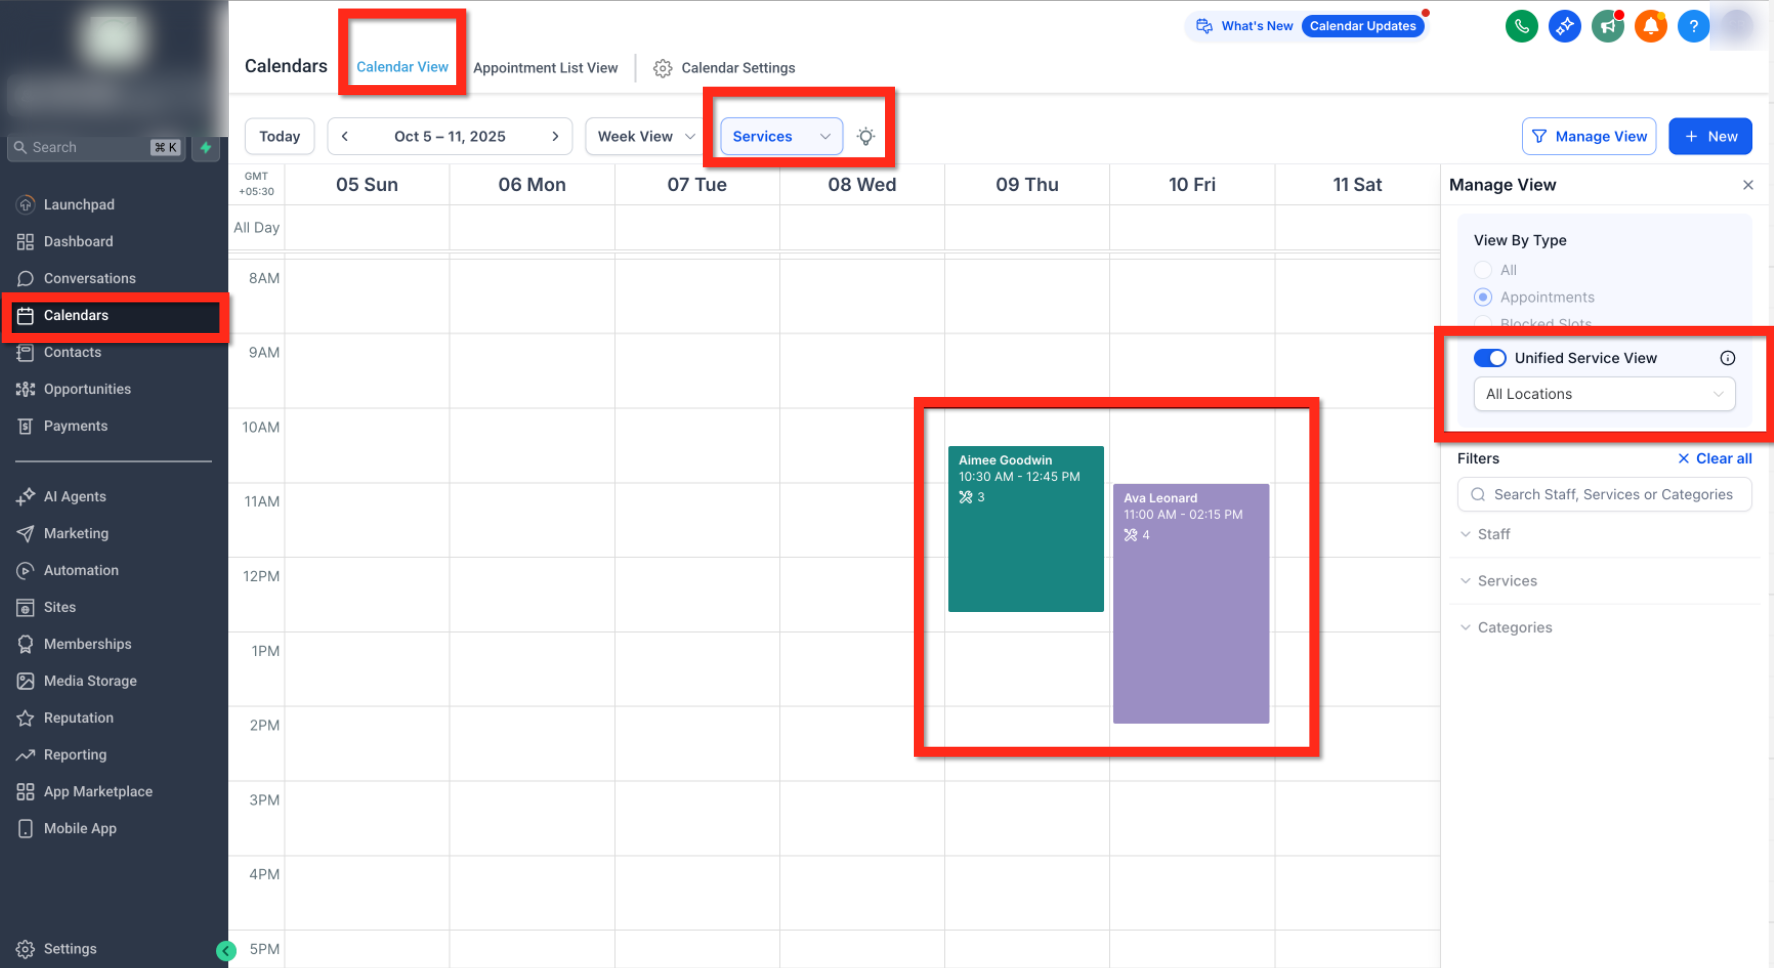
The update adds type specific calendars, Meetings, Services (v2) and future Rentals, each with its own set of filters and navigation tools. A new dropdown appears when more than one type is turned on in Agency Settings, letting users switch right away.
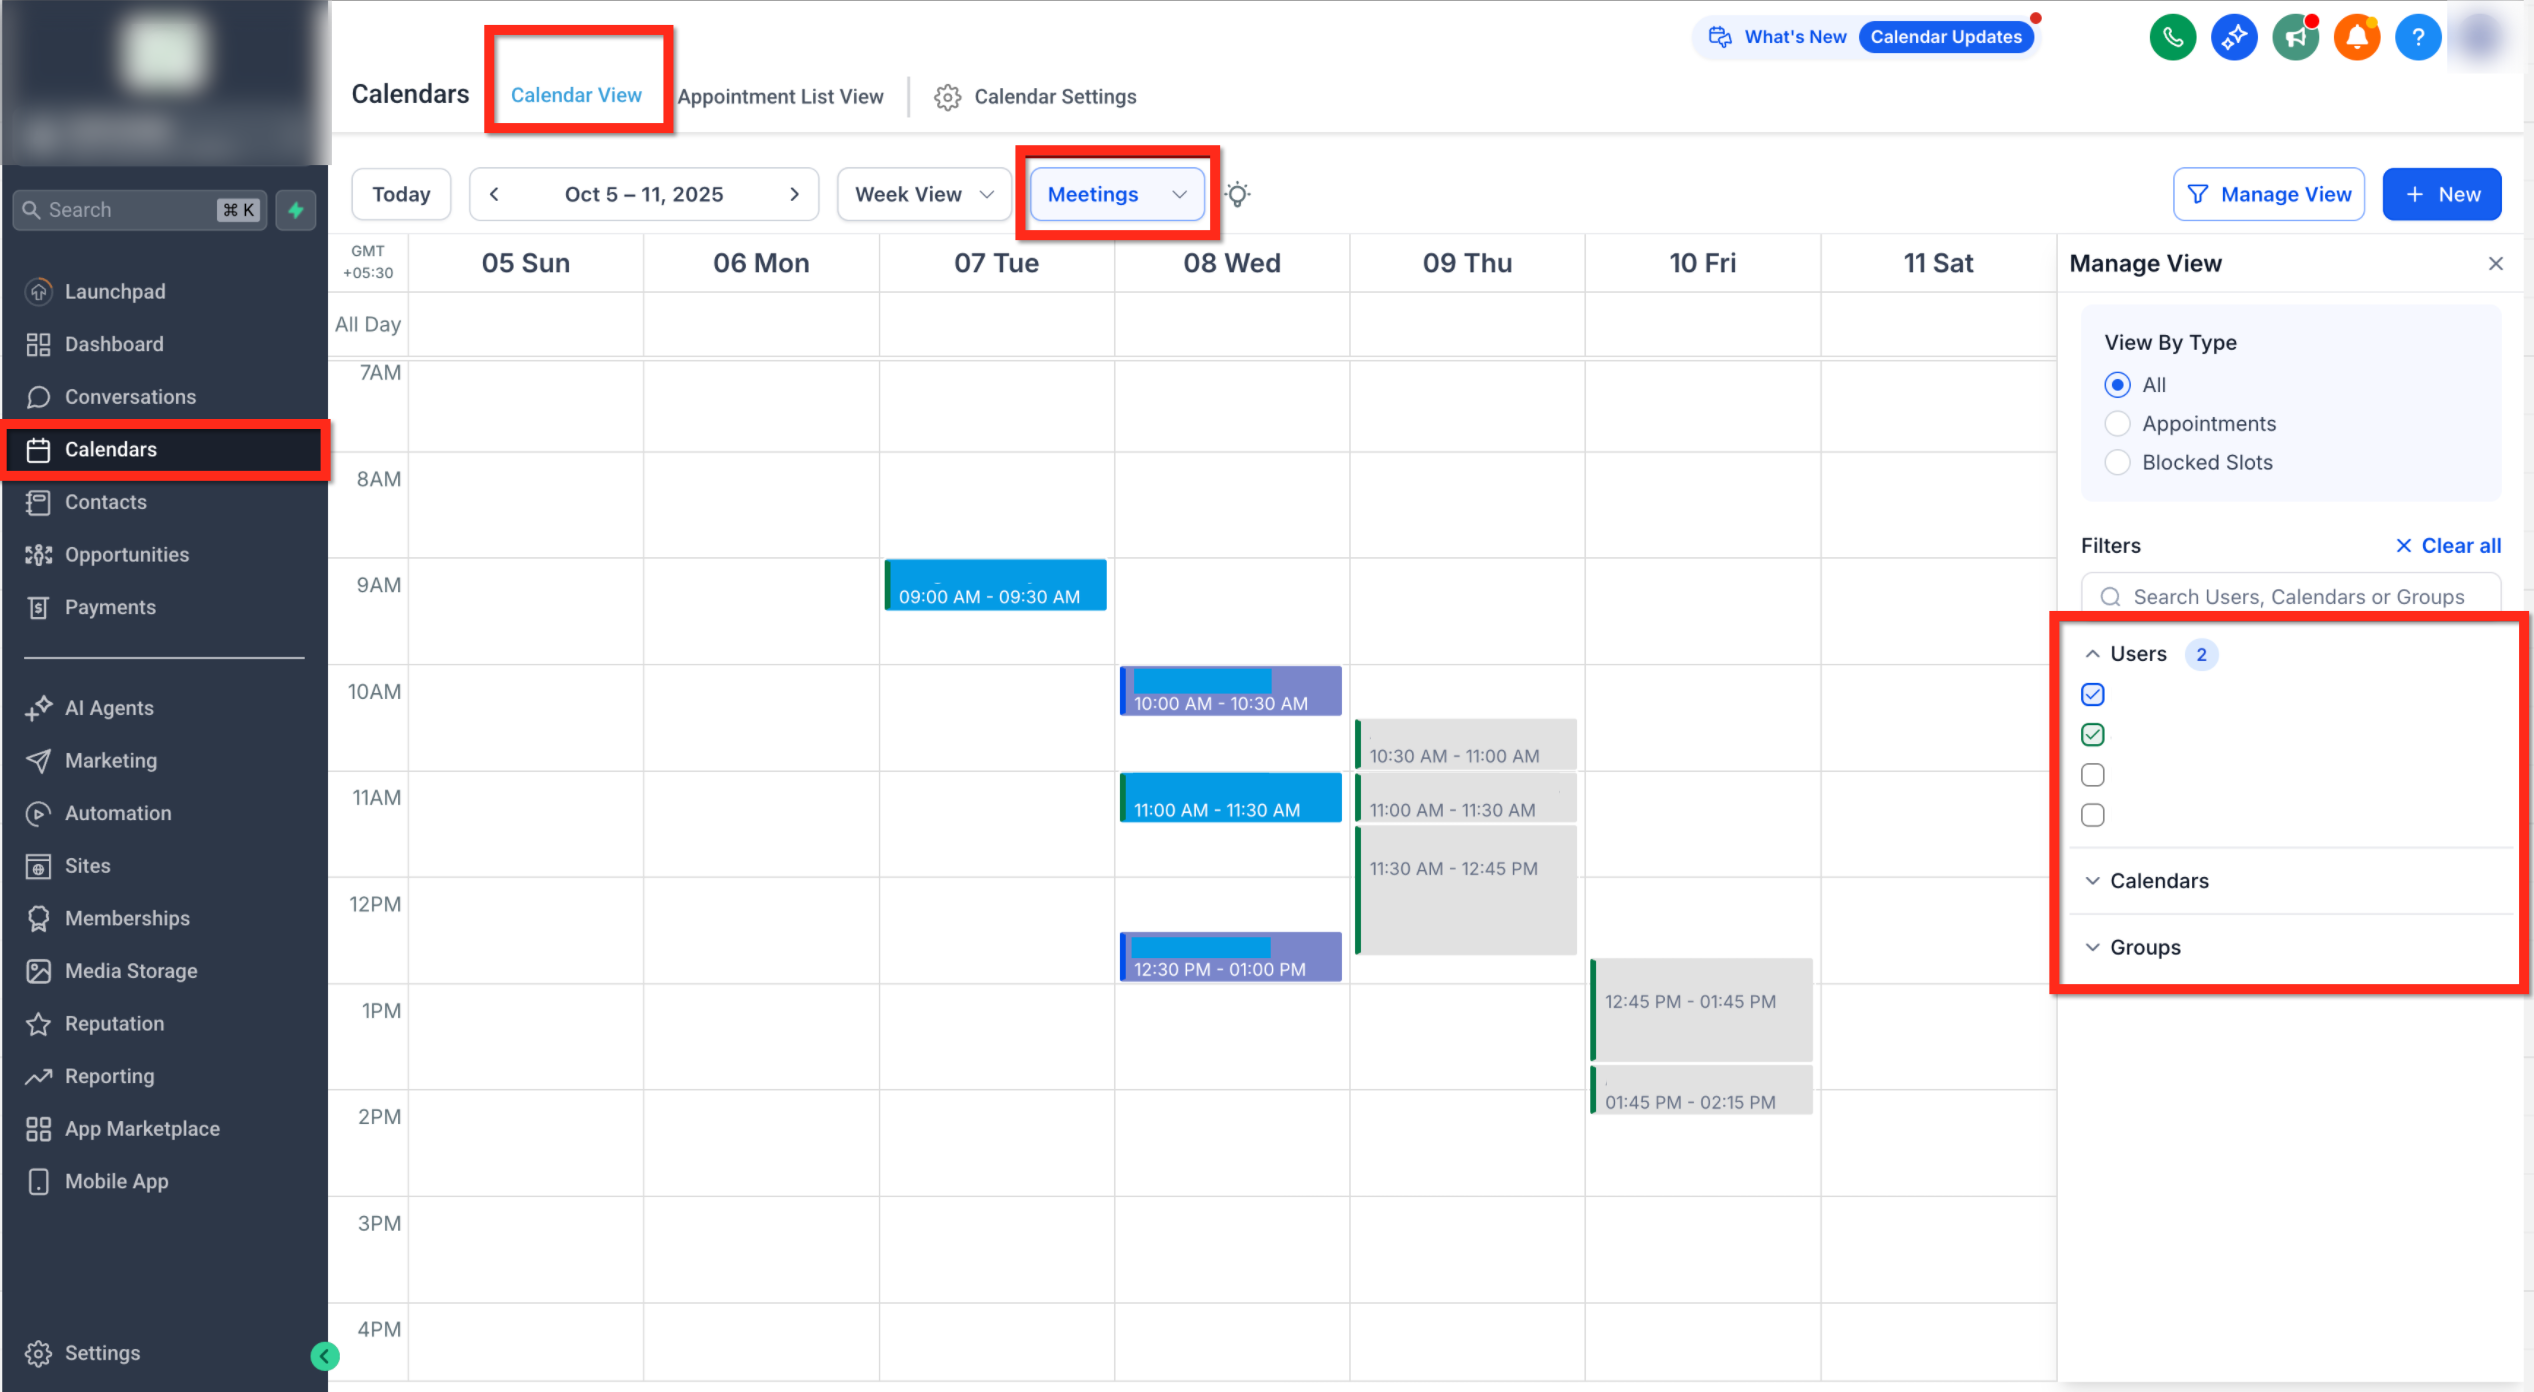
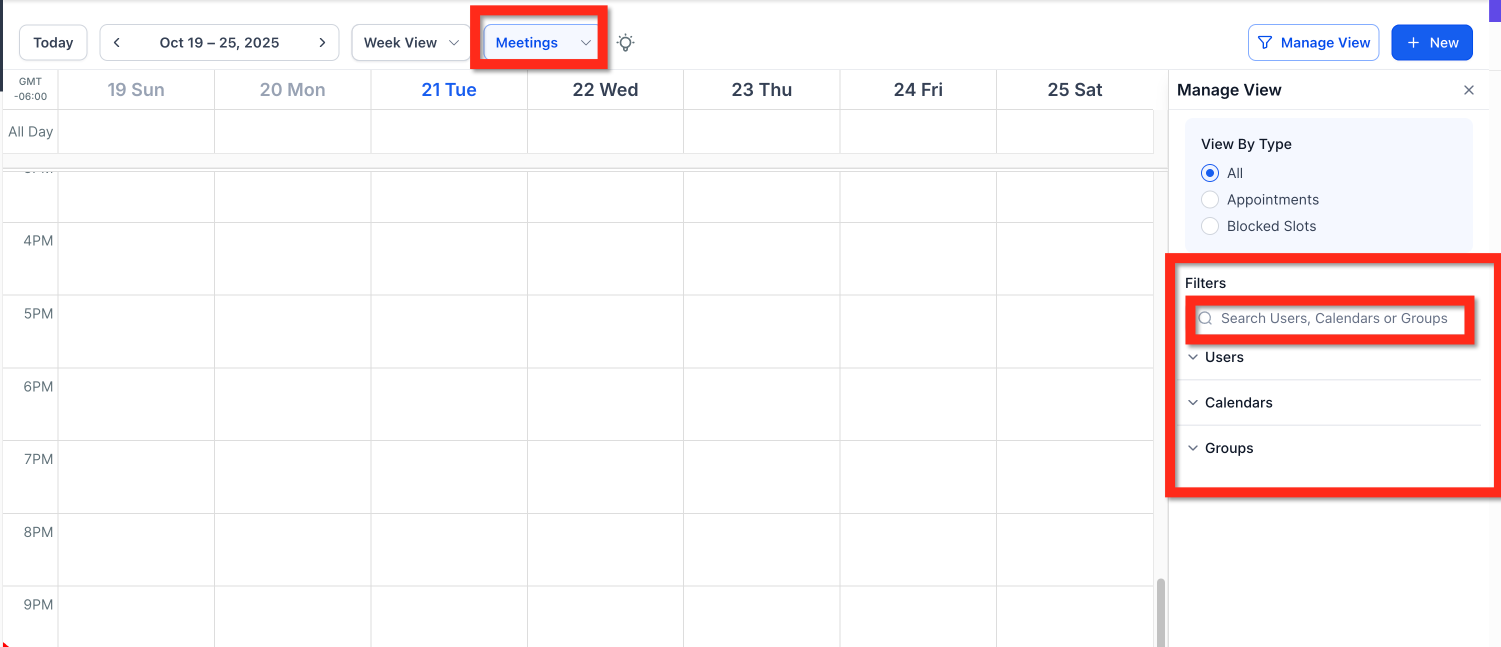
The right hand filter panel now changes based on the selected type, showing only relevant options such as Users, Calendars, and Groups for Meetings or Staff, Services, Categories, and Location for Services. Users can collapse this panel with the Manage View toggle, which expands the visible calendar area. In Day and Week views, a Show buffer time switch reveals pre and post buffer blocks around appointments.
These changes are active as soon as Meetings or Services (v2) are enabled; no extra configuration is required.
03How businesses use calendar view enhancements
- Salon or spa. Enable Services (v2) and turn on Unified Service View to see every therapist’s bookings in one timeline. Use the Show buffer time toggle to visualize preparation periods between services.
- Coaching agency. Keep the Meetings type active, hide the filter panel with Manage View, and expand the calendar area to monitor many client sessions at once without scrolling.
- Studio rental space (future). When the Rentals type launches, the calendar will provide a dedicated view for equipment or room bookings, allowing owners to manage reservations without mixing them with other calendar types.
04Before you start
- Agency Settings must have the Meetings type, Services (v2) type, or both turned on.
05How to set up and use calendar view enhancements in HighLevel
Expand view space
- Click the Manage View button located at the top right of the screen.
- Hide or reveal the right hand filter panel as needed.
- Adjust the browser zoom level or resize the window to show more appointments.
Show buffer time
- Open the Calendars section.
- Select Day view or Week view.
- Press Manage View.
- Enable the Show buffer time option.
06What it looks like in HighLevel
07Settings that matter
- Manage View. Controls the visibility of the right hand filter panel and provides access to additional display options such as buffer time.
- Show buffer time. When turned on, pre buffer and post buffer periods appear as shaded blocks around each appointment in Day and Week views.
- Unified Service View. Groups all service appointments across staff into a single timeline, giving a consolidated view of service bookings.
08Things to know before you rely on it
- The Rentals scheduling type is not yet released; it will be added in a future update.
- Google Calendar sync works only for Meetings; Services (v2) must be managed directly within HighLevel.
- The dropdown for selecting scheduling types appears only when more than one type is active in Agency Settings.
09How it connects to the rest of HighLevel
- Set a primary calendar for the account Assign primary calendar
- Add a payment gateway to collect calendar fees Calendar payments
- Review HighLevel pricing and plan options Pricing
Michael's take

Most people think the dropdown’s hidden state means the feature is broken, when it’s simply respecting the number of active scheduling types. I would first verify that both Meetings and Services (v2) are turned on in Agency Settings so the selector appears and I can jump between them without leaving the page.
Once the selector is visible, I’d hide the filter panel with Manage View to see as many appointments as possible, then turn on Show buffer time to make sure my team respects spacing rules without altering the underlying appointment settings.