
01Who this is for
- Barbershop owners, gain control over appointment slots and resource allocation, reducing scheduling conflicts.
- Salon managers, coordinate multiple chairs and stylists, ensuring each client sees accurate availability.
02Service calendars, explained
Service Calendars are scheduling tools inside HighLevel that let you set up individual services, link them to staff members, and tie resources such as chairs or equipment to each offering. When a client books, the system checks staff availability and reserves the assigned room and tools, preventing overlapping appointments.
You access these tools from the Calendars section of the platform. Settings include Calendar Settings, Preferences, and the Service Menu builder. After enabling the Service Menu, you can create groups to categorize services, then build calendars for each service type, assign rooms and equipment, and finally combine multiple services into a single booking page.
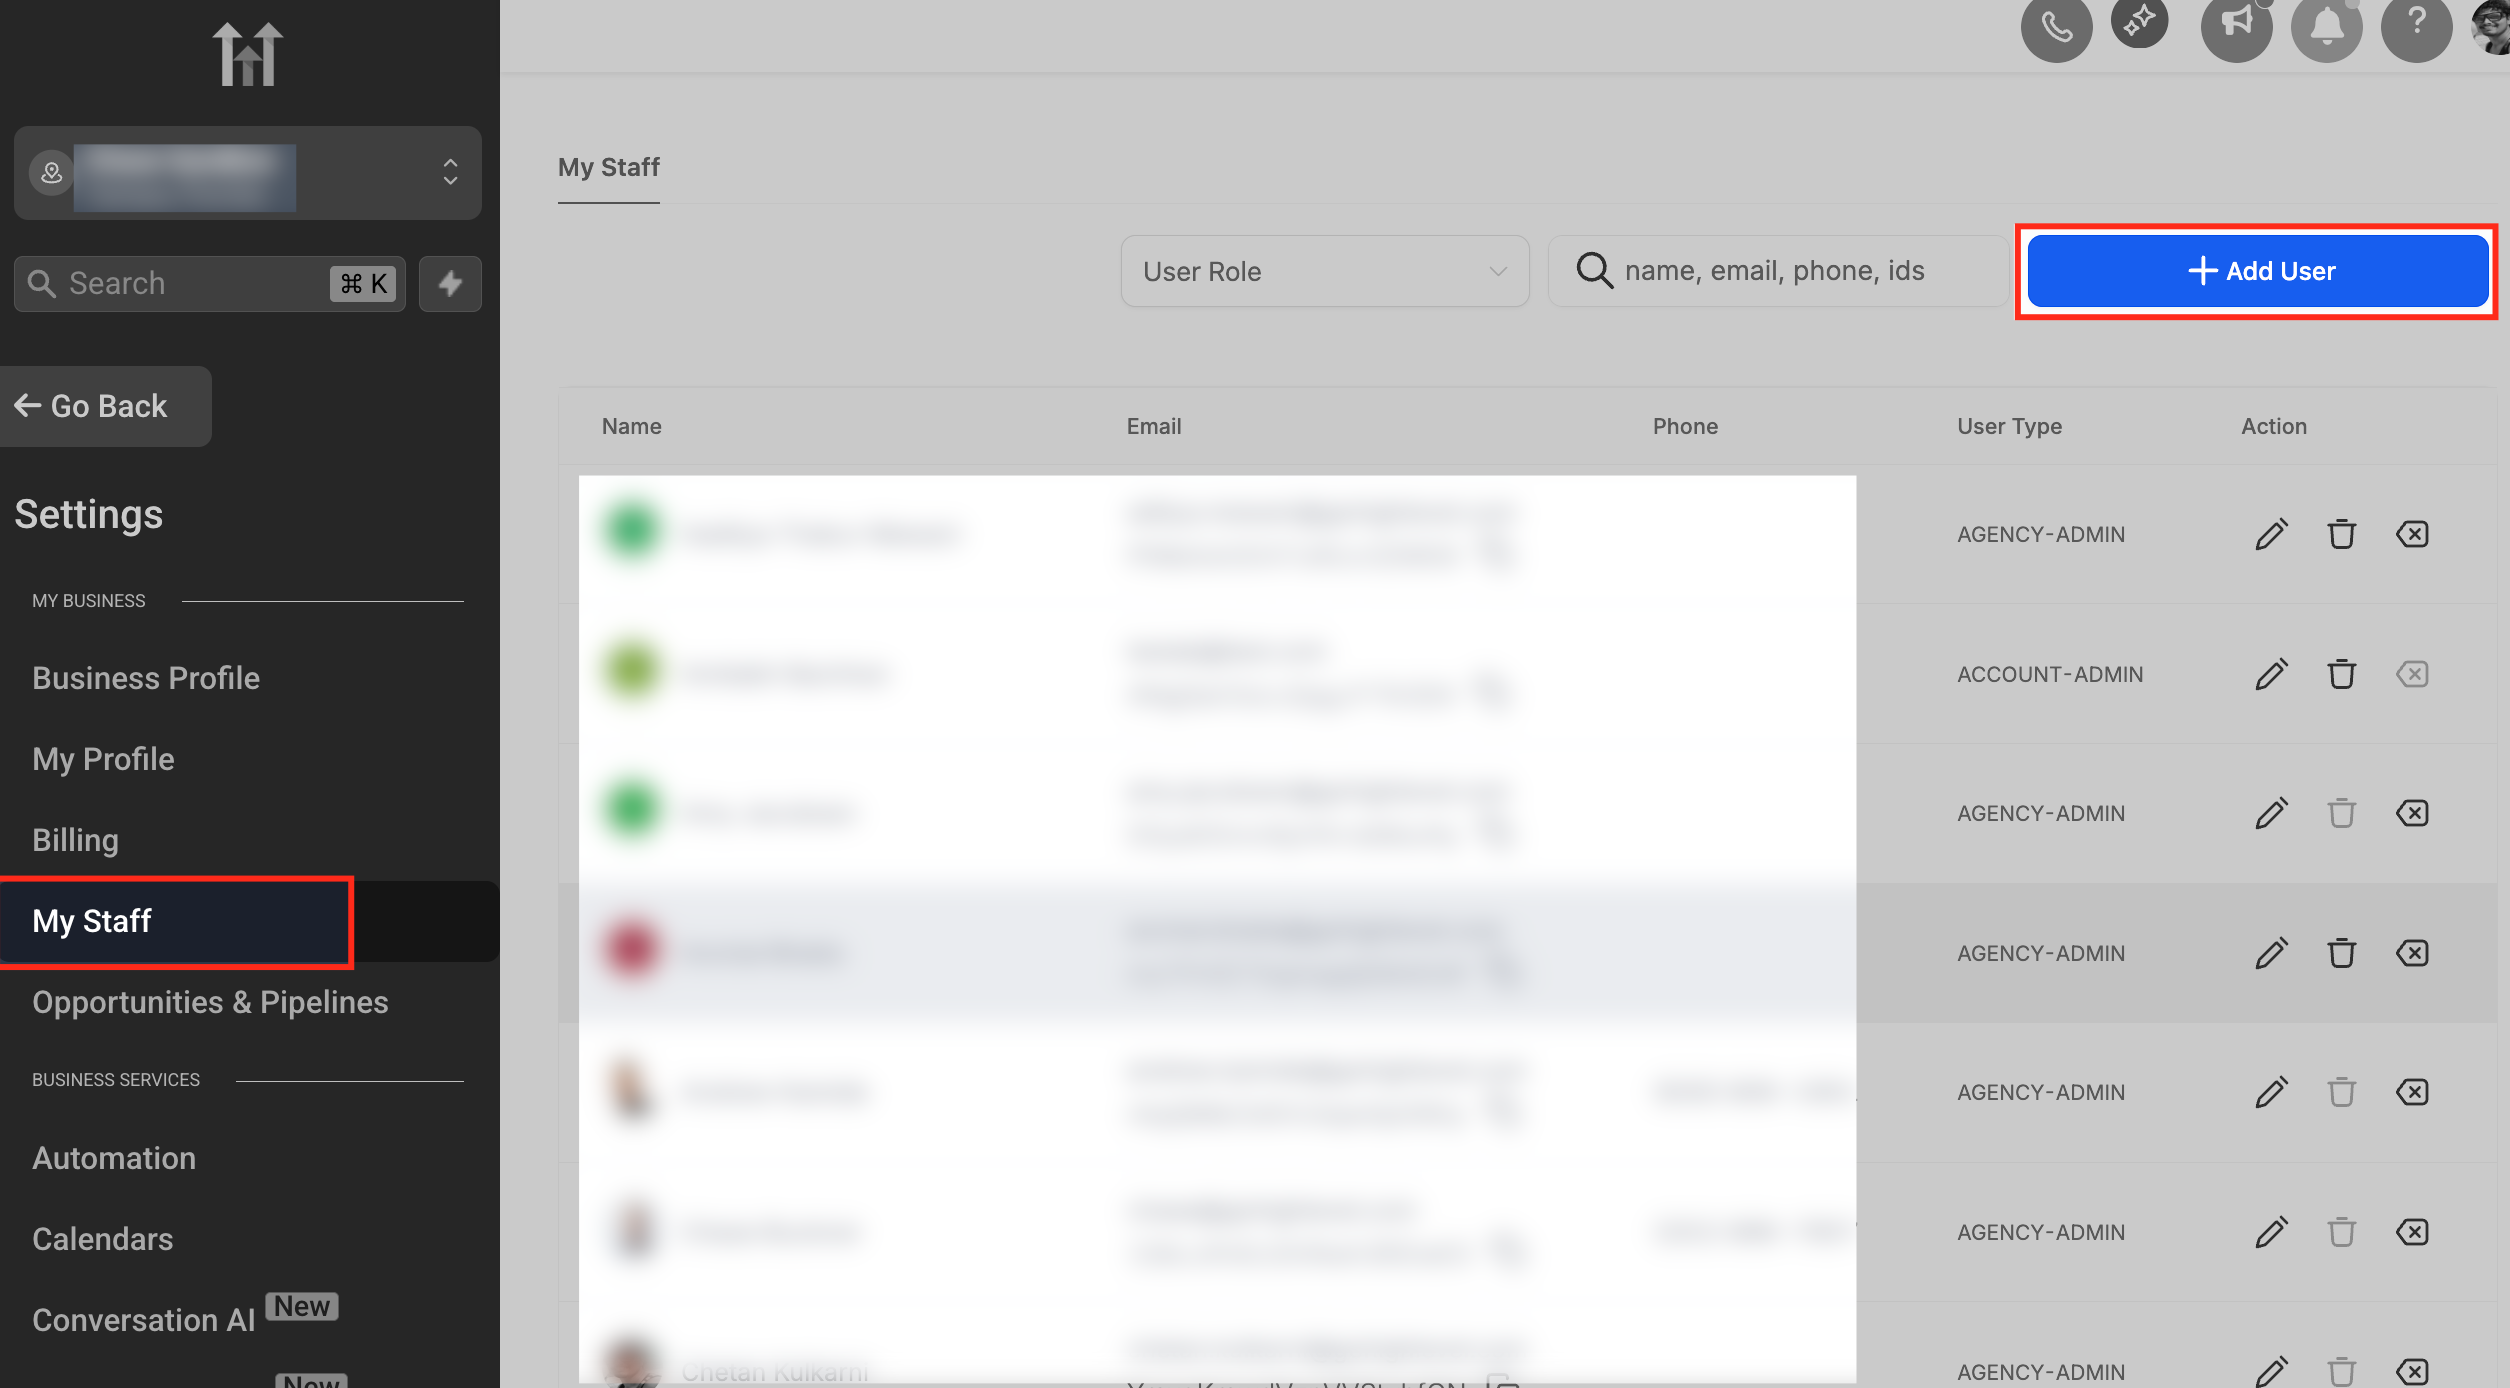
All configuration lives within the subaccount dashboard. Staff are added under Settings > My Staff > Add User. Groups and calendars are managed from the Calendars menu, while the Service Menu is reached via Meetings > Service Calendars (v1) > Service Menu.
03How businesses use service calendars
- Single location barbershop. Add each barber as staff, assign each cutting chair as a room, and link tools like razors. Create service calendars for haircuts, shaves, and styling, then bundle them in a Service Menu so clients can book any service and choose their preferred barber.
- Barbershop chain with multiple shops. Create staff profiles for each location, assign rooms that correspond to each shop’s chairs, and set equipment per location. Build separate service calendars per shop and combine them in a single Service Menu that directs clients to the correct venue.
- Mobile barber service. Register traveling barbers as staff, define a portable chair as a room, and list mobile equipment such as clippers. Use service calendars for on site haircuts and shaves, then present them in a Service Menu that allows clients to schedule appointments at their address.
04The numbers and rules that matter
- Service Menu settings include Enable Add Guests, Enable Multiple Service Selection, and Enable Staff Selection.
- To edit an existing service calendar, go to Service Calendars (v1) under the Meetings tab, click the pencil icon, and adjust the desired settings.
05Before you start
- At least one staff member must be added and have availability defined before a service calendar can be saved.
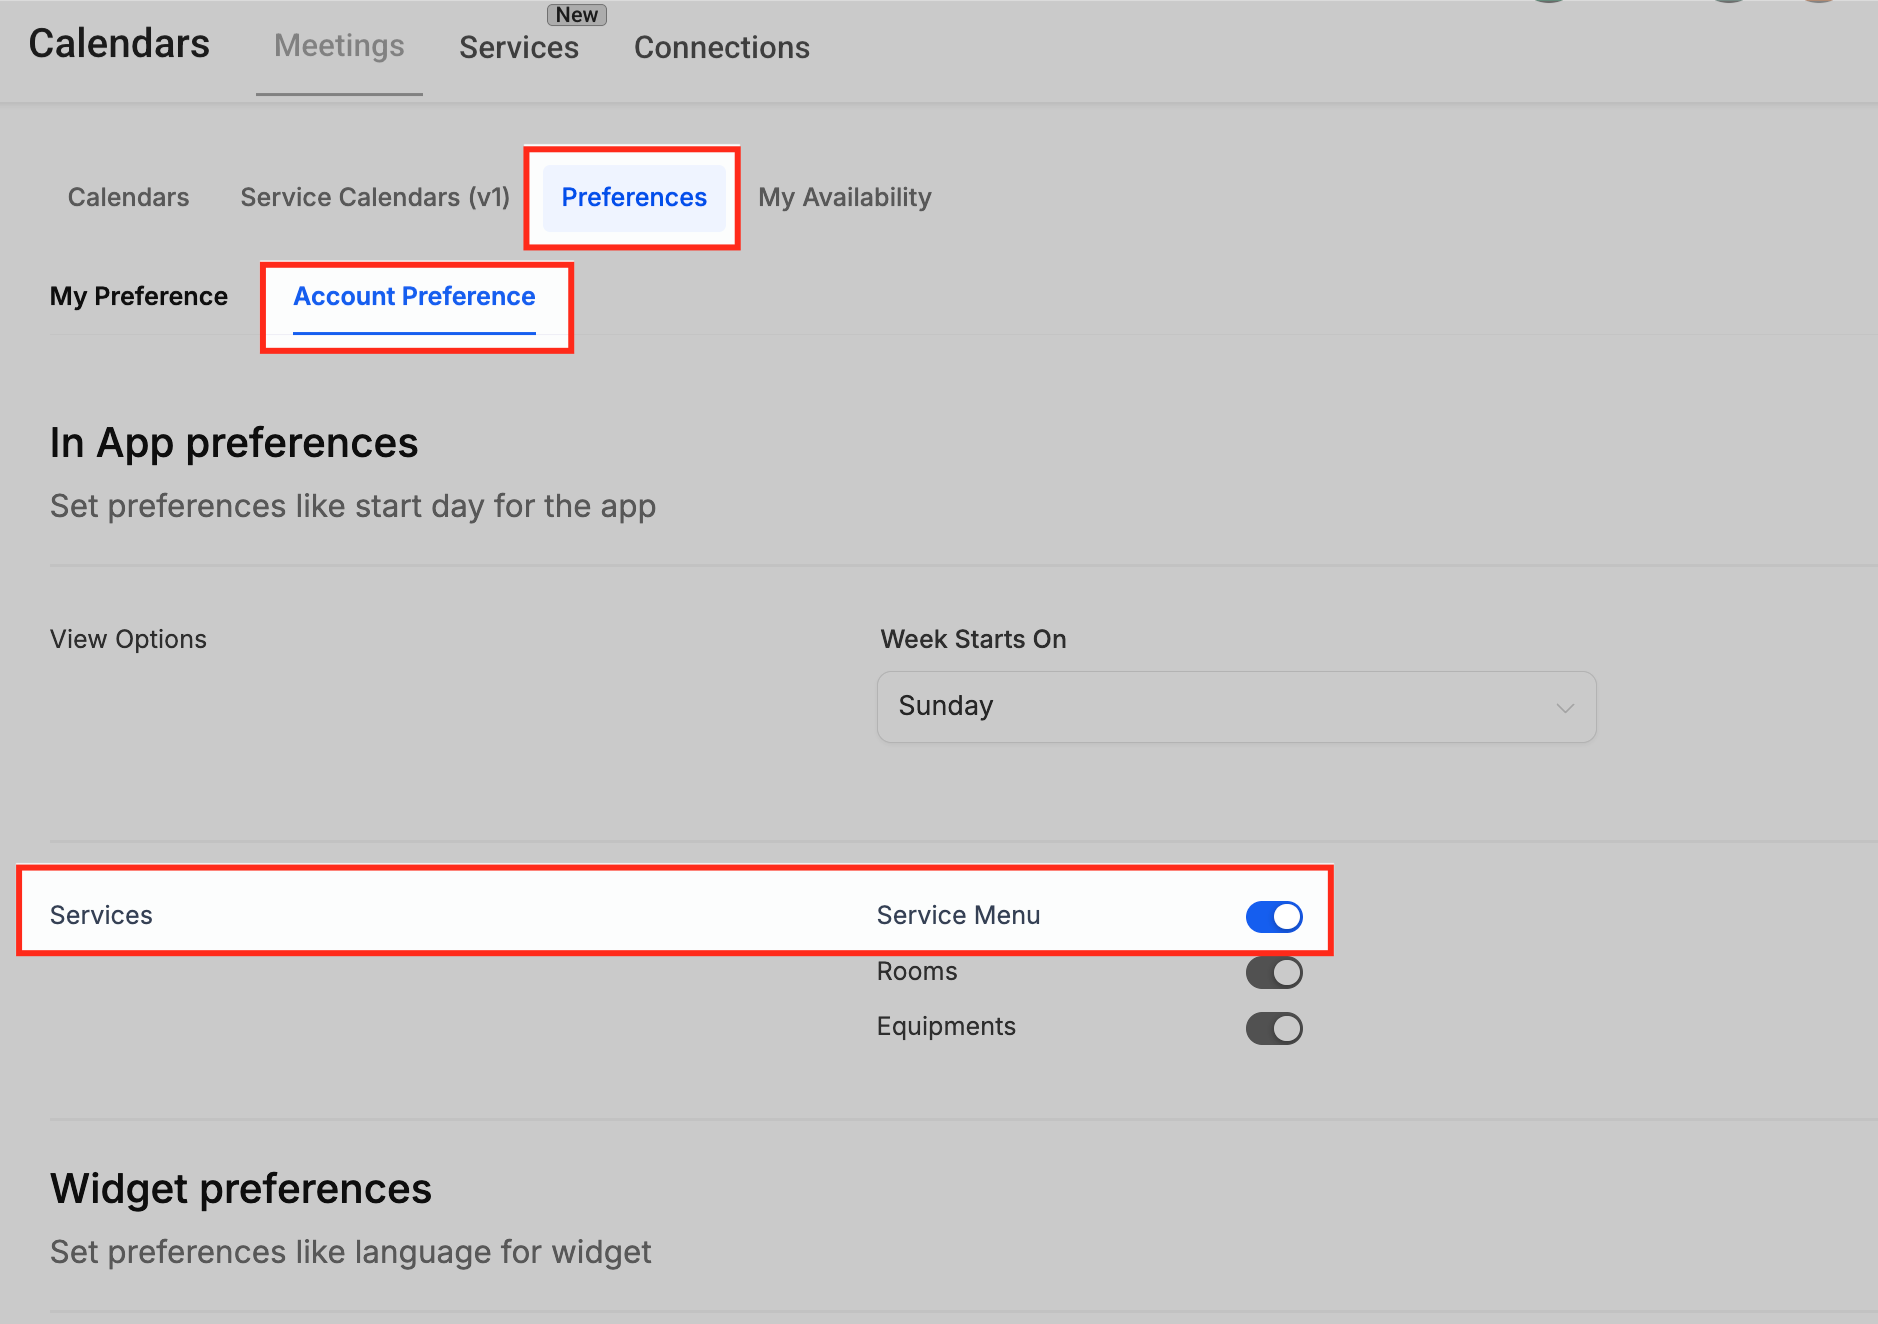
- The Service Menu option must be enabled in Preferences > Account Preference before creating groups or calendars.
06How to set up and use service calendars in HighLevel
Add staff members
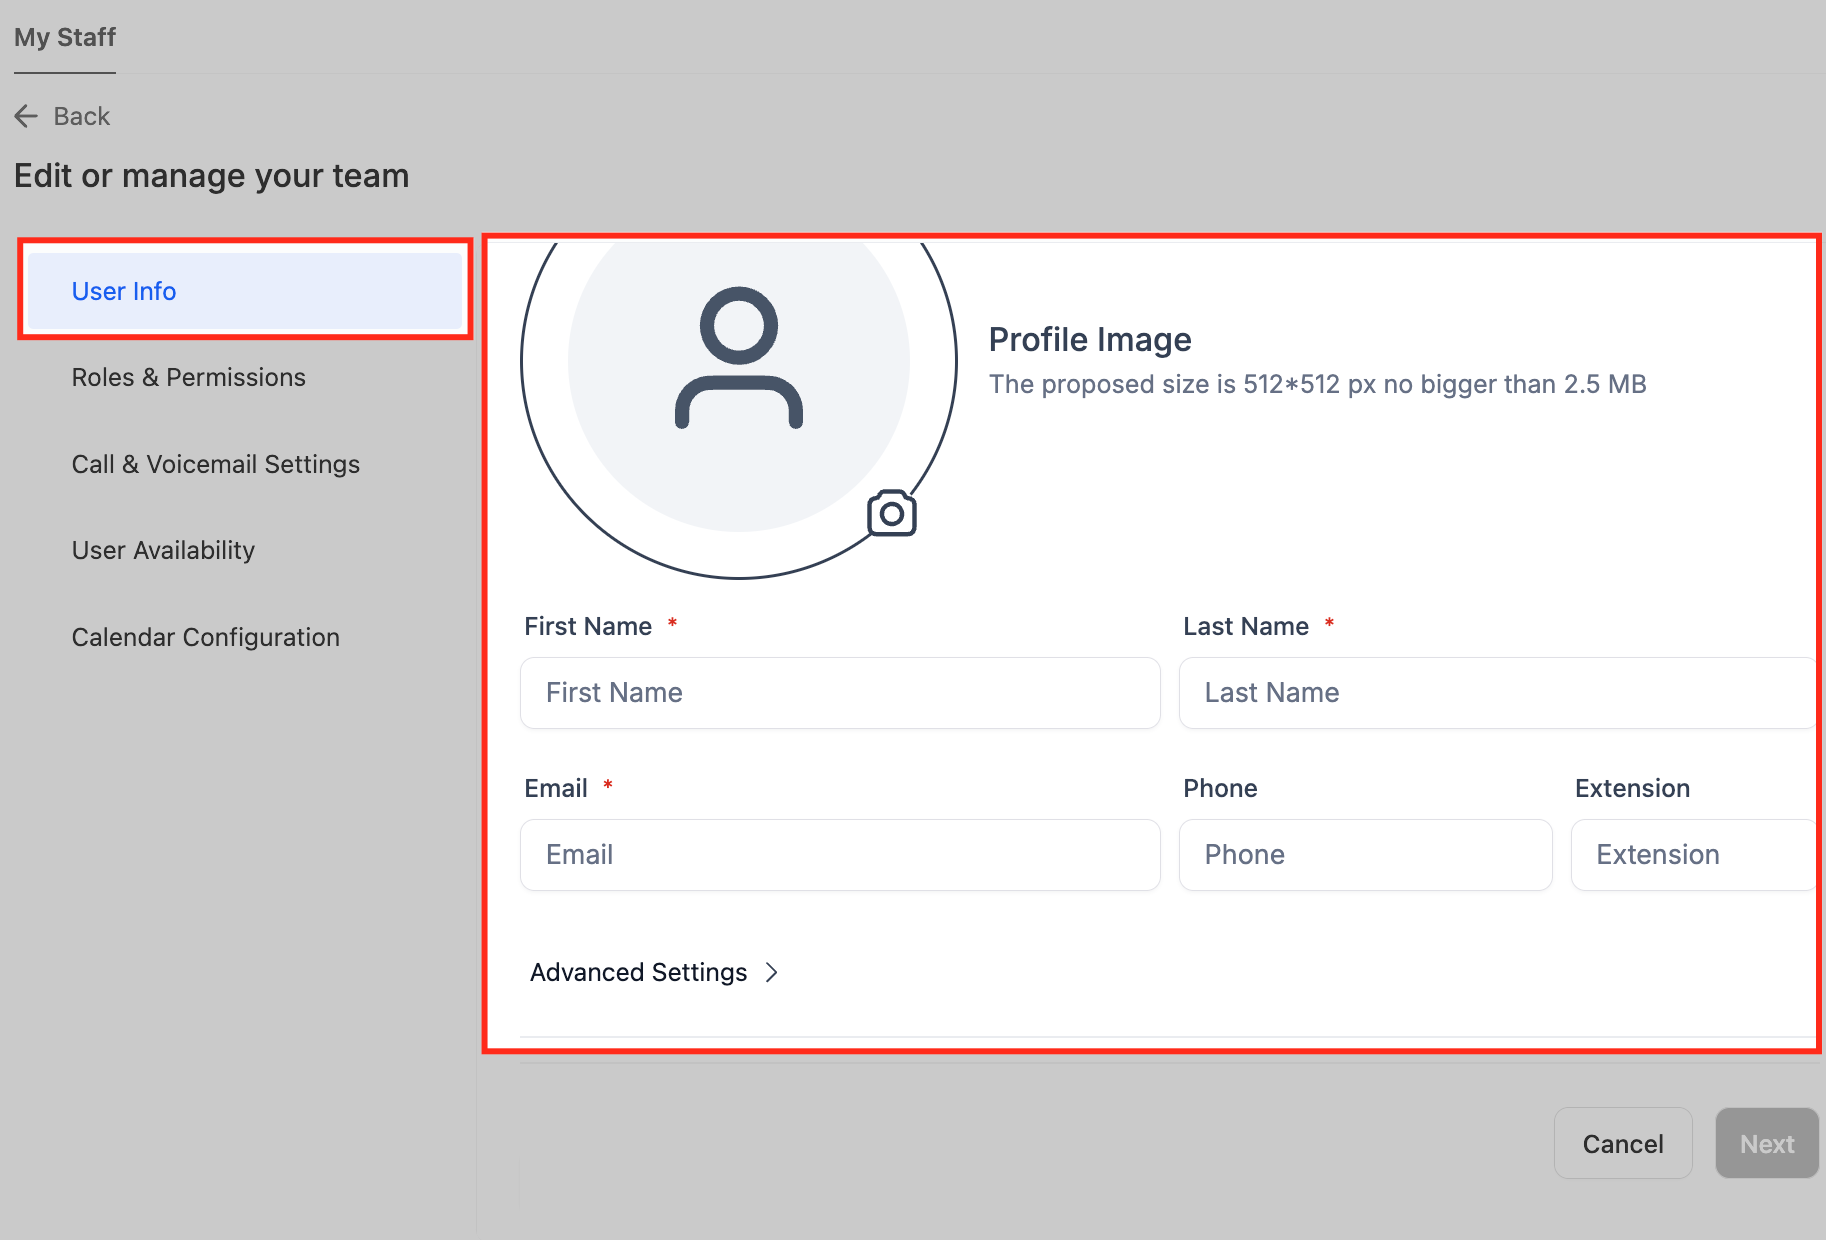
- Navigate Settings > My Staff > Add User from the subaccount dashboard.
- Enter the barber’s name, email address, and extension.
- Set the appropriate user permissions.
- Define the barber’s working days and hours.
- Click Save to store the new staff record.
Create service groups
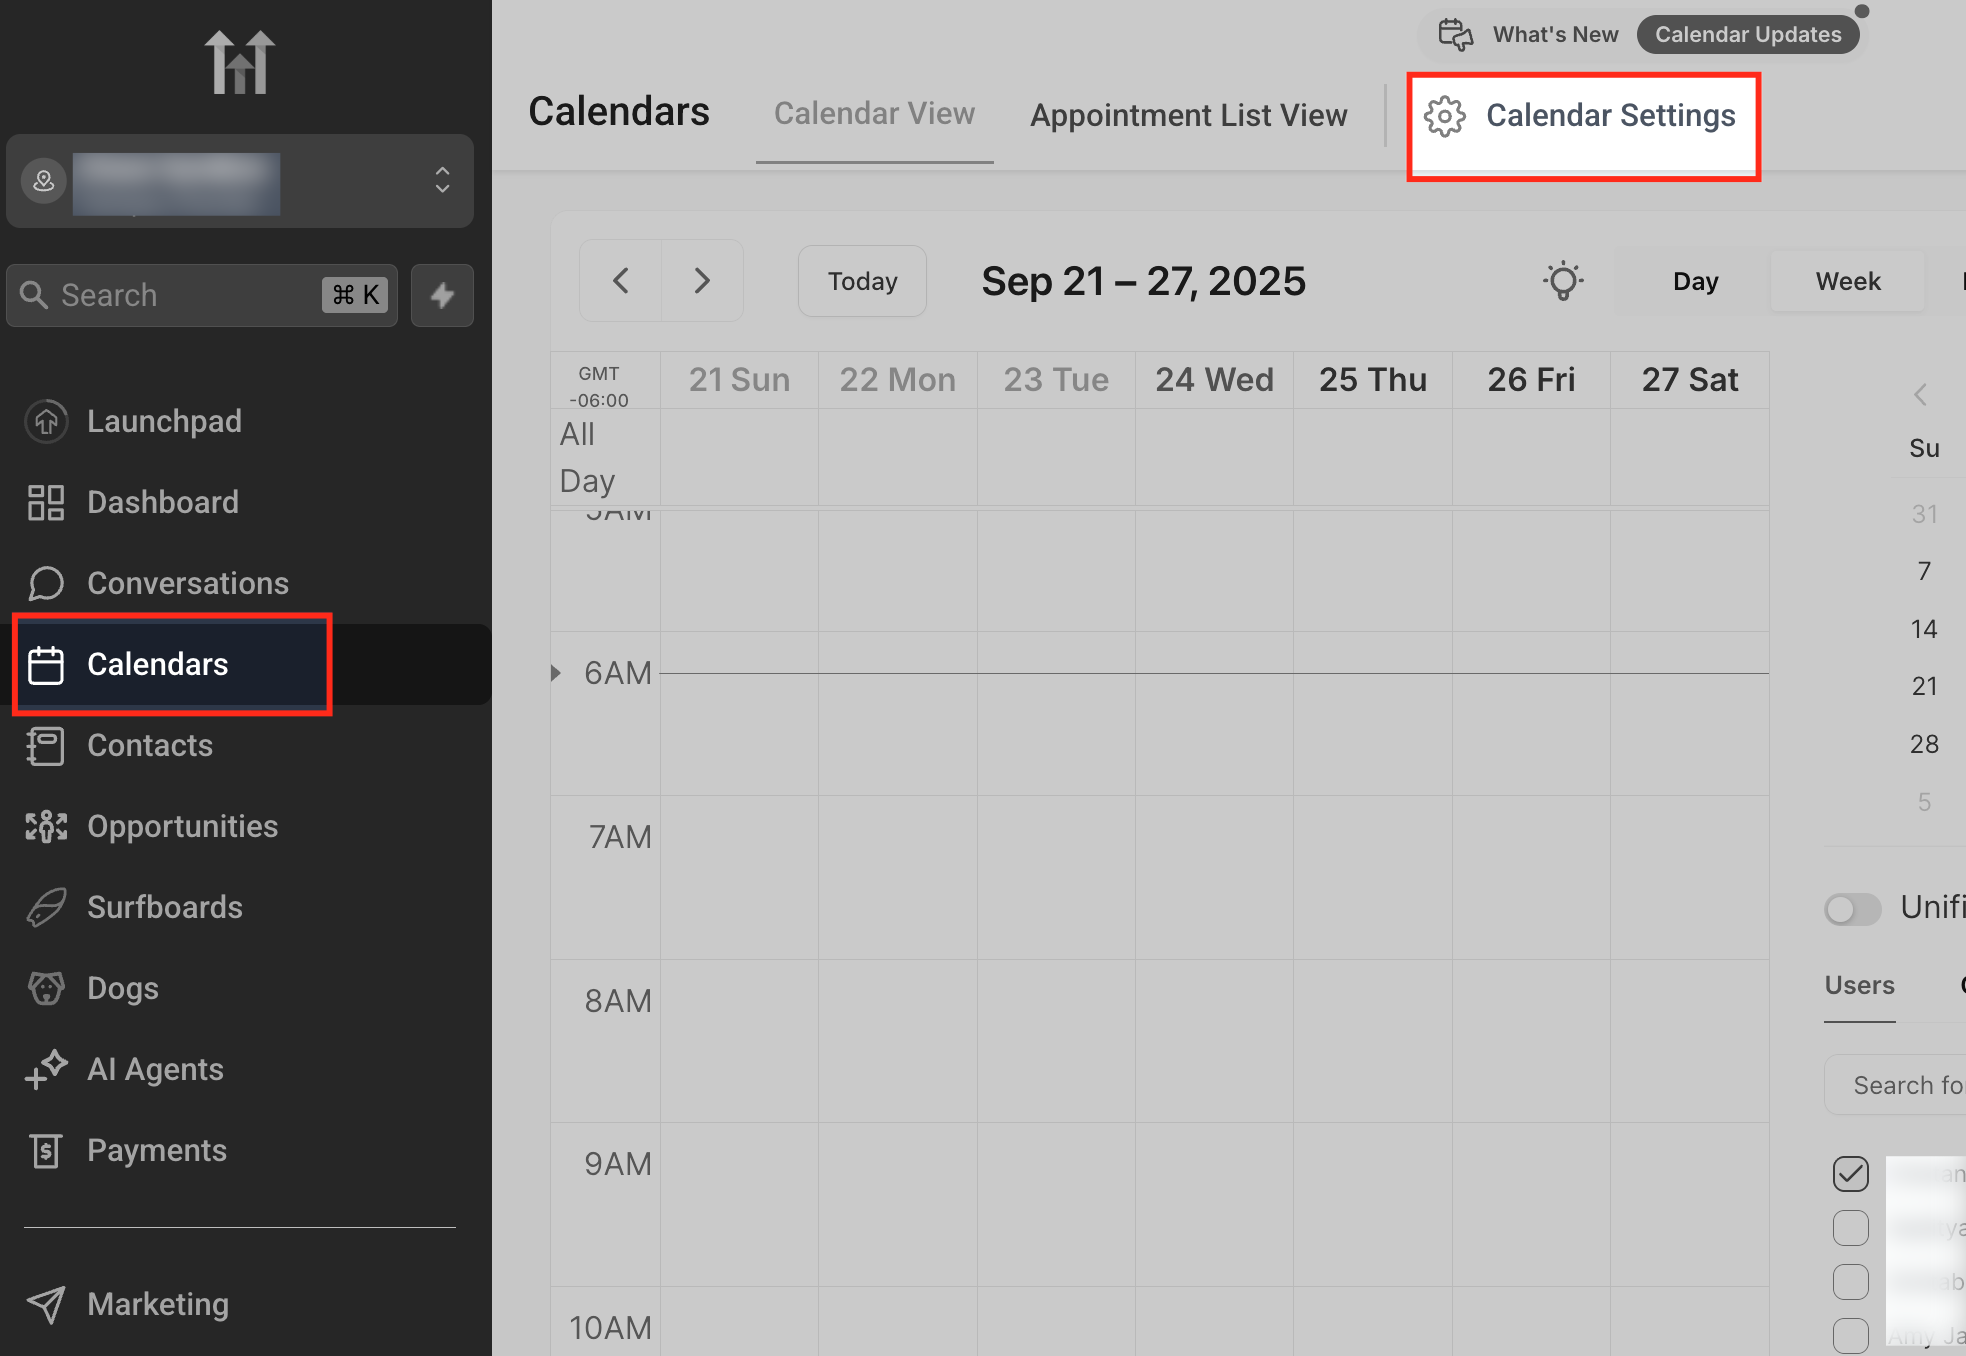
- Open Calendar Settings from the Calendars menu by clicking the button at the top right.
- Go to Preferences > Account Preference and toggle the Service Menu option on.
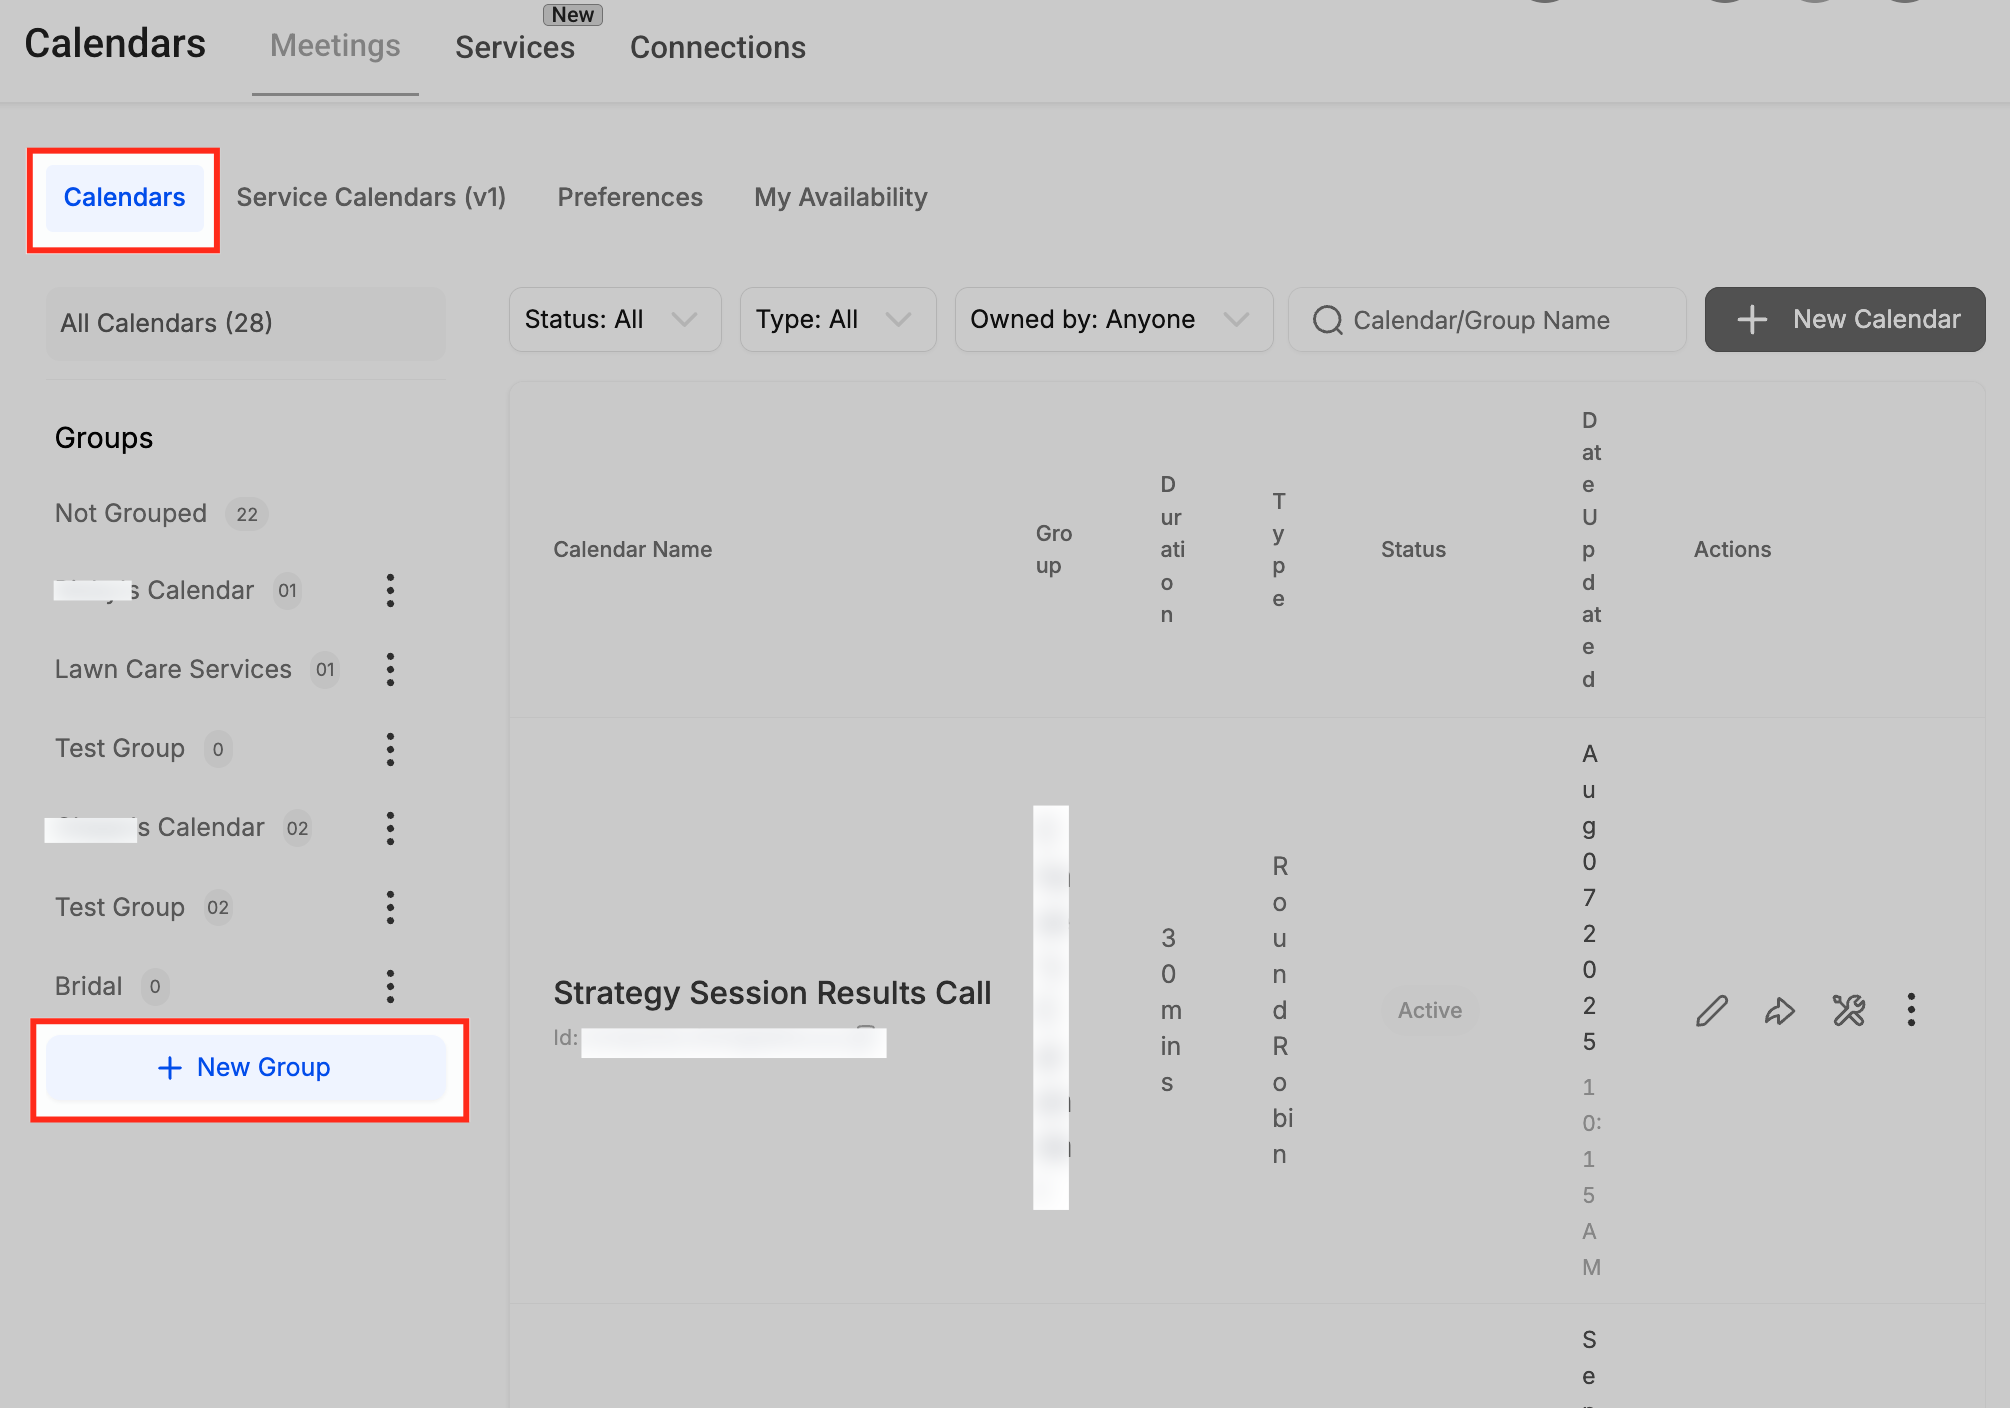
- In the Calendars tab, click the + New Group button on the left sidebar.
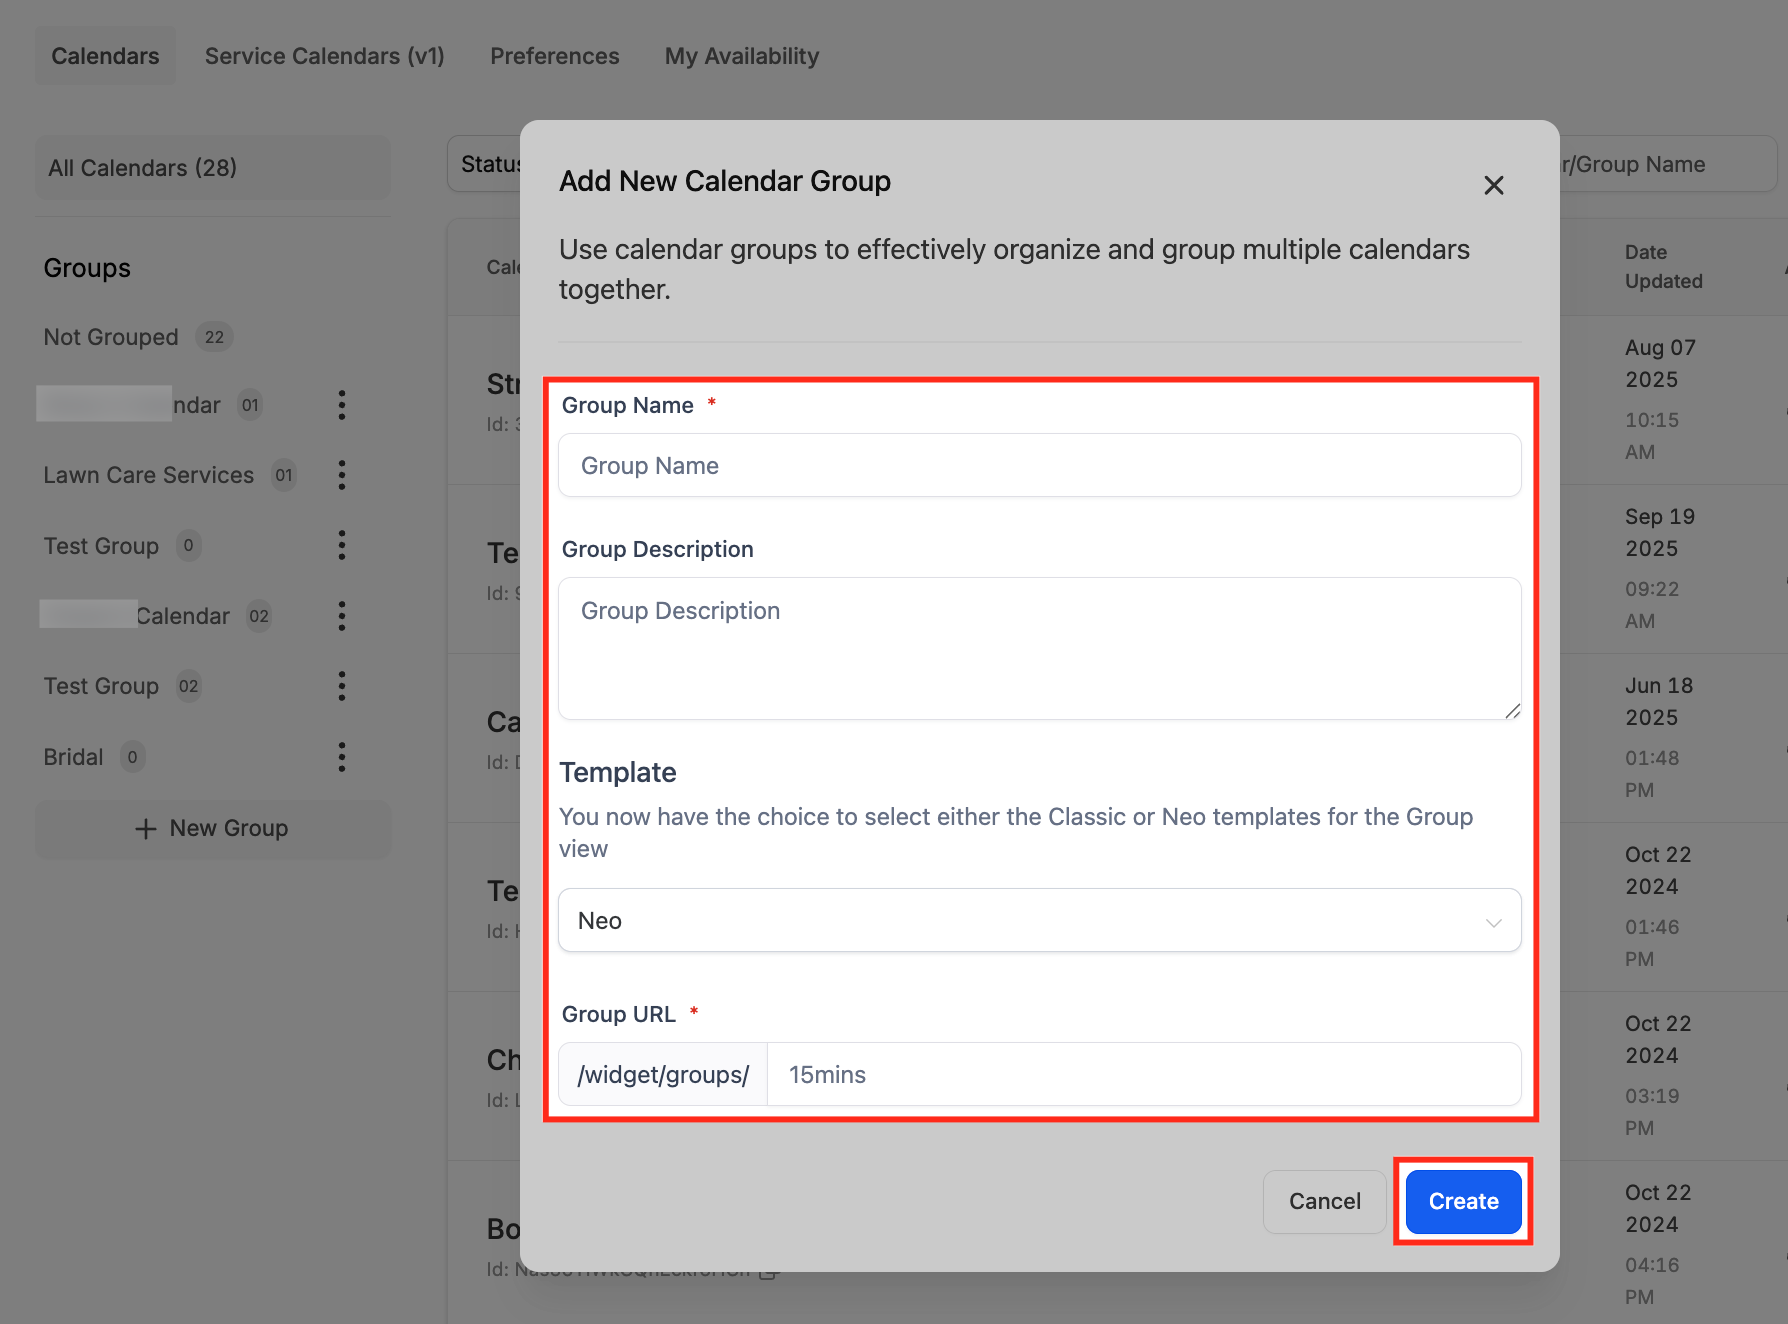
- Enter the Group Name, Description, and URL slug in the pop up form.
- Select a template type (Classic or Neo) and click Create to finalize the group.
Create a service calendar
- Select the desired group from the left sidebar and press Create Calendar.
- Navigate to Calendars > Service Menu > Create Service Menu.
- Click Service Booking from the list of calendar types.
- Provide basic service details such as name, assigned staff, custom URL, duration, and availability.
- Open Advanced Settings to adjust additional options, then save the calendar.
Assign rooms and equipment
- In the Rooms tab, choose a physical space, such as a chair or station, and assign it to the service.
- In the Equipment tab, link required tools like razors or dryers and set the available quantity.
- Save the assignments to lock the resources for future bookings.
Create a service menu
- Go to Meetings > Service Calendars (v1) > Service Menu to open the menu builder.
- Click the + Create Service Menu button in the top right corner.
- Enter the Service Menu name, description, URL slug, select a form, and toggle the Consent checkbox if needed.
- Under Additional Options, toggle Enable Add Guests, Enable Multiple Service Selection, and Enable Staff Selection.
- Click Select Services and choose the groups or calendars you want to include.
- Open Arrange your services and drag handles to reorder the items as desired.
07What it looks like in HighLevel
08Settings that matter
- Service Menu. Activates the service based booking system, allowing you to create service calendars and a combined booking page.
- Enable Add Guests. Lets clients add extra guests when they book a service.
- Enable Multiple Service Selection. Allows customers to choose more than one service in a single appointment.
- Enable Staff Selection. Gives clients the option to pick a specific barber or staff member for their booking.
09Things to know before you rely on it
- A service calendar cannot be saved without at least one staff member assigned.
- Time slots will not appear if staff availability, assigned rooms, or equipment are missing.
- The Service Menu must be turned on in Preferences before groups or calendars can be created.
10If something goes wrong
- Cannot save a service calendar. Assign at least one staff member to the service before attempting to save.
- No time slots showing for a service. Verify that staff availability is set and that rooms and equipment have been assigned to the service.
11How it connects to the rest of HighLevel
- General guide for creating service calendars in HighLevel Service calendar setup guide
- Sync HighLevel calendars with Google Calendar for unified scheduling Google Calendar integration
- Embed a HighLevel calendar on your website using HTML code HTML embed guide
Michael's take

Wondering if a service calendar is worth the effort for a busy barbershop? It gives you a clean way to let clients pick times, chairs and barbers without the back and forth of phone calls, and it keeps the schedule from overlapping.
The first thing I would set up is the staff list with exact working hours, then lock down rooms and equipment for each service. A quick test of a few dummy bookings confirms everything lines up before you open the link to real customers.