
01Who this is for
- Photographers who need separate booking pages for portrait, event, and studio sessions to keep staff and gear organized.
- Studio owners who manage multiple shooting spaces and want to avoid double booking rooms or lighting kits.
- Marketing teams that want a branded, image rich booking experience for clients across different photography services.
02Service calendars, explained
Service Calendars are scheduling modules inside HighLevel that let you specify a service, pick the photographer(s) who can perform it, and attach resources such as rooms or equipment. When a client books, the system checks staff hours, room availability, and gear quantities before confirming a slot. The feature lives under the Calendars menu, where you can access group settings, individual calendars, and the Service Menu builder.
Creating a Service Calendar involves selecting a group, defining the service basics, customizing details, and linking the appropriate room and equipment. After setup, the calendar appears in the Service Calendars (v1) list and can be edited from there. The Service Menu aggregates several calendars into one public page, allowing clients to pick multiple services or a preferred photographer.
03How businesses use service calendars
- Wedding photography studio. Add each photographer as a staff member, set their weekly hours, then create a group called "Weddings". Build separate calendars for "Ceremony Coverage" and "Reception Photography", assign the appropriate studio rooms and lighting kits, and finally bundle them in a Service Menu so couples can book both services in one flow.
- Corporate headshot provider. Create a group named "Headshots" and a calendar for "30 minute portrait session". Assign the headshot photographer, the dedicated studio booth, and the lighting equipment. Enable the Service Menu and turn on staff selection so corporate clients can choose their preferred photographer when booking.
- Product photography boutique. Set up staff for each specialist, then make a group called "Product Shoots". Add calendars for "Small item photography" and "Large item studio" and attach the corresponding backdrop rooms and camera gear. Use the Service Menu to let clients select multiple shoot types in a single appointment.
04The numbers and rules that matter
- Service Menu path: Meetings > Service Calendars (v1) > Service Menu.
- Advanced Settings panel includes Service Details, Availability, Forms & Payment, Notifications, Customizations, and Rooms & Equipment.
05Before you start
- At least one photographer must be added as a staff member before any calendar can be saved.
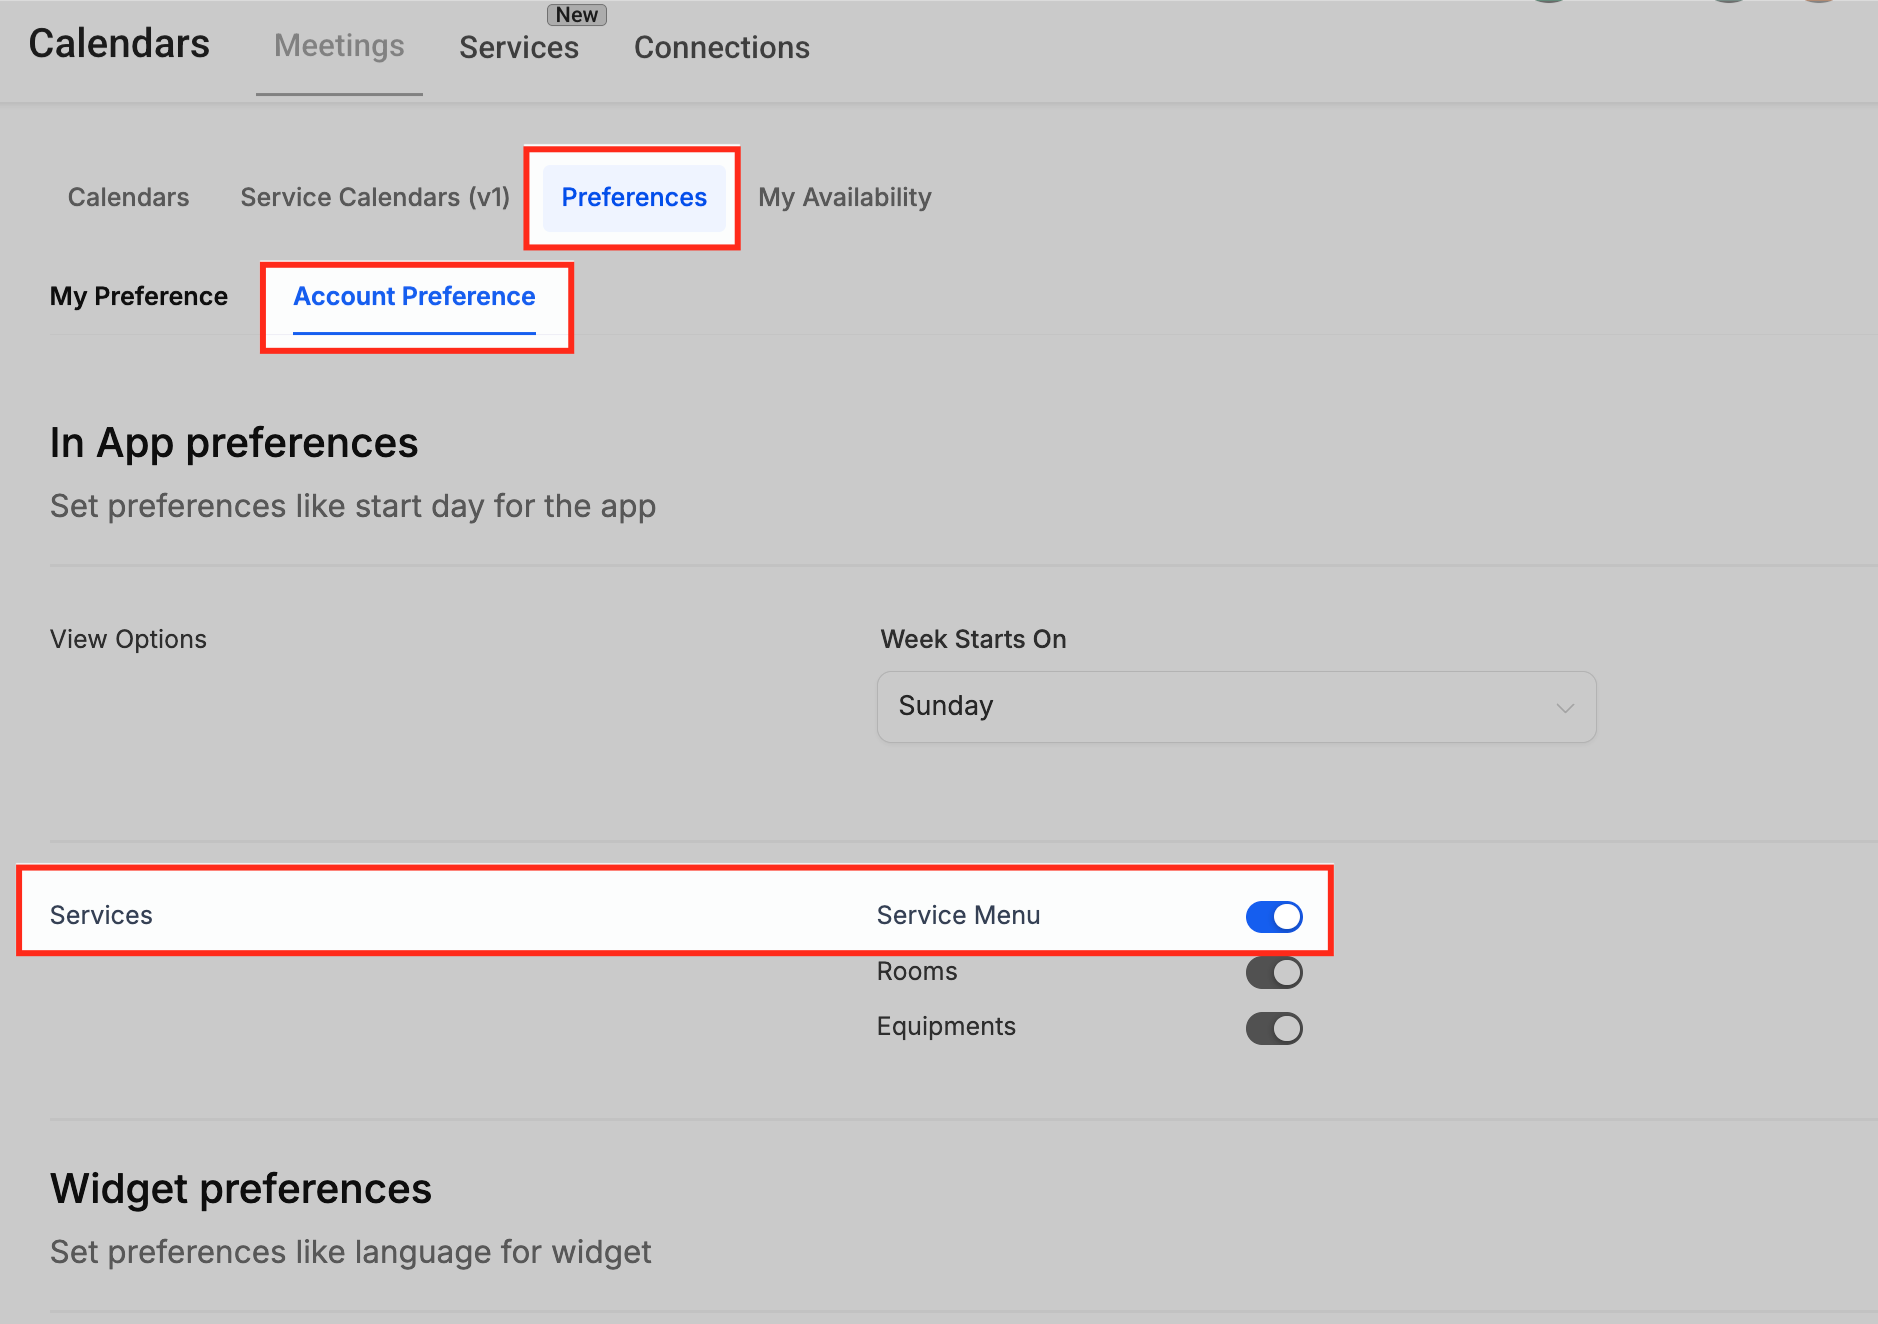
- The Service Menu toggle must be enabled in Preferences > Account Preference before groups can be created.
06How to set up and use service calendars in HighLevel
Add staff member and set availability
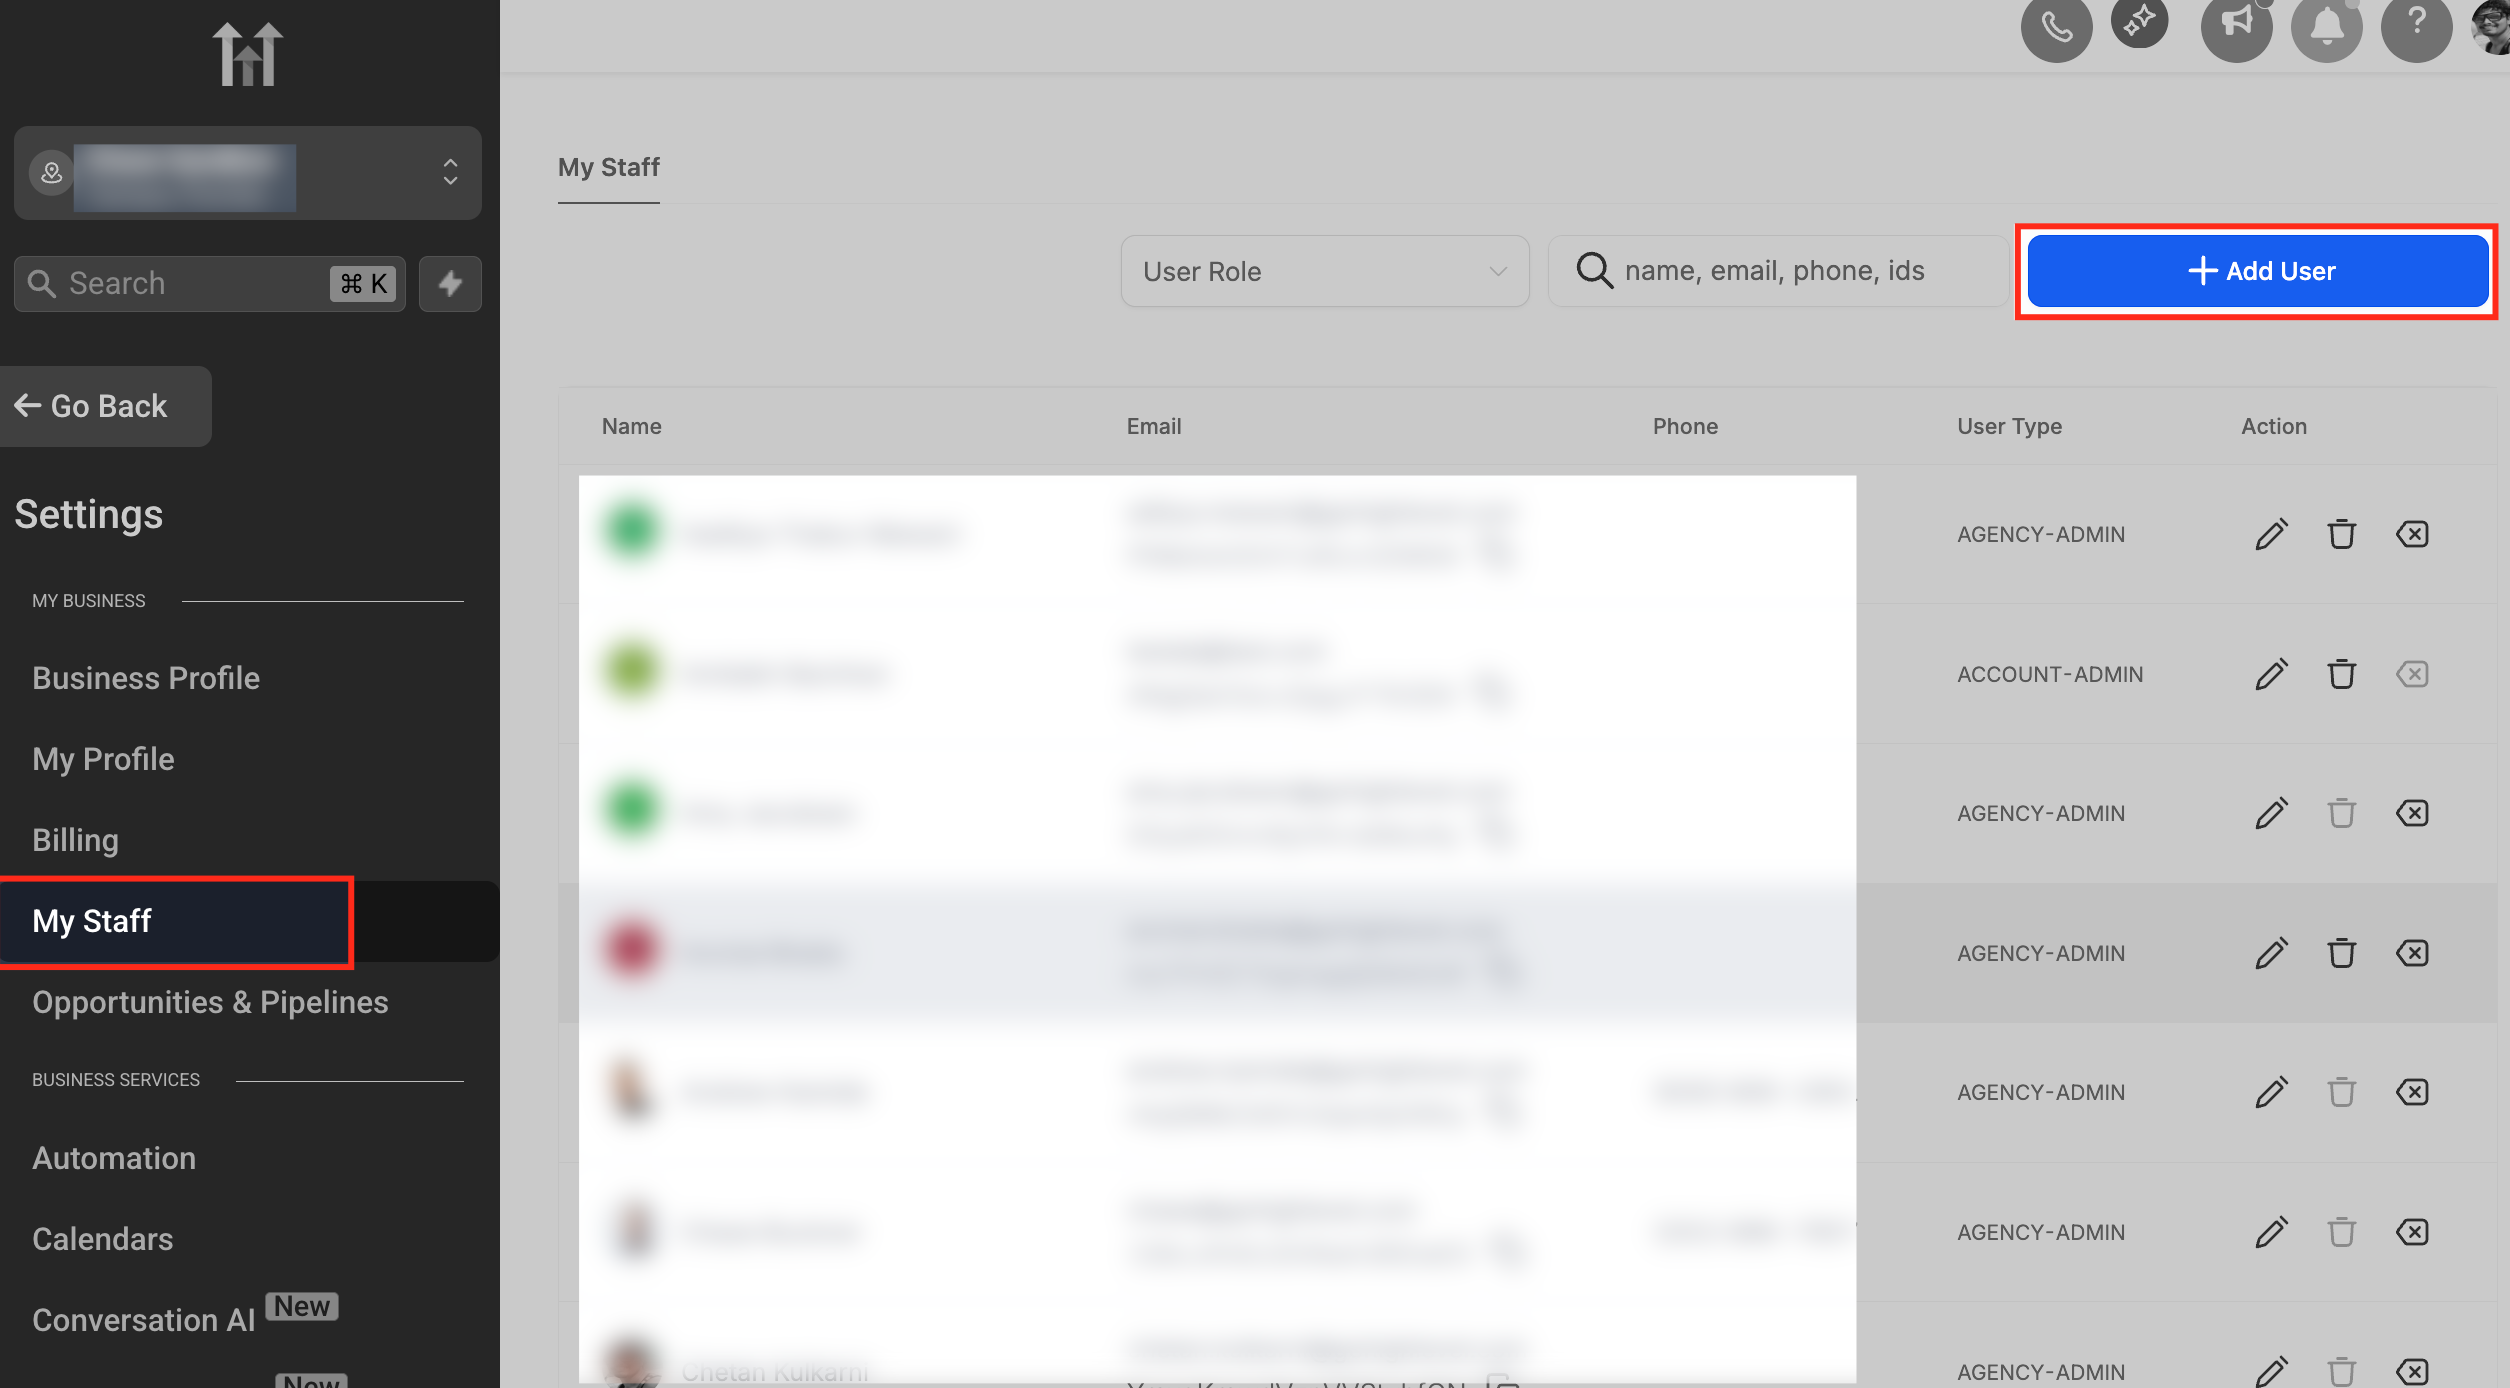
- Open Settings and select My Staff.
- Click the Add User button.
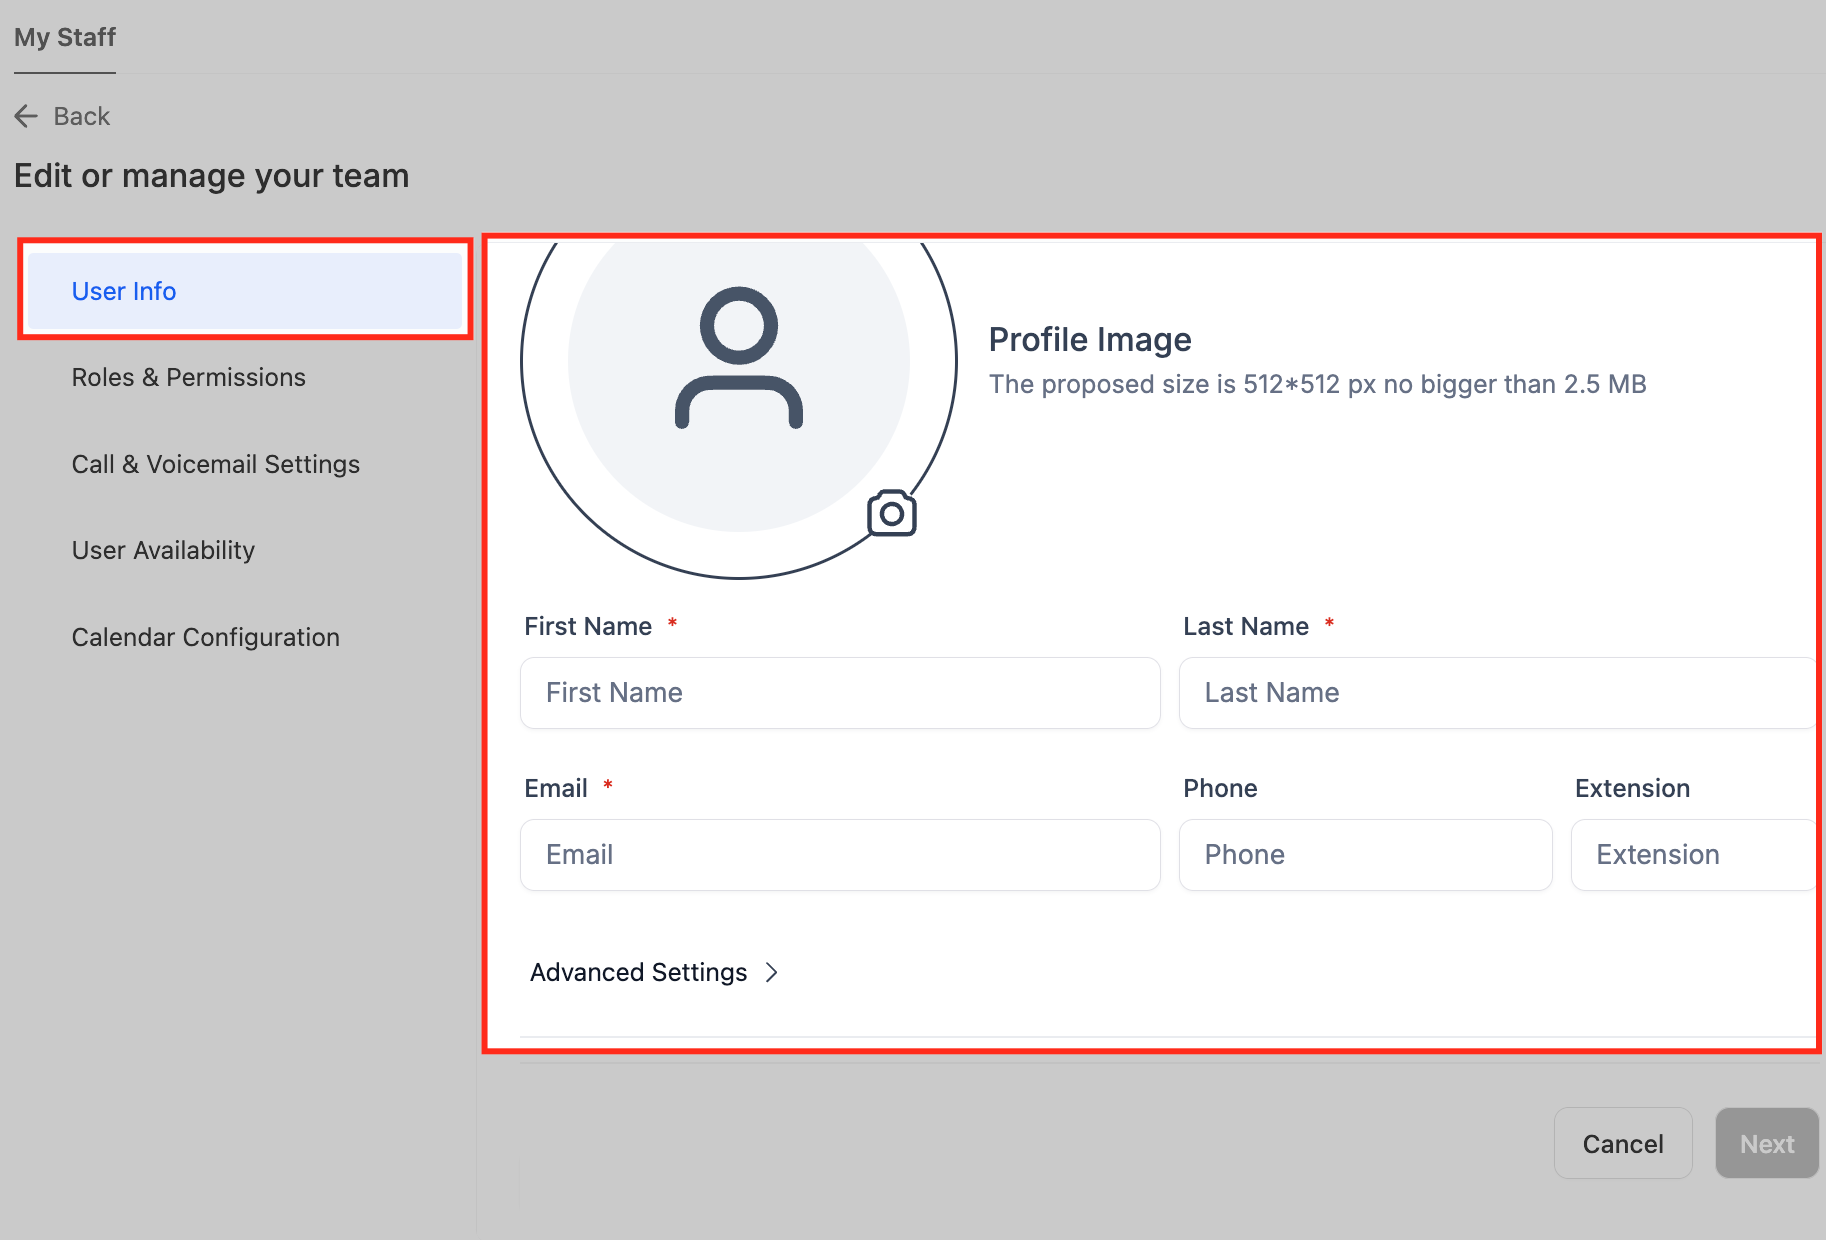
- Enter the photographer’s name, email address, and optional extension.
- Choose the appropriate permission level for the user.
- Mark the days and hours the photographer works and save the record.
Create a service group
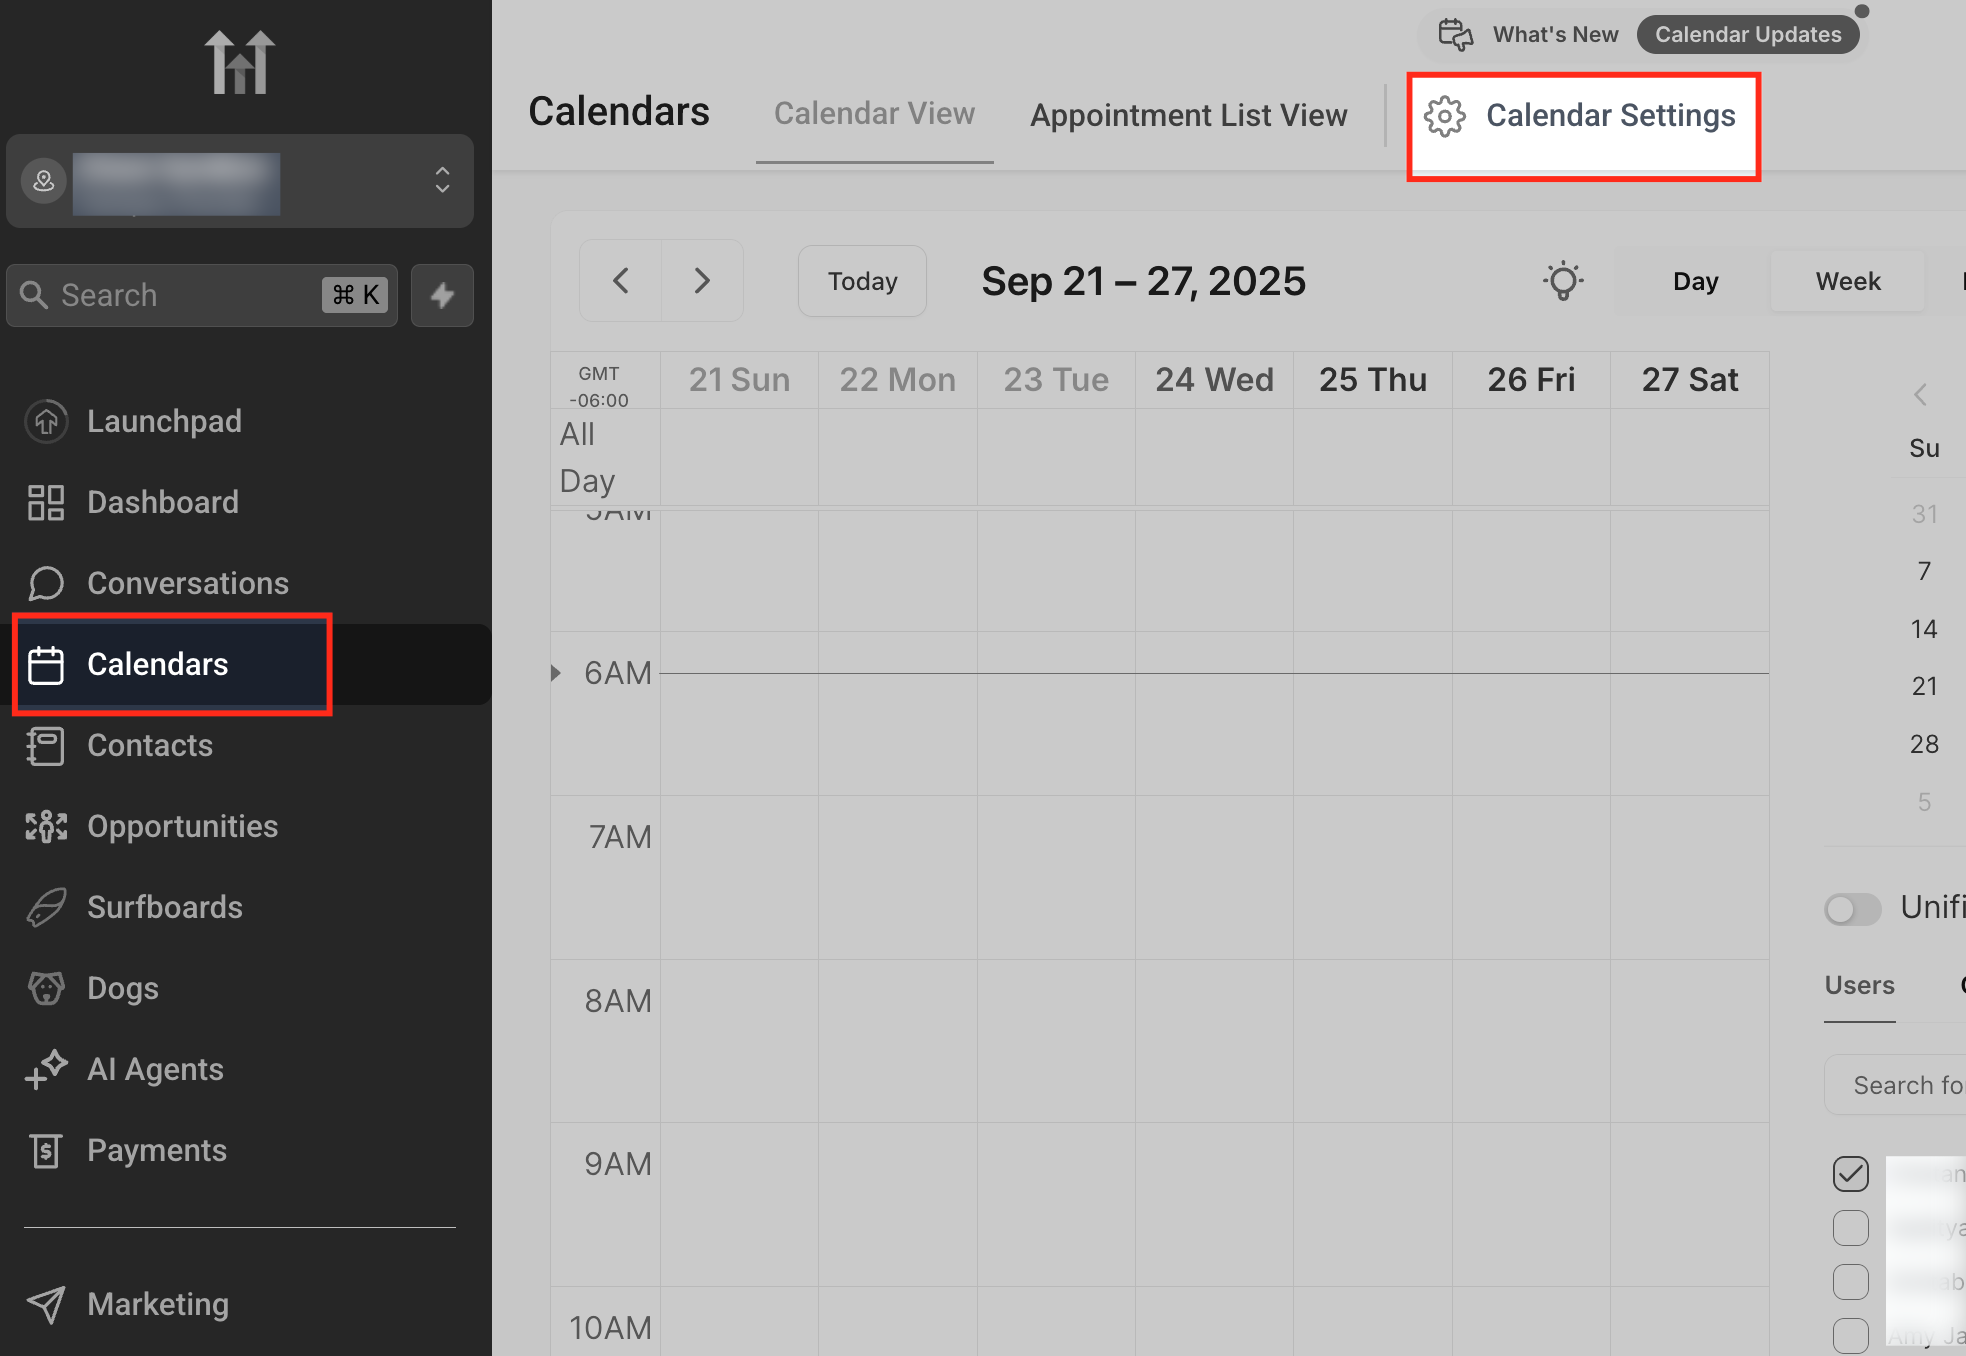
- Open the Calendars menu and launch Calendar Settings.
- Go to Preferences > Account Preference and toggle the Service Menu option on.
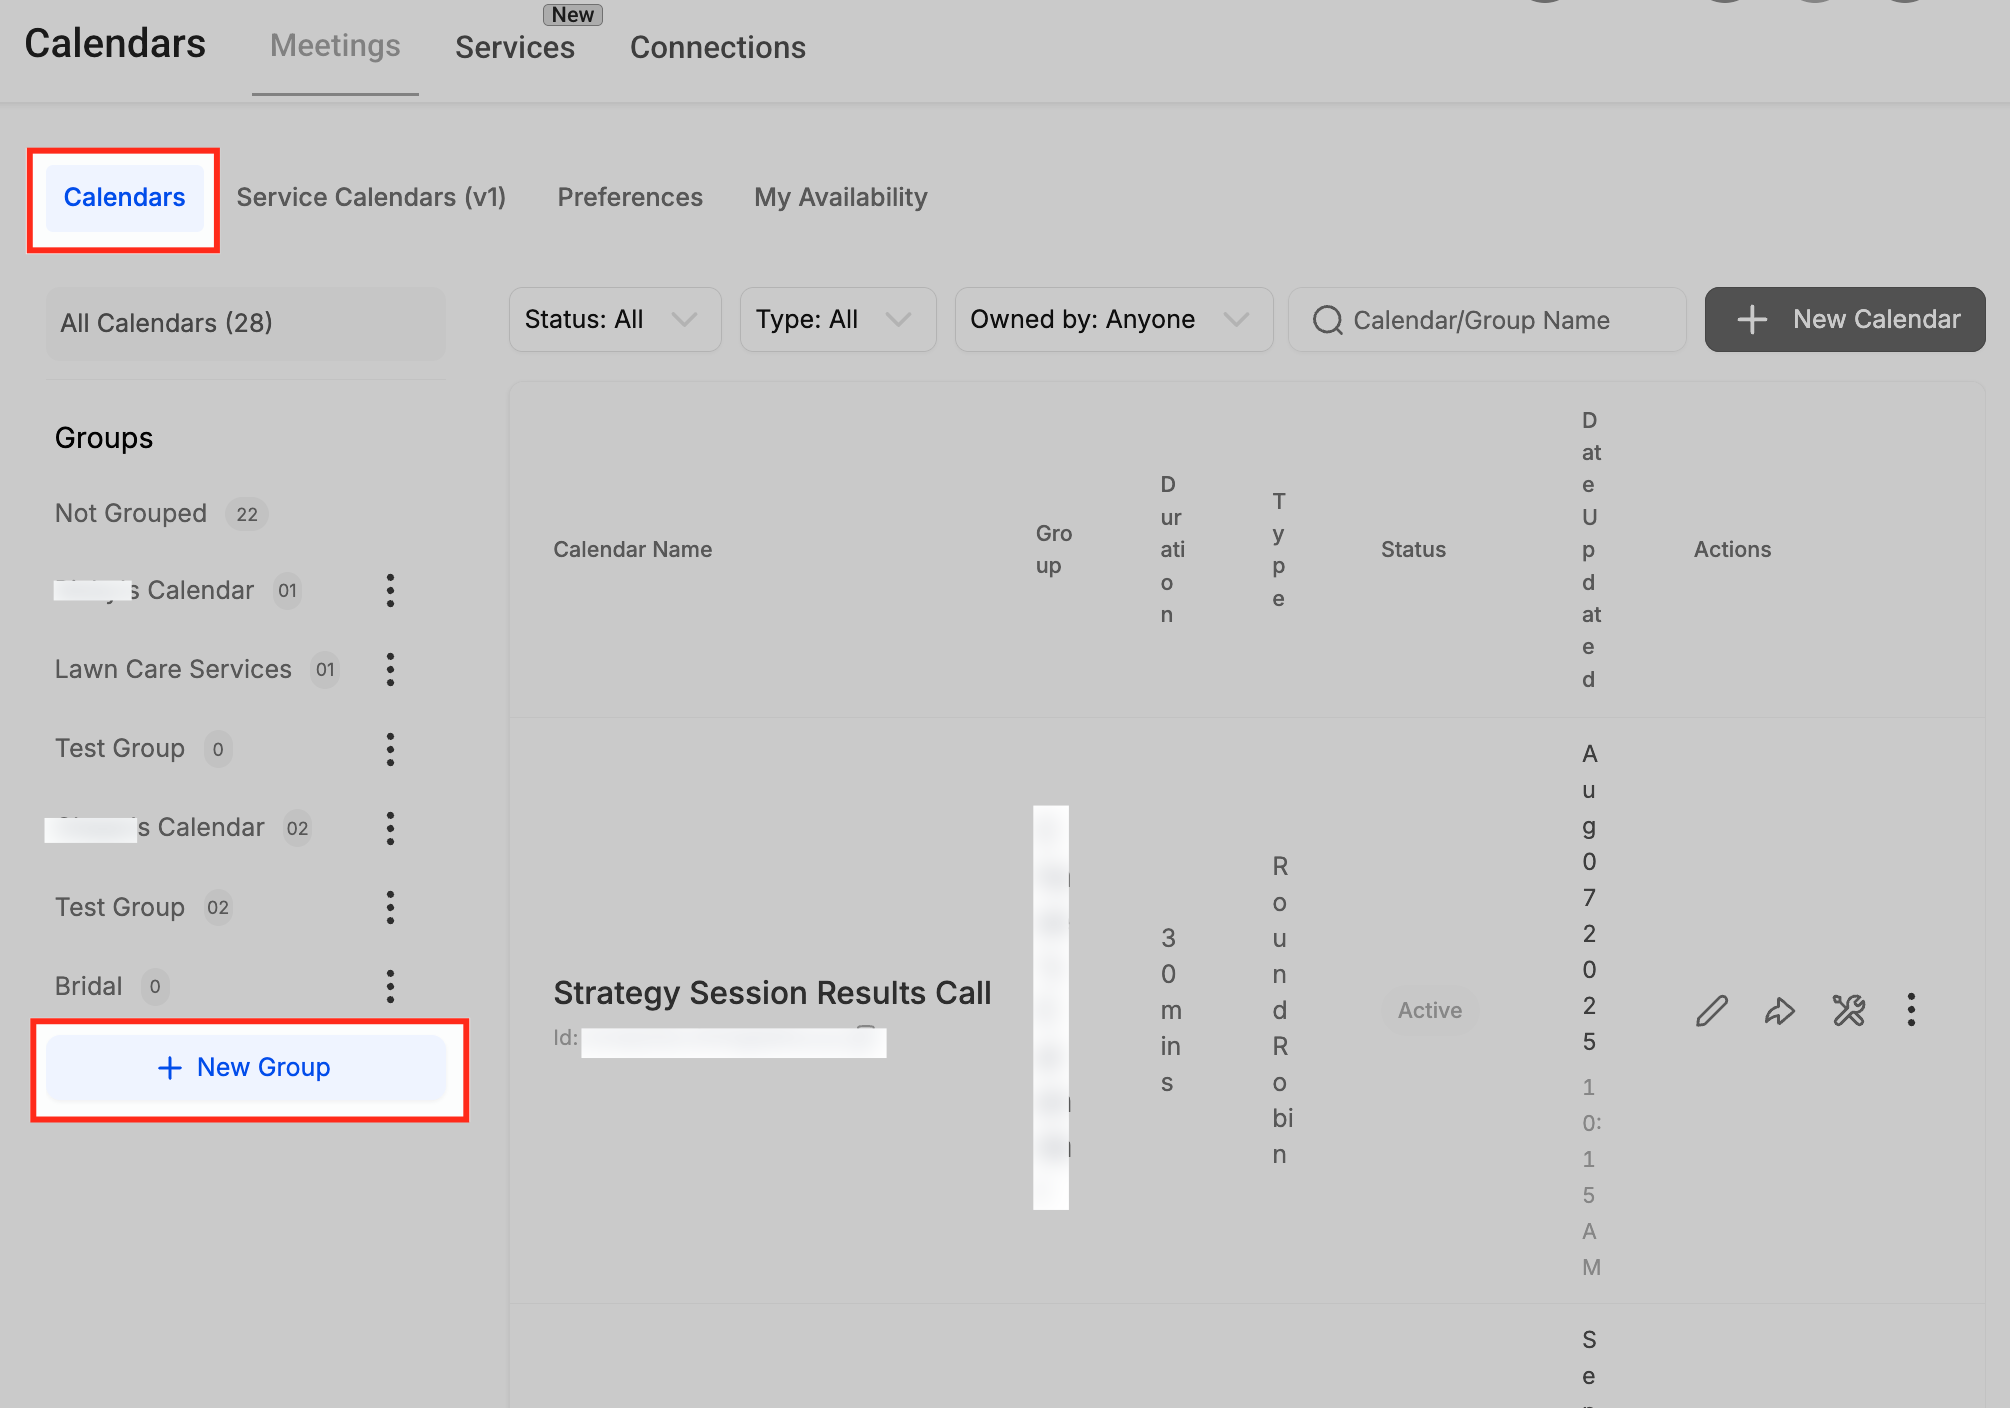
- Click the + New Group button in the left sidebar.
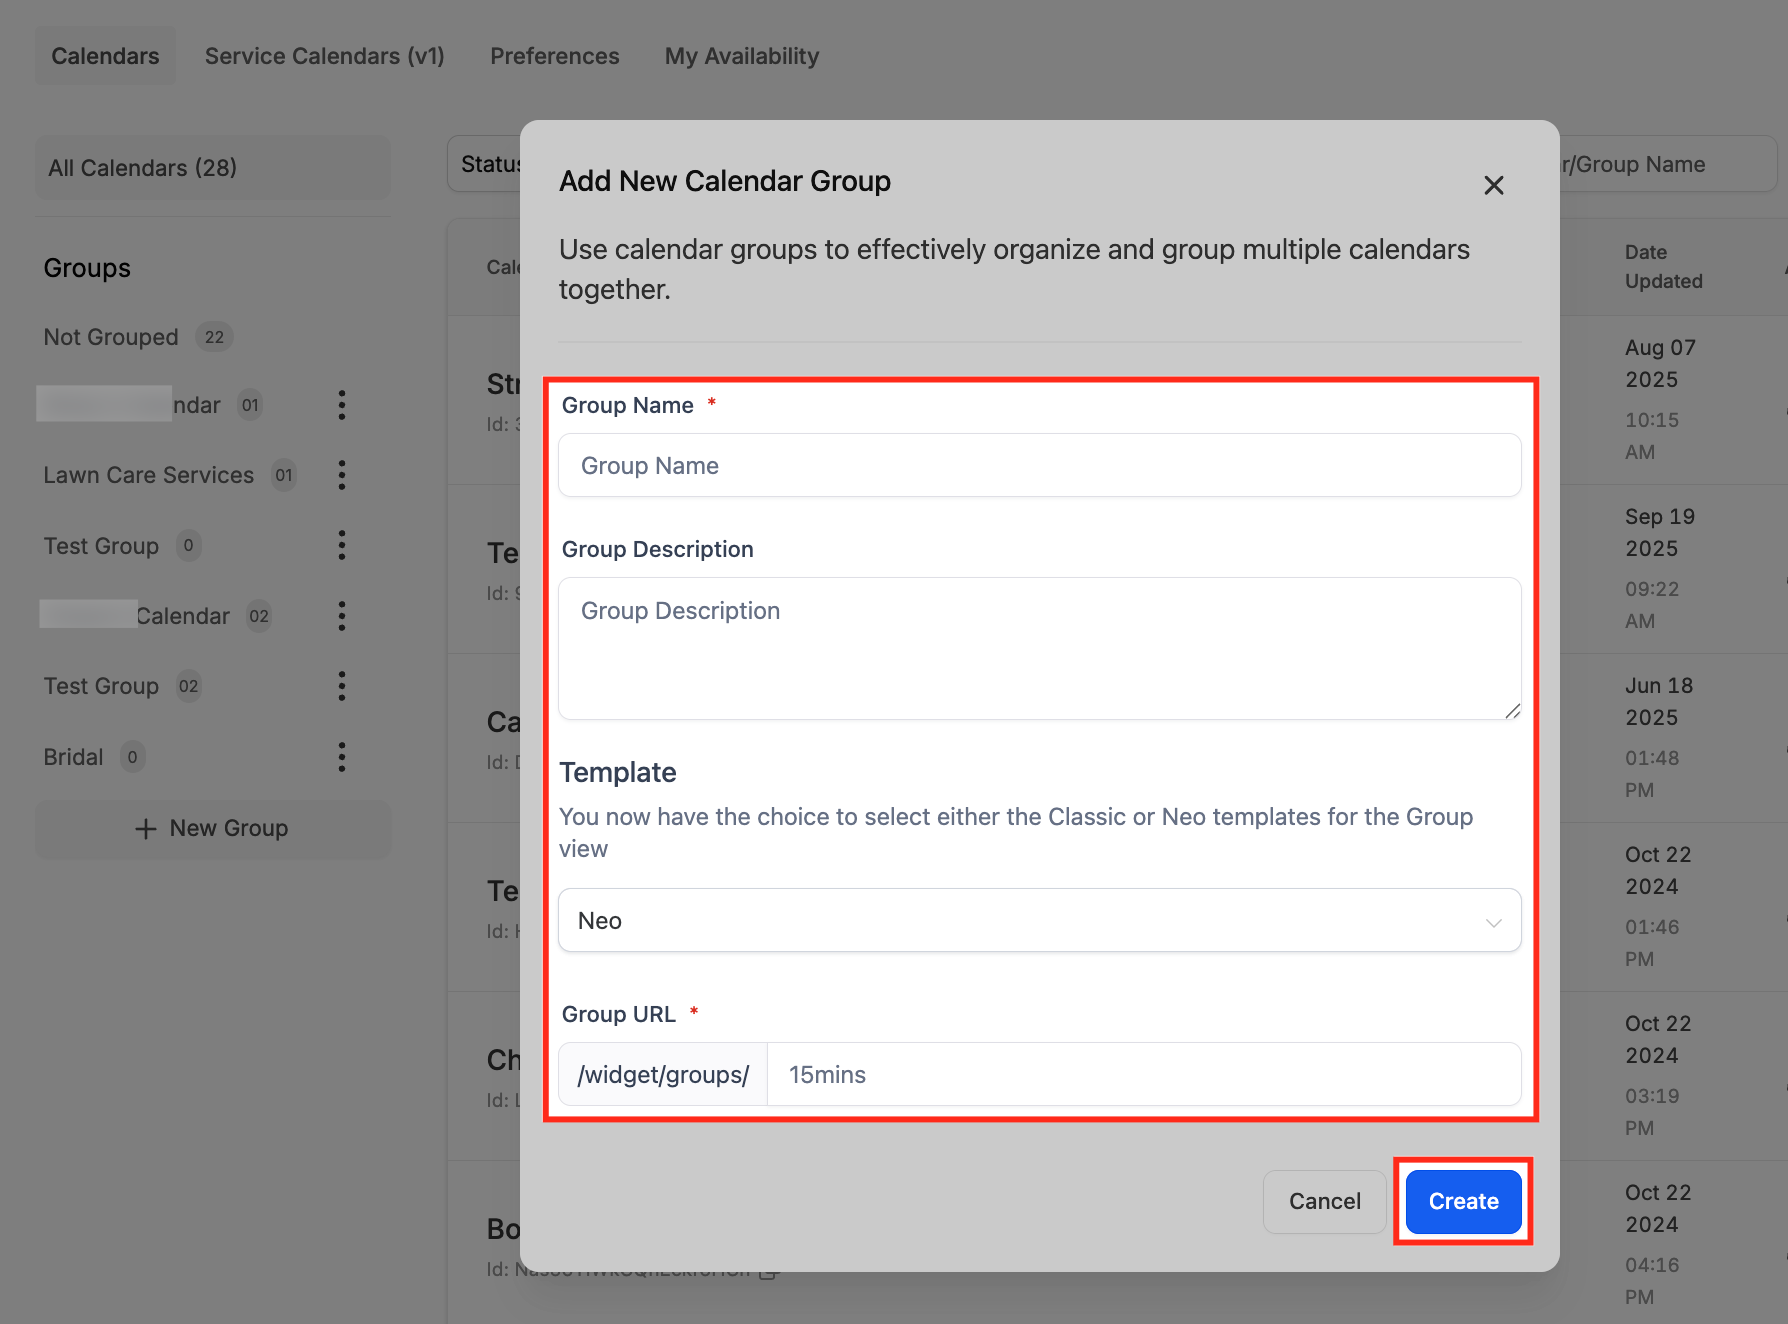
- Fill in the group name, description, and URL slug in the dialog.
- Select either the Classic or Neo template and confirm by clicking Create.
Create a service calendar
- Select the desired group from the left sidebar and press Create Calendar.
- Navigate to Calendars > Service Menu > Create Service Menu and pick Service Booking.
- Enter the service name, assign staff, set a custom URL, define duration, and set availability.
- Open Advanced Settings, then upload a logo, write a description, assign the group, and save the custom URL.
- Configure appointment details: set the invite title, assign photographers, choose a meeting location, and pick a calendar color.
Create a service menu
- Go to Meetings > Service Calendars (v1) > Service Menu.
- Click the + Create Service Menu button in the upper right corner.
- Provide a menu name, description, and URL slug, select a form, and enable the consent option if required.
- Turn on Add Guests, Multiple Service Selection, and Staff Selection under Additional Options.
- Press Select Services and choose the groups or individual calendars to appear in the menu.
- Open the Arrange your services panel and drag items to set the display order.
- Save the menu to generate the public link for client bookings.
07What it looks like in HighLevel
08Settings that matter
- Service Menu. Activates the service based booking workflow, allowing the creation of service calendars and menus.
- Enable Add Guests. Lets clients include additional attendees when they book a service.
- Enable Multiple Service Selection. Allows a single booking to contain more than one service from the menu.
- Enable Staff Selection. Gives clients the option to pick a specific photographer during checkout.
- Appointment Invite Title. Defines the subject line that appears on calendar invites for both clients and staff.
09Things to know before you rely on it
- A service calendar cannot be saved until at least one staff member is assigned.
- Only services that have been linked to a group will show up in the Service Menu selection list.
- Rooms and equipment must be assigned to avoid double booking of studio spaces or gear.
10If something goes wrong
- Cannot save a service calendar. Assign at least one photographer to the calendar before attempting to save.
- No time slots appear for a service. Verify that staff availability, assigned rooms, and equipment are correctly set.
11How it connects to the rest of HighLevel
- General guide to creating service calendars in HighLevel Service calendar basics
- HighLevel pricing and plan details Pricing
- Start a 30 day trial of HighLevel Free trial
Michael's take

In my experience, setting up service calendars keeps the scheduling process organized and reduces the chance of accidental double booking.