
Home/HighLevel/Guides/Launch a lead capture funnel
HighLevel Guides · Volume 06 · Pillar 05
How to launch a lead capture funnel in GoHighLevel that follows up on its own.
A lead capture funnel is one page, one form and one workflow. The page brings the visitor in, the form takes their details, and the workflow follows up the moment they submit. By the end you will have a published funnel on your own domain, a Meta pixel firing on it, and an automation that runs on every new lead. HighLevel is the same platform many people still search for as GoHighLevel.
What you are building
What you are building and why it matters.
The finished system is a single funnel page on your custom domain with a form built into it. When someone submits the form, HighLevel creates the contact, a Form Submitted workflow sends the follow up, and the funnel event pixel reports the conversion to Meta through the Conversions API. No lead sits untouched and every lead is counted. To qualify those leads automatically, see AI lead qualification. Agencies building funnels for clients can pair this with lead generation for agencies.
- A funnel page live on your own root domain or subdomain with SSL
- A form with Full Name, Email and Phone that saves every submission as a contact
- A Meta pixel installed on the funnel without duplicate events
- A workflow that fires on Form Submitted and sends the first follow up
- A Conversions API action that records each lead as a funnel event in Meta
- A real test submission that passes before you send traffic
Before you start
Before you start have these ready.
Gather these first so you build straight through without stopping.
- Access to a HighLevel subaccount
- A root domain or subdomain you own, with access to its DNS provider
- A decision on whether visitors will use the root domain or a subdomain
- A clear goal for the funnel and the one offer the page will make
- Access to Facebook Business Manager with the correct Ad Account and Page permissions
- The first follow up message you want every lead to receive
Part 01 of 05
Create the funnel from a template.
The funnel is the container for your page. A template gets you a finished design in minutes, so you spend your time on the offer and the form instead of the layout.
- Go to Sites, then Funnels.
- Click New Funnel.
- Select From Template and click Continue.
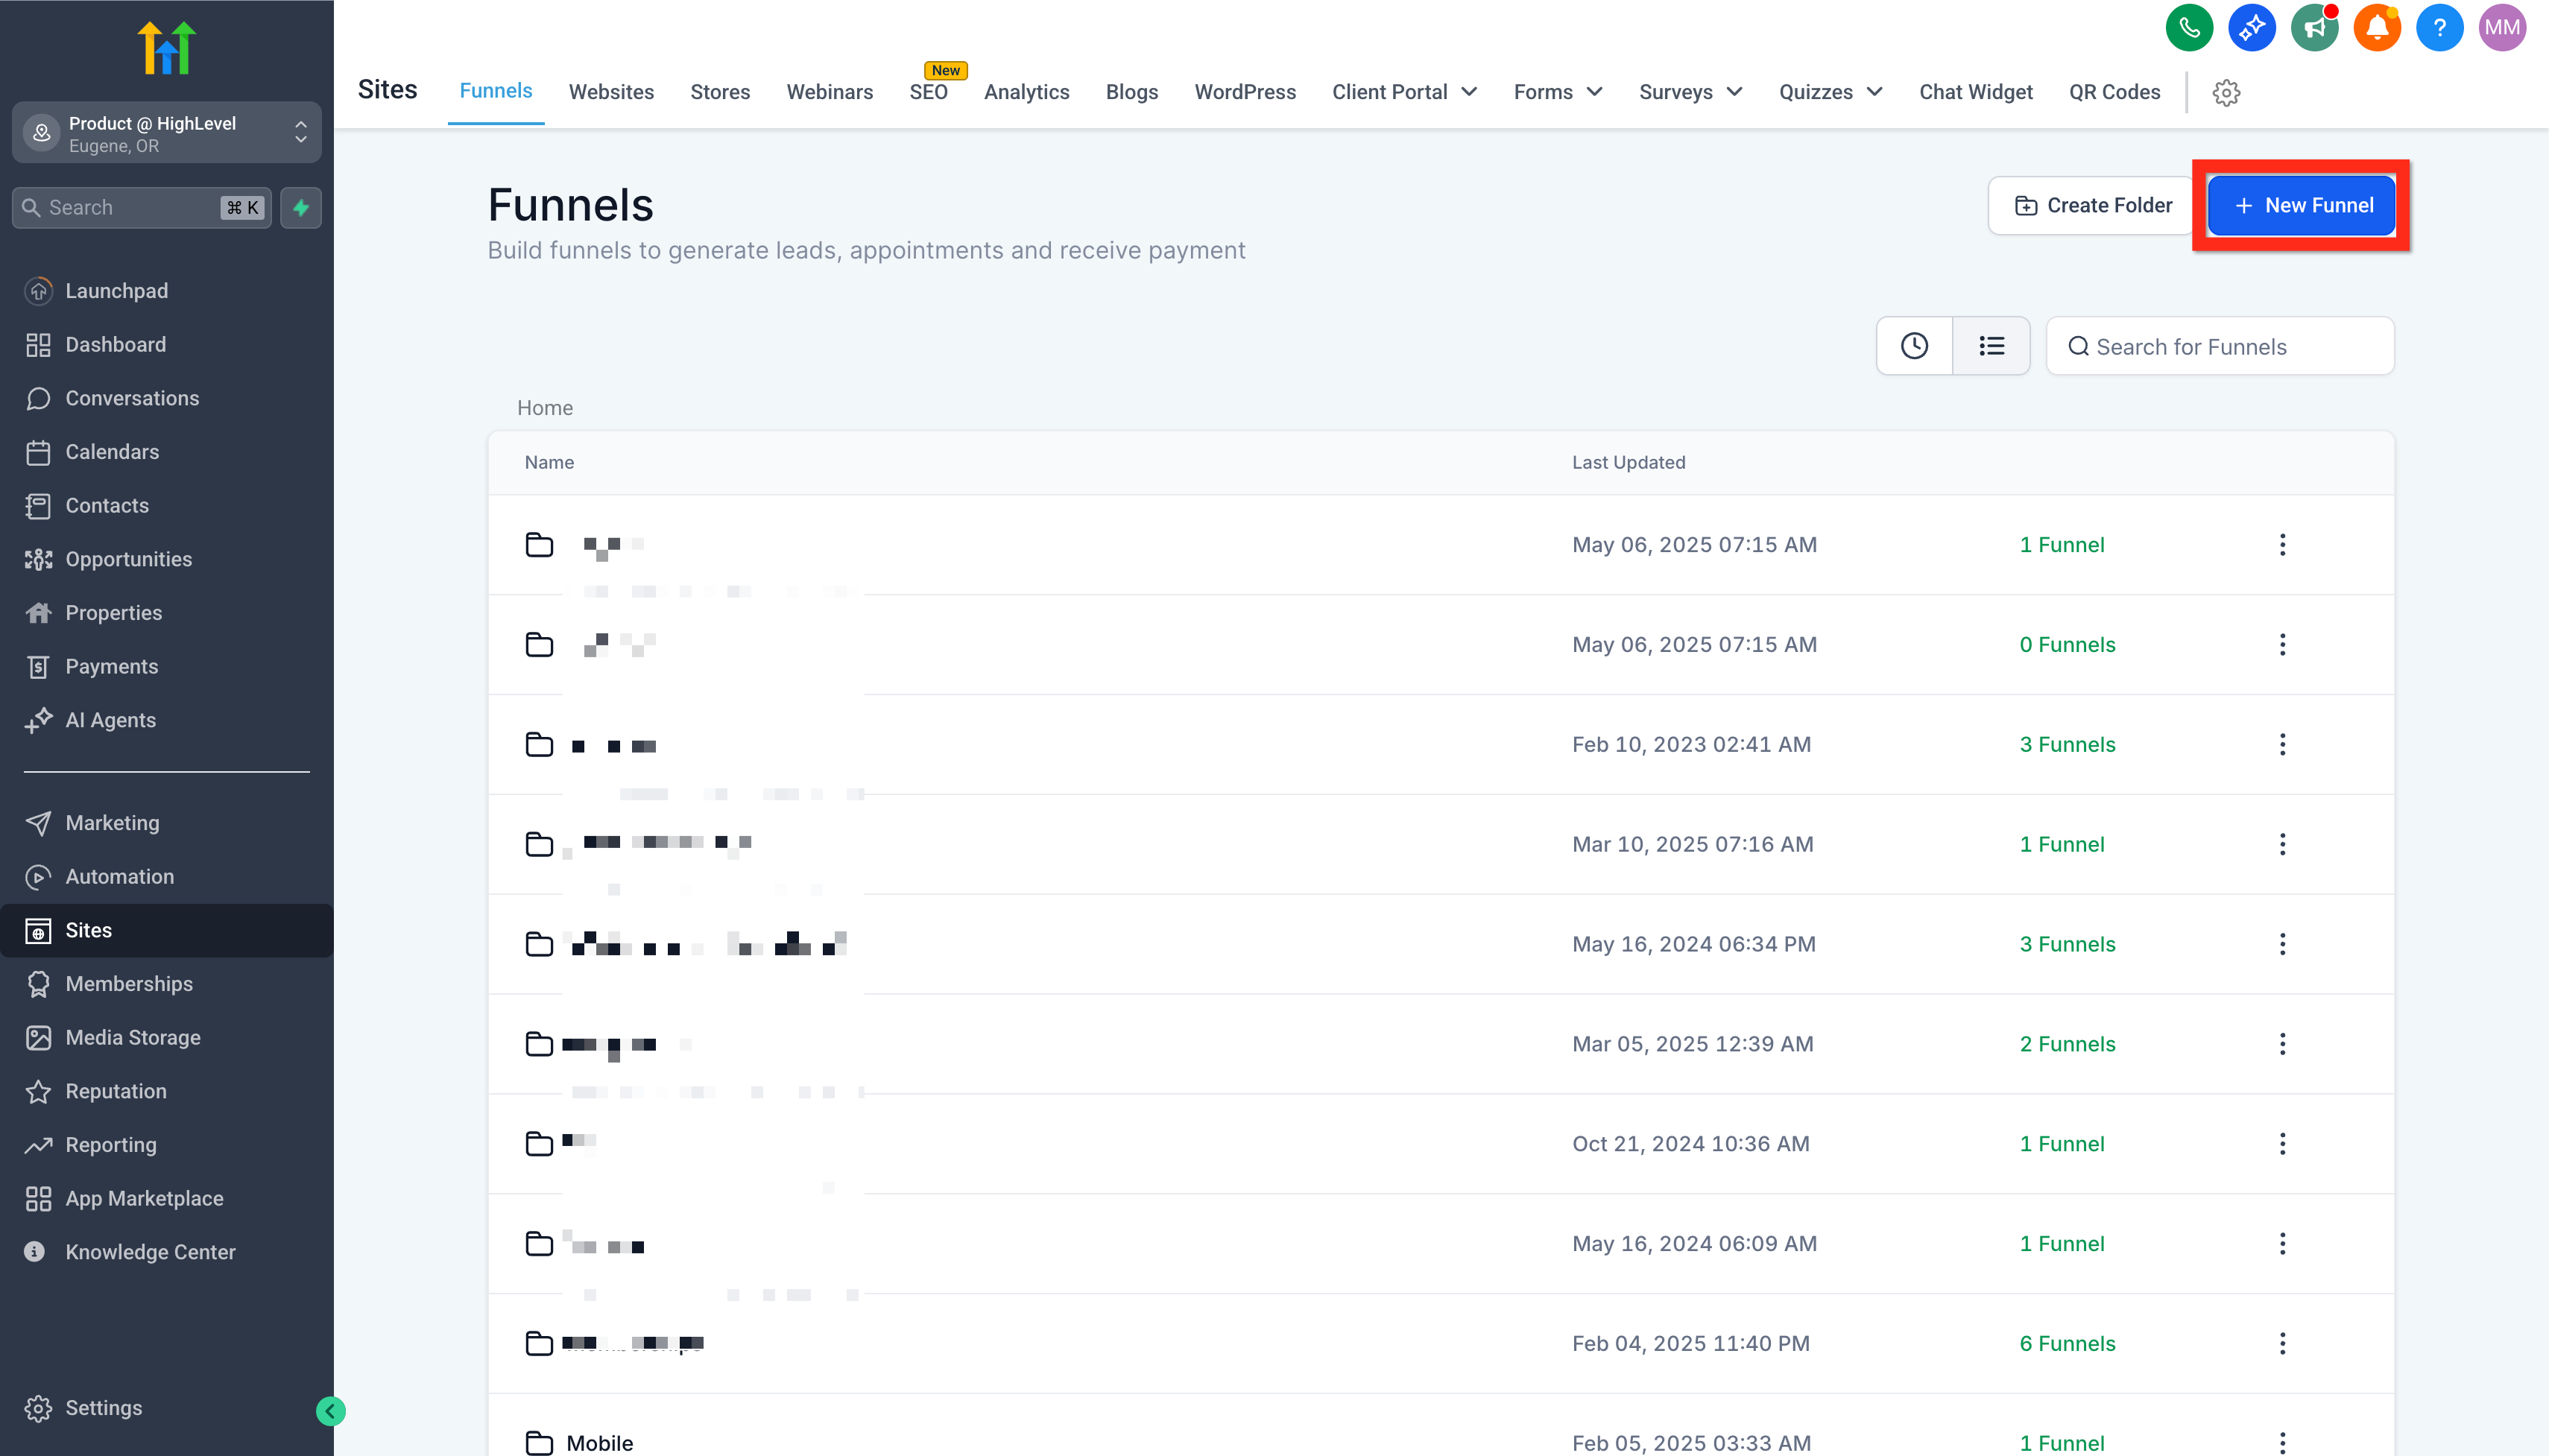
Start at Sites, then Funnels, then New Funnel. - Open the Template Library and search, filter and sort to find a lead capture design.
- Preview your chosen template and click Continue.
- Customize the headline, offer and images in the Funnel Editor.
- Click Save.
Part 02 of 05
Add the form and set its fields.
The form is where the lead happens. You add it inside the funnel step and edit it in a pop up, so you never leave the page you are designing.
- In Sites, then Funnels, open your funnel and select the Steps tab.
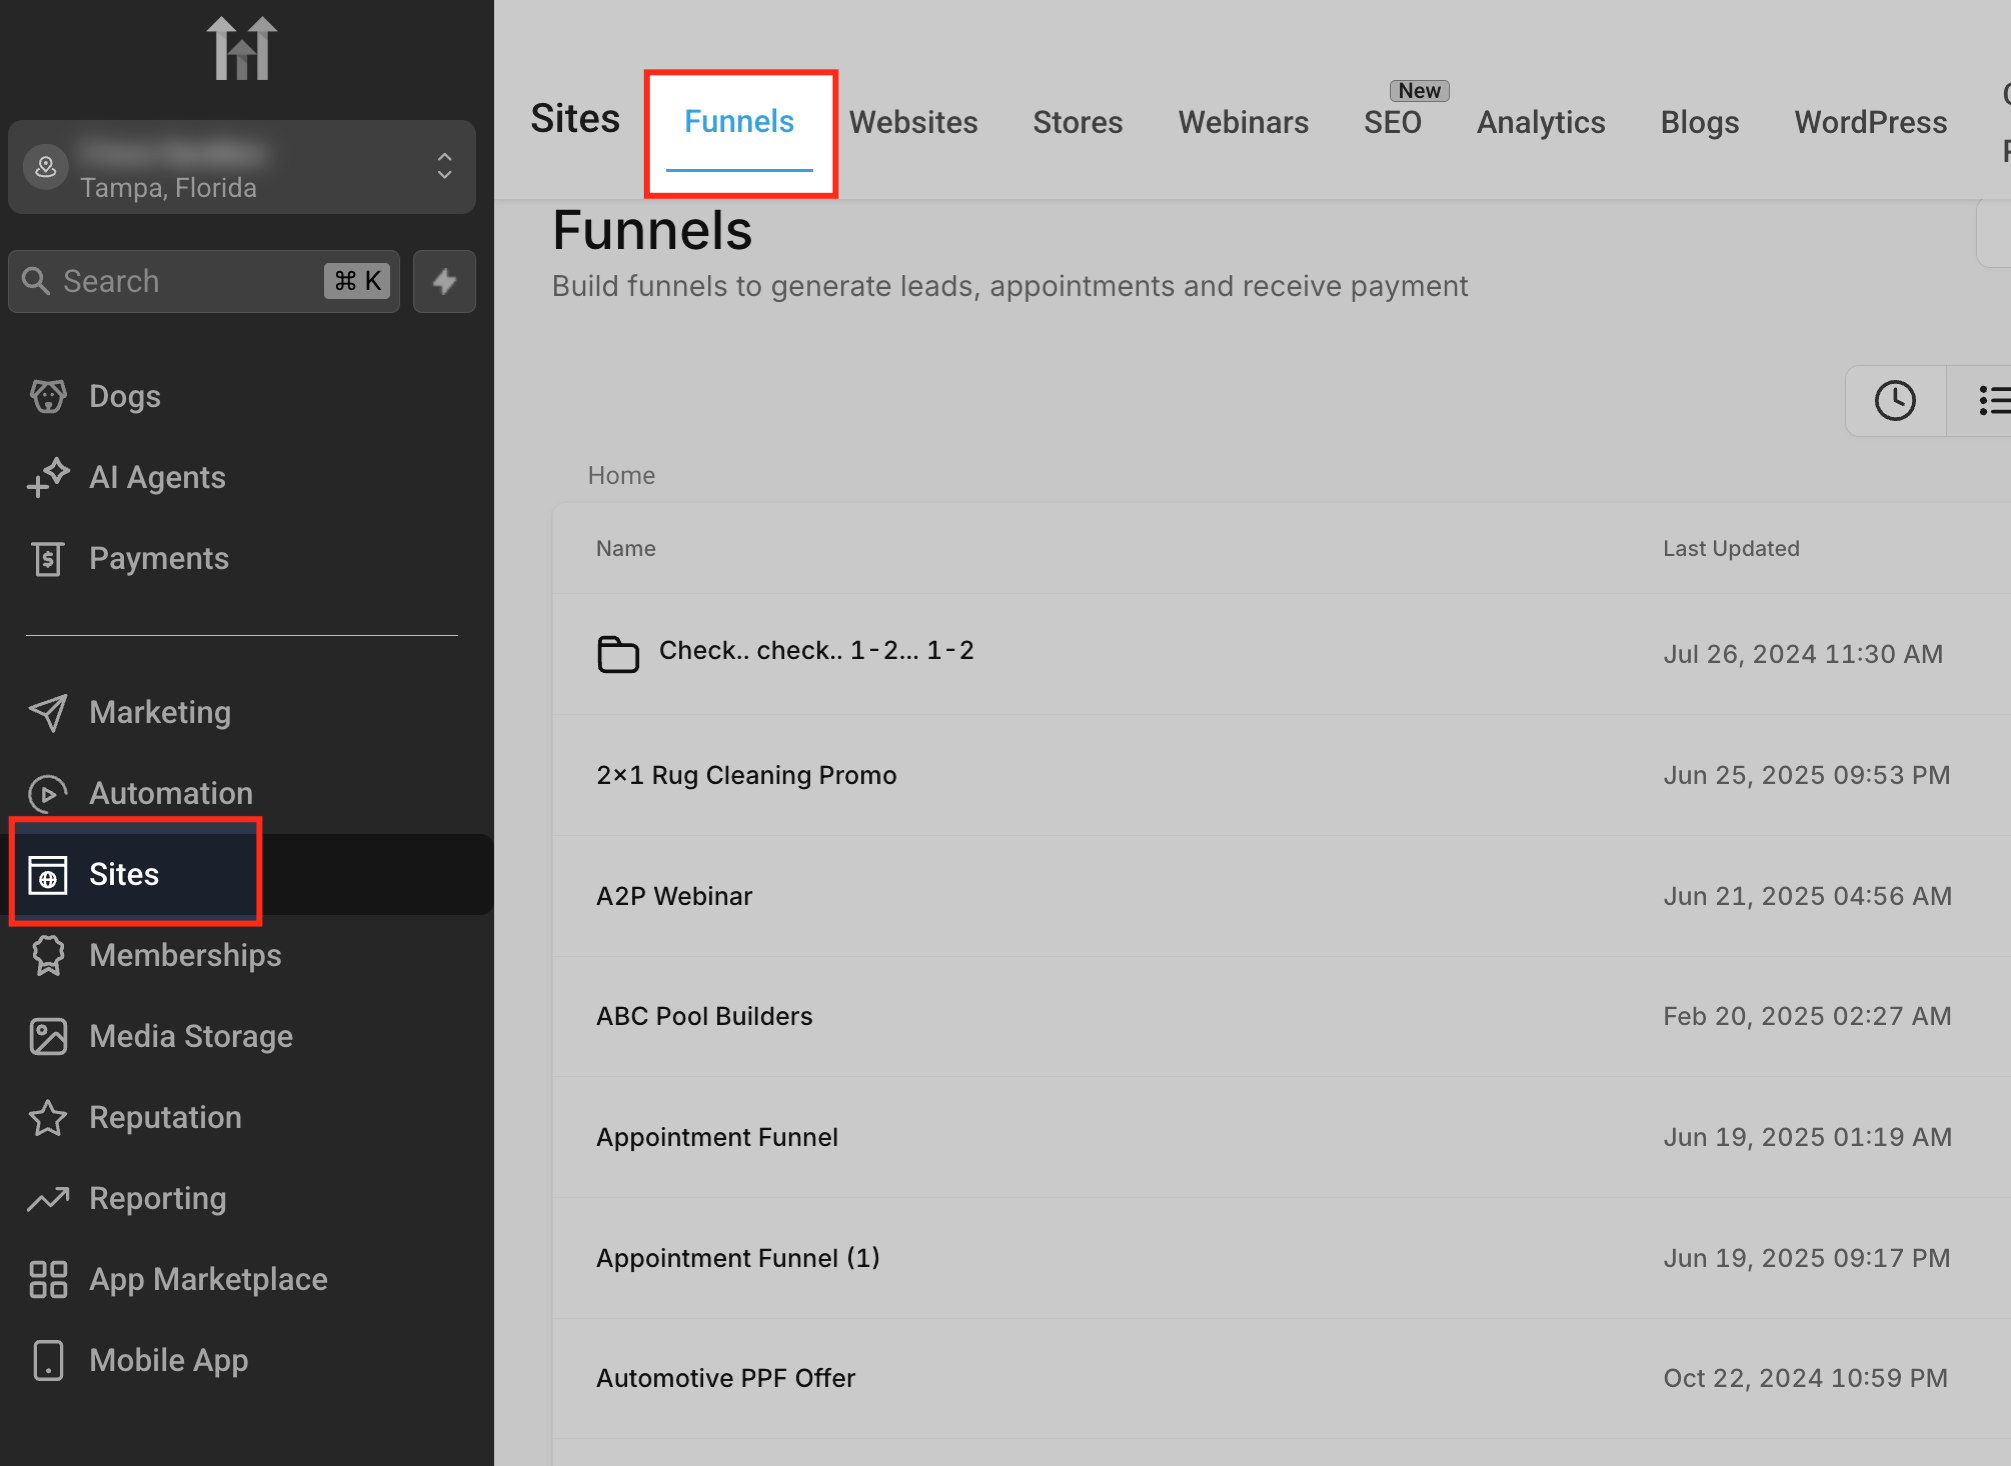
The form editor opens as a pop up over the funnel step. - Choose the step and click the Edit button below the step preview.
- Click the + icon in the top toolbar, choose Elements, scroll to Form, and drag the Form element onto the page.
- When the Form Picker appears, click the Click Here link to create a new form.
- In the right side panel, click Edit form to open the pop up.
- Use the Quick Add panel to drag Full Name, Email and Phone onto the form.
- Choose a layout of Single Column, Two Column or Single Line, and adjust any field with Field Width in Percentage.
- Click Save in the top right corner of the pop up, then click Save on the funnel step.
Part 03 of 05
Connect your domain and link the funnel.
A custom domain puts the funnel on your brand instead of a HighLevel address. HighLevel verifies the DNS record, links the funnel, and provisions SSL for you.
- From the subaccount view, click Settings, then Domains & URL Redirects.
- Click + Connect a domain.
- Locate Funnel/Website/Store/Blog/Webinar and click Connect.
- Enter the root domain or subdomain in the Domain URL field.
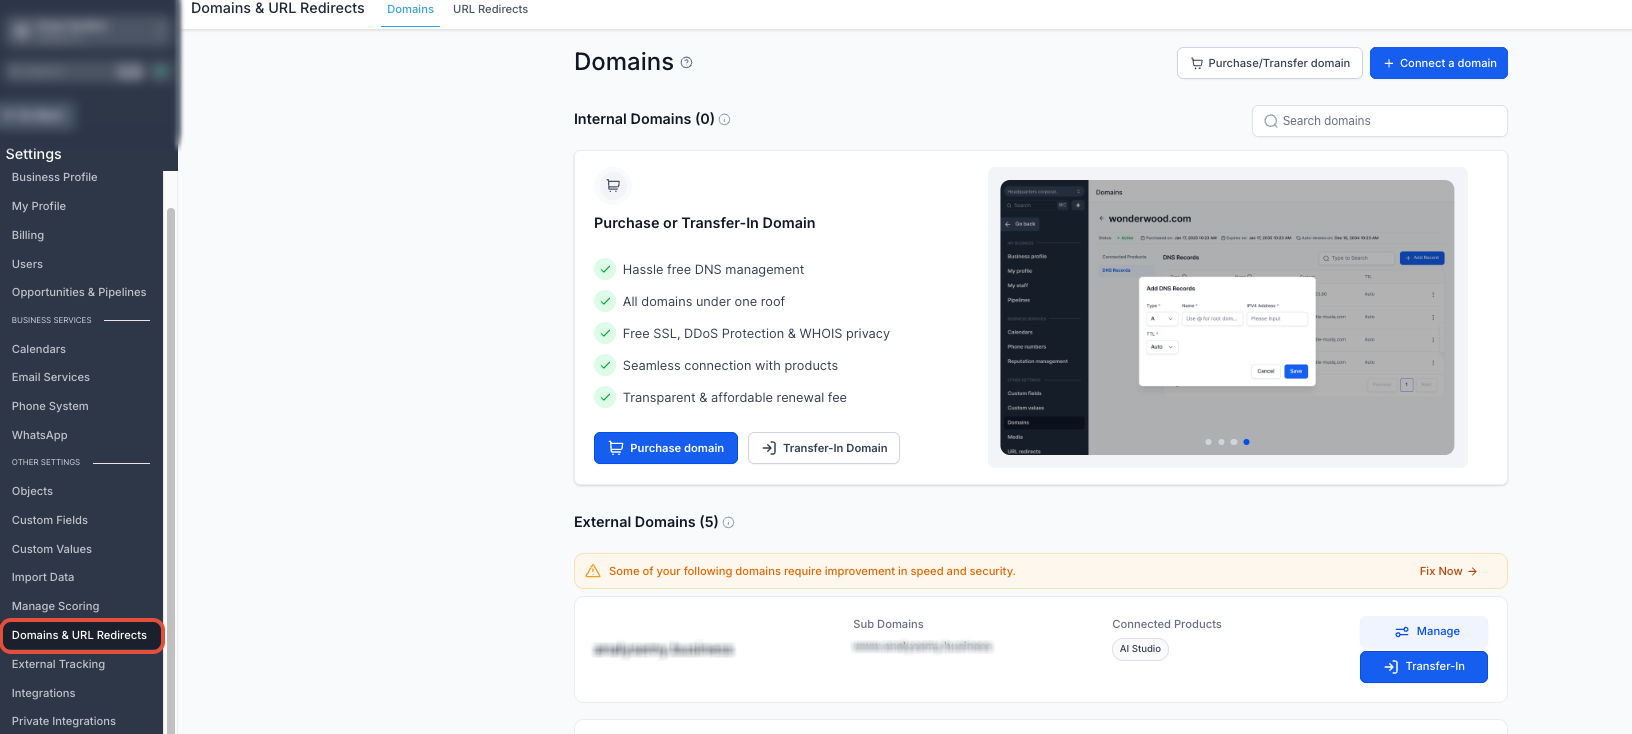
Enter the domain, then pick Domain Connect or manual DNS. - Choose Continue for automatic Domain Connect and authorize your provider, or choose Add record manually and add the record at your DNS provider: an A record at @ pointing to 162.159.140.166 for a root domain, or a CNAME pointing to sites.ludicrous.cloud for a subdomain.
- Wait for HighLevel to verify the DNS record.
- Select your funnel and choose the lead capture step as the default landing page.
- Click Link Domain and allow a few minutes for SSL to provision.
Part 04 of 05
Install the funnel pixel on every page.
The pixel tells Meta who visited and who converted. You create it in Events Manager, then paste the code into the funnel so it runs on every step without duplicates.
- In Facebook Business Manager, go to Events Manager and click Connect Data Sources in the left sidebar.
- Choose Web, click Next, then create a new pixel or select an existing one and click Continue.
- Enter the funnel domain, click Check, and wait for the green checkmark.
- Click Next, choose Meta Pixel and Conversions API, then click See Instructions, continue through the industry, event and parameter selections, and click Finish.
- Copy the pixel code from the Facebook popup.
- In HighLevel, go to Sites, then Funnels, open your funnel and click the Settings tab.
- Paste the code into the Head tracking code field and click Save.
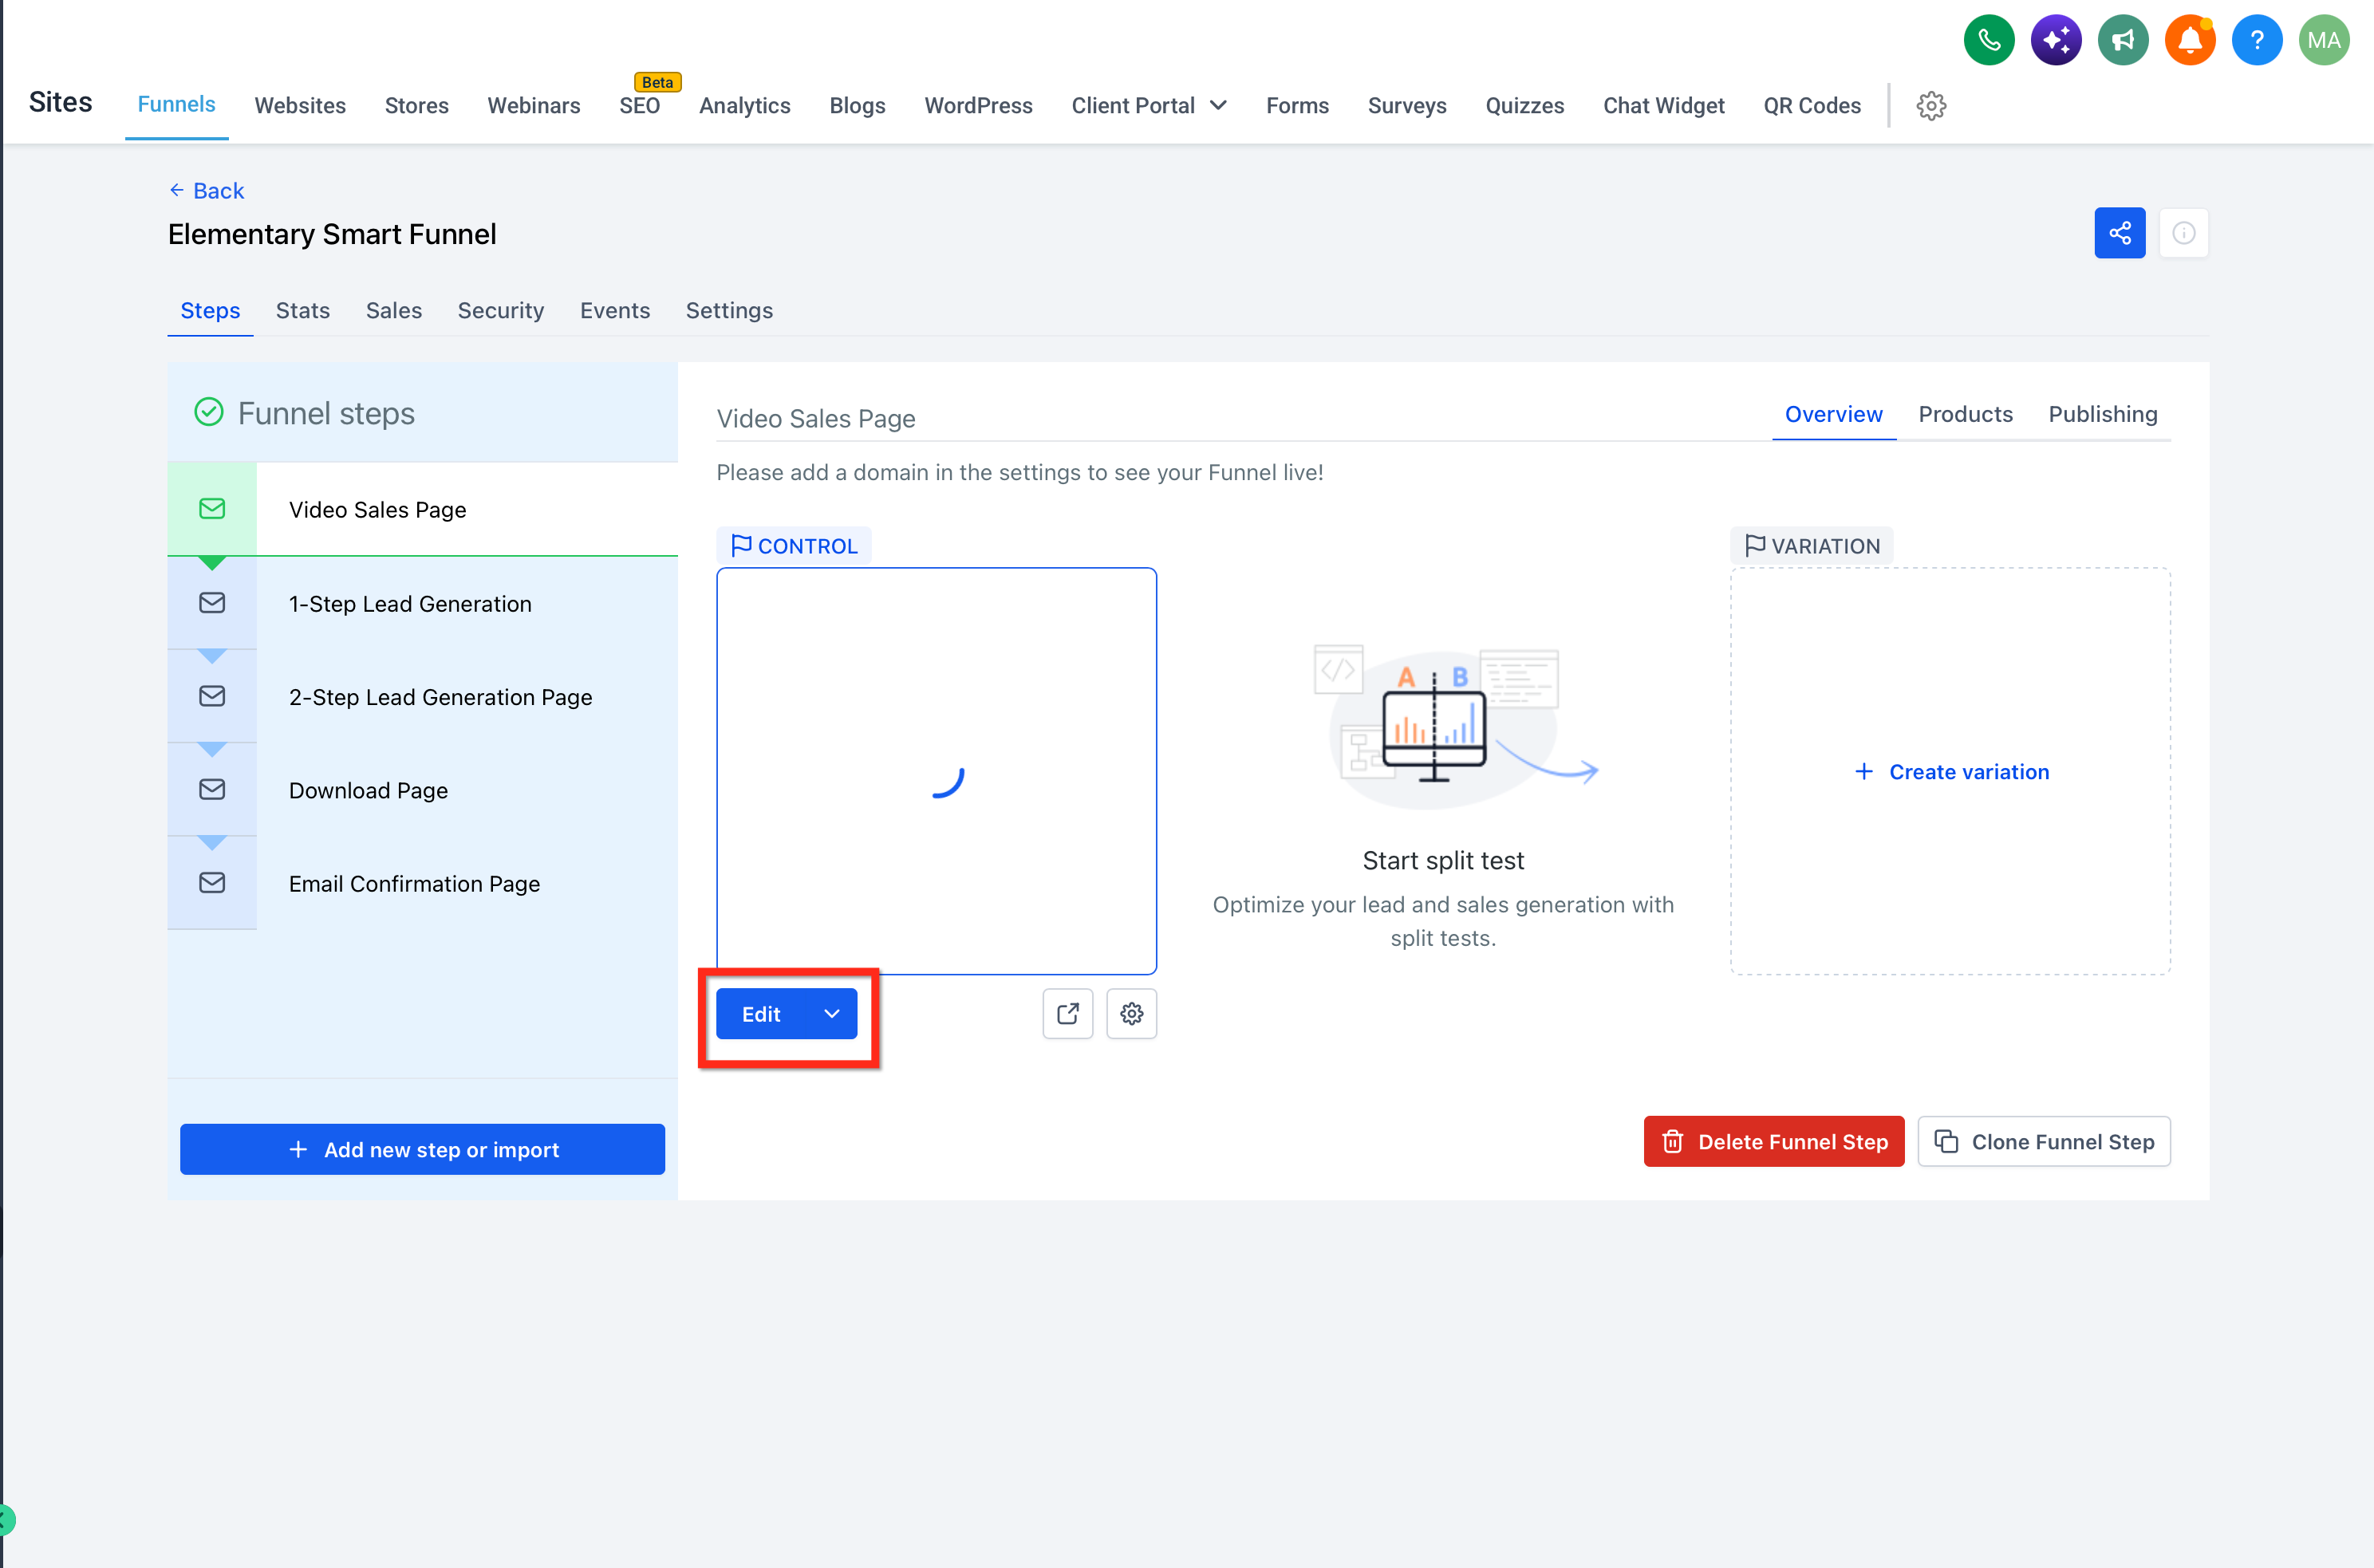
Site wide scripts go in Head tracking code under the funnel Settings tab.
Part 05 of 05
Build the workflow that fires on submit.
This is the part that turns a form entry into a conversation. The Form Submitted trigger starts the workflow, the follow up goes out, and the Conversions API action reports the lead to Meta.
- Go to Automation, then Workflows, and click Create Workflow.
- Click Add New Trigger and choose Form Submitted from the dropdown.
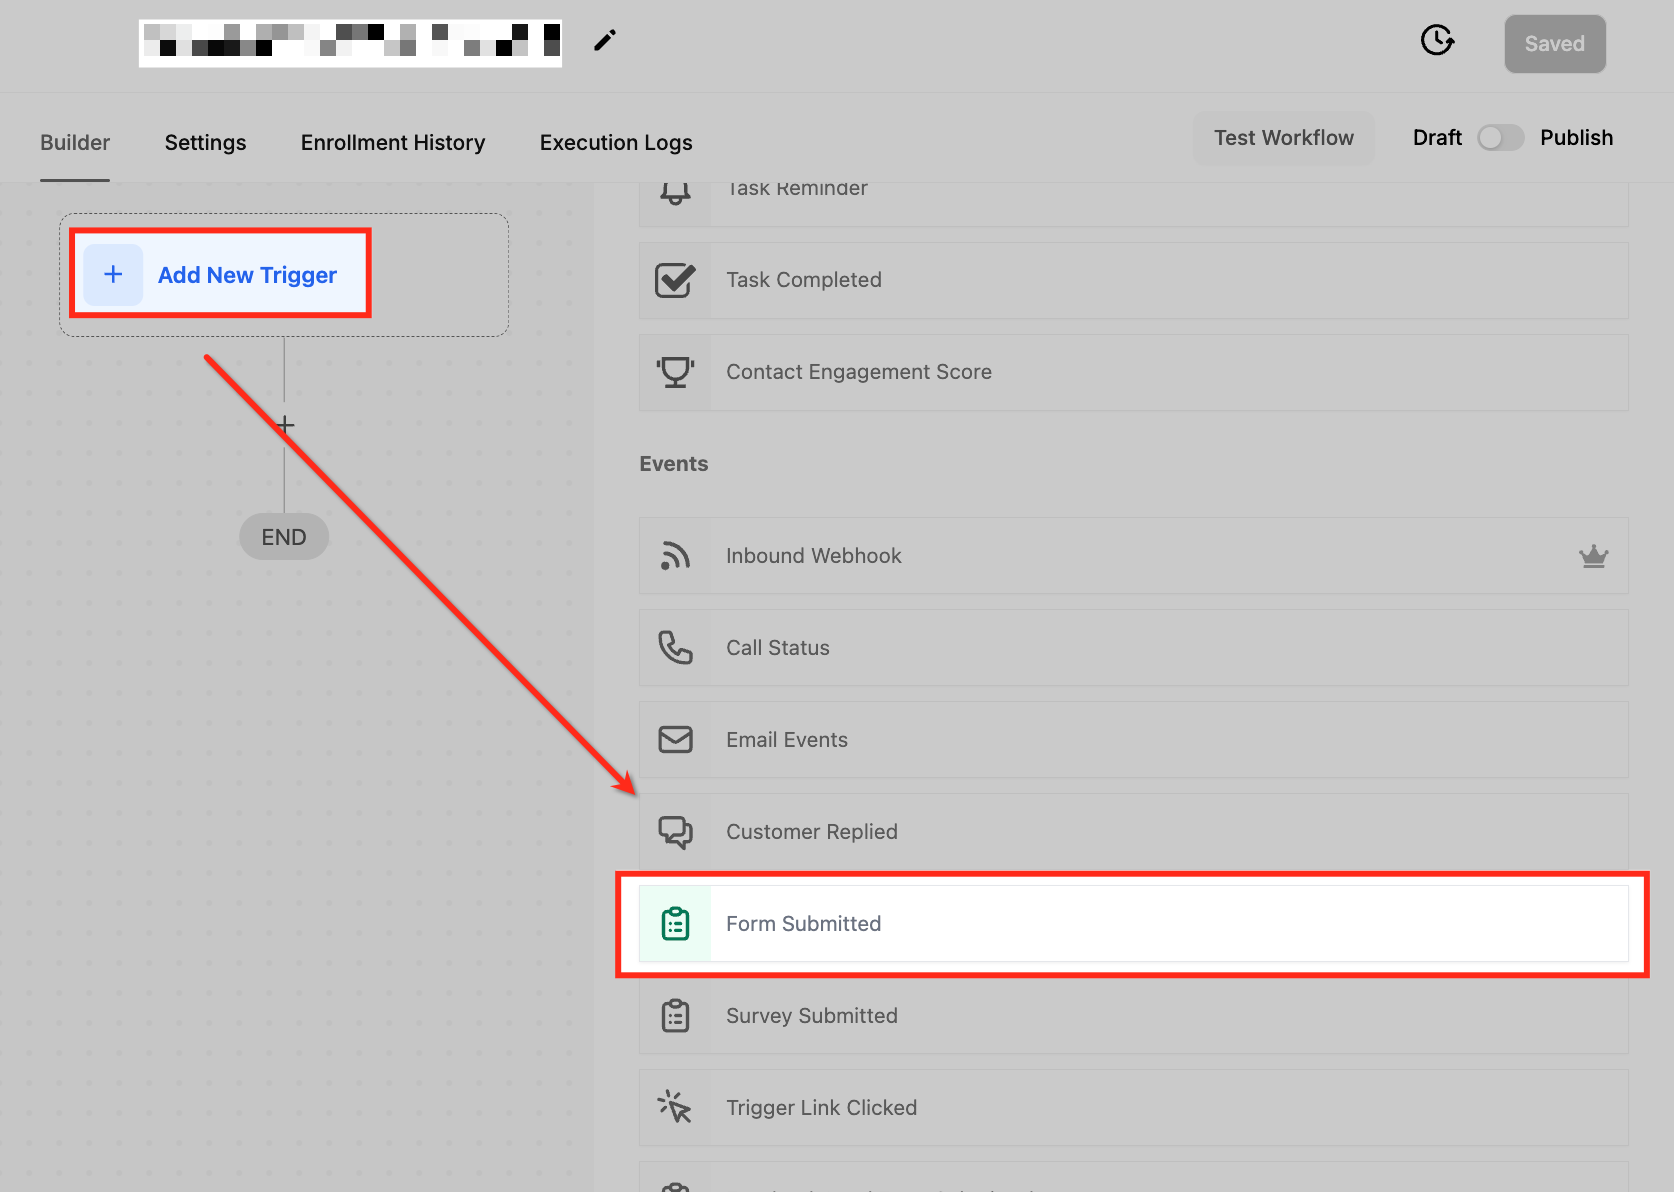
Point the Form Is filter at the exact form on your funnel. - Name the trigger with a descriptive label.
- Under filters, set Form Is to the form you built in Part 2, then click Save the Trigger.
- Add your first follow up action, such as an email or SMS, and use merge tags like {{contact.name}} to pull in the submitted data.
- Click Add Action, select Facebook Conversion API, name the action, and set Event Type to Funnel Event.
- Paste your Access Token and Pixel ID (Dataset ID) into the respective fields and save the action.
- Click Save, then turn on the Publish toggle.
Test it
Test it before you send traffic.
Run one real submission through the whole chain and watch every piece respond.
- Open your custom domain in a browser. The funnel step loads with a padlock and no SSL warning.
- Run a public DNS lookup on the domain. The expected HighLevel record (A 162.159.140.166 or CNAME sites.ludicrous.cloud) is publicly visible.
- Submit the form with a test name, email and phone. The page accepts the entry.
- Open Contacts in HighLevel. The test contact exists with the submitted details.
- Open the workflow and check its history. The test contact entered through the Form Submitted trigger and the follow up went out.
- Check the pixel with Meta's testing tool. One page view and one funnel event appear, not two of each.
When a step fails
When it fails here is the fix.
Most problems trace back to DNS, a duplicate script or a missing filter.
- The funnel does not load on the domain
- Verify the custom domain, check DNS propagation, and confirm the funnel is linked to the domain with a default page set.
- HighLevel cannot find the CNAME or A record
- Confirm which provider hosts the active DNS, remove any other A or CNAME on that hostname, enter only the hostname portion such as www in the Host field, save, wait for propagation and retry verification.
- The domain shows an SSL or privacy error
- Remove conflicting A, CNAME or AAAA records, make sure a Cloudflare record is set to DNS only, then allow time for propagation and SSL provisioning.
- The form is not collecting leads
- Confirm the form is on the page, submit a test entry, and check the workflow attached to the form.
- Pixel events fire twice
- Check whether the same script sits at both the page level and in the funnel Settings and remove the duplicate.
- Tracking stopped after cloning a page
- Page level tracking does not copy when a page is duplicated. Add the script back to the cloned page, or keep it site wide in Settings.
Questions
Which questions come up about lead capture funnels in GoHighLevel?
- Do I need to buy an SSL certificate for the funnel domain?
- No. HighLevel provisions SSL automatically once the domain connects successfully. It can take a few minutes. You can connect a domain and publish a funnel during a 30 day GoHighLevel trial through Michael's link.
- Can I run more than one funnel on the same domain?
- Yes. Multiple funnels and websites can share one domain. Set the paths and the default page so each URL routes visitors to the right place. Plan details are on the GoHighLevel pricing page.
- Which workflow triggers can fire the funnel event pixel?
- Form Submitted, Customer Booked Appointment, Survey Submitted and Order Form Submission, alone or in combination.
- What happens if the same person submits the form twice?
- The trigger fires each time. Use conditions or cooldown periods in the workflow to manage duplicate submissions.
- Why can I not see the pixel in View Page Source?
- HighLevel can inject tracking code dynamically. Use browser developer tools or the testing tool from Meta to confirm the script is running.
- Do I have to start the funnel from a template?
- No. You can also pick From Blank or Funnel AI at the New Funnel screen. For a first lead capture page, a template is the fastest path to something you can publish today.
From the field
Michael’s take.

I start with the domain, even before I touch the design. Connect it in Settings, verify the record, and let SSL provision while you build. DNS is the one piece you cannot rush, so get it moving first and the rest of the build never waits on it.
Where people go wrong is the form. They add eight fields because they can. Full Name, Email and Phone is enough for a lead capture page. The second mistake is the pixel. Someone pastes it on the page and again in Settings, and a week later the reports show double the conversions that actually happened. Pick one place and keep it there.
This build pays off the first time a lead comes in at 11pm and gets a reply before you wake up. One page, one form, one workflow. Once it runs clean, you clone it for the next offer and you have a repeatable way to turn traffic into conversations.
Go deeper
The features behind this build.
Every feature this guide touches has its own page in the library, with the settings, limits and Michael’s notes.
- SitesHow to launch a HighLevel funnel and start capturing leads
- SitesCustomizing Forms Inside Funnels using the Form Builder
- SitesEnhanced form builder features for flexible layouts in HighLevel
- SitesSetting up root domains and subdomains in HighLevel
- IntegrationsSetting up the funnel event pixel in HighLevel
- WorkflowsWorkflow Trigger: Form Submitted: Automates workflow actions
- SitesAdd tracking code to funnels and websites in HighLevel
Get the guide
Take it with you. The PDF is yours.
The whole build, cover to cover, as a PDF you can keep open on a second screen or print for the team. HighLevel's Founder page opens alongside it.
Next step
Build it with us on a HighLevel trial.
Start your HighLevel trial through Michael and the CRM Pros team comes with it. We help you get the funnel, the domain and the follow up running the right way the first time.
The how to library has step by step HighLevel builds for Conversation AI, Voice AI, funnels, calendars, workflows and AI Studio. Go back to the full list.
Back to the GuidesAll the step by step builds