
01Who this is for
- Marketers who need to push leads to external ad platforms, because the webhook can deliver contact fields right away.
- Developers building custom dashboards, because the payload provides standard and trigger dependent data for analytics.
- Operations teams that must sync appointment bookings with third party scheduling tools, since the webhook includes appointment details when the trigger matches.
02Outbound webhook actions, explained
The outbound webhook is an action you place inside a workflow. When a contact reaches that step, HighLevel collects the contact’s information, any data related to the workflow trigger, and any custom fields you added, then sends it as a JSON payload to the URL you specify.
The action lives in the Workflow Builder under Automation > Workflow Builder. After adding the step, you configure the request method, destination URL, and optional custom key/value pairs. The step can be tested with the built in Test Workflow button before the workflow is published.
03How businesses use outbound webhook
- Marketing agency. Add a webhook step that posts new lead details to a Slack webhook URL. The agency names the action, sets the method to POST, enters the Slack URL, and includes a custom key for the campaign source. When a lead is tagged, the workflow fires and the Slack channel receives the lead data.
- Real estate brokerage. Create a webhook that sends appointment information to an external calendar system. After selecting the Appointment Booked trigger, the broker adds a custom field for property ID, sets the destination URL of the calendar API, and saves the action. Each booked showing is right away pushed to the external system.
- Online course provider. Configure a webhook to add a new student record to a custom database. The provider sets the action name, chooses POST, inputs the database endpoint, and maps the contact's email and course ID as custom data. When a user completes enrollment, the webhook creates the record in the external database.
04The numbers and rules that matter
- Standard payload fields include Full Name, First Name, Last Name, Email, Phone Number, Address, Tags, and all standard and custom contact fields.
05Before you start
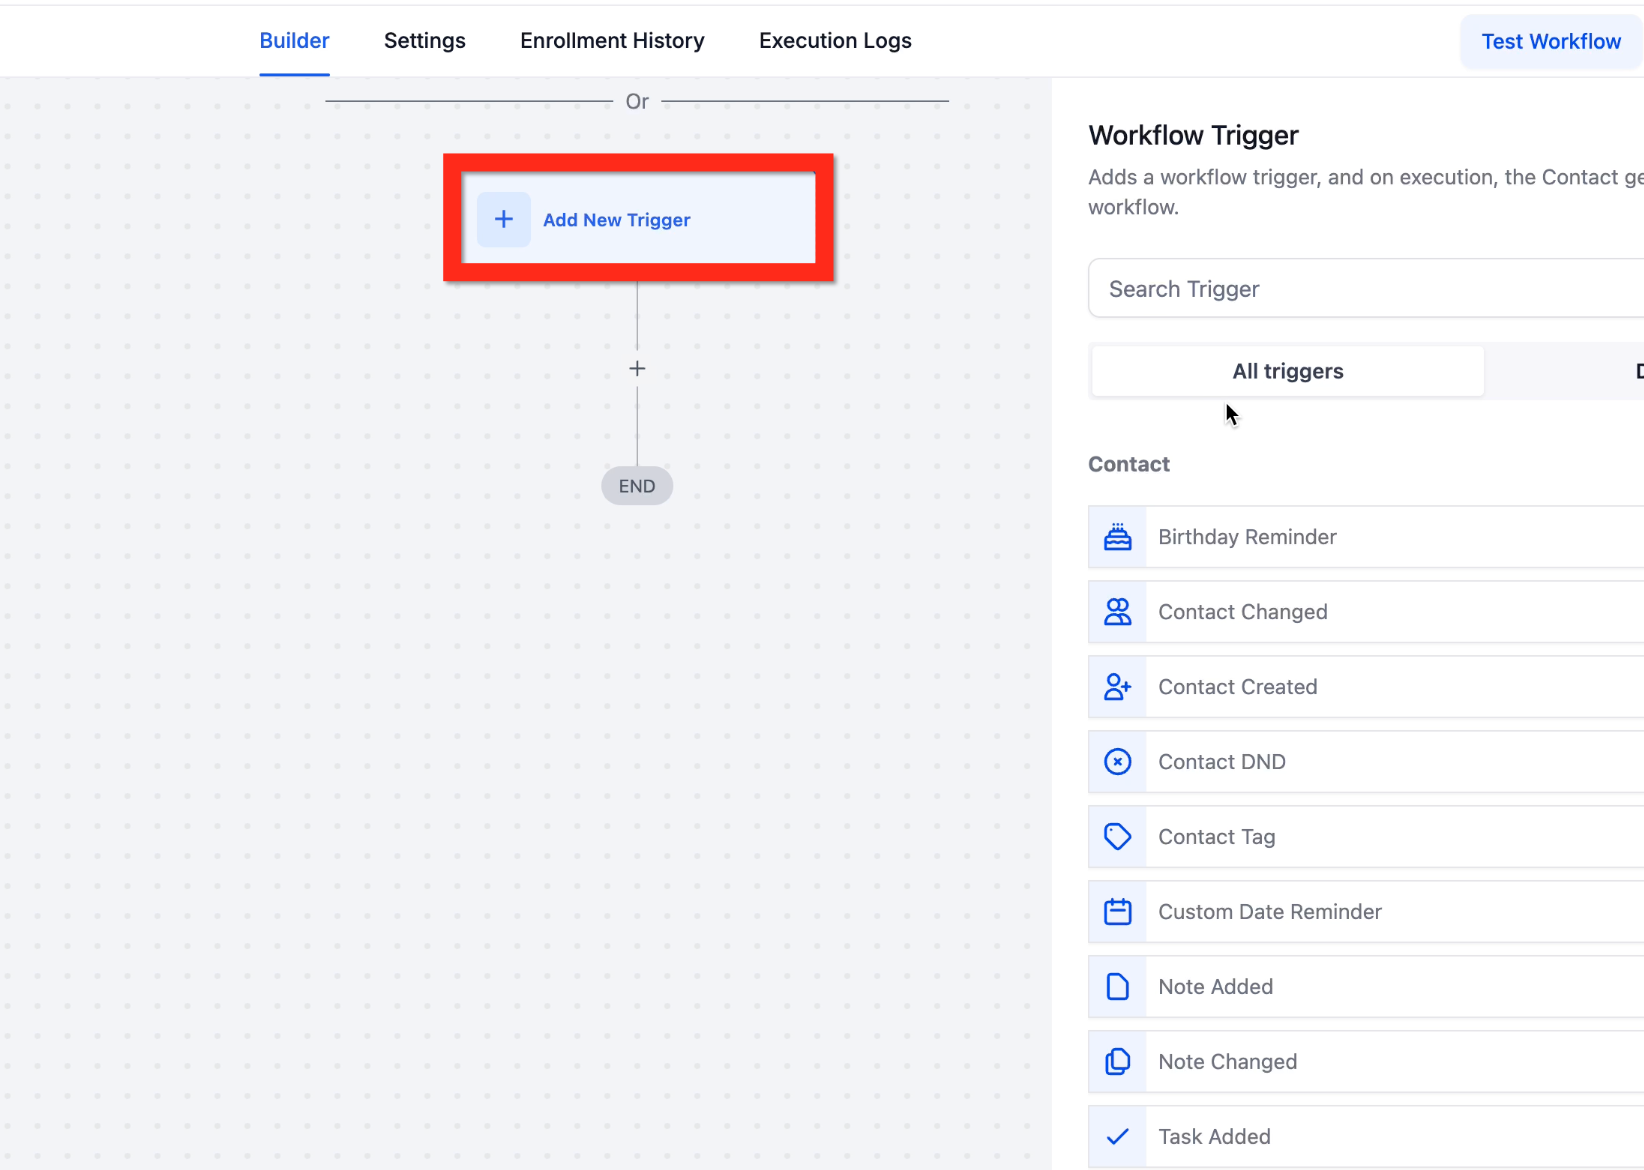
- A workflow must already have at least one trigger, such as "Contact Tag Added".
- You need the destination URL for the external service you plan to call.
06How to set up and use outbound webhook in HighLevel
Add a webhook step
- Open the Automation tab and select Workflow Builder.
- Create a new workflow or open an existing one for editing.
- Confirm the workflow includes at least one trigger.
- Click the plus icon on the canvas where the action should appear.
- Type "webhook" in the Actions panel search bar.
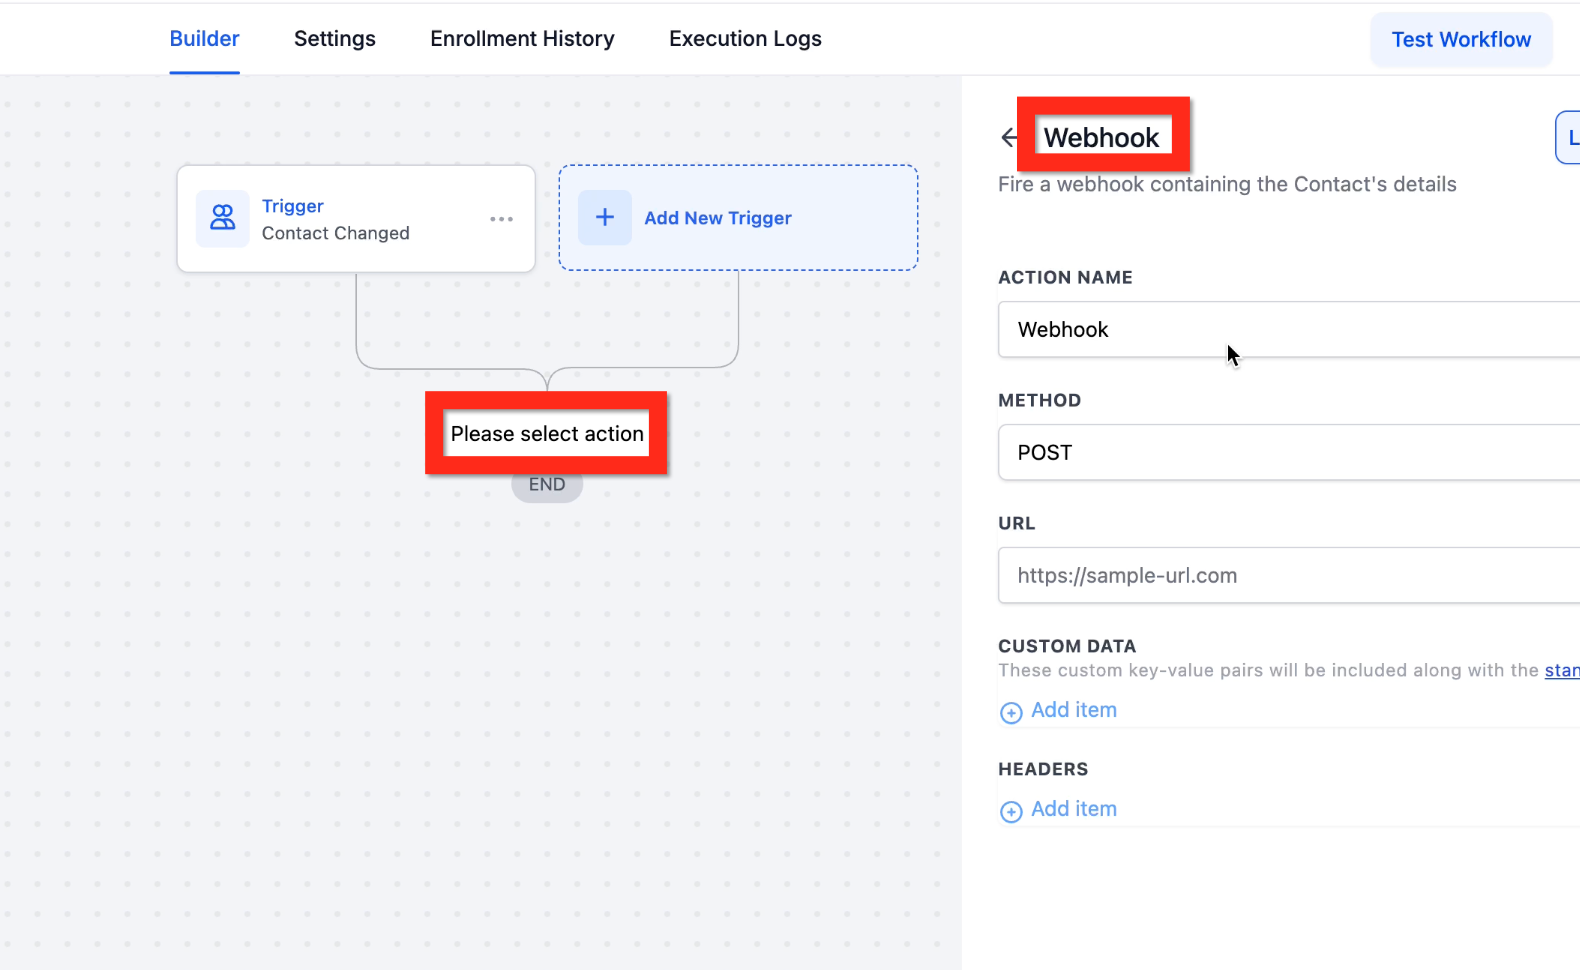
- Choose the Webhook option to place the step on the canvas.
Configure the webhook
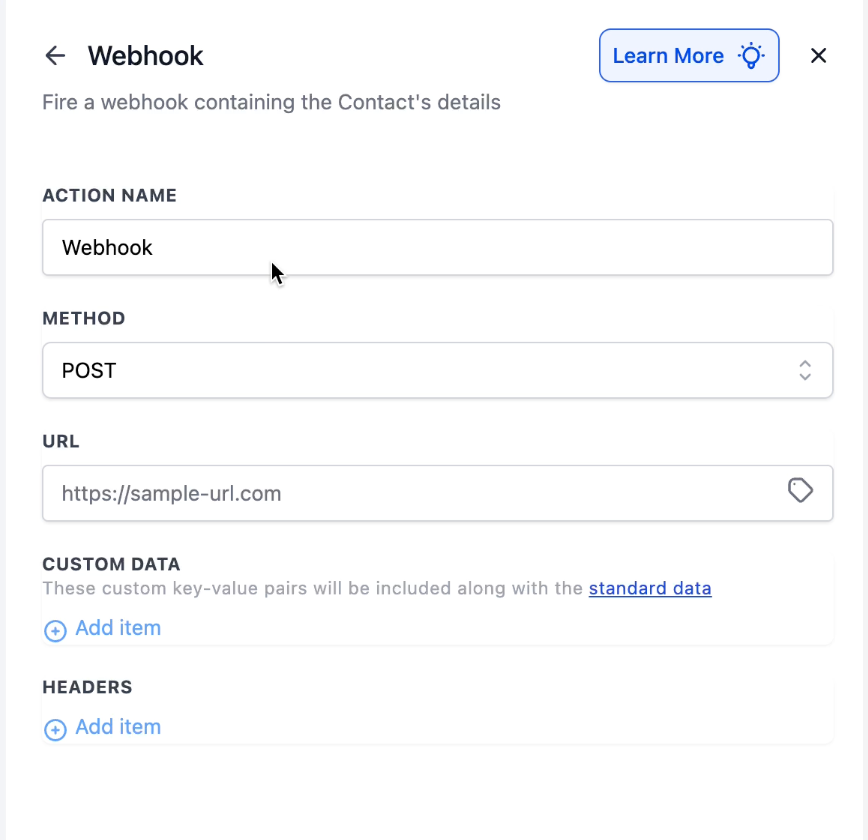
- Enter a descriptive Action Name for the step.
- Select the HTTP Method, keeping POST as the default.
- Paste the destination URL of the external service.
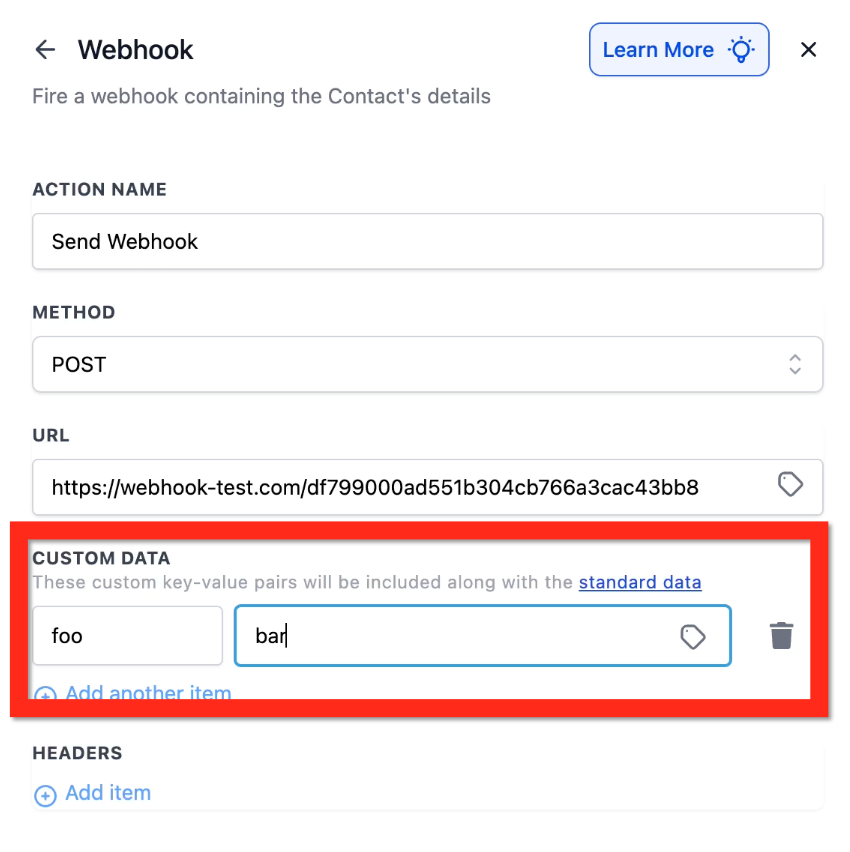
- Click the "+ Add item" button under CUSTOM DATA.
- Fill in the Key and Value fields, using dynamic values if needed.
- Press the blue Save Action button to store the configuration.
Test and publish the webhook
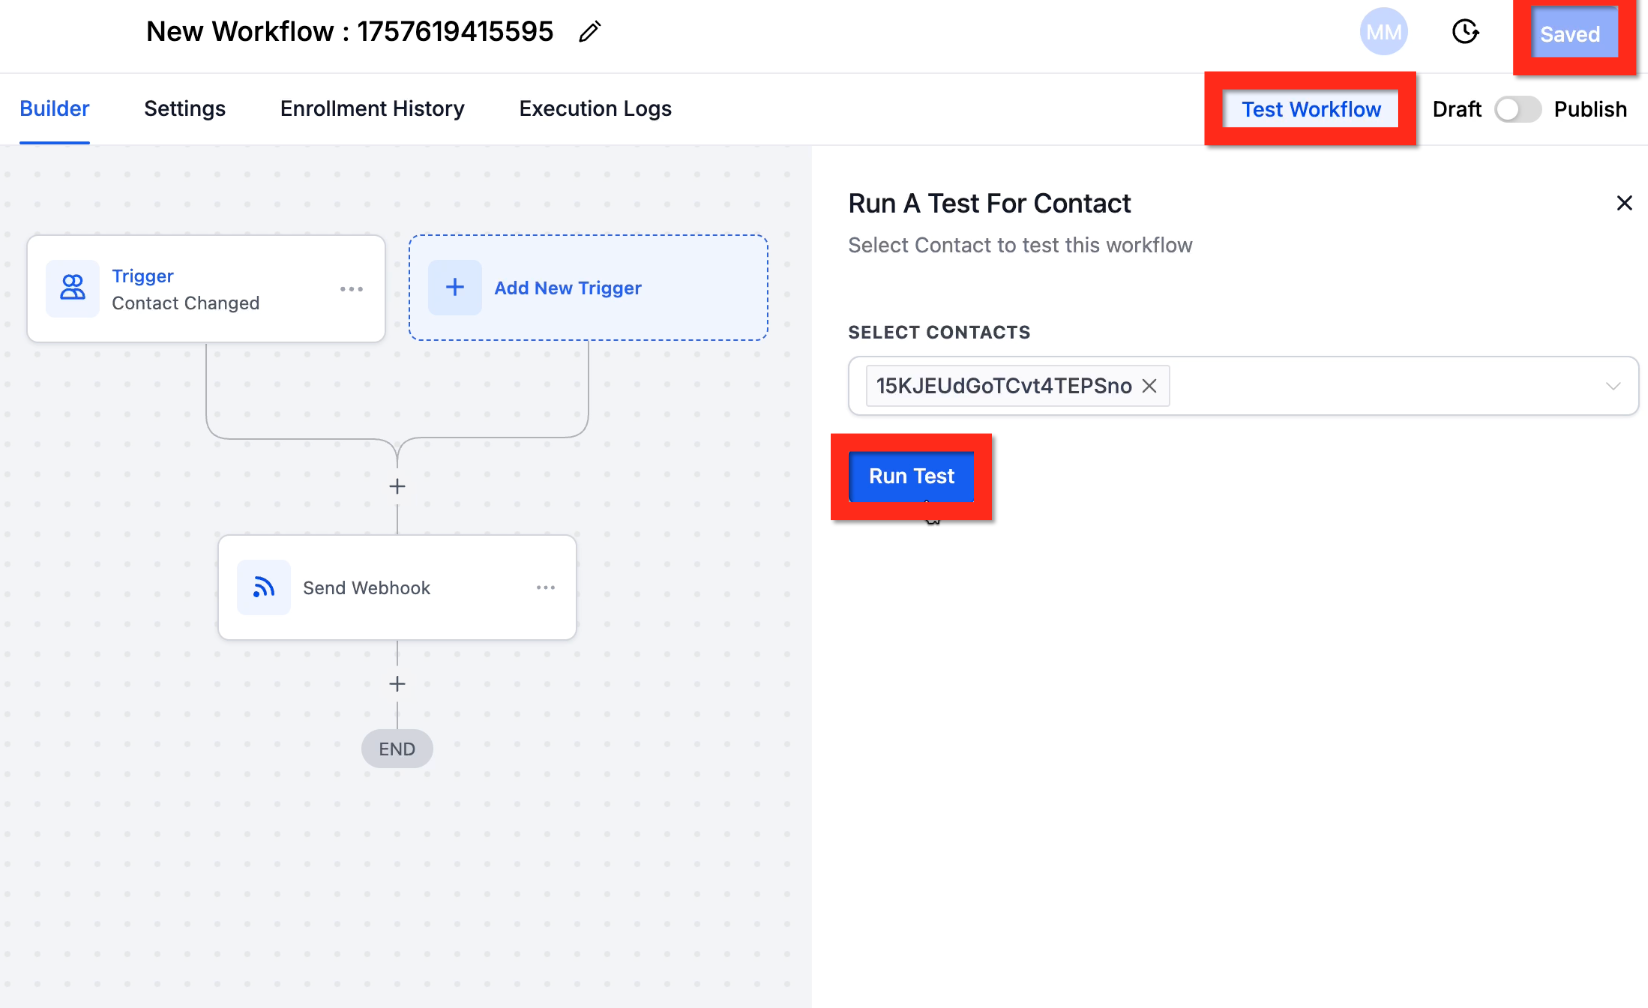
- Click the Test Workflow button in the top right corner of the builder.
- Choose a test contact, then run the test to fire the webhook.
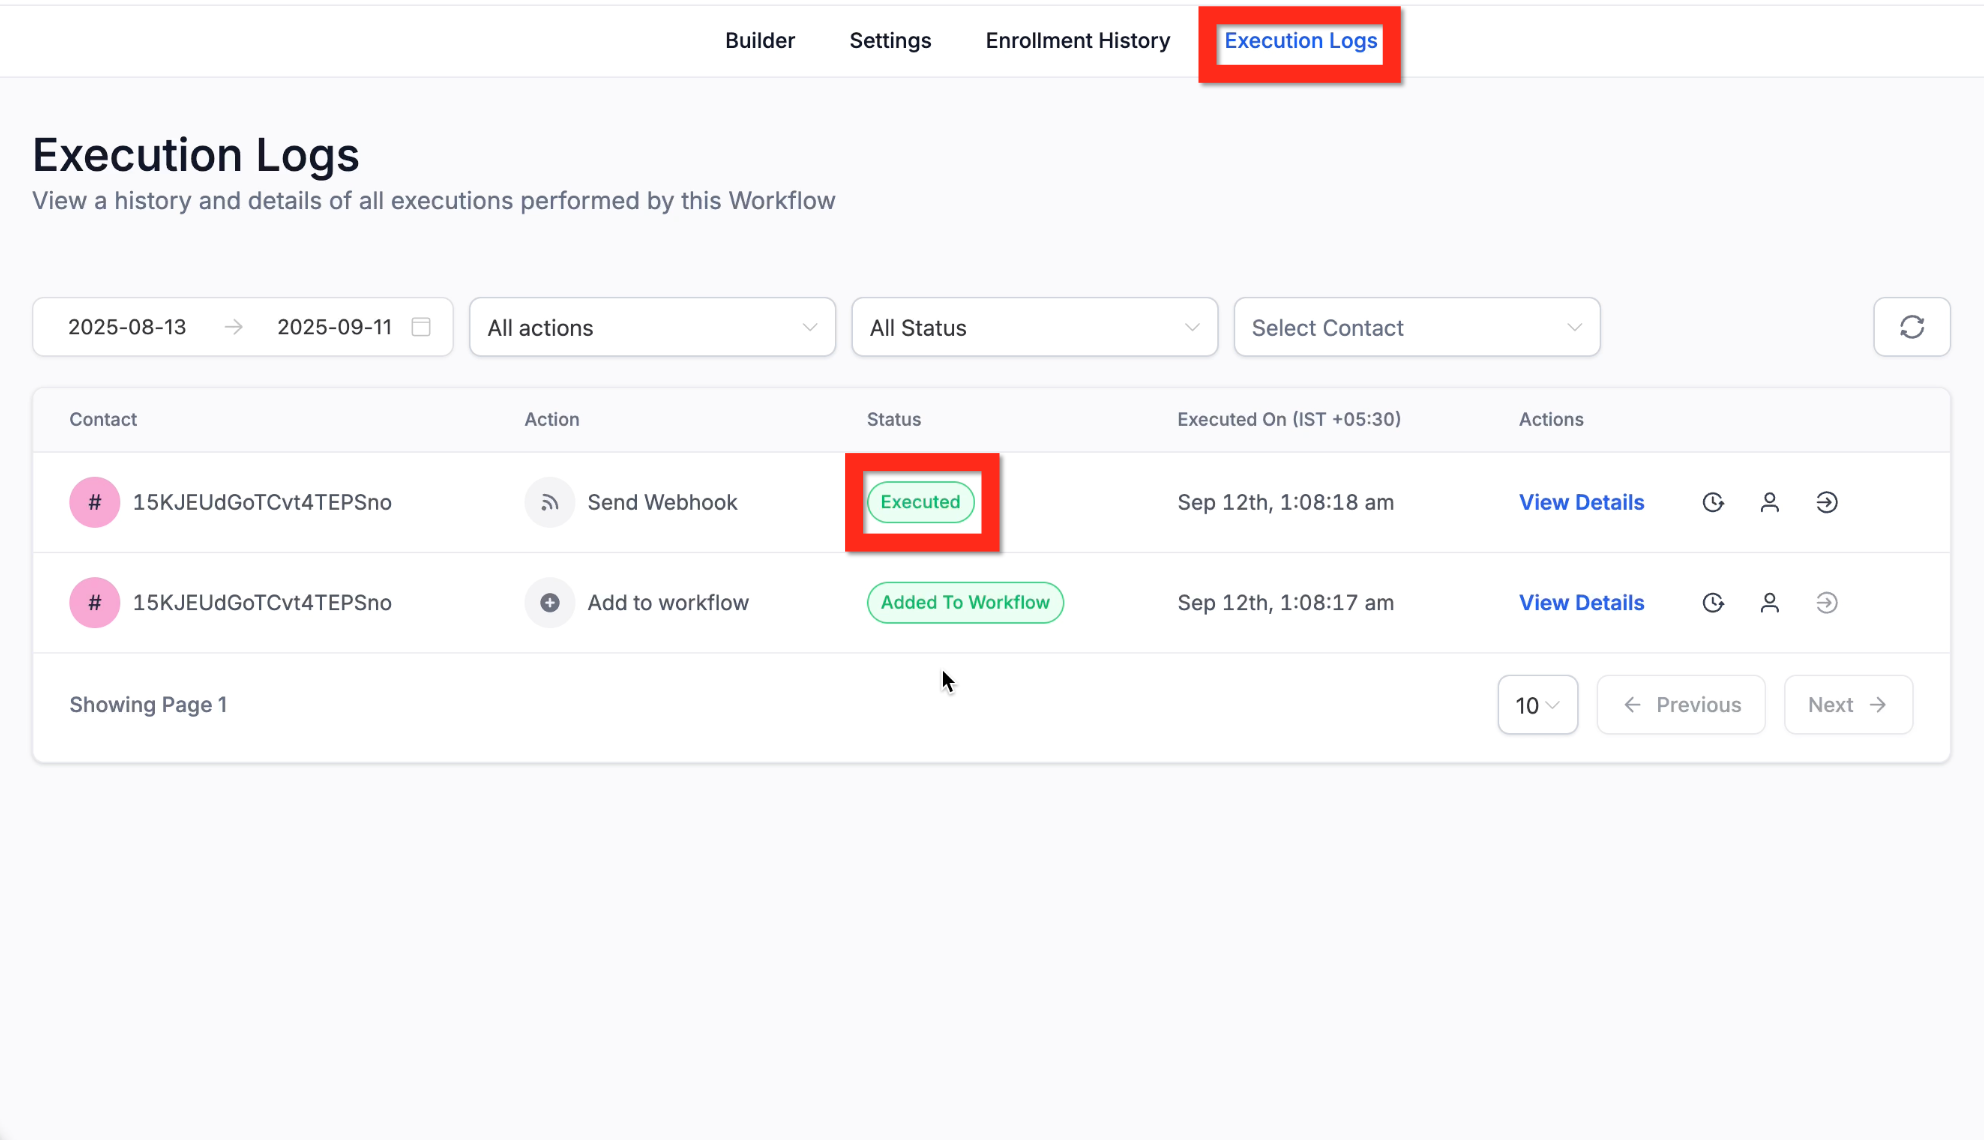
- Open the Execution Logs tab to view the test run.
- Locate the log entry for the contact and verify the status shows Executed.
- Toggle the Publish switch to activate the workflow for live events.
07What it looks like in HighLevel
08Settings that matter
- Action Name. A label that identifies the webhook step within the workflow.
- Method. The HTTP verb used for the request; POST is selected by default.
- URL. The endpoint that will receive the JSON payload from HighLevel.
- Custom Data, Key. The identifier for a piece of data you add to the payload; must be a simple string without spaces.
- Custom Data, Value. The content sent for the corresponding key; can be static text or a dynamic placeholder such as {{contact.email}}.
09Things to know before you rely on it
- Only data related to the workflow trigger is included; objects like appointments or opportunities appear only when the trigger references them.
- Images or files cannot be transmitted through an outbound webhook.
- The feature does not display the exact payload in Execution Logs; a separate testing tool is needed to view the JSON.
10If something goes wrong
- Webhook shows an error in Execution Logs. Verify the URL is typed correctly and reachable. Ensure the receiving service accepts POST requests and can process the JSON format. Review the external application's error logs for additional details.
11How it connects to the rest of HighLevel
- Step by step guide for setting up a custom webhook action Custom webhook guide
- Overview of HighLevel workflow automation basics Workflow basics
- How inbound webhook triggers start workflows Inbound webhook trigger
- HighLevel pricing and plan information Pricing page
Michael's take

Outbound webhooks can feel risky because you’re sending data outside of HighLevel, and any typo in the URL or mismatch in expected format can break the integration. Treat the URL like a password. Copy it carefully and verify the external service is ready to accept the request.
When the webhook works, you can push leads into a custom dashboard, sync appointments with a proprietary scheduling system, or fire off real time notifications. It’s the bridge that lets HighLevel talk to the rest of your tech stack without writing code.