
01Who this is for
- Marketers who run lead capture forms can confirm receipt right away, improving lead handling.
- Customer support teams can receive notifications when a client submits a request, enabling quick follow up.
- Survey administrators can automatically thank respondents, keeping engagement high.
02Automated email notifications, explained
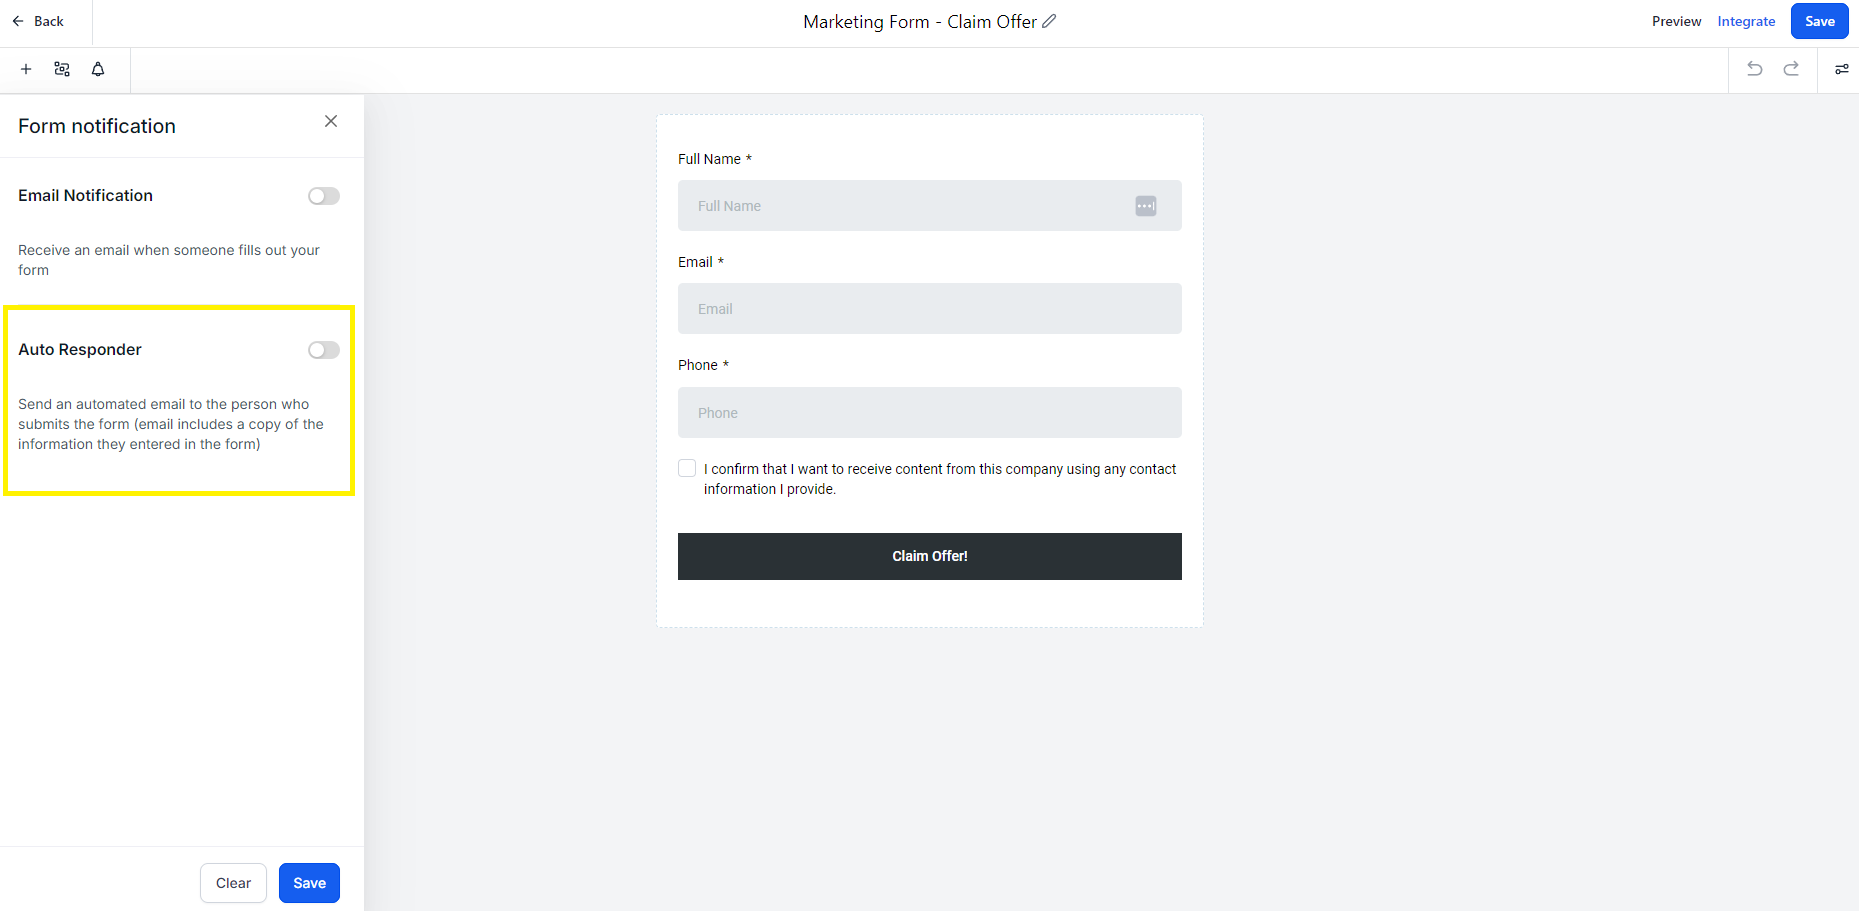
The feature adds two email options to each form or survey. One option sends a copy of the submission to a designated internal address. The second option, called Auto Responder, delivers a pre written email back to the person who completed the form.
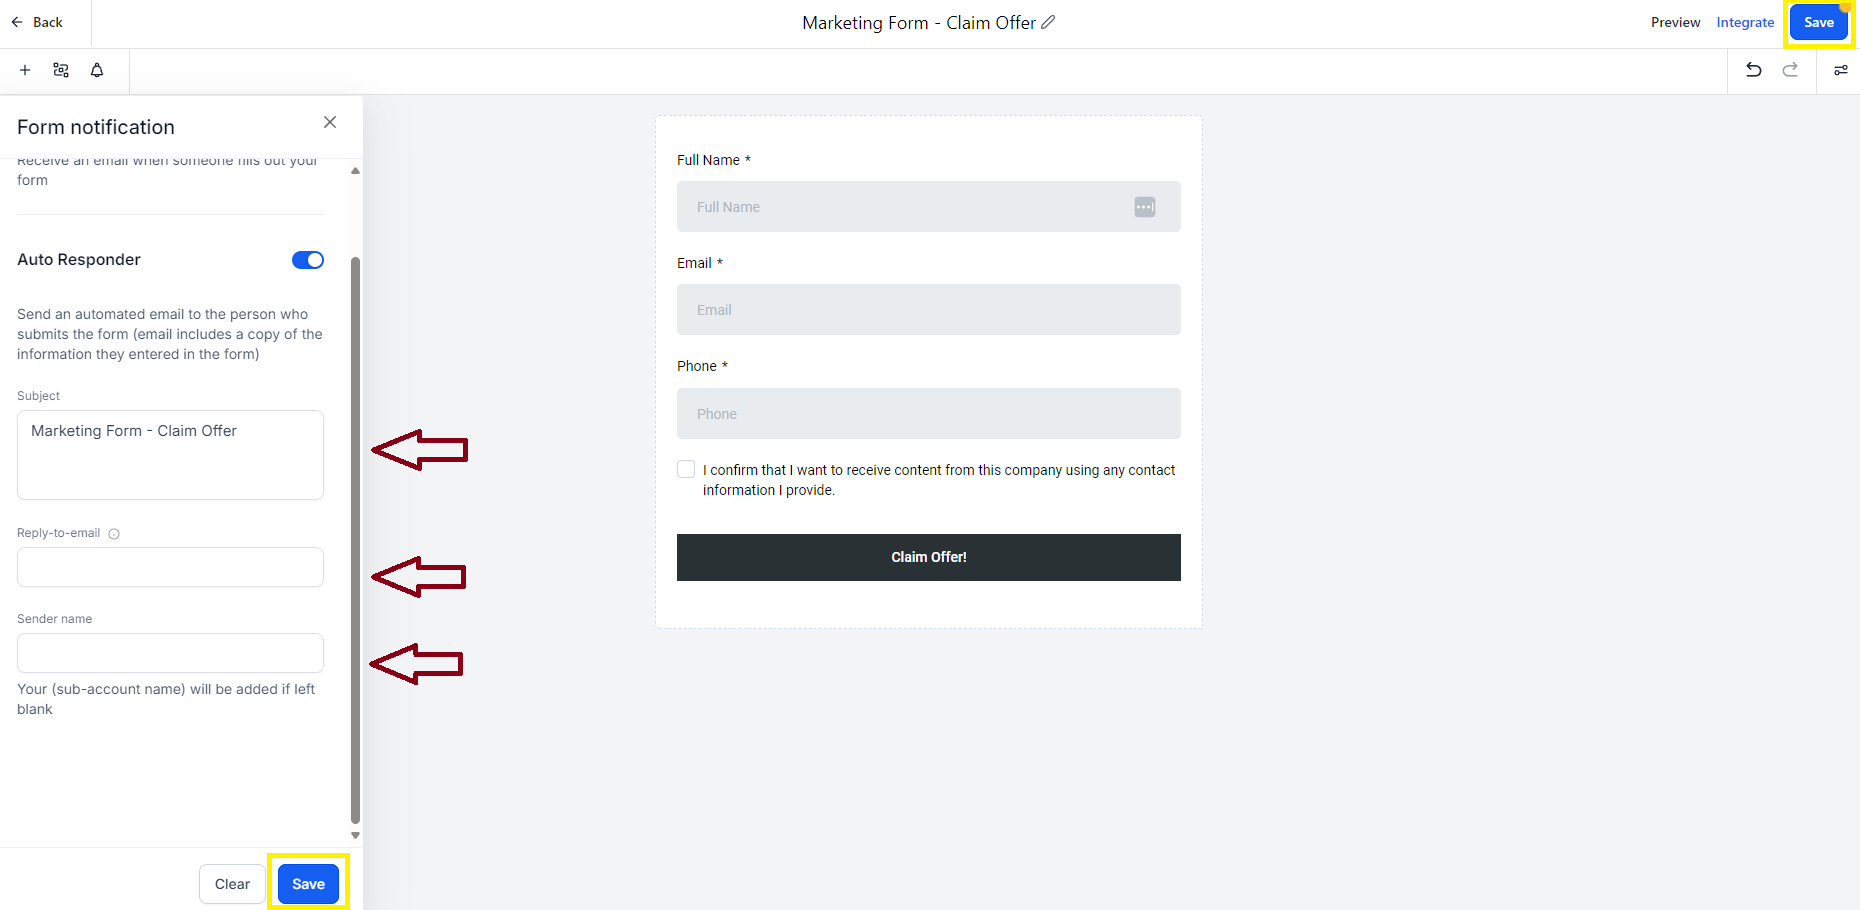
Both options are configured inside the Form Builder. After toggling the switches, you fill out the Subject, Reply to email and optional Sender name fields. The platform then includes these values in the outgoing messages.
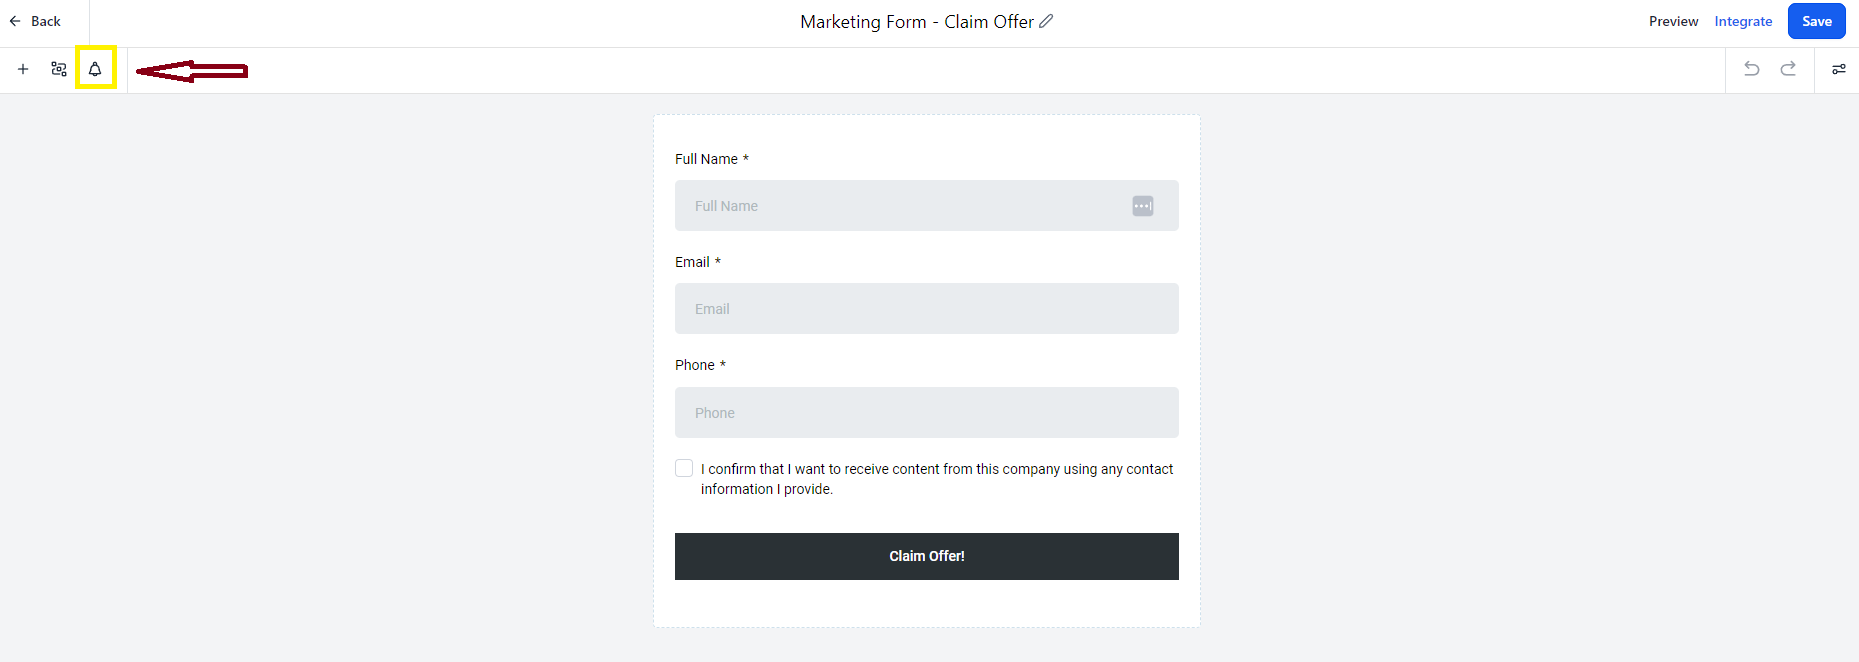
The settings reside under the form’s notification icon in the upper left of the Form Builder. Changes are saved to the individual form, not to the entire account.
03How businesses use automated email notifications
- Digital marketing agency. The agency enables the Auto Responder for its lead capture forms, writes a welcome subject line, sets the reply address to the agency inbox, and customizes the sender name to its brand. This ensures every prospect receives immediate acknowledgment.
- Medical clinic. The clinic turns on internal email notifications for appointment request forms, fills in the subject to indicate a new request, and sets the reply to address to the scheduling team. Staff receive an email each time a patient submits a form.
- Online education platform. The platform activates the Auto Responder for course feedback surveys, supplies a thank you subject, uses a generic reply address, and leaves the sender name blank to default to the location name. Respondents receive a confirmation email after submitting feedback.
04How to set up and use automated email notifications in HighLevel
Activate email notifications for a form or survey
- Navigate to Subaccount > Sites > Forms > Form Builder and either add a new form or select the existing form you want to edit.
- Locate the Bell icon for notifications in the upper left corner and click it.
- Toggle the first option to receive an email when someone fills out the form.
- Toggle the Auto Responder option to send an automated message to the submitter.
- Enter the desired Subject line for the automatic email.
- Provide the Reply to email address that should receive any responses.
- Optionally type a Sender name, or leave it blank to use the default location name, then click Save twice on the upper right to store the changes.
- Click the Preview button on the upper right, fill out the form, and submit to verify that notifications and the auto response are working.
05What it looks like in HighLevel
06Settings that matter
- Subject. Defines the line that appears as the email subject in the automatic message.
- Reply to email. Specifies the address that will receive replies if the recipient responds to the automatic email.
- Sender name. Determines the name shown as the sender of the automatic email; defaults to the location name when left blank.
07Things to know before you rely on it
- The notification options and fields are also available for Surveys.
- Changes apply only to the selected form or survey; other forms remain unaffected.
08How it connects to the rest of HighLevel
- Configuring email alerts and auto responders in HighLevel forms Email notifications guide
- Enable Sticky Contact in HighLevel forms, surveys and calendars Sticky Contact feature
- Embedding HighLevel forms on popular website builders Form embedding guide
Michael's take

Automated email notifications are a neat way to keep both prospects and your team in the loop without extra effort.
If you don’t need to send a response back to the person filling out a form or you already have another system handling alerts, you can skip this feature.