
01Who this is for
- Founders who need a fully custom site to match their brand and capture leads.
- Small business owners who want to build a web presence without using a pre made template.
02Websites from blank, explained
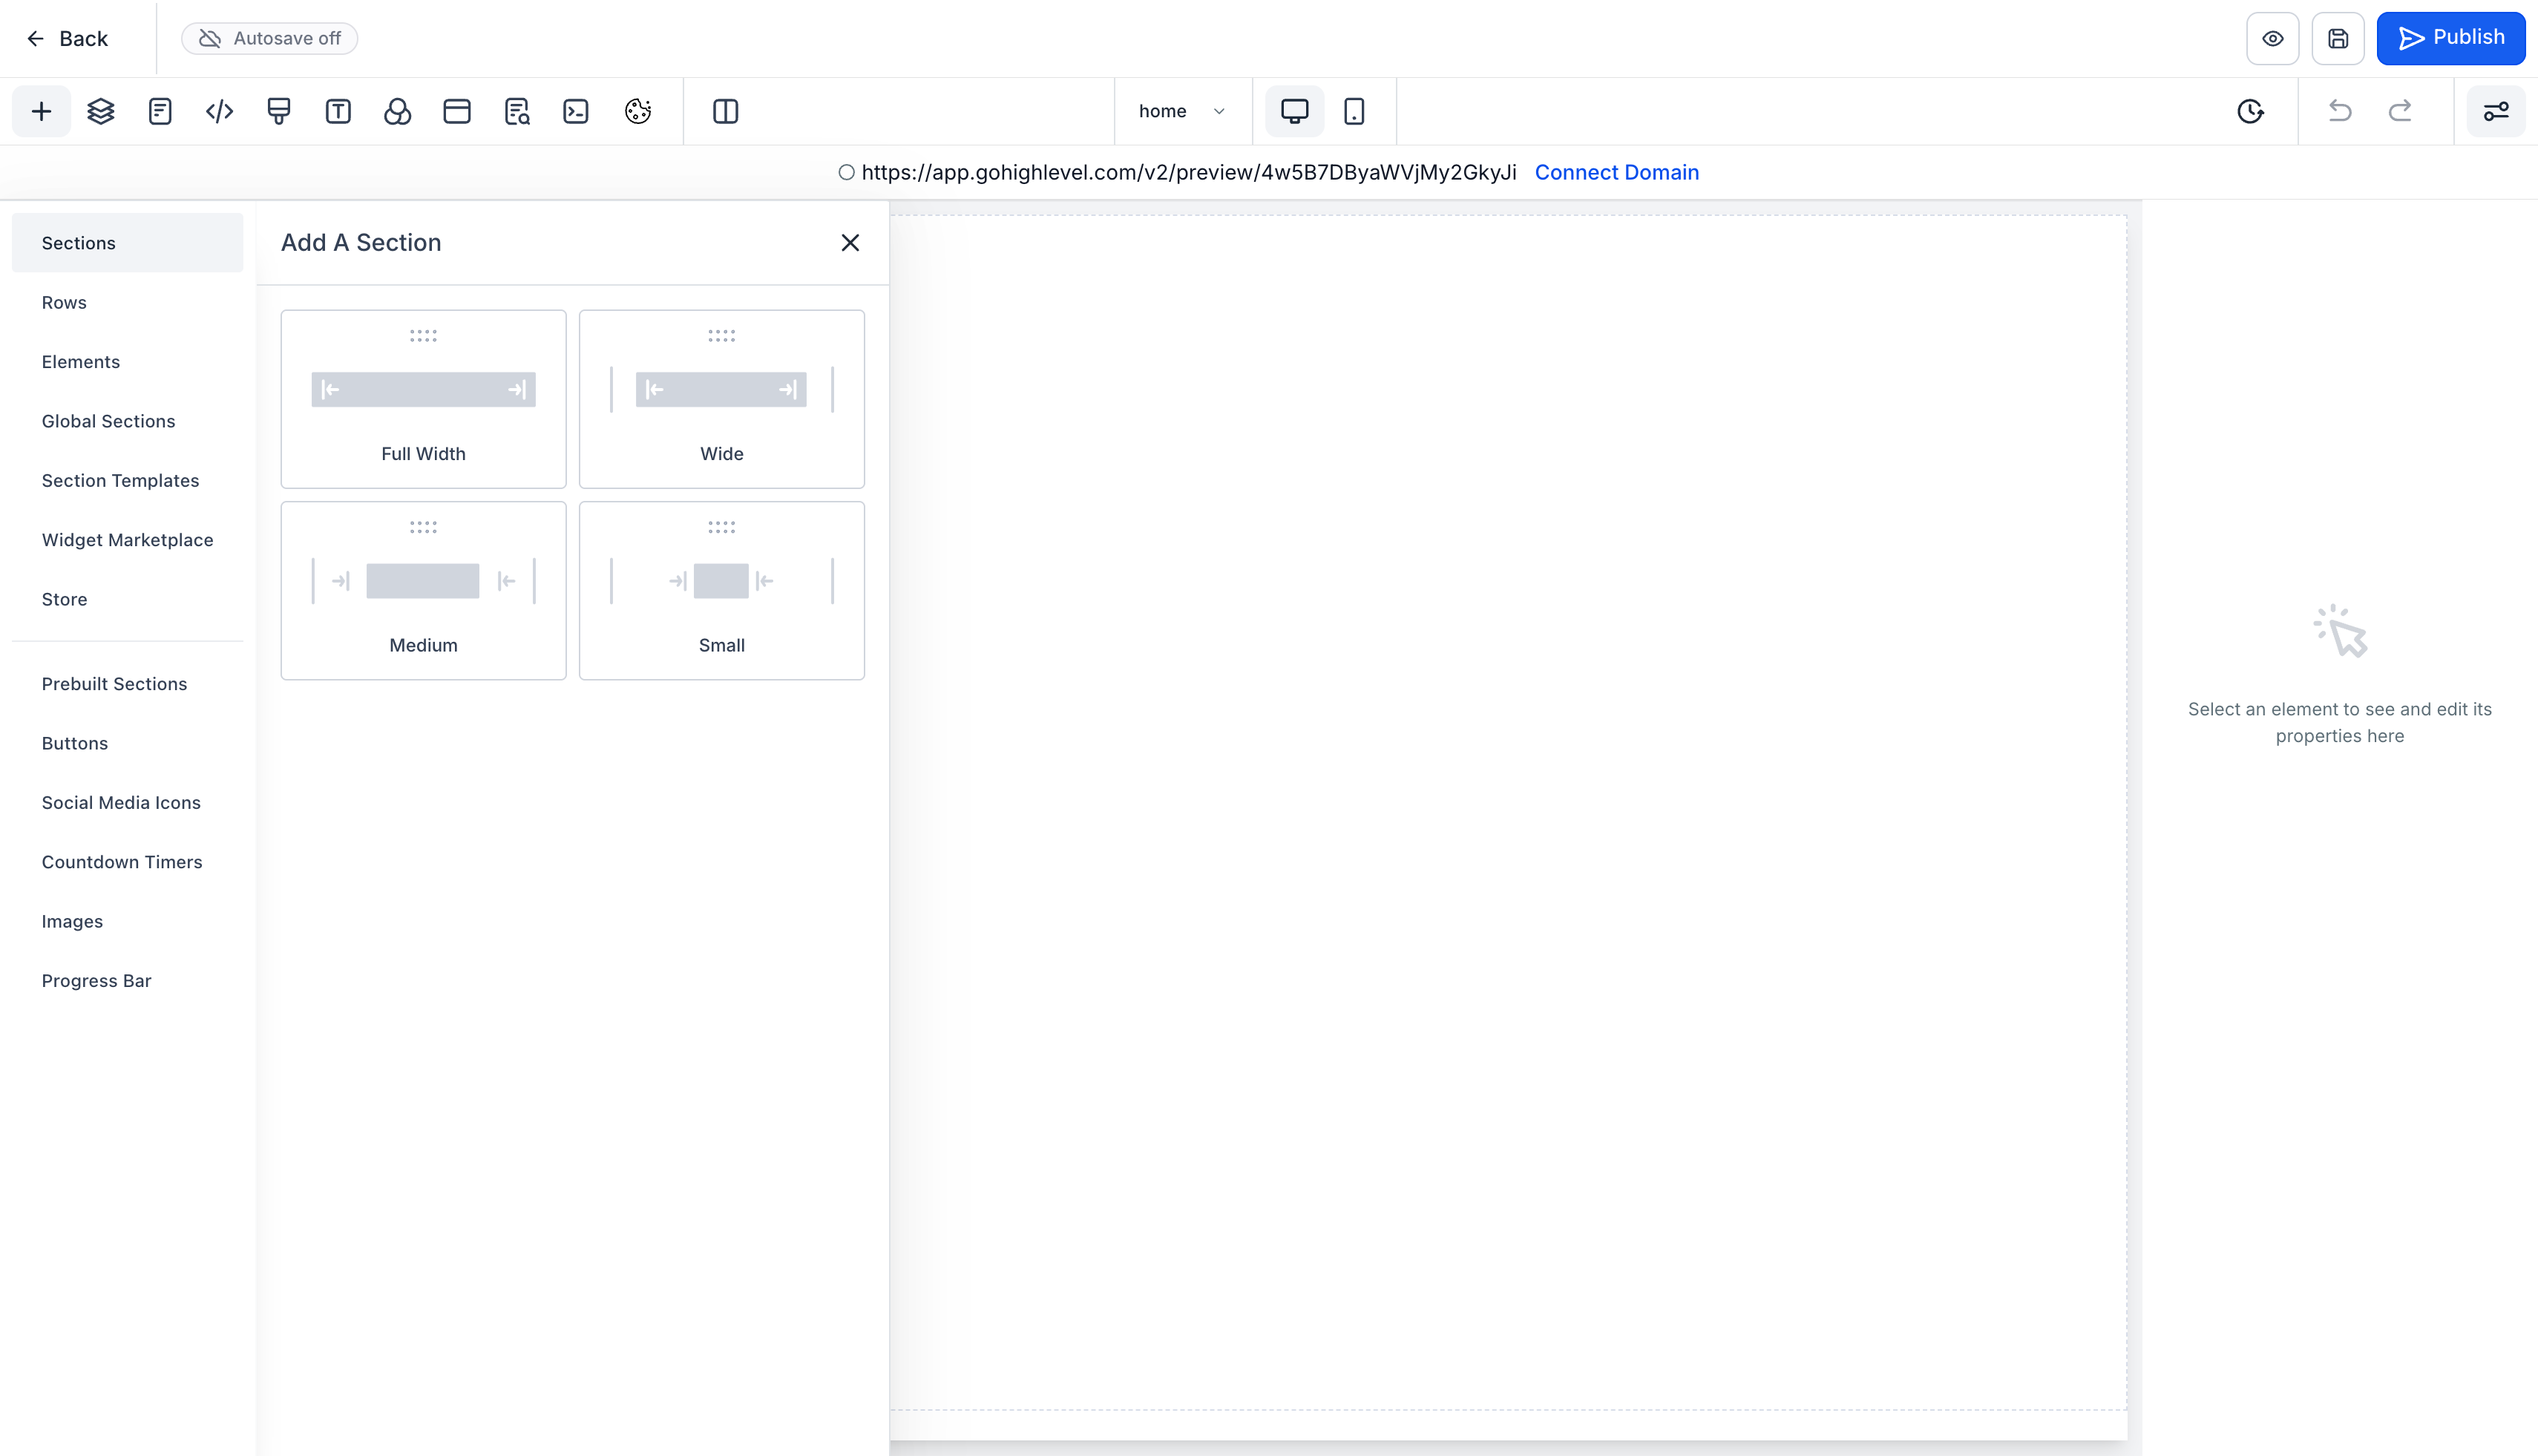
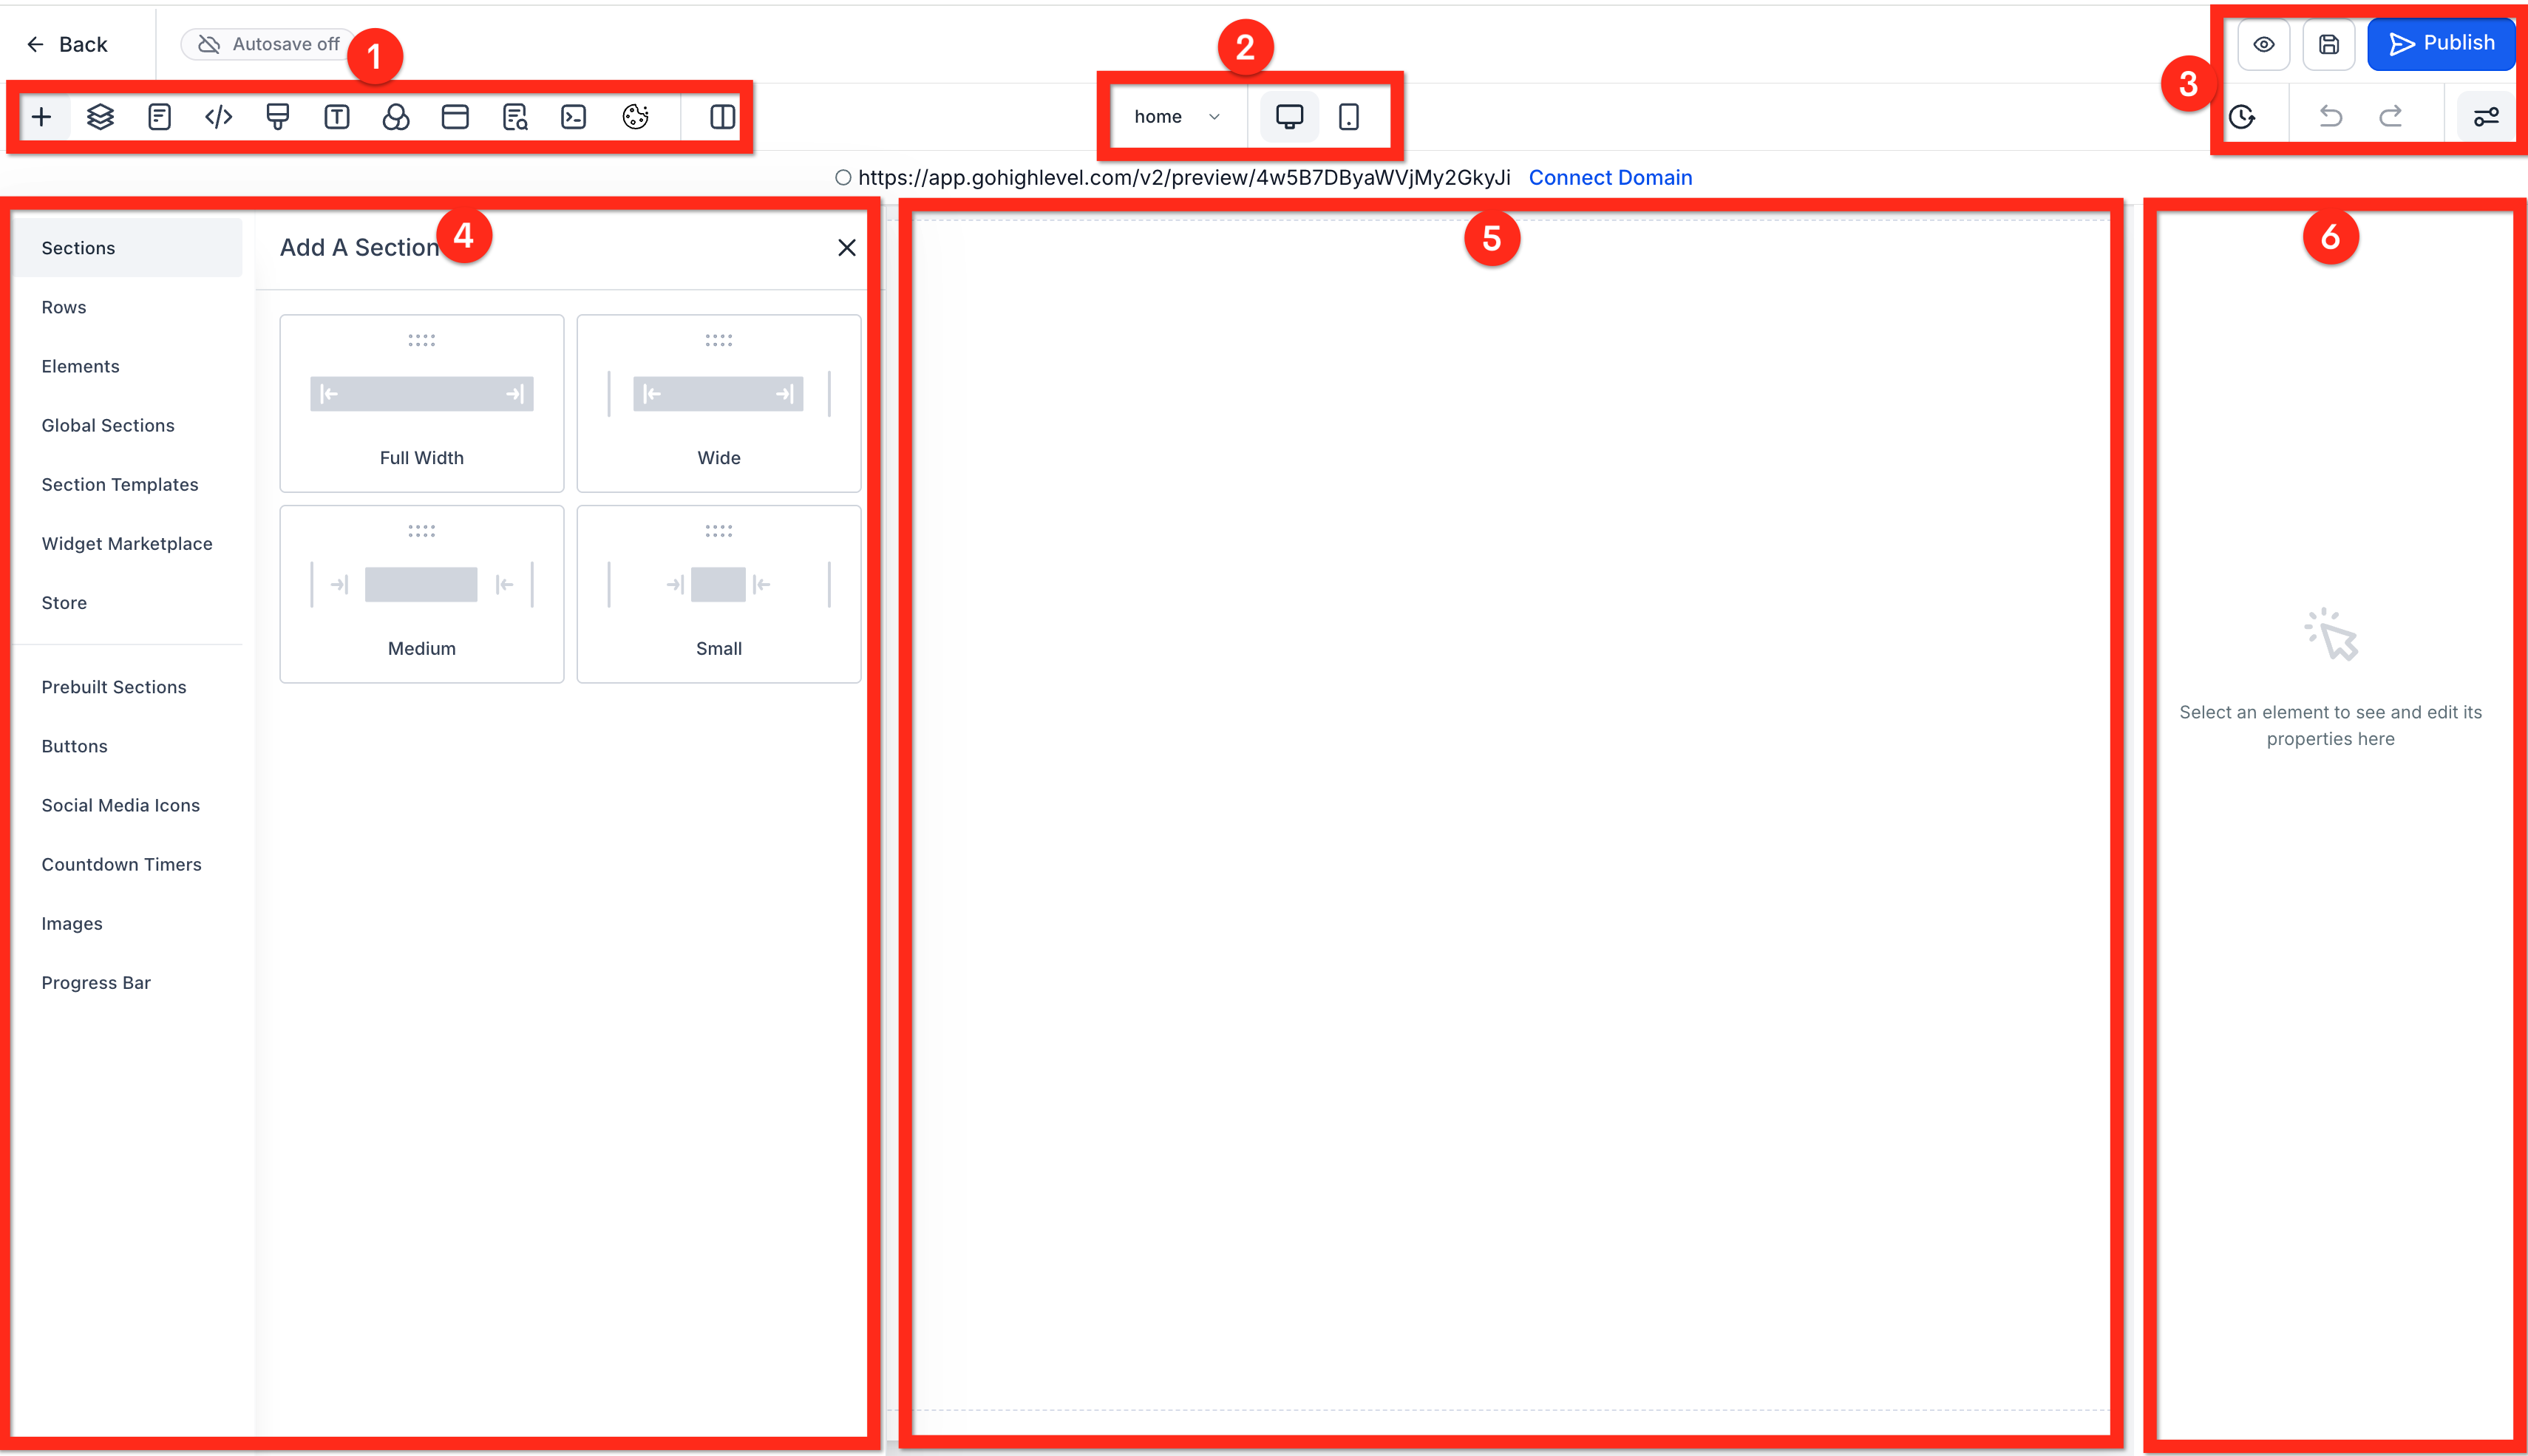
The blank website feature opens a fresh canvas inside the Sites area. You start with a new site, then add sections, rows, and individual elements such as headlines, buttons, and navigation menus. The builder shows a left panel for elements, a center panel with a live preview, and a right panel for styling and settings.
All pages are created from scratch, so you decide the layout, content, and SEO metadata for each page. After designing, you can preview desktop and mobile views, adjust responsiveness, and publish the final version. Domain connection and SEO entry are optional steps that live in the Settings tab of the site.
The process lives under Sites > Websites in the HighLevel navigation. Each step, building the home page, adding additional pages, setting navigation, and publishing, has its own controls within the website builder.
03How businesses use website from blank
- Consulting firm. The firm creates a home page with a headline, sub headline, and call to action button that dials their office. They add about, services, and contact pages, then set up a navigation menu linking each page. Finally they preview on mobile and publish the site.
- Fitness studio. The studio builds a homepage that showcases class videos and a button to schedule a trial. They add a class schedule page and a membership page, configure navigation links, and edit SEO titles before making the site live.
- Ecommerce retailer. The retailer designs a product landing page with headline, images, and a button that leads to a checkout flow. They add additional pages for about and contact, insert a navigation menu, preview the layout on mobile, set SEO meta data, and publish.
04How to set up and use website from blank in HighLevel
Create the home page layout and content
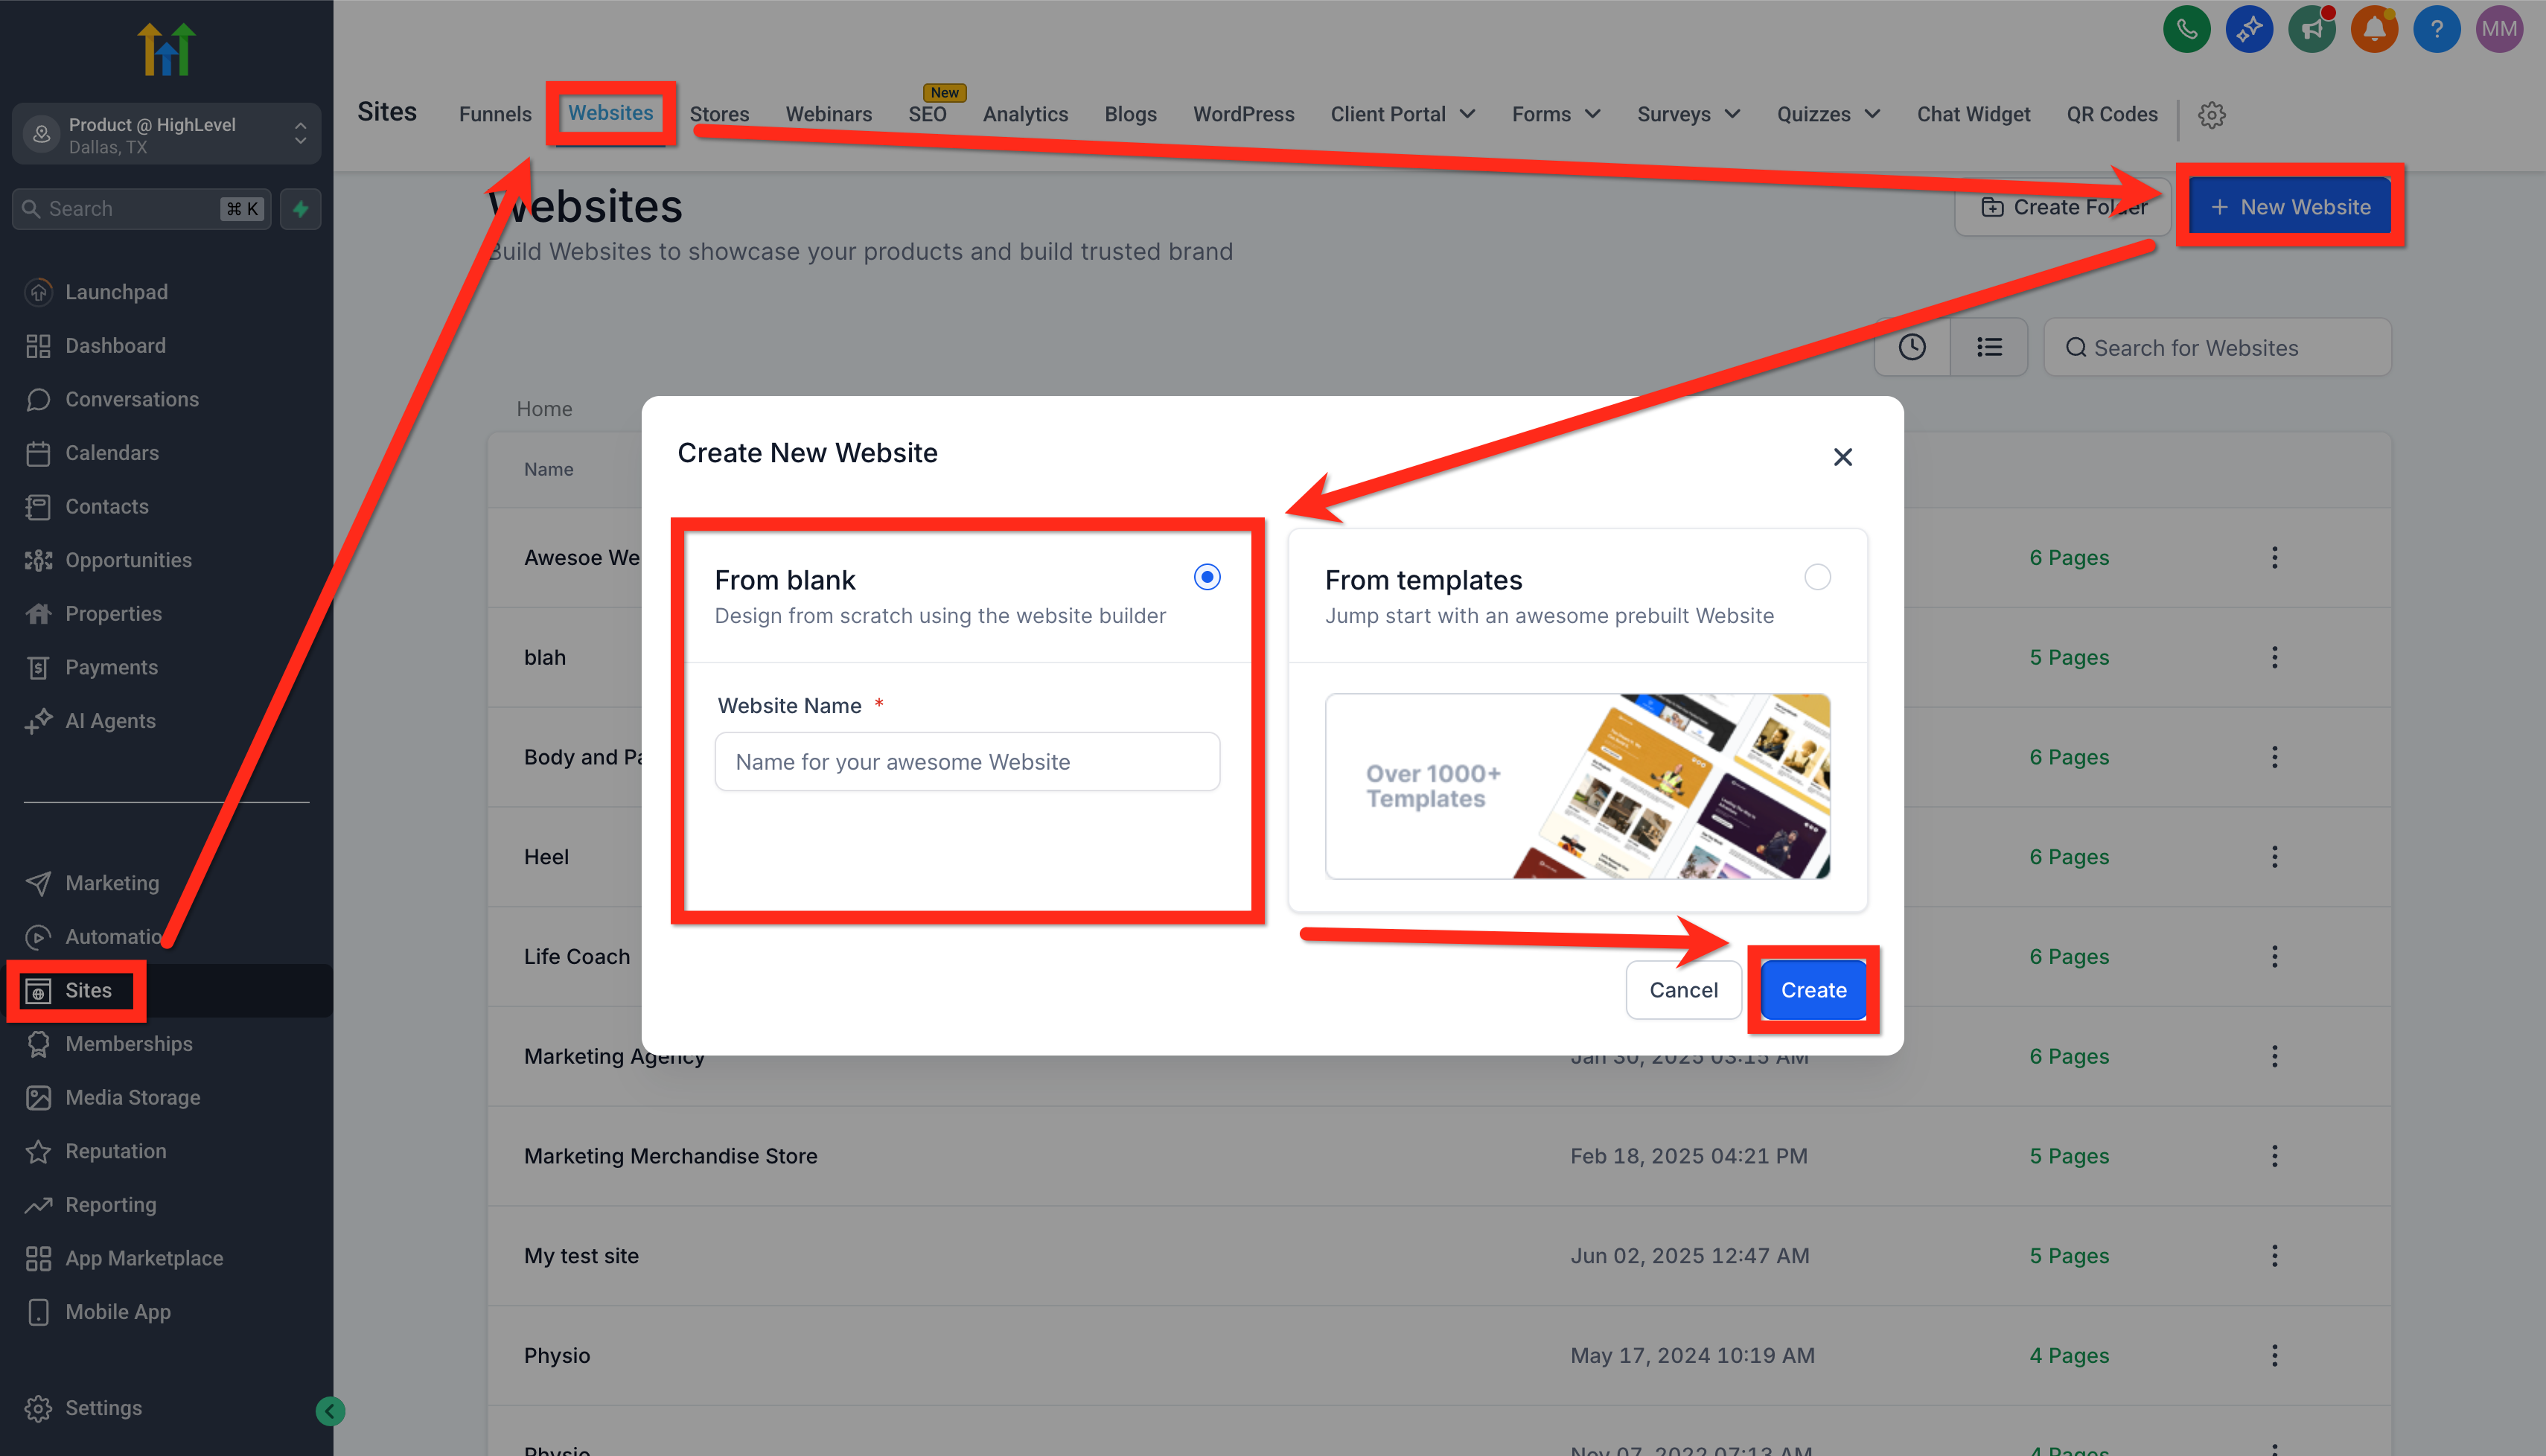
- Click Create From Blank to start a new page.
- Open the Website Builder interface.
- Add a full width section using the plus icon on the left sidebar.
- Insert a row inside the section and choose a single column layout.
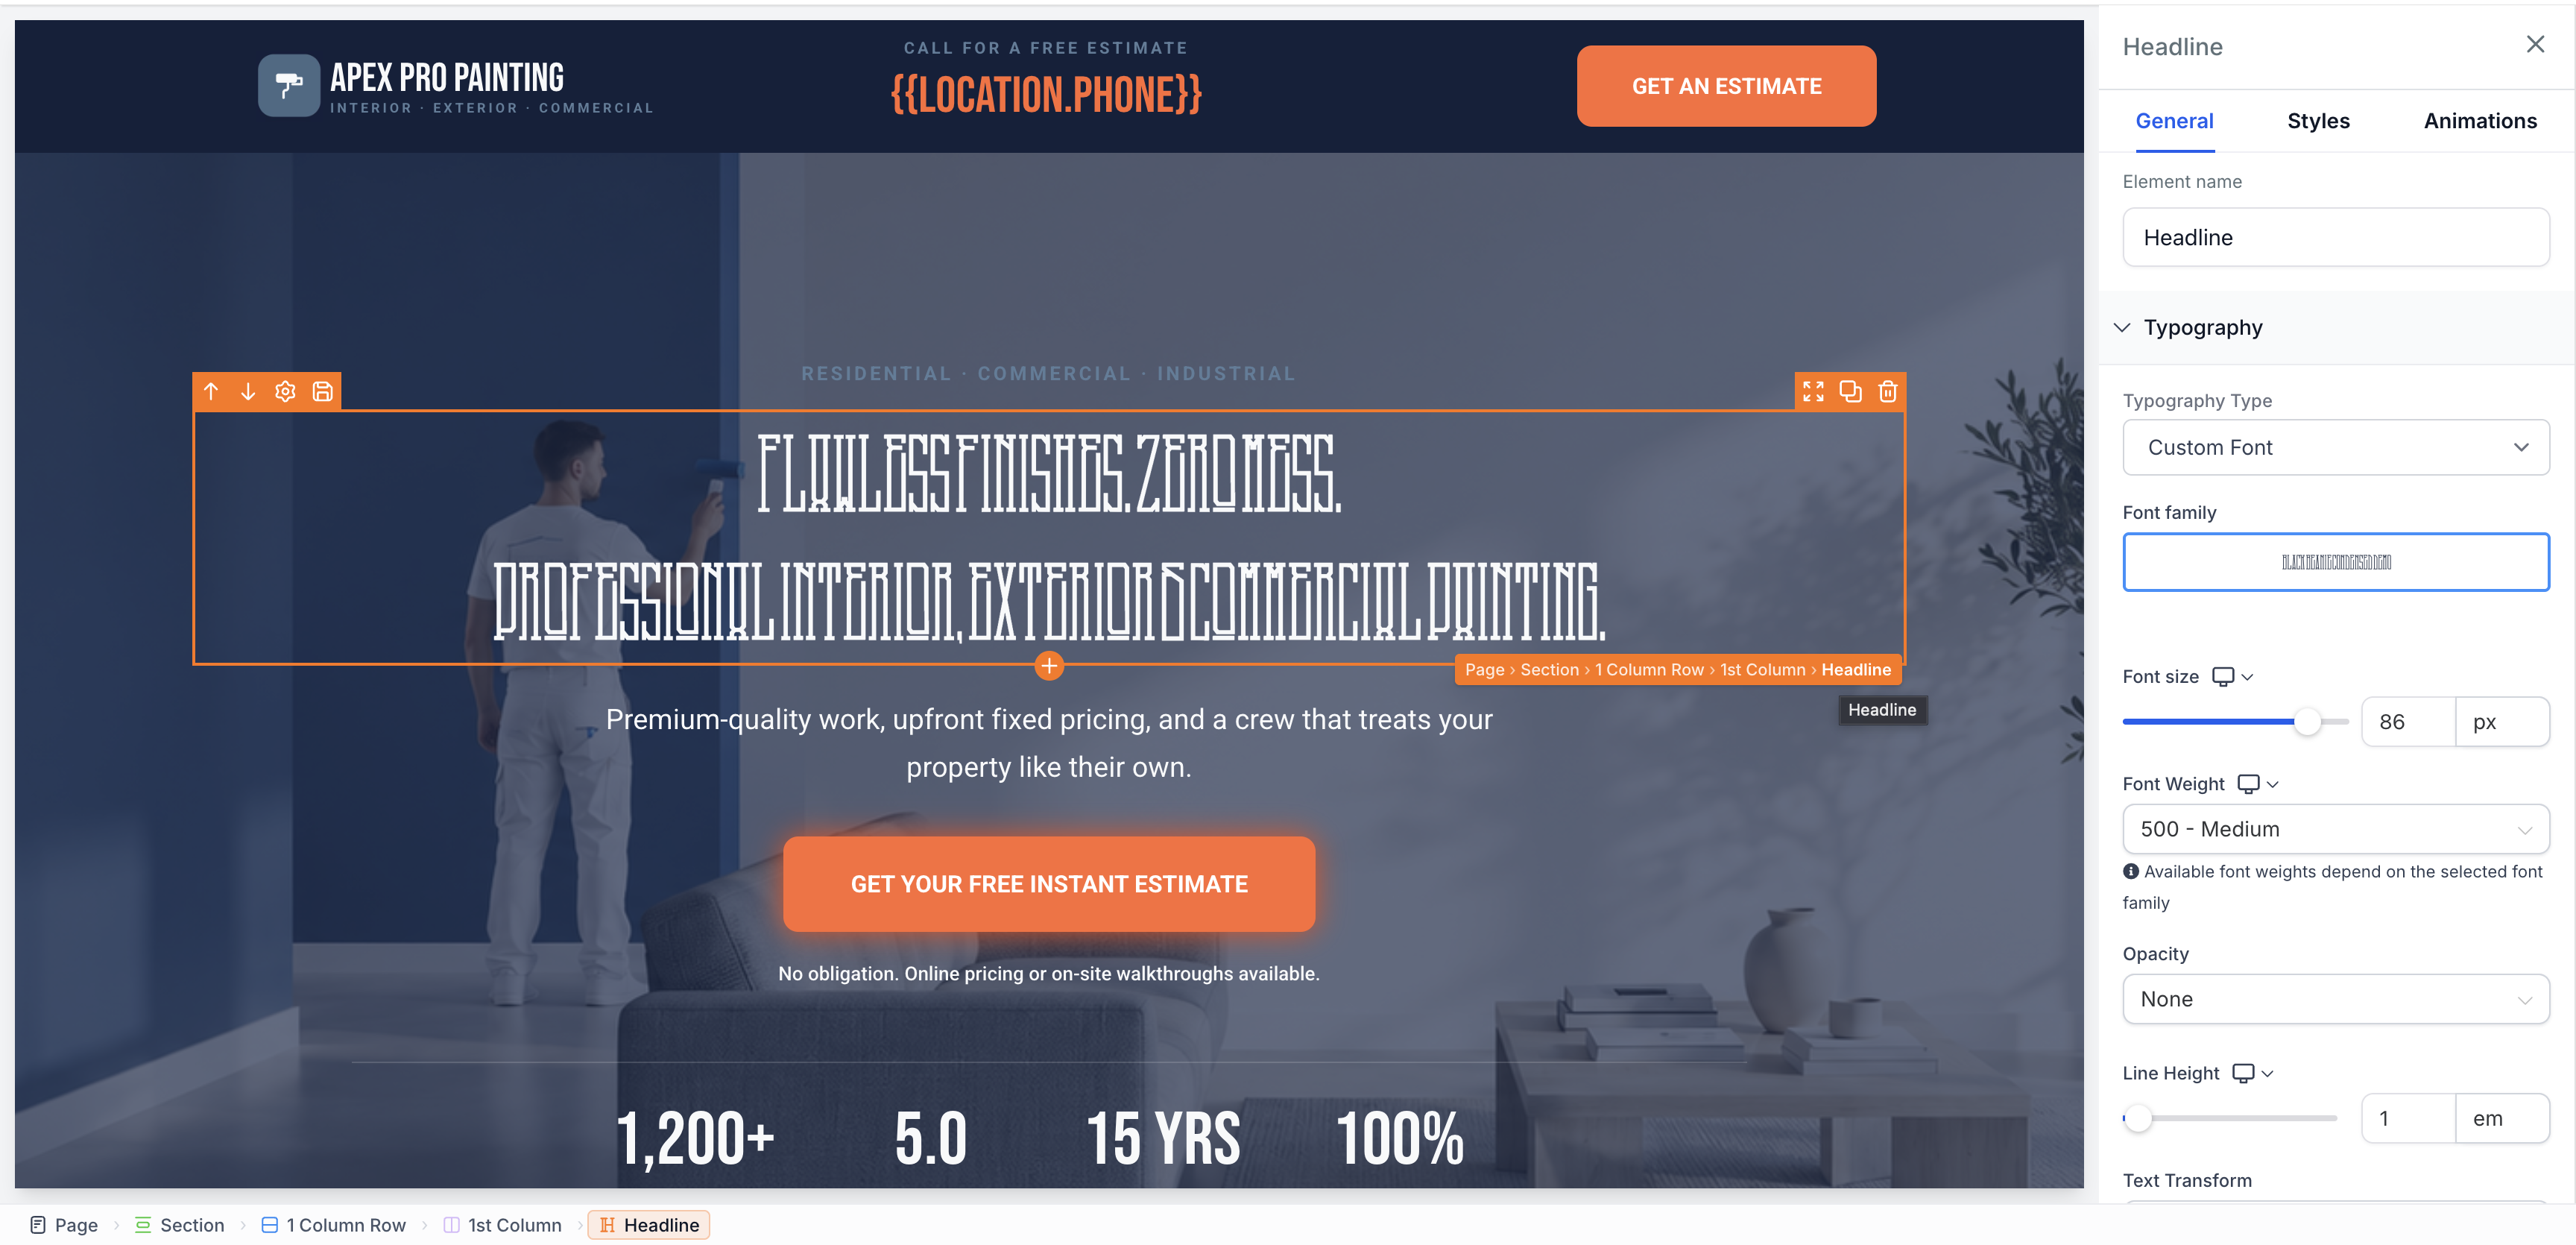
- Add a Headline element to the column and edit its text and style.
- Add a Sub Headline element below the headline and customize its appearance.
- Place a Button element under the sub headline and change its label to the desired call to action.
- In the button's settings, select Button Actions, choose Call, and enter a phone number.
- Save the page by clicking the save icon.
Add additional pages to the website
- Navigate to Sites > Websites > Site Details, using the back button if still in the page editor.
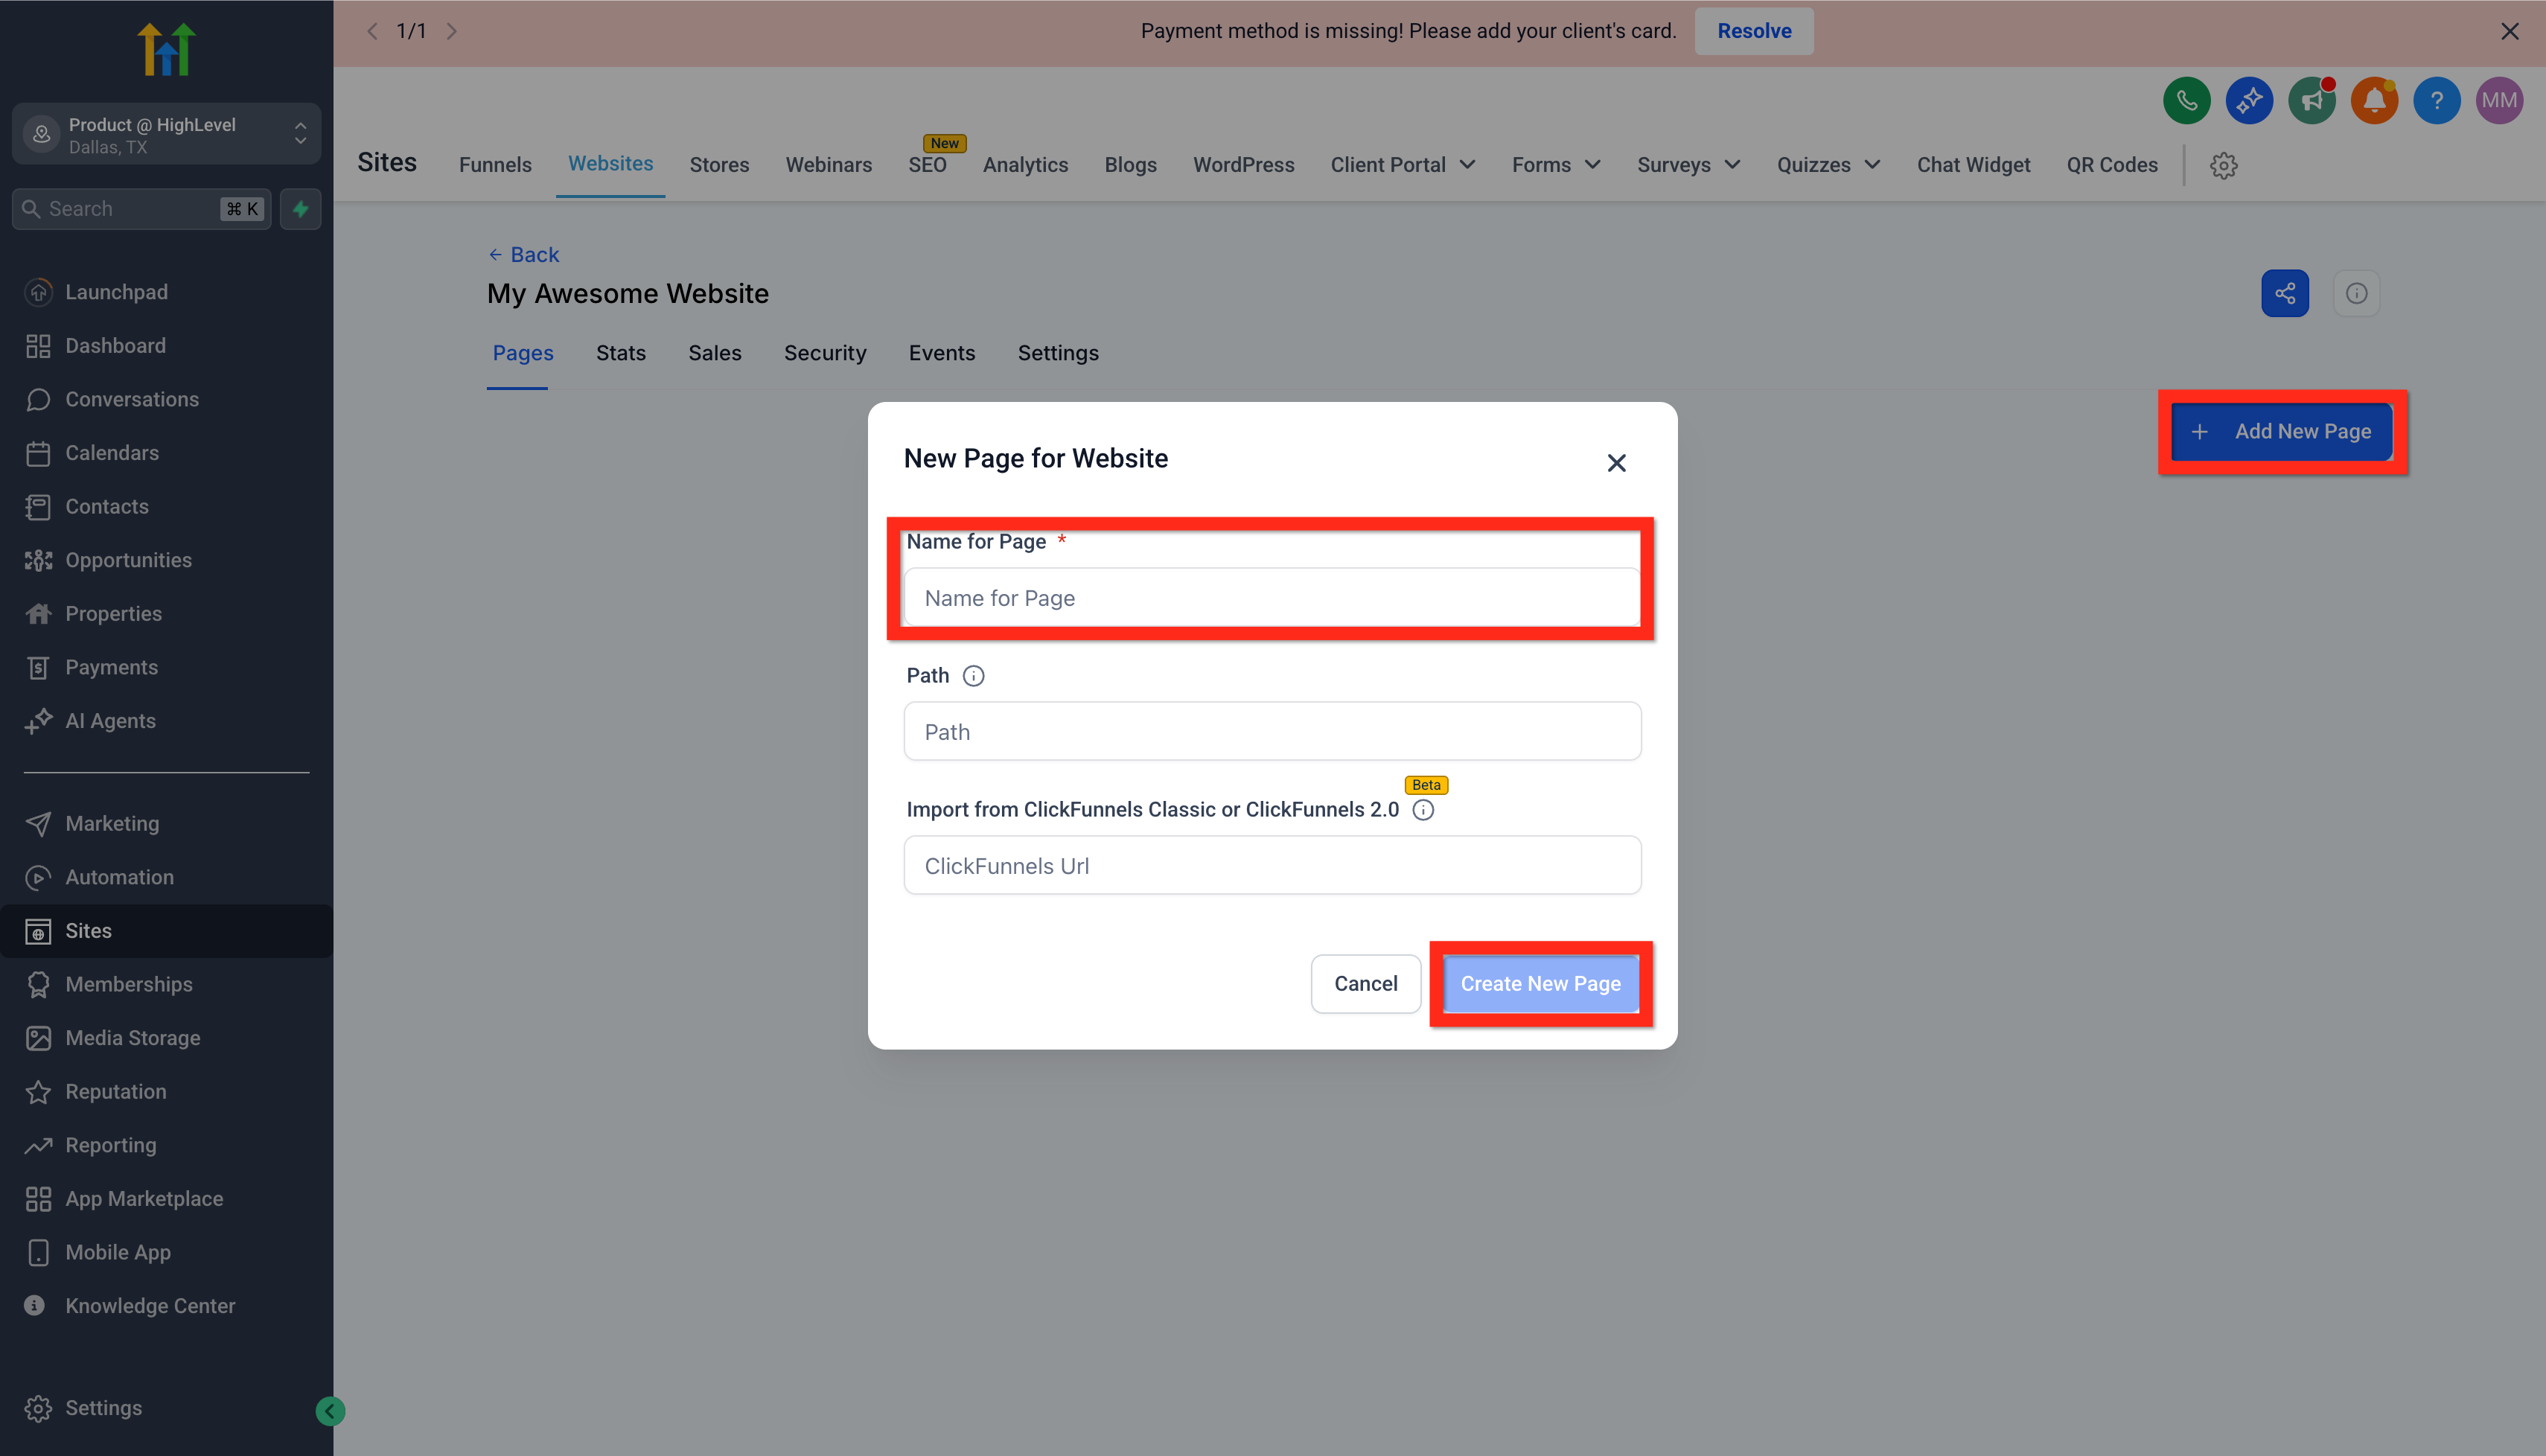
- Click Add New Page, type the page name, and confirm with Create New Page.
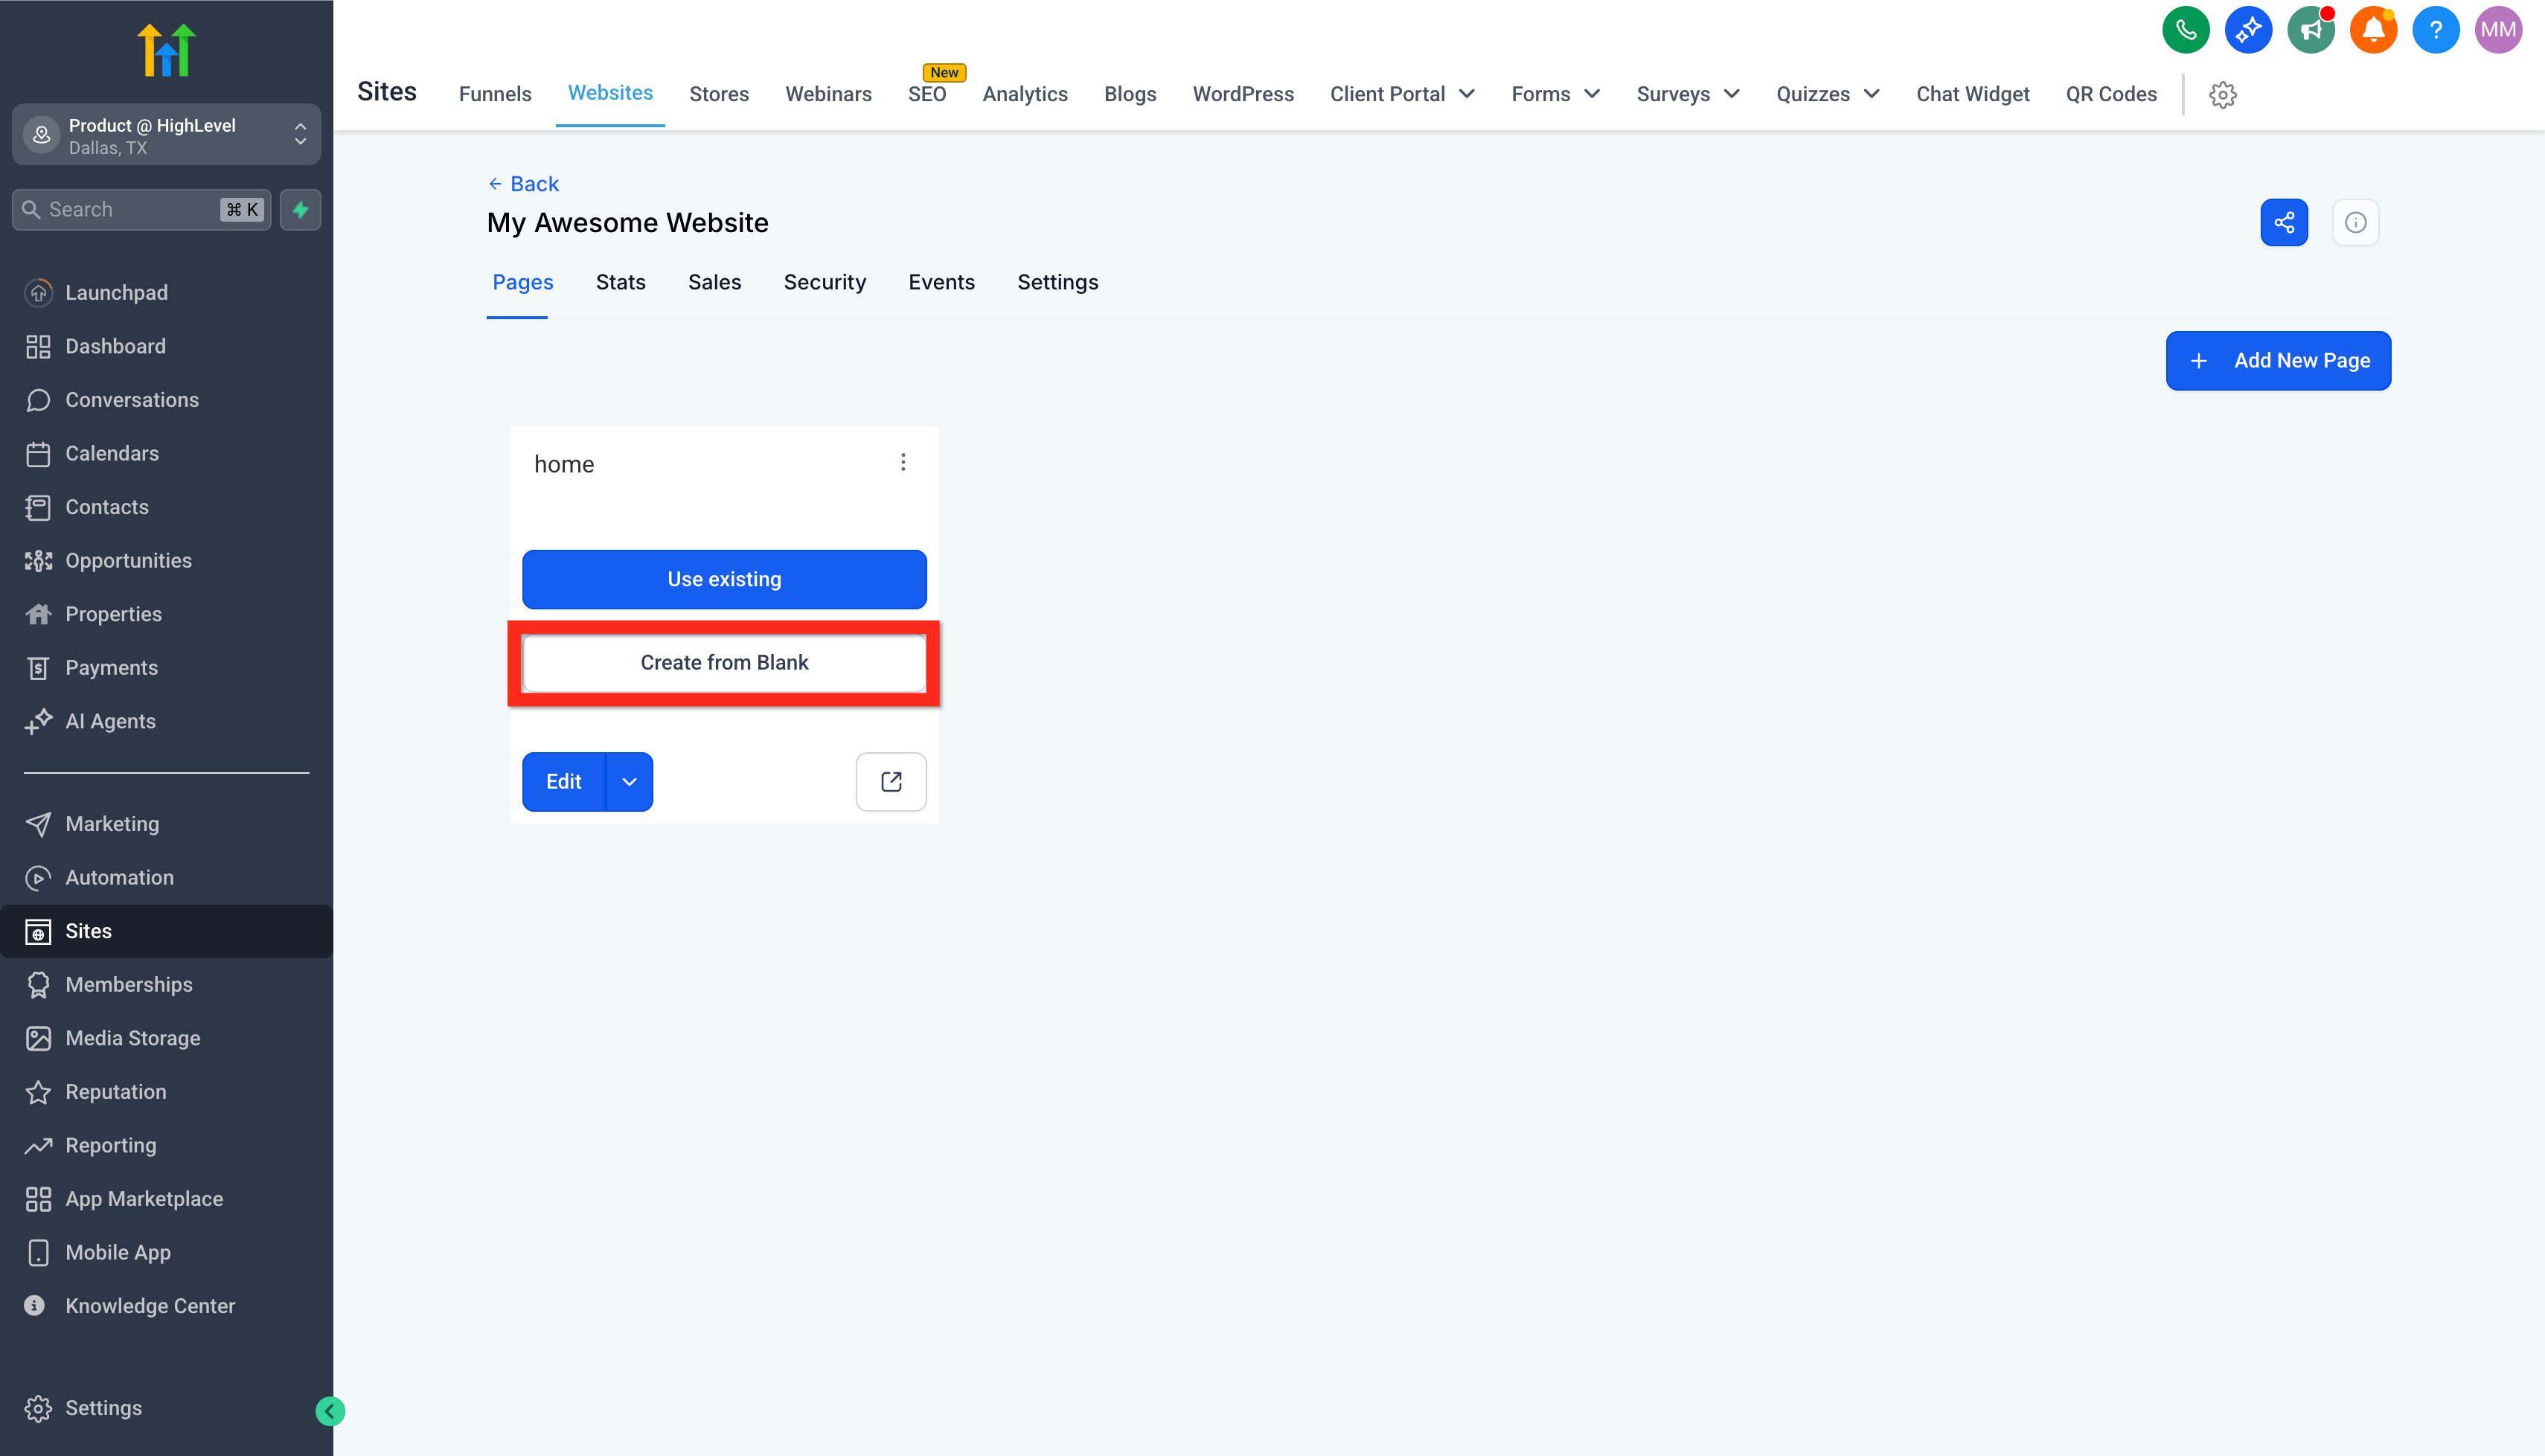
- Press the Create From Blank button for the new page.
- Add elements such as text and images to build the page content.
- Save the page and return to the site overview.
Insert navigation menu and footer into the site
- Navigate to Sites > Websites > Site Details and go back from the editor if needed.
- Select Edit on the Home page card.
- Add a new full width section at the top of the page.
- Inside that section, add a one column row and drop a Navigation Menu element into it.
- Configure each menu link, add a logo, and adjust settings in the right panel.
- Add a bottom full width section, drag a prebuilt Footer element into it, adjust its settings, then save and go back.
Preview the site, set SEO metadata, and publish
- Open the preview for the site from Site Details or click the preview icon in the builder.
- Switch to mobile view using the mobile phone icon or the inspector’s device toggle.
- Modify elements until the layout looks correct on both desktop and mobile views.
- Save any changes and click Publish to make the site live.
- Open the SEO panel via the SEO icon, edit the title and description, and optionally connect a custom domain from the Settings tab.
05What it looks like in HighLevel
06Settings that matter
- Button Actions. Specifies the behavior that occurs when a button is clicked, such as initiating a phone call.
- SEO Meta Data. Controls the page title, description, and other search engine optimization fields for a page.
07Things to know before you rely on it
- Connecting a custom domain is optional and must be done from the Settings tab.
- Mobile only visibility requires using advanced settings on individual elements.
08If something goes wrong
- The live website still shows old content. Open the page in the Website Builder, click Save, then click Publish, and view the site in an incognito browser.
- The domain shows as pending or is not connecting. Verify DNS records match HighLevel values, correct any typing errors, remove conflicting records, and allow time for propagation.
- The website opens a 404 page. Ensure the domain is assigned to the correct website, the intended page is published, the URL path is correct, and the home page setting points to the right page.
- The website shows an SSL or privacy warning. Check for incorrect or conflicting DNS records, adjust Cloudflare settings to DNS only when required, and allow time for the SSL certificate to issue.
- Navigation links open the wrong page. Open the Navigation Menu element and verify each menu item points to the correct page or URL.
- The website looks incorrect on mobile. Switch to mobile view in the builder, review element spacing, font sizes, and column widths, then adjust or set visibility accordingly before saving and publishing again.
- Forms, calendars, or buttons are not working. Test each form, calendar link, and button as a visitor, confirm submissions create the expected records, and verify that links open the correct destinations.
09How it connects to the rest of HighLevel
- Connect a custom domain to your site Connect domain
- Overview of website setup steps in HighLevel Website setup overview
- Explore all Sites features available in HighLevel All Sites features
Michael's take

It gives you control over layout, messaging and branding while letting you launch quickly.
Don’t forget to publish each page after you save; otherwise visitors will still see the old version.