
01Who this is for
- Founders who need consistent brand messaging across client acquisition forms.
- Marketing managers who want a controlled thank you experience without redirects.
- Web designers who require desktop and mobile styling for on submit screens.
02On Submit messages, explained
The On Submit Message Editor replaces the default plain thank you screen with a customizable layout. Users can add headlines, subtext, images, emojis, and links, and adjust colors, fonts, padding, margins, and corner radius. The editor shows a live preview against the form background.
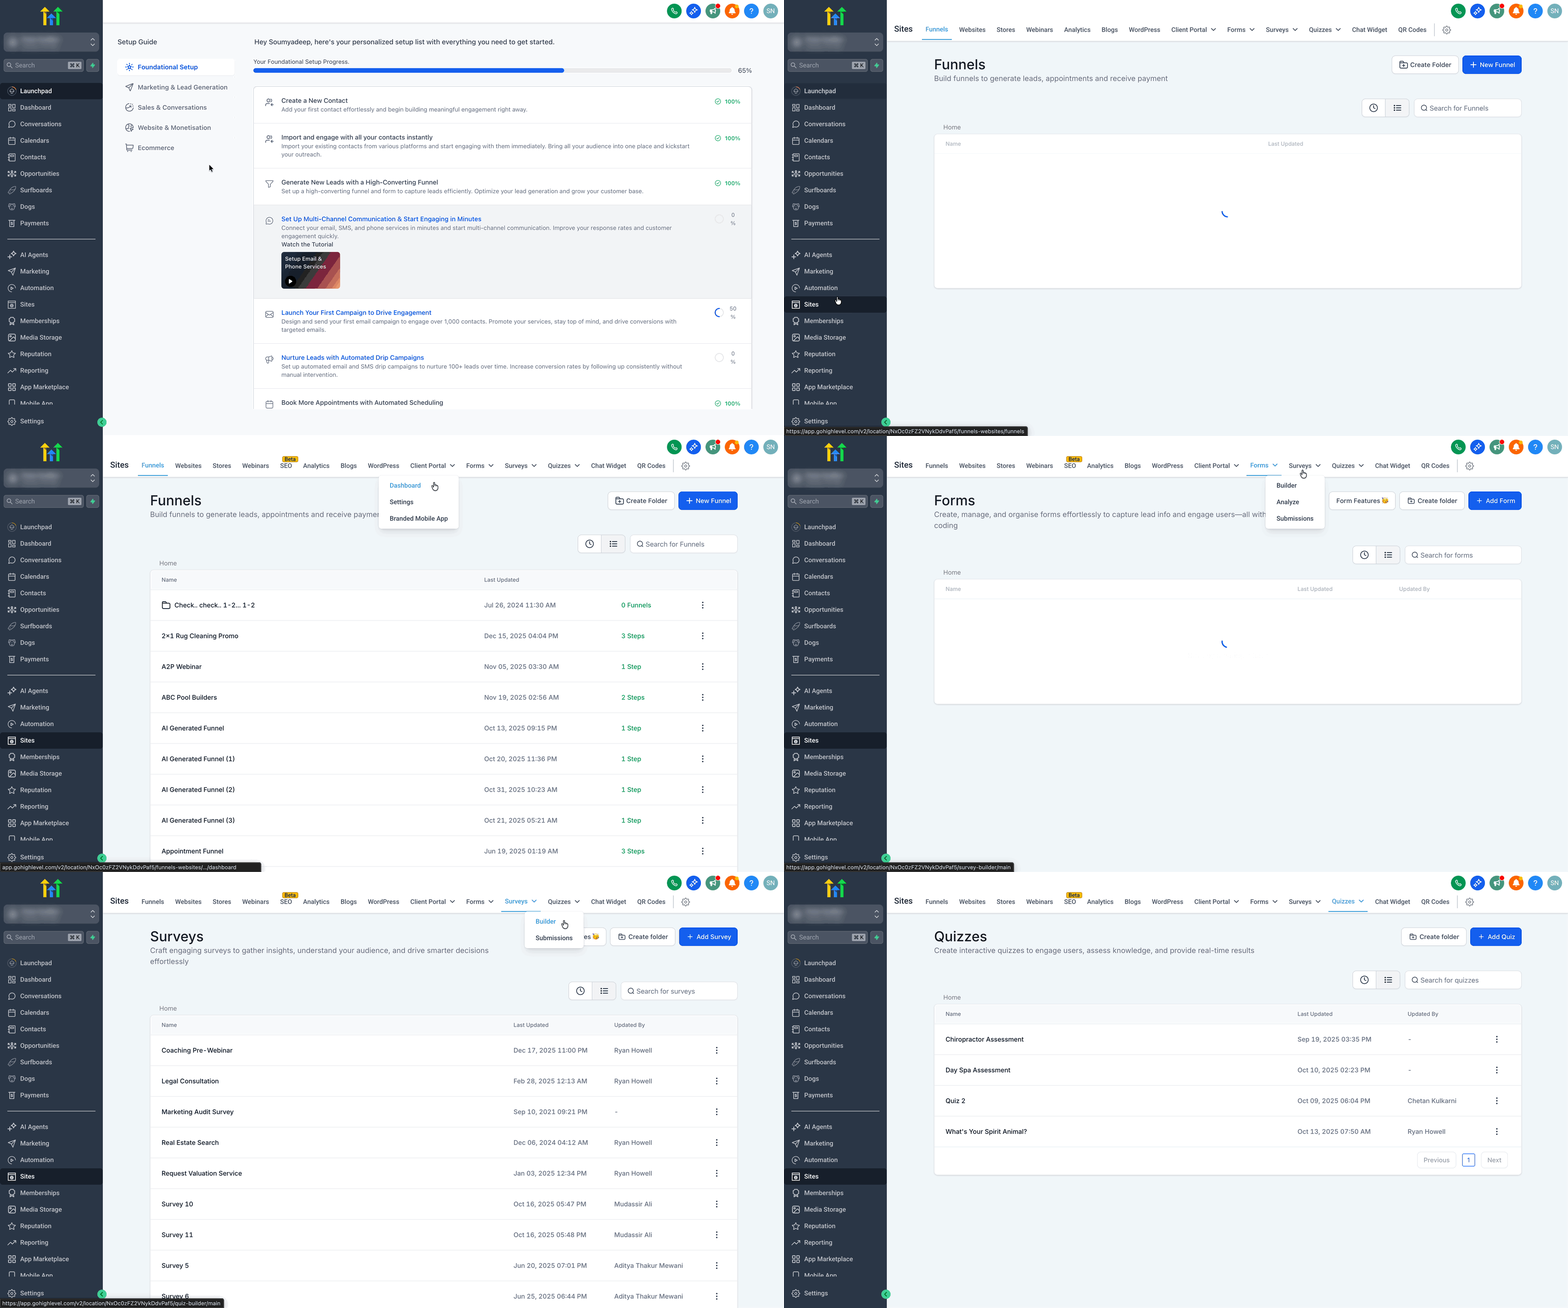
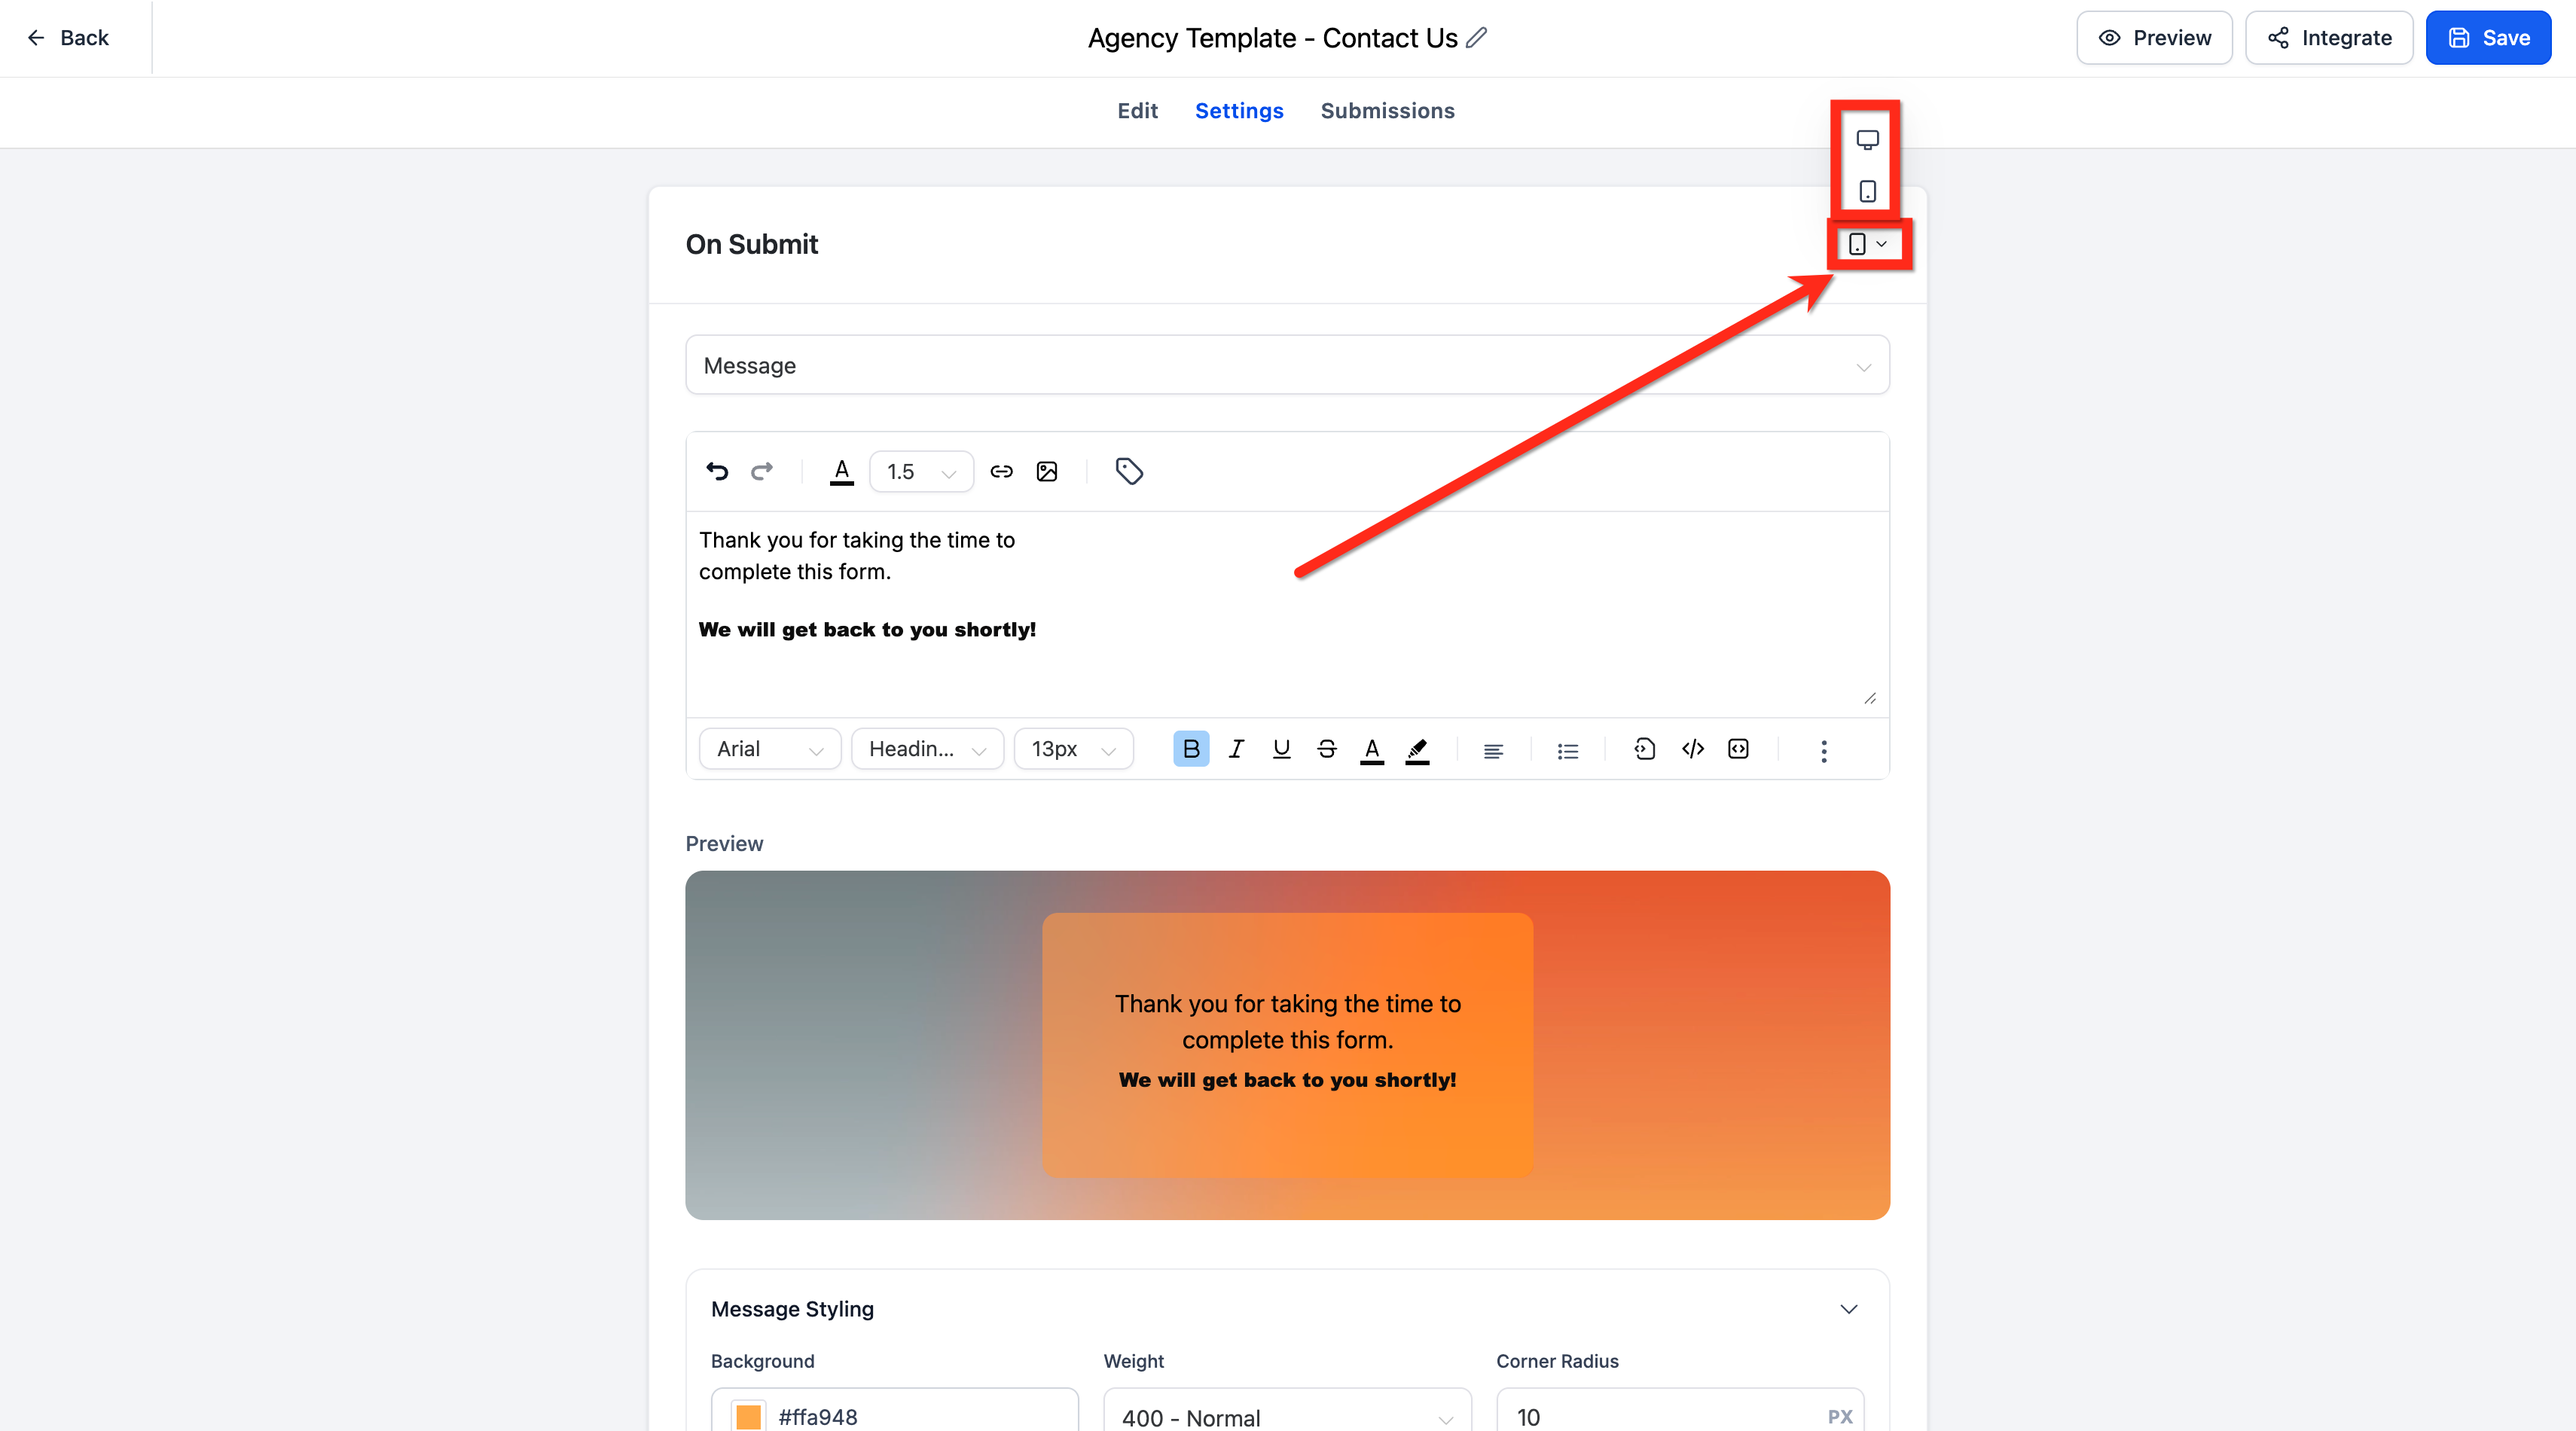
The feature is located inside the form, survey, or quiz builder. After opening a form, users go to Settings and select the On Submit tab, then choose Message from the dropdown. Separate styling controls exist for desktop and mobile views, and a background blur option appears when a background image is set.
03How businesses use the On Submit message
- Fitness studio. The studio builds a class sign up form and uses the On Submit Message Editor to display a branded confirmation with class details and a photo. They set a solid message box with the studio colors and enable background blur for readability.
- Legal consultancy. The consultancy creates a lead capture survey and designs a professional thank you message that matches their brand fonts and spacing. They adjust padding and margin for mobile to ensure the text is clear on all devices.
- Ecommerce store. The store adds an on submit message to a product request quiz. They include a promotional image and a link to a special offer, using the editor’s image insertion and link tools, and preview the result before publishing.
04Before you start
- Log in to the appropriate subaccount.
- Have a form, survey, or quiz created or selected for editing.
05How to set up and use the On Submit message in HighLevel
Customise on submit message
- Log in to the subaccount.
- Navigate to Sites > Forms/Surveys/Quizzes > Builder.
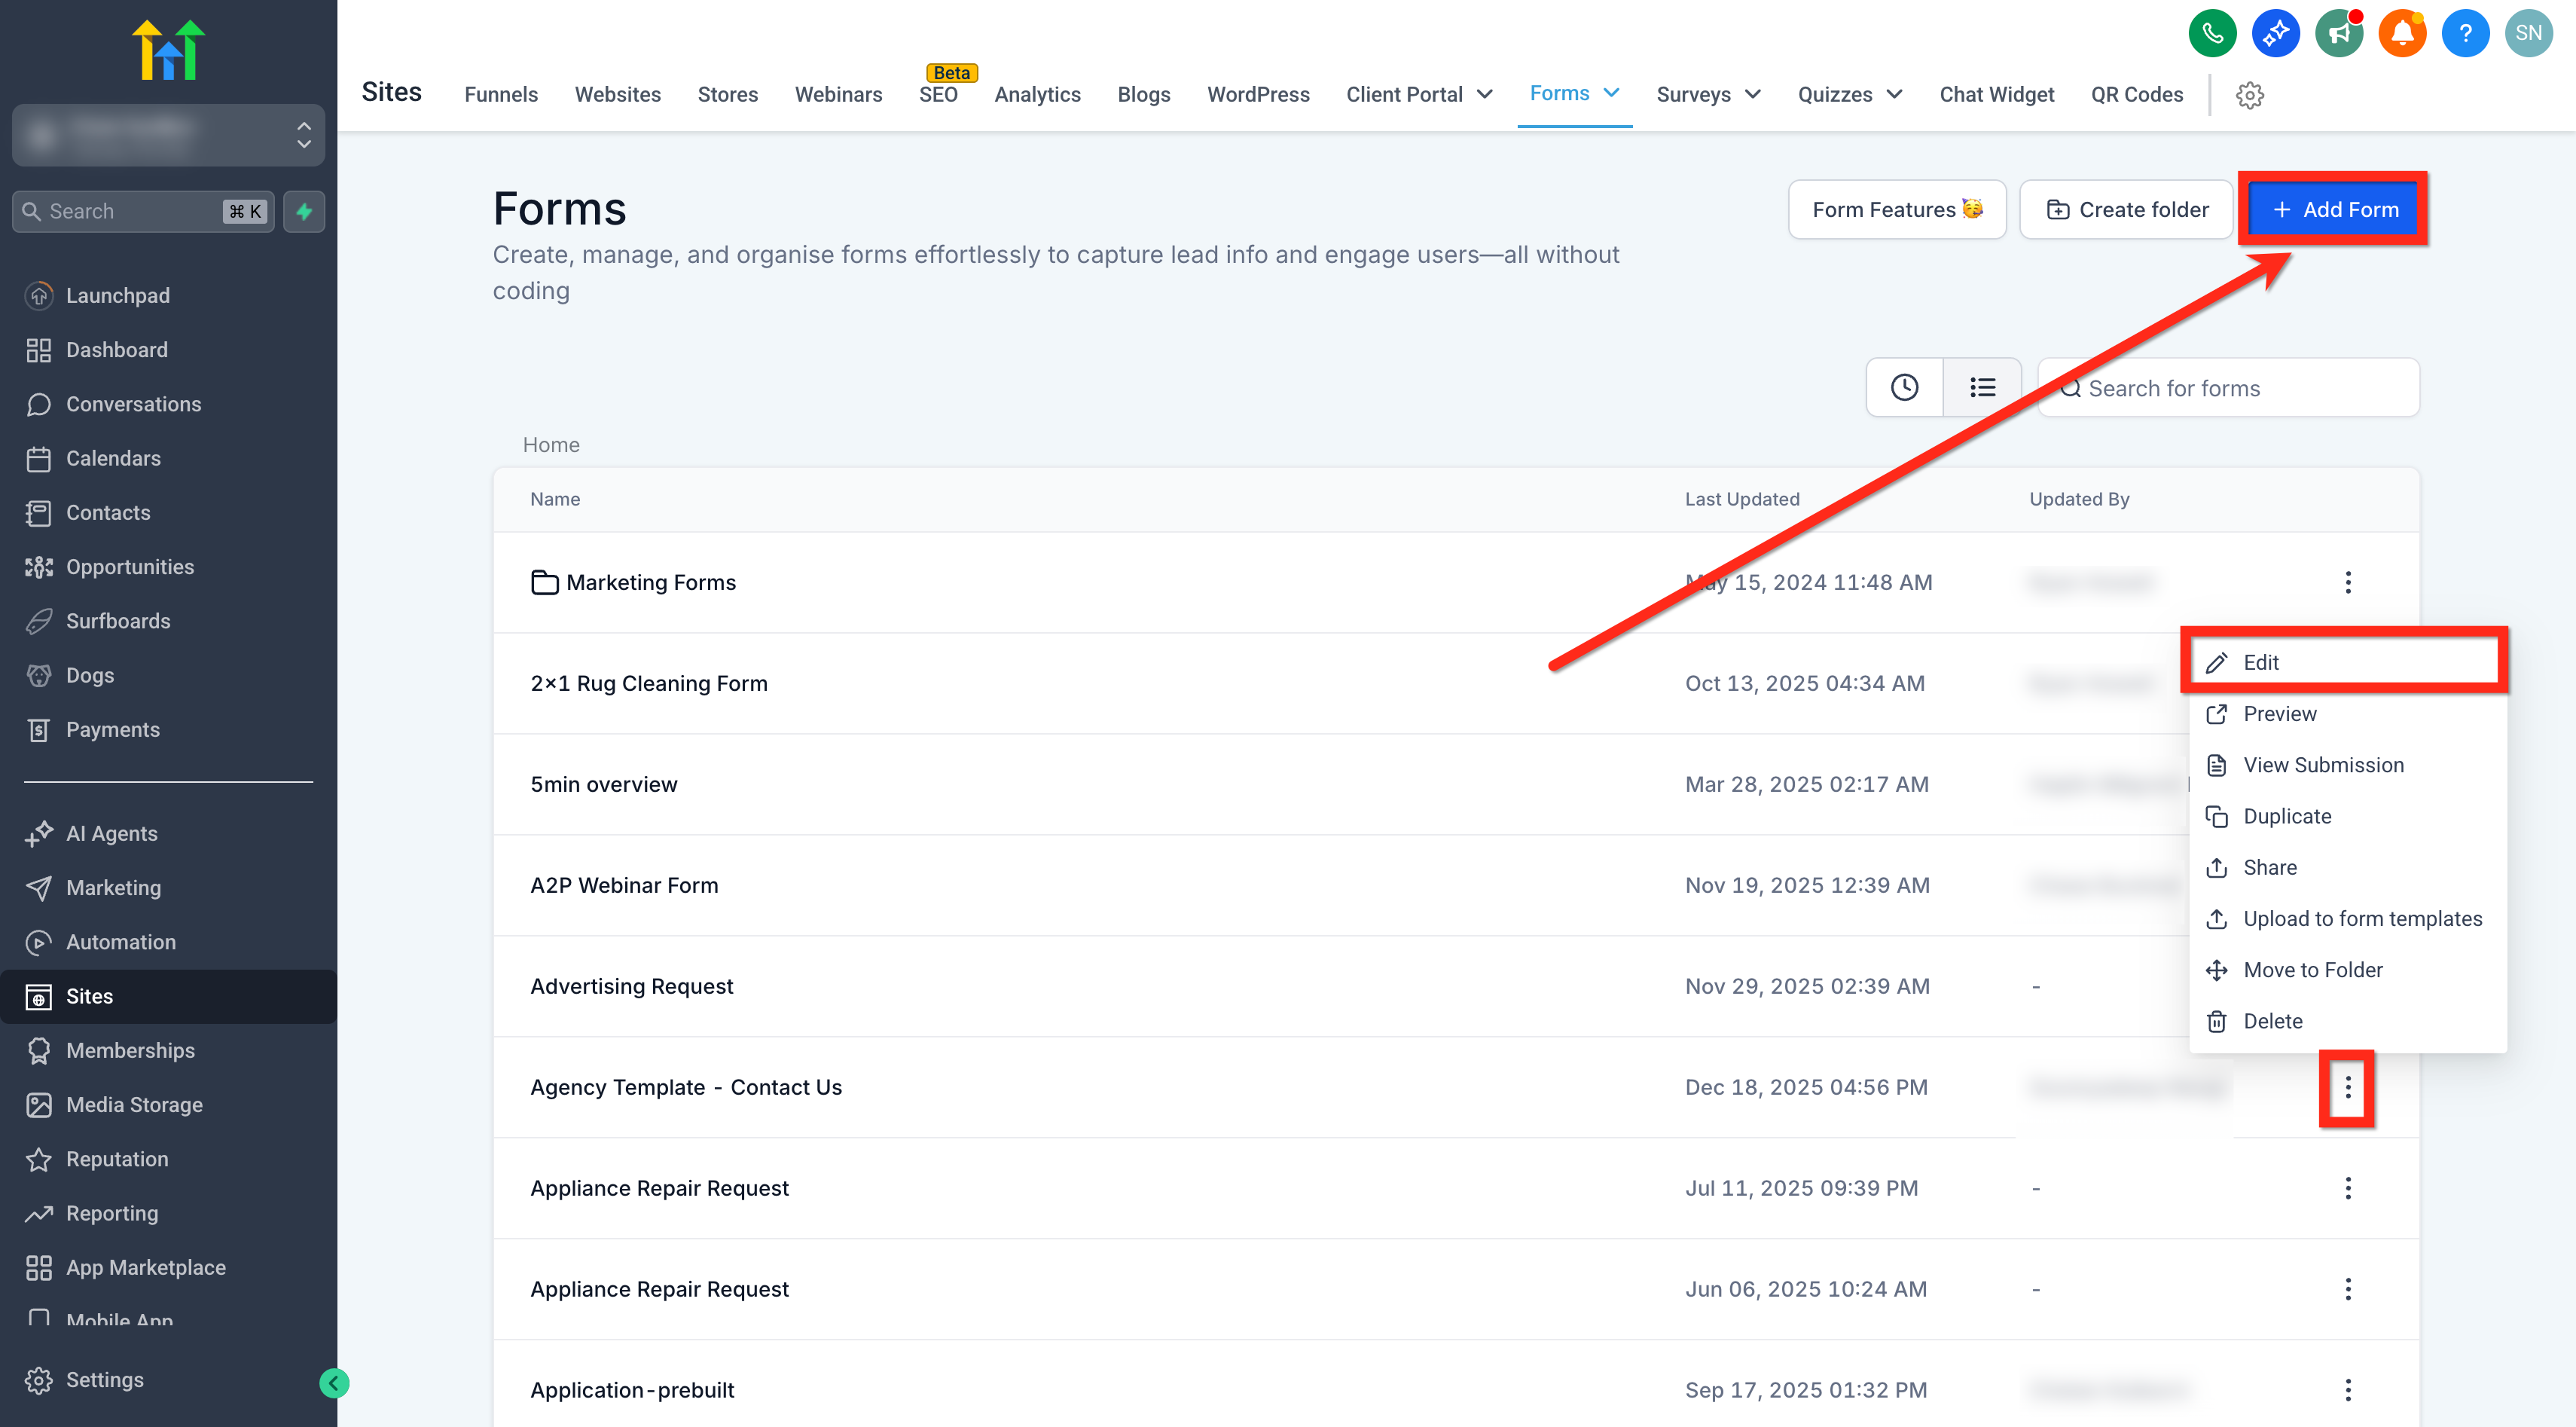
- Click the + Add Form/Survey/Quiz button to create a new item, or open an existing one via the three dot menu and select Edit.
- Edit the form, survey, or quiz as needed.
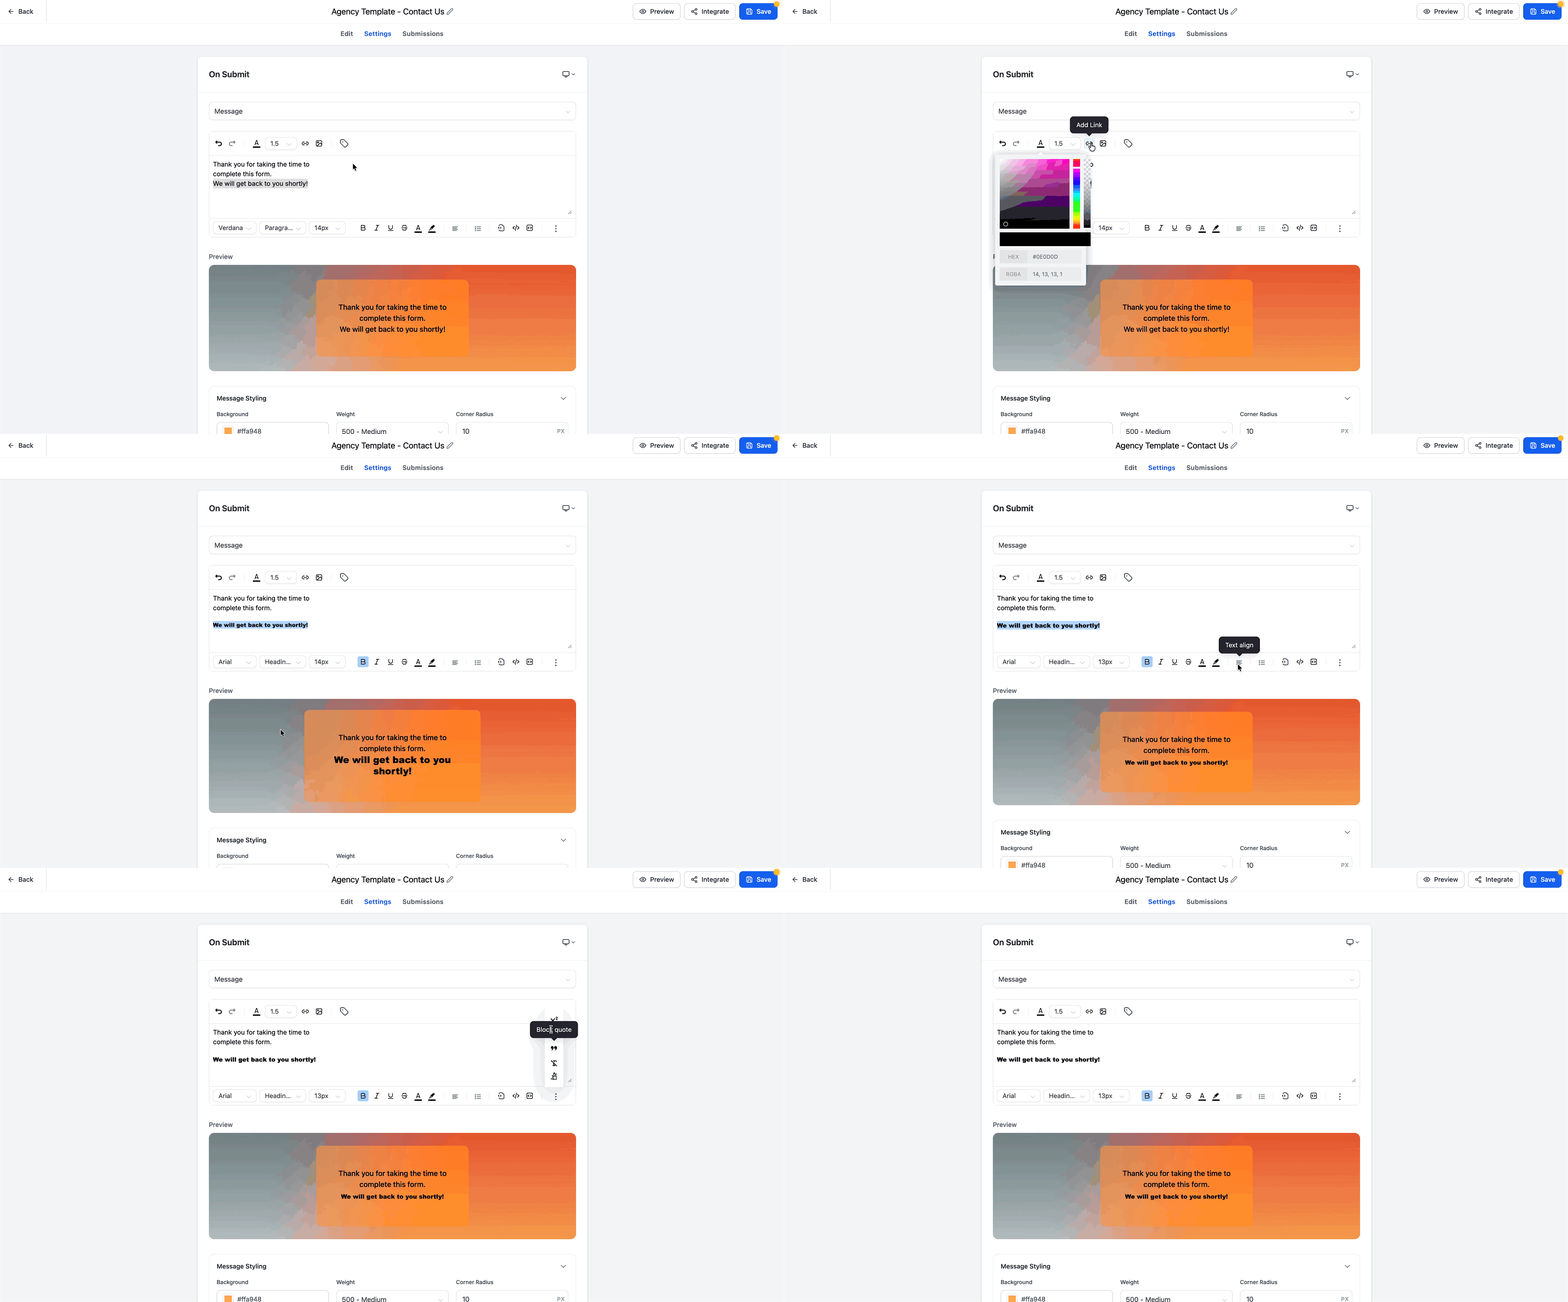
- Open Settings and choose On Submit.
- Select Message from the dropdown list.
- Enter the headline and subtext using the rich text editor.
- Apply text formatting such as size, color, alignment, lists, links, images, and custom values.
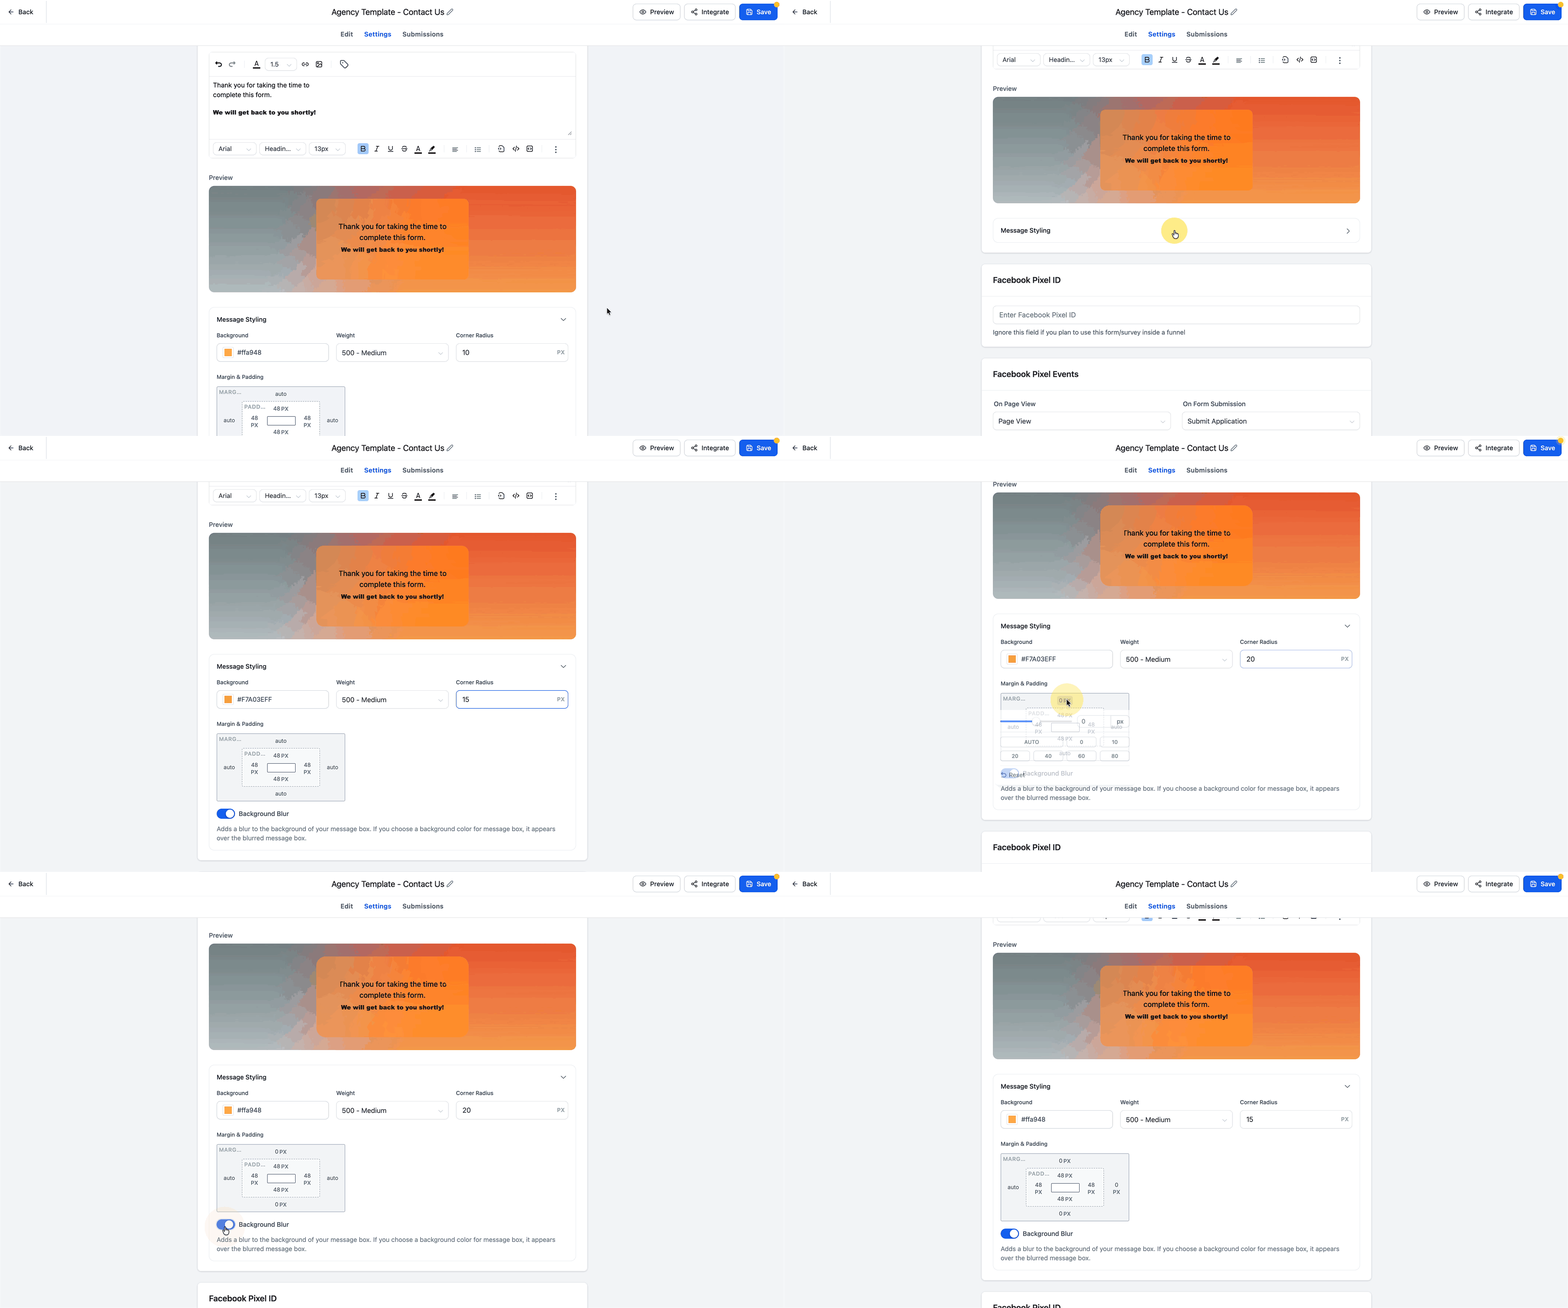
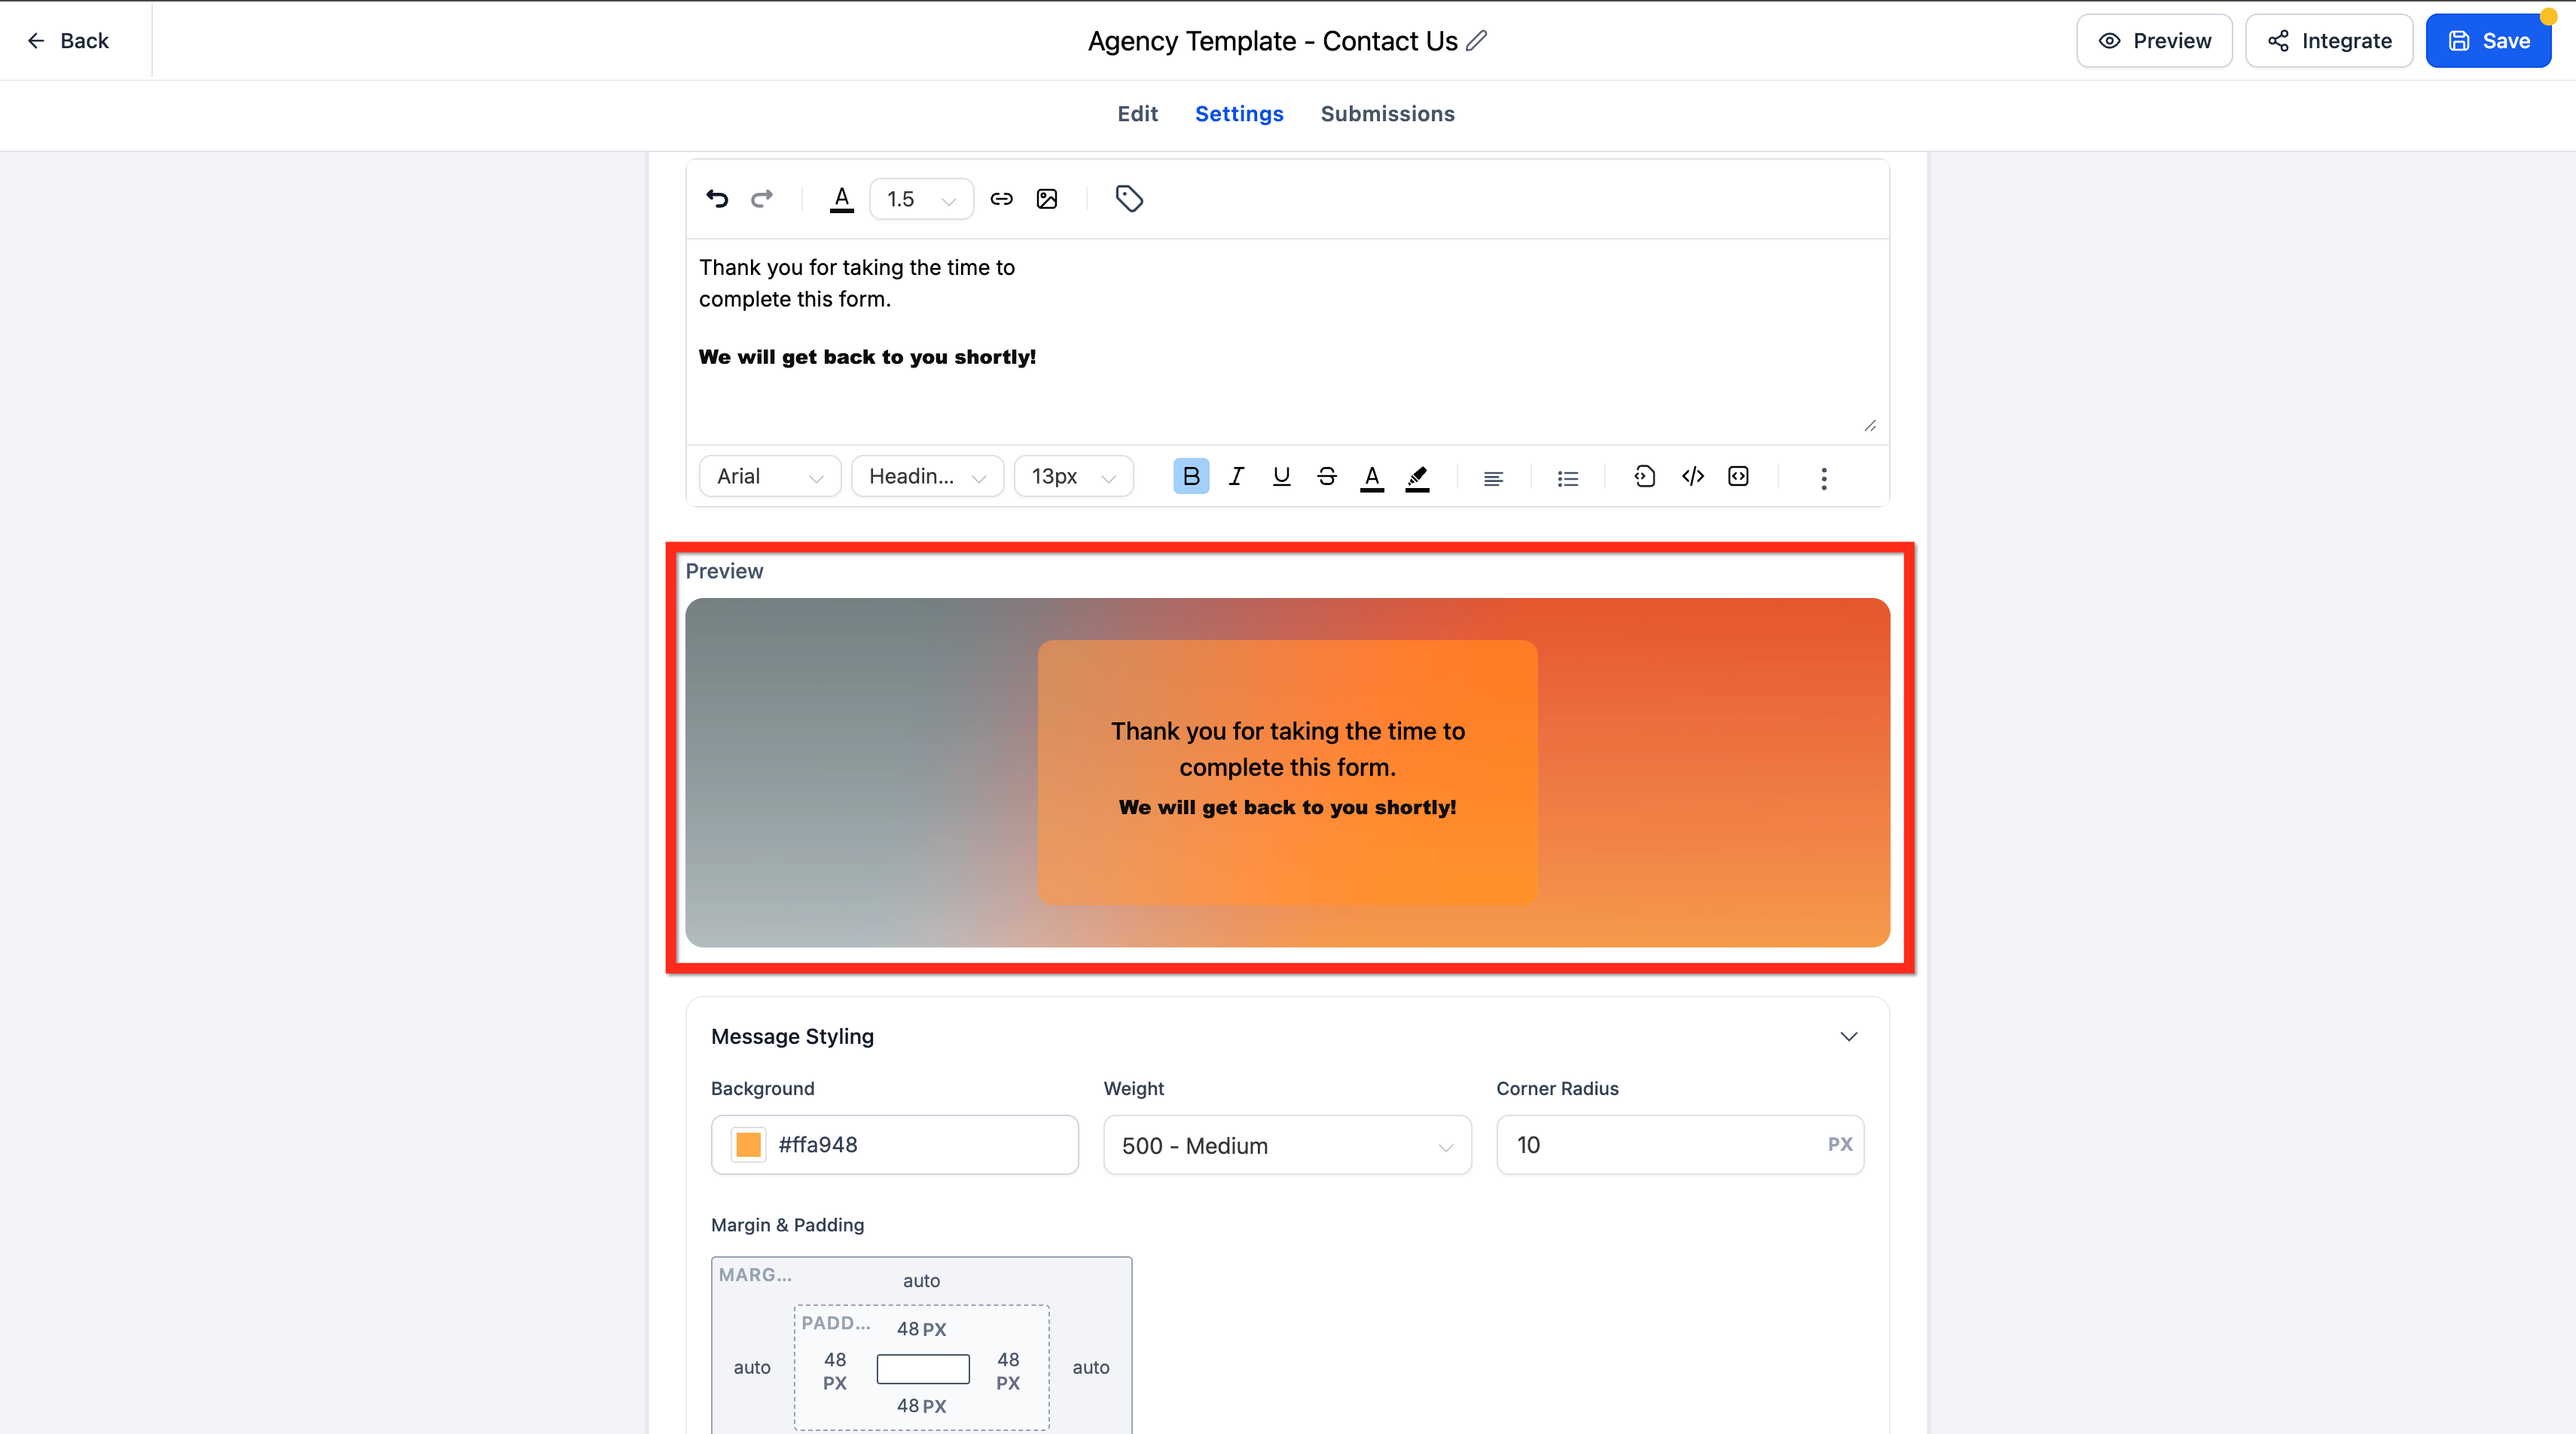
- In Message Styling, set the background color, text weight, and corner radius.
- Adjust the margin and padding values.
- Toggle Background Blur on or off; this option appears only when a background image is set.
- Switch between Desktop and Mobile views to style each separately.
- Use the Preview panel to review the customisations.
- Click Save in the builder.
06What it looks like in HighLevel
07Settings that matter
- Message. Chooses the on submit confirmation type; selecting Message enables the custom editor.
- Text Formatting. Controls headline and subtext appearance, including size, color, alignment, lists, links, images, and custom values.
- Message Styling. Sets background color, text weight, and corner radius for the confirmation box.
- Margin and Padding. Adjusts the spacing around the message content.
- Background Blur. Applies a blur effect to the form background when enabled; available only if a background image exists.
- Desktop and Mobile views. Allows independent styling for desktop and mobile devices.
08Things to know before you rely on it
- Background Blur can be toggled only when a background image is set.
- Only one default on submit behavior can be selected; Message and Redirect cannot be used together.
- Images or custom values may not appear in the preview; some resolve only after a real submission.
09If something goes wrong
- Attempting to use both a Message and a Redirect at the same time.. Choose either Message or Redirect as the default; use conditional logic to switch when needed.
- Images or custom values do not display in the preview.. Understand that certain custom values render only on actual form submissions.
- Workflows seem to run before the on submit message appears.. Know that workflows operate independently of the visual confirmation.
10How it connects to the rest of HighLevel
- Learn how to add sticky contact behavior to forms and surveys. Sticky contact in forms
- Read the guide on building and managing a contact form in HighLevel. Contact form builder
- Explore configuring email alerts and auto responders for forms. Email notifications
Michael's take

Businesses lose brand momentum when a plain “thank you” pops up after a lead fills out a form. The On Submit message lets you keep the experience on brand, reinforcing trust at the exact moment a prospect converts. The first setting I would perfect is the background blur, because a clean backdrop makes the headline stand out across any device.
After the blur is dialed in, I’d focus on the headline text style to match the rest of the site. That way the confirmation feels like a natural extension of the landing page rather than a separate after thought.