
01Who this is for
- Content marketers can showcase recent blog articles on landing pages, increasing on page relevance.
- Agency owners can embed client blog posts into client funnels, keeping the experience cohesive.
- Small business Founders can display category specific posts on resource pages, helping visitors find relevant information.
02Blog Post element, explained
The Blog Post element pulls content from a HighLevel blog and renders it inside a funnel step or website page. You can select which blog supplies the content, determine how many items appear, and filter by recent posts, category, or author. The element updates automatically when the source blog changes.
After adding the element, its settings let you pick a display style, choose the source blog, set sorting order, limit categories, decide pagination, and customize button text and colors. These options control the visual layout and which posts are shown.
The element is accessed in the page editor under Sites > Funnels or Websites. Once you edit a specific page, you add the element from the Add Elements panel and configure it through the element’s settings modal.
03How businesses use the Blog Post element
- Real estate agency. The agency adds the Blog Post element to a property listing page, selects the blog for market updates, and filters by the "Local News" category. This surfaces relevant articles directly on the listing without leaving the site.
- Health clinic. The clinic places the element on a services page, chooses recent posts by the "Wellness" author, and customizes the button to read "Read More". Visitors see the latest health tips while exploring services.
- SaaS startup. The startup embeds the element on a resource hub, selects the main product blog, sets sorting to recent posts, and limits pagination to three items. The hub stays current with fresh content for prospects.
04Before you start
- A blog must be set up in HighLevel.
- At least one blog post must be published.
05How to set up and use the Blog Post element in HighLevel
Add blog post element to a page
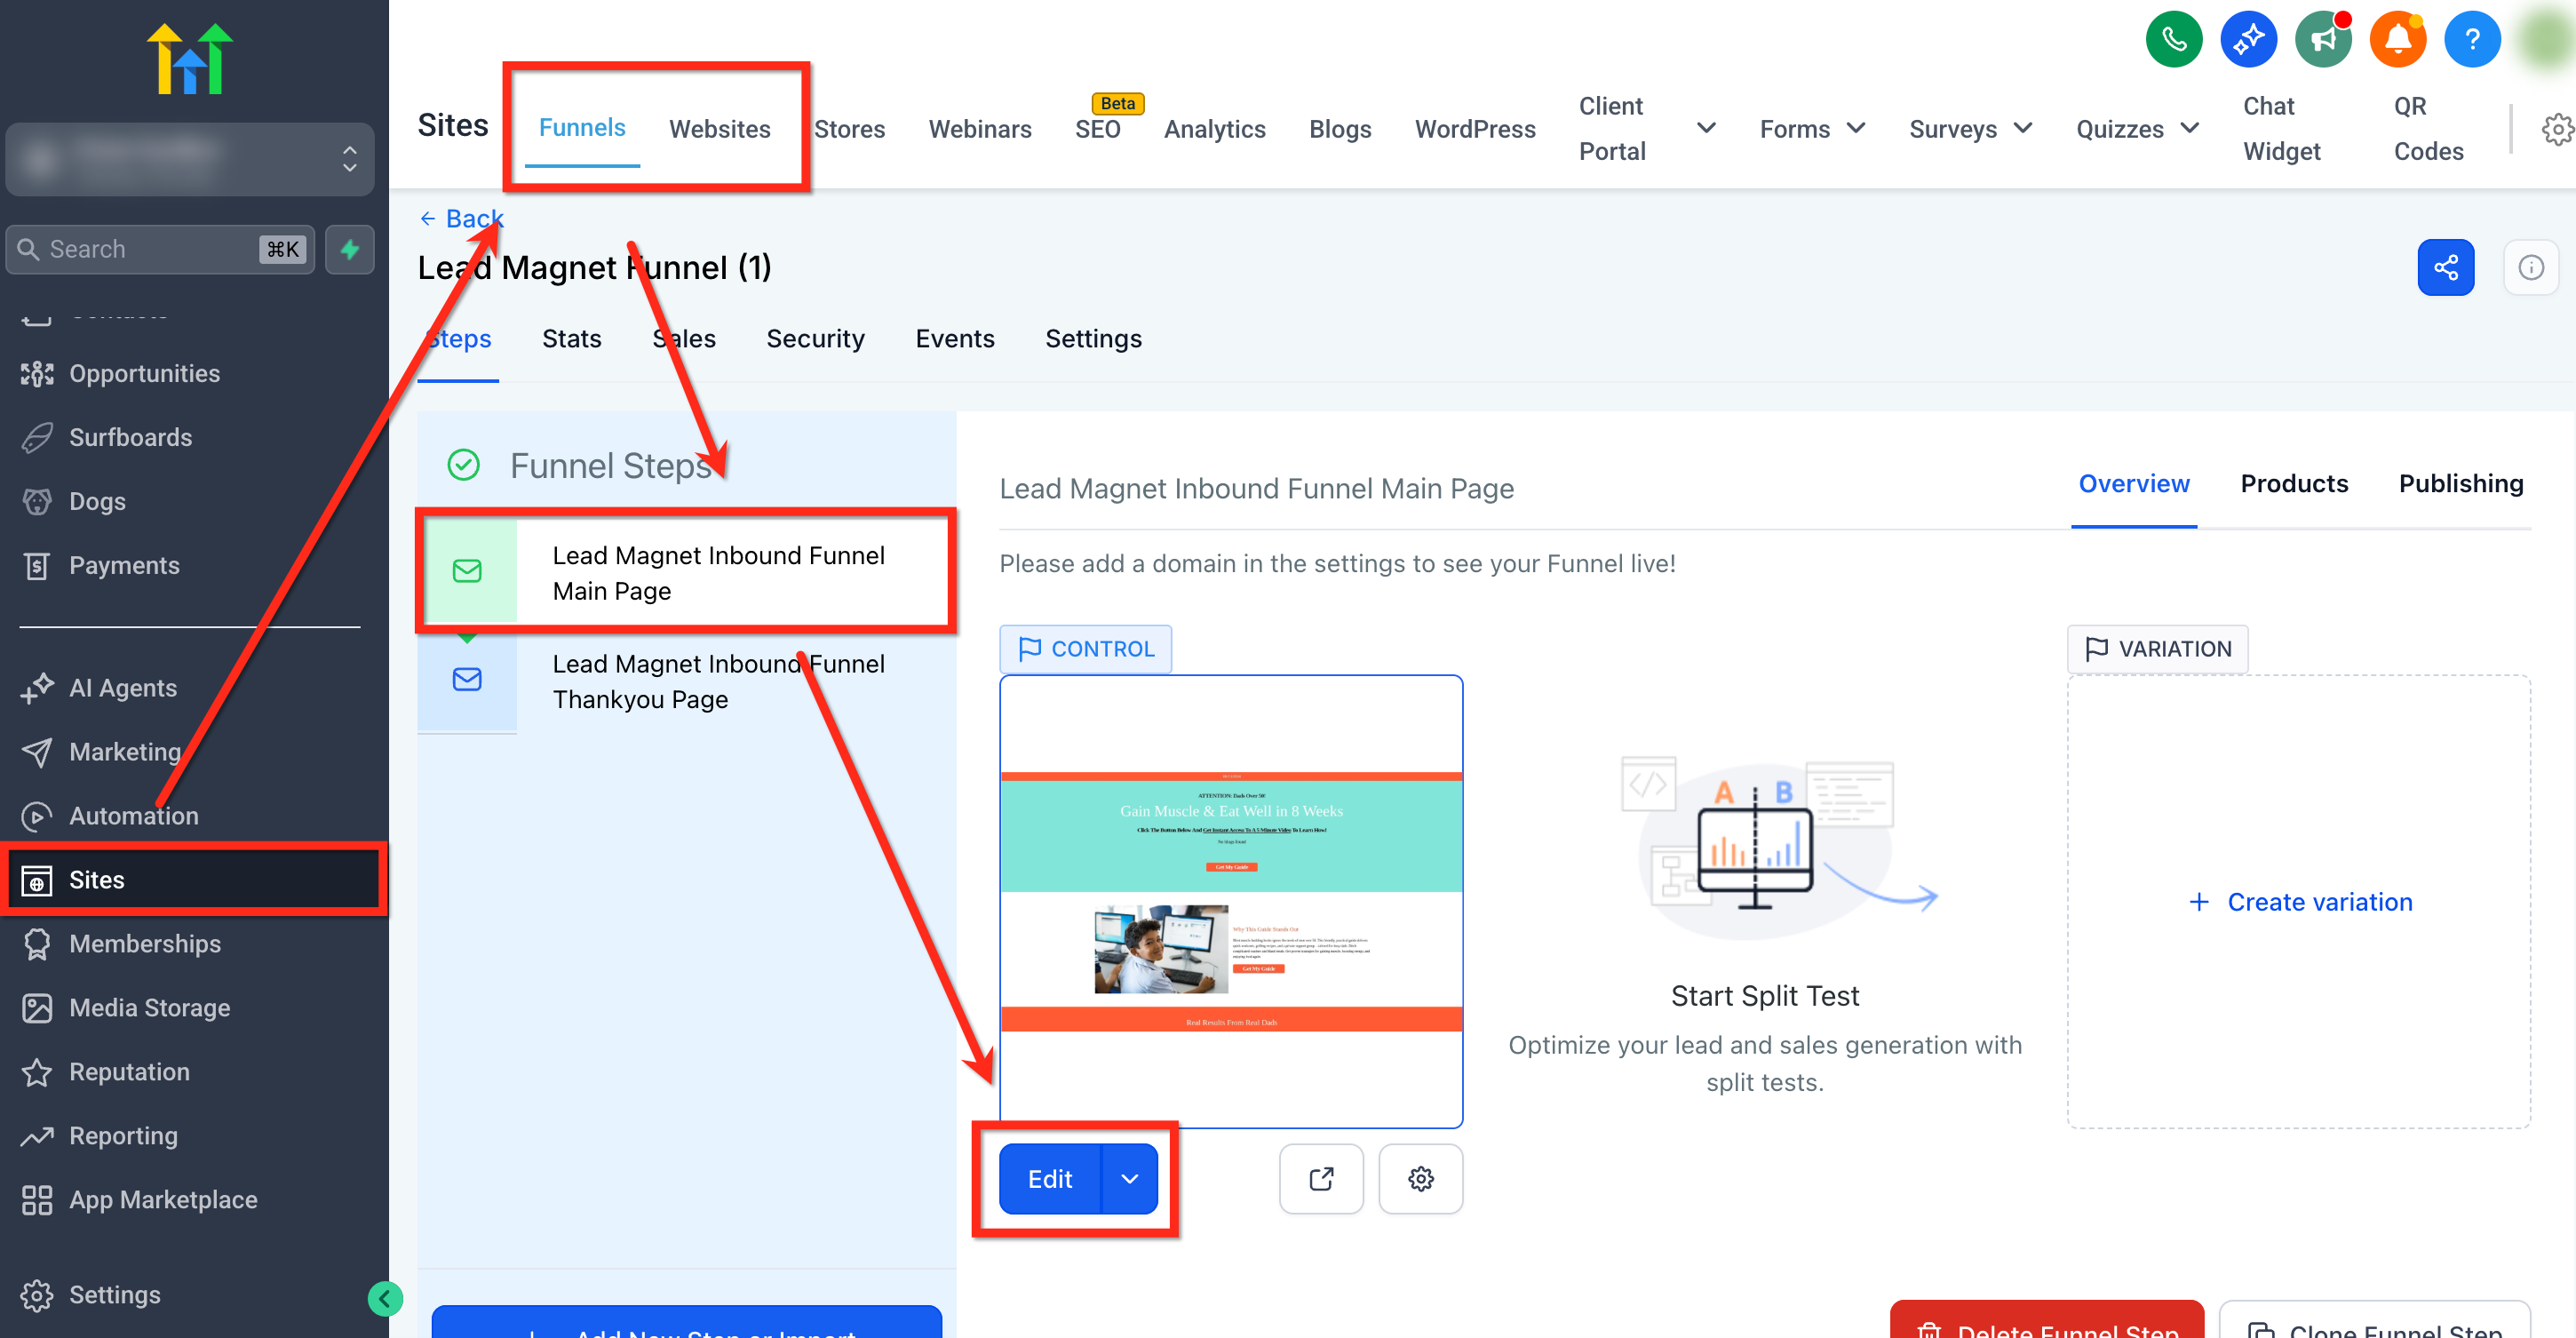
- Open Sites, choose Funnels or Websites, select the page to edit, and click Edit.
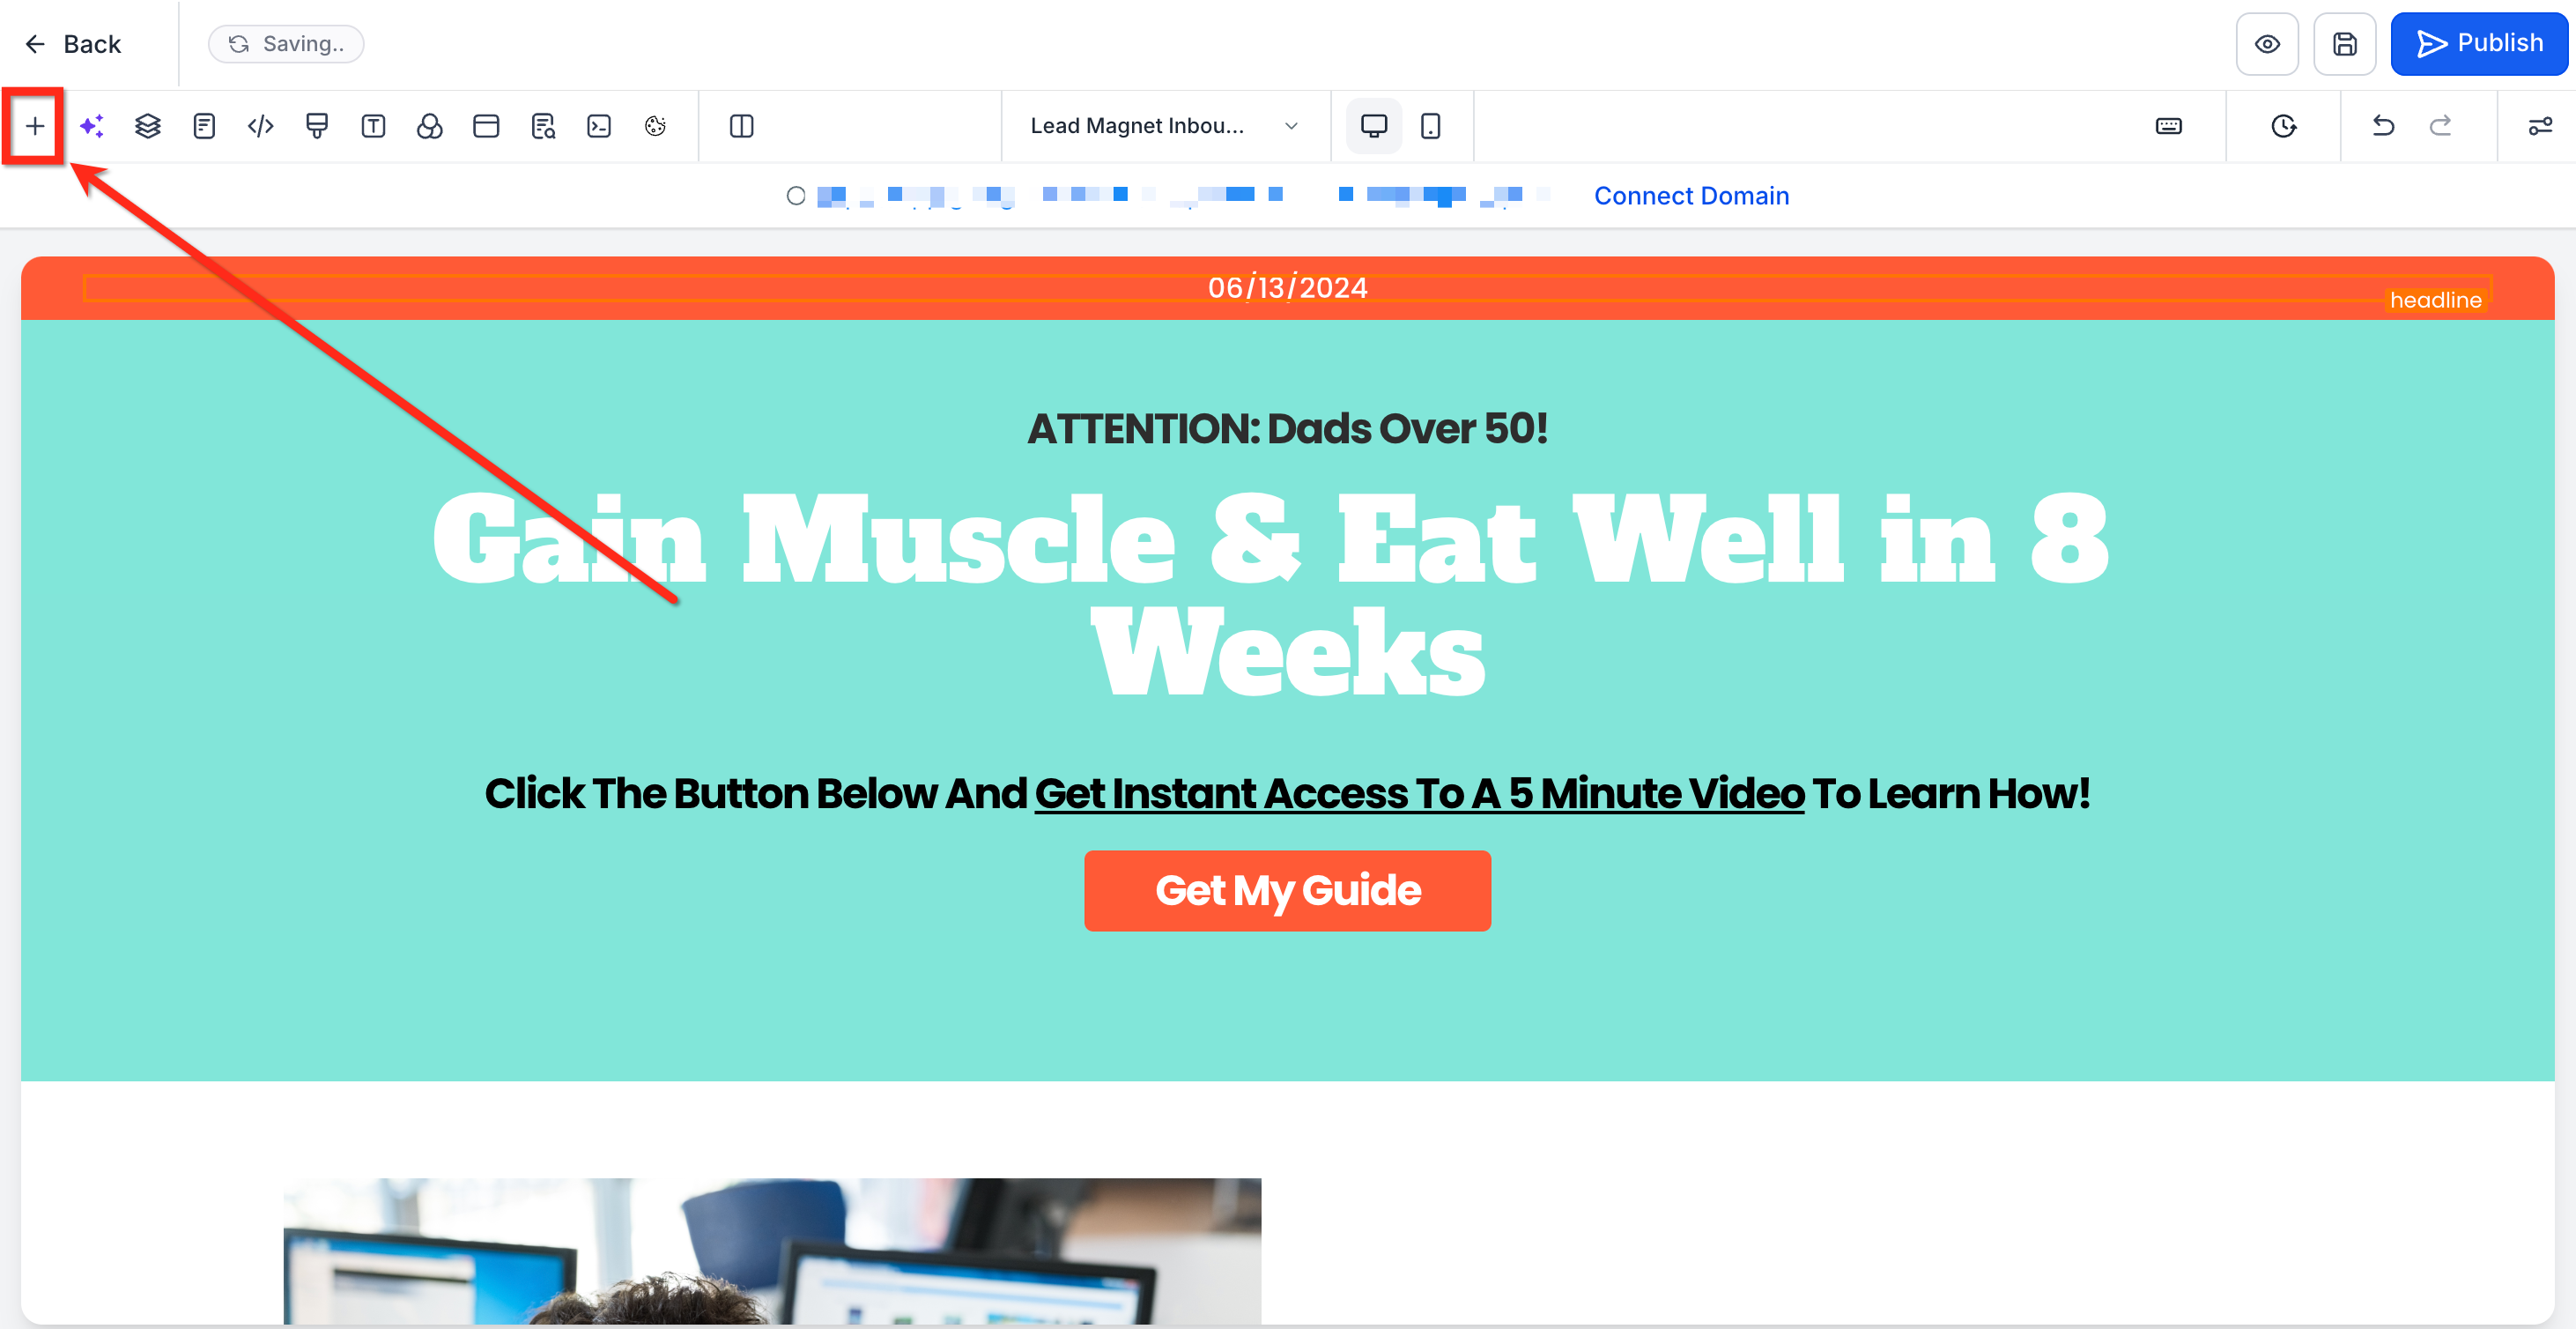
- Press Add Elements.
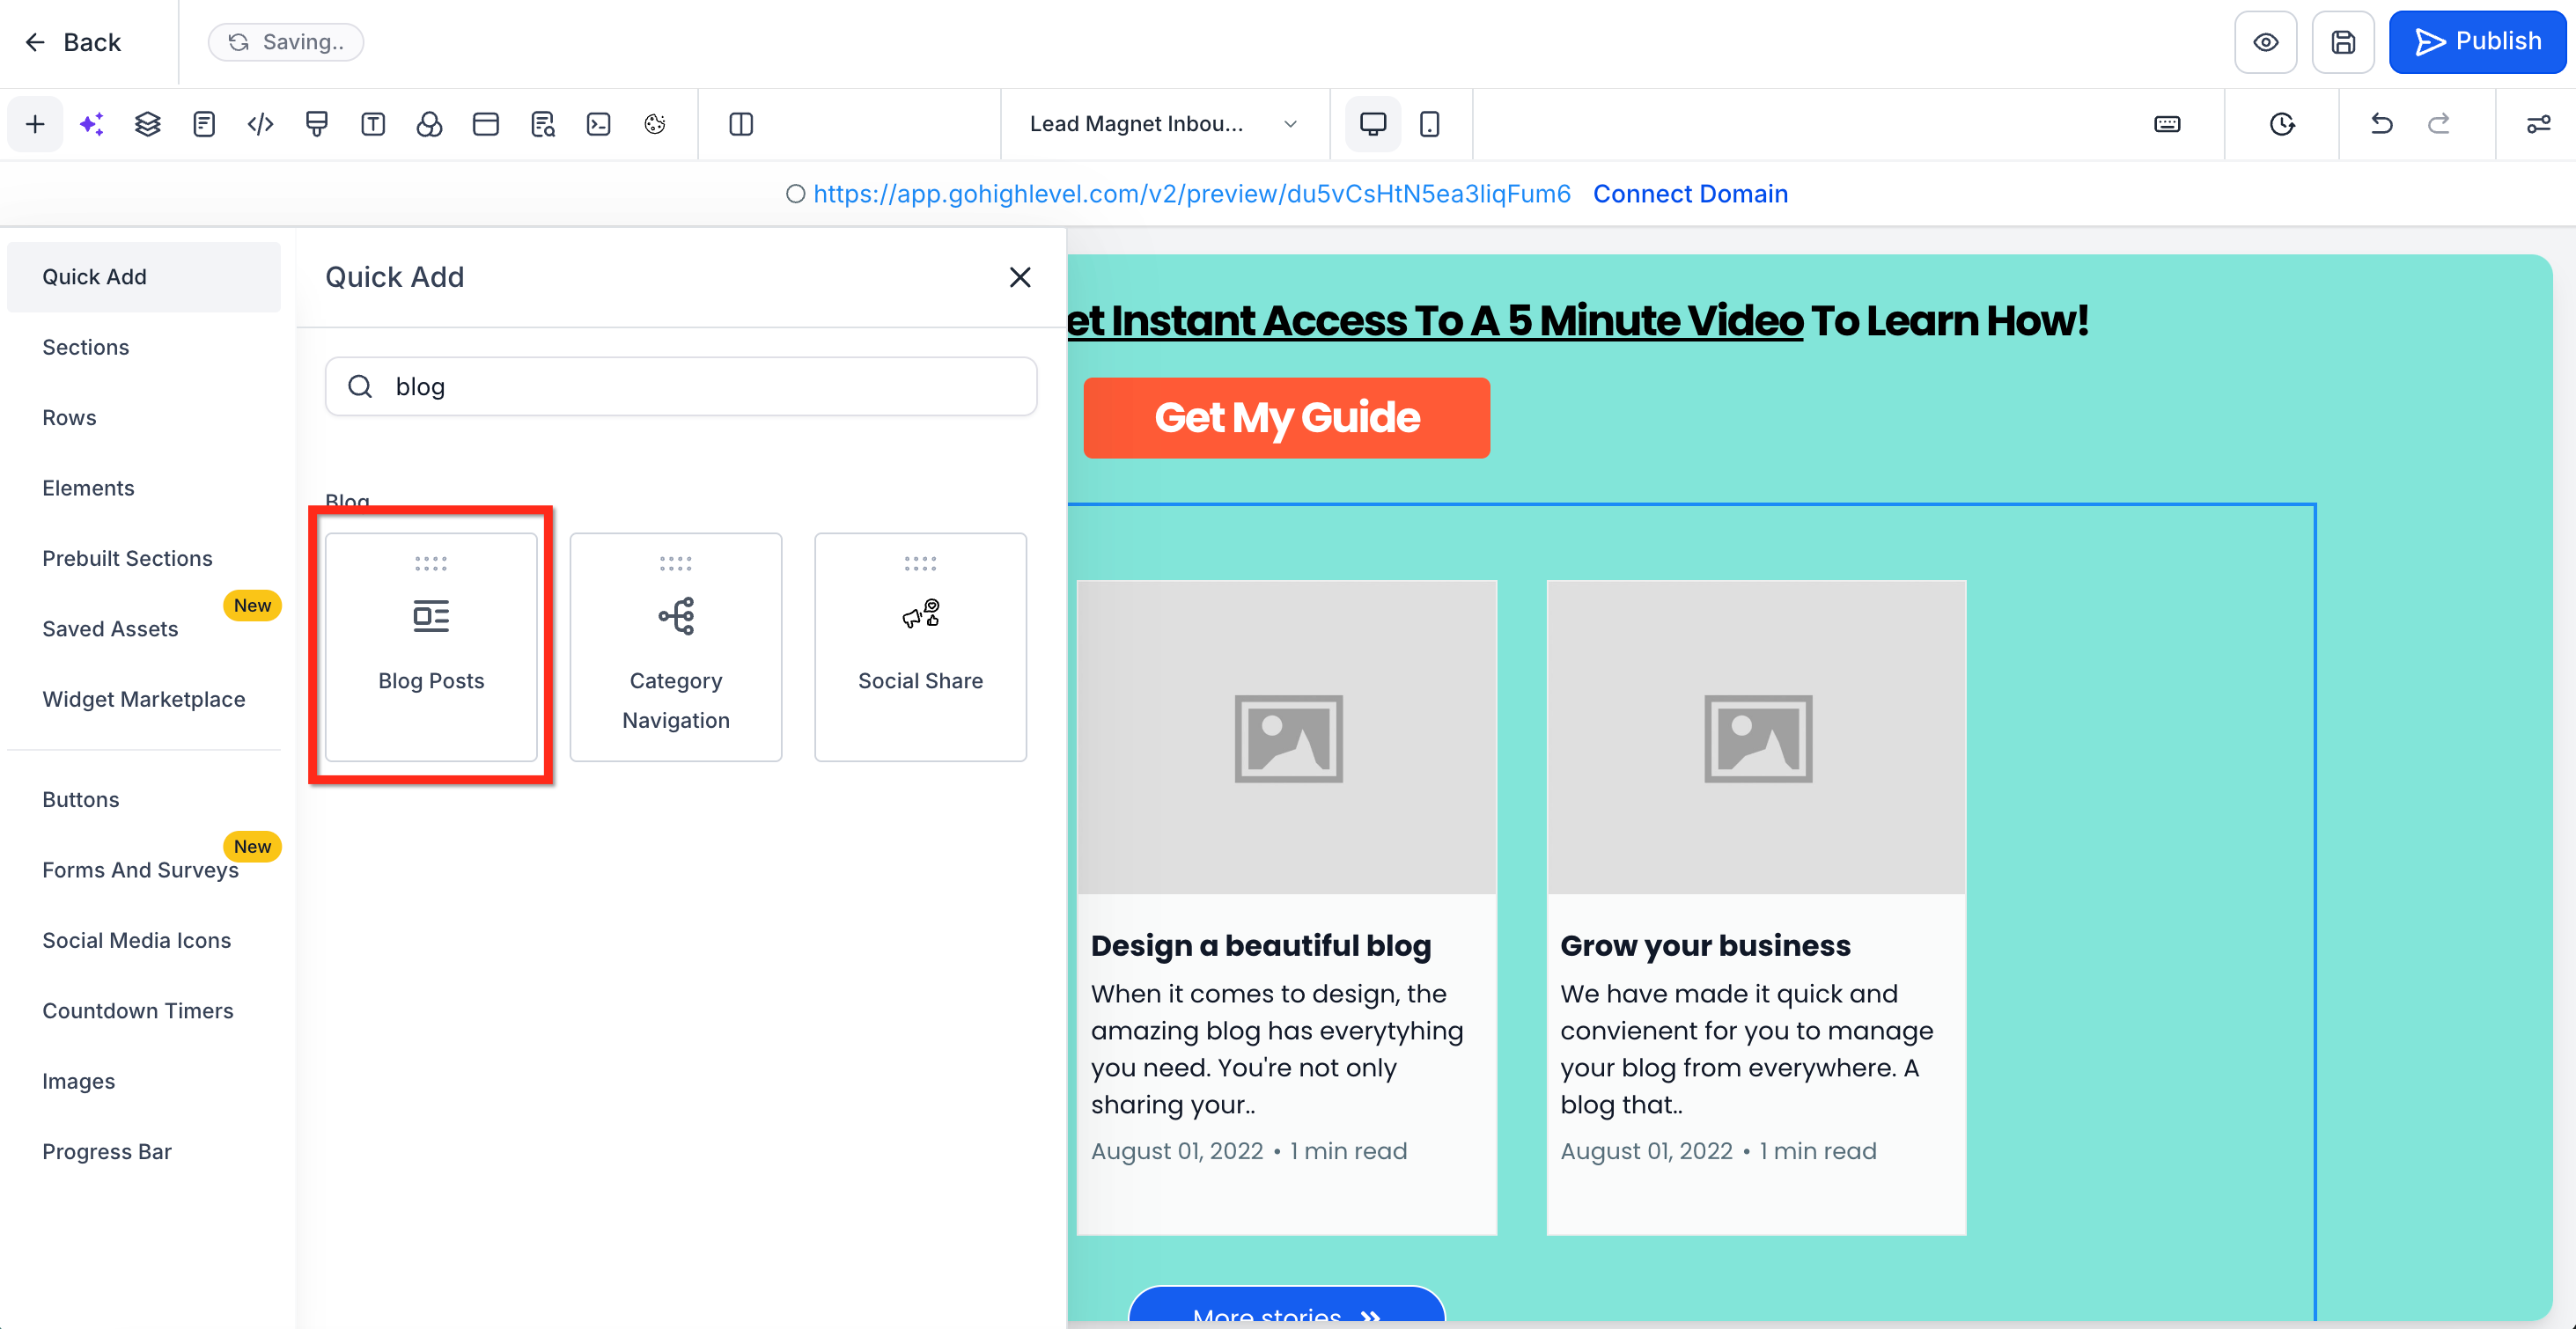
- Find the Blog Posts element and drag it onto the page where you want it.
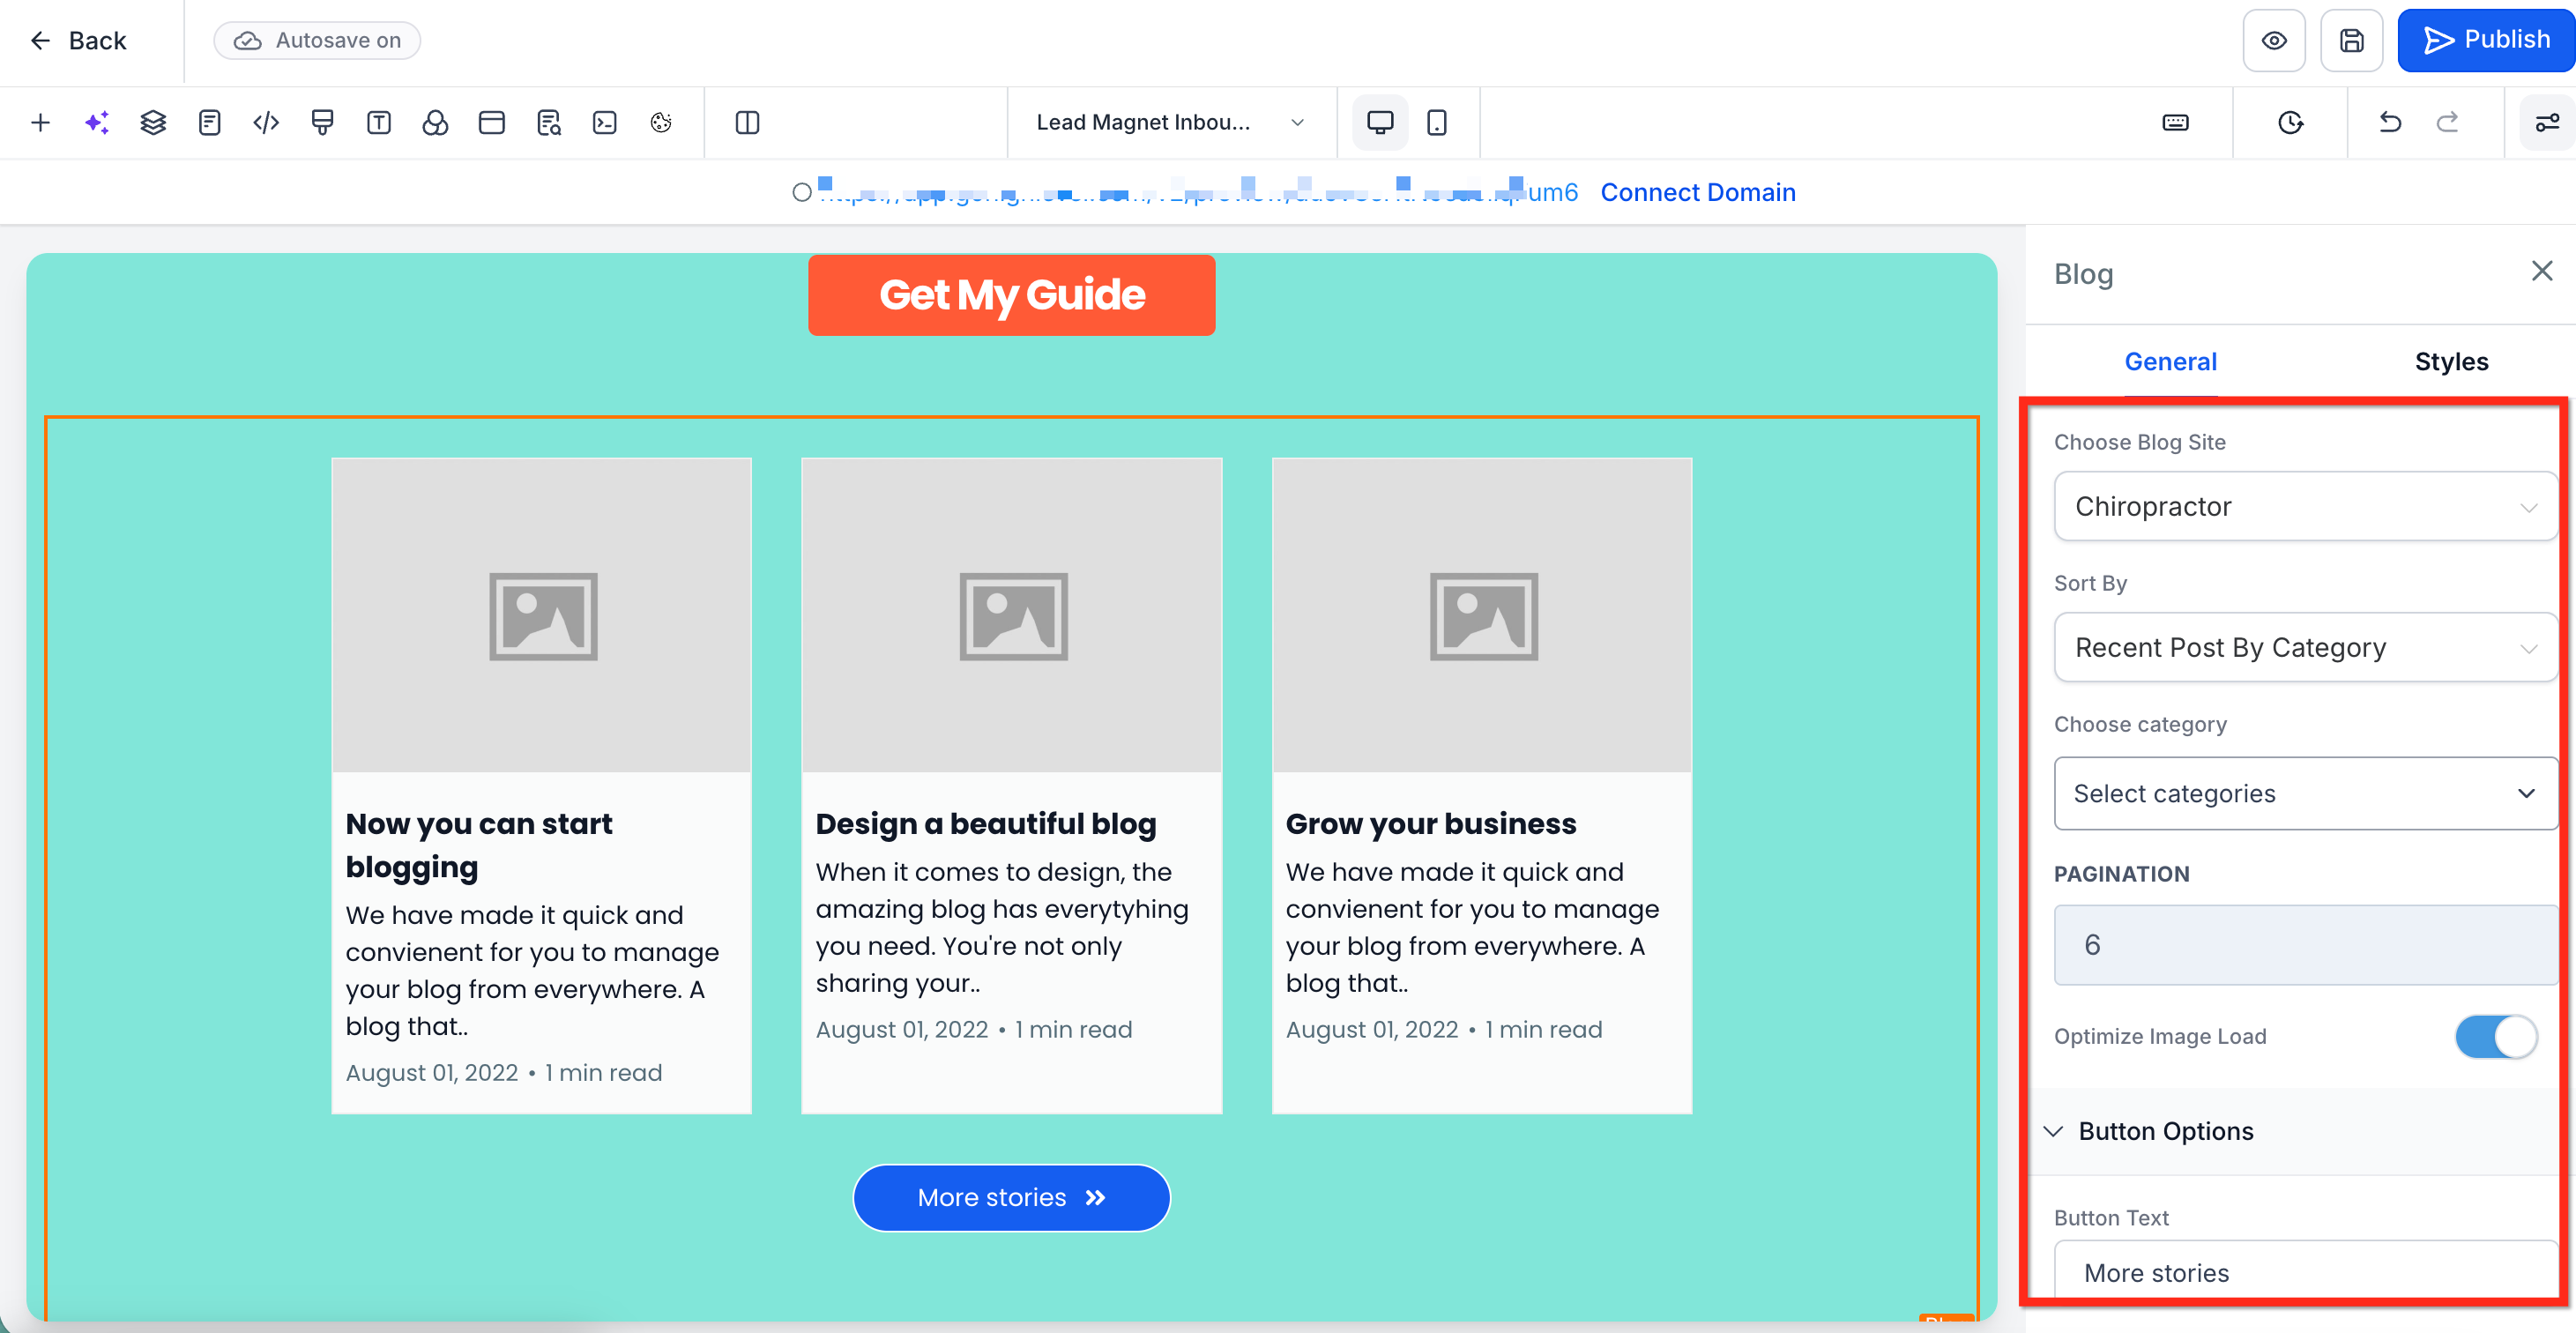
- Click the placed element to open its settings panel.
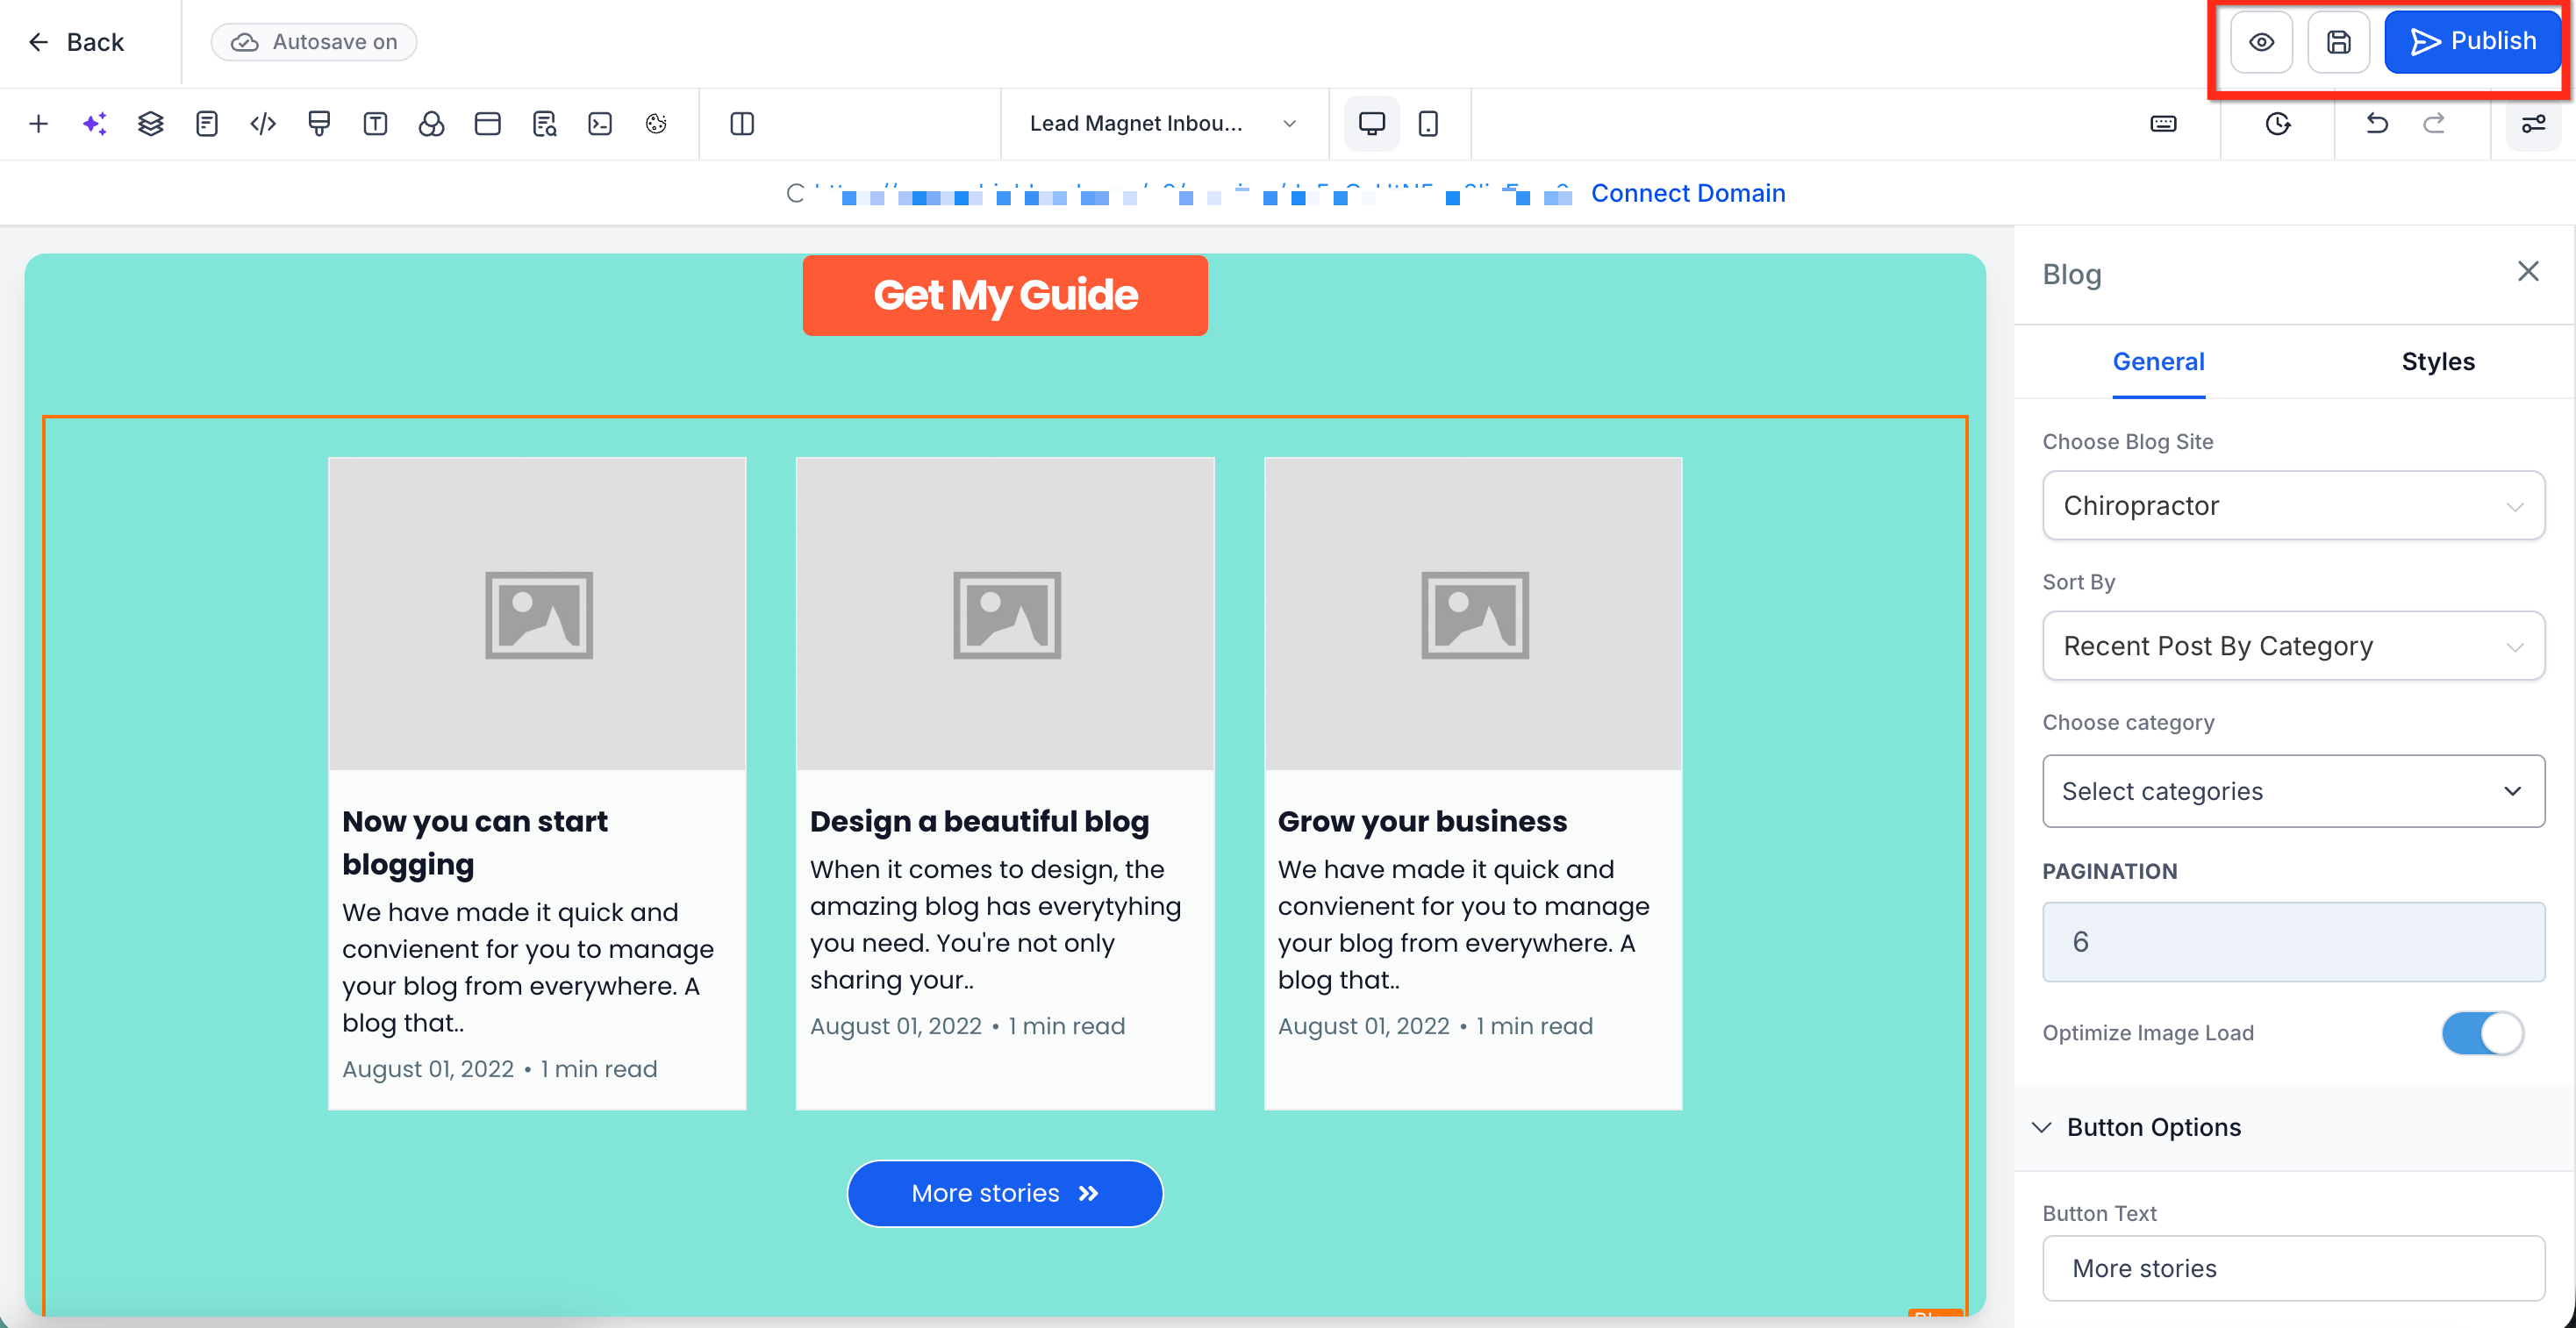
- Set Display Style, choose the blog source, select Sort By option, pick Categories if needed, define Pagination, and adjust Button Options.
- Save your changes.
- Publish the funnel or website to make the element live.
06What it looks like in HighLevel
07Settings that matter
- Display Style. Controls the visual layout of the blog posts on the page.
- Choose Blog Site. Determines which blog the element pulls content from.
- Sort By. Sets the order in which posts are displayed, such as recent posts, by category, or by author.
- Choose Categories. Limits the displayed posts to selected blog categories.
- Pagination. Specifies how many blog posts to show in the element.
- Button Options. Allows customization of the button text and its colors.
08Things to know before you rely on it
- The element works only if a blog exists with at least one published post.
- Filters like category or author will show content only when matching posts are available.
09If something goes wrong
- No posts appear after adding the element. Verify the blog is created correctly, ensure posts are published, and confirm the selected category or author filter matches existing content.
10How it connects to the rest of HighLevel
- Learn how to set up and manage blogs in HighLevel. Getting started with blogs
- Step by step guide to manually create and publish a blog post. Create blog posts
- Add search and category navigation to enhance your blog. Blog navigation
Michael's take

Embedding your latest blog posts directly into a funnel or website page supports SEO and can increase content visibility.
Make sure the blog you point to actually has published posts; otherwise the element shows nothing.