
01Who this is for
- Ecommerce Founders need accurate tax collection and simultaneous shipping/billing data to avoid manual entry.
- Service based businesses benefit from letting clients reuse their shipping address for billing, speeding up appointment payments.
- Non profit organizers can gather donor shipping details while automatically applying tax exempt rules where applicable.
02Automatic taxes and address settings, explained
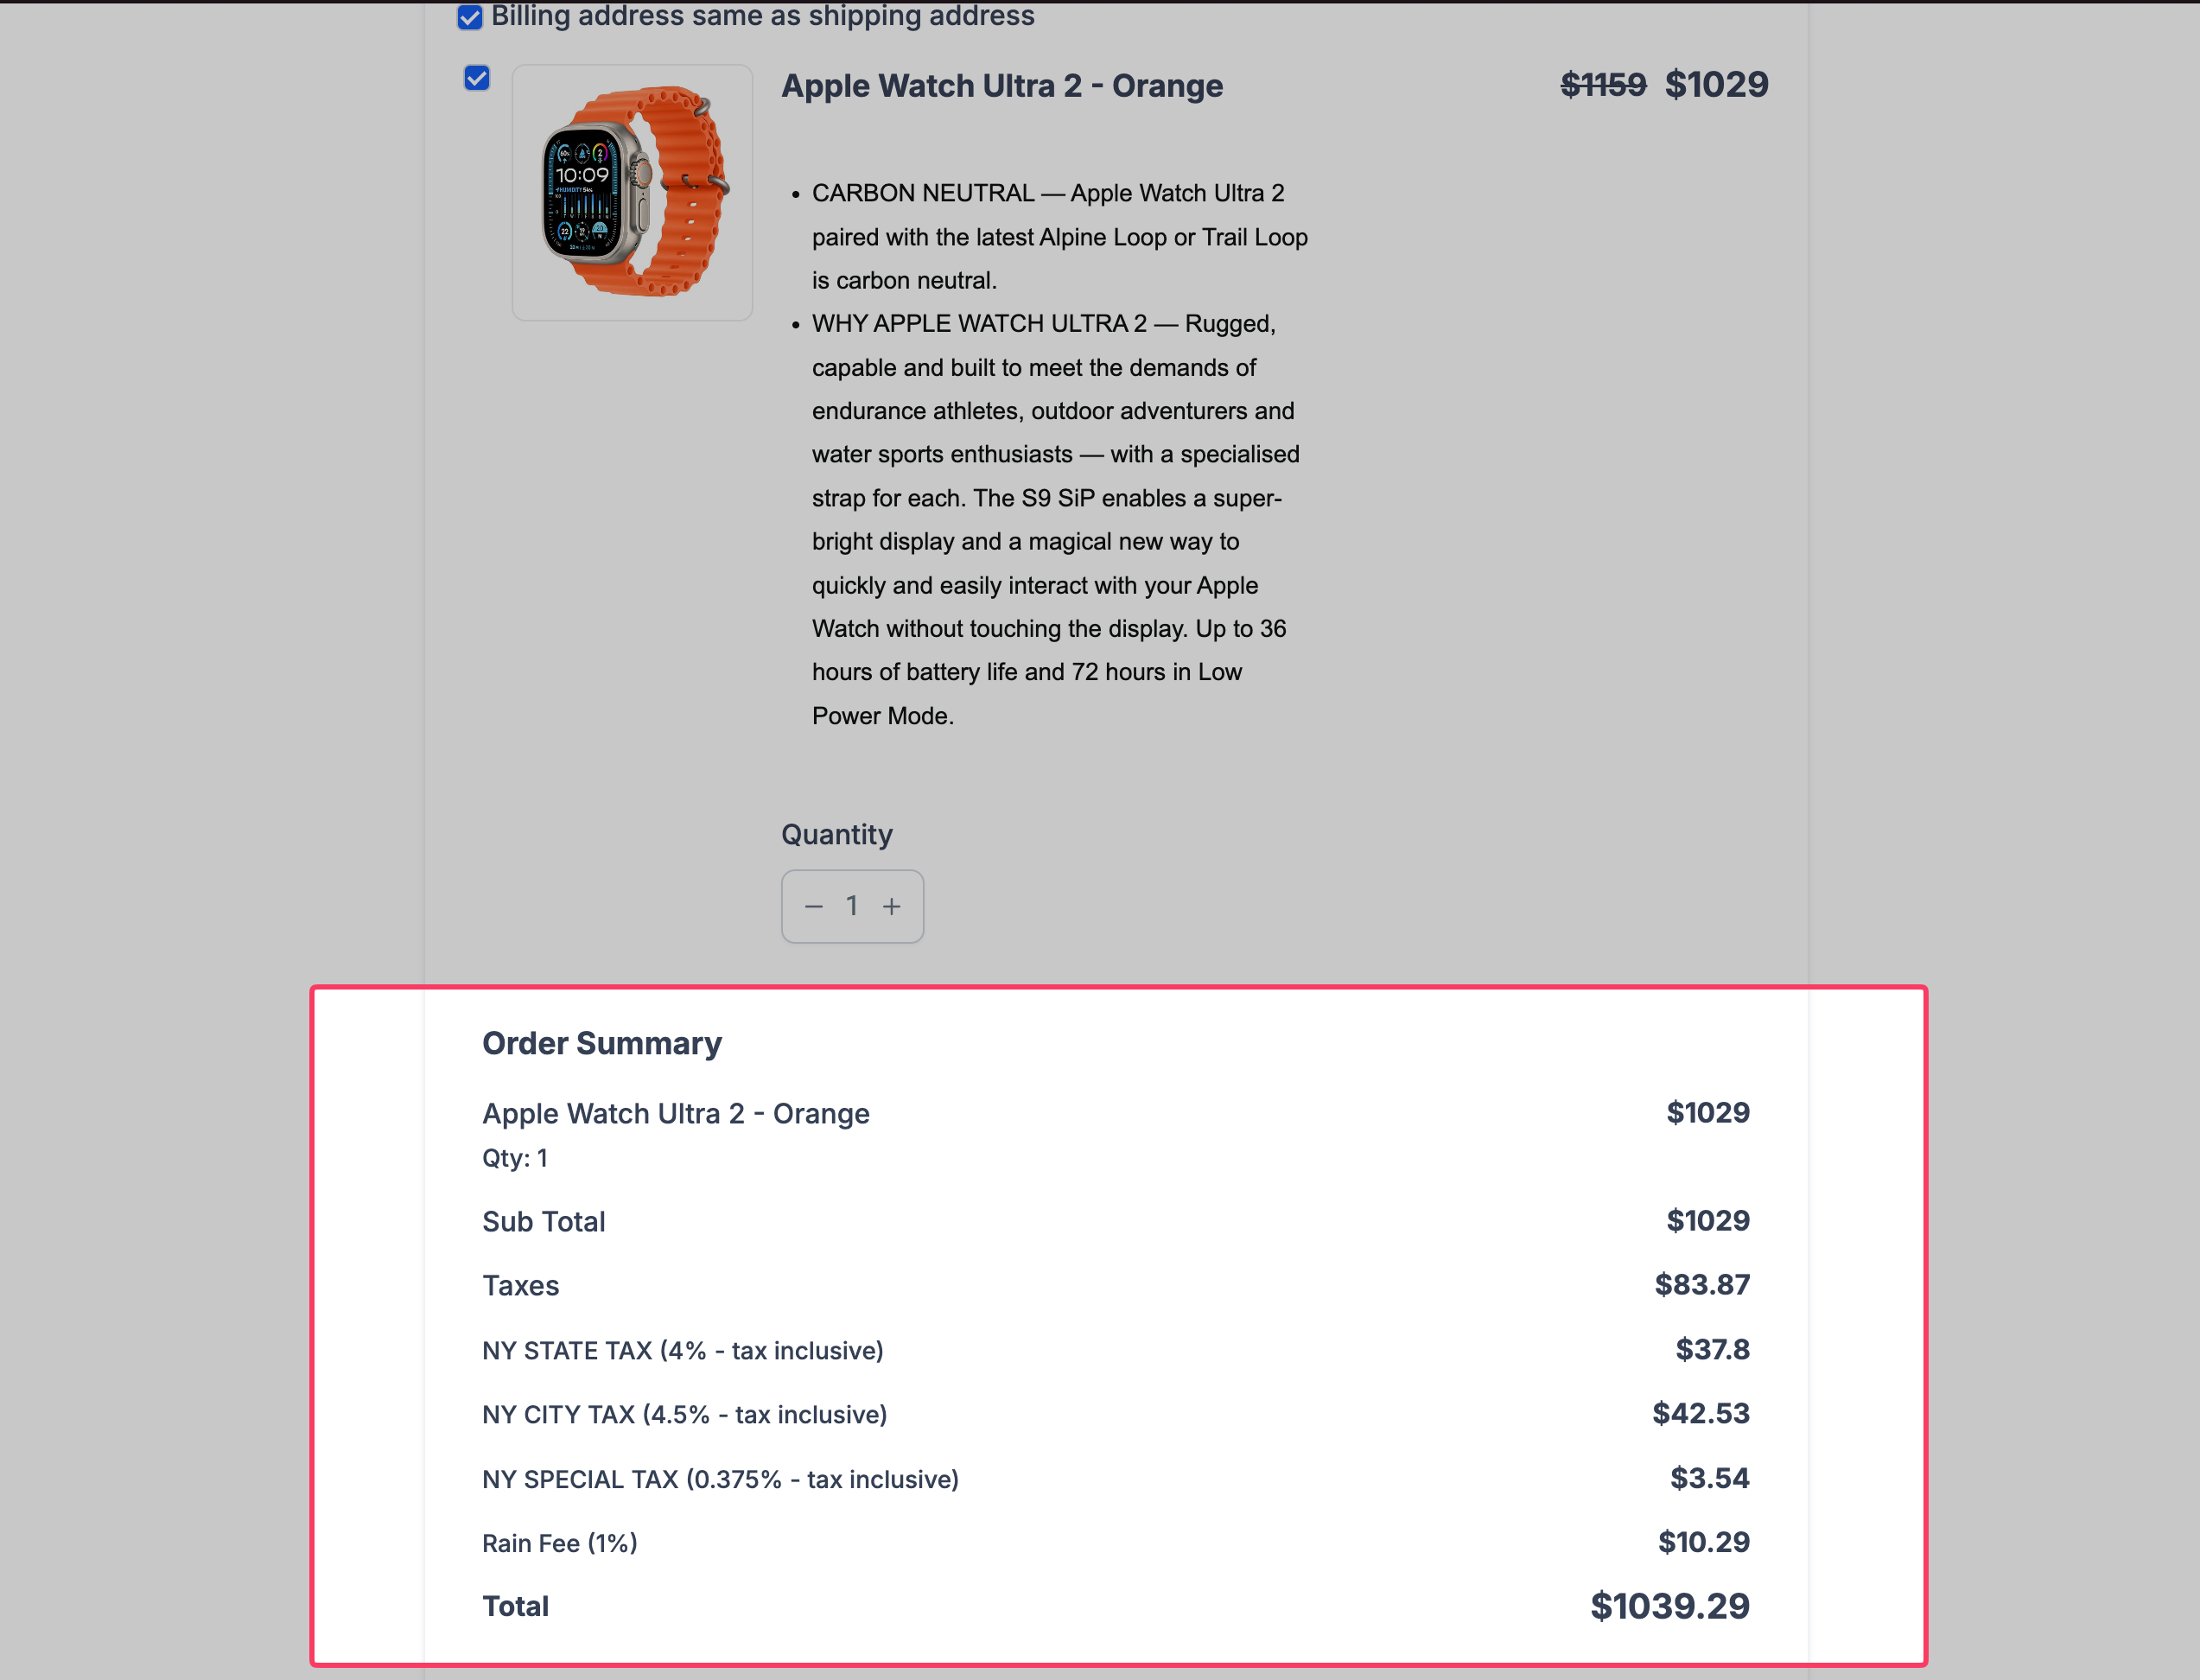
Automatic Taxes reads the address entered in the Address element and determines the tax amount using the tax settings you configured in Payments. The calculation appears in the Order Summary during checkout.
Shipping Address and Billing Address options extend the Address element. When Shipping Address is turned on, you can also enable Billing Address, which mirrors the same field configuration. A checkbox lets customers copy the shipping information to the billing section or supply a different address.
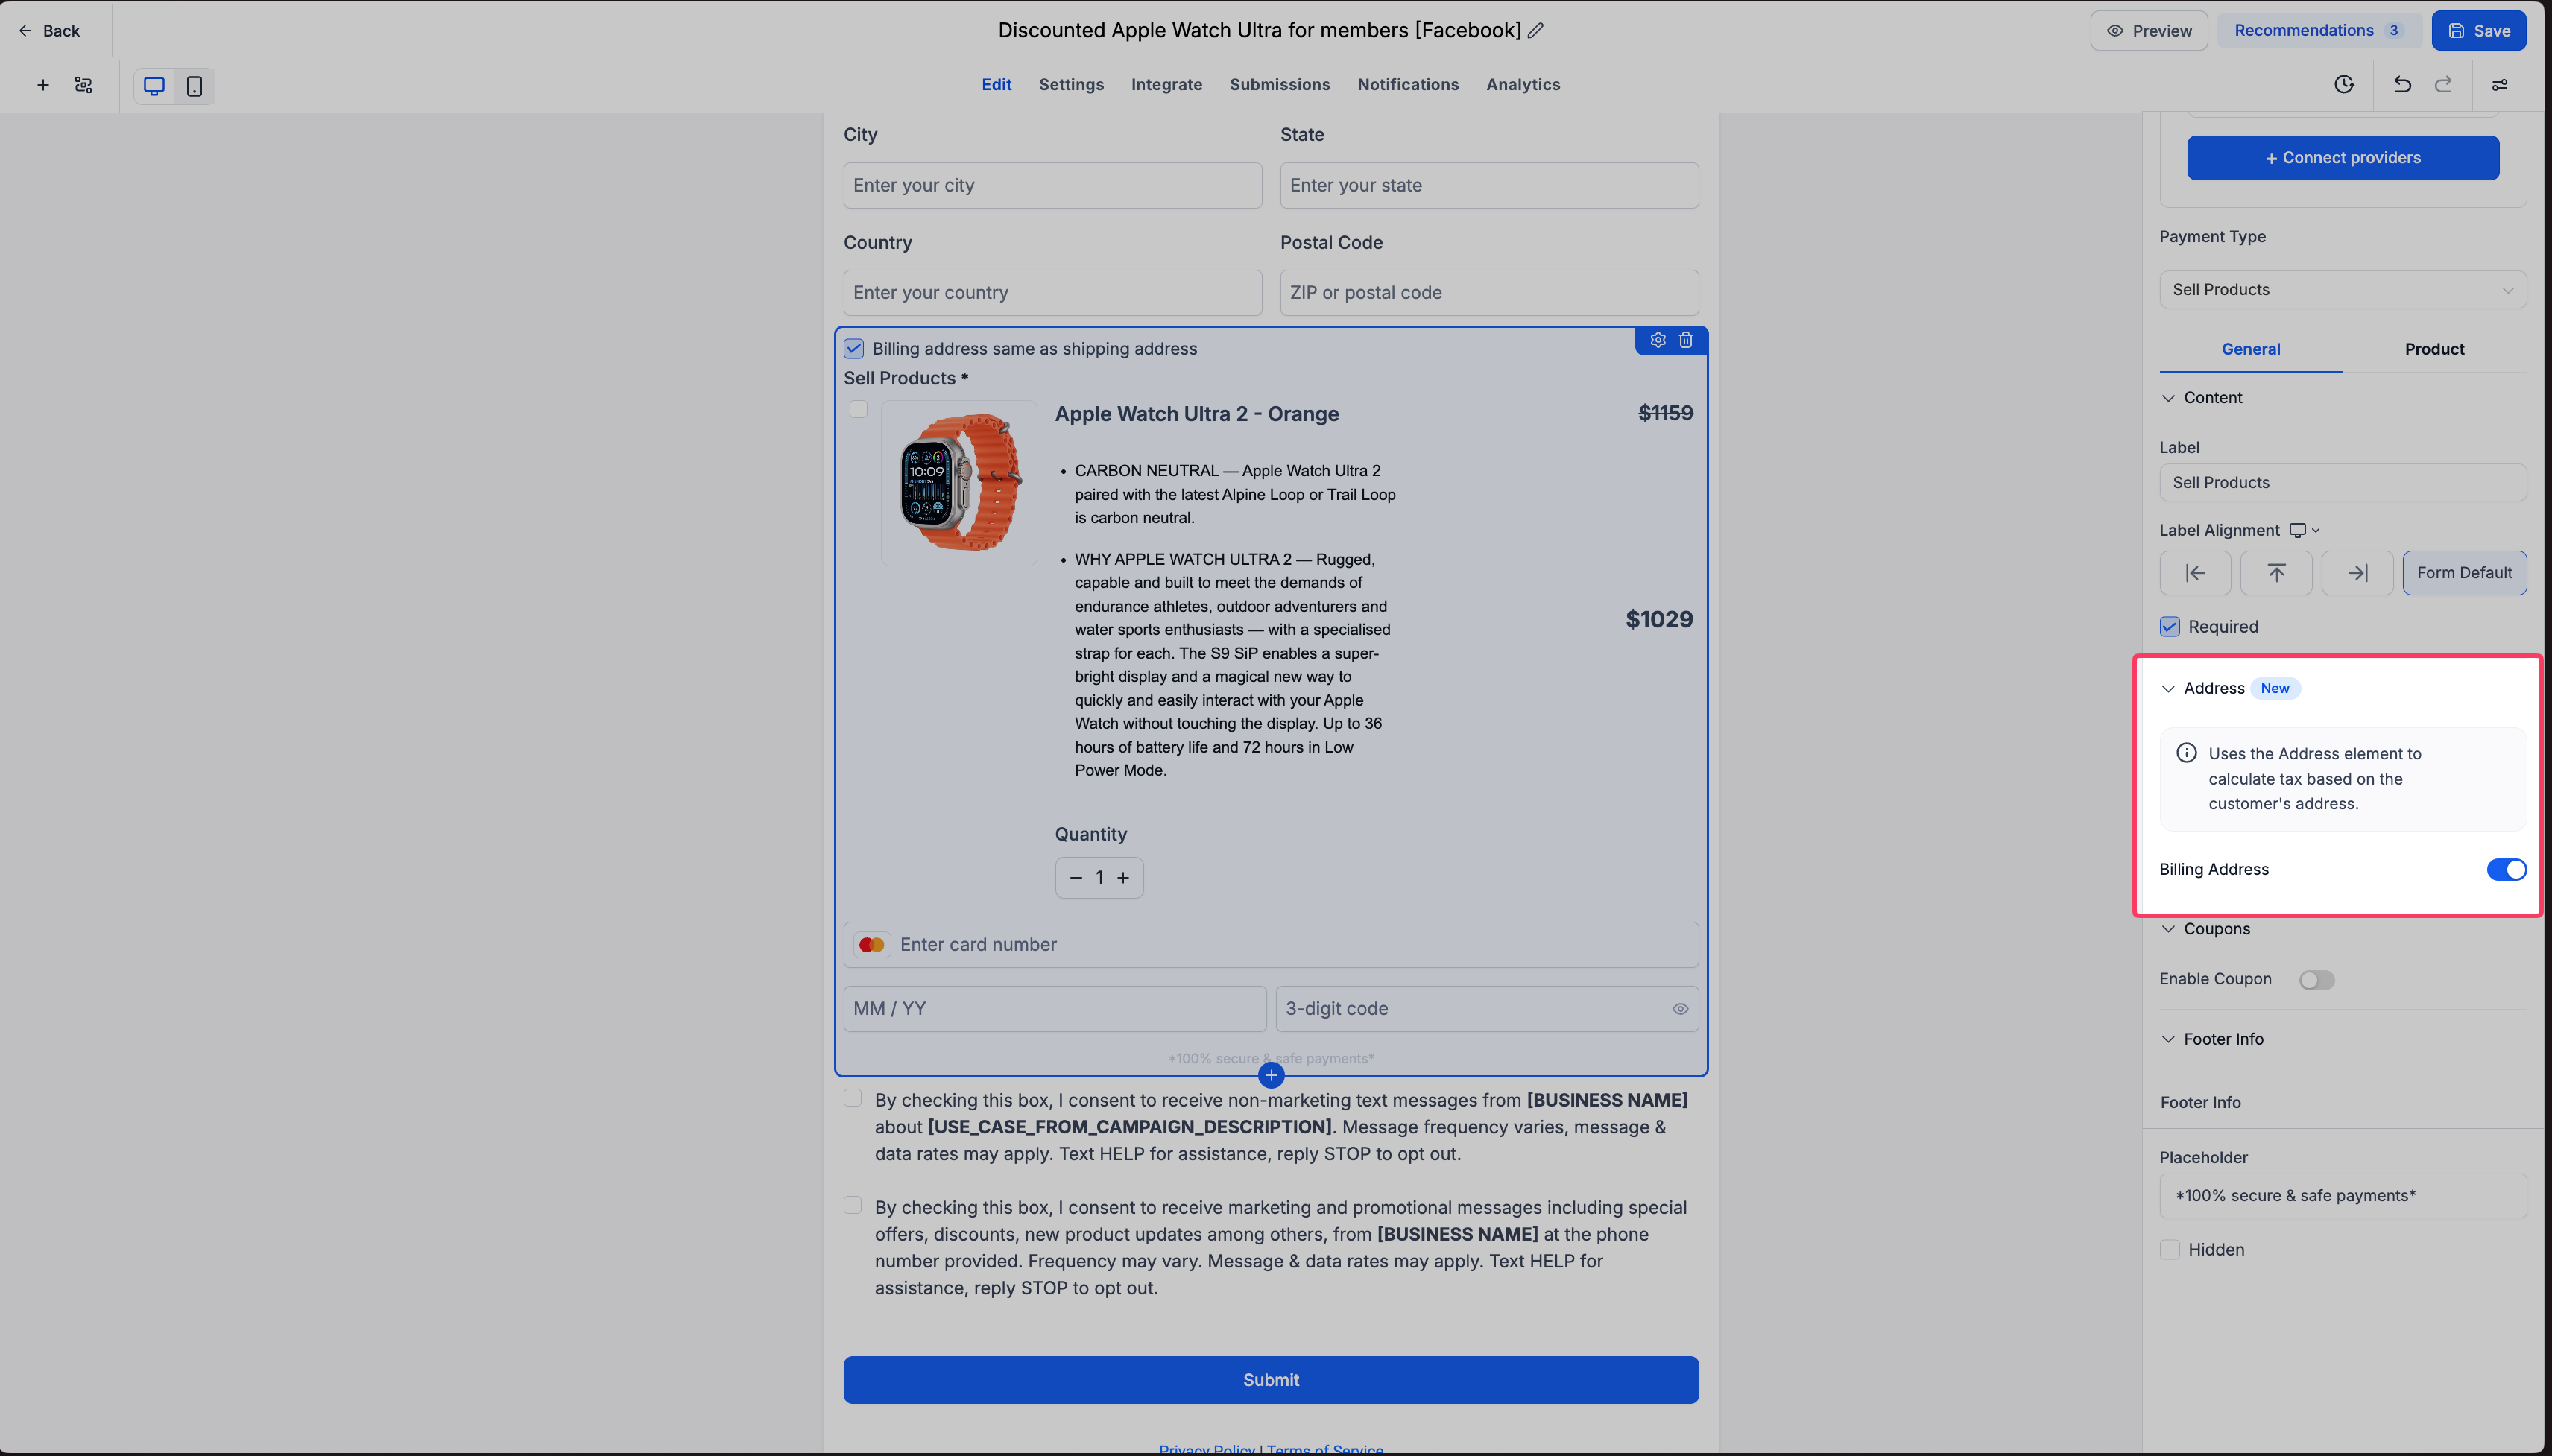
All settings are found inside the form editor. The Sell Products element must have Address enabled under its General > Address tab for the shipping and billing fields to appear.
03How businesses use automatic taxes and address settings
- Online retail store. Add the Address element to a product checkout form, rename its label to "Shipping Address," enable Shipping and Billing Address, and turn on Automatic Tax in Payments. Customers can pay, see tax added, and reuse their shipping info for billing.
- Consulting service provider. Insert the Sell Products element to collect service fees, activate Shipping Address, then enable Billing Address. The client can enter their office location once and check the same as shipping box to finish payment with tax calculated automatically.
- Charity fundraiser. Create a survey that includes a donation amount and the Address element. Turn on Automatic Tax, enable Billing Address, and let donors copy their shipping address to billing. The tax amount (if applicable) shows before the donor completes the payment.
04How to set up and use automatic taxes and address settings in HighLevel
Configure automatic taxes and billing address fields in a form or survey
- Go to Payments > Settings > Taxes, enable Automatic Tax and set the nexus locations, product tax categories, and pricing options.
- Open Sites > Forms or Sites > Surveys and select an existing form or survey, or create a new one.
- Add the Sell Products element if needed, choose the products to sell, and connect the desired payment provider.
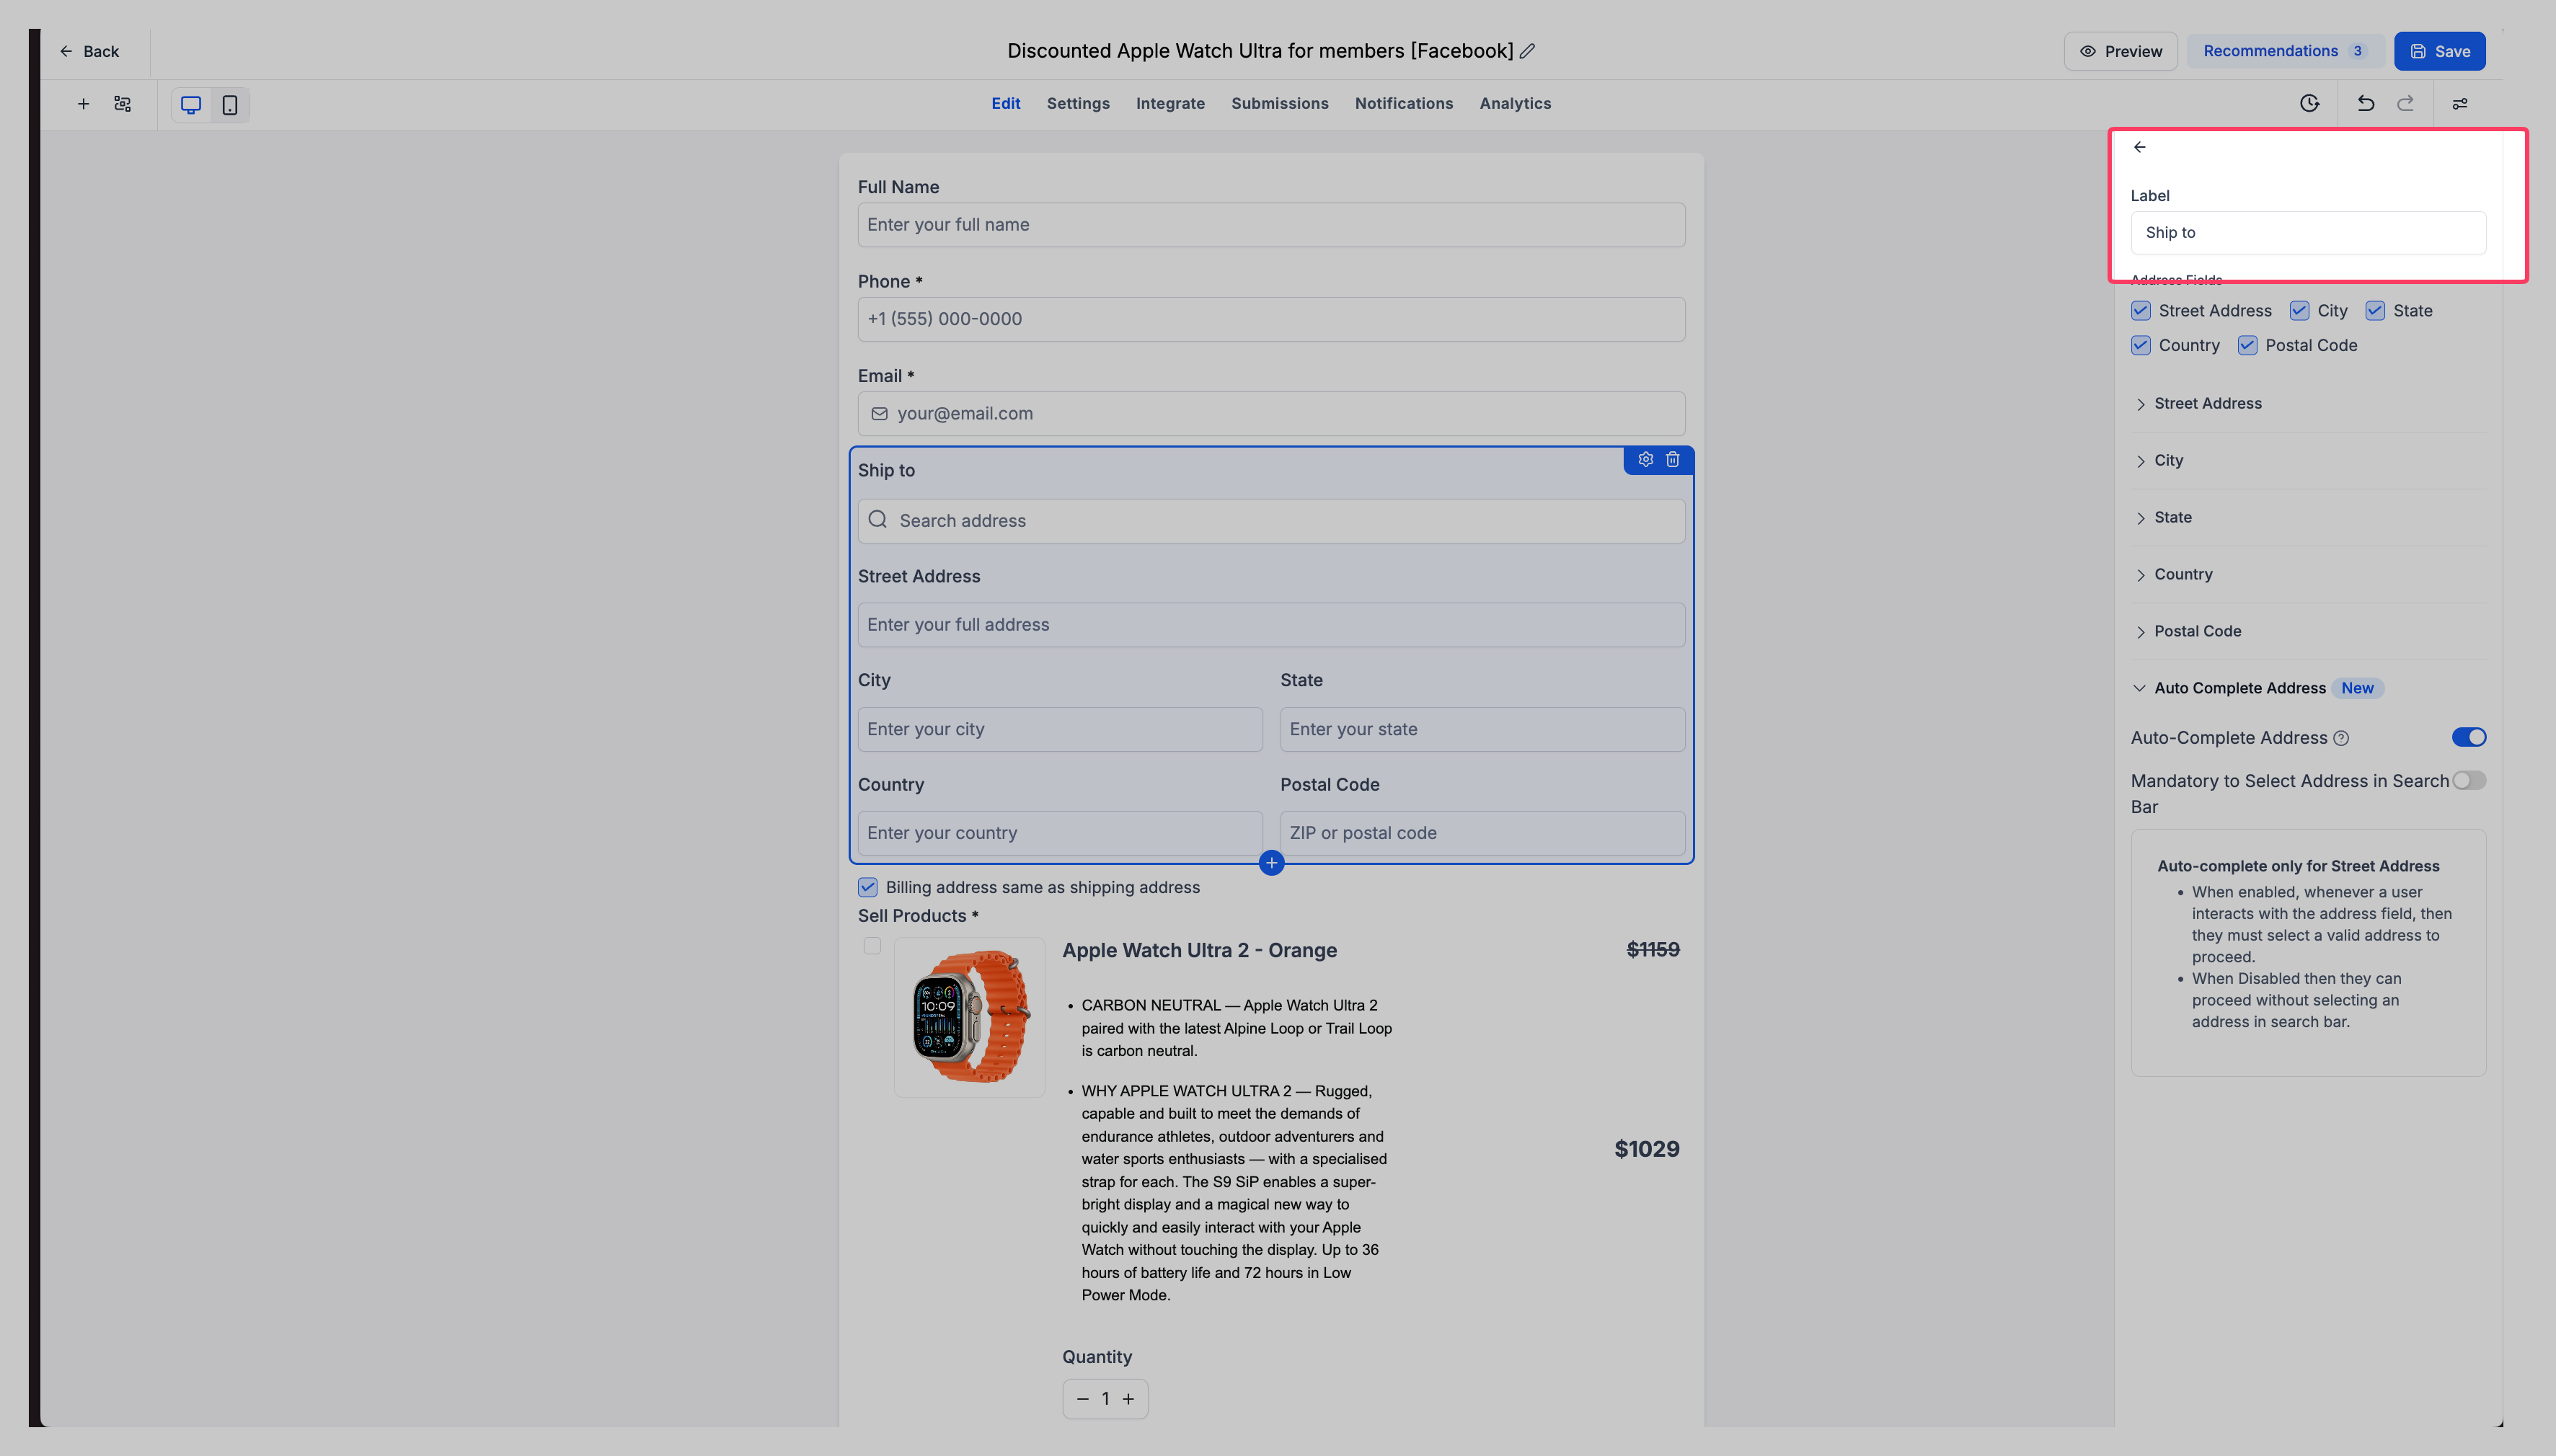
- Add or select the Address element, then edit its settings to rename the label (for example, "Shipping Address") and pick the required address fields.
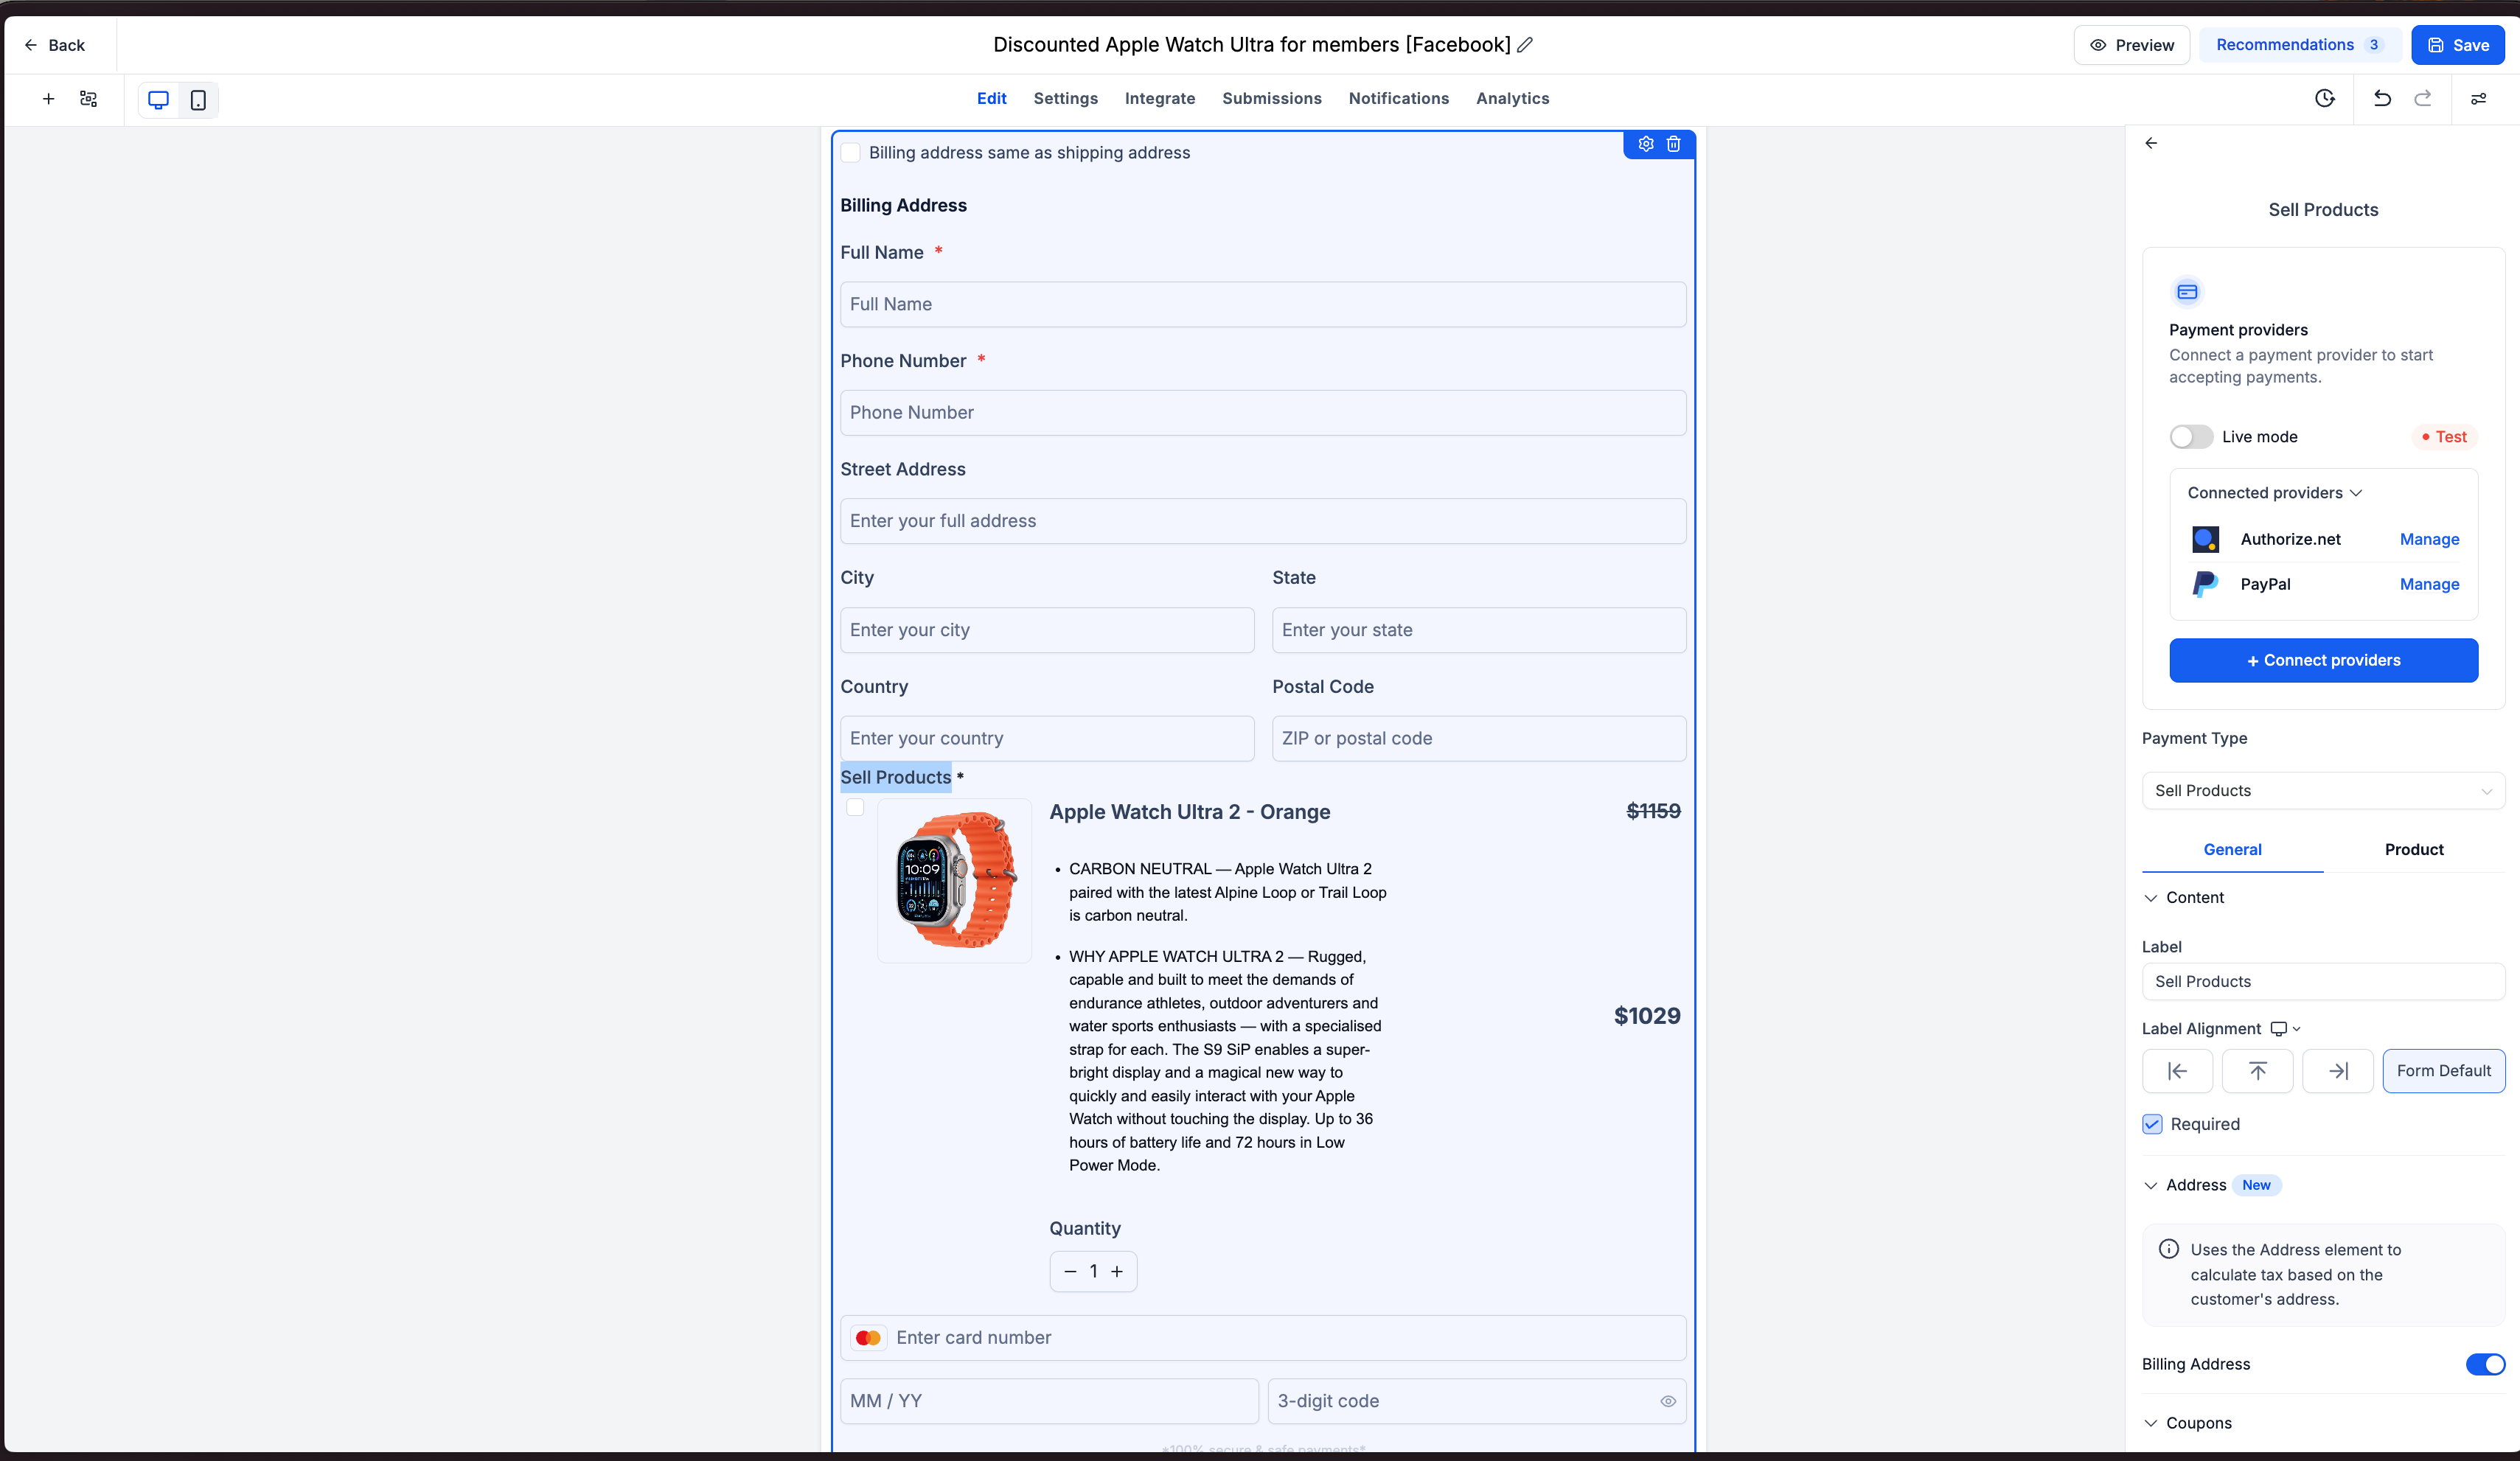
- Select the Sell Products element, open General > Address, and turn on Shipping Address followed by Billing Address; the billing fields will mirror the address element configuration.
- In the form preview, locate the "Billing address same as shipping address" checkbox and confirm that customers can copy shipping details or clear the box to enter a different address.
- Save the form or survey, then open the preview mode.
- Enter customer and shipping information, choose a product, and verify that tax amounts appear in the Order Summary.
- Test the checkout with identical shipping and billing addresses, then repeat with different addresses to ensure both options work correctly.
- After successful testing, save the changes and publish the form or survey.
05What it looks like in HighLevel
06Settings that matter
- Automatic Taxes. Turns on tax calculation using the address supplied by the customer.
- Custom Address Label. Changes the label shown for the Address element, such as to "Shipping Address" or "Ship to."
- Billing Address. Adds a separate set of fields for billing information when Shipping Address is active.
- Mirrored Address Fields. Uses the same field configuration for both shipping and billing, so no extra setup is required.
- Same as Shipping Address. Provides a checkbox that lets customers reuse their shipping details for billing.
07Things to know before you rely on it
- Automatic tax calculations only work for supported jurisdictions; they are not available for every country.
- Taxes appear only when the required address information is entered and the tax settings (nexus locations and product categories) are configured.
08If something goes wrong
- Automatic taxes are missing from the Order Summary.. Make sure Automatic Taxes are enabled, the correct nexus locations and product tax categories are set, and the customer has filled in the required address fields.
- Enabling Address Auto Complete does not trigger tax calculation.. Remember that Address Auto Complete and Automatic Taxes are separate settings; enable Automatic Taxes in Payments > Settings > Taxes.
09How it connects to the rest of HighLevel
- Learn how Conditional Logic V2 can further personalize your form experience. Conditional Logic V2
- Explore appointment booking integration that can be added alongside tax enabled checkout forms. Appointment booking
- Review HighLevel pricing and plan options if you need to upgrade for advanced tax features. Pricing
Michael's take

When I need to collect taxes for physical products, the automatic taxes and address settings save me time by handling tax calculations and address collection in the same form.
If my business only sells digital products that aren't taxed or operates in a single tax jurisdiction, I might not find this feature necessary, since it adds extra configuration.