
01Who this is for
- Founders of service based businesses who need reviews on both Google and Facebook to broaden credibility.
- Marketing managers overseeing reputation who want control over where review traffic is directed.
- Small agencies that manage multiple client pages and require a balanced flow of reviews across platforms.
02Review request balancing, explained
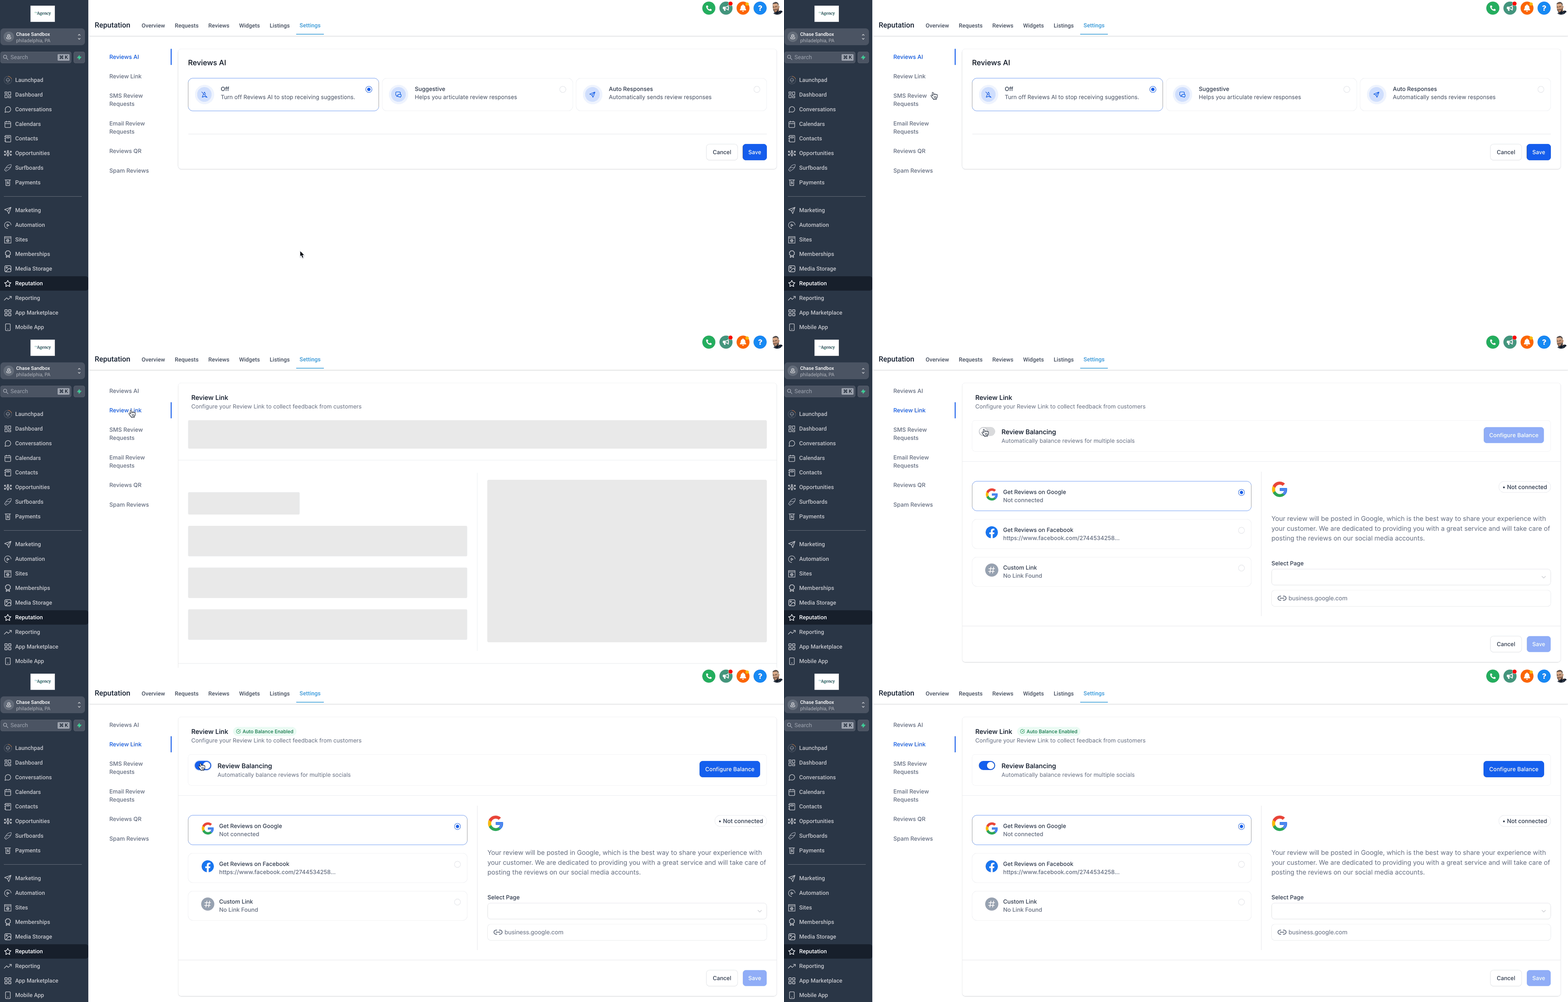
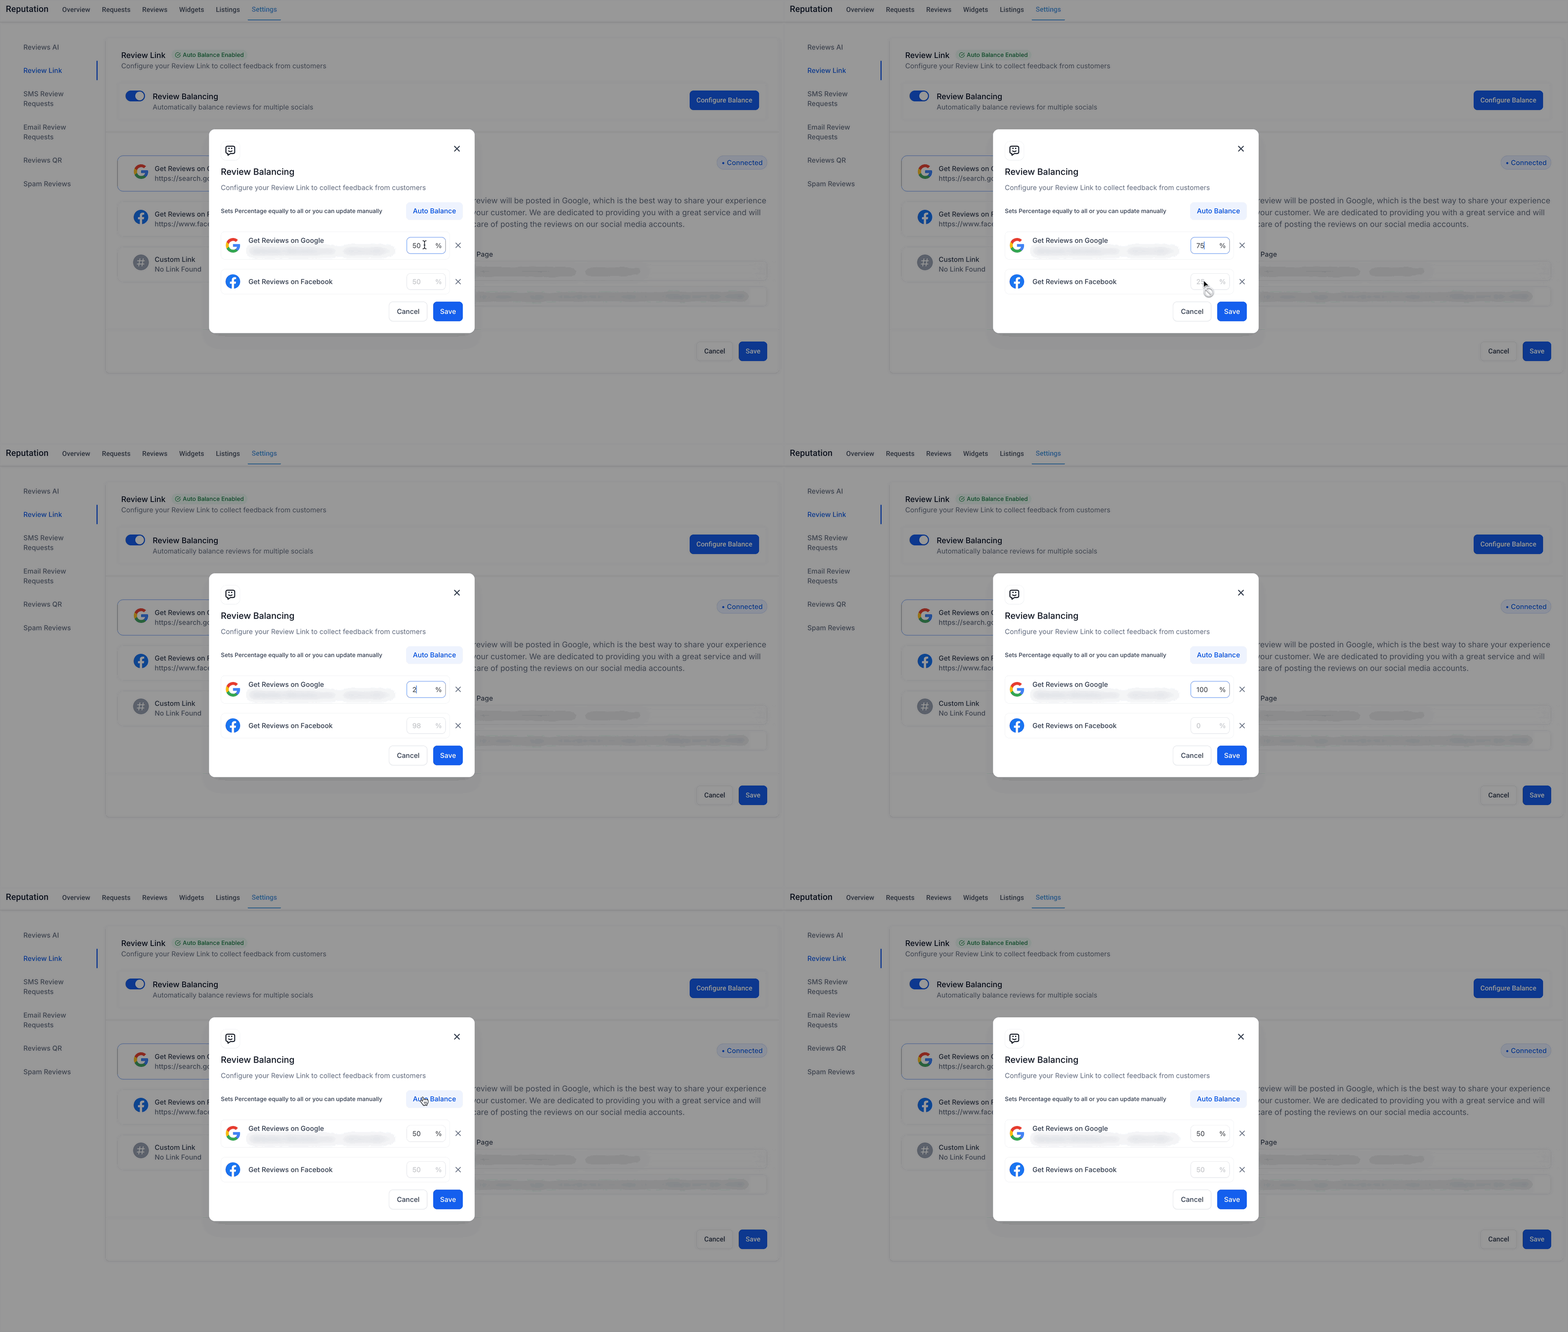
The feature is located in Reputation > Settings > Review Link. Turn on Enable Review Balancing, then configure the redirection ratio between Google and Facebook. The default ratio is 50 % Google and 50 % Facebook when both platforms are integrated. If only one platform is linked, all requests go to that platform. The current split is shown in the Configure Balance modal.
03How businesses use review request balancing
- Dental practice. The office enables Review Balancing, selects its Google Business Profile, and sets a 70 % Google 30 % Facebook split. Patient invitations are routed according to that ratio.
- Home cleaning service. The company integrates both Google and Facebook pages, activates the feature, and chooses a 60 % Facebook 40 % Google ratio to boost its Facebook presence without losing Google visibility.
- Fitness studio. The studio turns on Review Balancing, leaves the default 50 % 50 % split, and later adjusts the percentages during a promotion to favor the platform offering a special review incentive.
04The numbers and rules that matter
- Default ratio is 50% Google and 50% Facebook when Review Balancing is enabled for the first time (if both pages are integrated).
05Before you start
- Both Google Business Profile and Facebook Business page must be integrated via Settings > Integrations before configuring Review Balancing.
06How to set up and use review request balancing in HighLevel
Enable Review Balancing
- Navigate to Reputation > Settings > Review Link.
- Toggle the Enable Review Balancing option.
Configure GBP Page
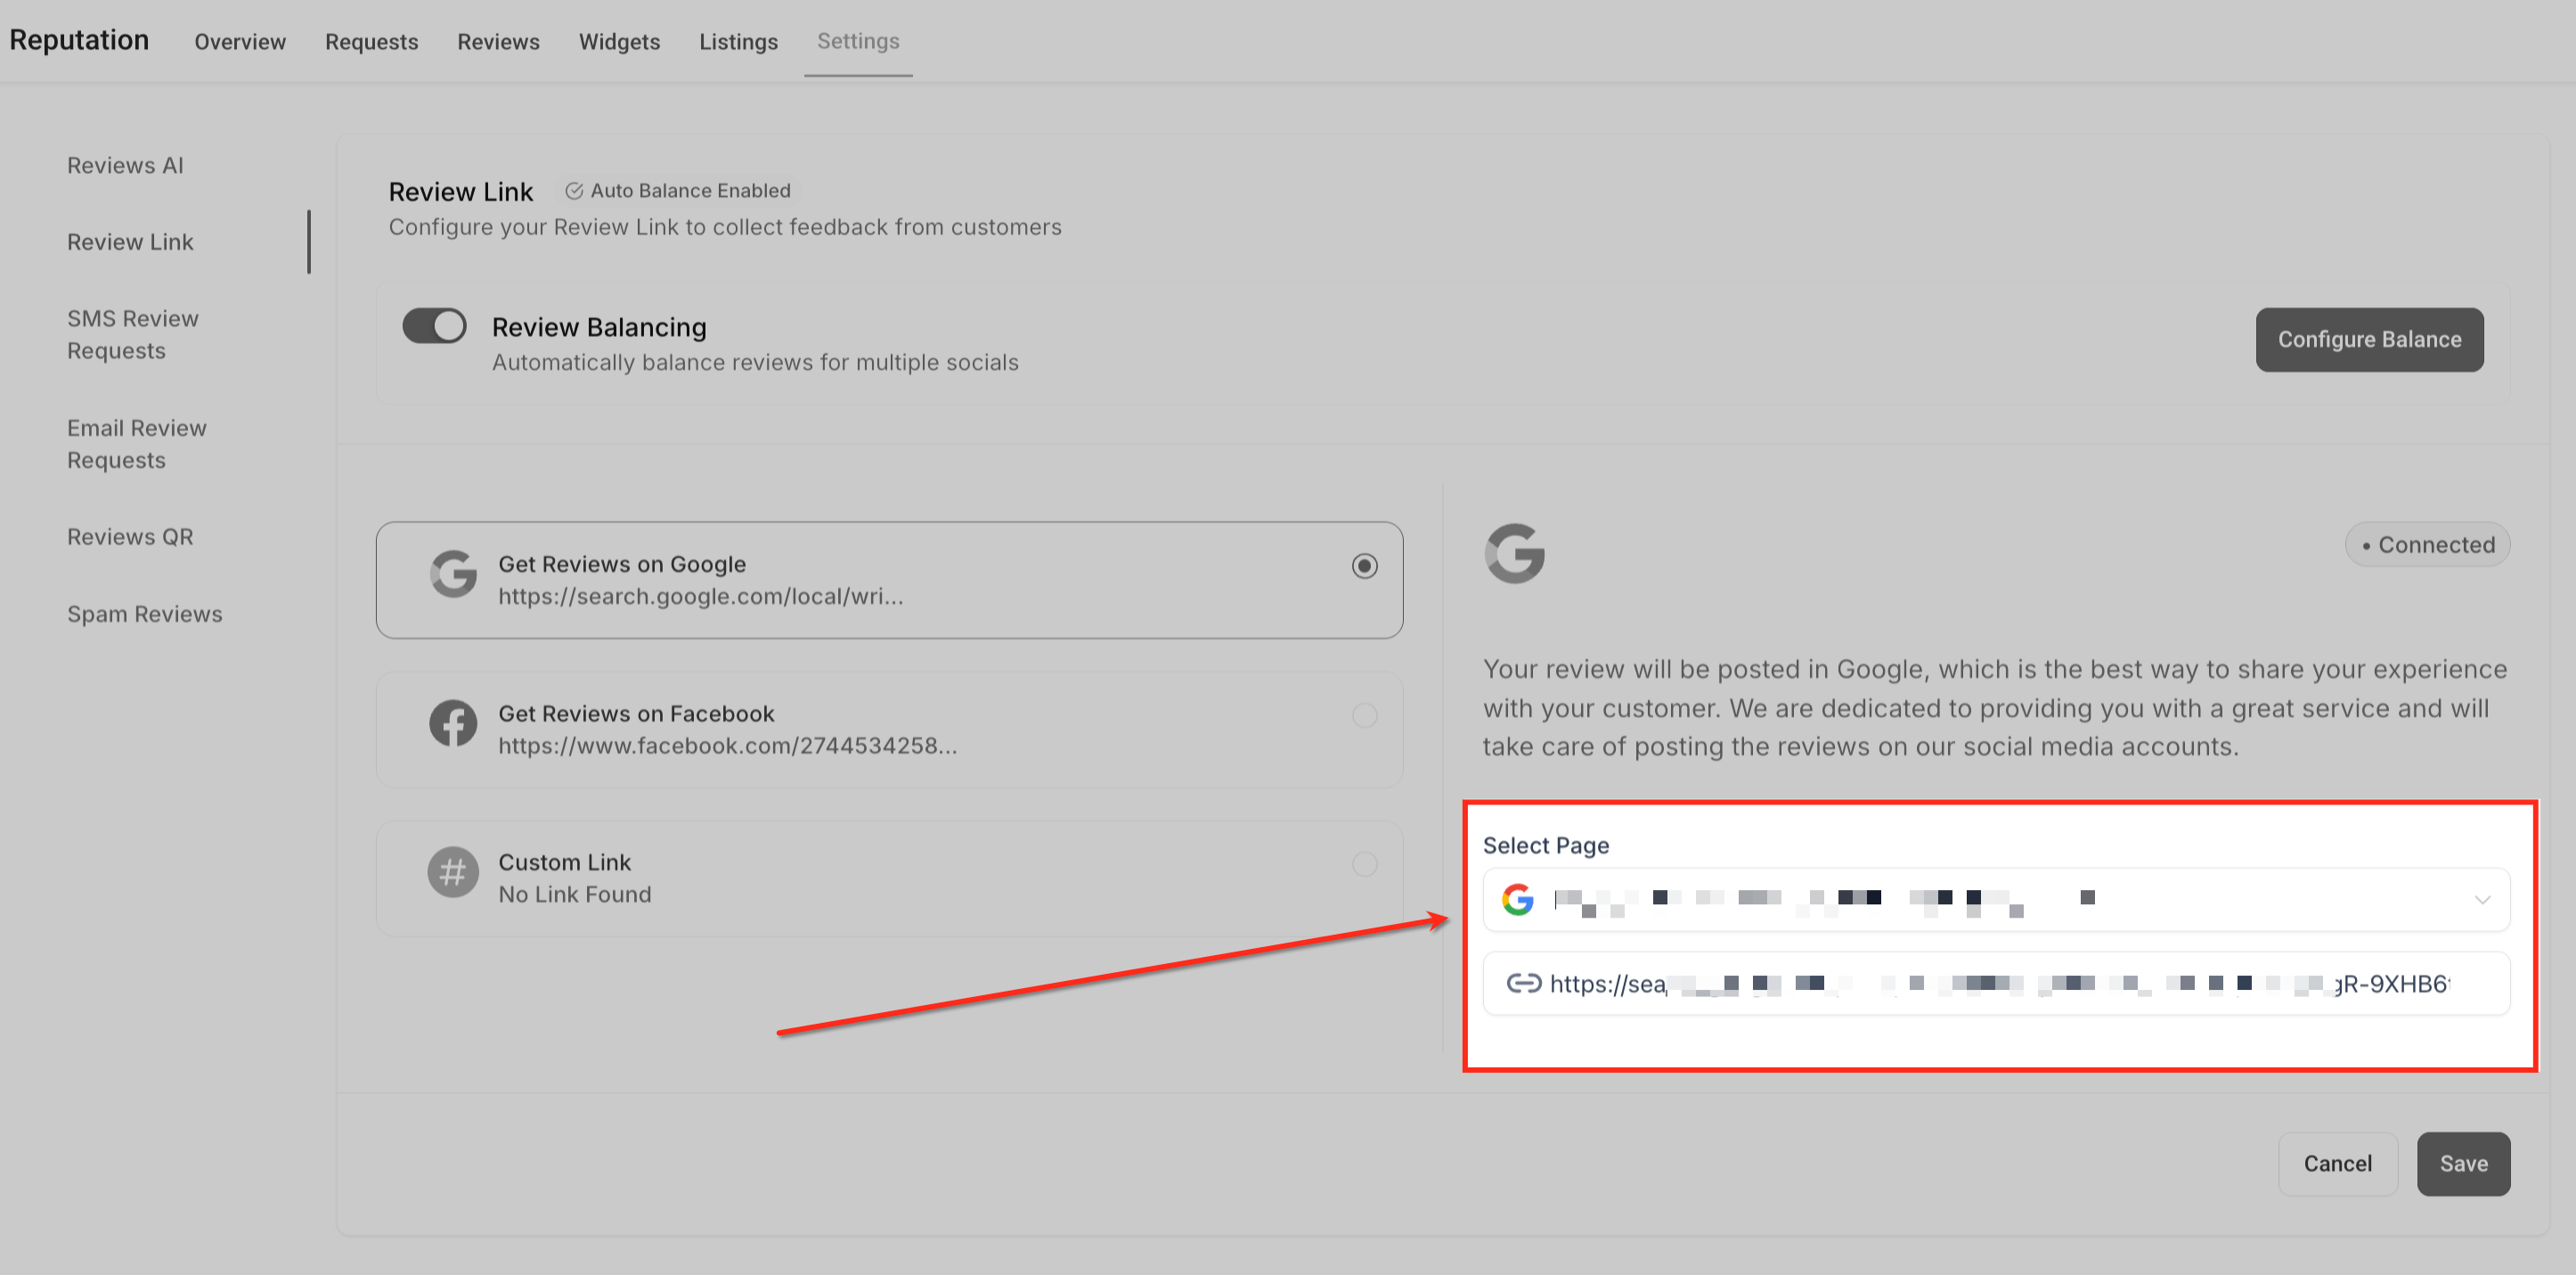
- In Reputation > Settings > Review Link, locate the Get Reviews on Google section.
- Use the Select Page dropdown to choose the integrated Google Business Profile.
Set the Balance
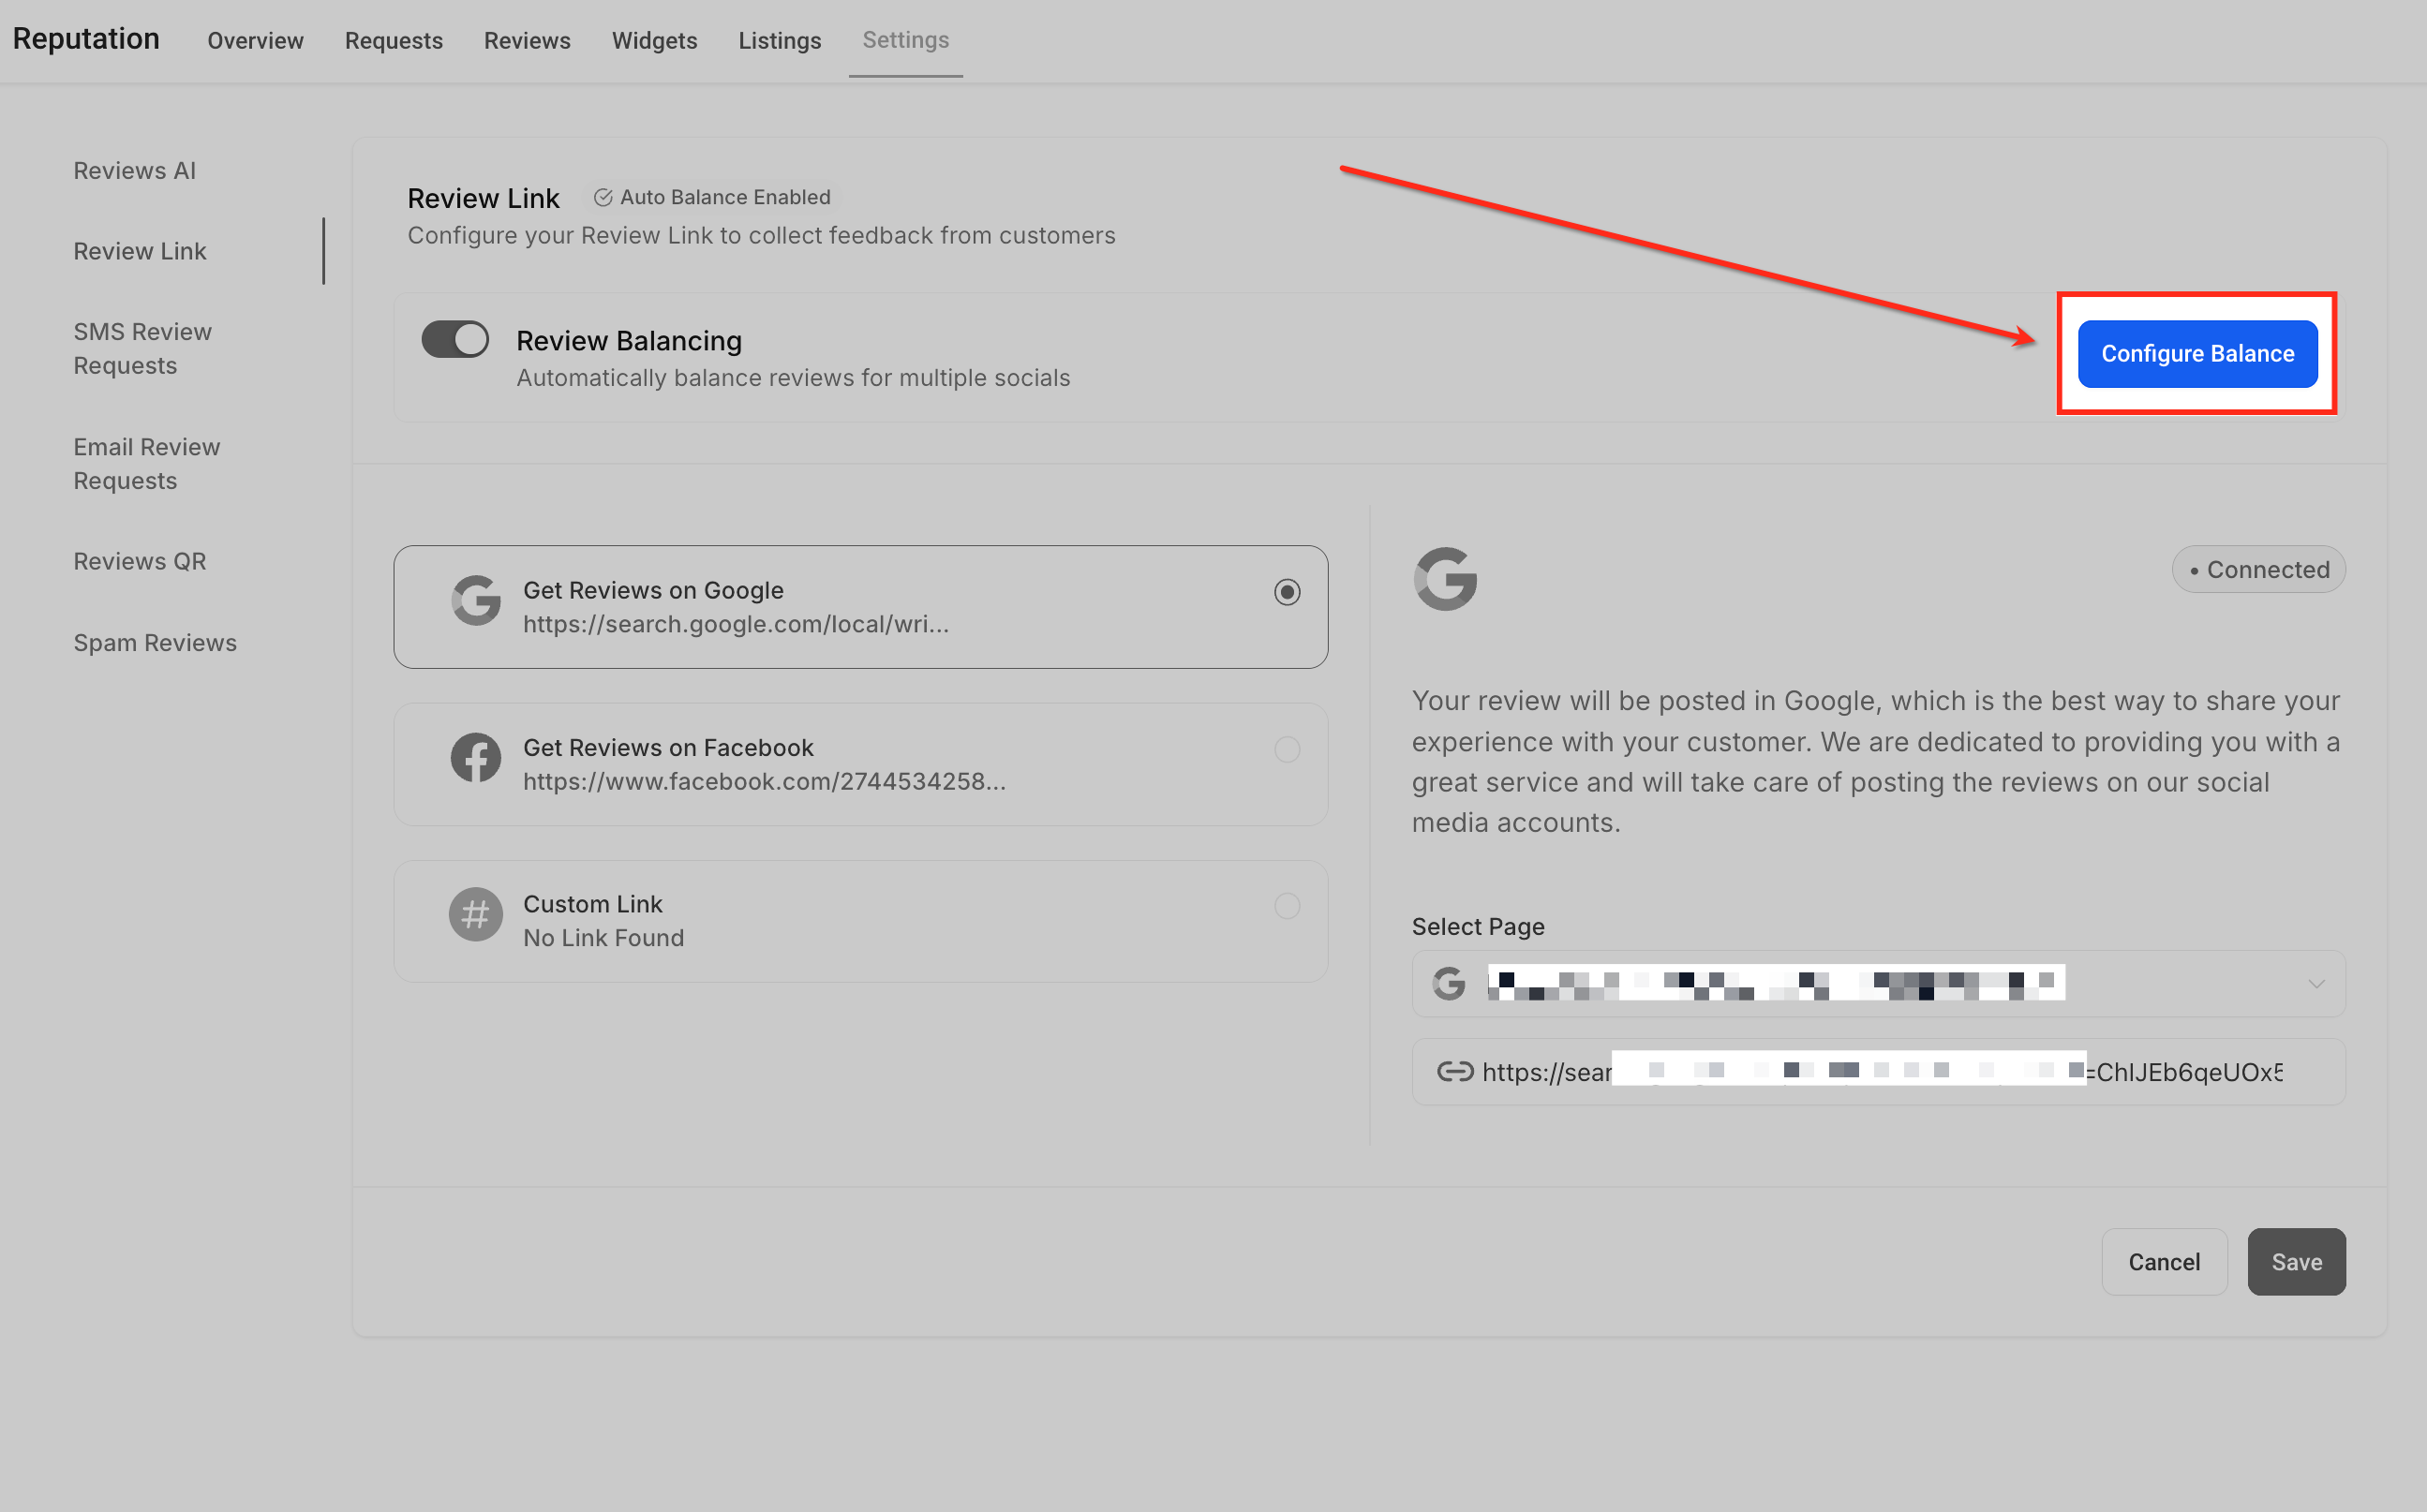
- Click the Configure Balance button.
- Adjust the redirection percentages between Google and Facebook as desired.
- Click Save to apply the changes.
07What it looks like in HighLevel
08Settings that matter
- Enable Review Balancing. Turns the balancing feature on or off, determining whether review requests are split between platforms.
- Select Page. Chooses which integrated Google Business Profile receives the portion of review requests assigned to Google.
- Configure Balance. Opens a modal where you set the percentage split between Google and Facebook for outgoing review requests.
09Things to know before you rely on it
- The default split is 50 % Google and 50 % Facebook when the feature is first enabled and both platforms are integrated.
- If only one platform is connected, all review requests automatically redirect to that single platform.
- If no custom balance is set after enabling, the system uses the default 50 to 50 distribution.
10How it connects to the rest of HighLevel
- Explore manual and workflow options for sending review requests. Sending review requests
- View overall reputation metrics and platform specific performance. Reputation overview dashboard
- Check pricing plans and trial options for accessing Review Balancing. HighLevel pricing
Michael's take

Wondering if splitting review requests across Google and Facebook actually helps? It does when you want to show up on both sites and not rely on a single source. By setting a custom split you can push more reviews to the platform that matters most for your current marketing push.
If I were setting this up, I’d start by linking both my Google Business Profile and Facebook page, turn on the balancing toggle, and then experiment with a 70 to 30 split to see which platform brings the most new customers. I’d keep an eye on the distribution in the Configure Balance modal and adjust as my goals shift.