
01Who this is for
- Founders who want on site social proof without hiring designers, because the visual editor handles branding.
- Marketing teams that need flexible placement options to match different page layouts and keep page speed high.
- Small business owners who want AI summarized reviews to quickly convey key points to visitors.
02Review widgets, explained
HighLevel now offers two widget types for displaying reviews: a Floating Badge that stays visible in a corner and rotates through selected reviews, and a Slider that presents one review at a time in a carousel. Both widgets include configurable intervals, AI generated summary styles, and a visual style editor for colors and layout.
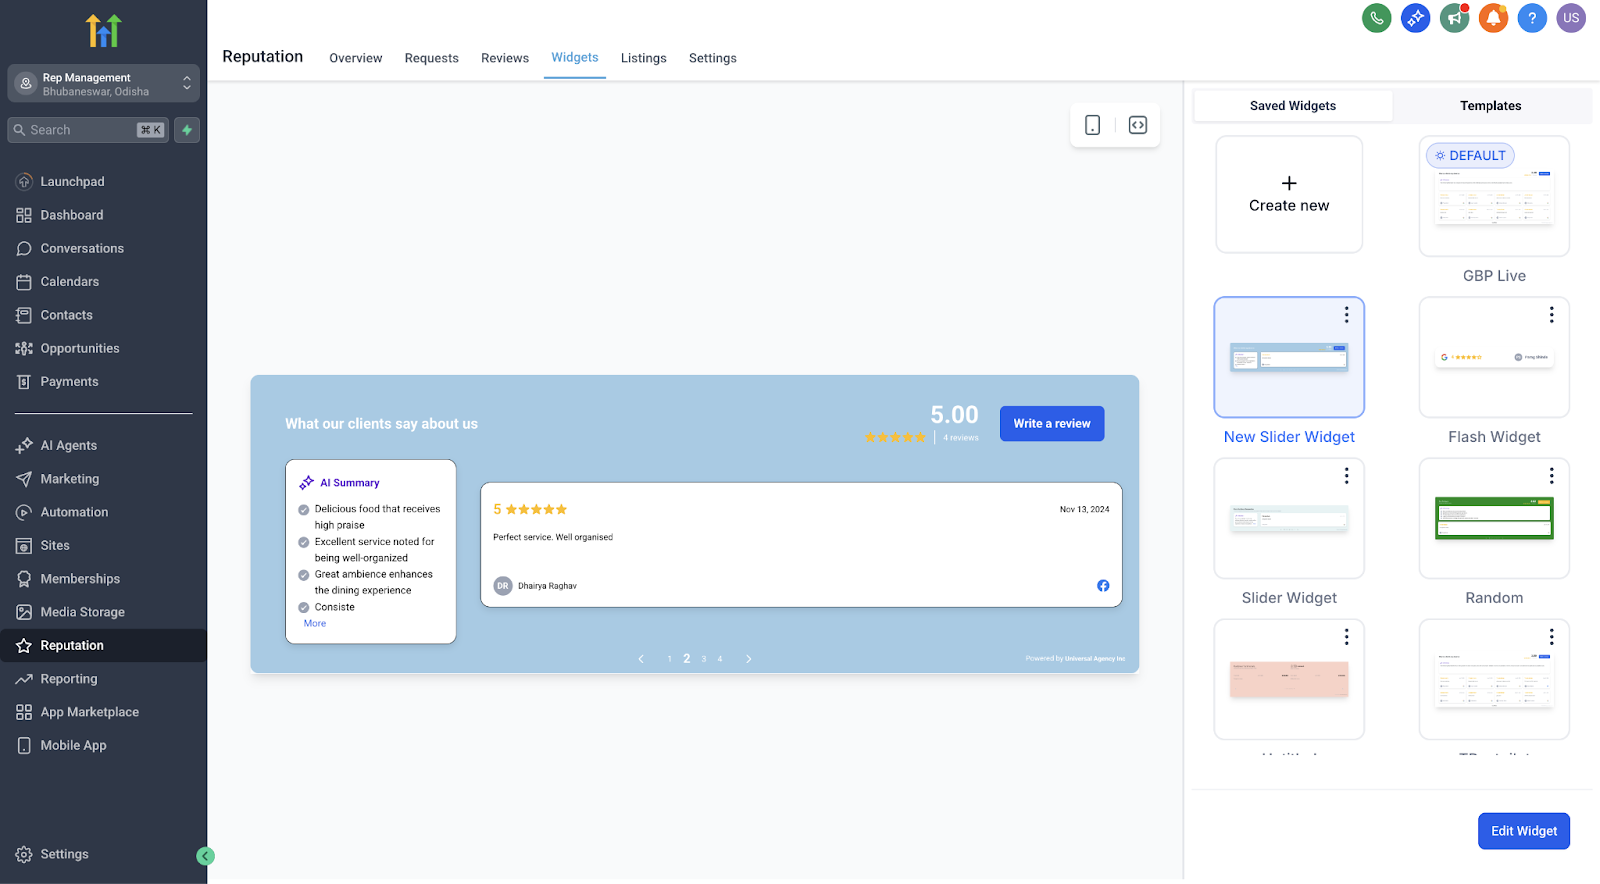
The widgets are created from the Reputation > Widgets section. You start with a template or a blank canvas, pick the widget type, set rotation or slide timing, choose an AI summary format and its placement, customize visual elements, preview in real time, and then publish. Once live, you can edit or replace the widget at any time.
03How businesses use review widgets
- Dental practice. The practice adds a Slider widget to the homepage hero area, sets a short AI summary at the top of each review, and uses the style editor to match the clinic’s brand colors. The widget cycles through patient testimonials one at a time.
- Real estate agency. The agency places a Floating Badge widget in the lower right corner of its listings page, chooses a rotation interval of ten seconds, and selects the detailed AI summary integrated within the review layout. The badge continuously shows recent client feedback without taking up page space.
- SaaS startup. The startup uses the visual style editor to set button and background colors that align with its product palette, picks the Action Points AI summary format, and embeds a Slider widget in the sidebars of its pricing pages to highlight feature specific reviews.
04The numbers and rules that matter
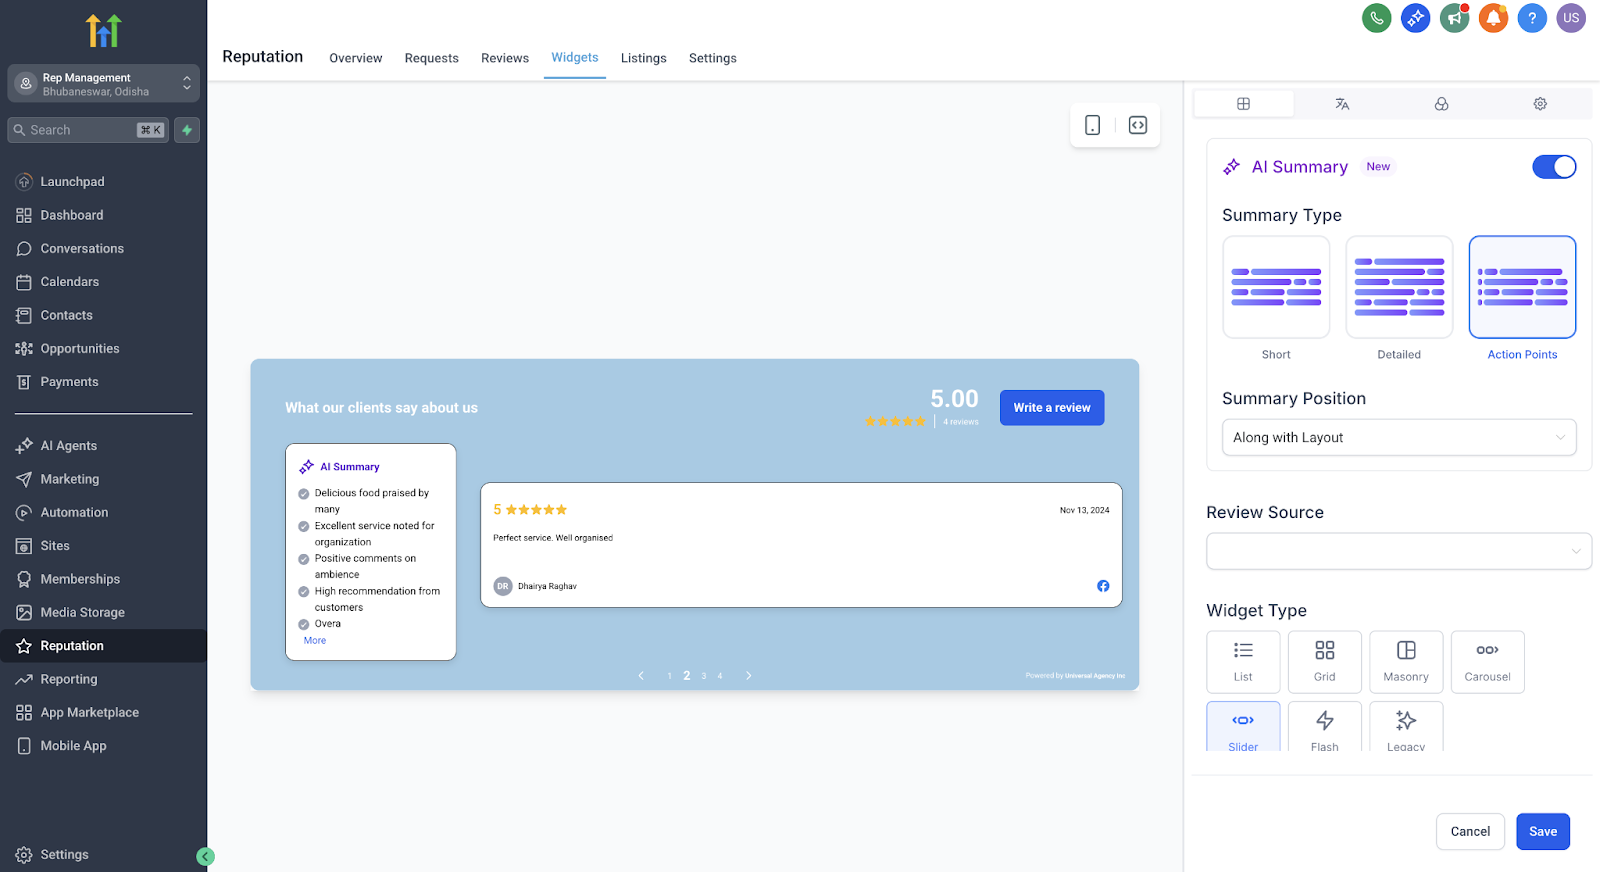
- AI summary types: Short (1 to 2 sentences), Detailed (3 to 4 sentences), Action Points (bullet format).
05Before you start
- These new widget options are fully optimized for faster loading and smoother performance across devices.
- Design bugs and inconsistencies from previous versions have been fixed to ensure a more reliable display.
- Once published, you can edit or update widgets anytime, no need to start from scratch.
06How to set up and use review widgets in HighLevel
Create and customize a new widget
- Open the Reputation menu and select Widgets.
- Pick a pre designed template or start with a blank layout.
- Choose the widget type you need, either Floating Badge or Slider.
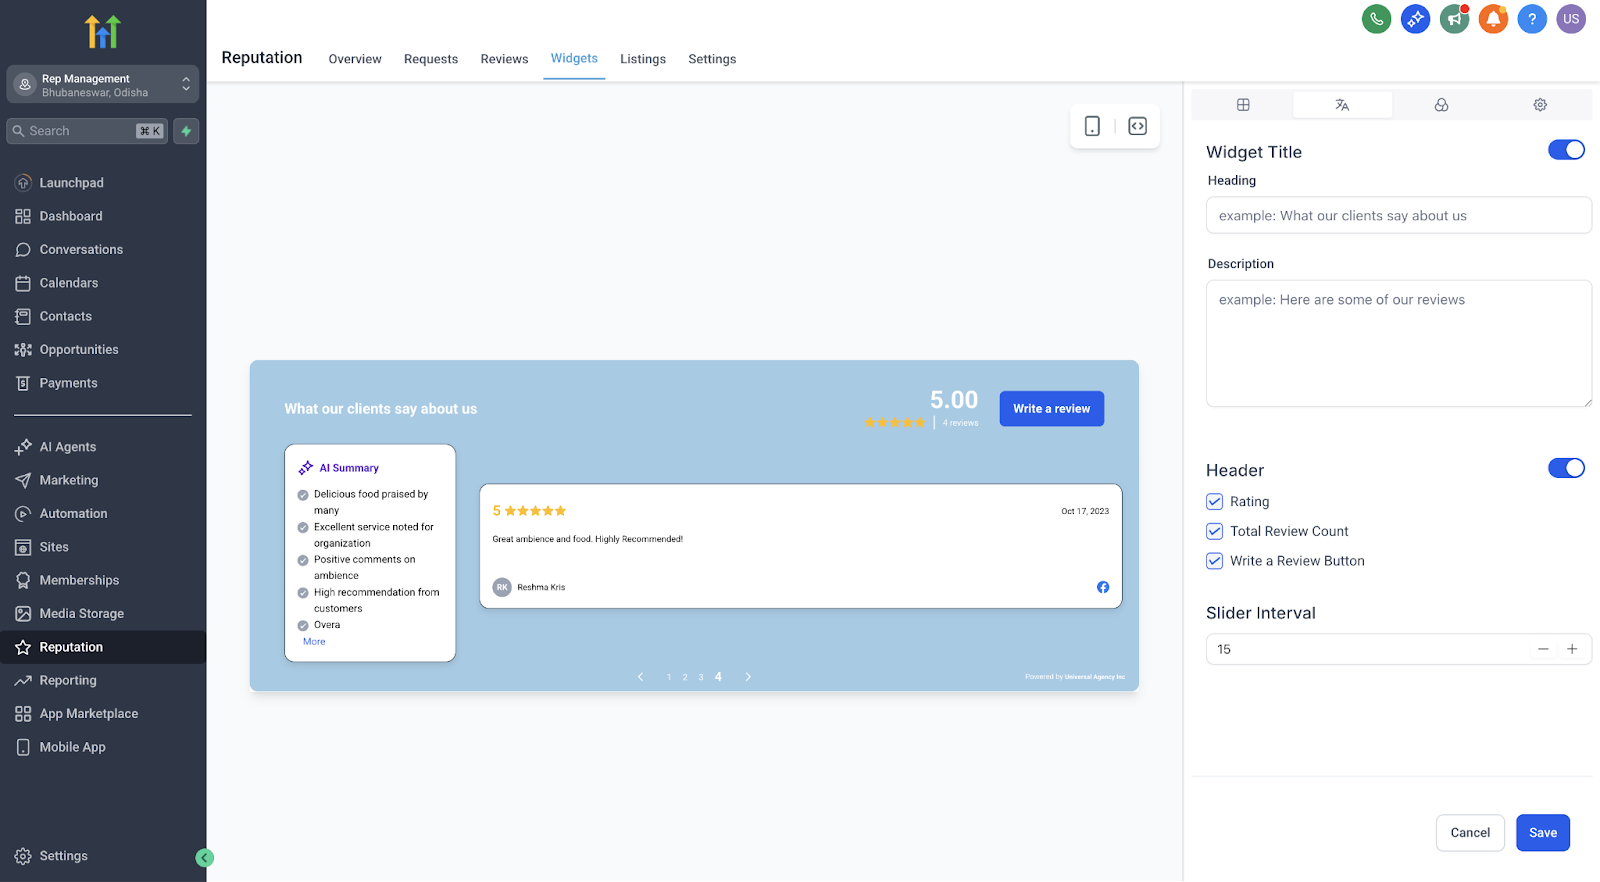
- Set the rotation interval for a badge or the slide interval for a slider.
- Select the AI summary type and decide whether it appears at the top or within the review layout.
- Open the visual style editor and adjust colors for buttons, avatars, backgrounds, and summary text.
- Watch the changes in the built in real time preview.
- Press Publish to make the widget live on your website.
07What it looks like in HighLevel
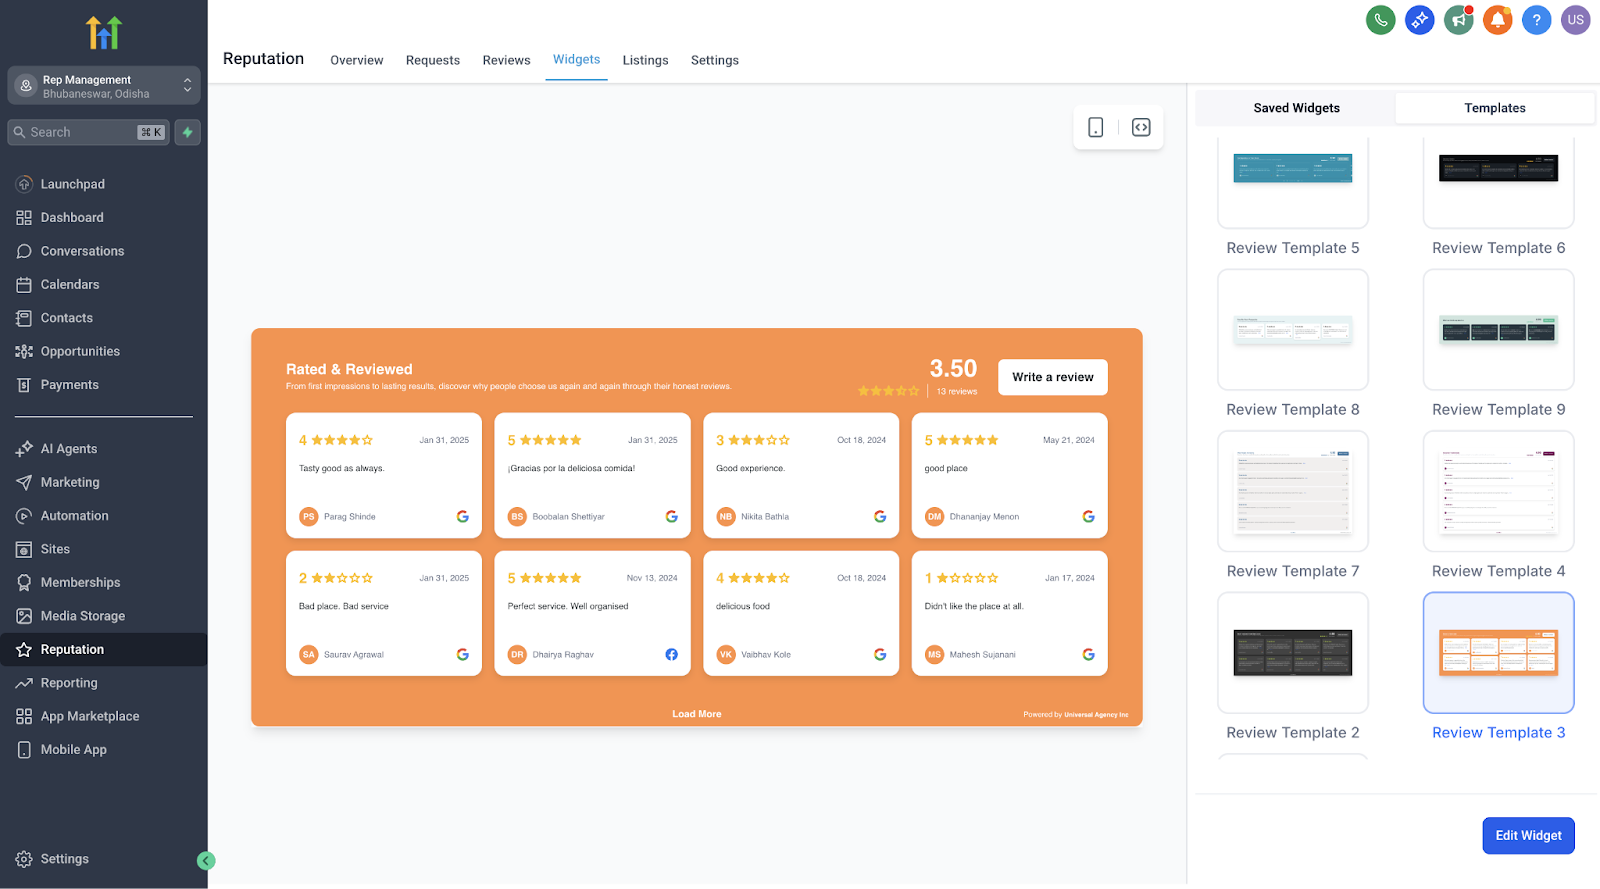
08Settings that matter
- Widget type. Determines whether the widget displays as a Floating Badge or a Slider carousel.
- Review rotation interval. Controls how often the Floating Badge cycles through different reviews.
- Slide interval. Sets the duration each review stays visible before moving to the next in the Slider.
- AI summary type. Selects the length and format of the automatically generated review summary: Short, Detailed, or Action Points.
- AI summary placement. Decides whether the AI summary appears above the review or integrated within the review layout.
- Style editor. Allows visual customization of button colors, avatar hues, background shades, and summary text color.
09How it connects to the rest of HighLevel
- Customize and embed review widgets Customize widgets
- View the reputation overview dashboard Reputation dashboard
- Explore HighLevel pricing and plans Pricing
Michael's take

These new review widgets give a simple way to add social proof without needing a designer.
Testing the rotation and interval settings helps ensure the message isn’t missed.