
01Who this is for
- Ecommerce store owners benefit because they can show only the payment types that work for their customers, avoiding checkout confusion.
- Coaches selling subscriptions can tailor card and wallet options for recurring payments without leaving HighLevel.
- Marketing agencies managing multiple client subaccounts gain centralized control over each account’s payment settings.
02Stripe payment methods, explained
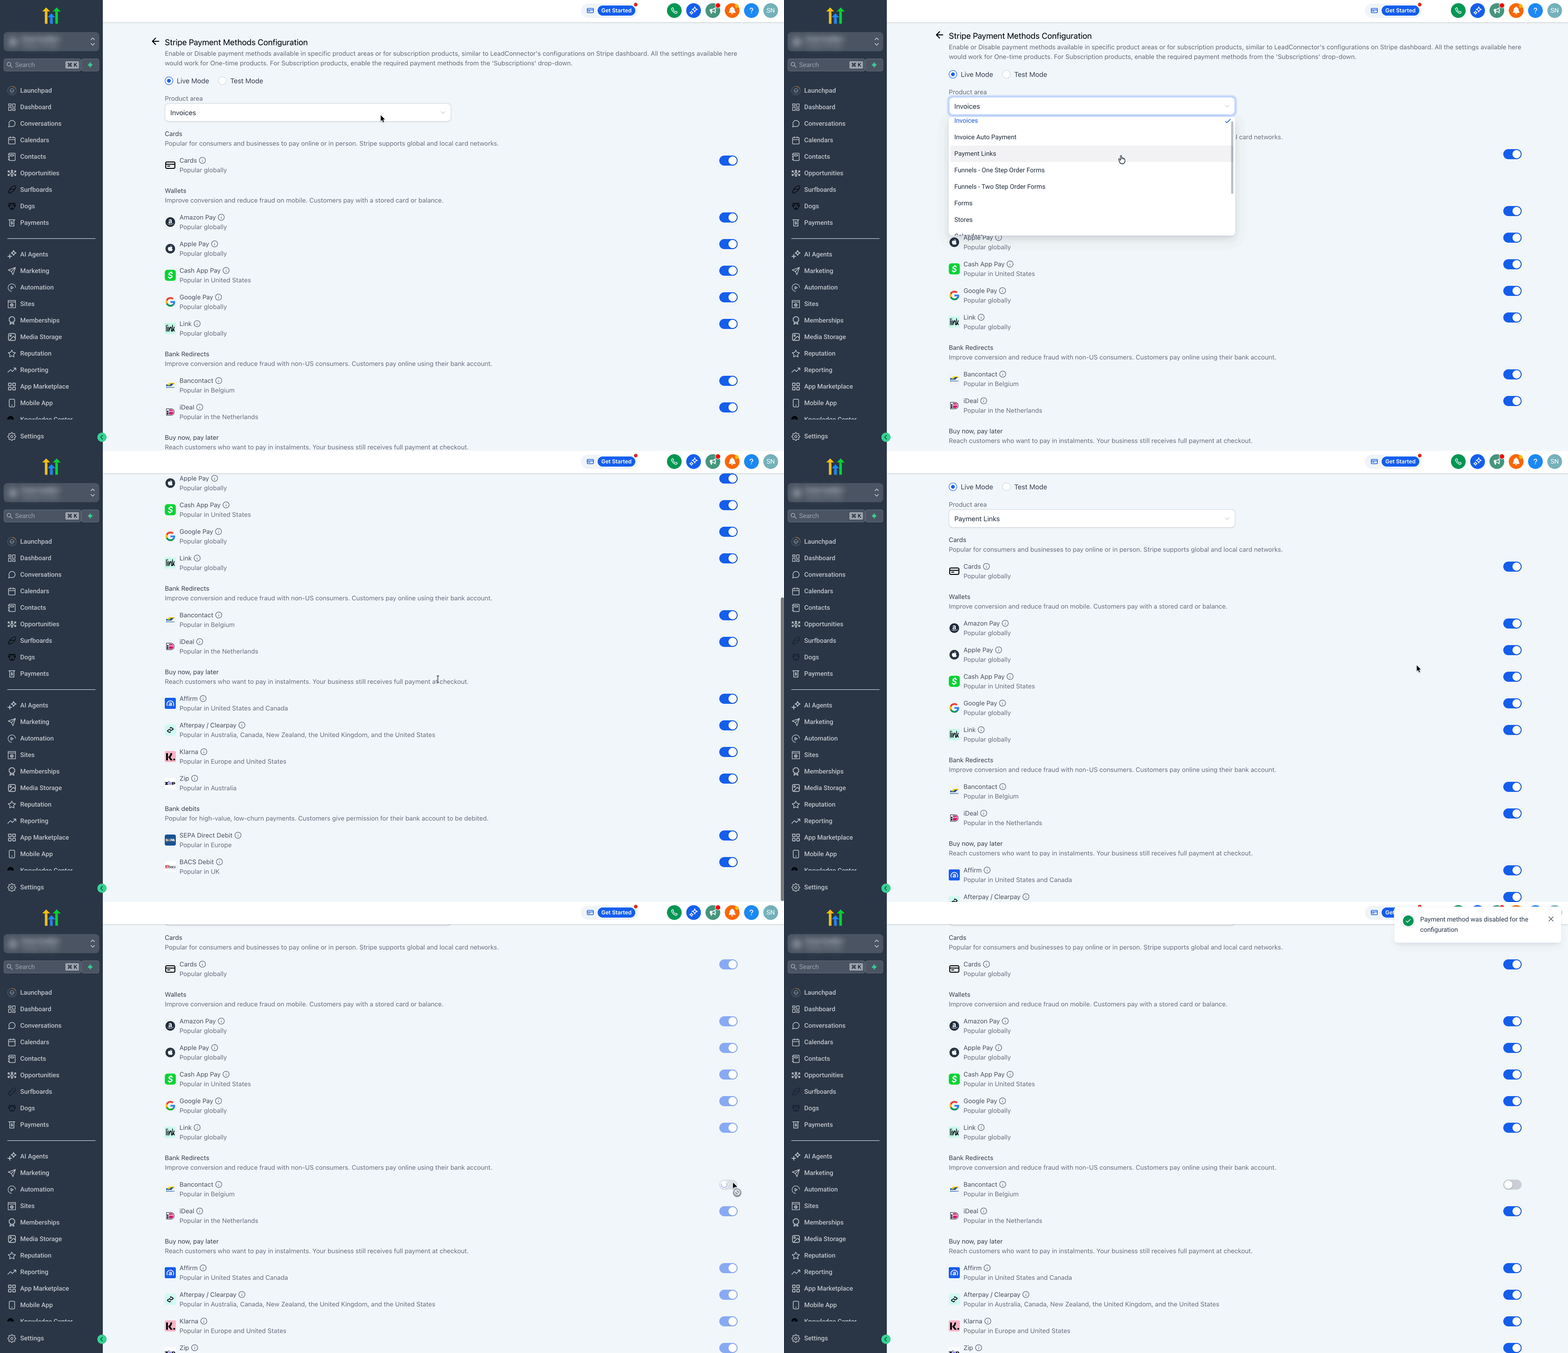
The feature lives in the Payments section of each subaccount. After selecting the connected Stripe account, you open Manage Payment Methods to see a list of options for each product area. You can turn any method on or off, and for subscriptions a separate dropdown lets you set the methods used at checkout.
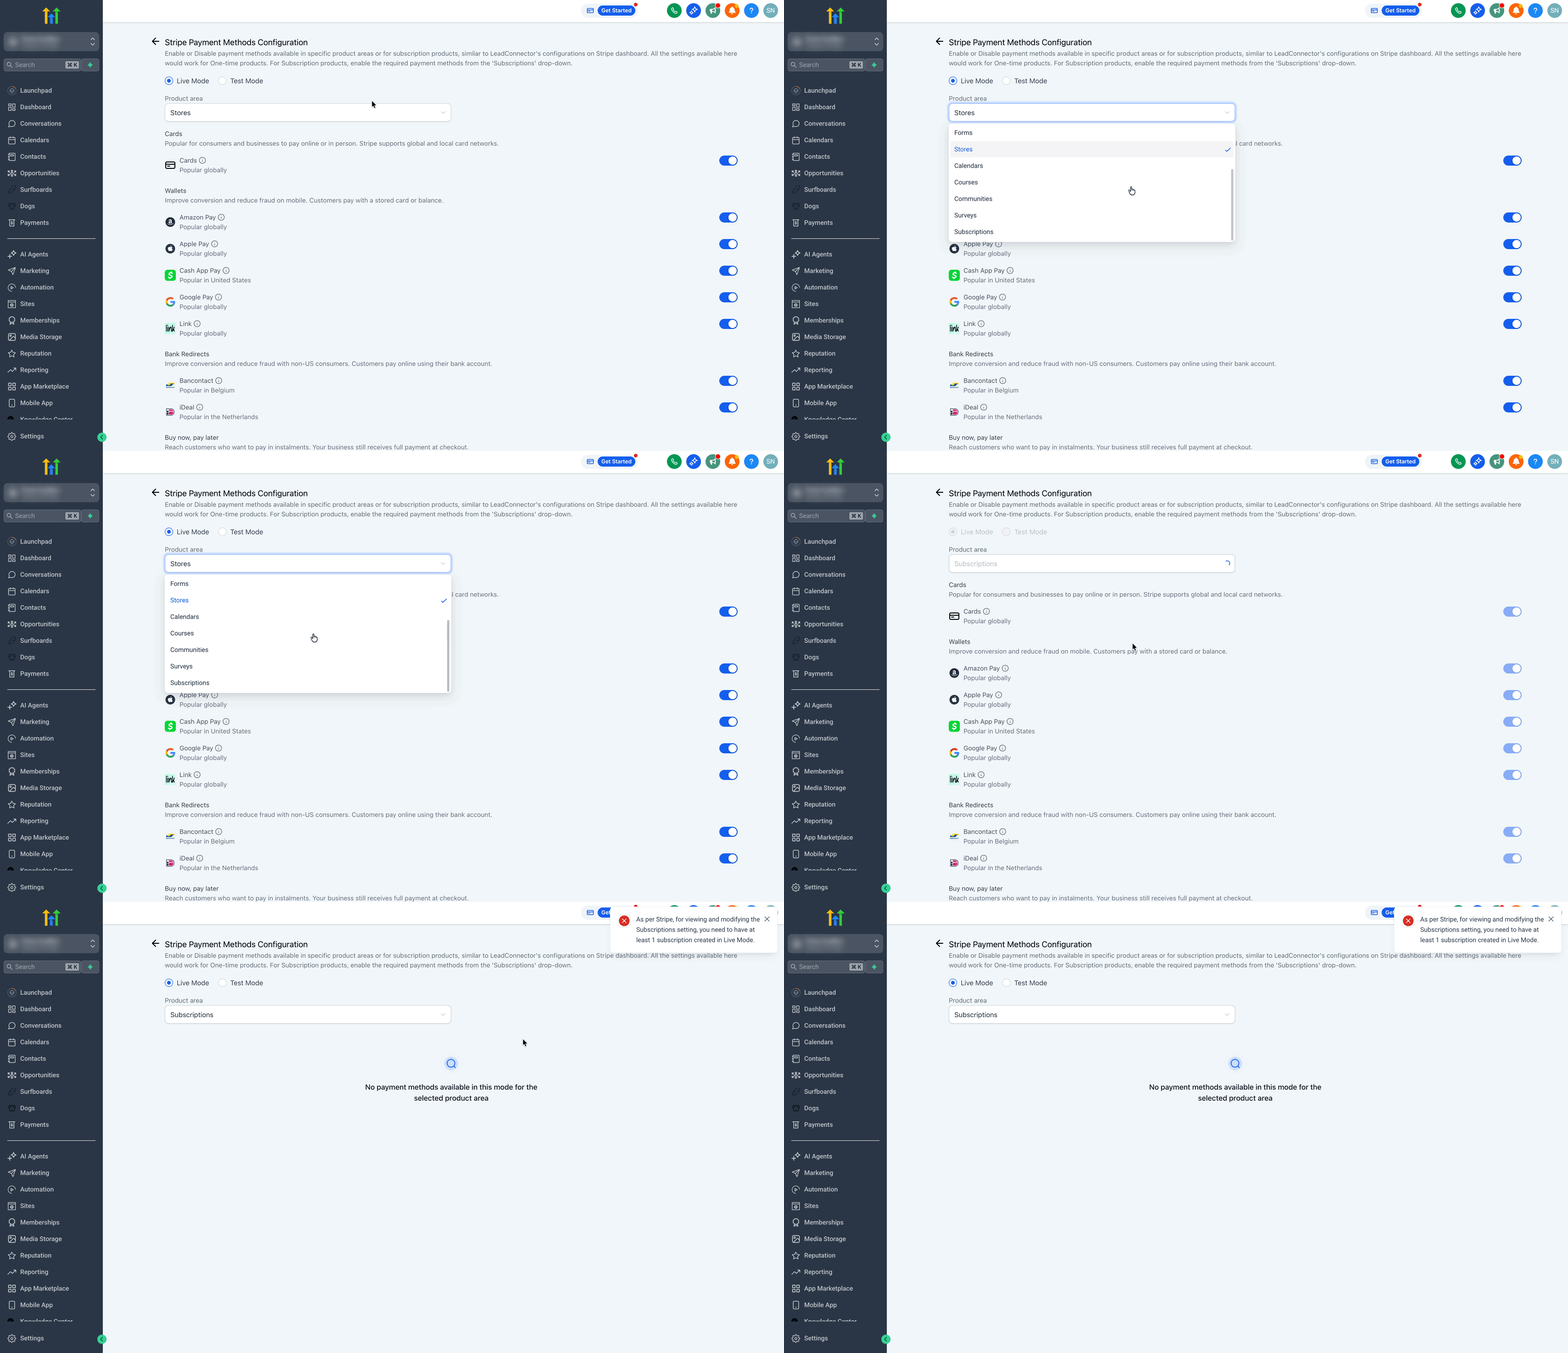
Settings apply per product area, invoices, order forms, funnels, forms, ecommerce stores, calendars, courses, communities and subscription checkouts. The platform respects the live or test mode you are using, so development and production can have independent configurations.
03How businesses use Stripe payment methods
- Ecommerce store. Open Payments, choose Manage Payment Methods and toggle iDEAL, SEPA or ACH on for European shoppers. Save the changes and the selected methods appear on the store checkout page.
- Online coach with recurring billing. Navigate to Manage Payment Methods, use the Subscriptions dropdown to enable Apple Pay and Google Pay for subscription checkouts. Save the settings so members can choose their wallet at sign up.
- Digital product seller. In the Payments menu enable Buy Now Pay Later options such as Klarna or Afterpay. After saving, those financing choices become visible on one step and two step order forms.
04The numbers and rules that matter
- Apple Pay, Google Pay, ACH, iDEAL, SEPA, Affirm, Klarna, Afterpay, Clearpay are supported if eligibility criteria are met.
05Before you start
- A Stripe account must be connected to the subaccount.
- For Apple Pay, the payment account must be fully activated and the domain verified.
- Bank based methods require any additional verification required by Stripe.
06How to set up and use Stripe payment methods in HighLevel
Enable or disable payment methods
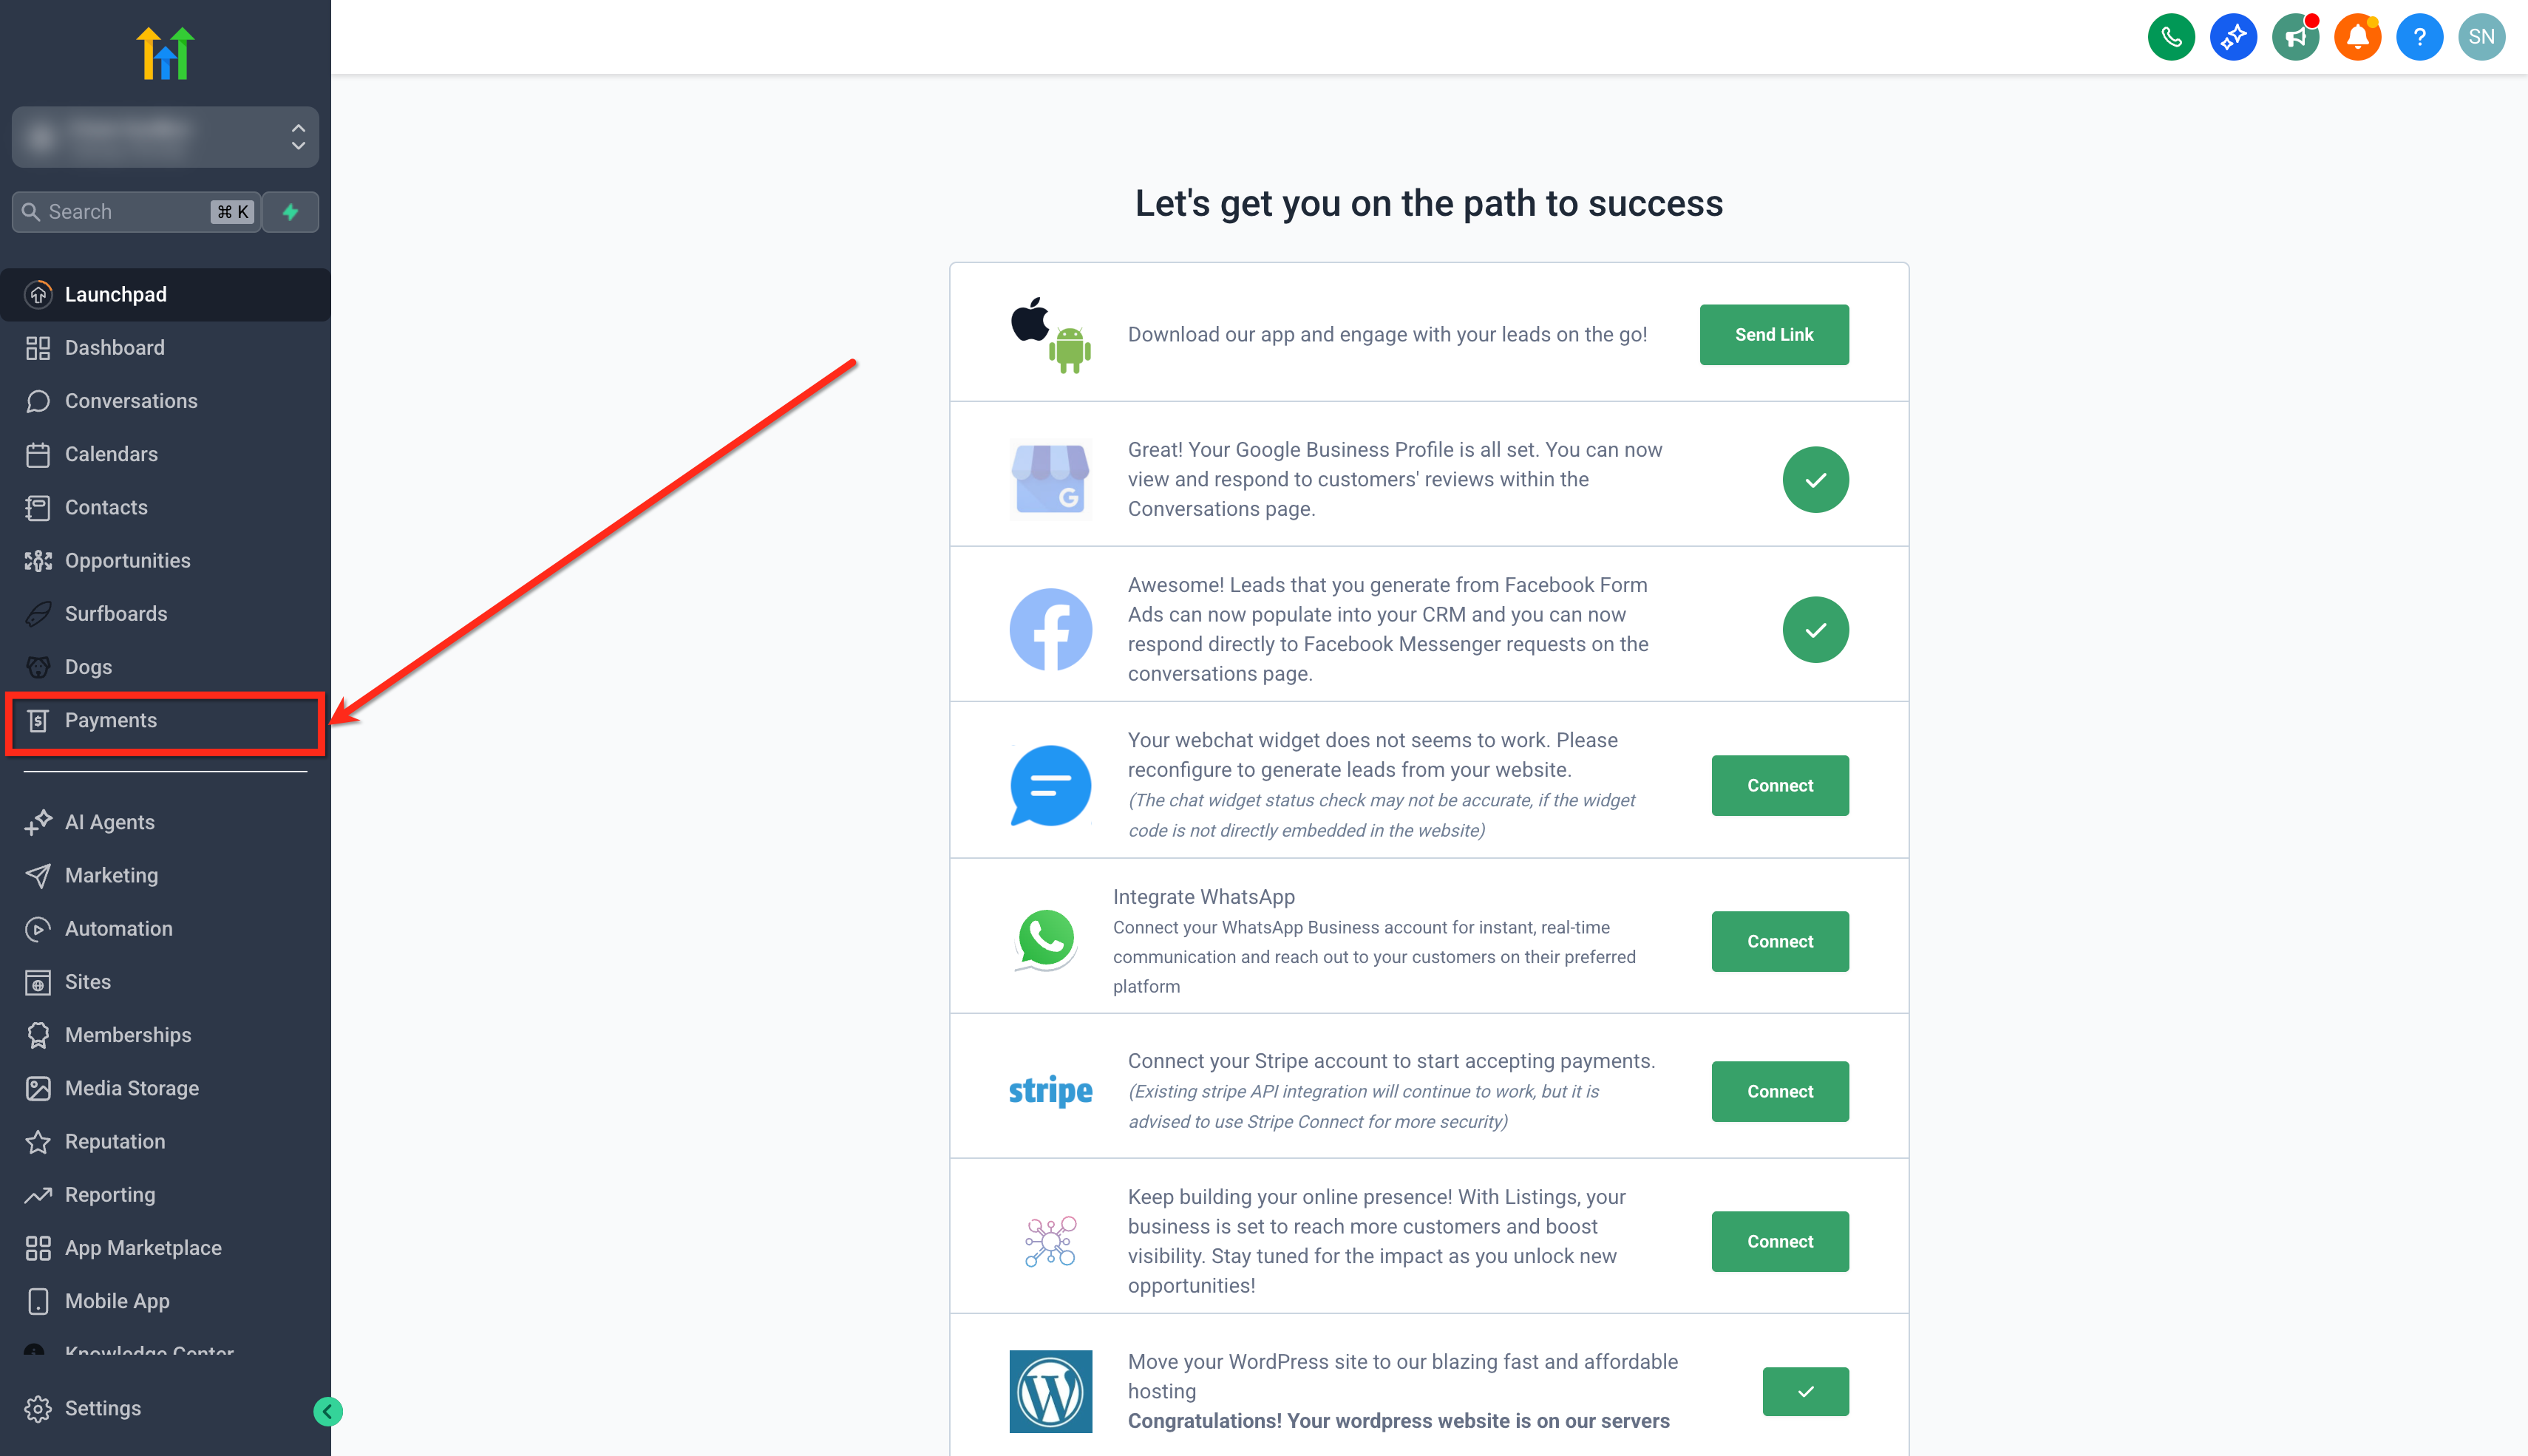
- Click the Payments tab in the subaccount menu.
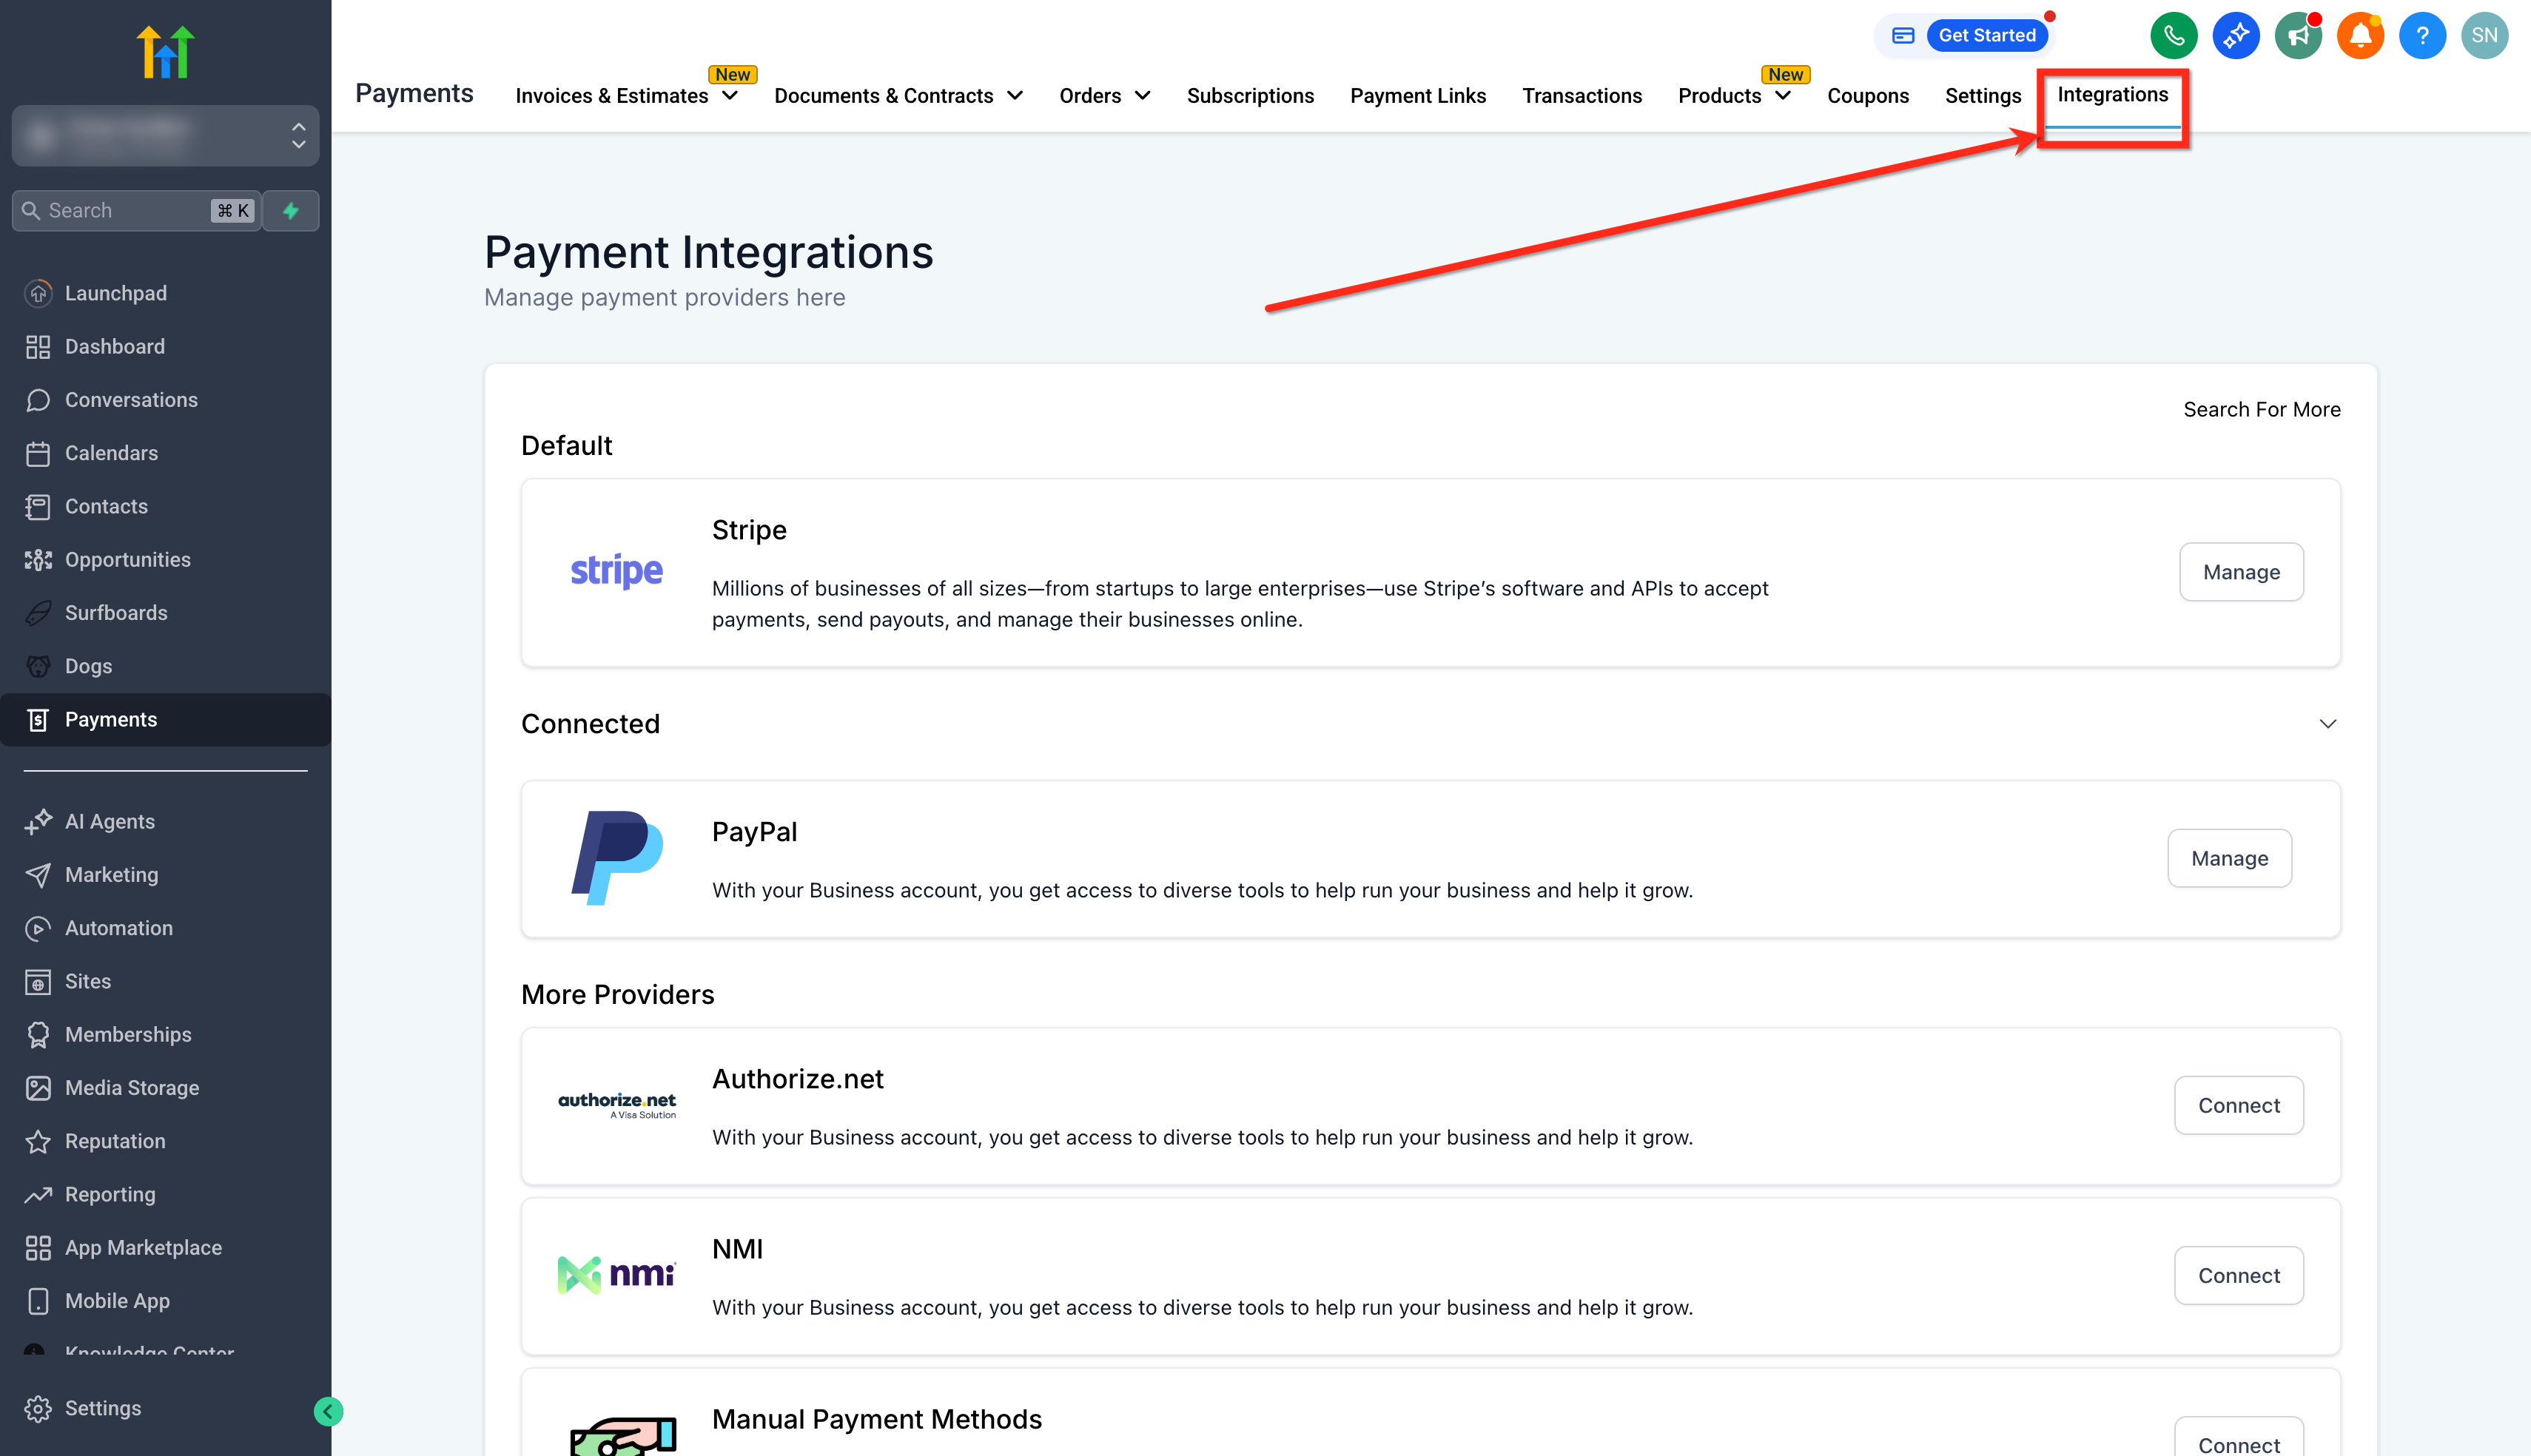
- Select Integrations from the Payments page.
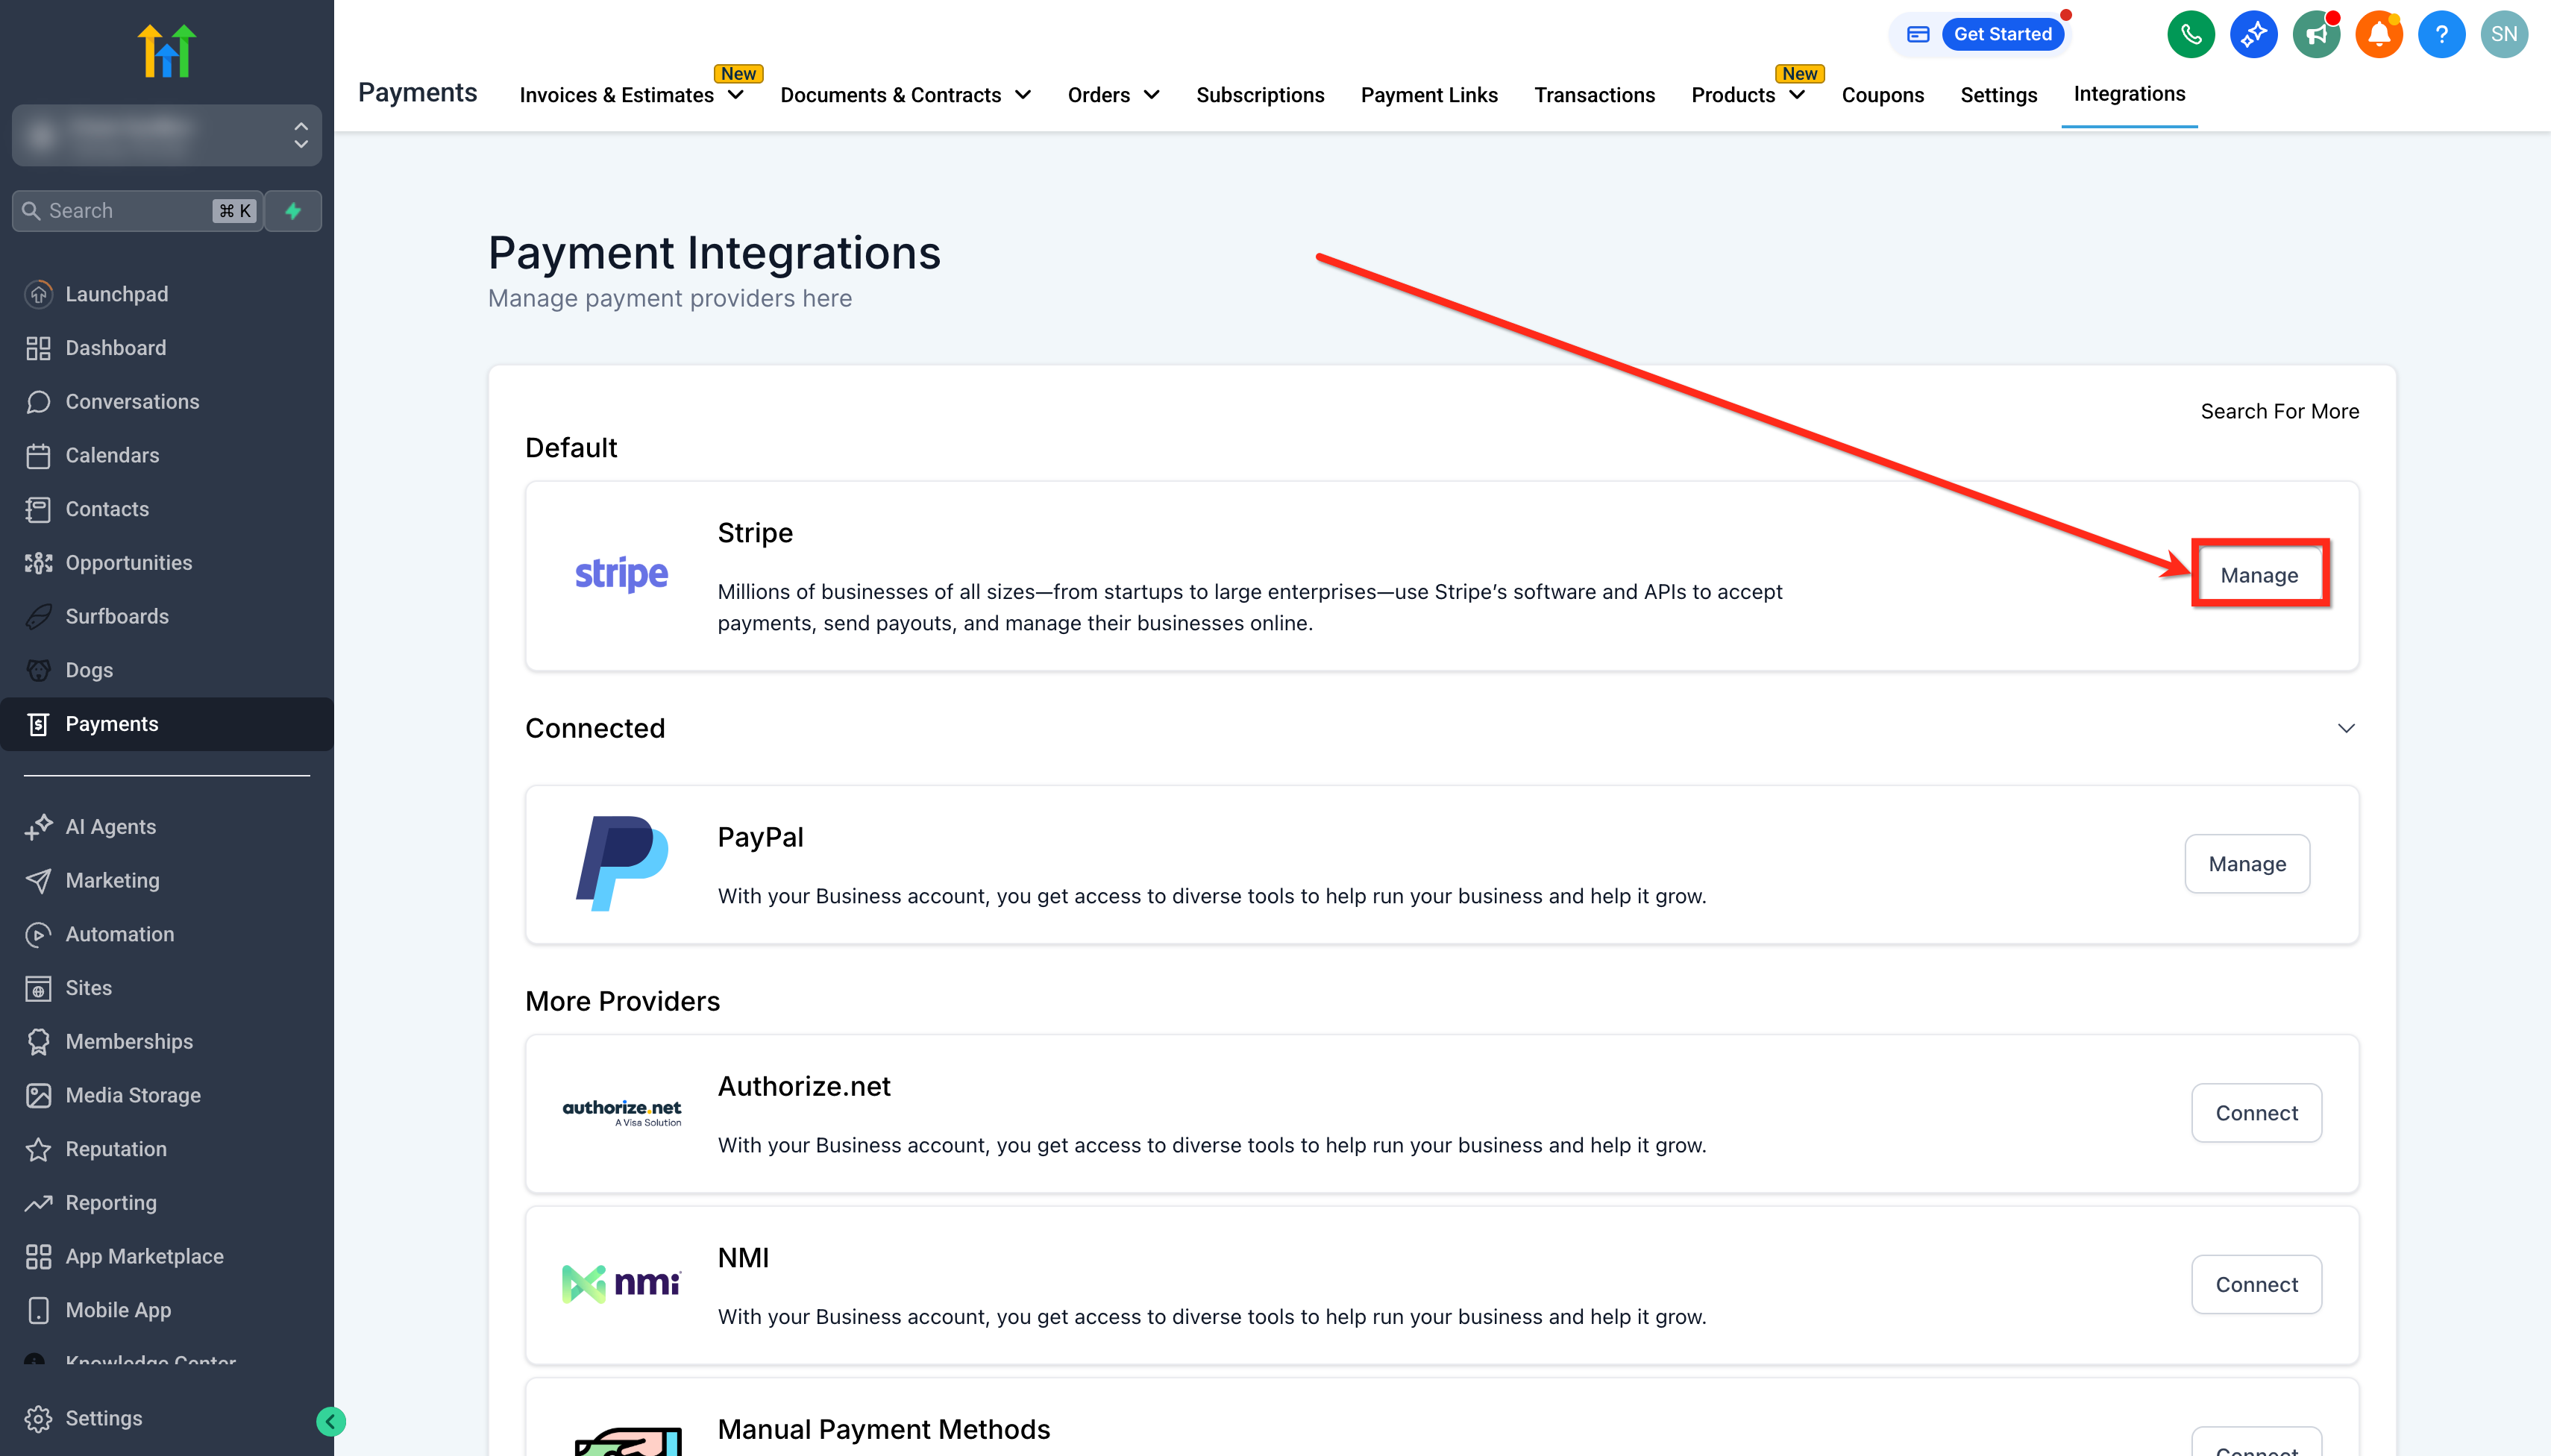
- Press the Manage button next to the connected Stripe account.
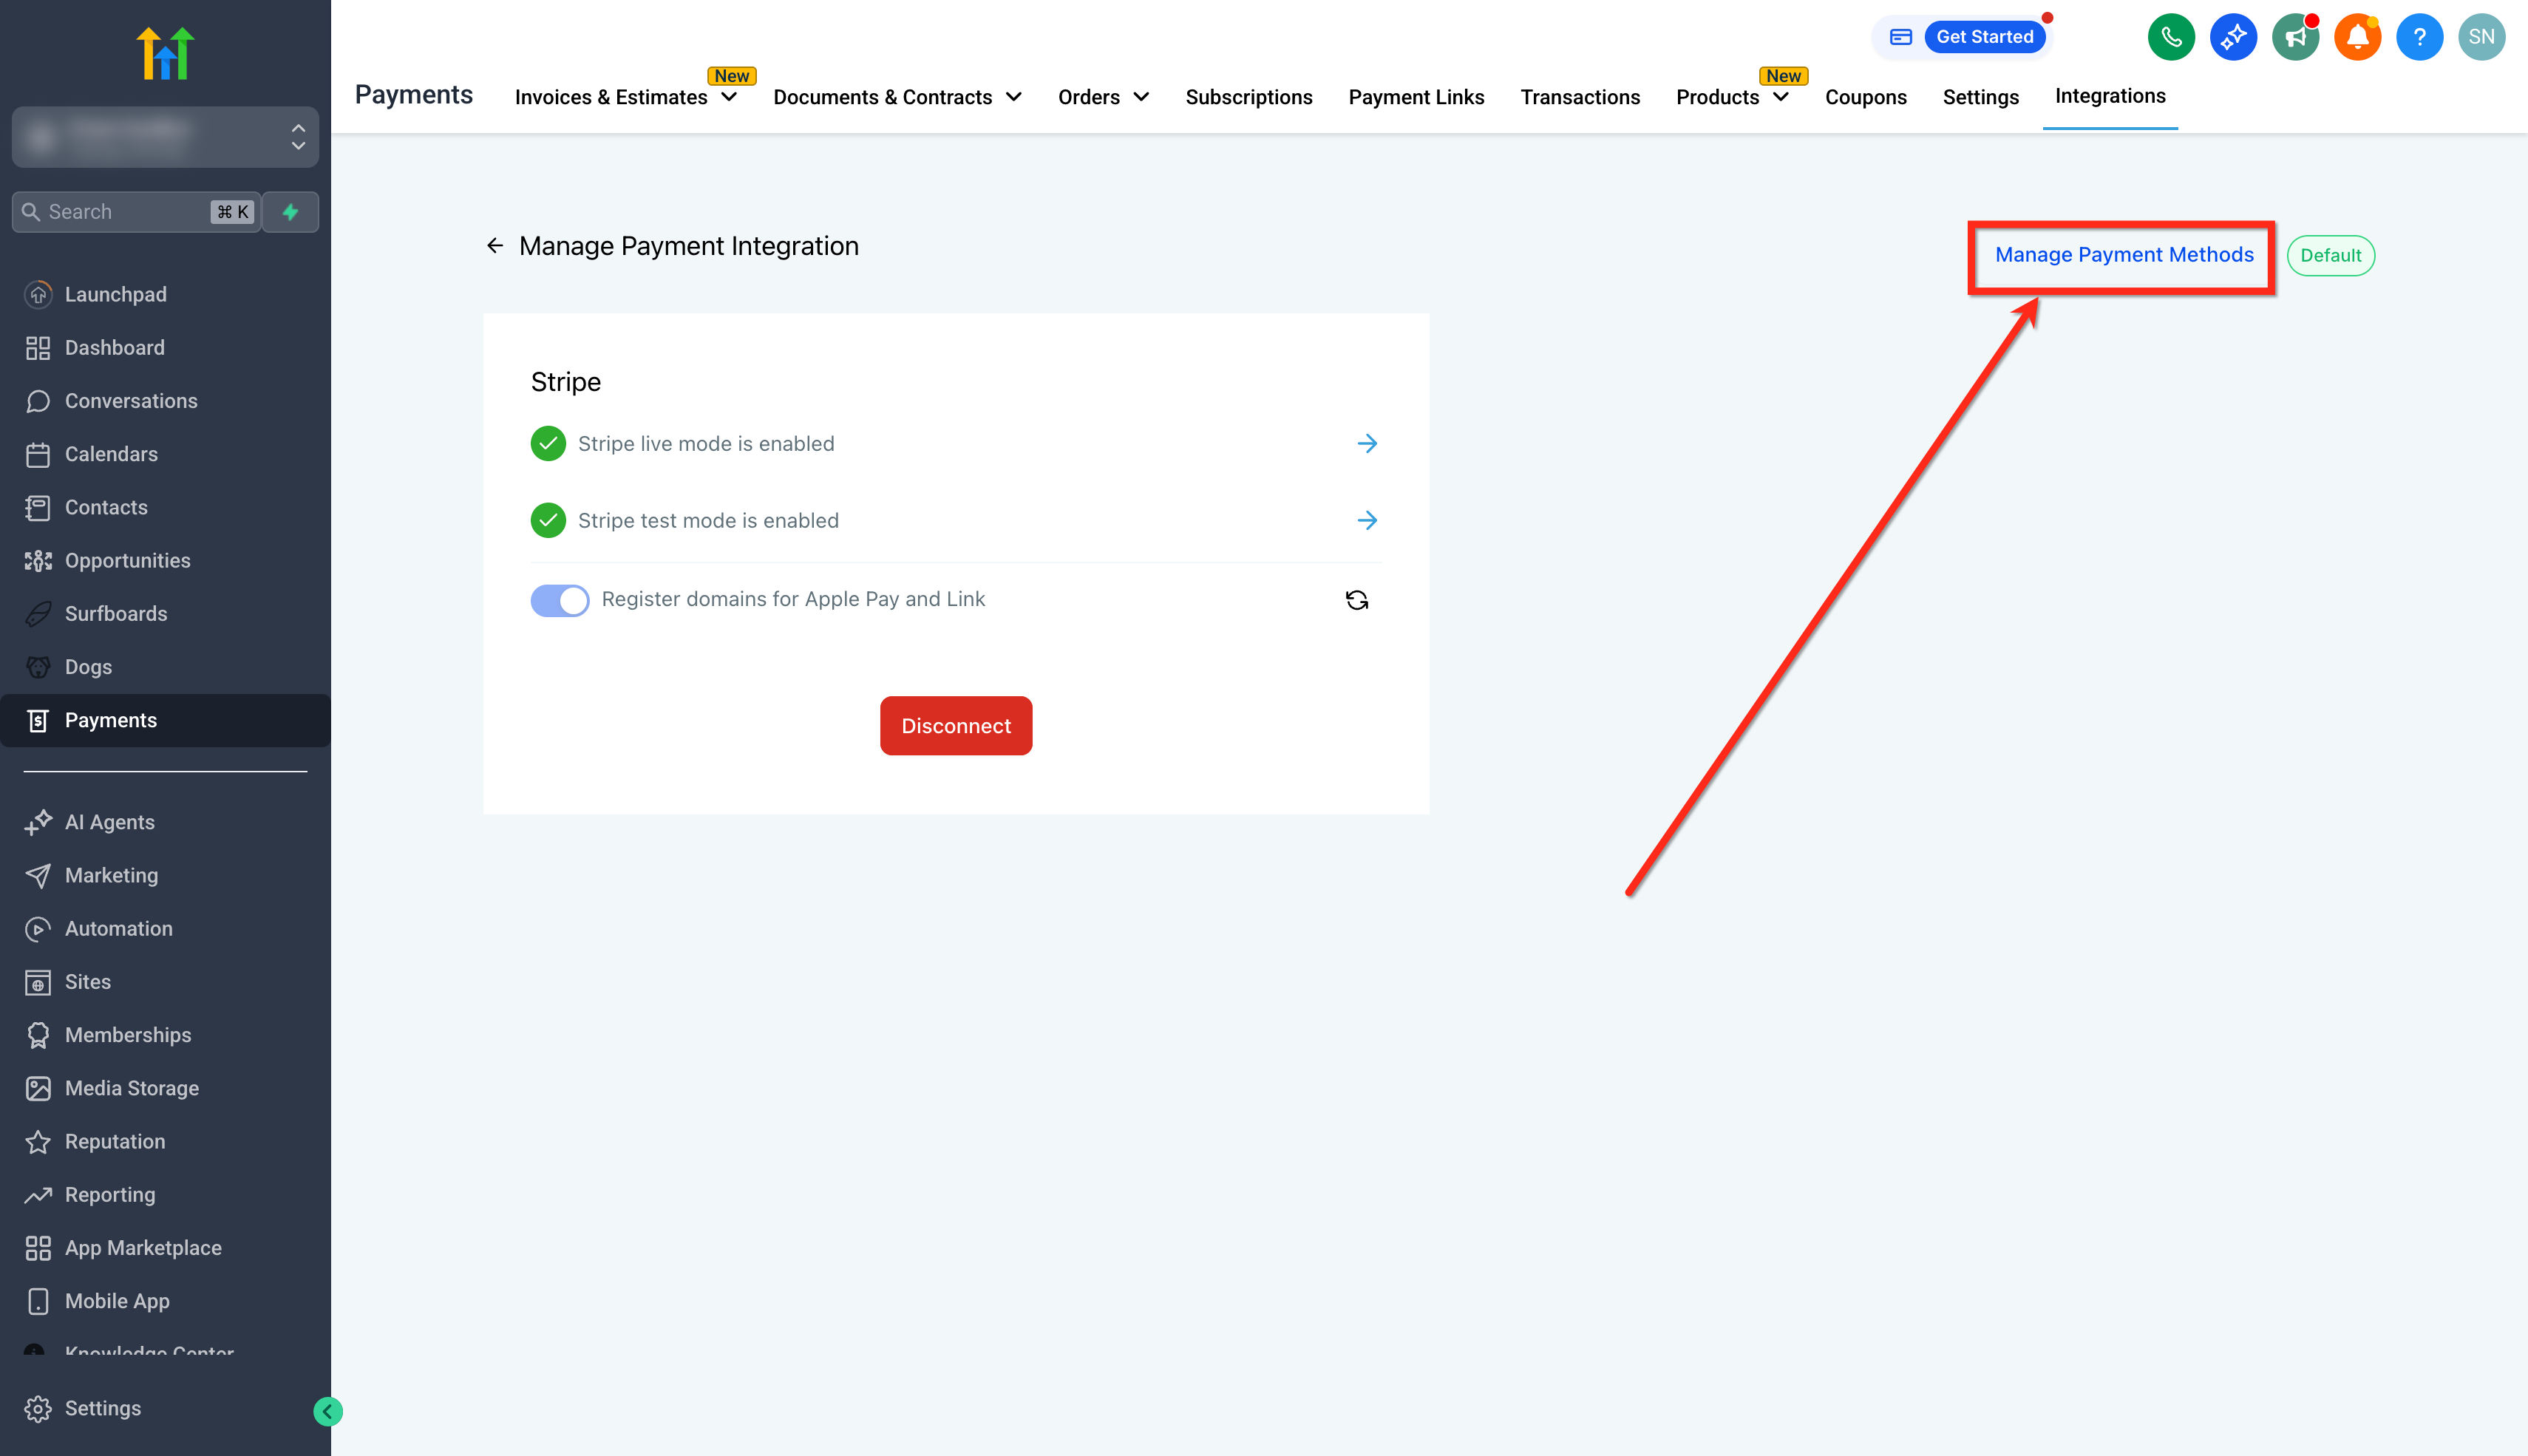
- Choose Manage Payment Methods.
- Review the list of methods shown for each product area.
- Toggle each method on or off according to your needs.
- If you sell subscriptions, use the Subscriptions dropdown to set methods for those checkouts.
Enable Apple Pay
- Open Payments then go to Integrations.
- Select your connected Stripe account.
- Click Manage Payment Methods.
- Turn on Apple Pay where it is offered.
- Save the changes.
Enable Google Pay
- Open Payments and navigate to Integrations.
- Select the linked Stripe account.
- Choose Manage Payment Methods.
- Enable Google Pay.
- Save the settings.
Enable ACH payments
- Open Payments and go to Integrations.
- Select the connected Stripe account.
- Open Manage Payment Methods.
- Enable ACH if it appears as an option.
- Save the changes.
Enable iDEAL and SEPA
- Open Payments and select Integrations.
- Choose the connected Stripe account.
- Enter Manage Payment Methods.
- Enable iDEAL or SEPA as needed.
- Save your settings.
Enable Buy Now, Pay Later methods
- Open Payments then go to Integrations.
- Select the linked Stripe account.
- Open Manage Payment Methods.
- Enable any supported installment options such as Klarna or Afterpay.
- Save the changes.
Switch between test and live mode
- Check which mode, test or live, is currently active.
- Confirm the desired payment method is enabled for that mode.
- Save any changes before testing the checkout again.
07What it looks like in HighLevel
08Settings that matter
- Manage Payment Methods. Controls which Stripe payment options appear for each HighLevel product area.
- Subscriptions. Dropdown that lets you set payment methods specifically for subscription based checkouts.
- Apple Pay. Enables the Apple wallet option at checkout when the account is verified and the domain is approved.
- Google Pay. Turns on the Google wallet option for supported devices and browsers.
- ACH. Activates bank debit payments where the account and region support them.
- iDEAL. Adds the Dutch bank transfer option for eligible customers.
- SEPA. Adds European direct debit payments where the account permits them.
- Buy Now, Pay Later. Enables financing options such as Affirm, Klarna, Afterpay or Clearpay after provider approval.
09Things to know before you rely on it
- Availability of each method depends on Stripe verification, country support and account eligibility.
- Test and live environments have separate configurations; a method enabled in test does not appear in live automatically.
- BLIK is not supported in the current integration and will not appear at checkout.
- SaaS subscription links support only card payments; other methods are excluded.
10If something goes wrong
- A payment method is enabled but does not show at checkout.. Verify that the account meets verification requirements, that the method is supported for the checkout type, that regional limits are satisfied, and that it is enabled in the correct mode.
11How it connects to the rest of HighLevel
- Enable Apple Pay and Google Pay on order forms Apple and Google Pay guide
- Manage refunds within HighLevel Refunds guide
- HighLevel pricing and plans Pricing page
Michael's take

Stripe payment method management is a must have for anyone who wants full control over checkout options without juggling dashboards.
Teams that never run payments through HighLevel can skip it.