
01Who this is for
- SaaS Founders who need to collect fixed duration recurring subscription fees from Indian customers.
- Ecommerce retailers selling products through order forms who want to accept one time payments in India.
- Service agencies that bill clients via invoices and need automated receipt, refund and subscription actions.
02Razorpay integrations, explained
The Razorpay integration appears as a marketplace app inside the App Marketplace of a HighLevel subaccount. After installing the app you are prompted to enter your Razorpay API keys, which authenticates the connection. You also set a webhook URL so HighLevel can receive payment status updates from Razorpay.
Once the domain you use is registered and whitelisted both in HighLevel and in the Razorpay dashboard, the integration works like other payment providers. It can accept one time custom amounts and recurring payments on order forms, invoices, payment links, forms and contact pages, and it provides subscription management features such as cancellation, card updates and refunds.
03How businesses use Razorpay integrations
- Online retailer. The retailer installs the Razorpay app, enters the API keys, and adds the webhook URL. They then enable Razorpay on their order form so customers can pay one time for each purchase. The platform records the payment and can trigger a receipt email.
- Fitness studio. The studio configures Razorpay with its branded domain and sets up a recurring payment plan on its membership invoice template. Members pay monthly fees and can update their saved card or cancel the subscription through the portal.
- Digital marketing agency. The agency adds Razorpay to its service invoice and enables refunds and discount codes. When a client pays, the system logs the transaction and can automatically send a sales receipt or trigger a refund if needed.
04Before you start
- A Razorpay account with API keys must exist.
- The HighLevel subaccount must have access to the App Marketplace.
- A branded domain that will be used for payments must be ready to register.
05How to set up and use Razorpay integrations in HighLevel
Install and configure Razorpay
- Open the App Marketplace and install the Razorpay application.
- Copy the API keys from the Razorpay dashboard under Accounts & Settings > API Keys and paste them into the authentication page in HighLevel.
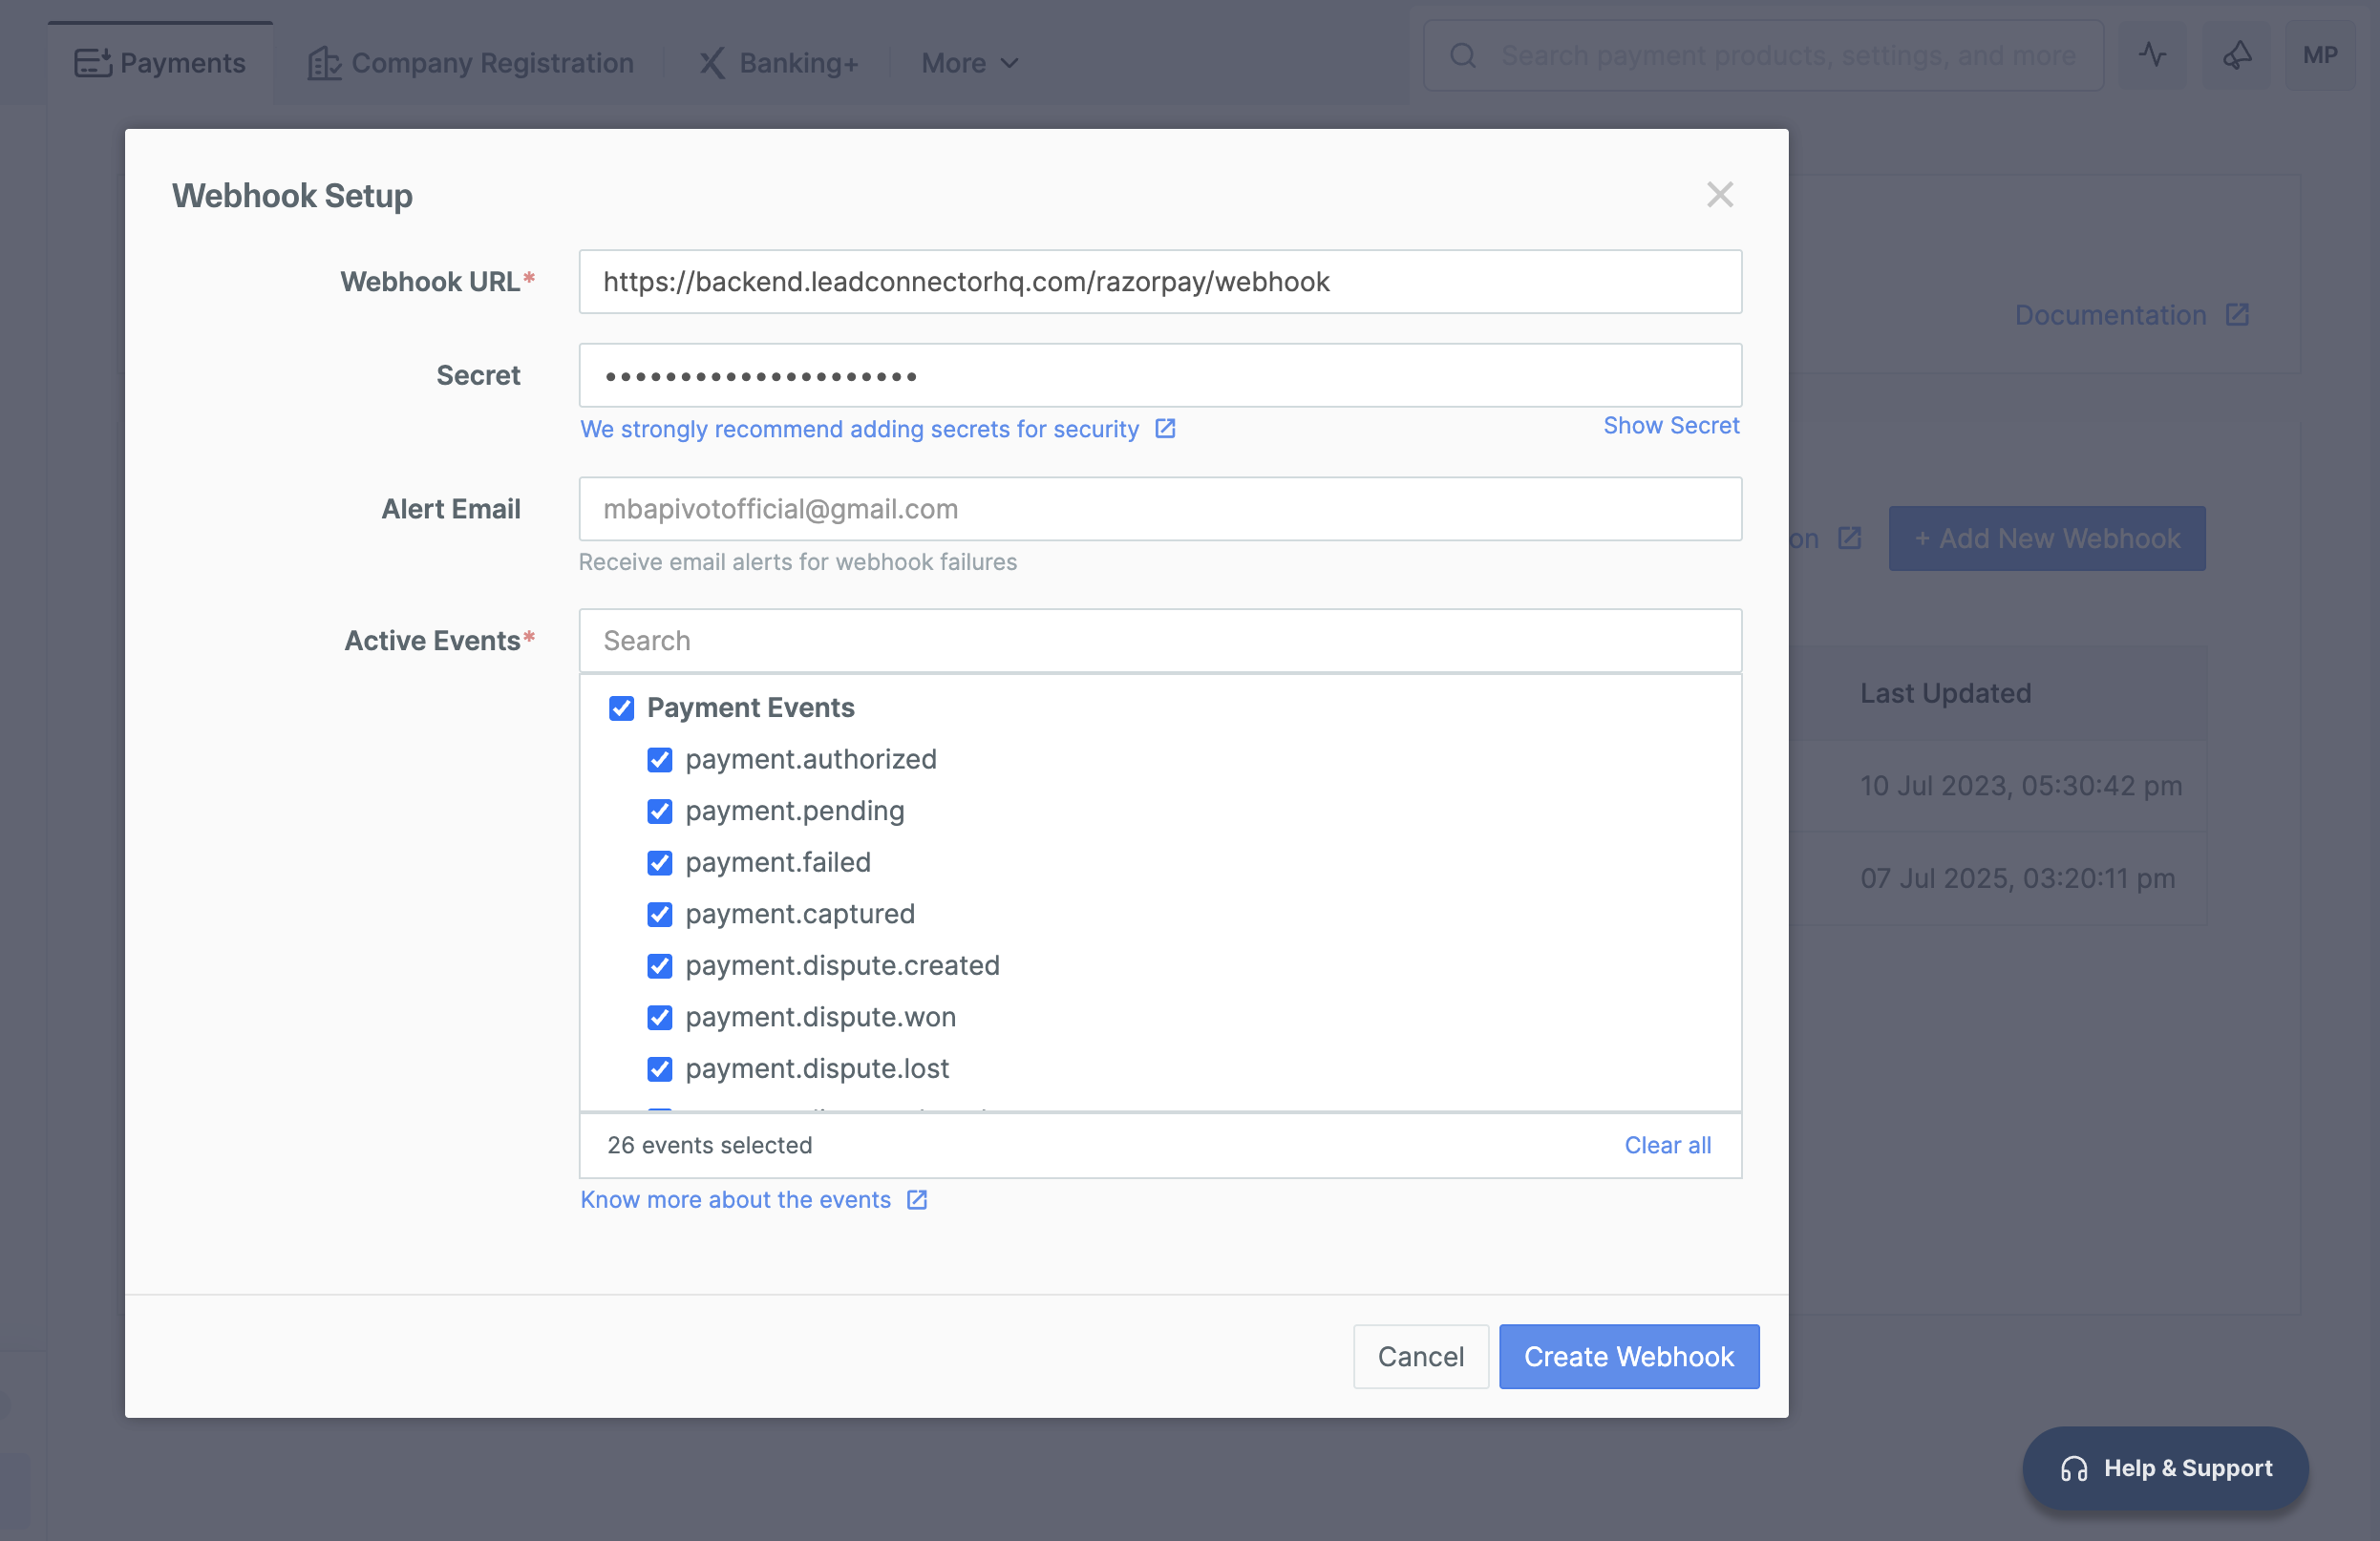
- In the Razorpay dashboard go to Accounts & Settings > Webhooks and add https://backend.leadconnectorhq.com/razorpay/webhook, enabling all payment related events.
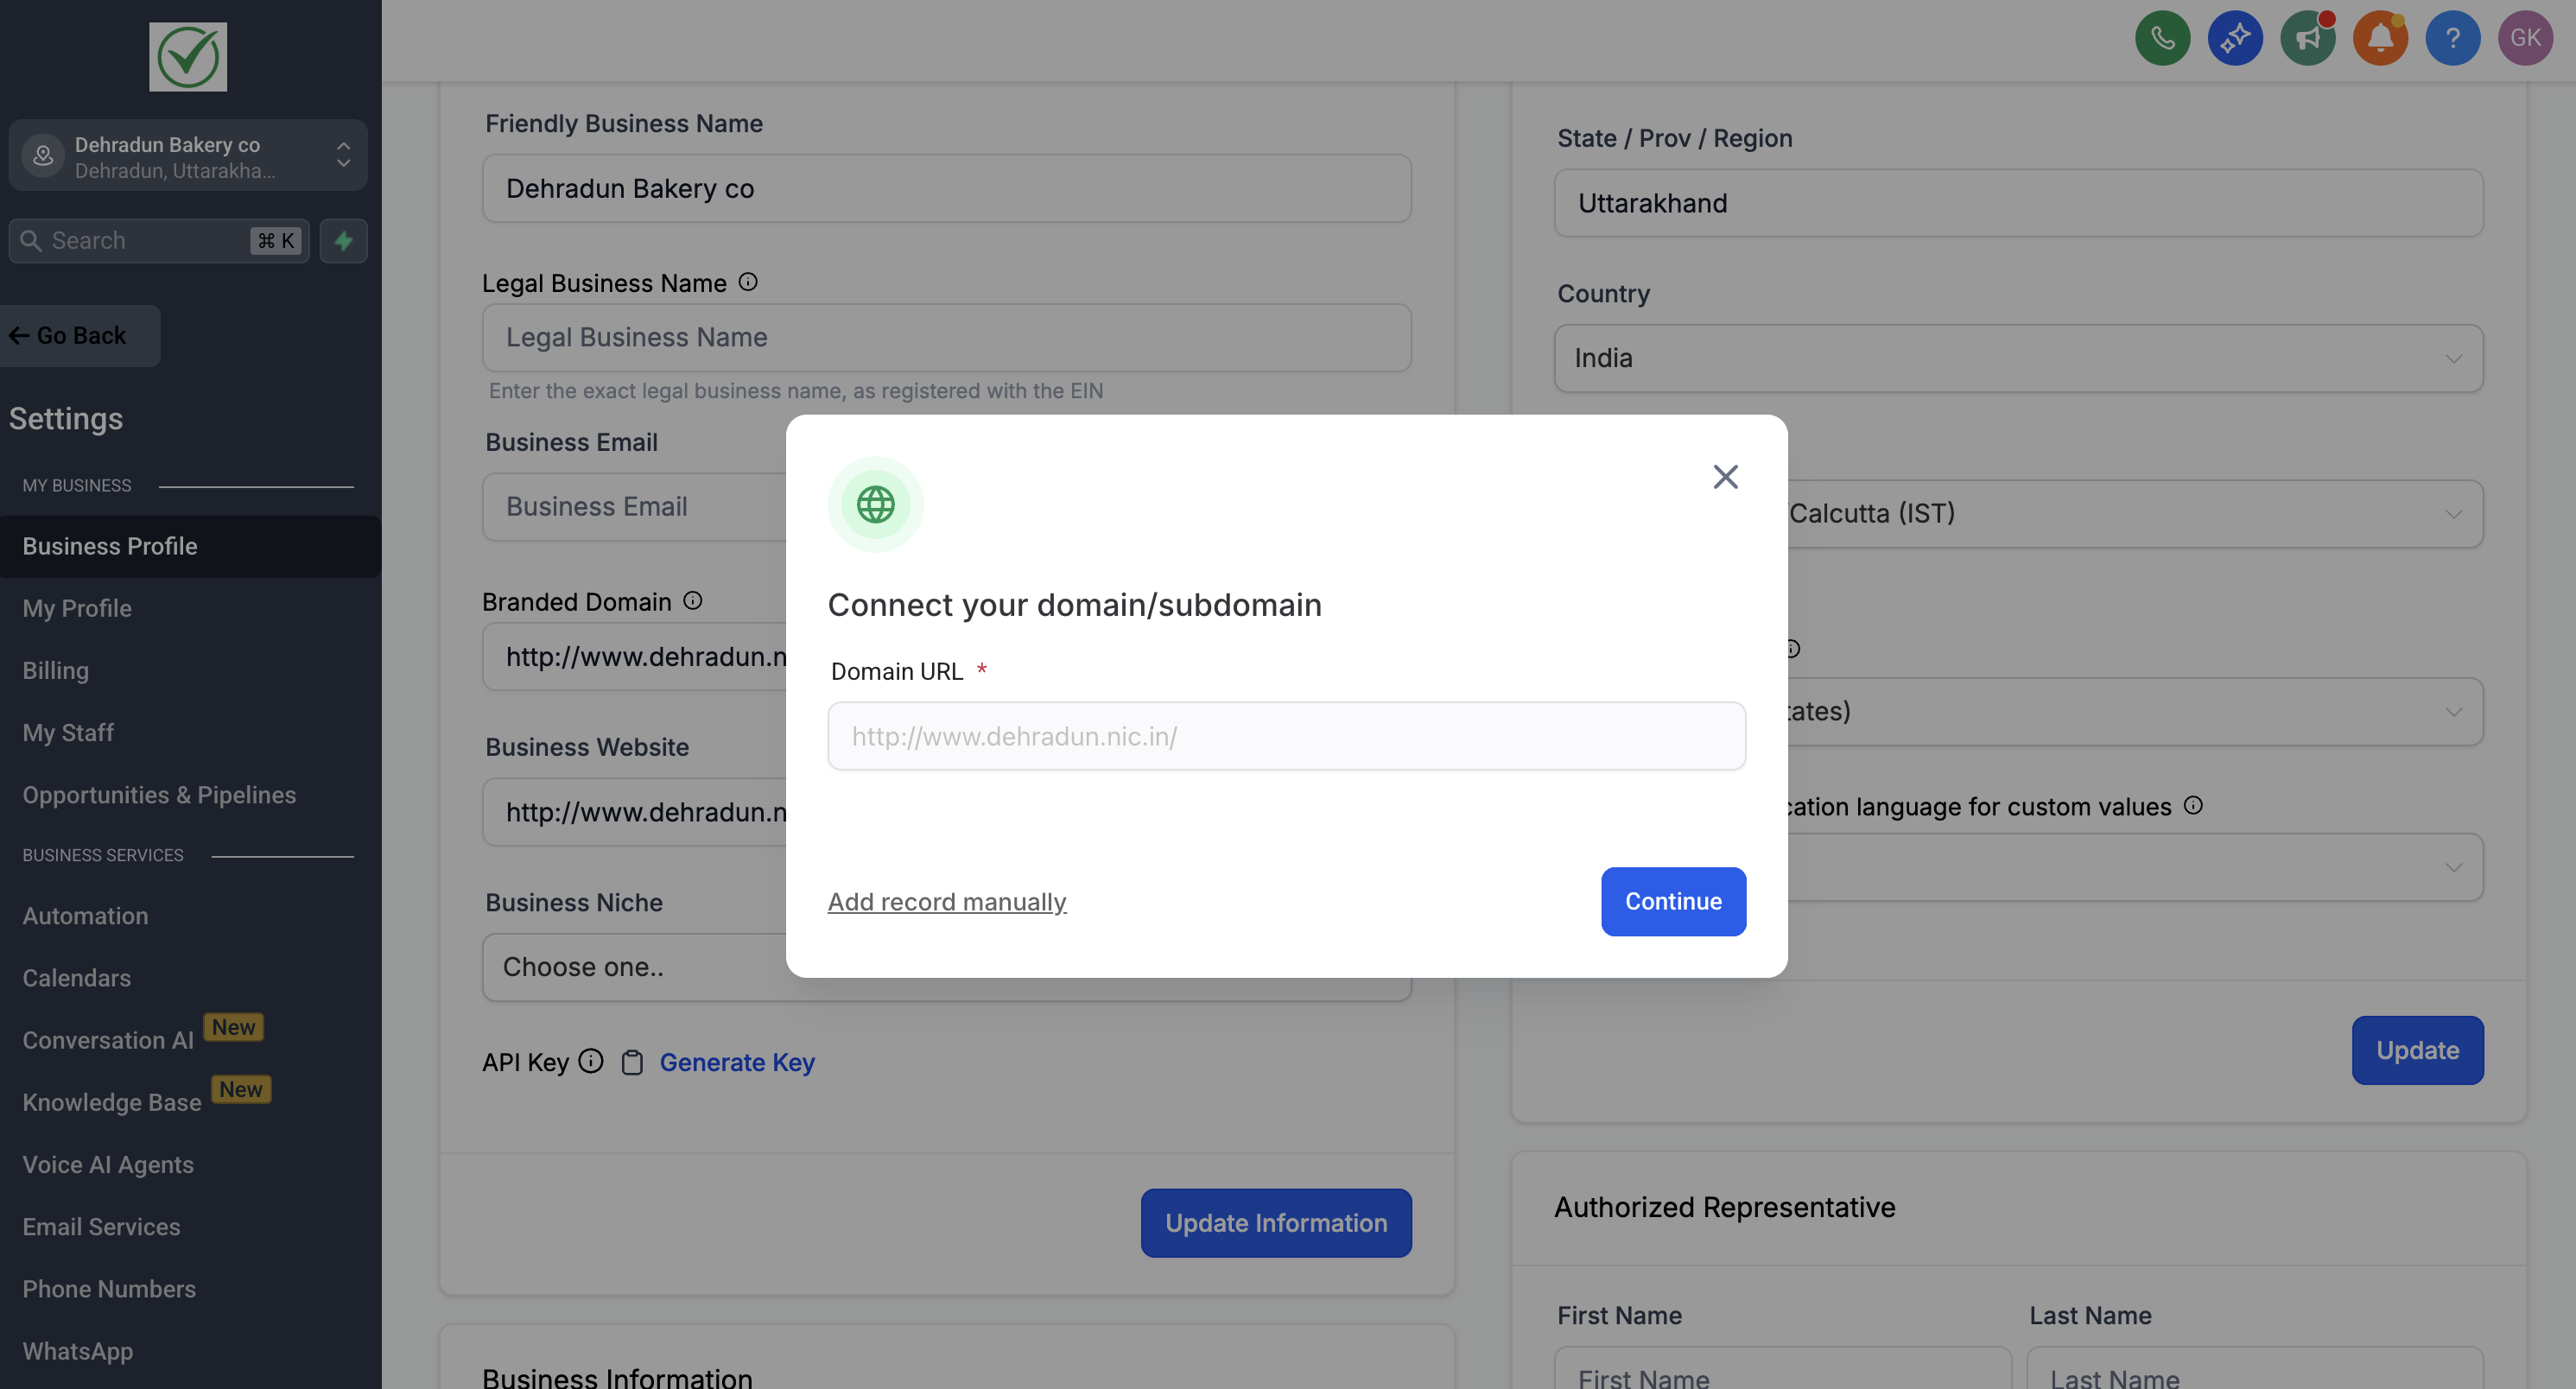
- In HighLevel go to Settings > Business Profile > Branded Domain, register your domain and verify it.
- In the Razorpay dashboard open Accounts & Settings > Business Website Details and add the same branded domain as an additional website or app detail.
06What it looks like in HighLevel
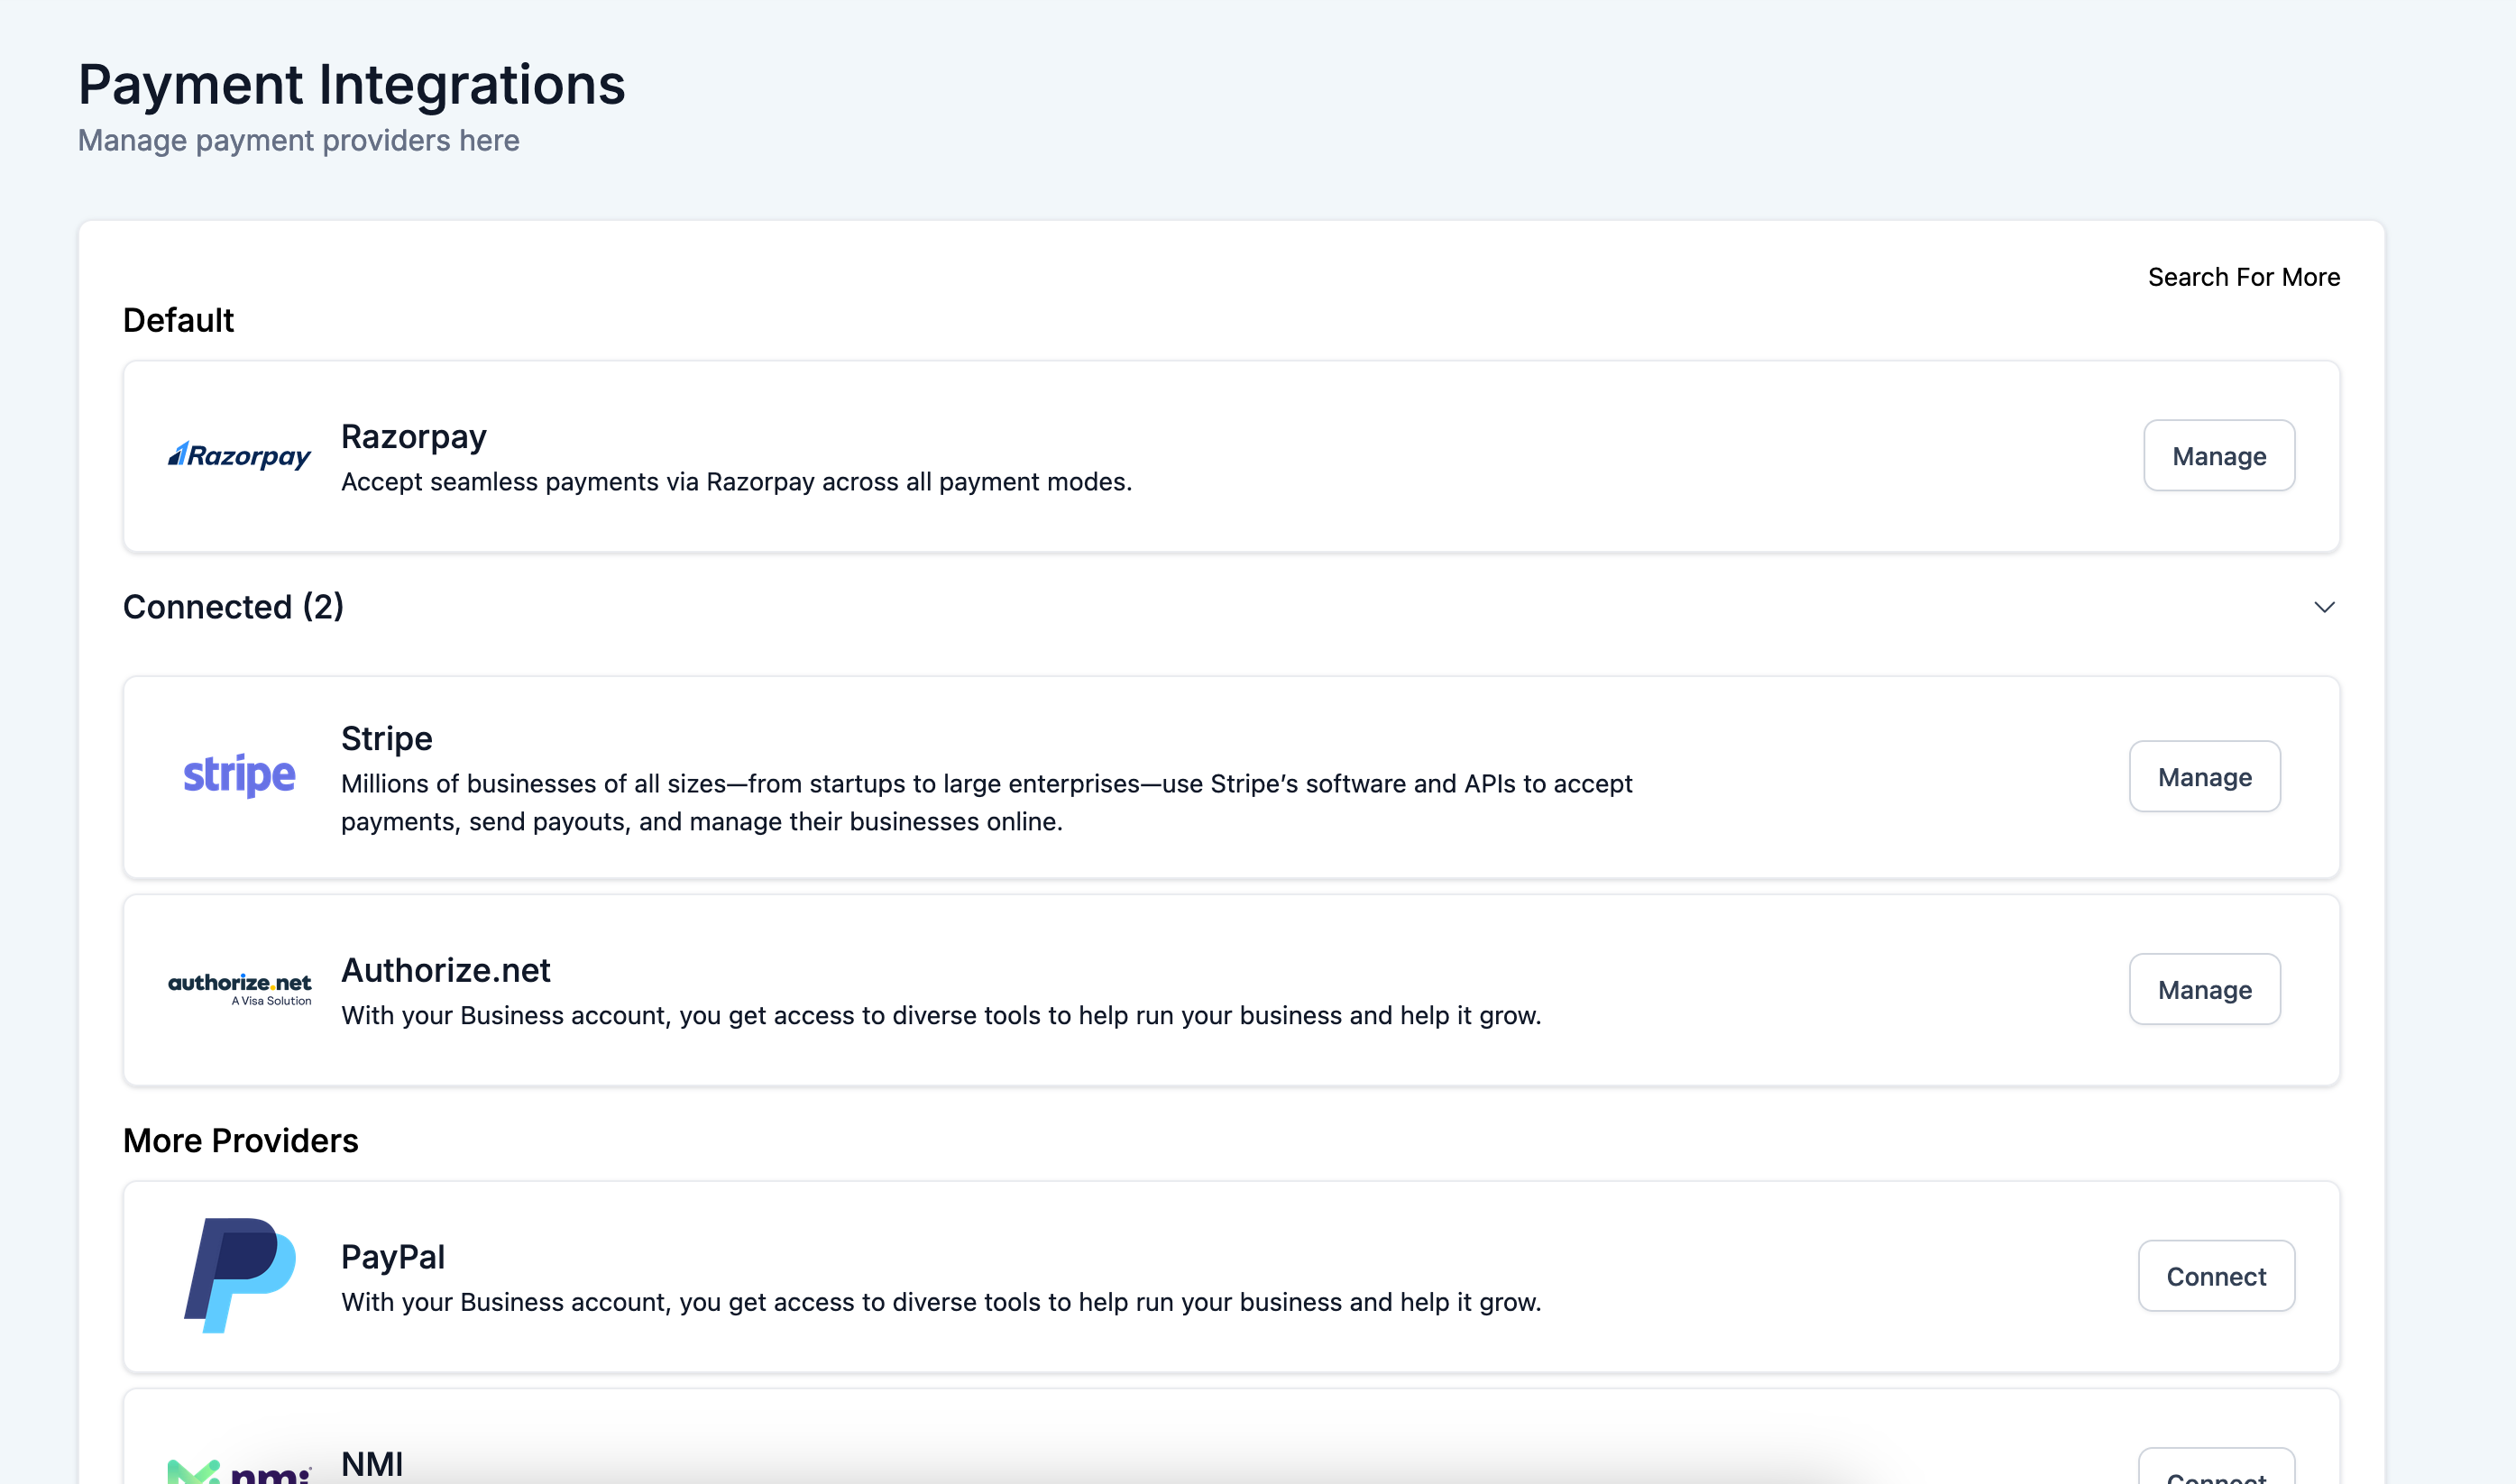
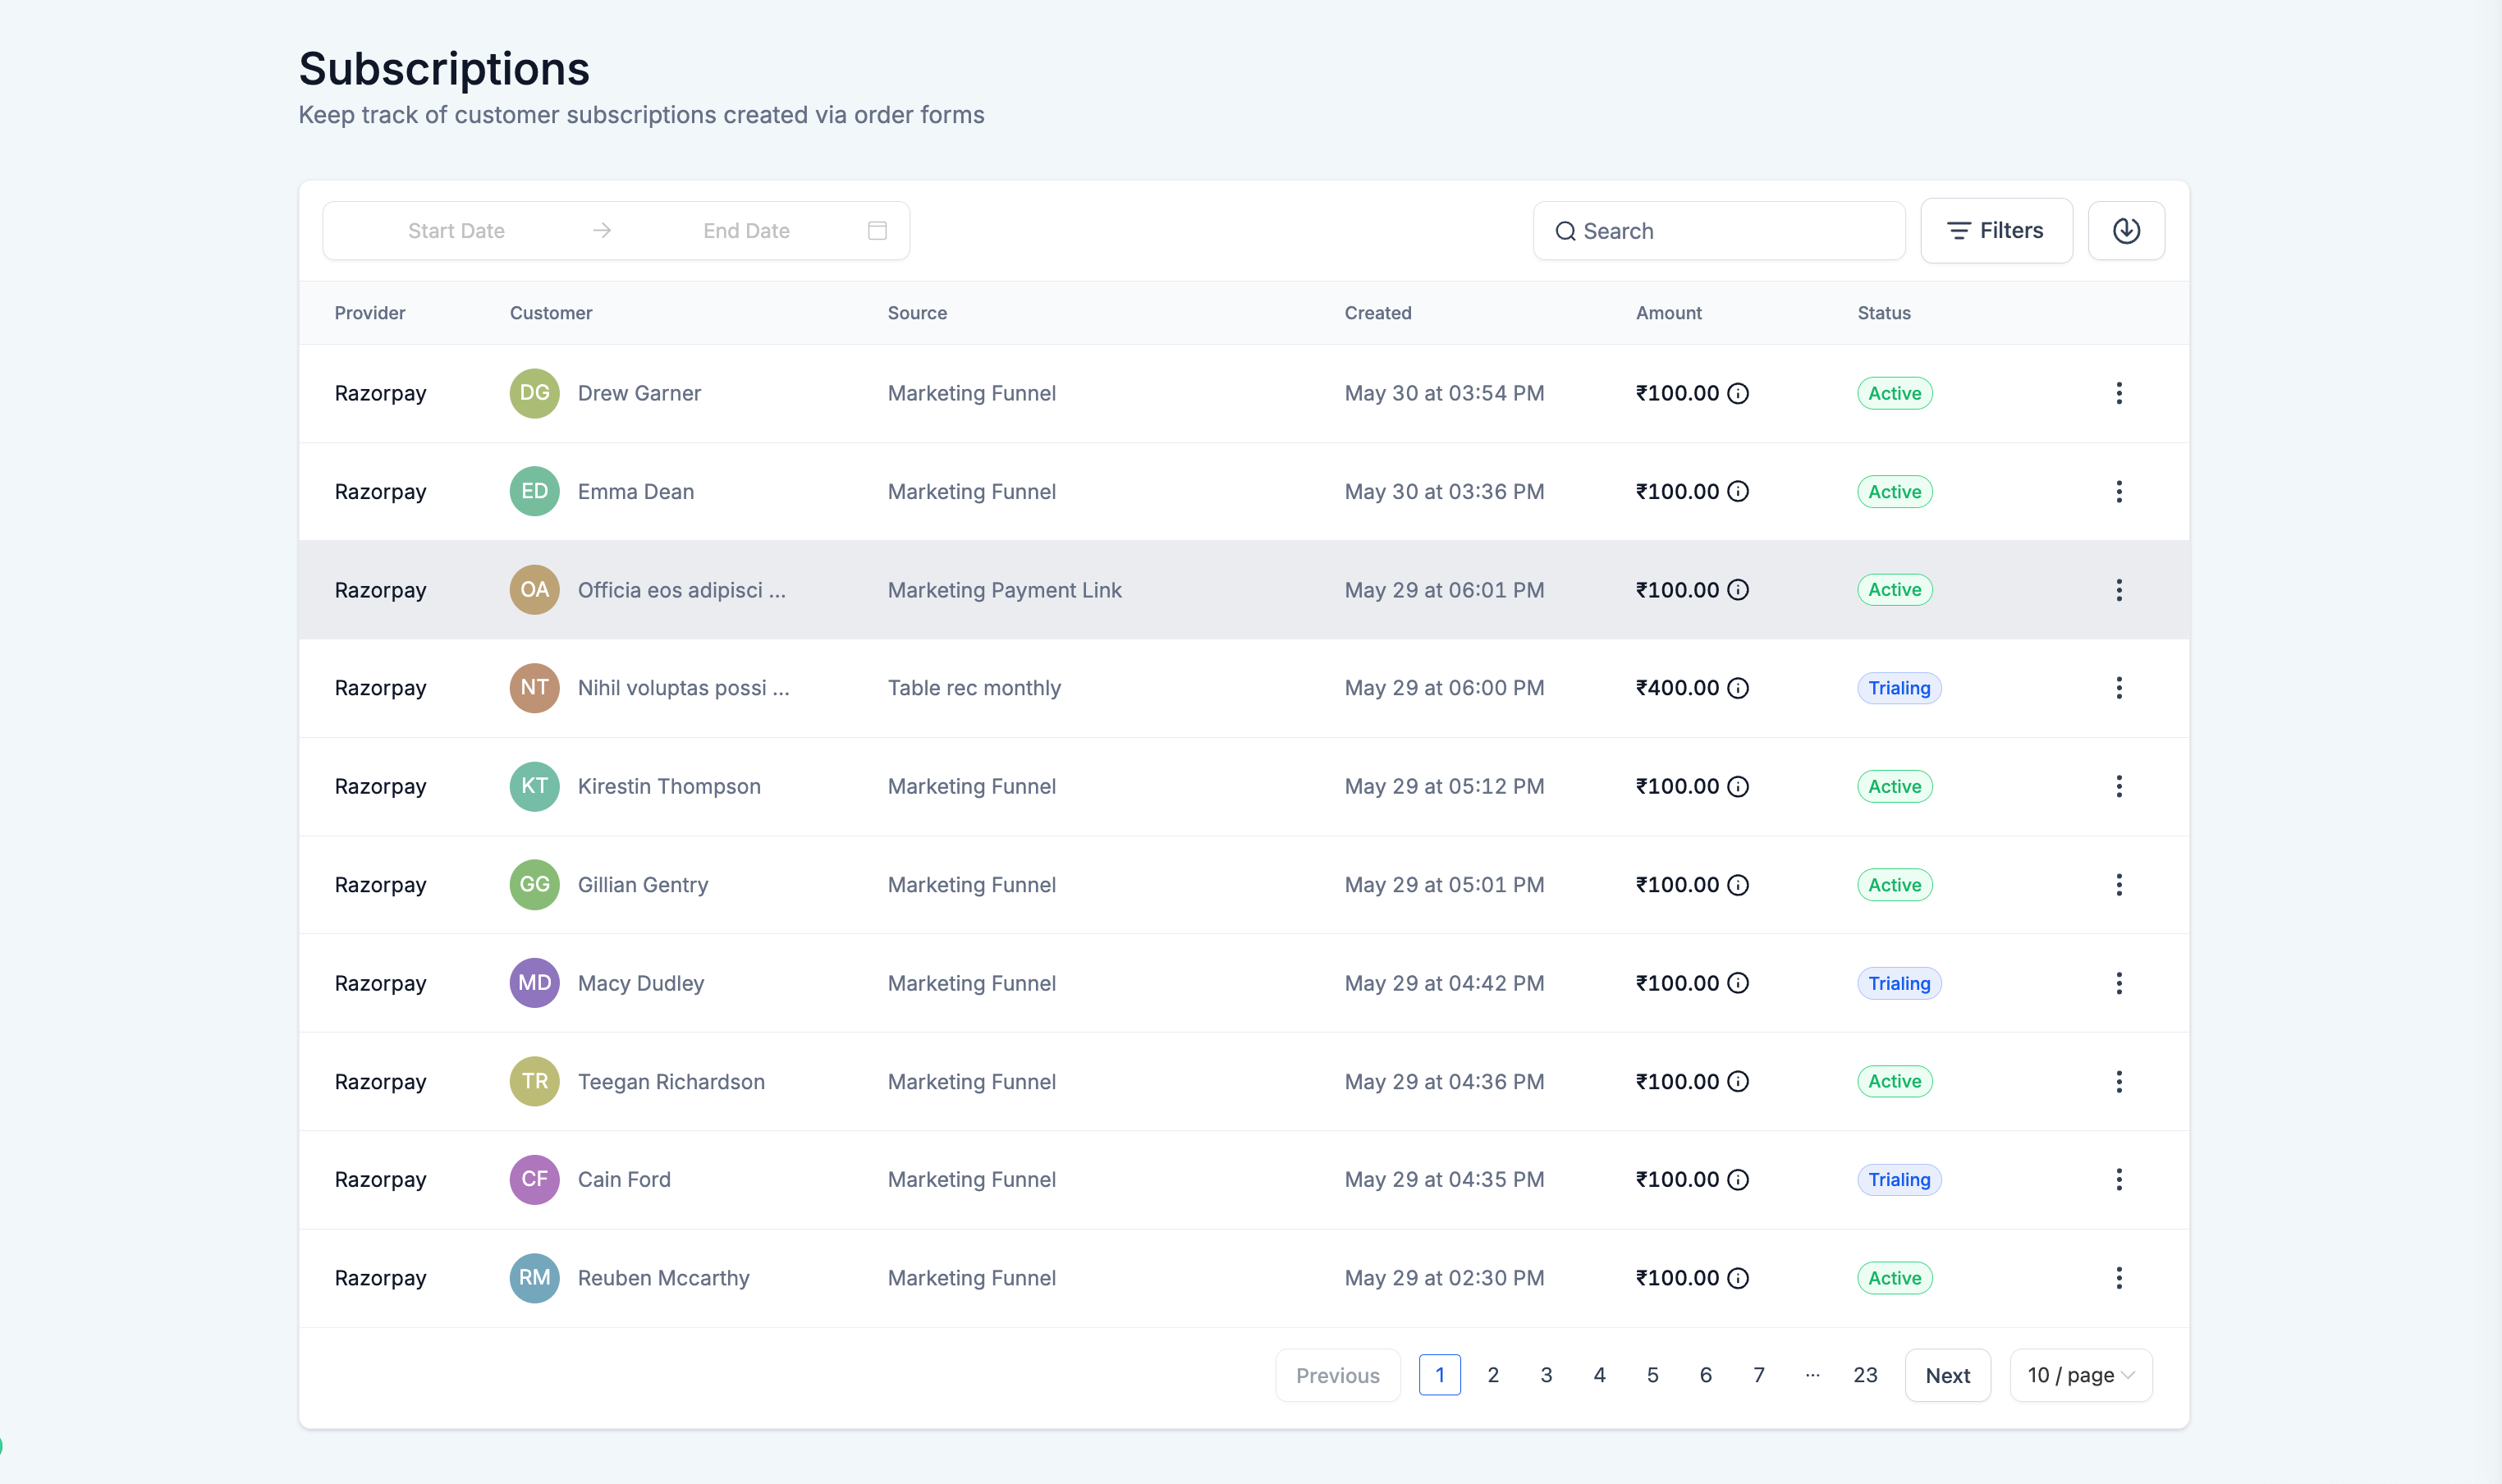
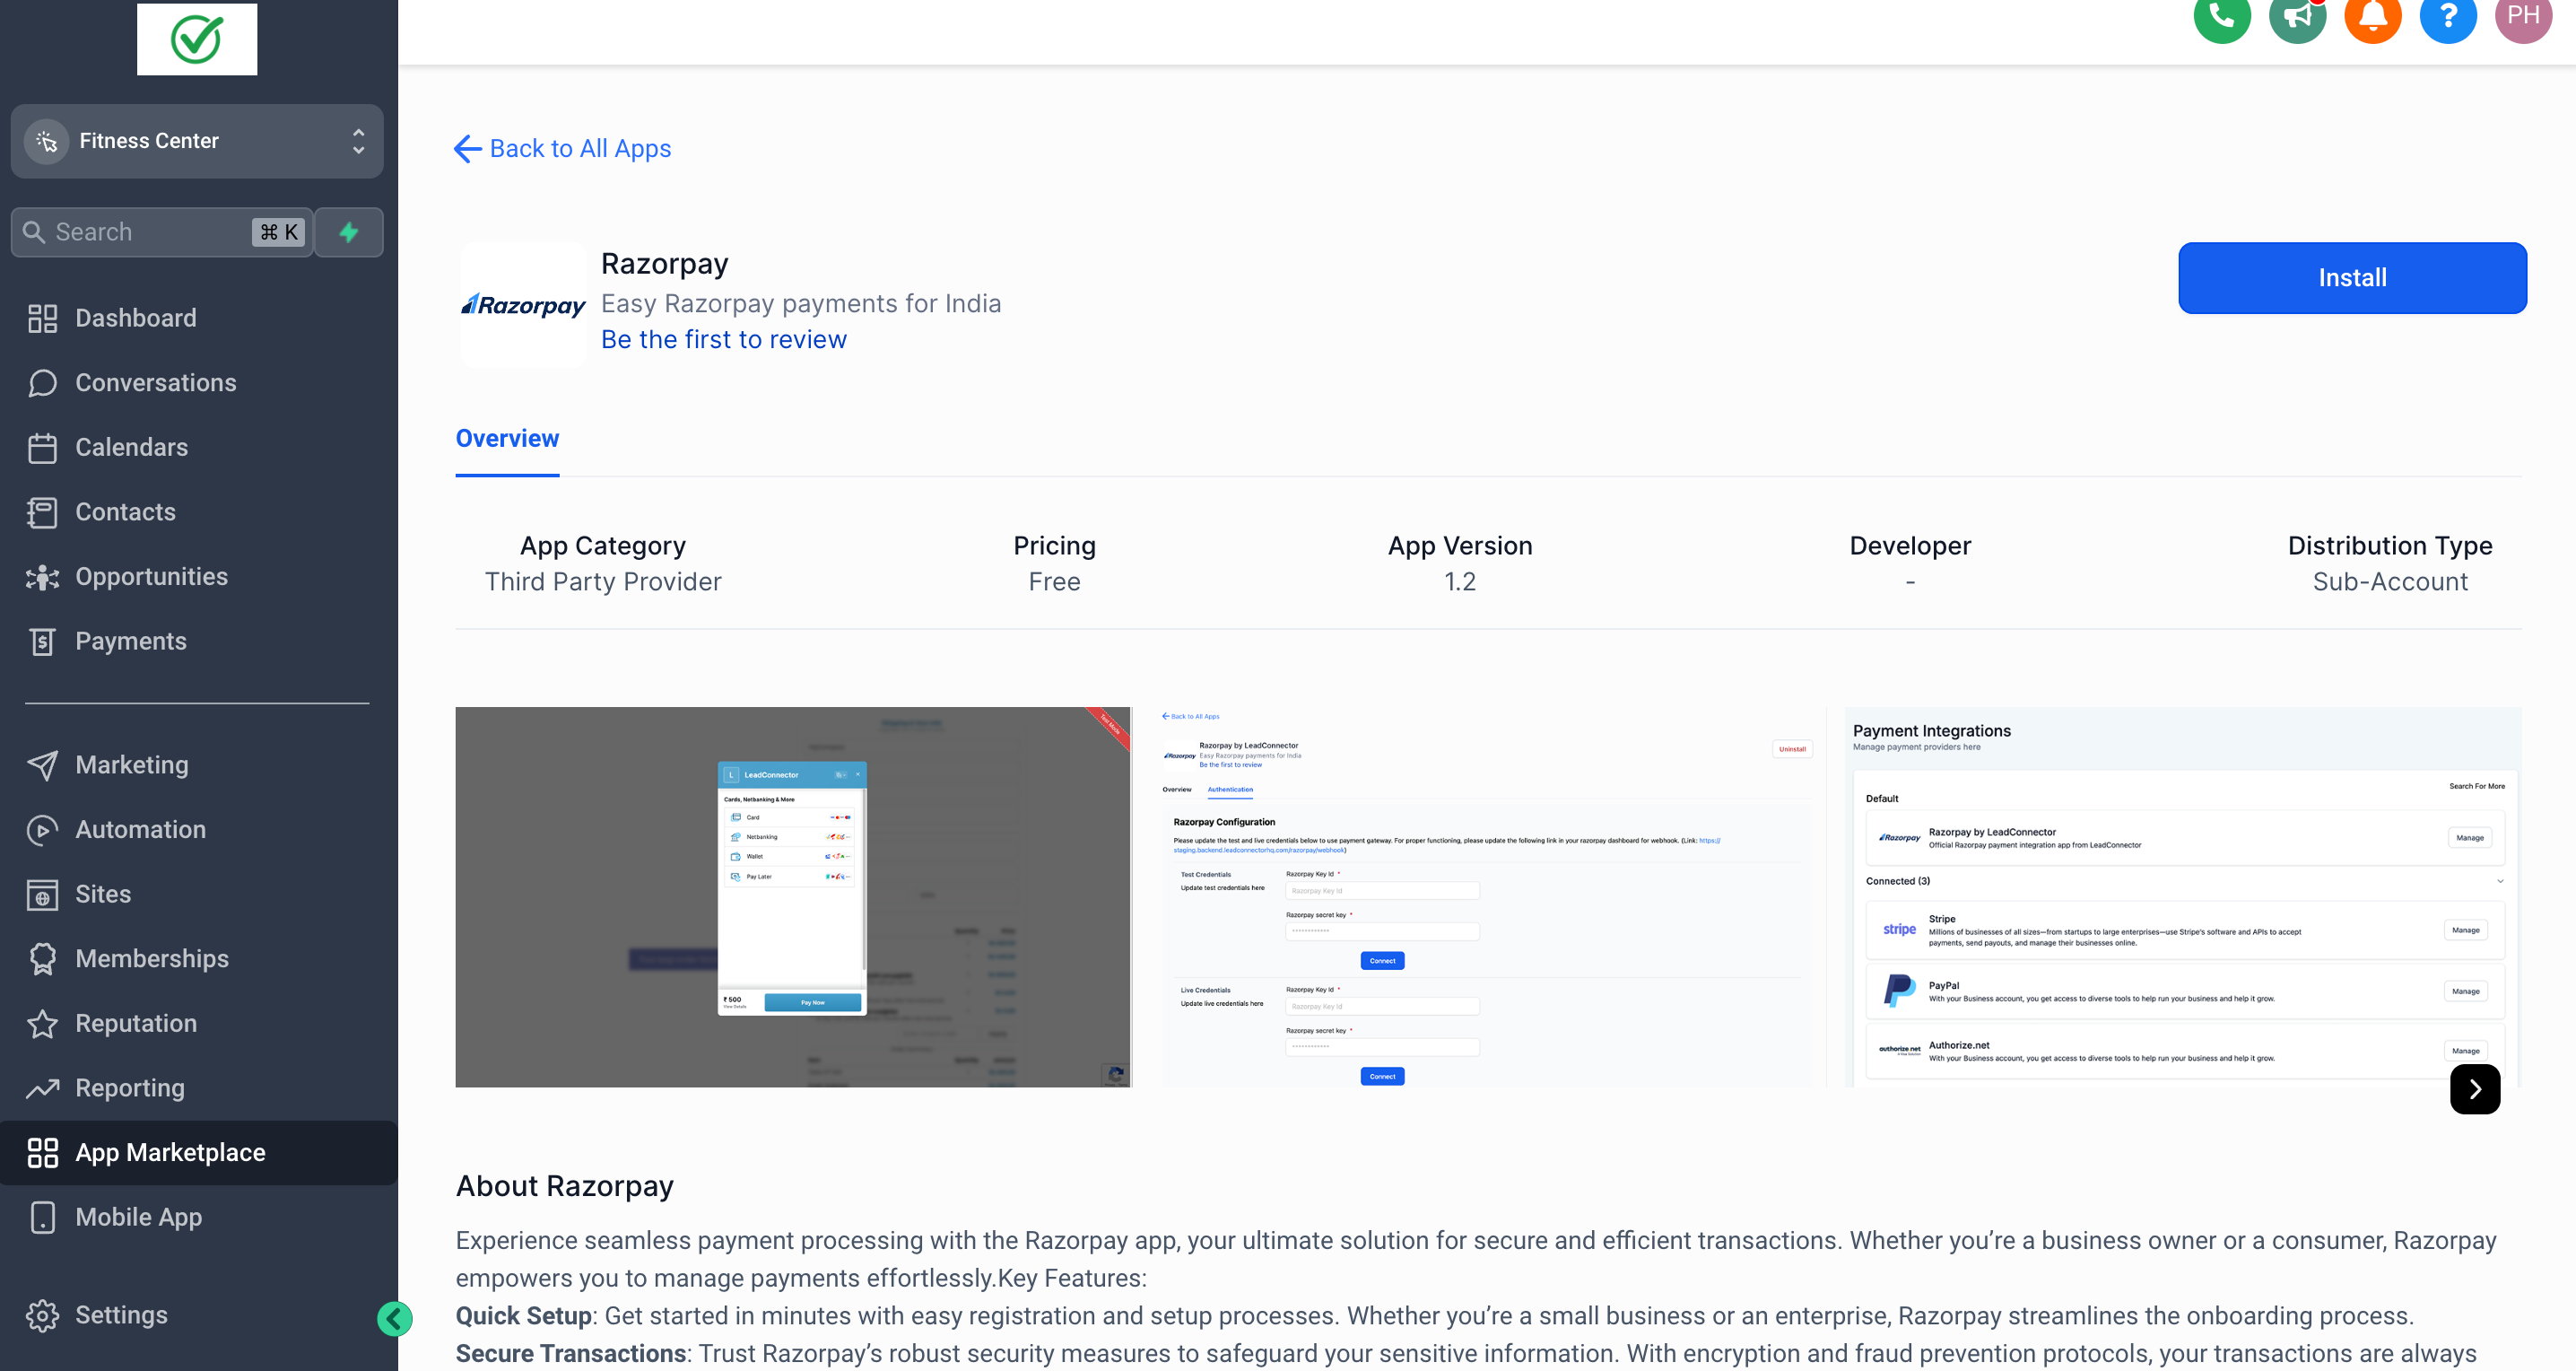
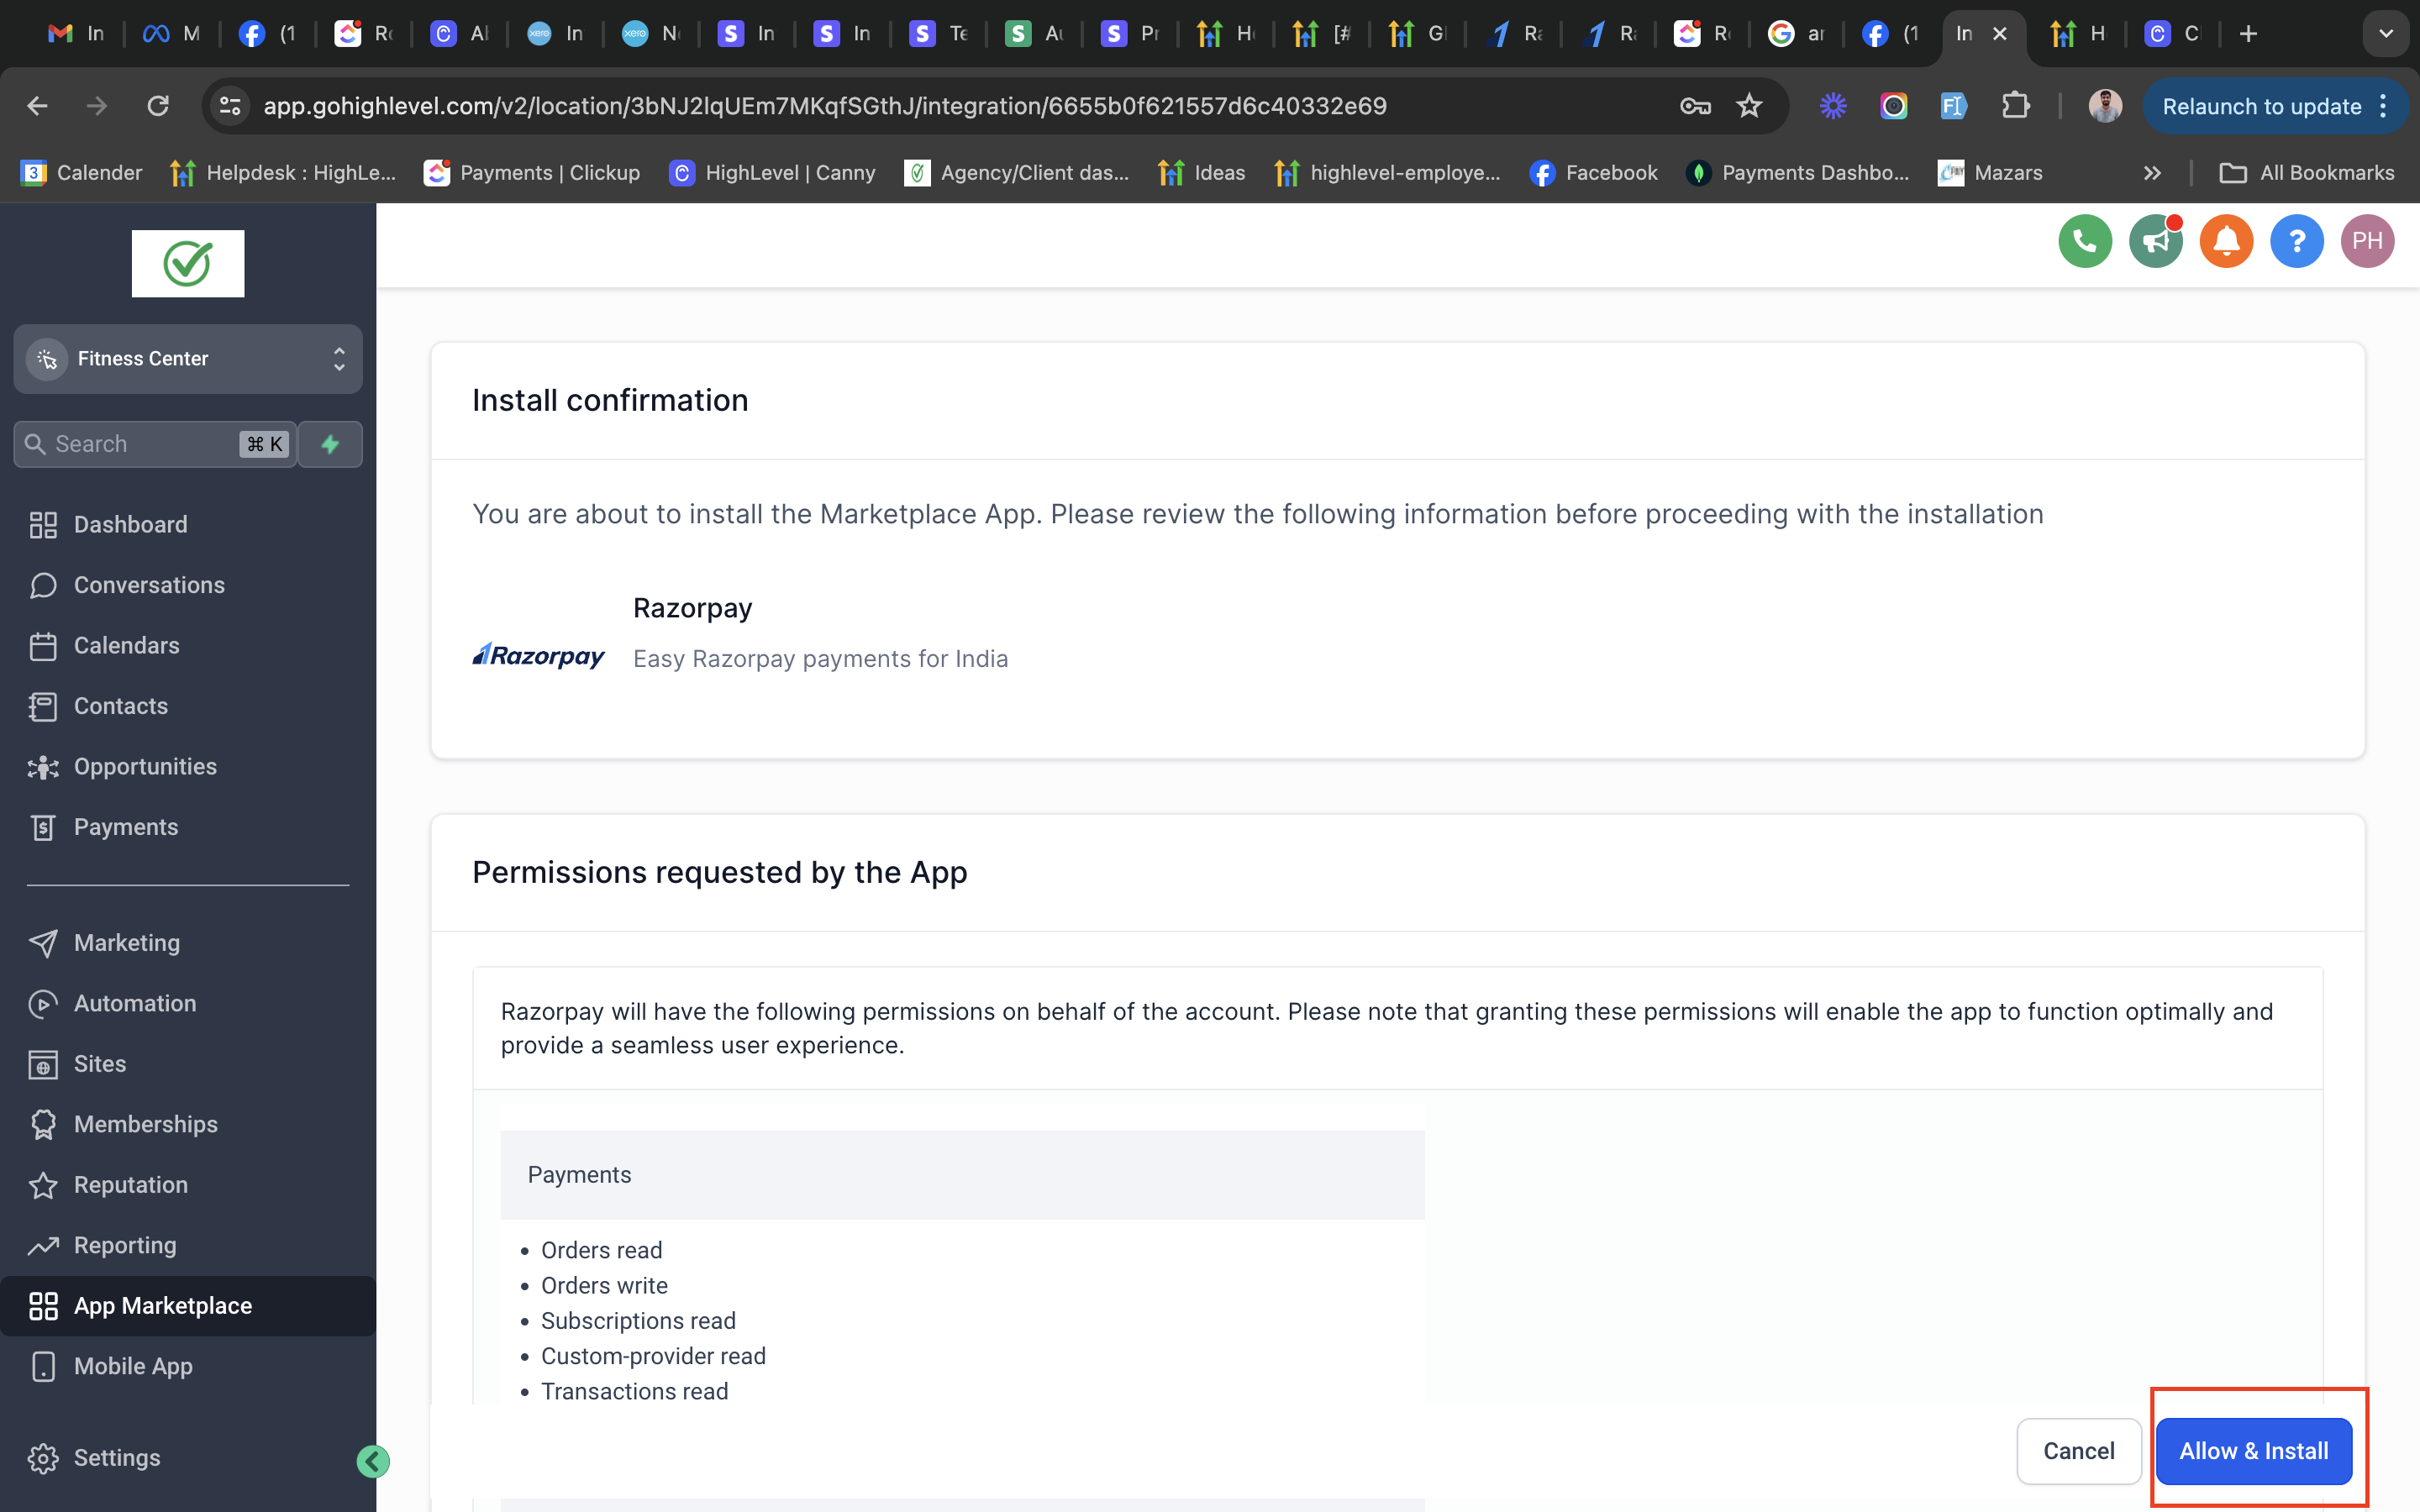
07Settings that matter
- API Keys. These keys authenticate the Razorpay account with HighLevel and allow payment processing.
- Webhook URL. The URL receives payment status updates from Razorpay so HighLevel can sync transaction information.
- Branded Domain. The domain registered in HighLevel and added to Razorpay must be whitelisted for payment acceptance.
08Things to know before you rely on it
- Razorpay only accepts payments from domains that have been whitelisted on its dashboard.
- The integration does not support SaaS mode or wallet recharges; off session charging on saved cards is not available.
- Only fixed duration subscriptions are supported.
09If something goes wrong
- Payment attempts fail with an email saying the web domain is not registered.. Register your own branded domain in HighLevel and add the same domain to the Razorpay dashboard under Business Website Details.
10How it connects to the rest of HighLevel
- View all payment features available in HighLevel. All Payments features
- Check which payment providers and methods are supported by product area. Supported payment providers
- Explore pricing and plan options for HighLevel. HighLevel pricing
Michael's take

Be careful that Razorpay will block any payment if the domain you use isn’t explicitly whitelisted on their dashboard. The default branded domain in HighLevel is tied to HighLevel’s own merchant account, so you must add your own domain in both systems before any transactions will go through.
Once you have the domain correctly registered, the integration opens up a simple way to collect one time and recurring payments in India, with all the usual automations like receipts, refunds and order triggers built in.