
01Who this is for
- Founders who want every customer touchpoint to match their brand identity.
- Marketing managers needing a quick way to keep payment pages aligned with campaign visuals.
- Ecommerce owners who sell online and want a cohesive look from product page to checkout.
02Payment link customization, explained
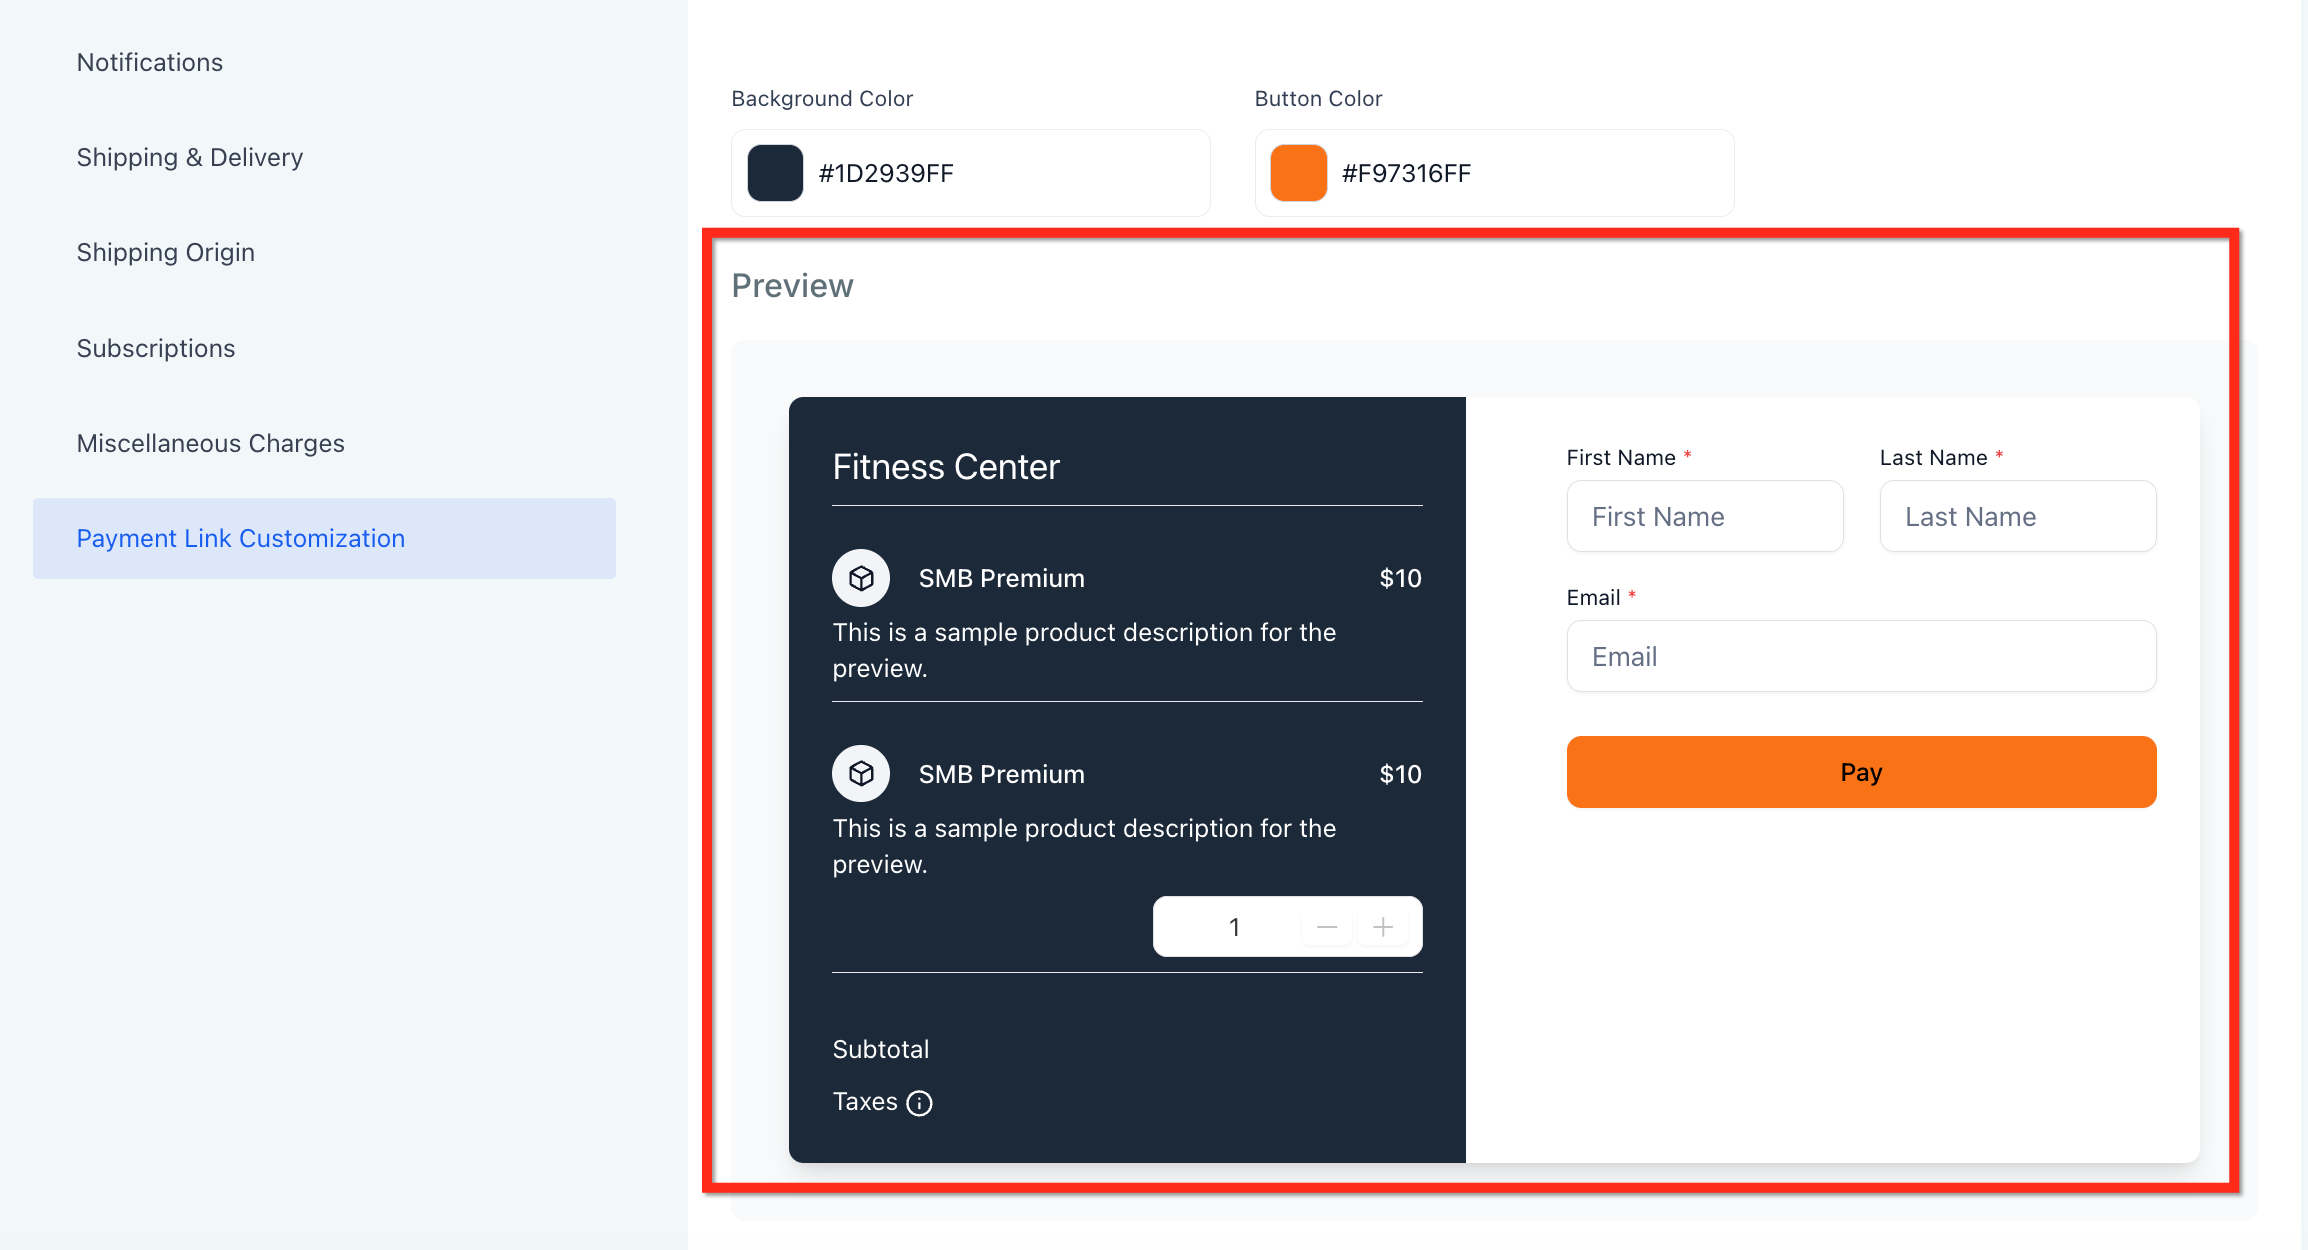
The feature changes only the visual elements of payment links, background and button colors, so the checkout screens reflect your brand palette. You can either pull colors automatically from an existing Brand Board or define a custom theme manually.
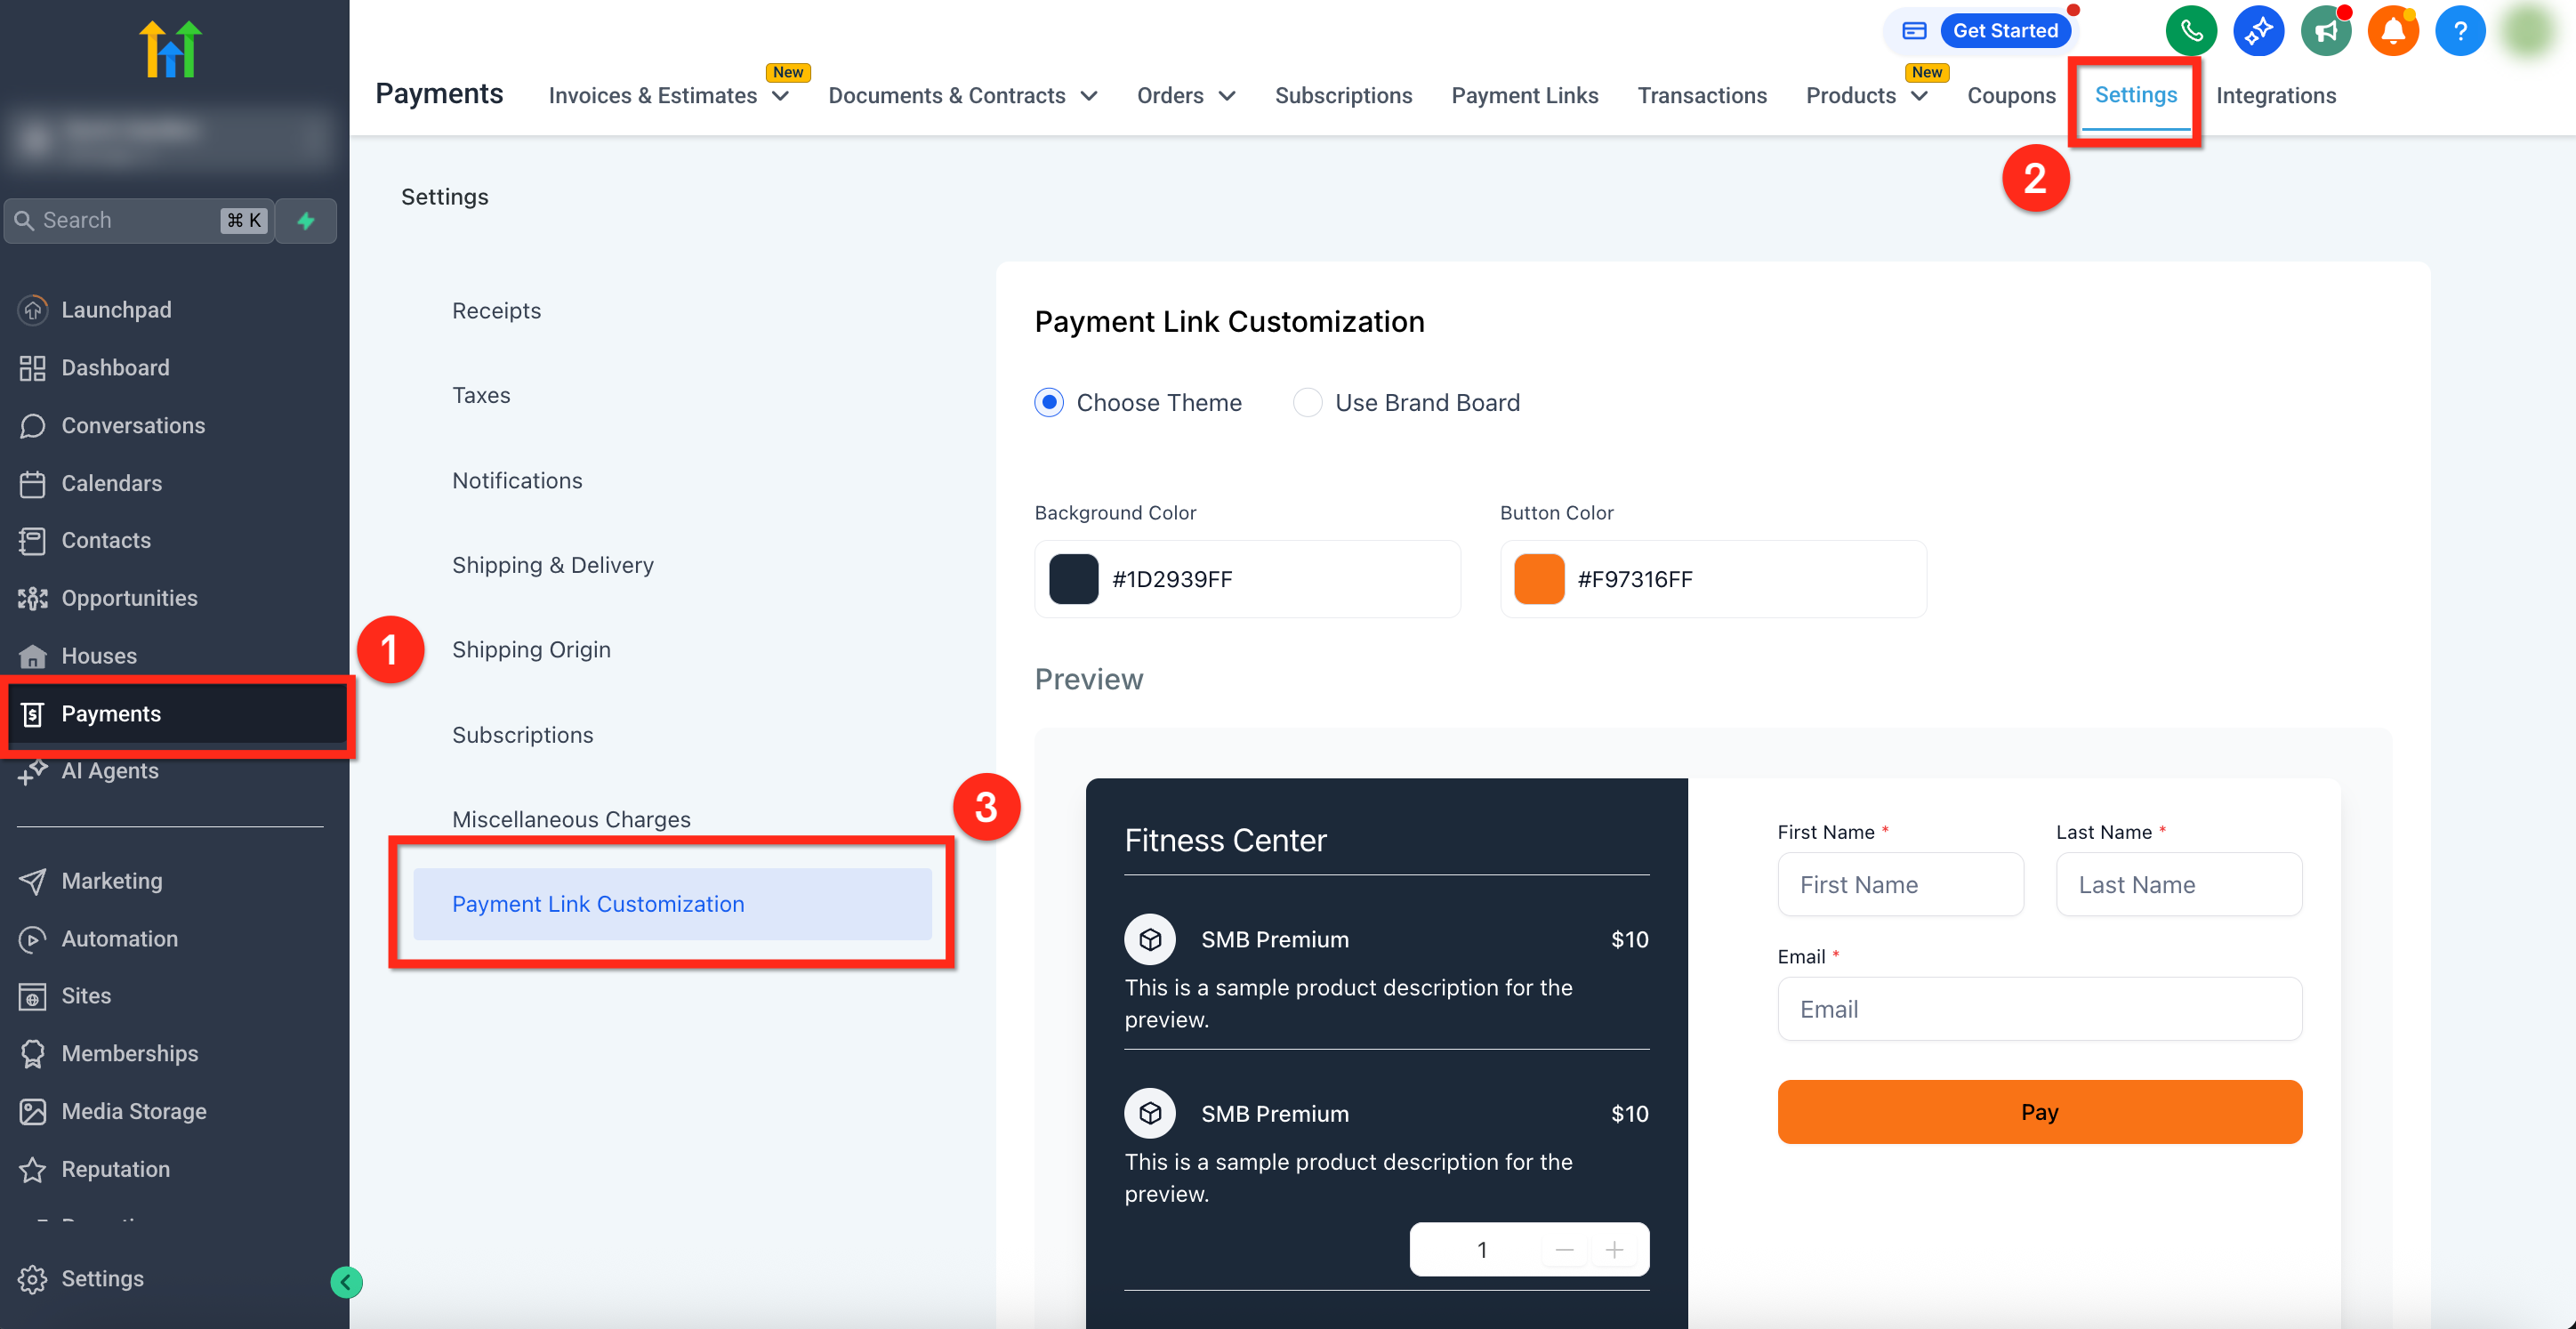
The customization settings are located under Payments > Settings > Payment Link Customization. Changes appear in a Live Preview panel, allowing you to see how the link will look before saving. Once saved, the selected theme applies to all current and future payment links across the account.
03How businesses use payment link customization
- Digital marketing agency. The agency selects its client’s Brand Board in the payment link settings, previews the updated checkout, and saves the theme. All client invoices and payment pages now carry the client’s logo colors, reinforcing brand consistency.
- Online fitness studio. The studio uses the custom theme builder to set a bright background and matching button color that match its website. After saving, every class signup payment link displays the new colors, creating a unified look across devices.
- Consulting firm. The firm picks a pre made Brand Board, clicks Save, and then opens a sample payment link to confirm the colors have applied. The same theme is automatically applied to any new consulting service payment links created later.
04How to set up and use payment link customization in HighLevel
Customize payment links
- Open the HighLevel platform and go to Payments > Settings > Payment Link Customization.
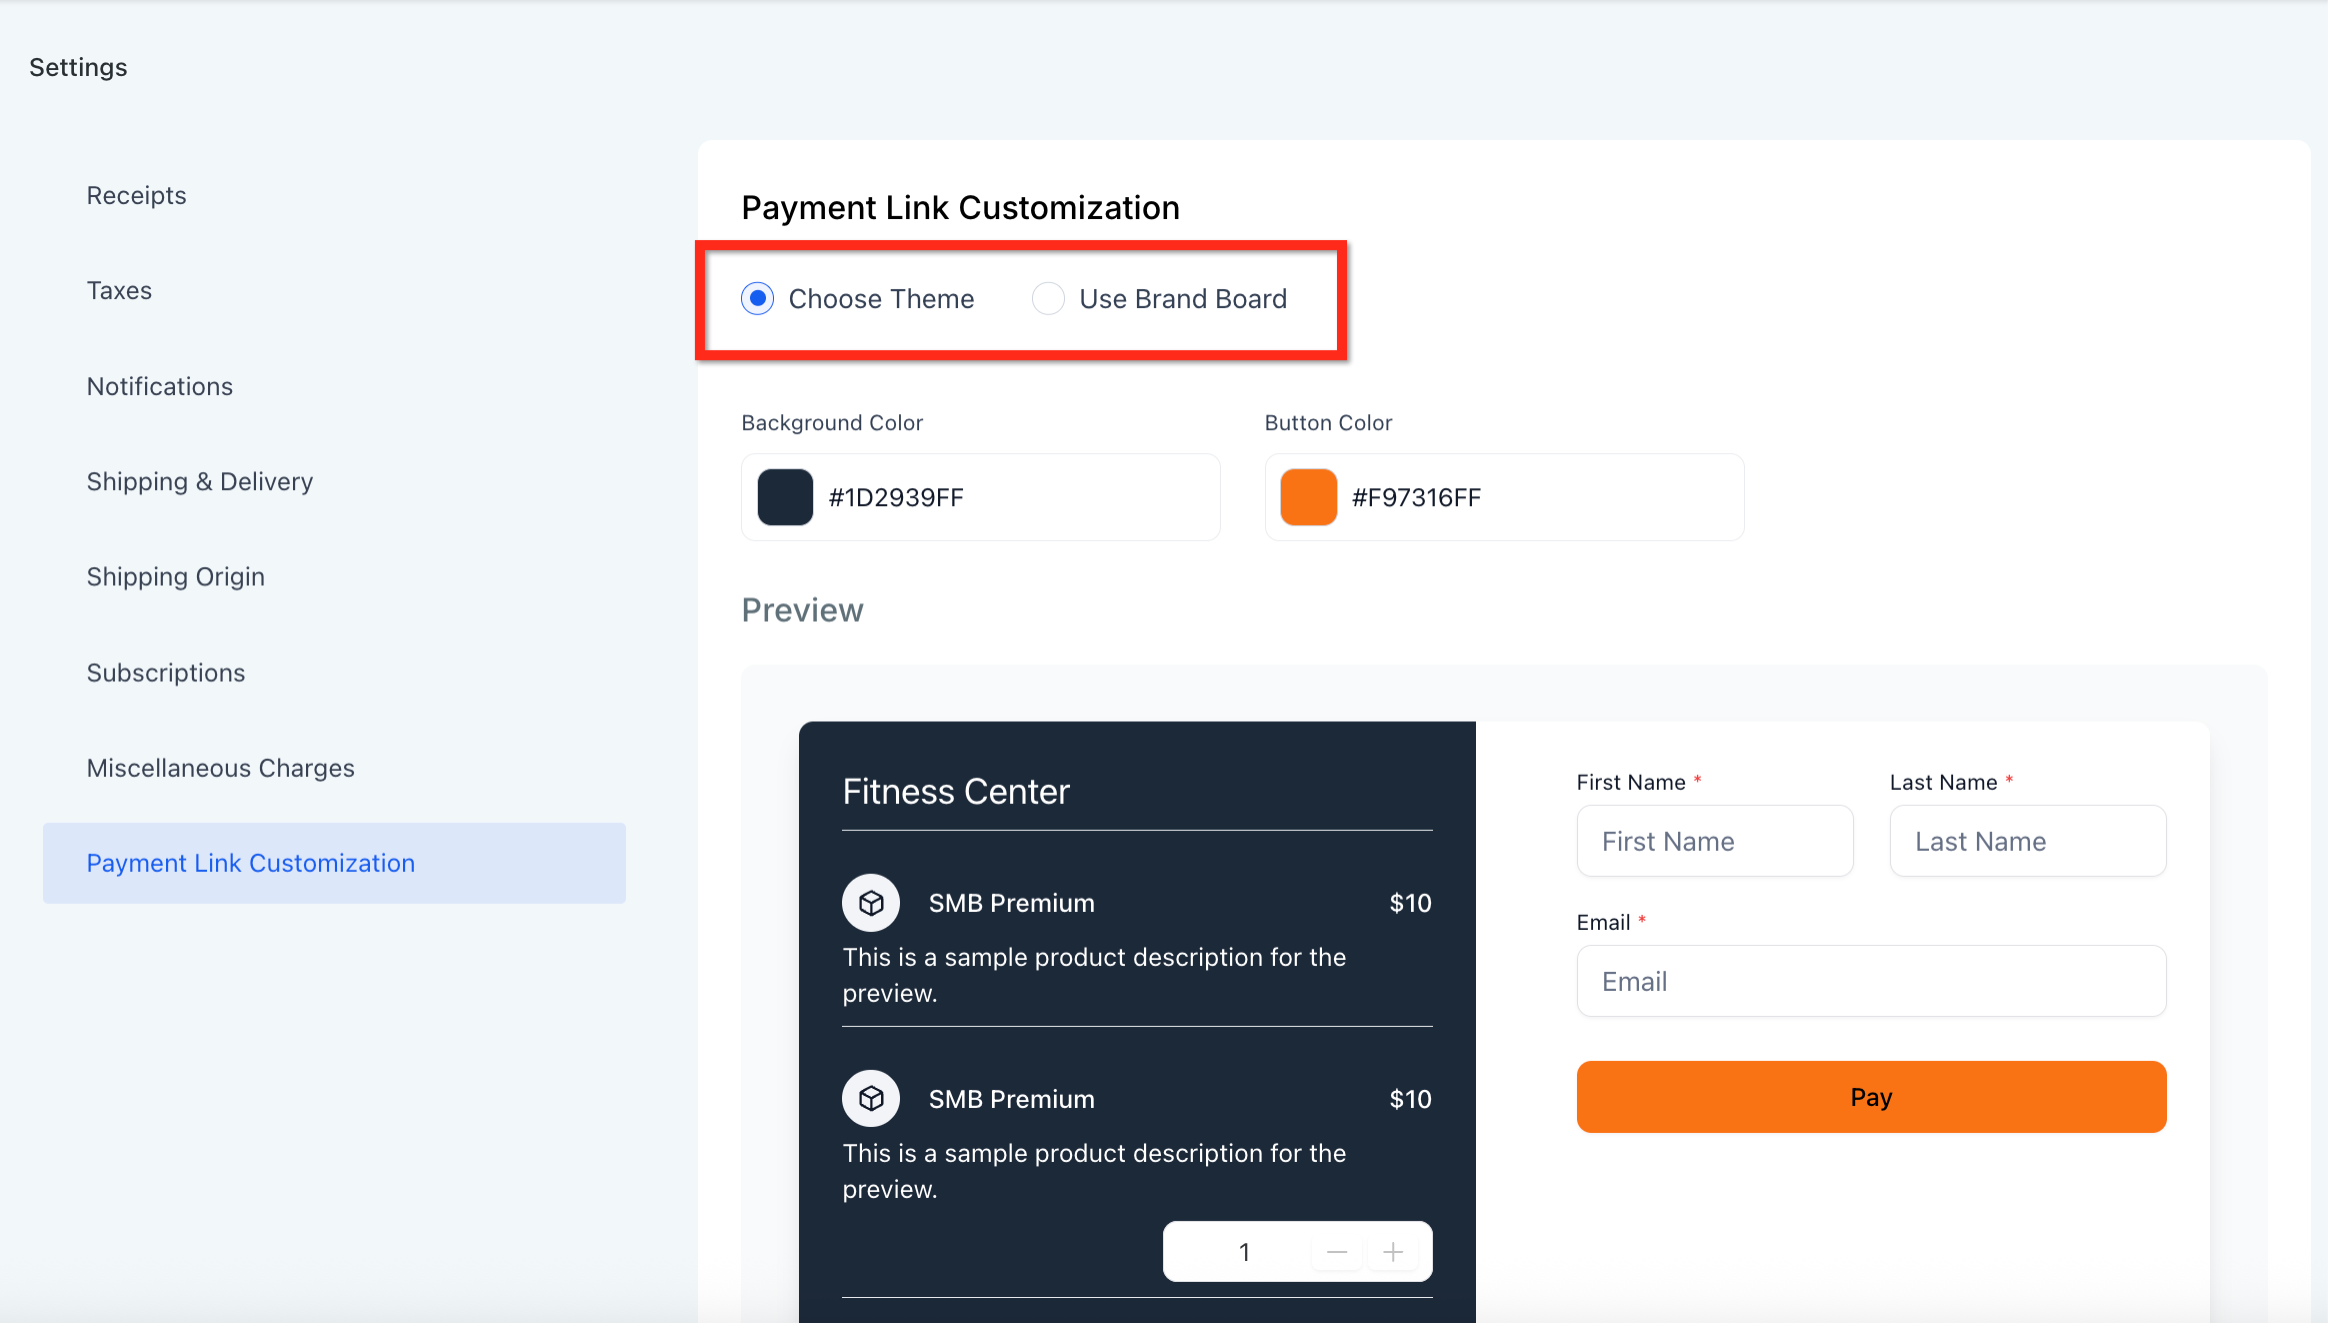
- Choose either the Use Brand Board option or the Choose Theme option.
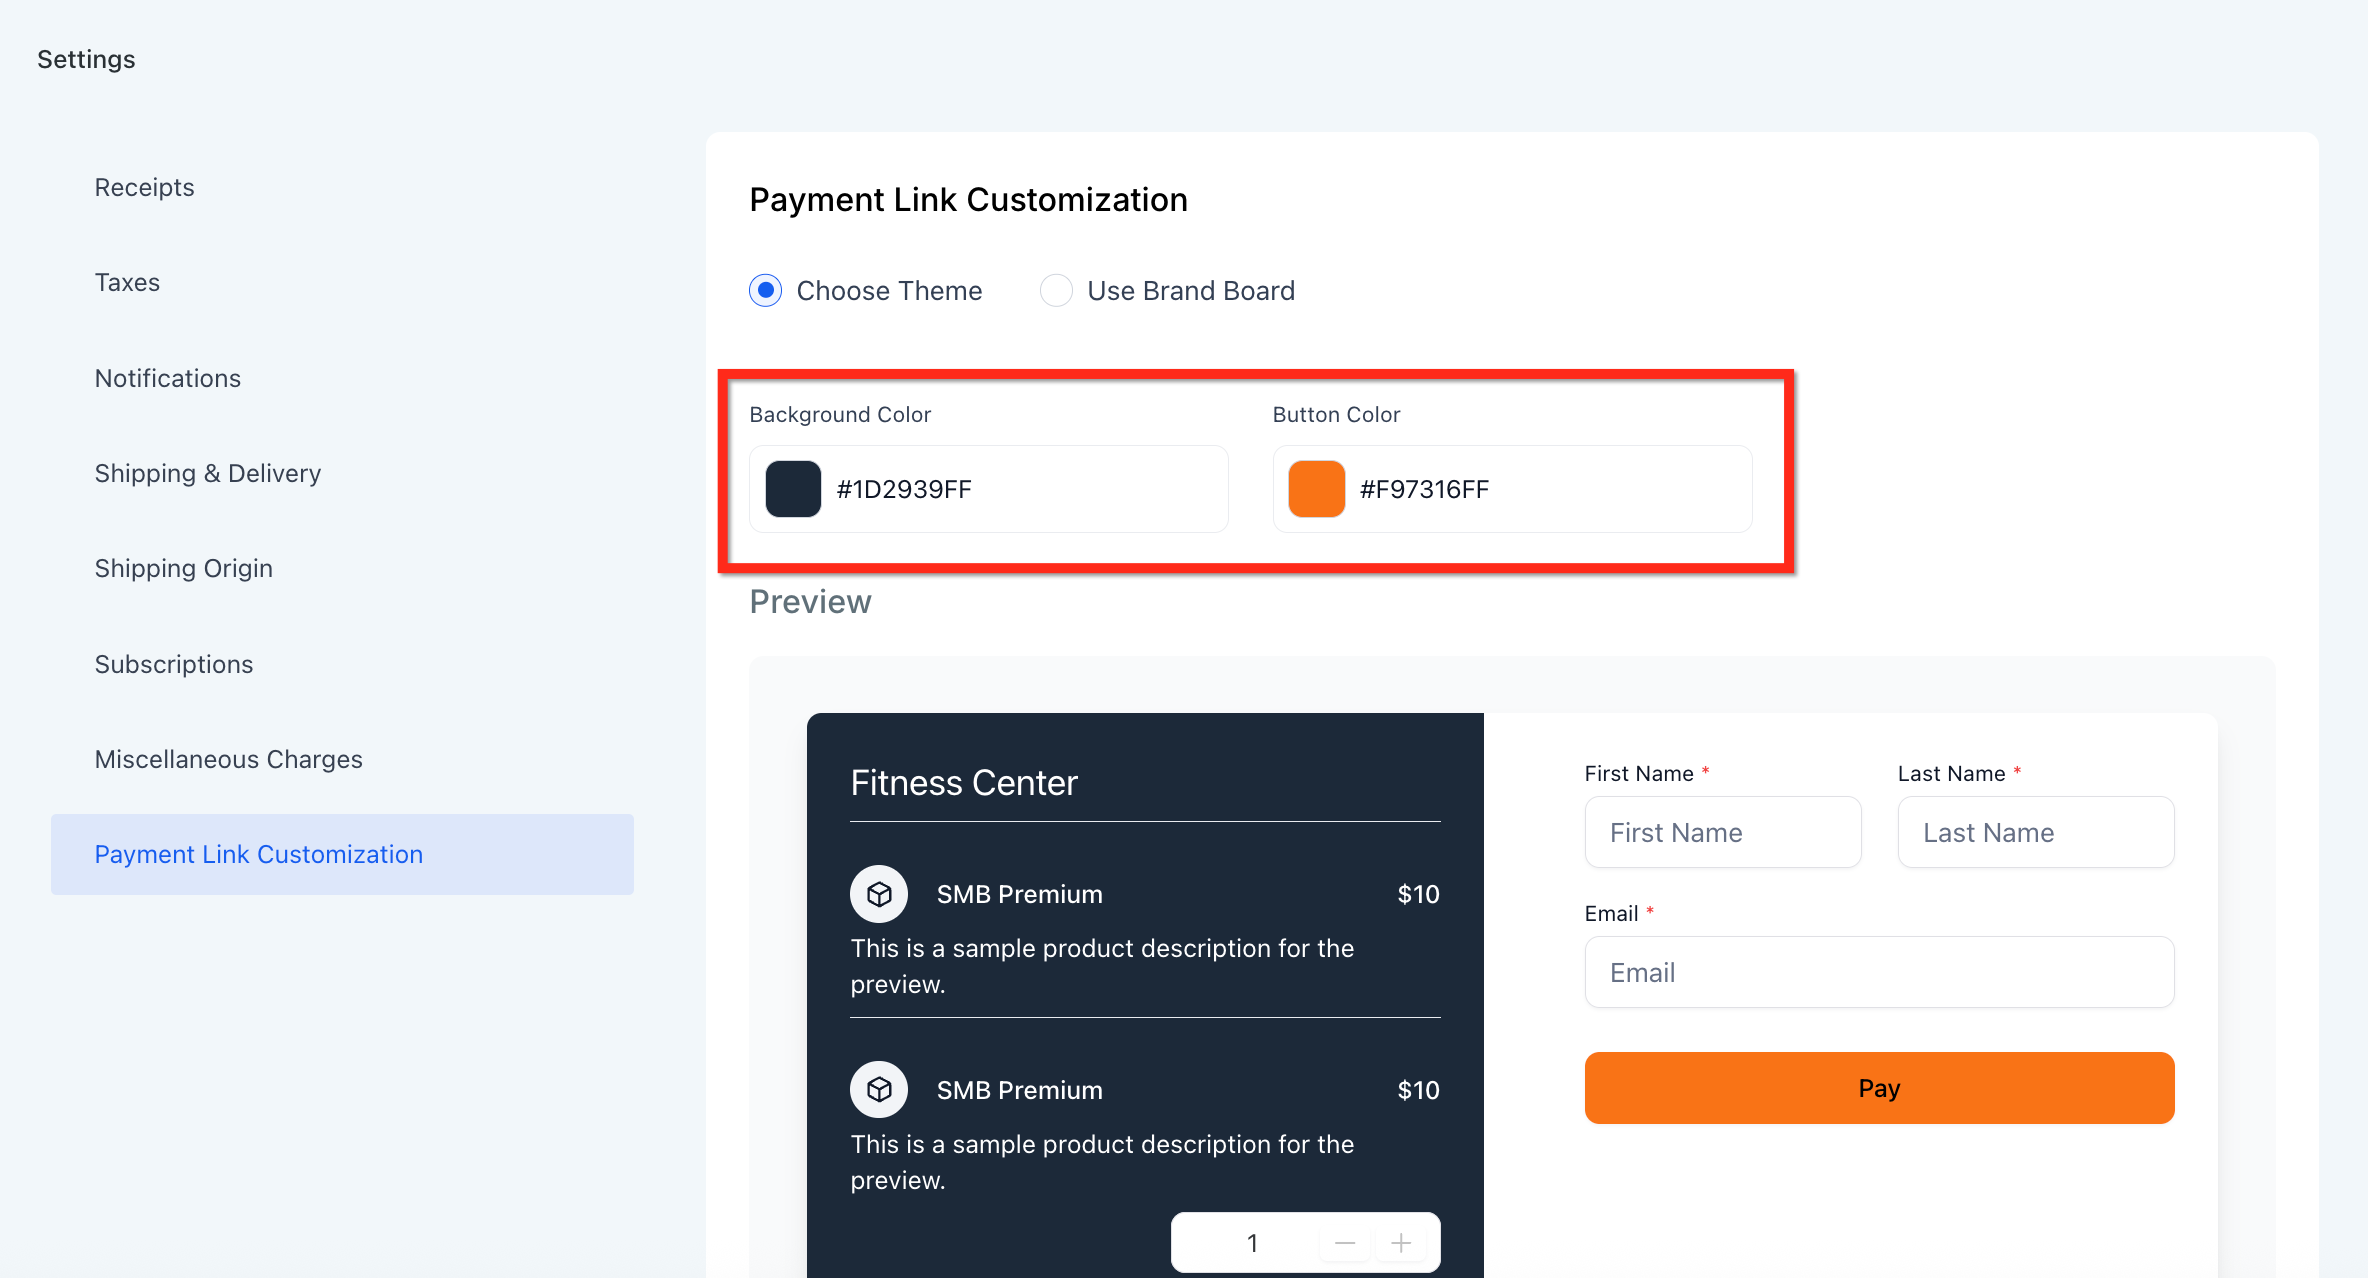
- If you pick Choose Theme, set the desired background color and button color.
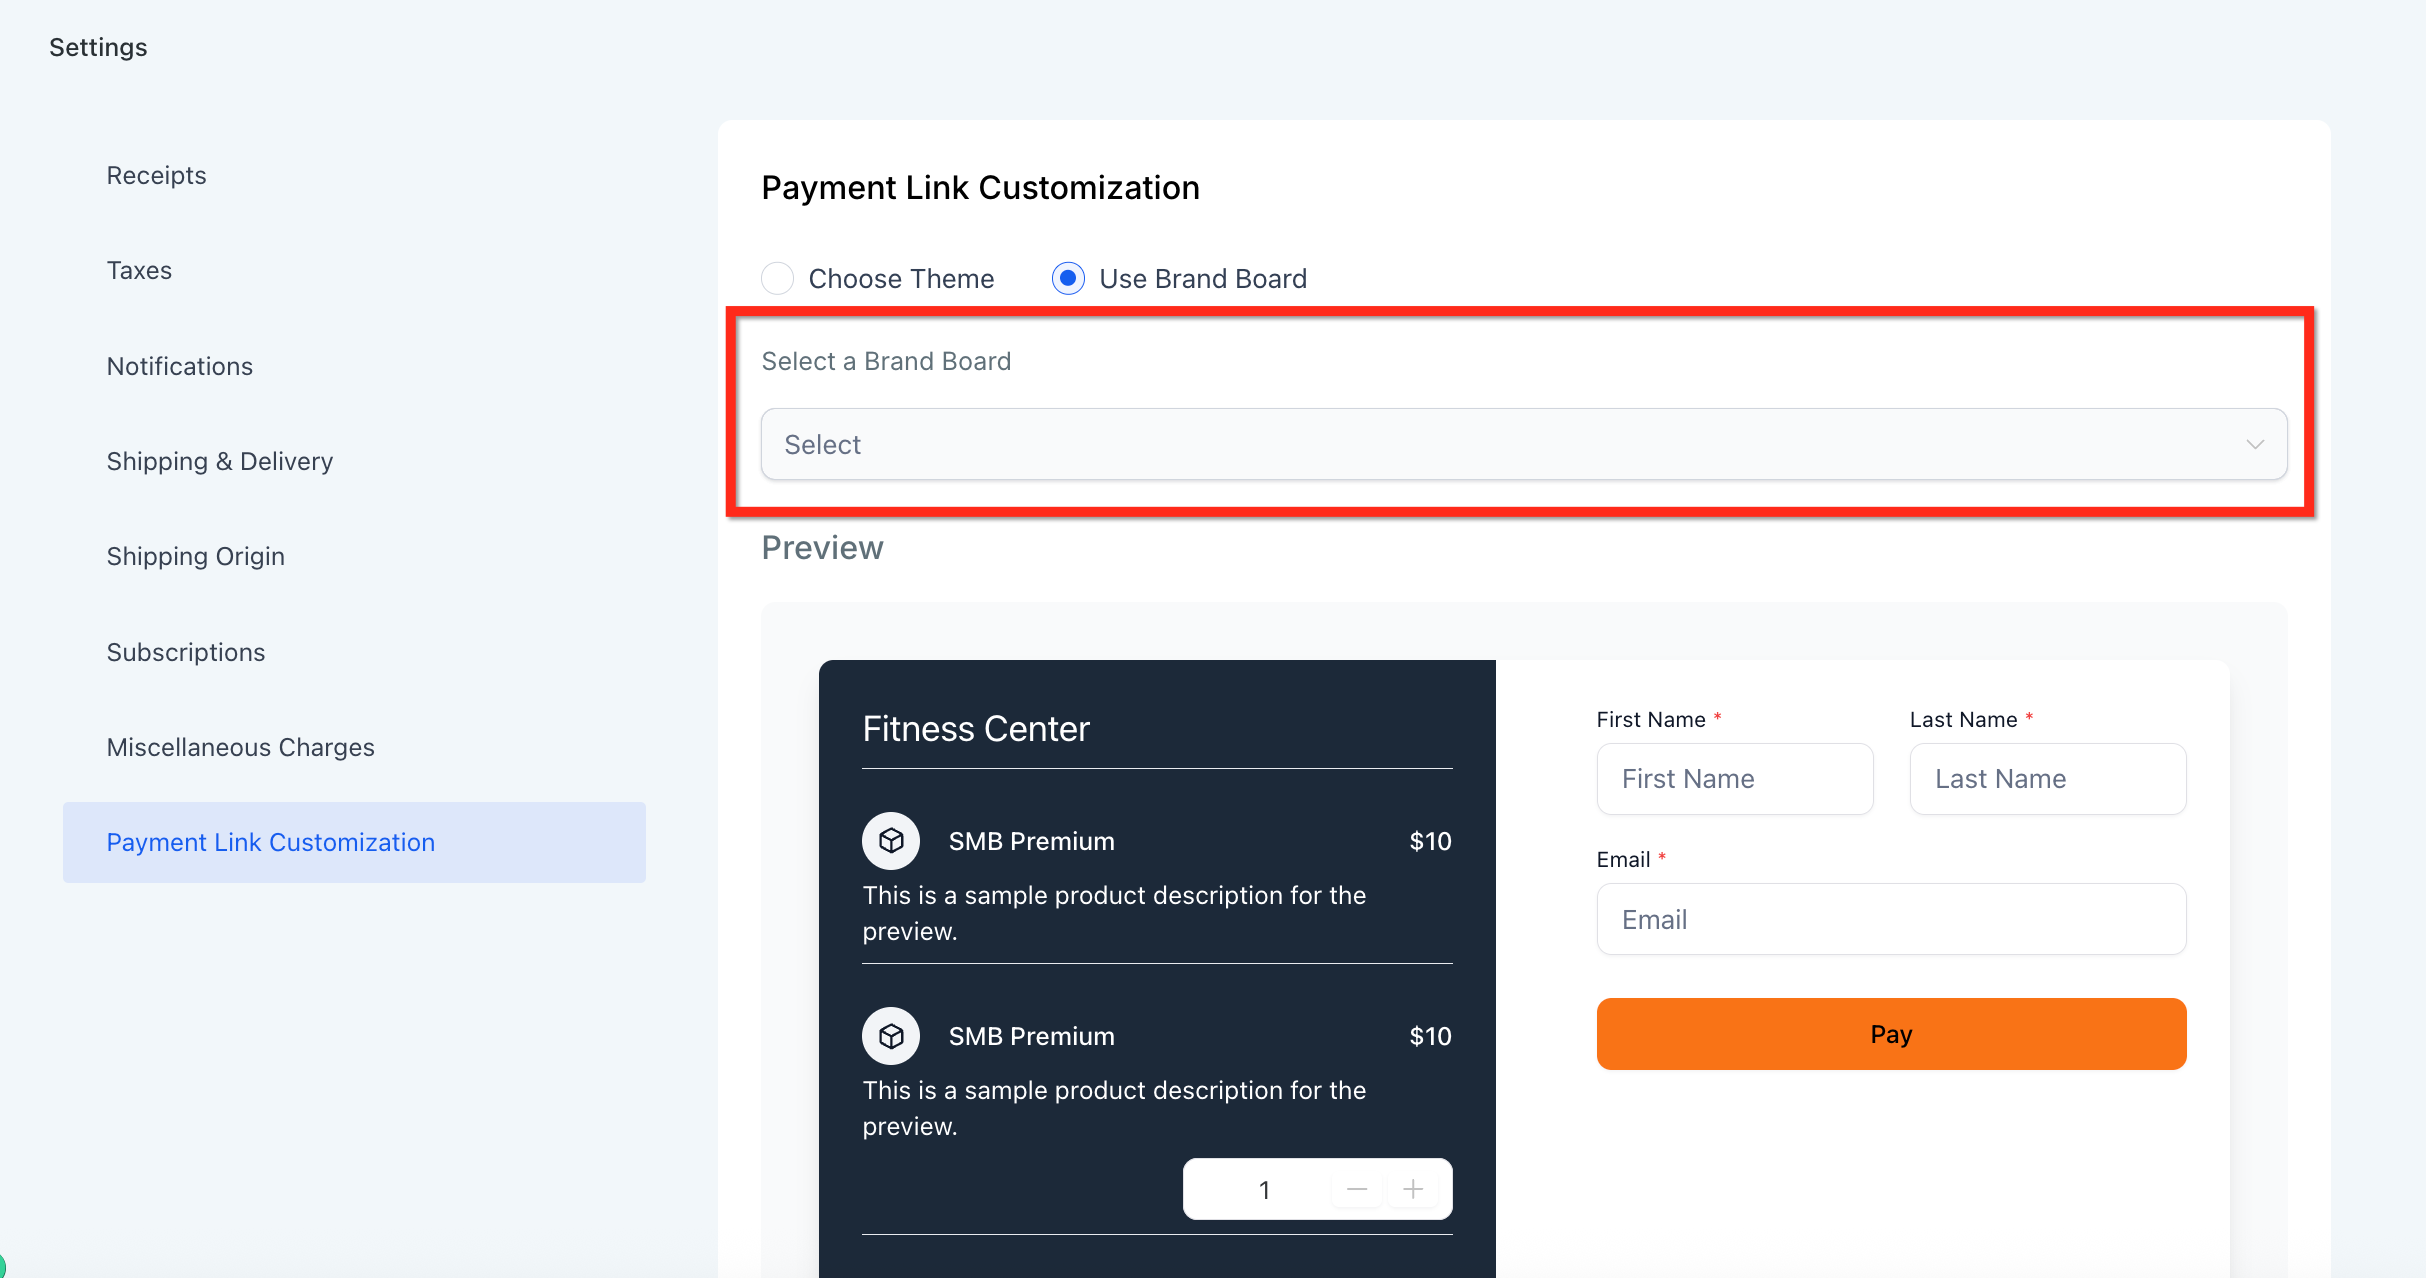
- If you pick Use Brand Board, open the Select a Brand Board dropdown and pick the required Brand Board.
- Watch the Live Preview panel update with the new colors.
- Click the blue Save button located in the bottom right corner.
- Open a payment link to confirm the visual changes are displayed correctly.
05What it looks like in HighLevel
06Settings that matter
- Use Brand Board. Applies the colors and styles from a selected Brand Board to all payment links.
- Choose Theme. Enables manual selection of background and button colors for payment links.
- Select a Brand Board dropdown. Lists available Brand Boards so you can pick which one to apply.
07Things to know before you rely on it
- The chosen theme is applied globally; you cannot set different themes for individual payment links.
- Brand Board updates are reflected right away across all payment links without additional steps.
08How it connects to the rest of HighLevel
- Set up a new payment link in HighLevel Create payment link
- Explore all payments features on the platform Payments overview
- View pricing and plan options for HighLevel Pricing
Michael's take

When your brand relies on visual consistency, matching payment links to your colors feels like the right move.
If you already have a simple checkout that works well, you might choose to keep the default colors.