
01Who this is for
- Founders of SaaS companies benefit by aligning invoice branding with their product look and feel.
- Marketing agencies gain clarity for clients by renaming sections such as "Billed to" to match campaign terminology.
- Non profit organizations can switch the pay button text to "Donate" and hide tax columns that are not needed.
02Invoice layout customization, explained
Invoice Layout Customization is a subaccount level feature that controls the visual design and wording of invoices. You can set the colors of the pay button and its border, change the button label, hide or show standard fields, and add up to three custom values in the business information block. The feature also lets you rename the recipient section header and edit line item column labels. All adjustments are made in the Payments area of the platform. After you save a layout, every new invoice you generate in that subaccount uses the saved design, and the preview and PDF output reflect those choices. Existing PDFs remain unchanged unless you create a new version of the invoice.
03How businesses use invoice layout customization
- Marketing agency. The agency opens the invoice settings, changes the pay button text to match its service terminology, and renames the "Billed to" section to "Client details". It also hides the tax column that it does not charge, keeping client invoices clean.
- Online retailer. The retailer adds a custom field for "SKU" under business information, adjusts the button color to its brand palette, and renames the item name column to "Product". These changes appear on every order invoice they send.
- Non profit organization. The non profit switches the button label to "Donate", hides the price column, and adds a custom field for "Campaign ID". The revised layout is used for all donation receipts they issue.
04The numbers and rules that matter
- Add up to 3 Custom Values in Business Information.
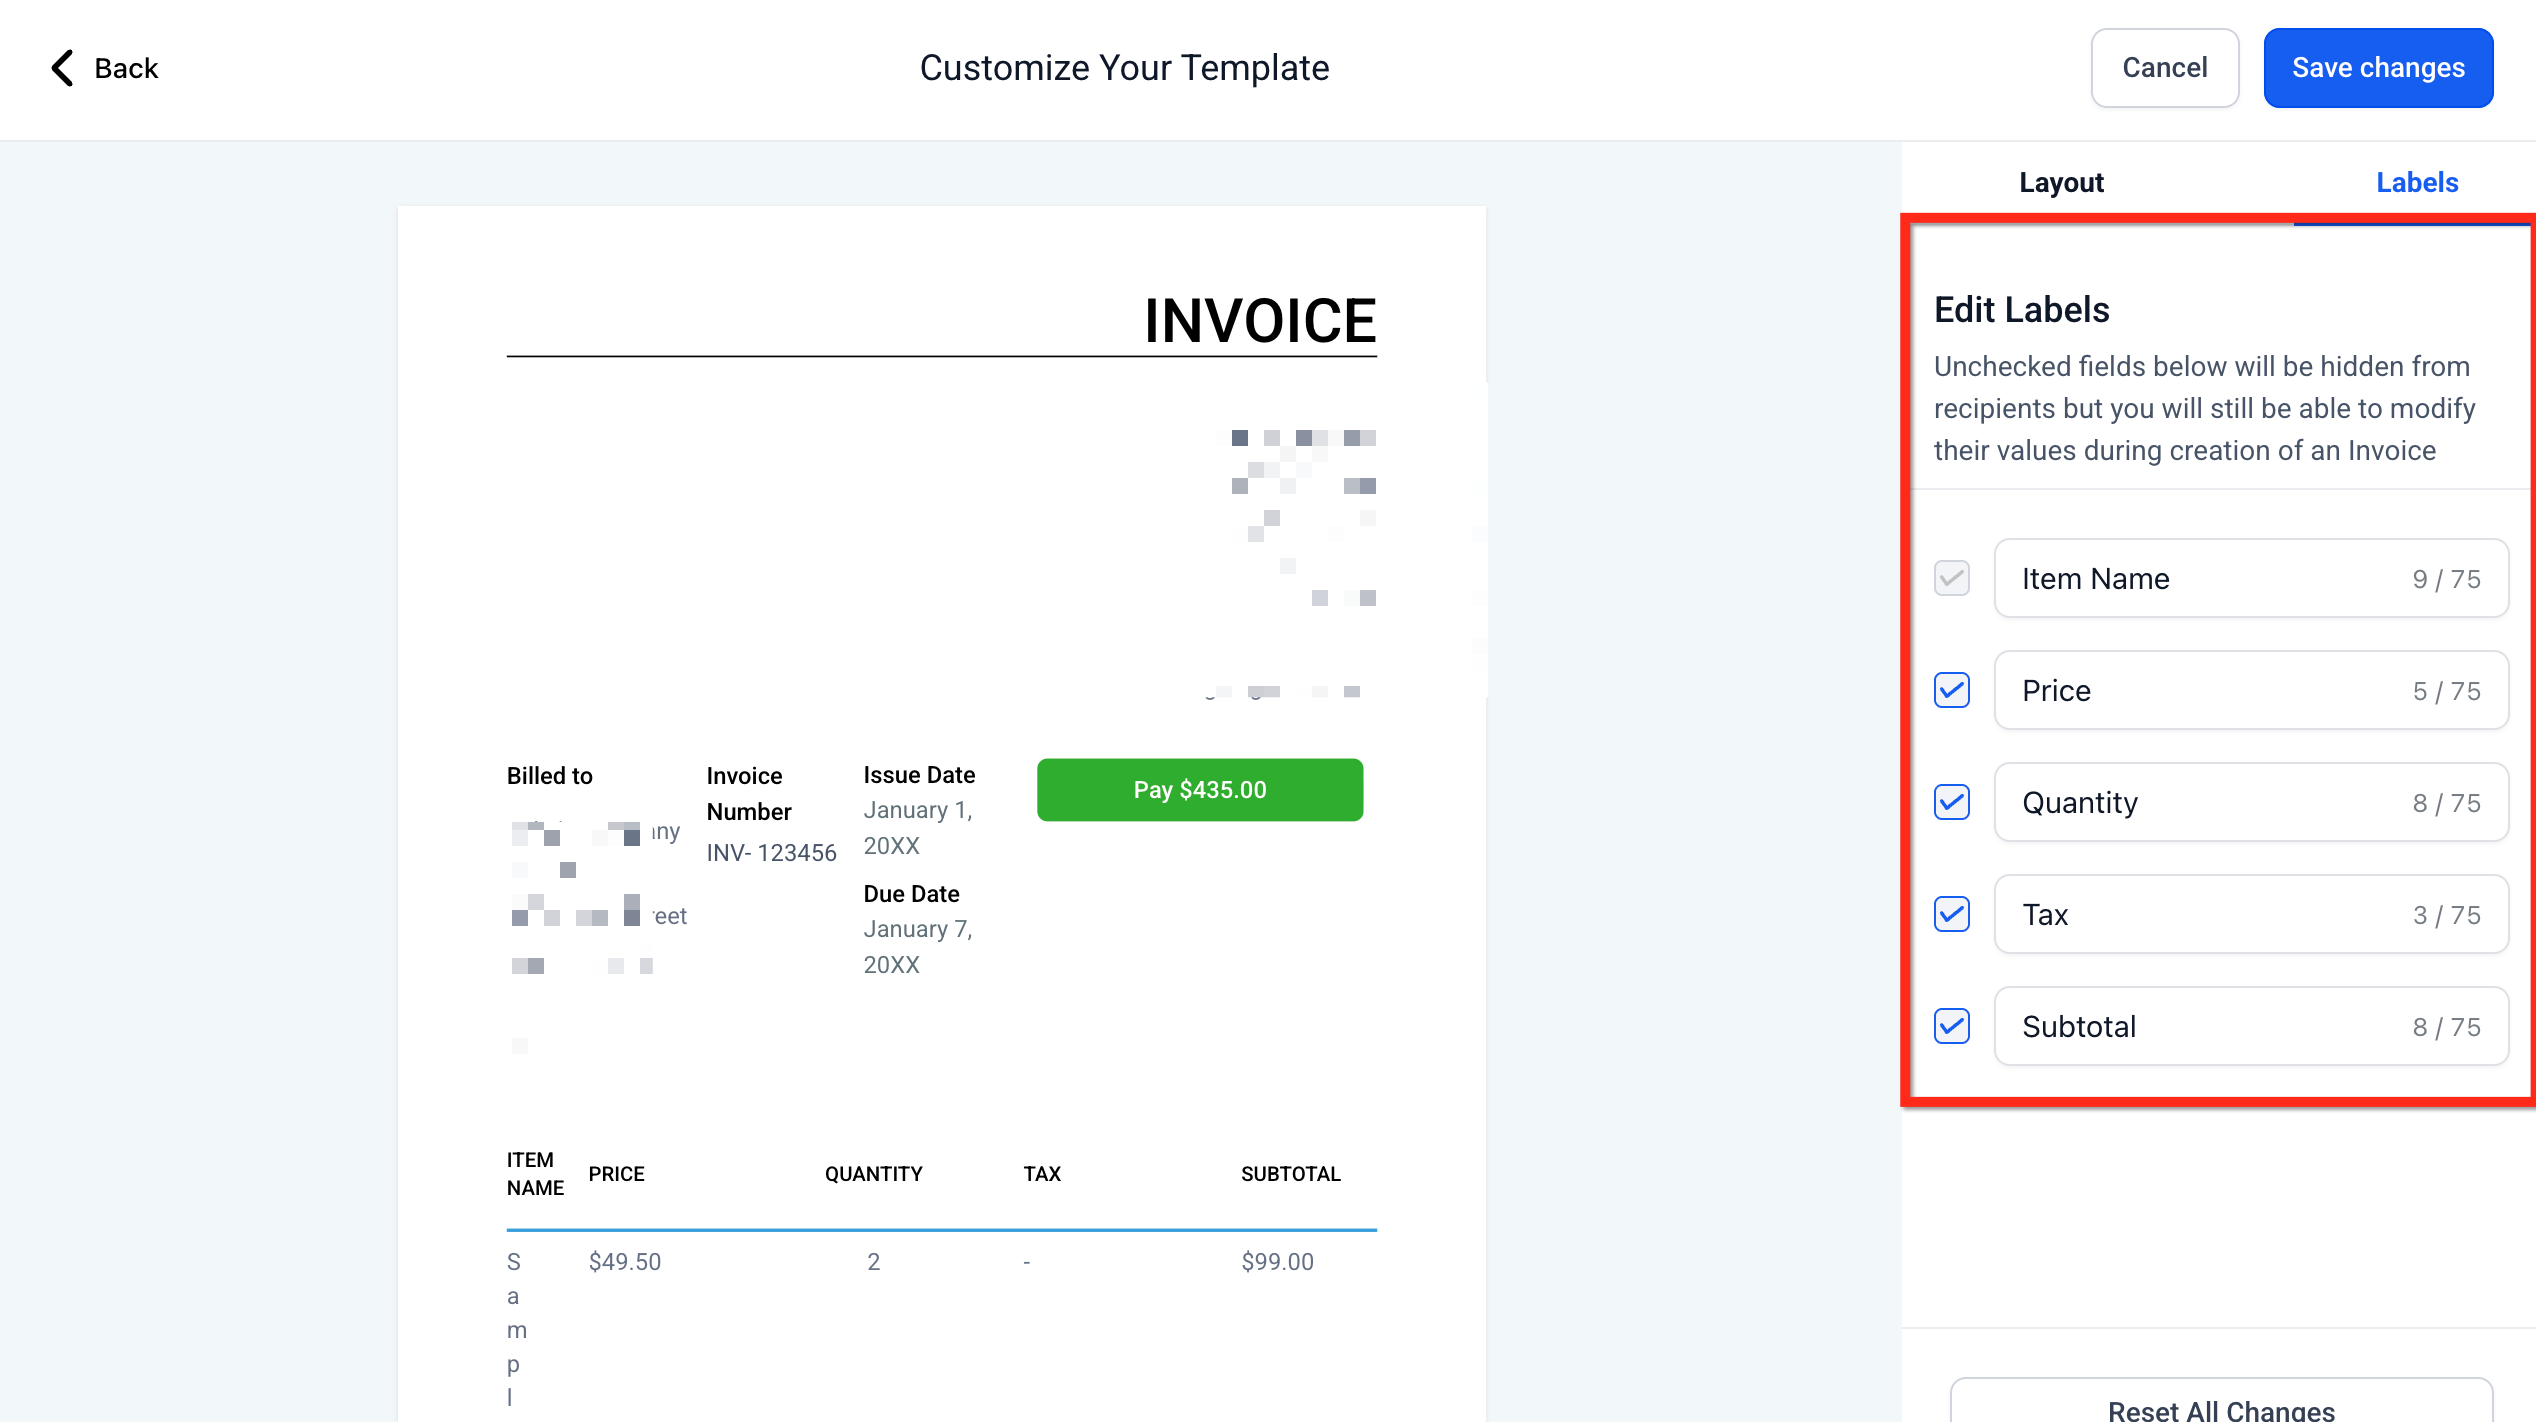
- Label character limit is up to 75 characters.
05How to set up and use invoice layout customization in HighLevel
Set up invoice layout customization
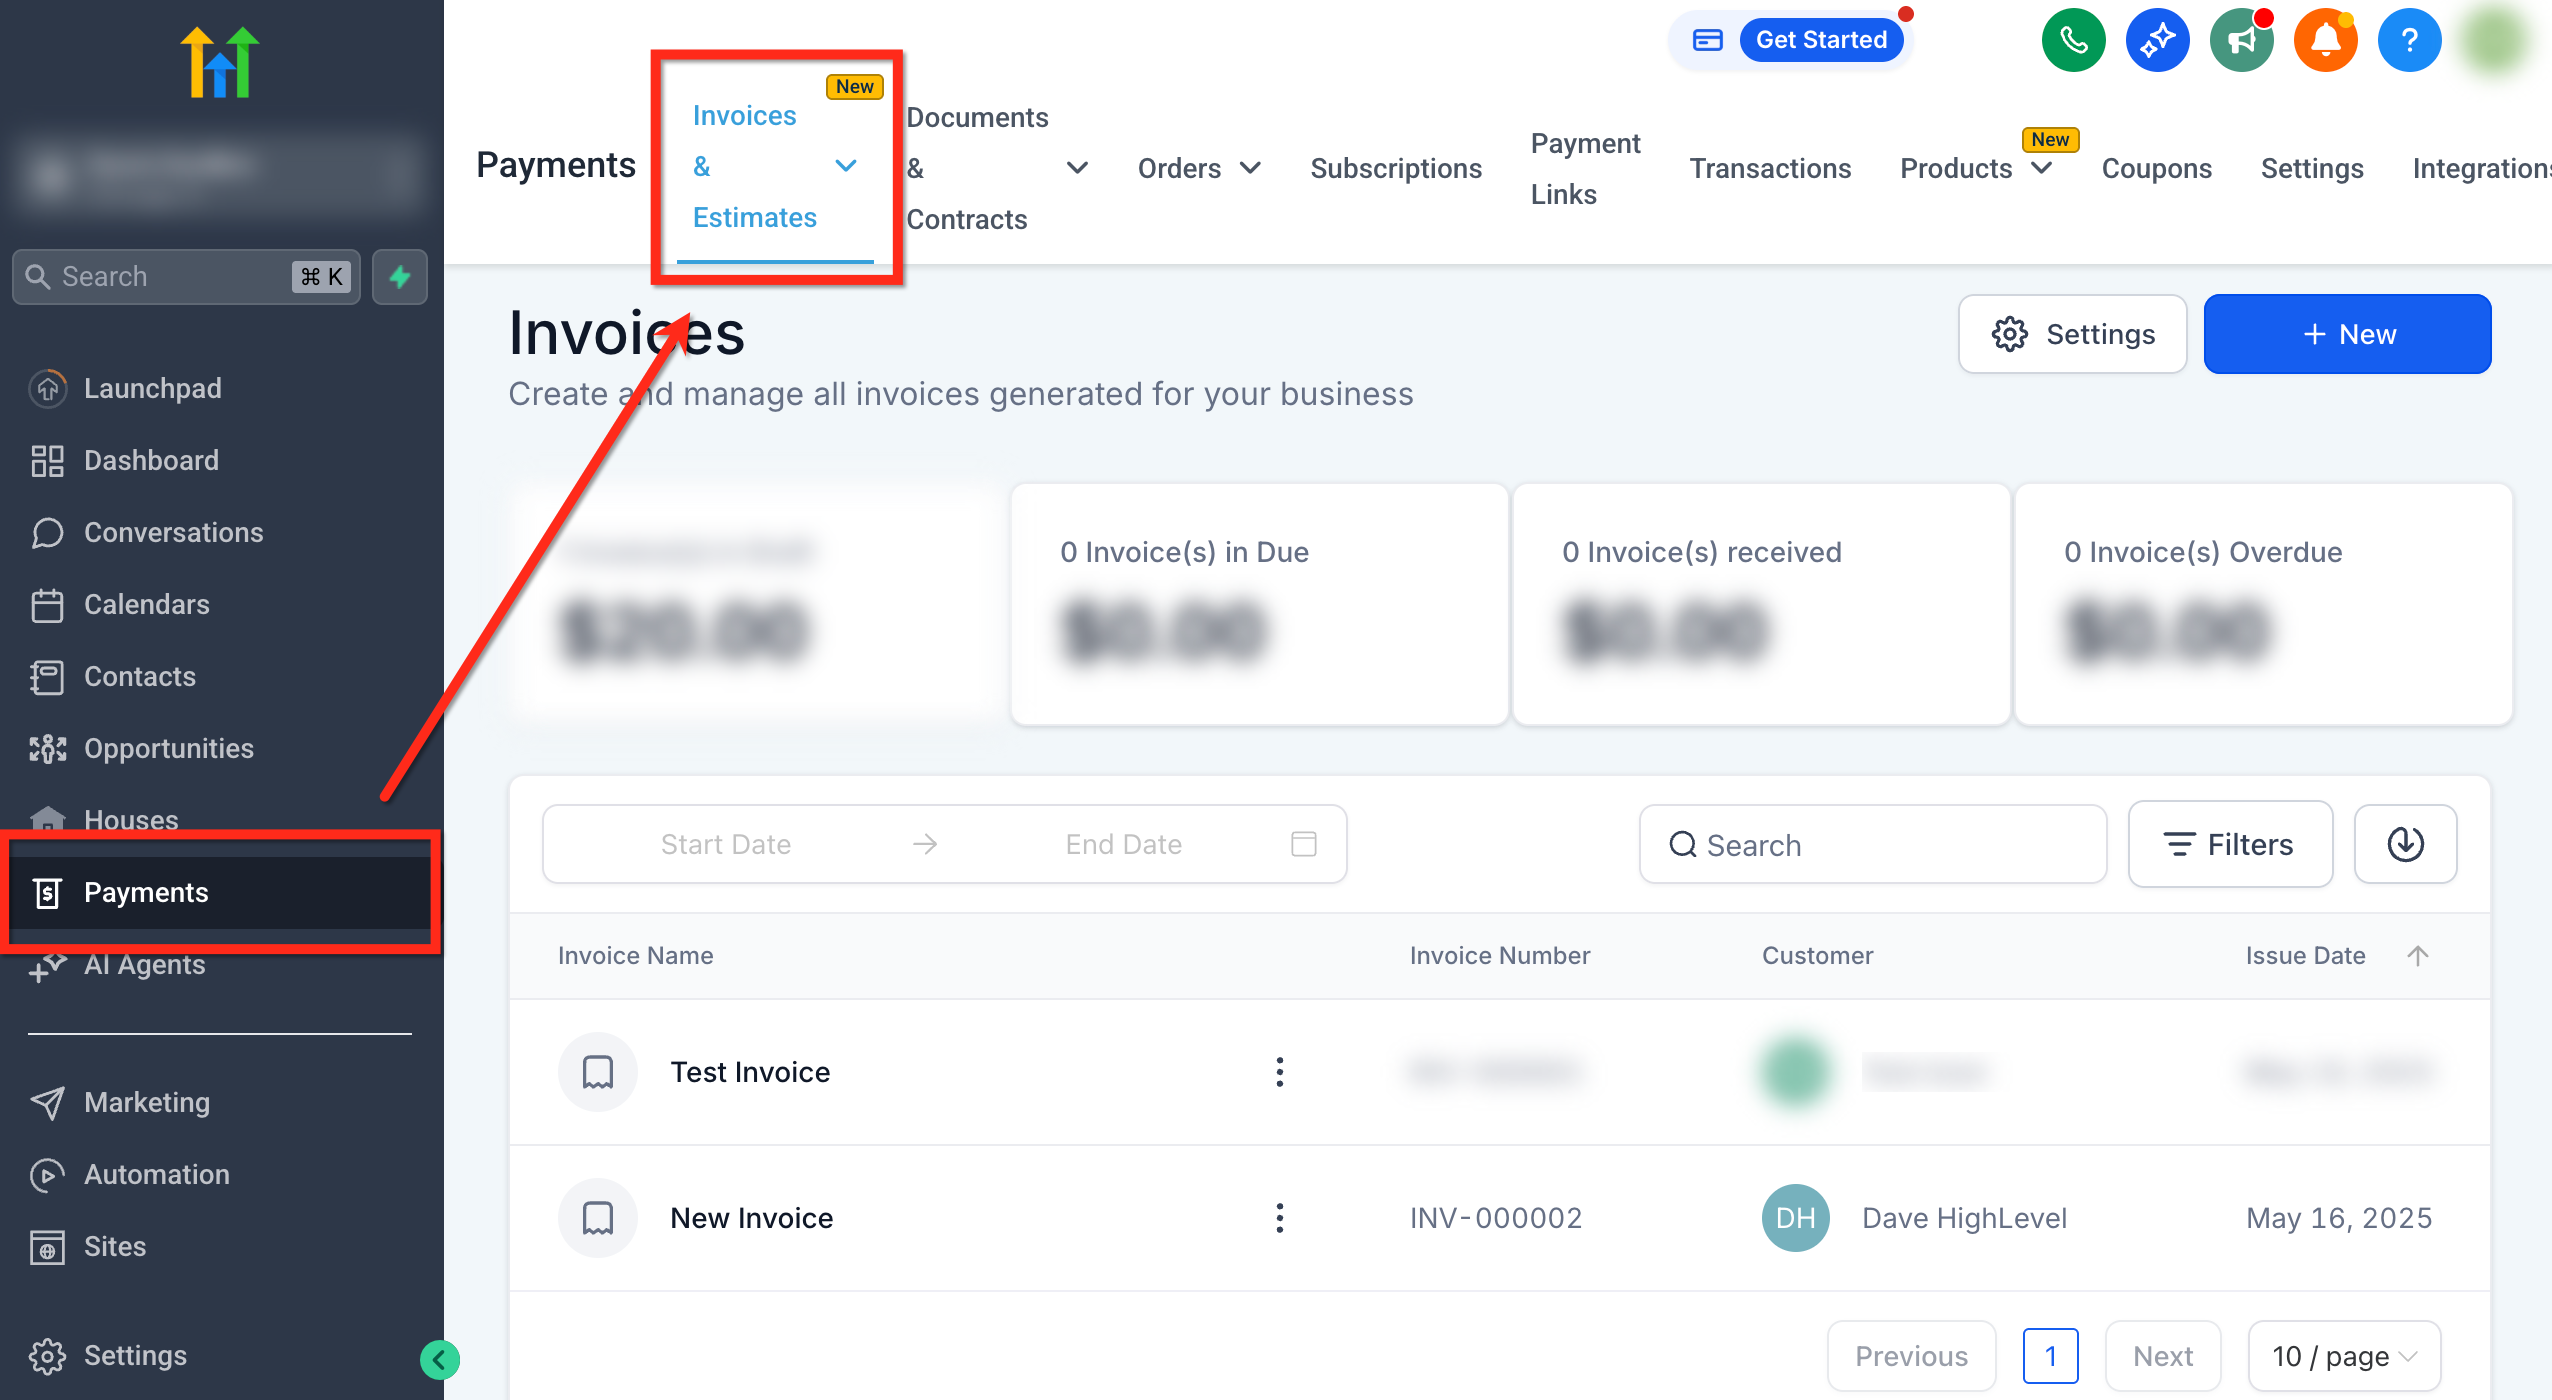
- From the subaccount dashboard, open Payments > Invoices & Estimates.
- Click the Settings button in the top right corner.
- In the secondary navigation, select Title, Terms and Layout.
- Scroll to the Invoice Layout section and press Customize Layout.
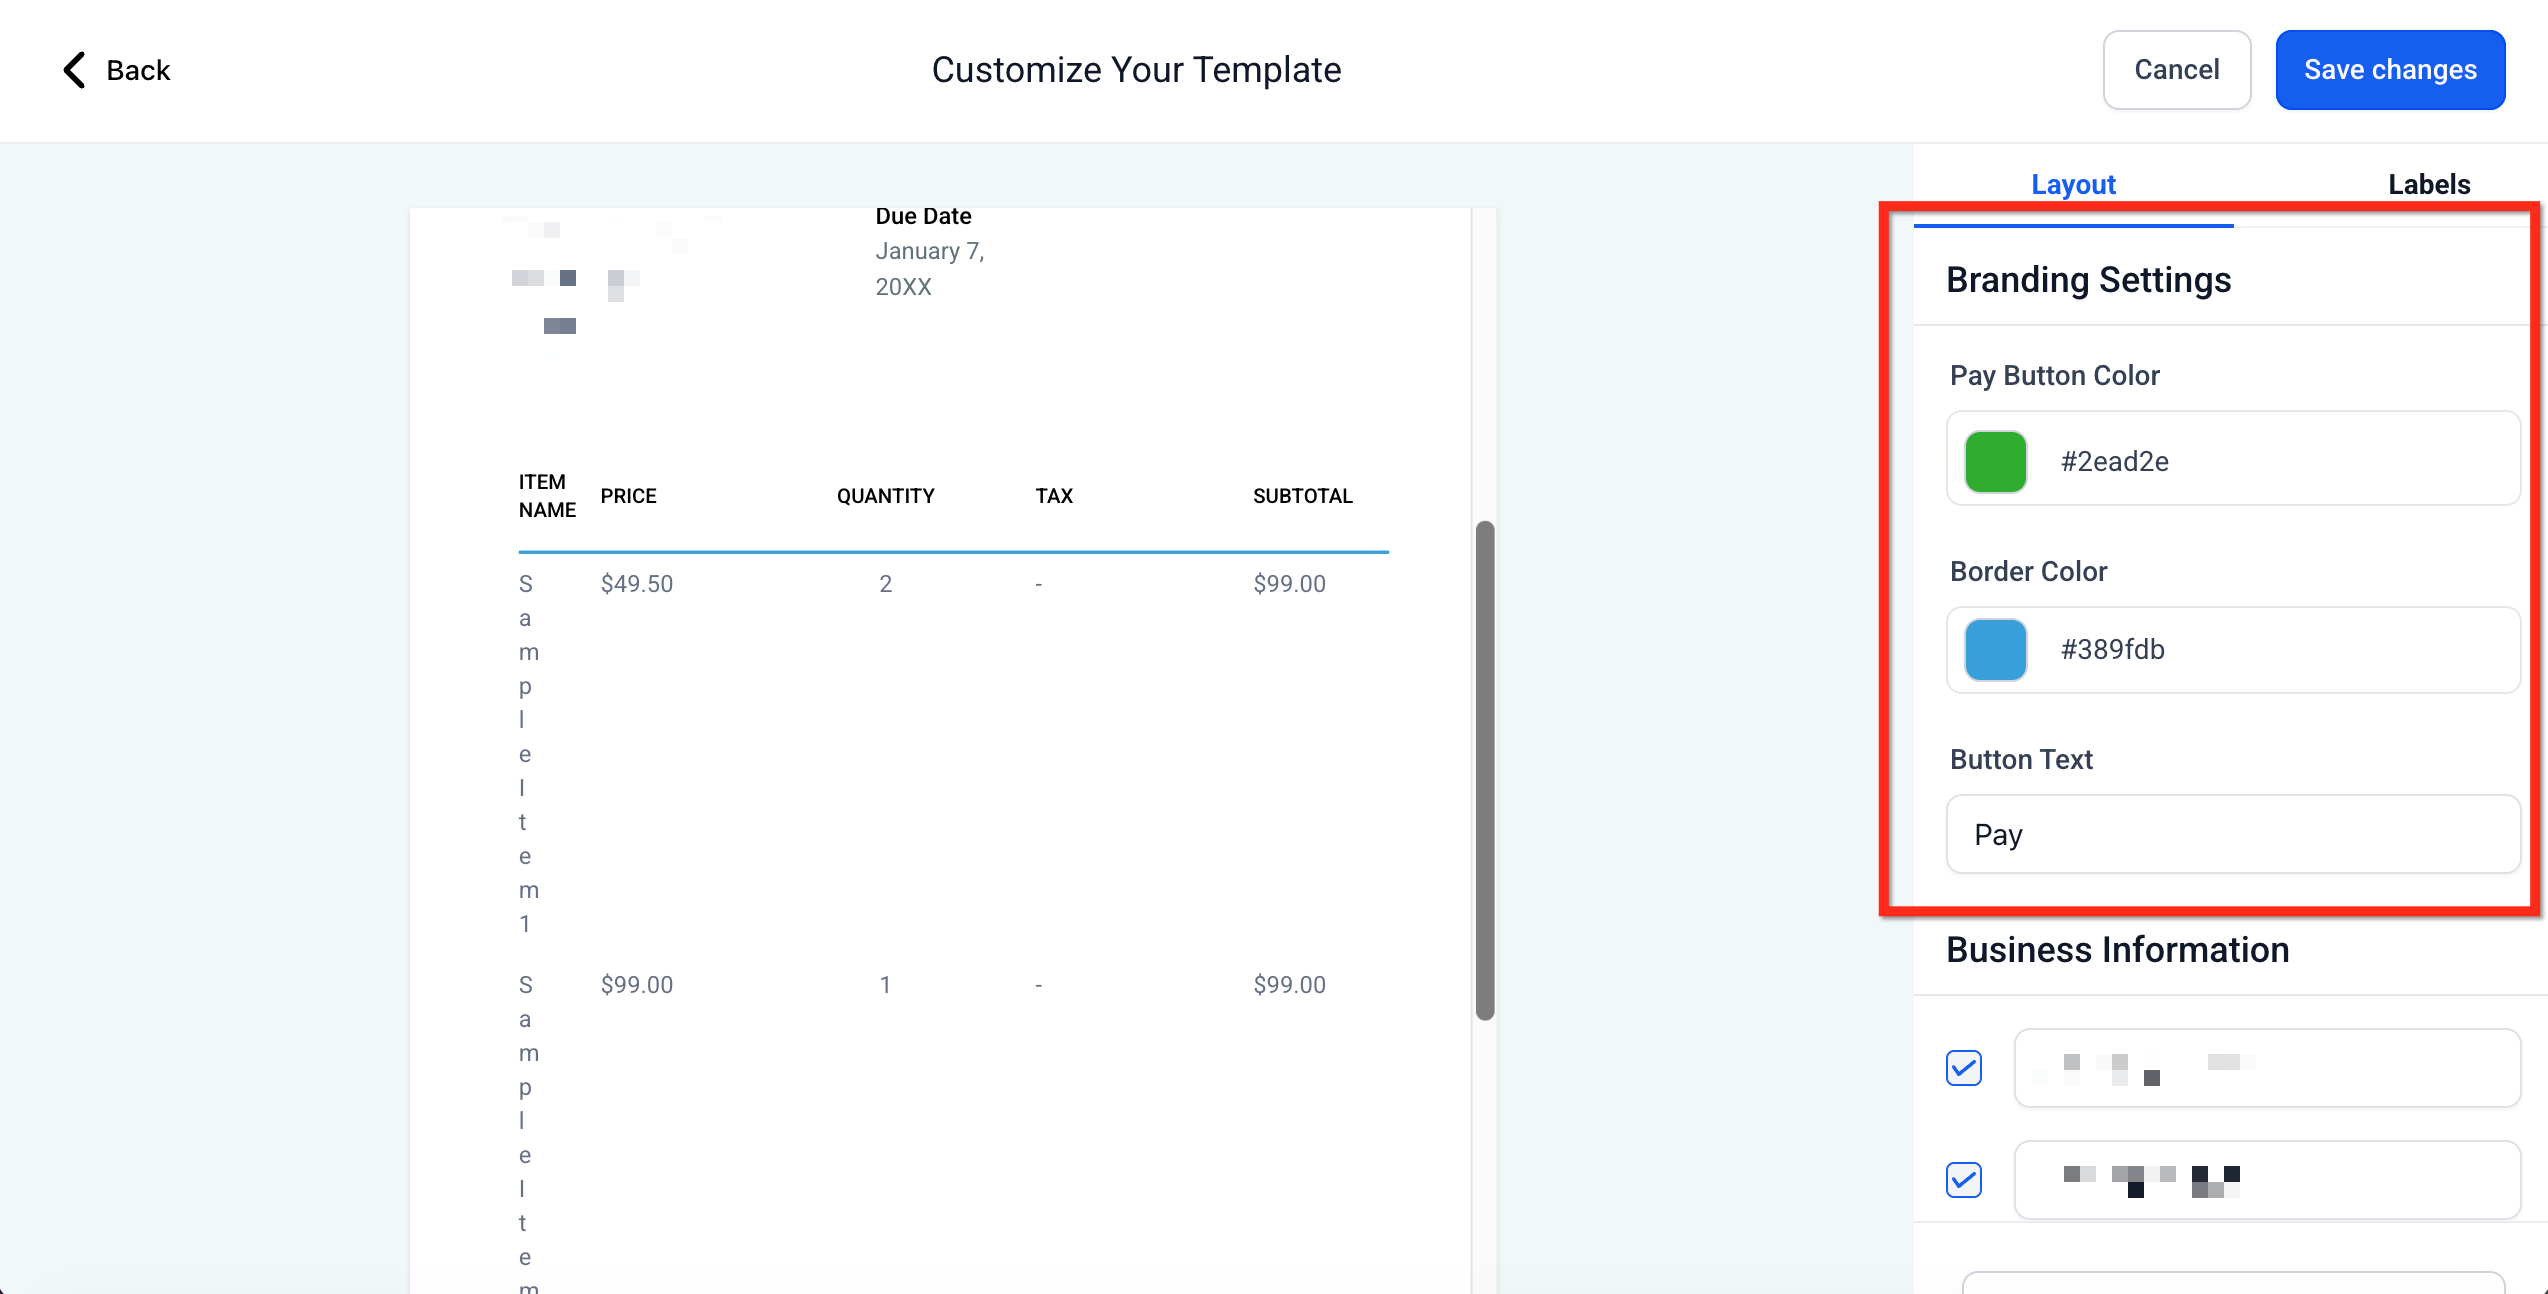
- In the Layout tab, open Branding Settings and pick a Pay Button color with the color picker.
- Within Branding Settings, choose a Border Color and edit the Button Text if needed.
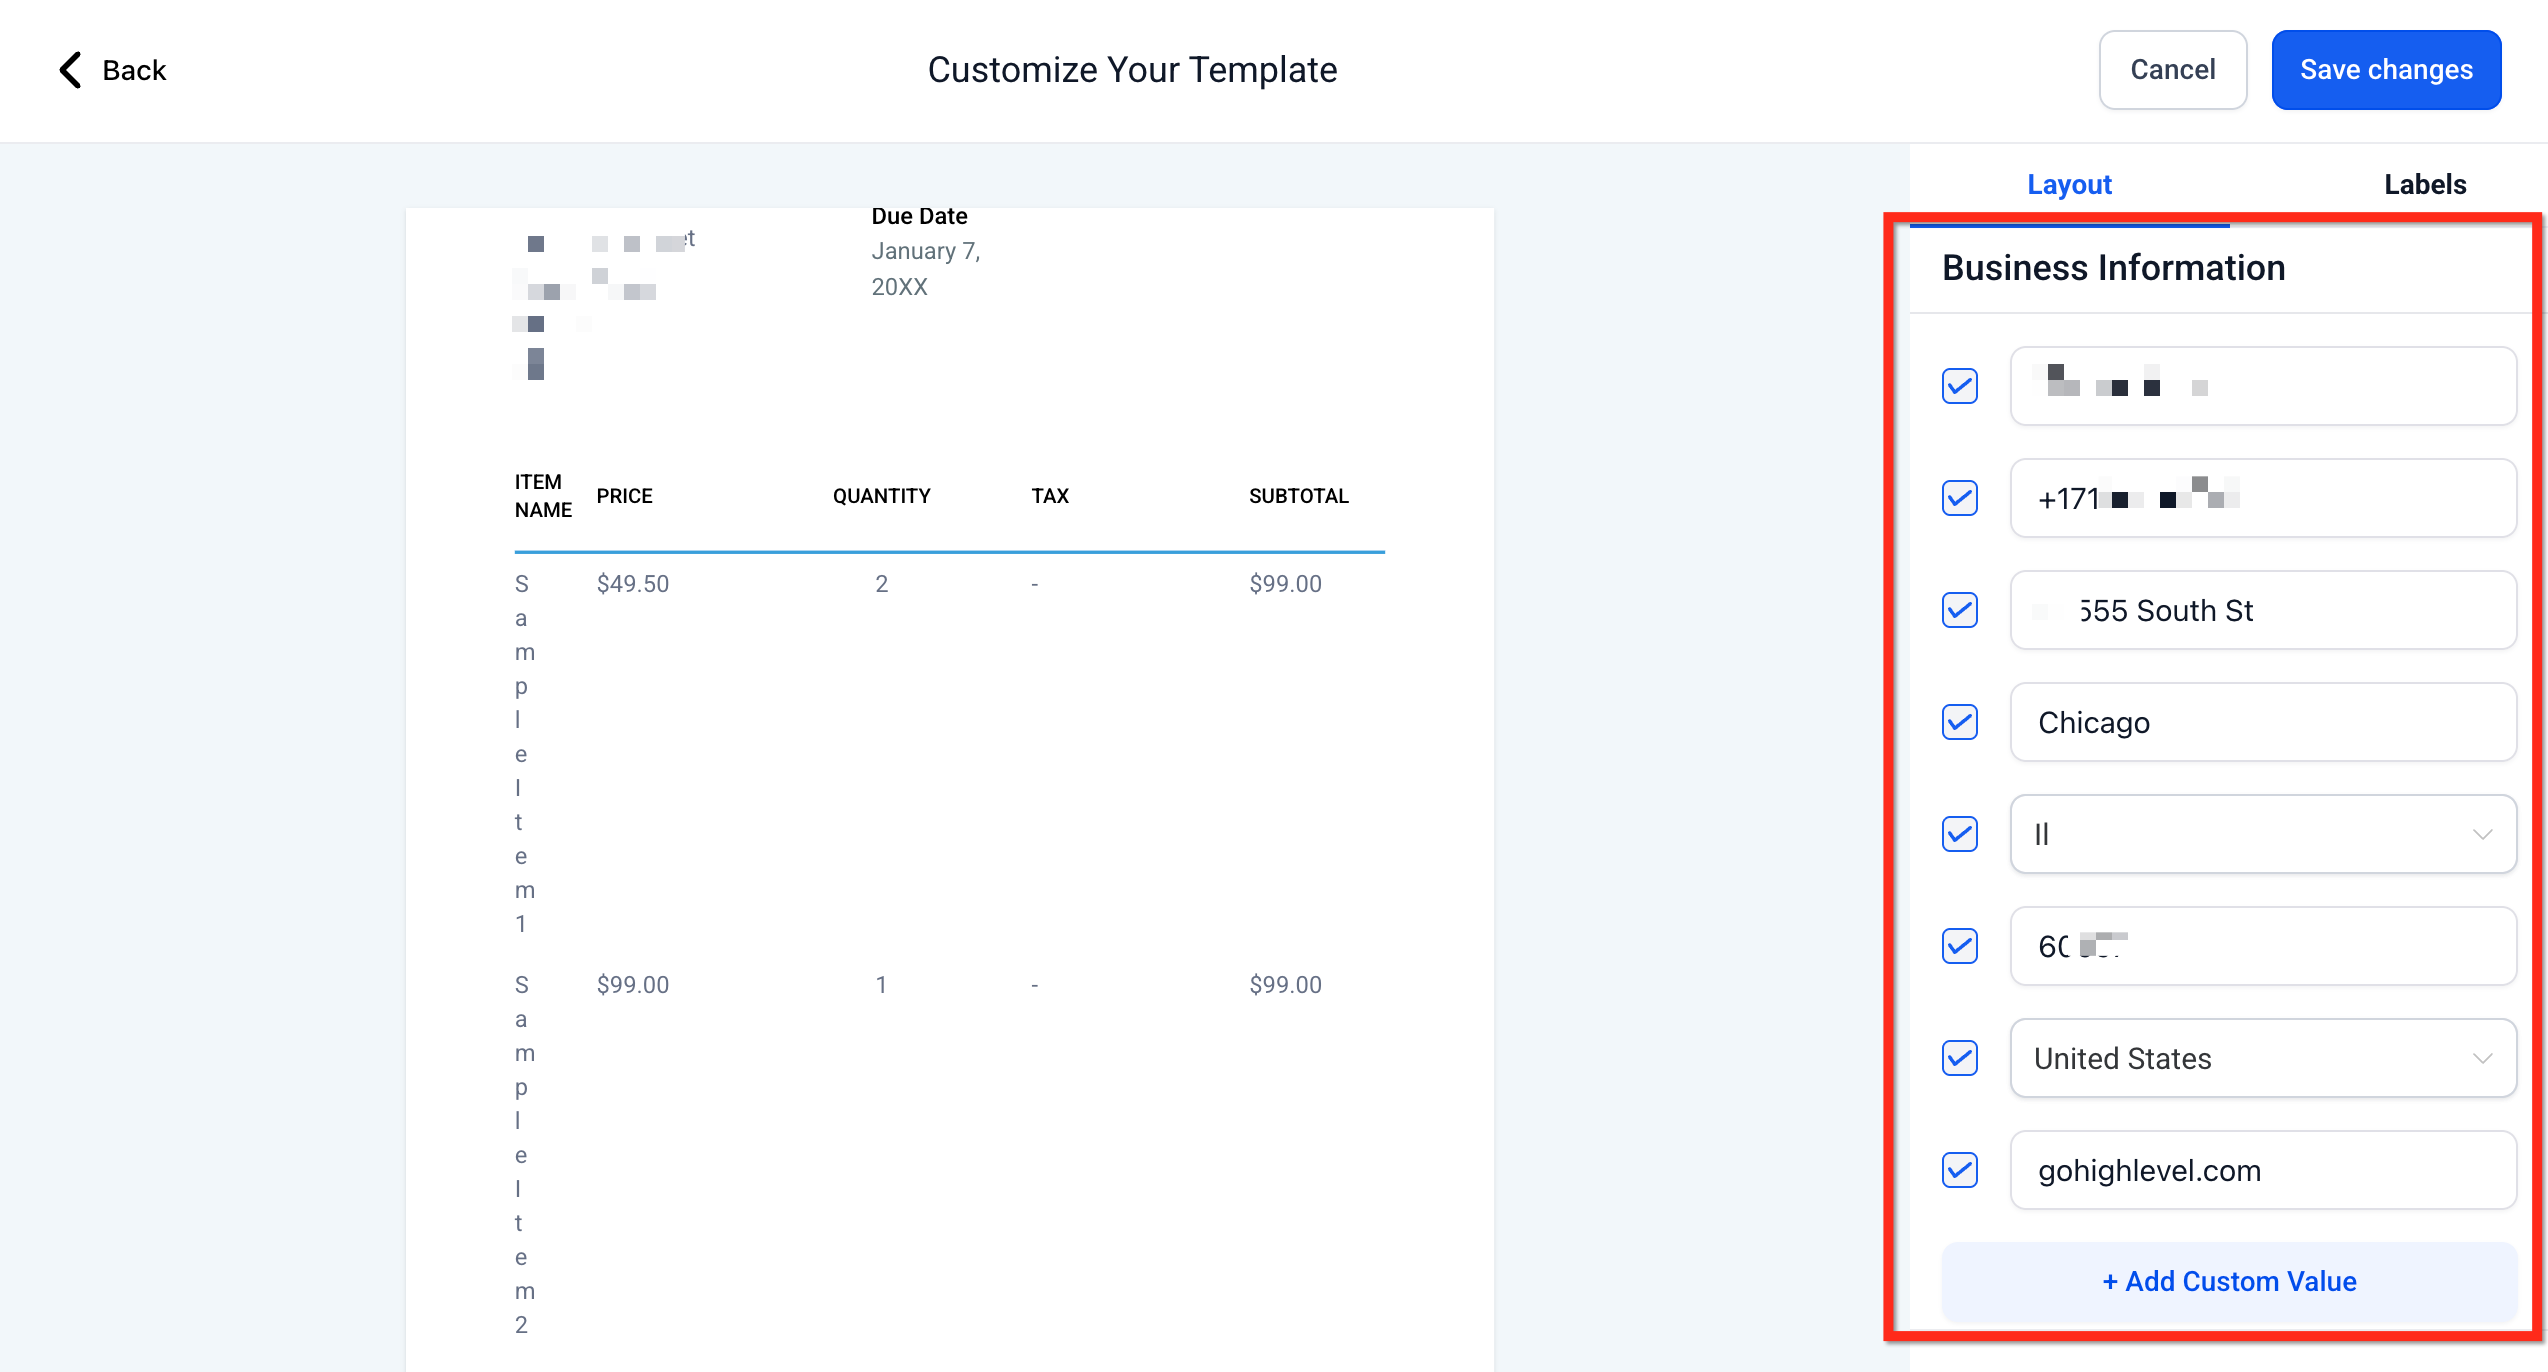
- Expand Business Information and check or uncheck the standard fields you want visible.
- Add up to three custom values under Business Information, then reorder or delete them as required.
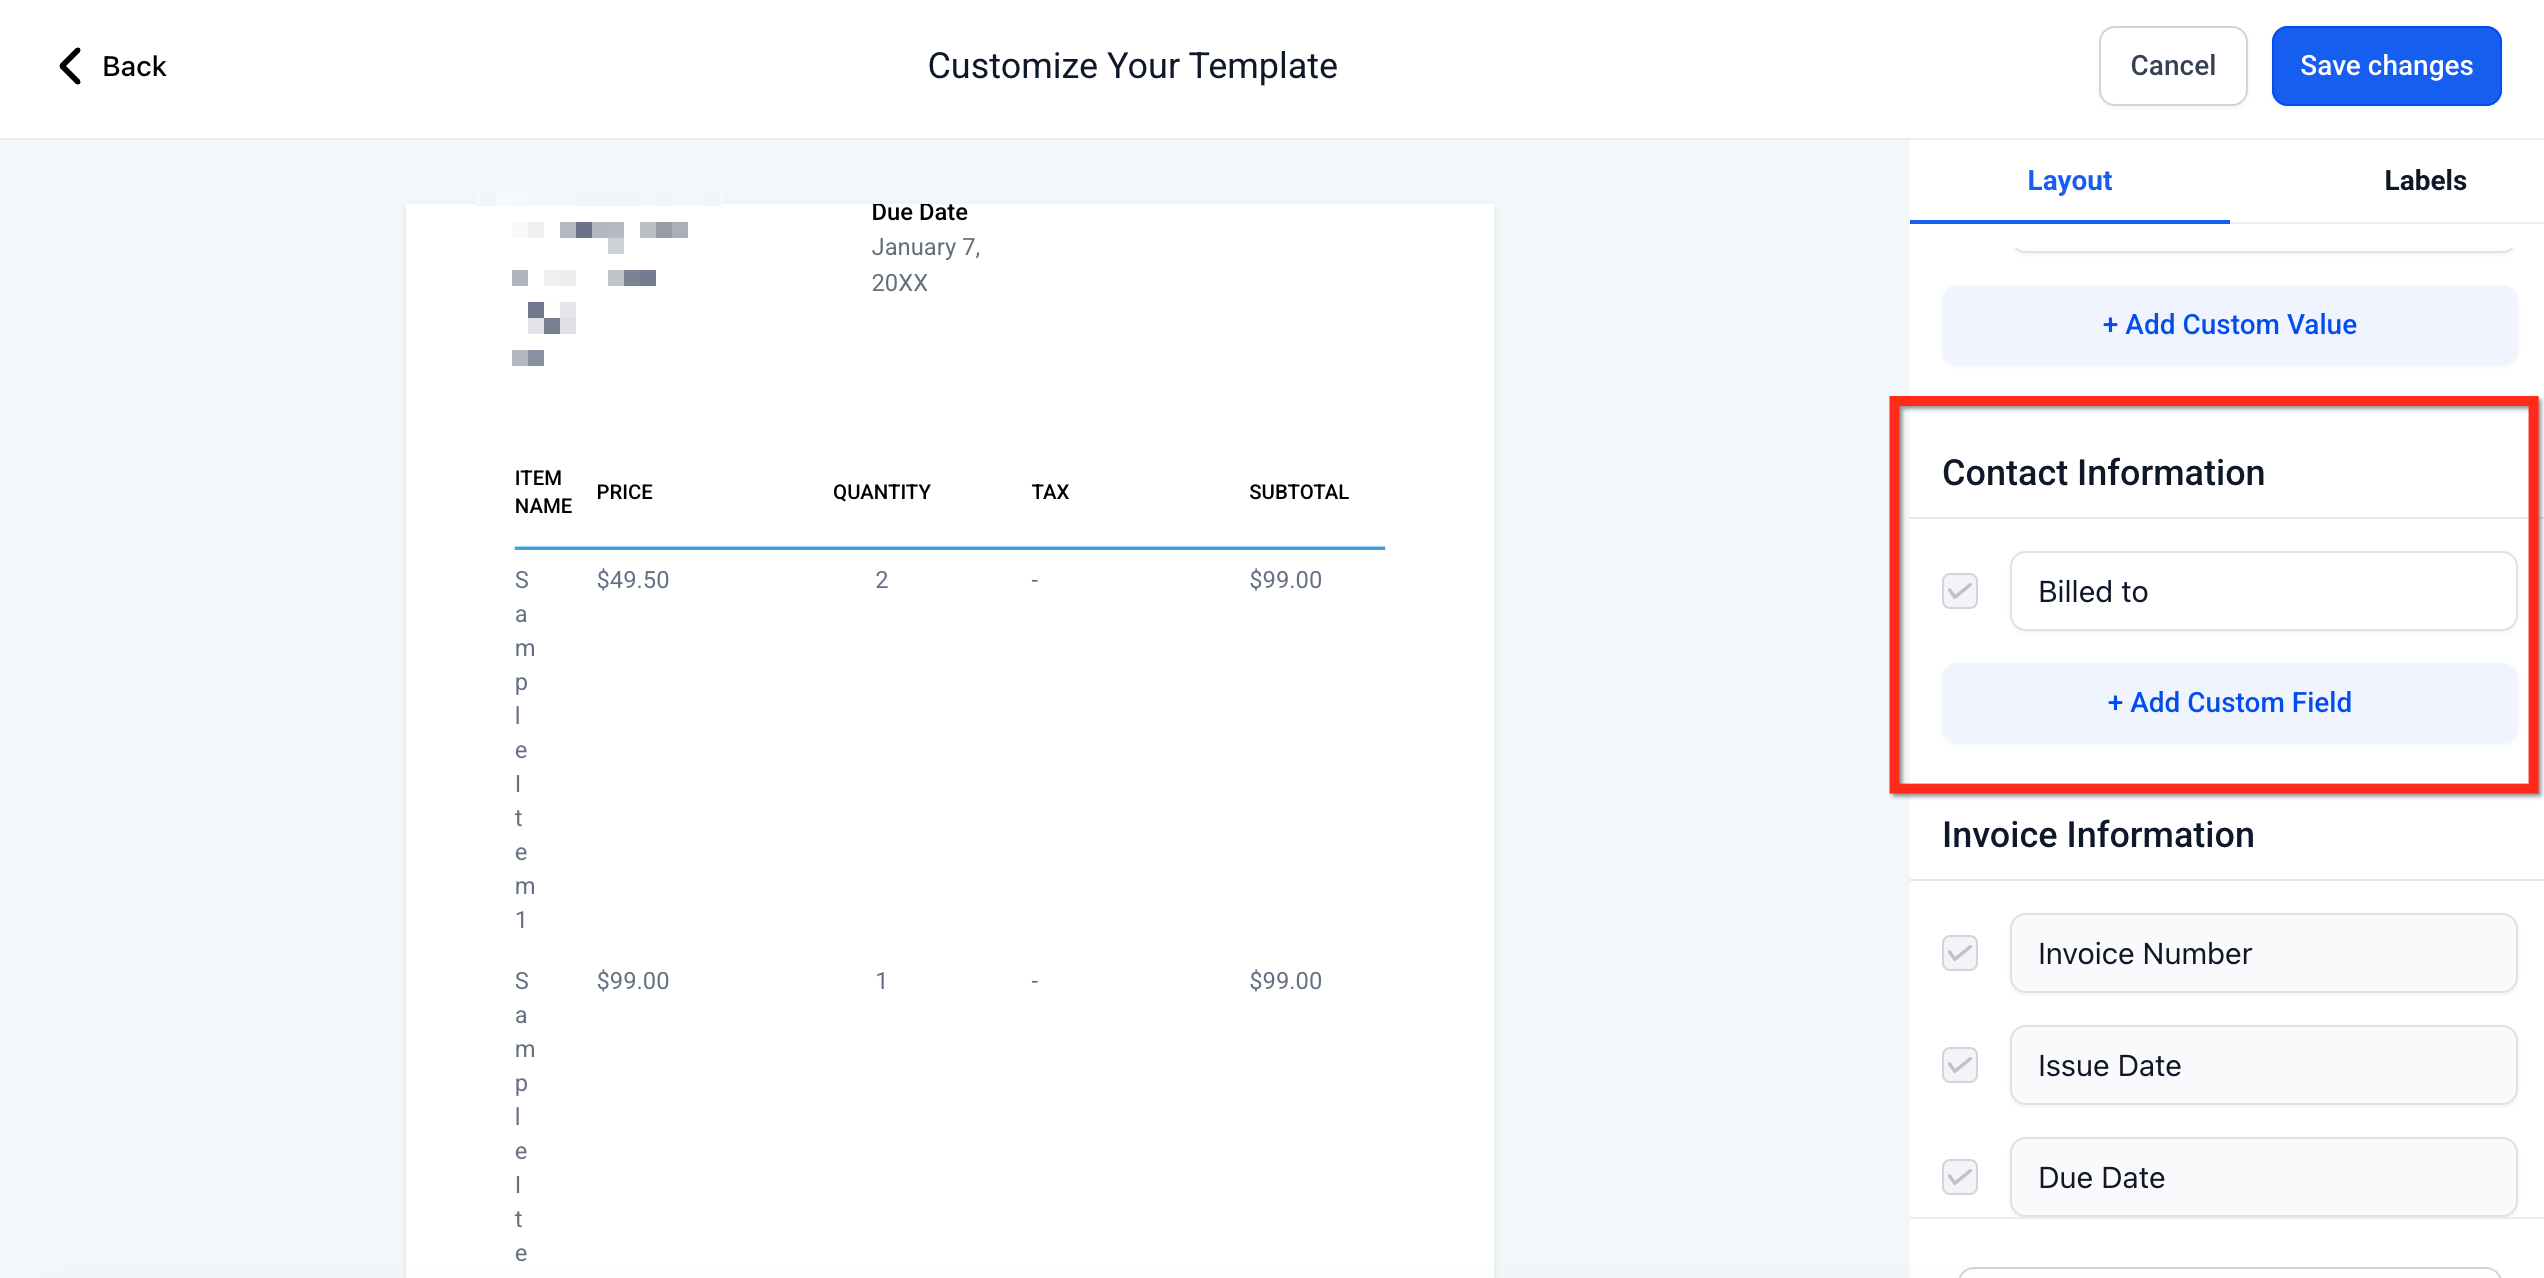
- Expand Contact Information, rename the section header and add any custom fields you need.
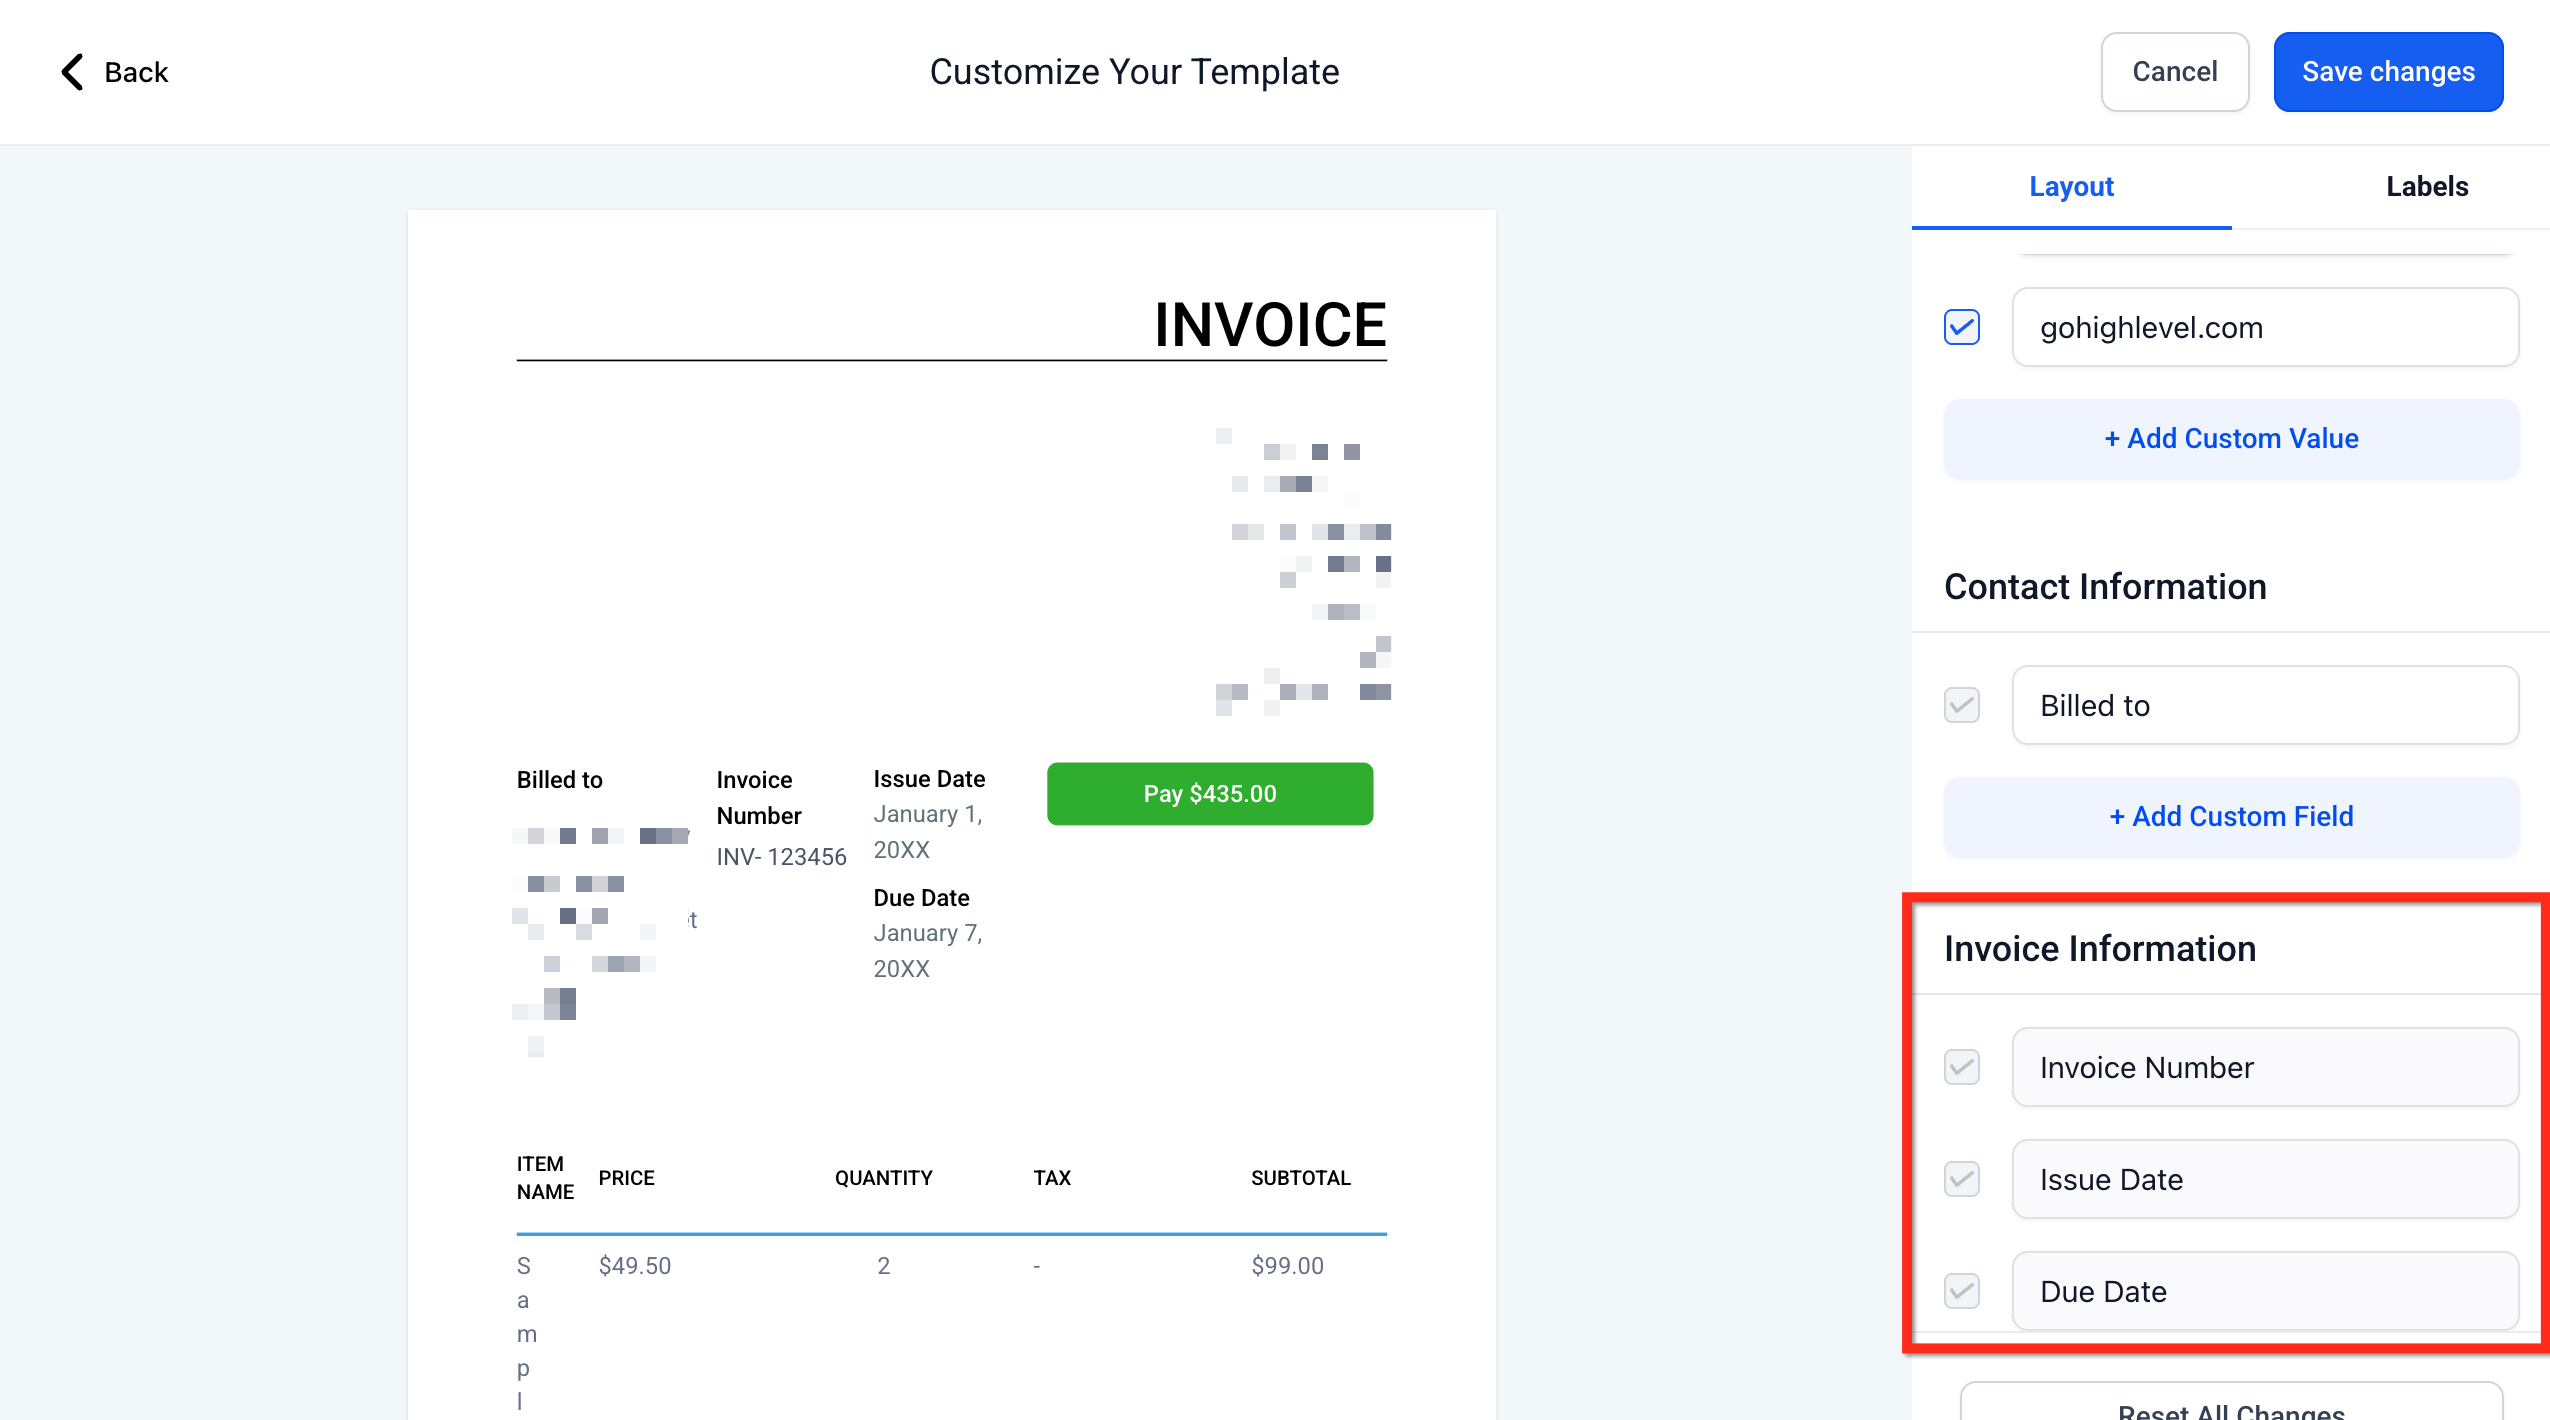
- Optionally expand Invoice Information and toggle visibility for Invoice Number, Issue Date and Due Date.
- Switch to the Labels tab, rename or hide line item columns, review the preview, and click Save changes.
- If you need to start over, click Reset All Changes to restore defaults.
06What it looks like in HighLevel
07Settings that matter
- Pay Button Color. Sets the background color of the payment button on the invoice.
- Border Color. Defines the color of the button border surrounding the payment button.
- Button Text. Changes the label displayed on the payment button, such as from Pay to Donate.
- Business Information fields. Controls which standard fields like Company Name, Phone, Address, and Tax IDs are shown on the invoice.
- Custom values. Allows up to three additional business specific values to appear in the business information block.
- Contact Information header. Renames the recipient section title to better describe the content, for example changing Billed to Shipping details.
- Labels. Renames or hides the column headers for line items, such as changing Item Name to Product Name.
08Things to know before you rely on it
- You can add a maximum of three custom values in the Business Information section.
- Line item column headers are limited to 75 characters to avoid wrapping.
- Layout changes apply only to invoices created after the save; previously sent PDFs do not update automatically.
- Hiding a label removes it from the recipient view but the values can still be entered when creating an invoice.
09How it connects to the rest of HighLevel
- Create and send a one time invoice in HighLevel One time invoice guide
- Invoice workflow: create, edit, tax, discount, send Invoice workflow
- Common scenarios and tips for payments and invoices Payments tips
Michael's take

The pay button colors, border, and text can be changed, and renaming sections and adding Custom Fields also affect the invoice appearance. When a field is hidden, it disappears for the client but remains editable for your team, allowing you to keep necessary data without clutter.
If I were setting this up, I would begin with mapping the exact terms my clients use. For example changing “Billed to” to “Shipping details” for a product business. Then I’d add the three custom business values that satisfy regional compliance and lock in the brand colors. A quick preview confirms everything looks right before I save.