
01Who this is for
- Agency owners who need to bill clients for project work can generate a detailed invoice in one place.
- Service based businesses such as coaches or consultants can add a client, list hours or fees, and send a professional invoice quickly.
- Product sellers that require a single purchase invoice can combine items, apply taxes, and deliver the document electronically.
02Invoices, explained
The invoice feature lives under Payments > Invoices & Estimates. From there you can start a new one time invoice, choose a client, set dates, and add line items. The editor shows a left hand panel for data entry and a right side preview that shows layout structure but not the final customer view.
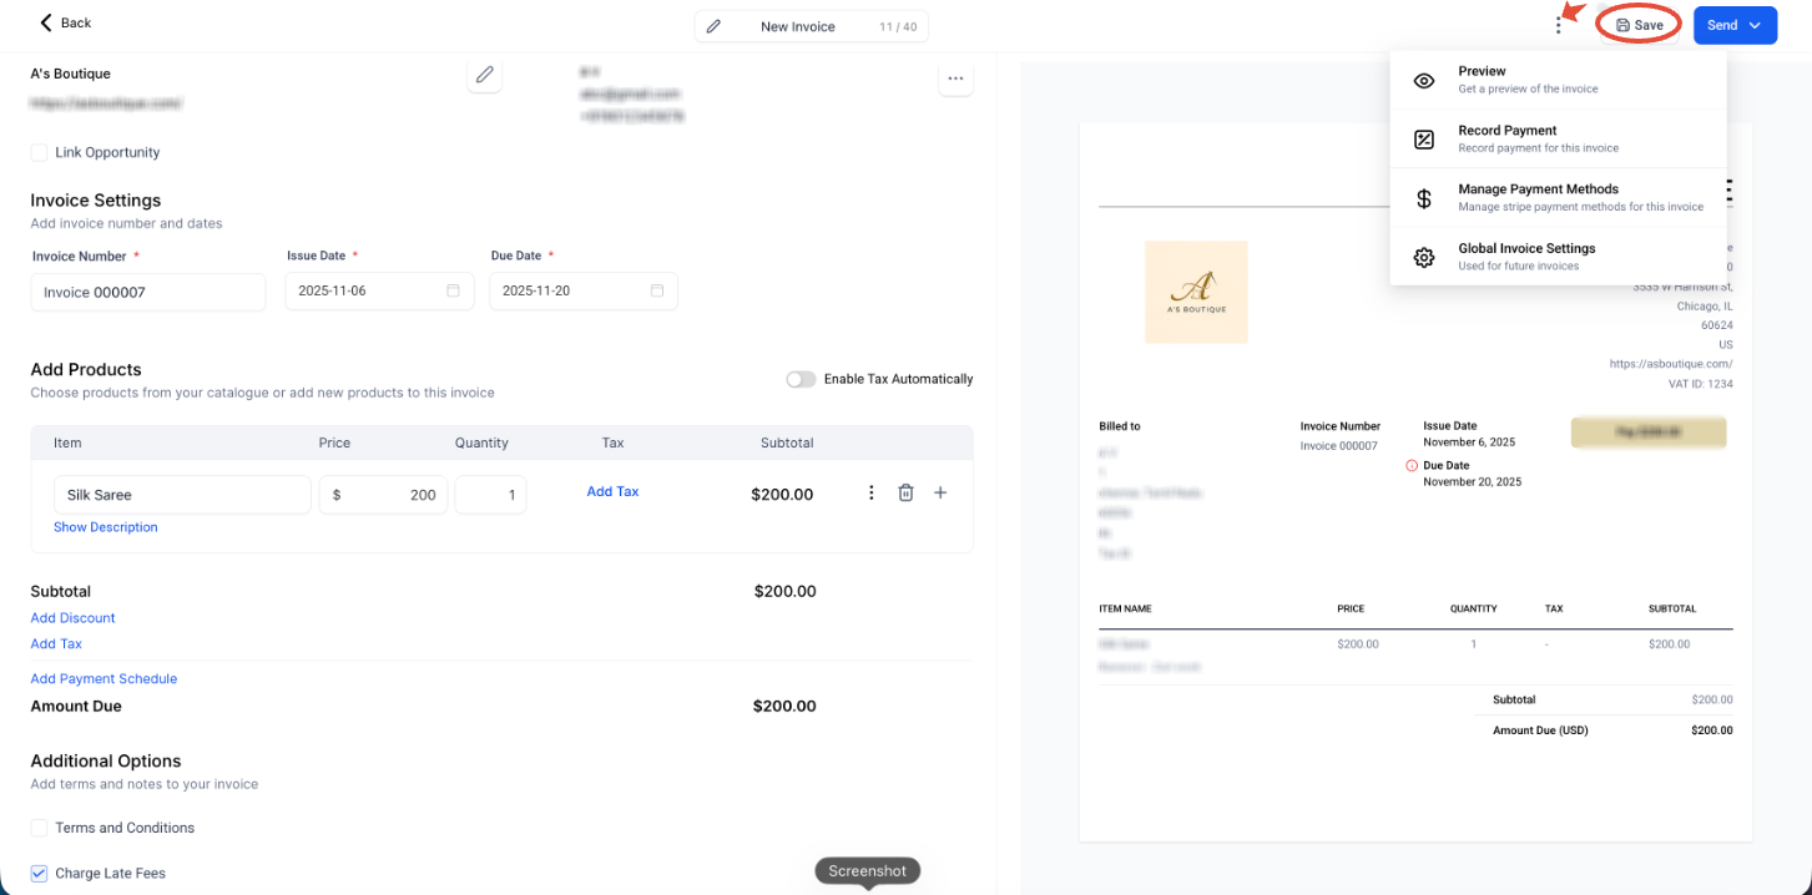
When you save, the invoice is stored as a draft. Using the three dot menu you can open a dedicated Preview page that renders the exact customer facing document. After confirming the layout, the Send button delivers the invoice via the delivery methods configured for that client, such as email, text, or both.
Invoice options let you attach discounts, taxes, payment schedules, late fees, processing fees, tips, terms, and file attachments. Availability of these options depends on your payment provider and the invoice payment settings you have enabled.
03How businesses use invoices
- Digital marketing agency. The agency selects a client, adds the monthly retainer as a product, applies a 10 % discount for early payment, and schedules the invoice for delivery. The invoice is previewed for correct branding, then sent by email to the client.
- Personal trainer. The trainer creates a one time invoice for a new client’s onboarding fee, adds the training package product, attaches a liability waiver file, and includes tax. After saving and previewing, the trainer sends the invoice via text message.
- SaaS startup. The startup builds an invoice for a single sale license, adds the subscription product, applies a processing fee, and sets a payment schedule with a 50 % upfront installment. The invoice is previewed and then emailed to the buyer.
04Before you start
- Use a one time invoice only for a single billing event.
- Configure any needed invoice defaults, such as partial payments or late fees, before creating the invoice.
- Ensure a payment provider and supported electronic payment methods are connected to the subaccount if online payment is required.
05How to set up and use invoices in HighLevel
Start a new invoice
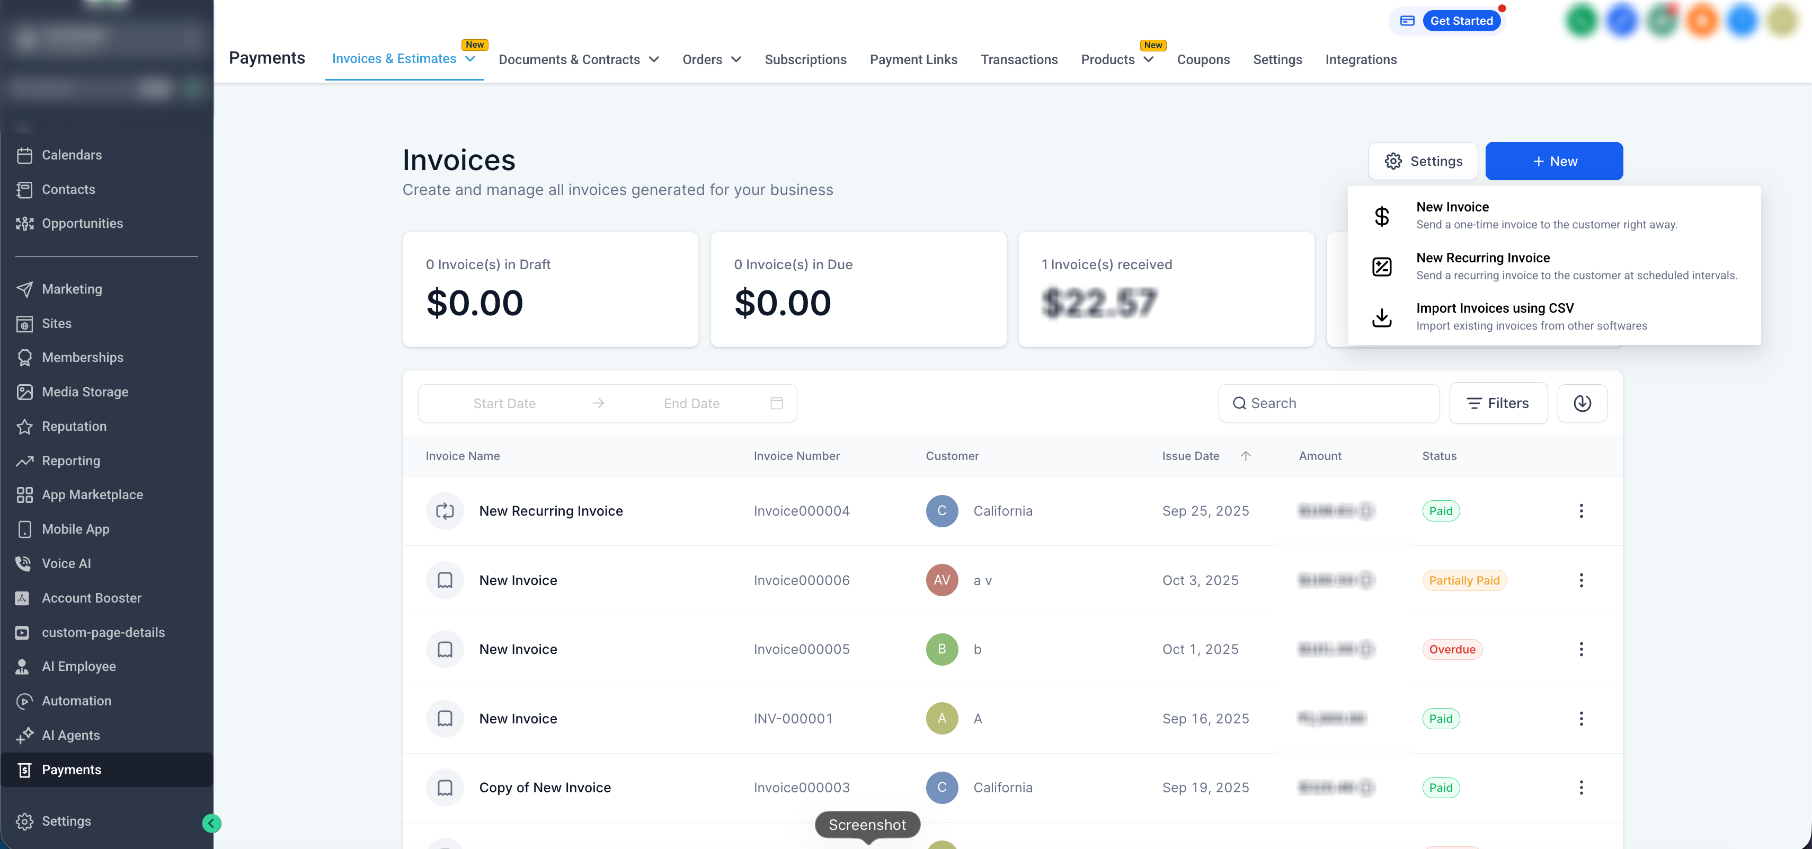
- From the Subaccount view, select Payments.
- Open Invoices & Estimates.
- Select All Invoices.
- Click + New.
- Select New Invoice.
Add the client and invoice details
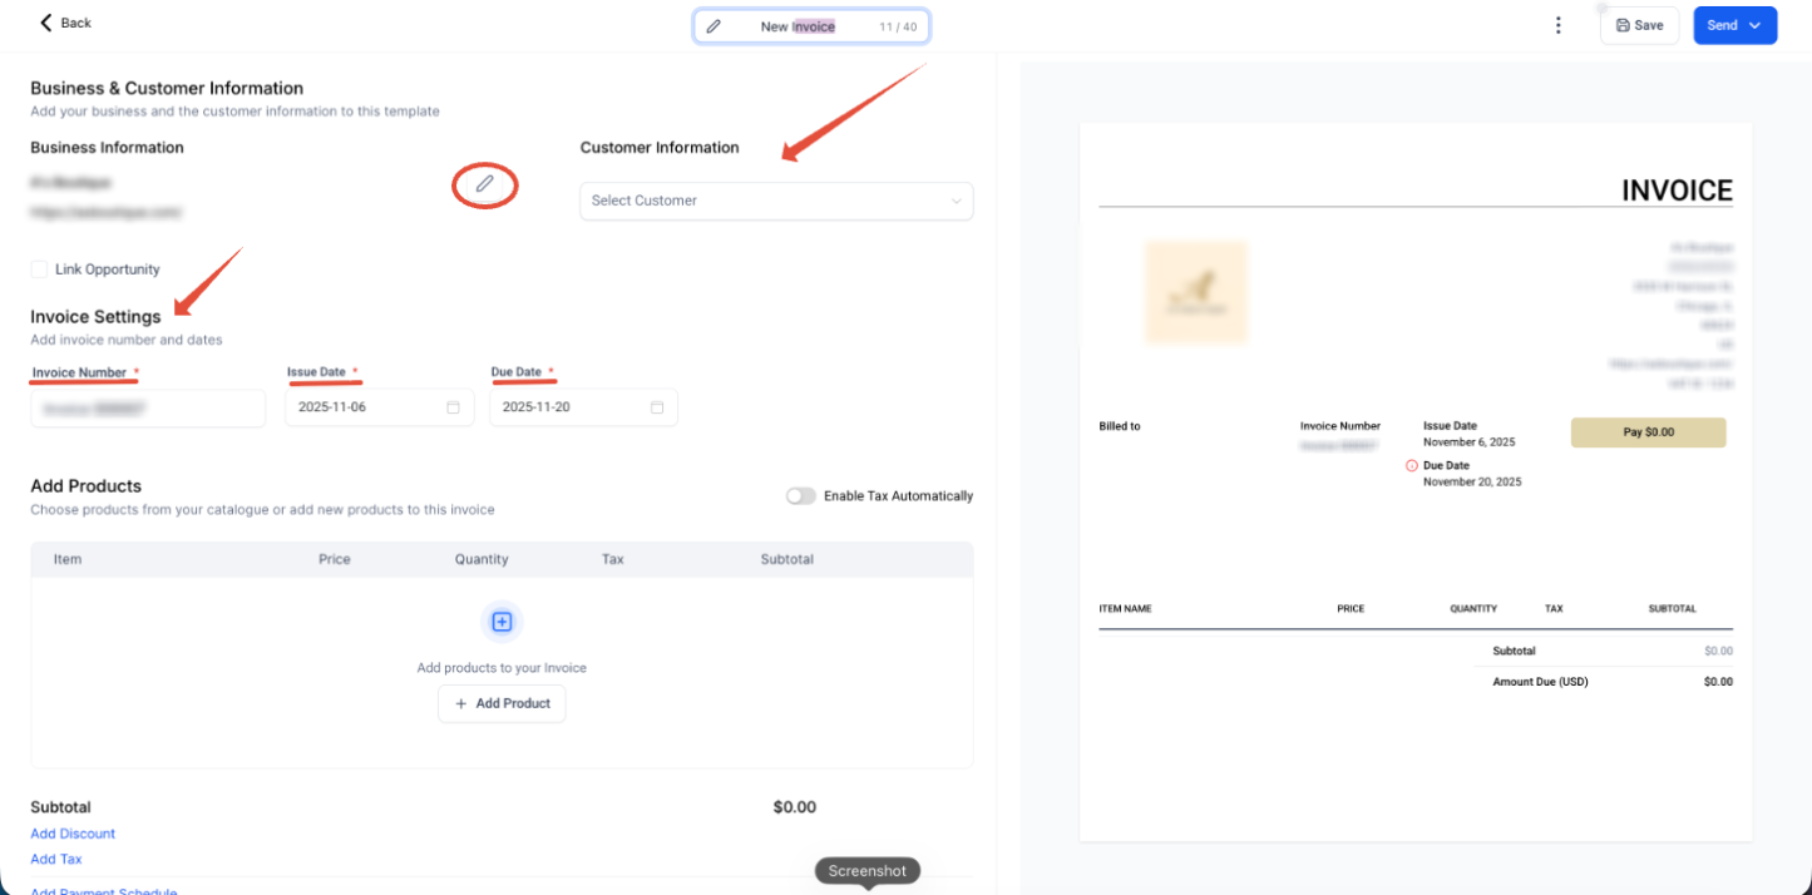
- Select the customer who should receive the invoice.
- Review or edit the Invoice Number.
- Review the Issue Date.
- Review the Due Date.
- Edit the business information when needed.
- Save any business information changes before continuing.
Add products or services
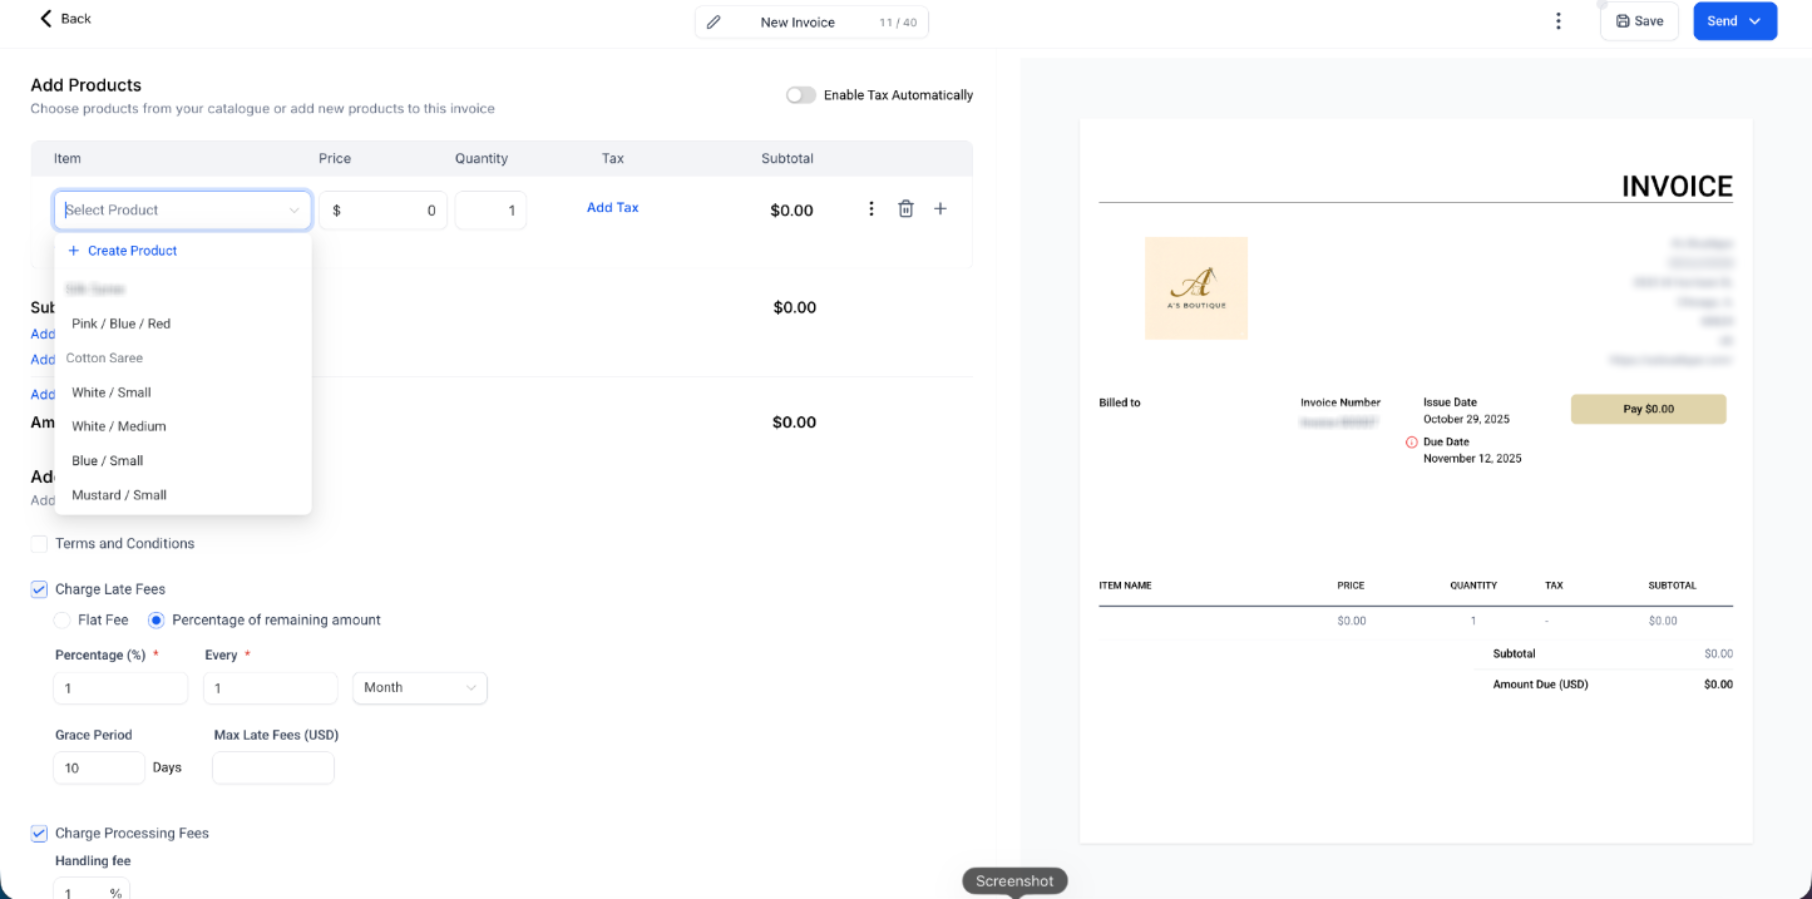
- In the Add Products area, click Add Product or the item selector.
- Choose an existing product from the list.
- If the product does not exist, select + Create Product and enter the required product information.
- Add the item to the invoice.
- Update the price or quantity on the invoice line when needed.
Configure invoice options
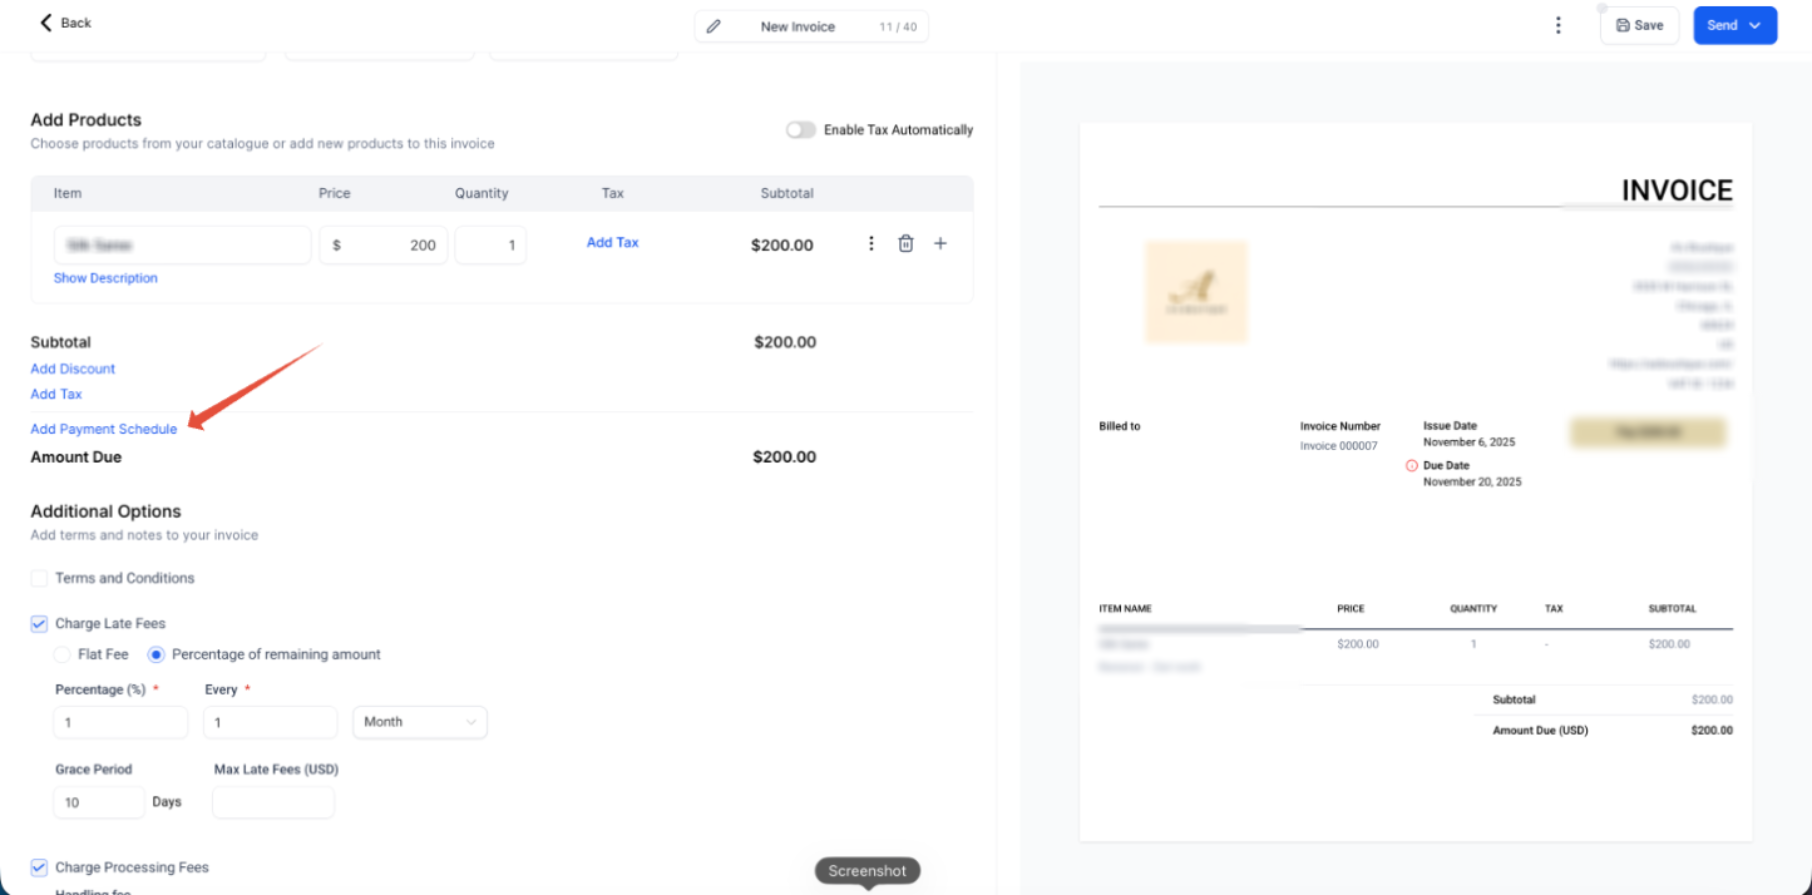
- Add Discount to apply an eligible flat or percentage discount.
- Add Tax to apply the configured tax.
- Add Payment Schedule to divide the amount into percentage based or fixed amount installments with due dates.
- Configure Additional Options such as terms, late fees, processing fees, tipping, or attachments.
Save and preview the invoice
- Review the invoice details and click Save.
- Click the three dots next to Save.
- Select Preview.
- Review the accurate invoice in the browser tab that opens.
- Return to the original invoice editor tab when ready to make changes or send the invoice.
Send the invoice
- Return to the invoice editor after reviewing the final preview.
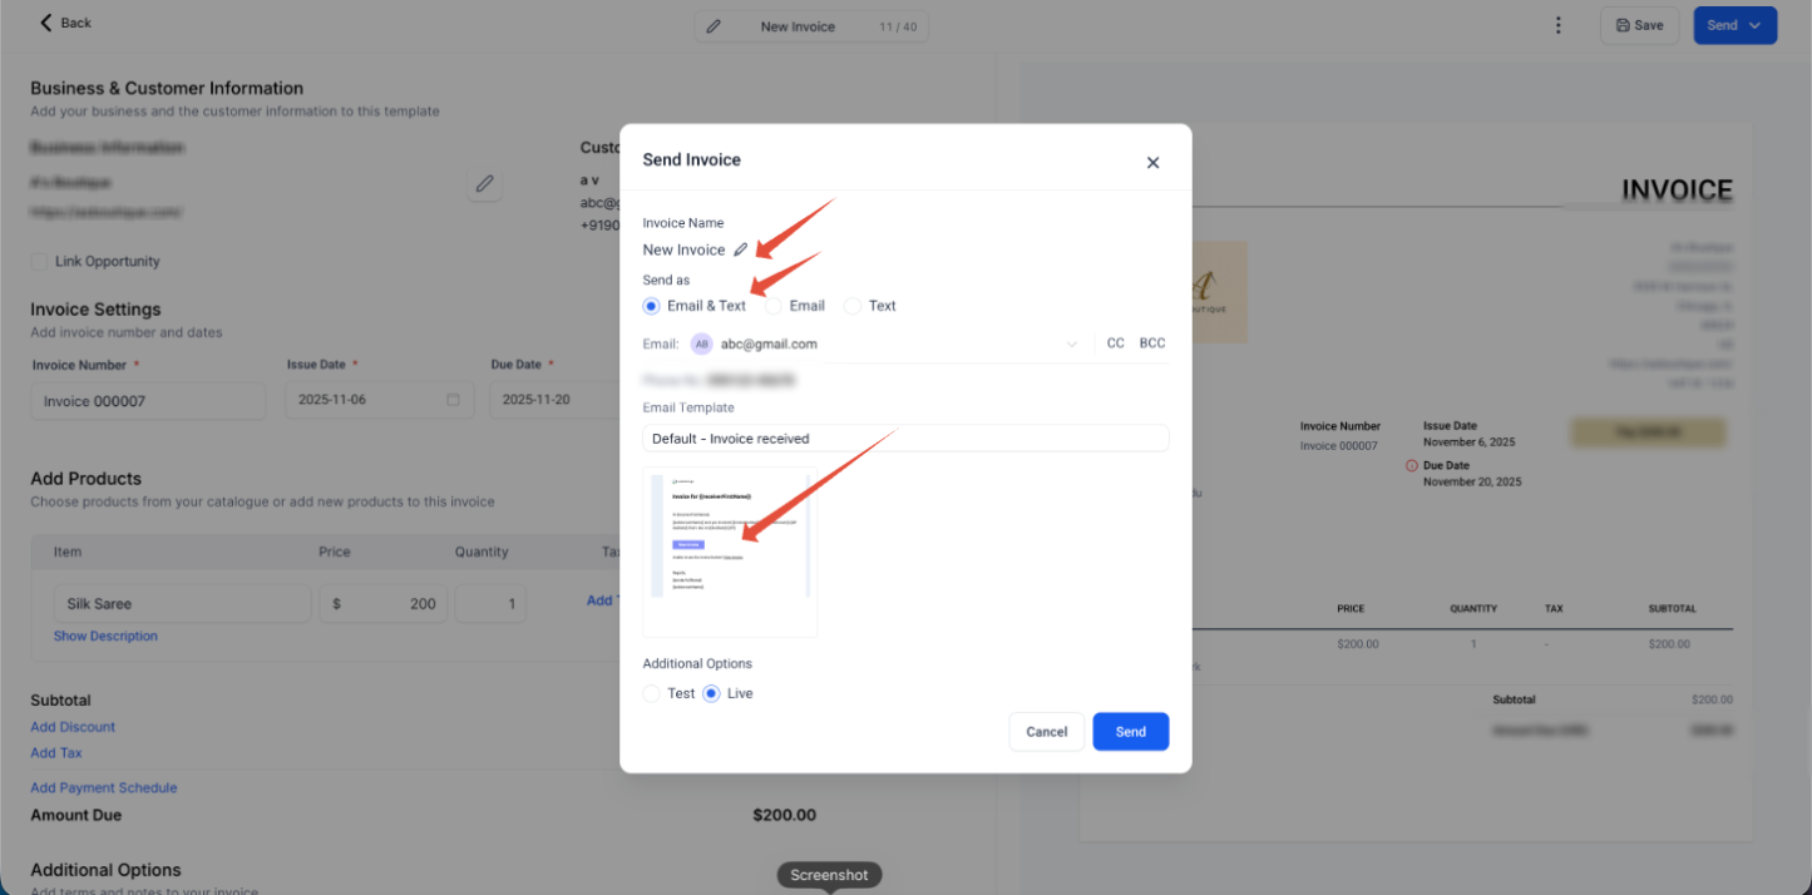
- Click Send.
- Review the invoice name.
- Choose the available delivery option, such as Email & Text, Email, or Text.
- Review the recipient information and message or email template.
- Review the applicable Additional Options, including Test or Live mode when shown.
- Complete the send action.
06What it looks like in HighLevel
07Settings that matter
- Add Discount. Allows a flat amount or percentage reduction to be applied to the invoice total.
- Add Tax. Applies the configured tax rate to eligible invoice items.
- Add Payment Schedule. Splits the invoice into multiple installments, each with its own due date.
- Terms & Conditions. Adds custom terms or notes that appear on the invoice for the customer.
- Late Fees. Applies a fee when payment is received after the due date, if the feature is enabled.
- Processing Fees. Adds a fee based on the payment provider’s processing cost, when supported.
- Tipping. Provides an option for the customer to add a tip when paying the invoice.
- Attachments. Allows files to be attached to the invoice email sent to the customer.
08Things to know before you rely on it
- Electronic payment availability depends on the payment provider and payment methods configured for the subaccount.
- Some invoice payment features depend on the connected provider and account configuration.
- One time invoices can be used in manual payment workflows, but the payment must be collected and recorded manually when no online provider is used.
09How it connects to the rest of HighLevel
- Learn how to create, edit, apply tax and discounts, and send invoices in HighLevel. Invoice workflow
- Set up recurring invoices for repeated billing cycles. Recurring invoices
- Explore common payment and invoice scenarios and tips. Payment scenarios
Michael's take

The first setting I would lock in is the preview step. Saving the draft is fine, but opening the three dot menu and selecting Preview ensures the layout you send matches what the client will see.