
01Who this is for
- Sales teams that need to show product details visually to speed up customer approvals.
- Service providers who want to illustrate variations or finishes and reduce clarification requests.
- Small businesses that rely on mobile friendly proposals and want a polished, professional look.
02Product images in estimates, explained
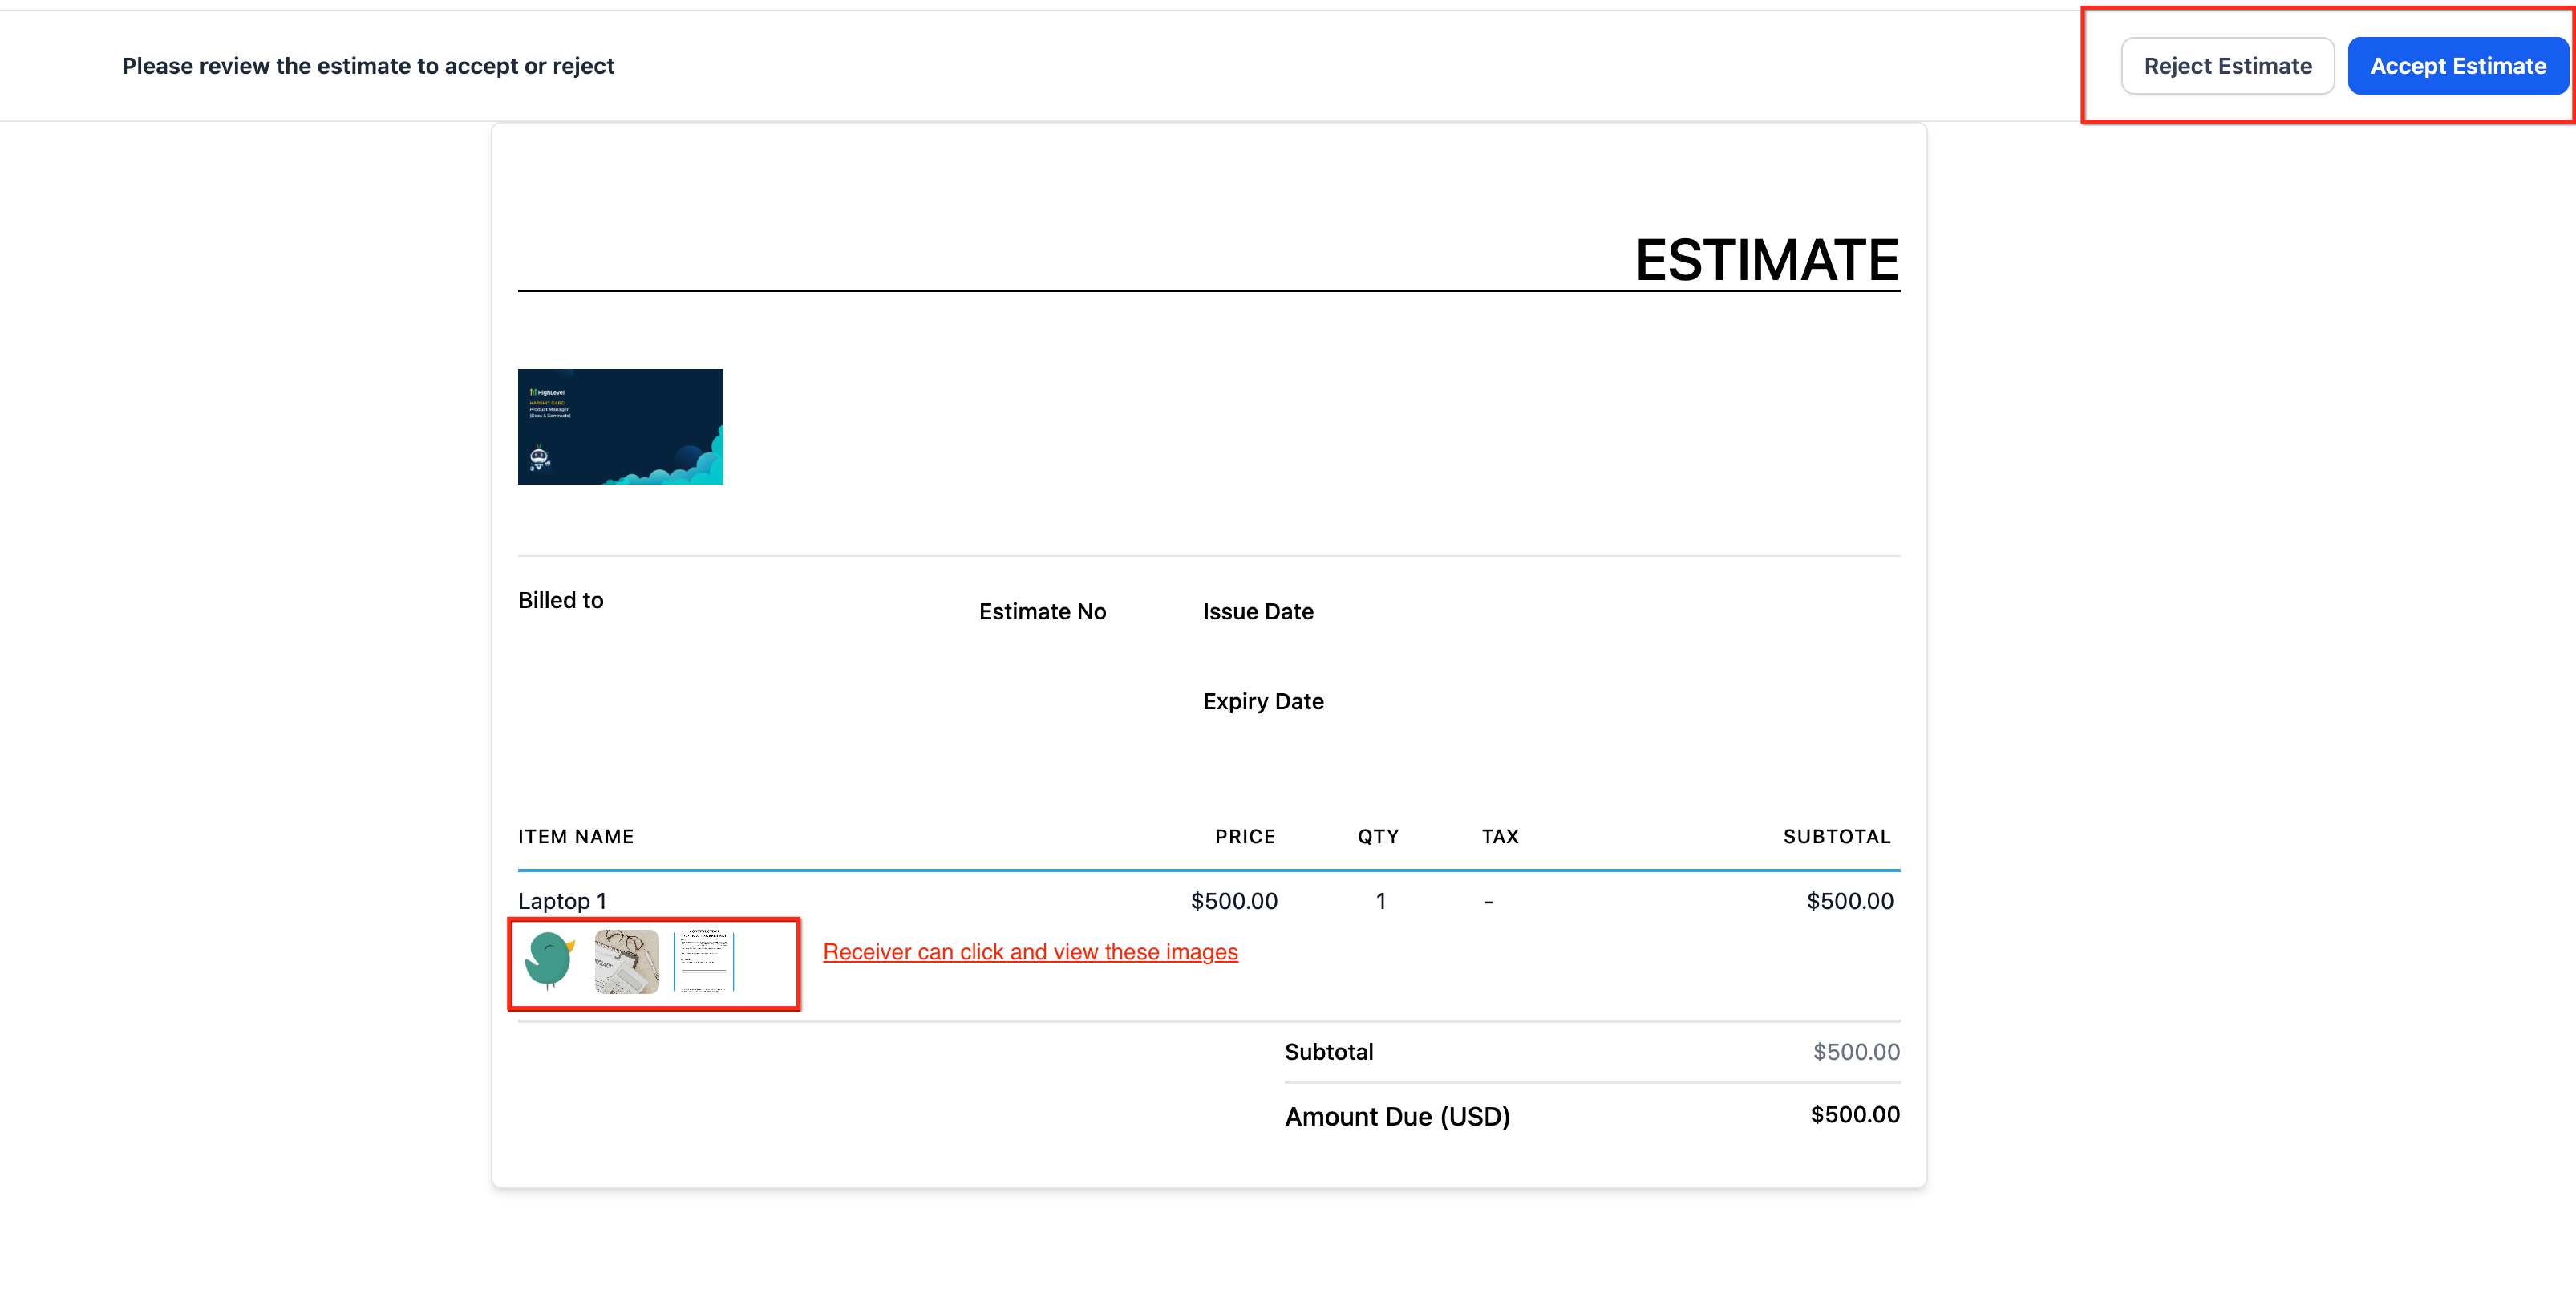
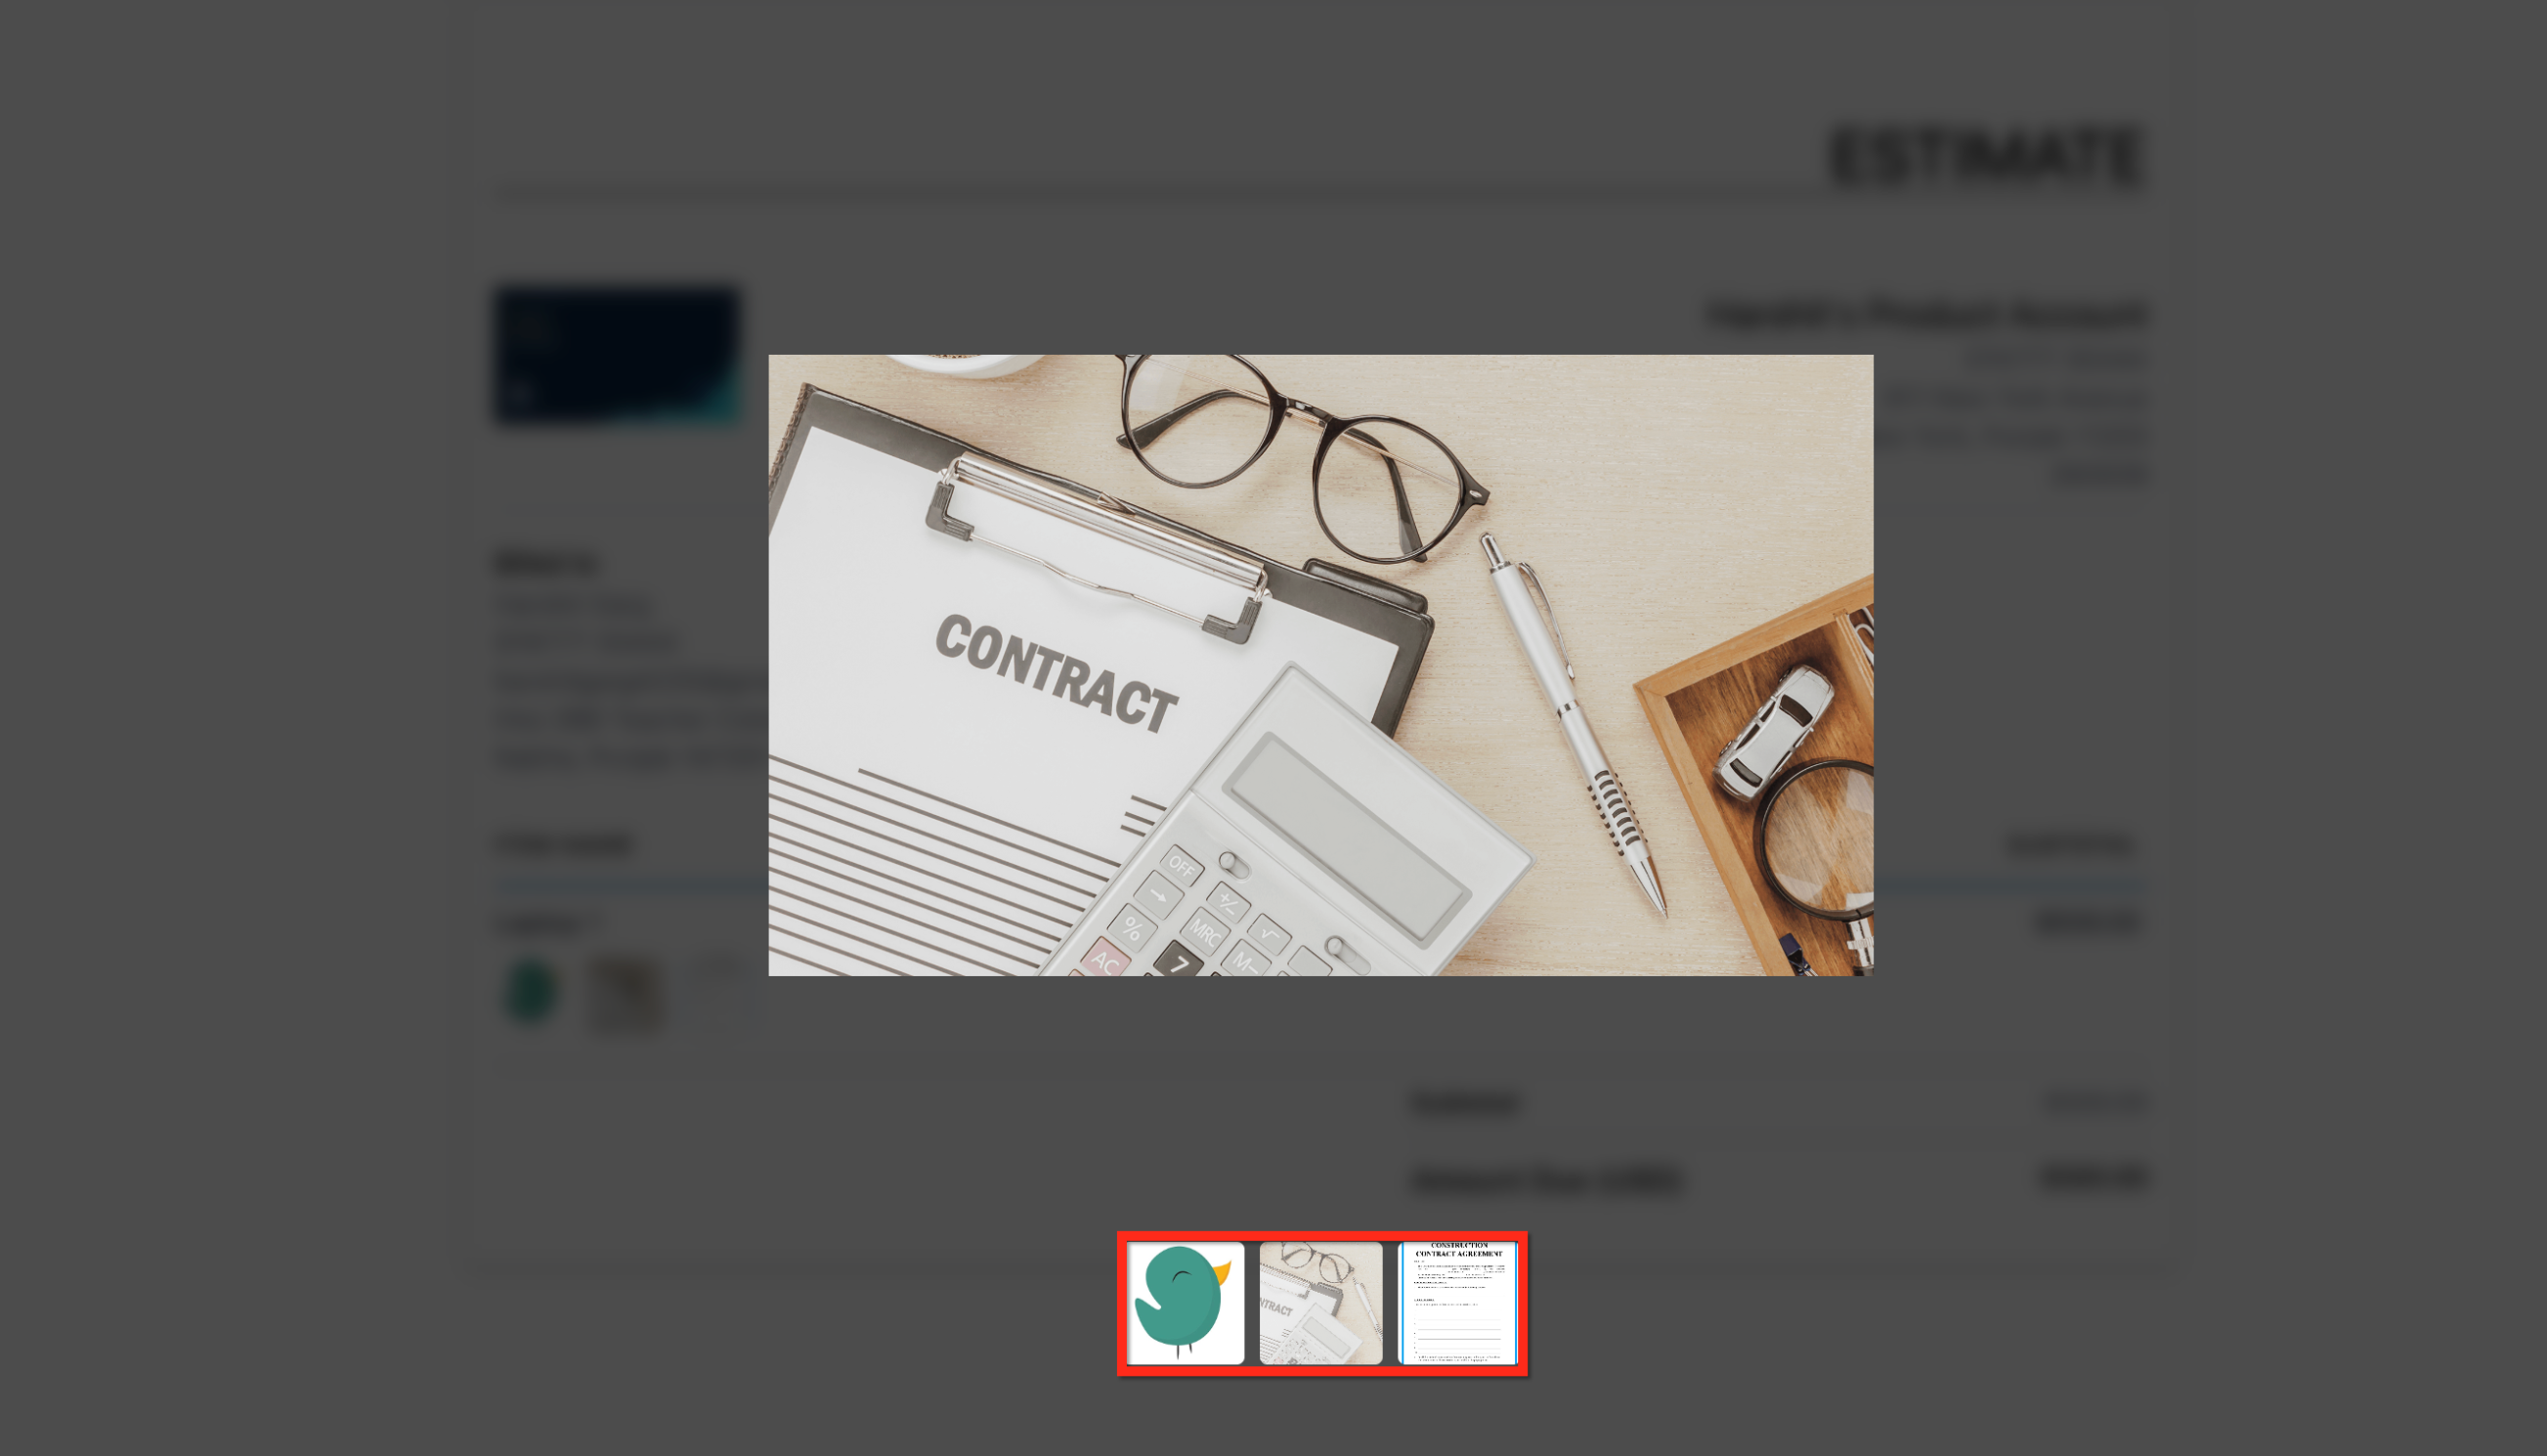
This capability adds a visual layer to each line item in an estimate. After an image is attached, a small thumbnail shows beneath the description and can be tapped to launch a gallery that fills the screen. The gallery lets the client zoom, swipe, and view each picture without leaving the estimate.
The feature lives inside the Payments section of HighLevel. When creating or editing an estimate, a button labeled Upload Images appears beneath each line item. You can pull files from the platform’s Media Storage library or upload fresh pictures from your computer; any new file is saved to Media Storage automatically for later reuse. The images remain attached if the estimate is later converted to an invoice.
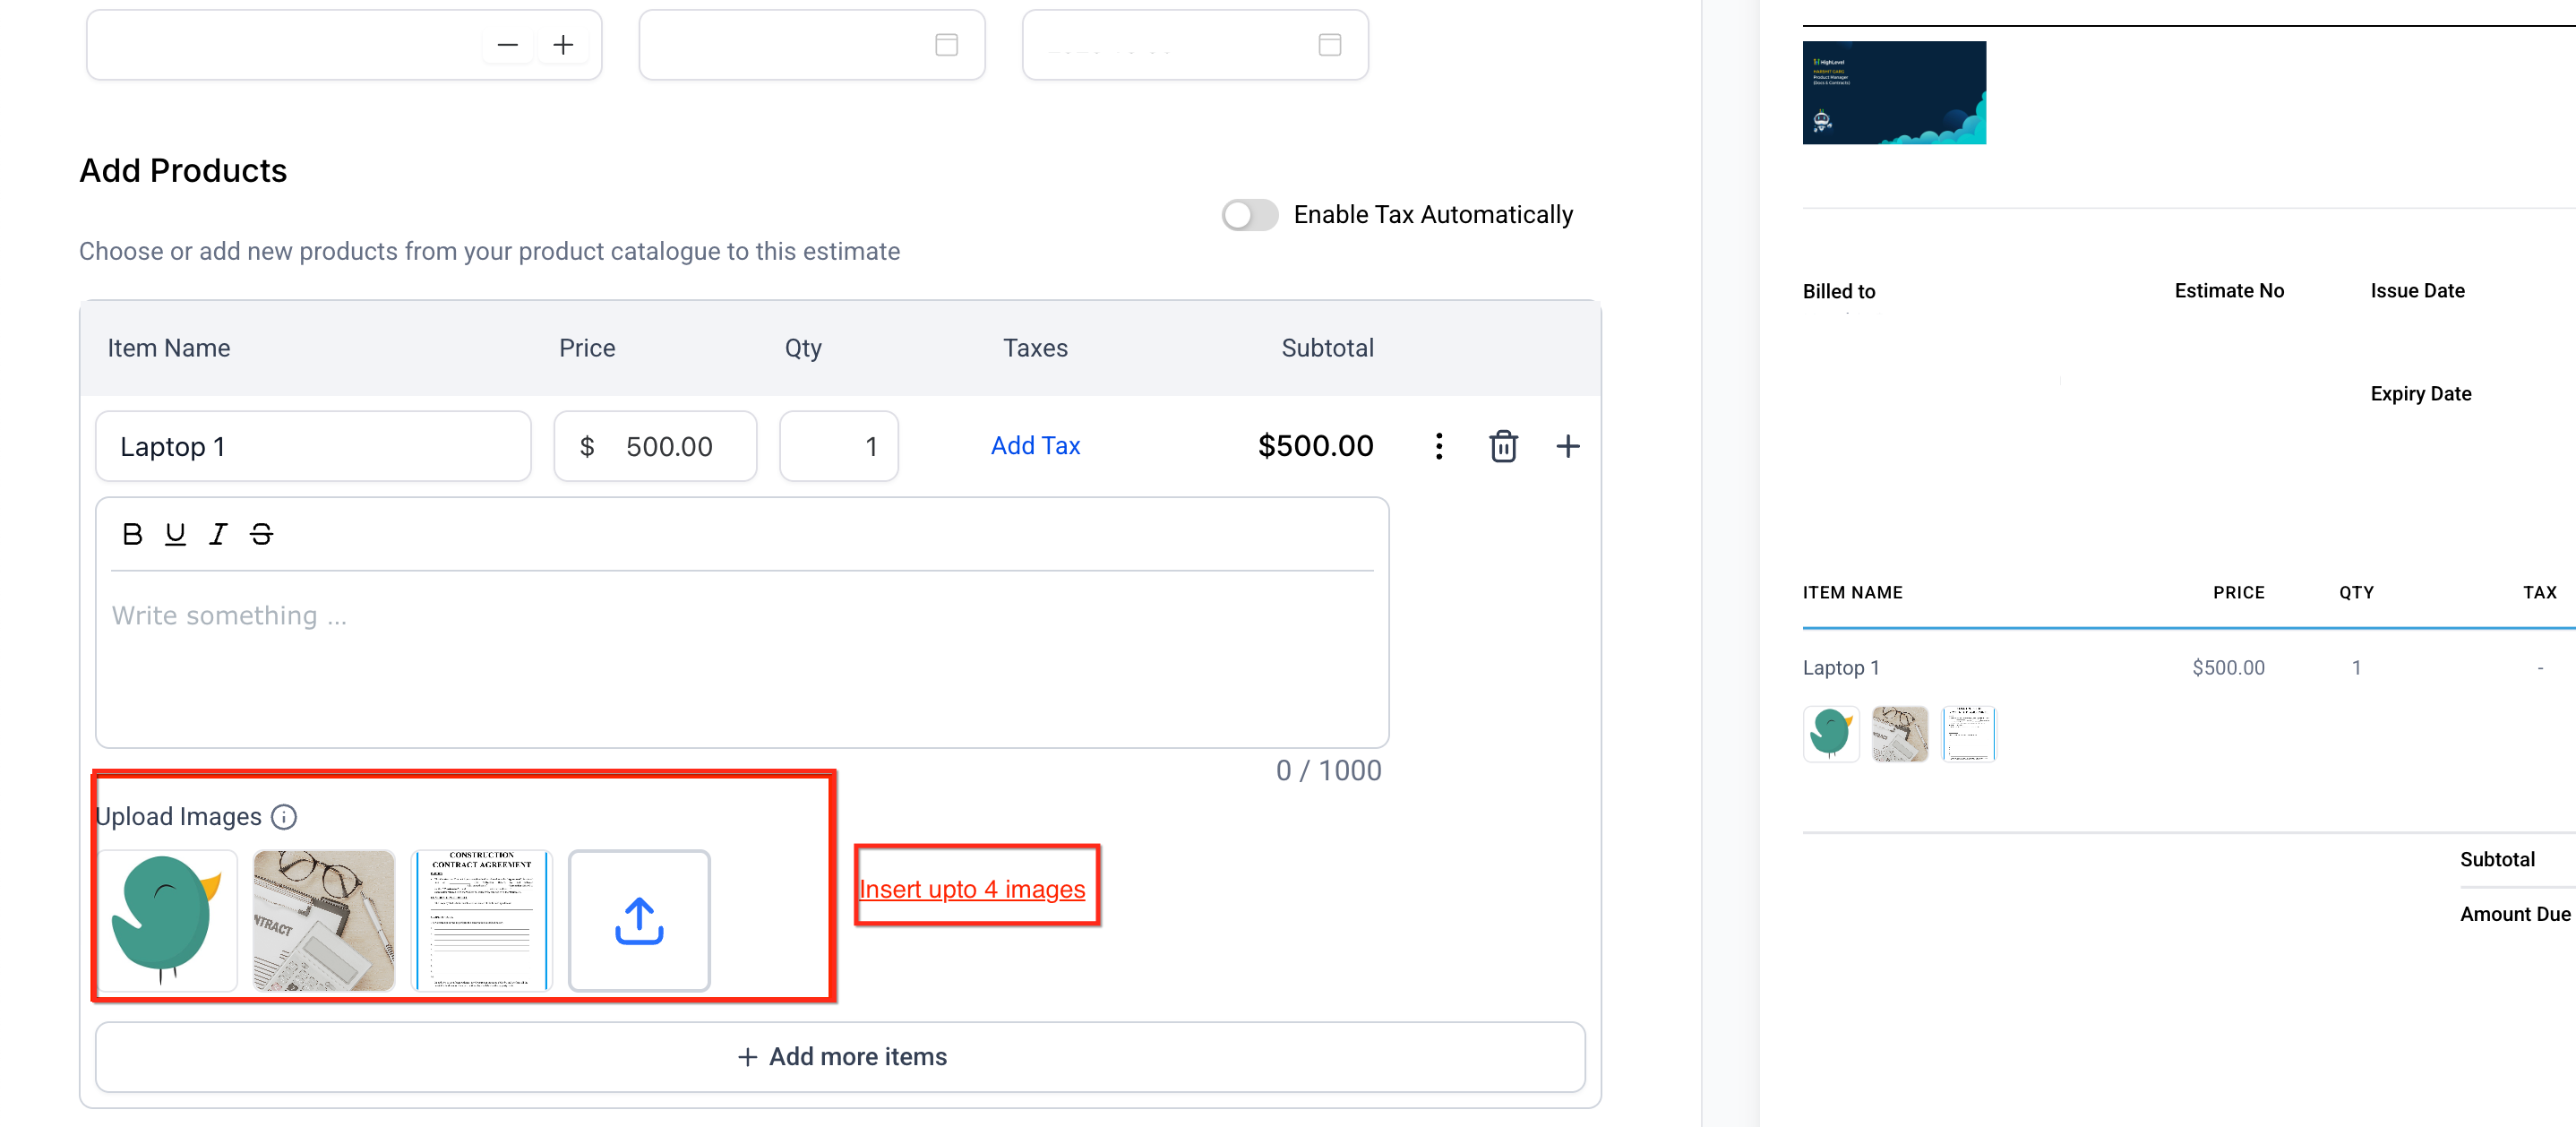
Images are limited to four per line item, must be JPG or PNG, and should stay under 2 MB to keep the estimate lightweight. For additional documents such as manuals or spec sheets, the separate Attachments option supports up to ten files per estimate.
03How businesses use product images in estimates
- Home remodeling contractor. The contractor adds photos of tile patterns, countertop finishes, and cabinet styles to each estimate line. Clients can tap the thumbnails to see full size images, helping them confirm selections before signing.
- Digital marketing agency. When quoting website design services, the agency uploads screenshots of mockups or previous work beside each deliverable. Prospects view the visuals directly in the estimate, reducing follow up clarification emails.
- Event planning business. The planner attaches photos of venue layouts, table setups, and décor items to the corresponding line items. Clients can scroll through the gallery on mobile devices to verify the proposed look.
04The numbers and rules that matter
- Maximum of 4 images per line item.
- Each image must be under 2MB for optimal performance.
- Attachments feature supports up to 10 files per estimate.
05How to set up and use product images in estimates in HighLevel
Add photos to an estimate
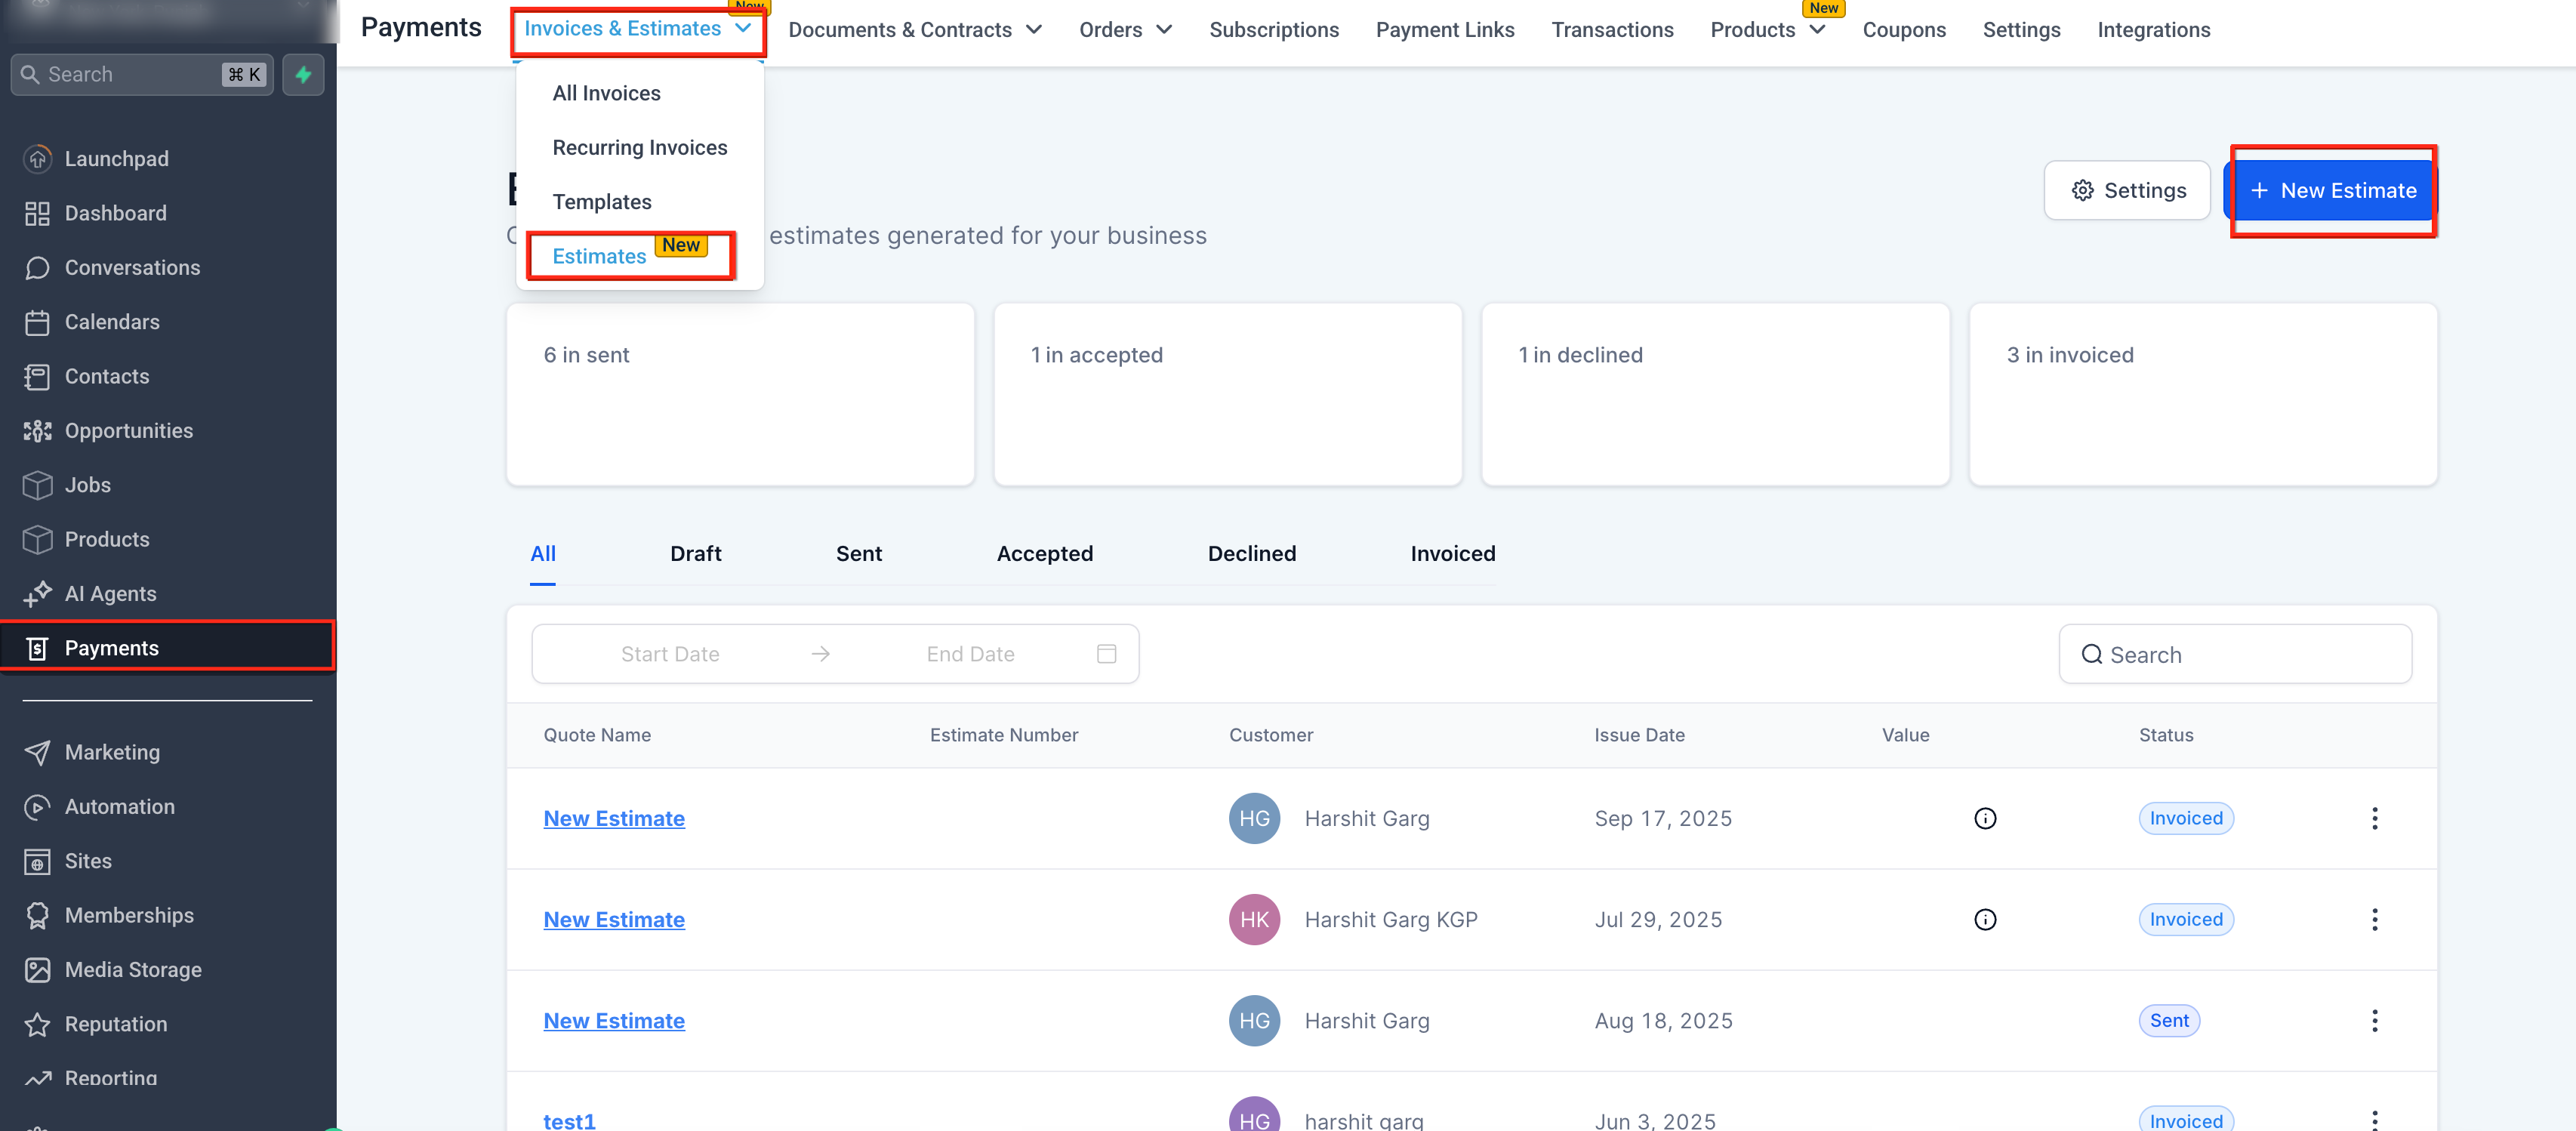
- Navigate to Payments, then choose Invoices & Estimates, and open the Estimates screen.
- Select the New Estimate button.
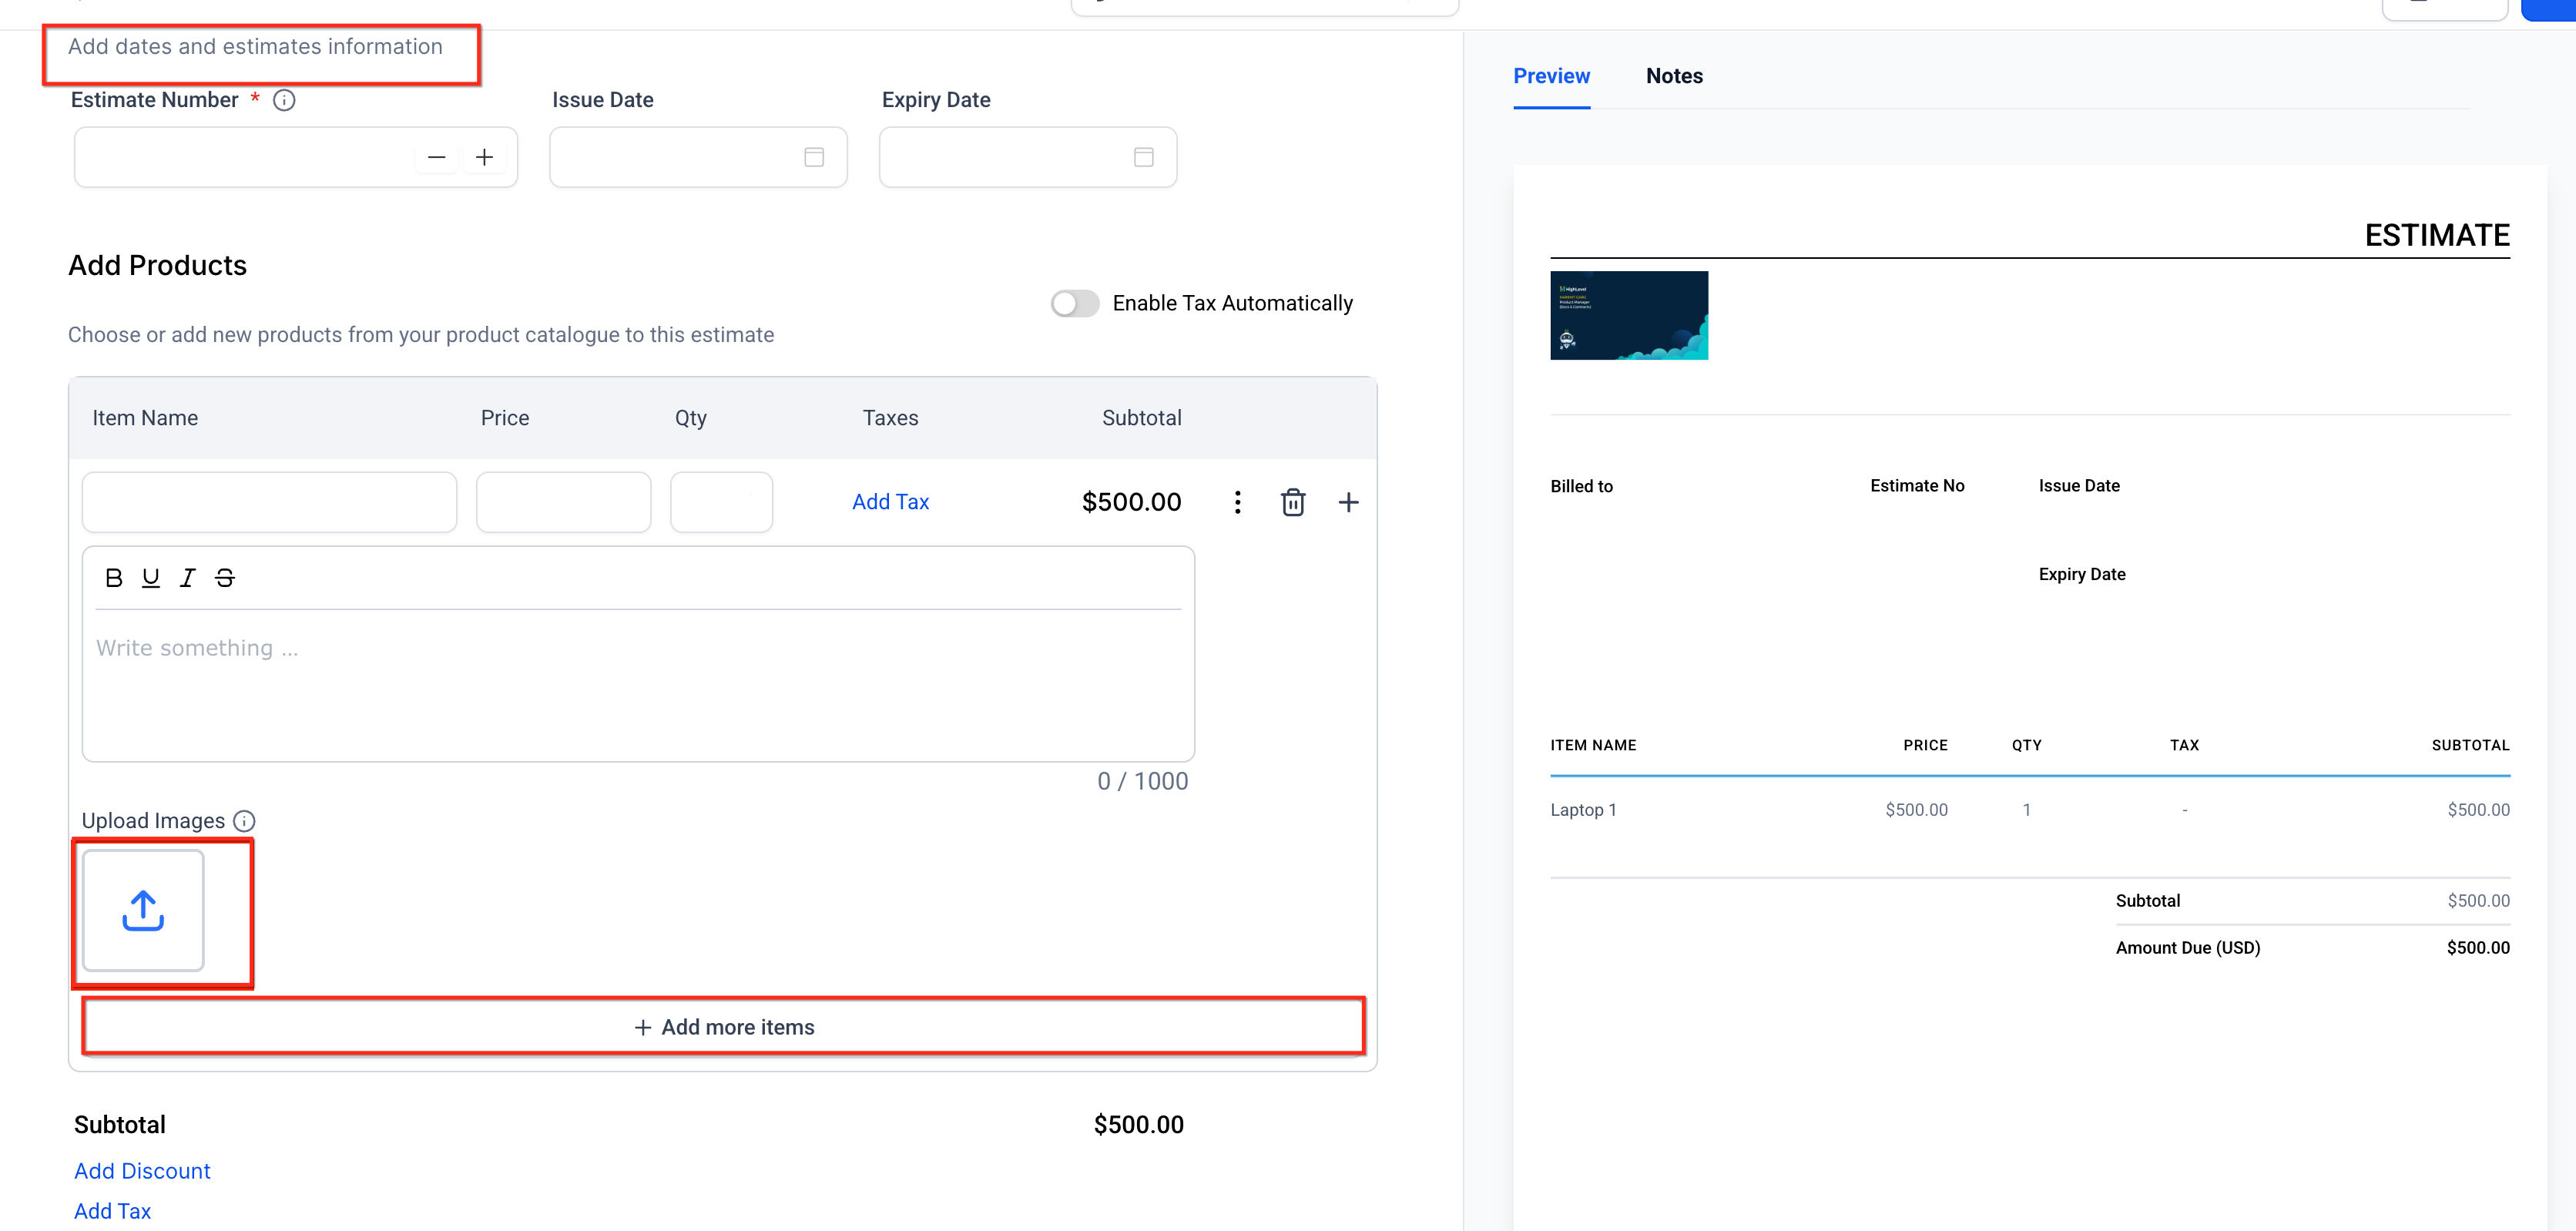
- Fill in the required estimate information, including client details, item titles, and prices.
- Find the desired line item and press the Upload Images control.
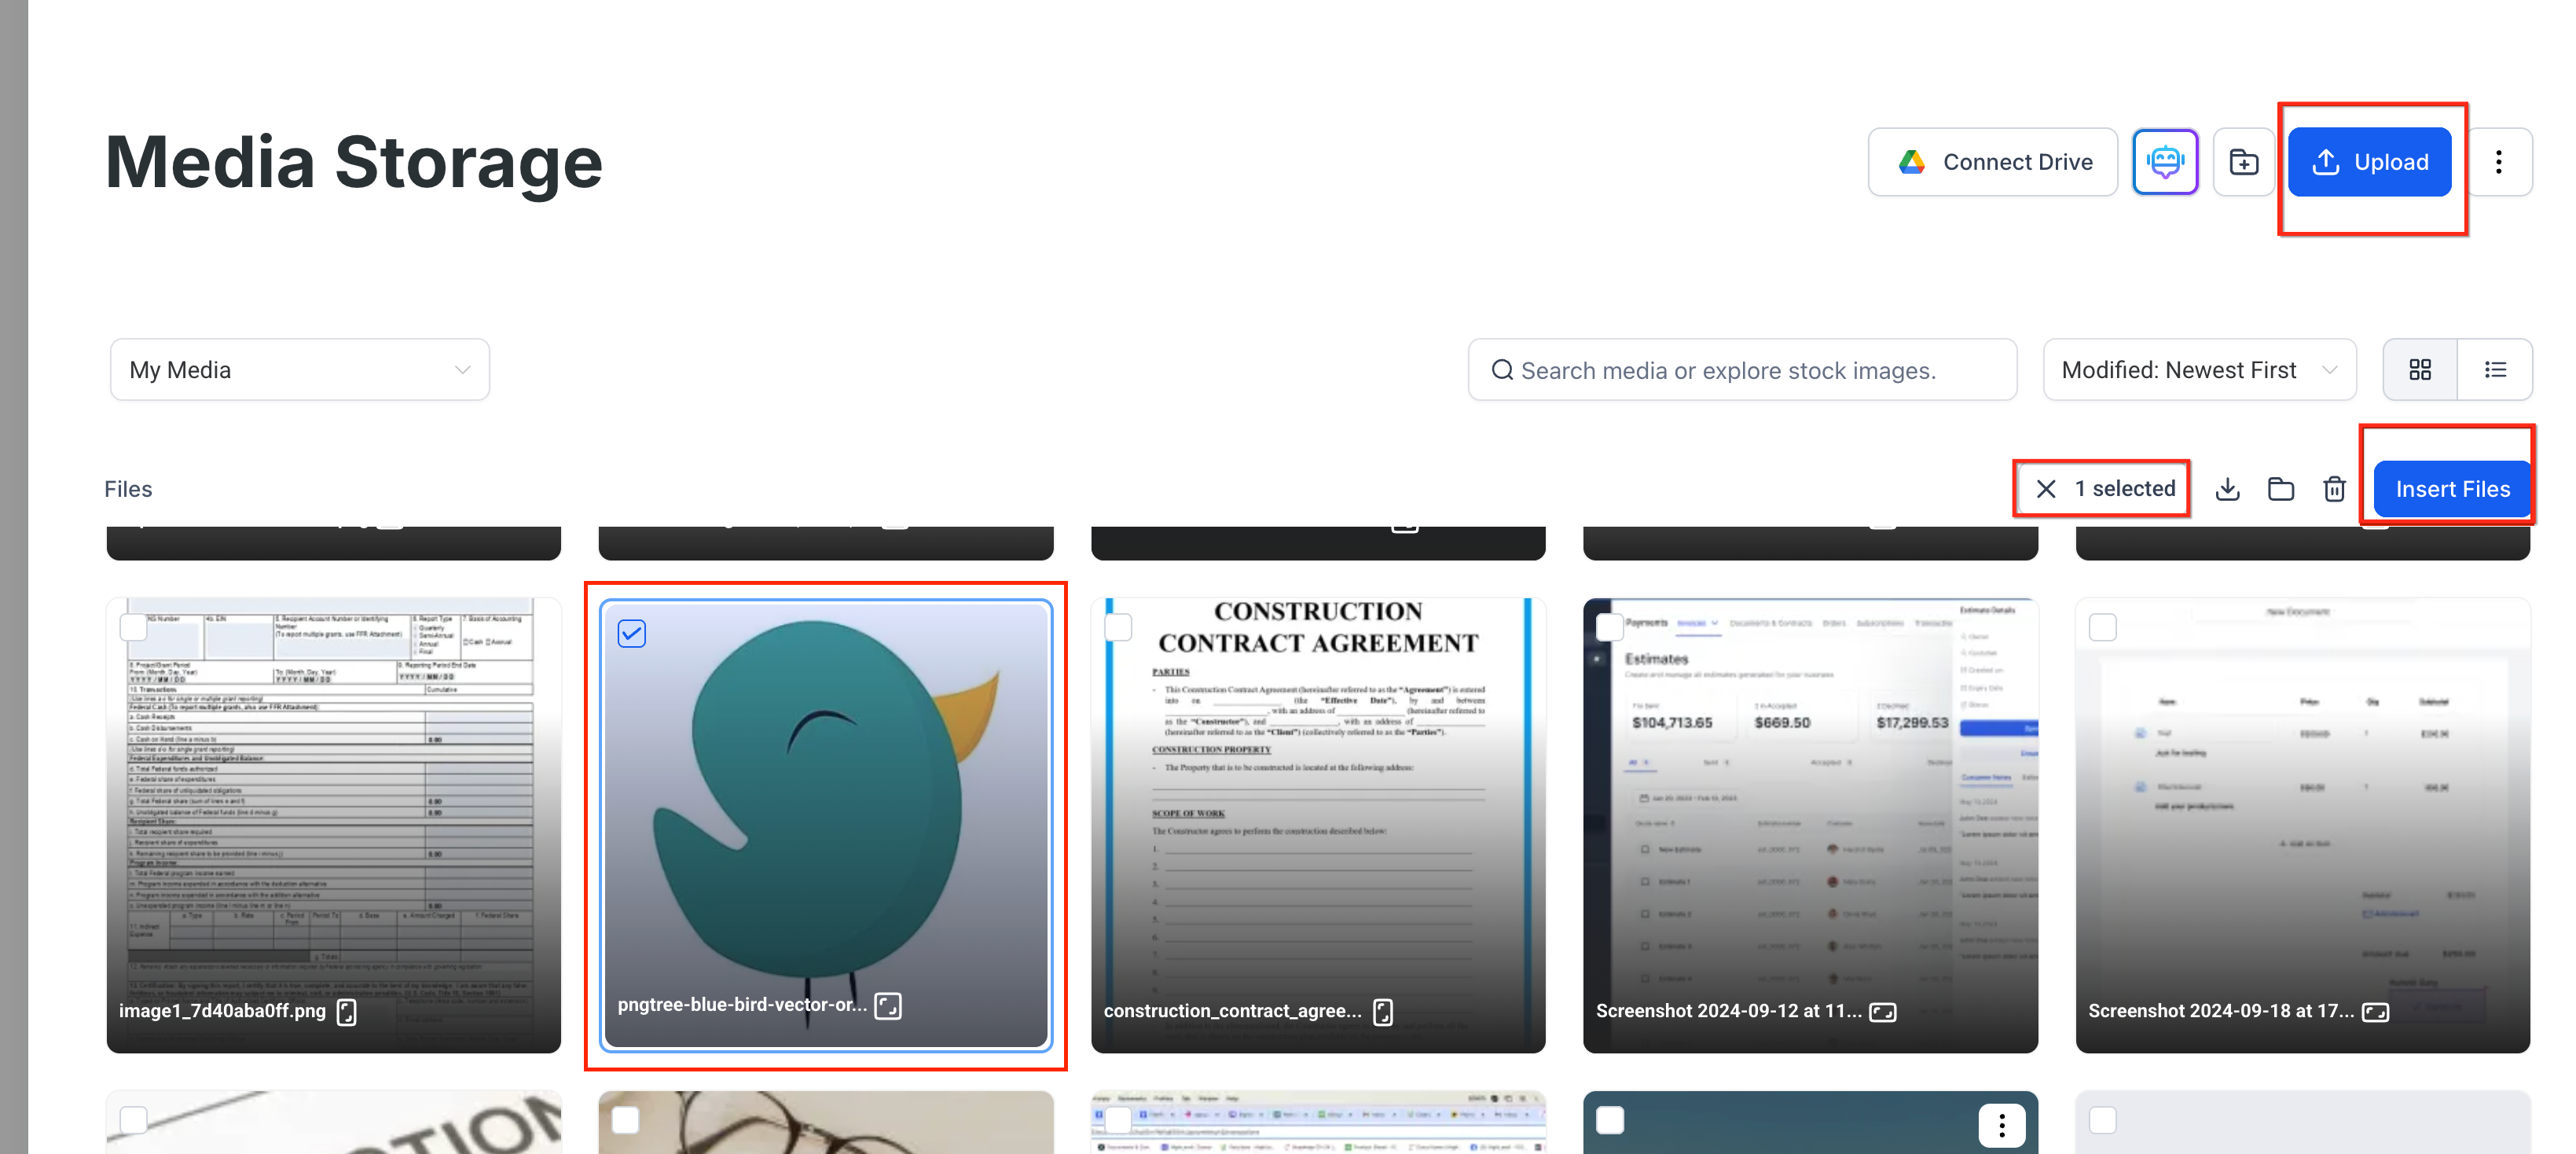
- Pick either the Upload option to bring new files from your computer or the Media Storage option to reuse existing pictures.
- Choose a maximum of four pictures and confirm by clicking Insert Files.
- Check the draft to ensure thumbnail previews appear under the correct line item.
- Press Send to deliver the estimate to the client.
06What it looks like in HighLevel
07Things to know before you rely on it
- A maximum of four images can be attached to a single line item.
- Only JPG and PNG formats are accepted.
- Each image should be smaller than 2 MB for optimal loading.
- Images remain visible when an estimate is turned into an invoice.
- Images do not transfer to external accounting systems such as QuickBooks.
08How it connects to the rest of HighLevel
- Explore the full set of payment and invoice tools. All Payments features
- Learn how to create and send a one time invoice, which can also display attached images. One time invoices
- Review pricing options and the Founder Plan for access to advanced features. HighLevel pricing
Michael's take

Adds a polished, visual edge to estimates, but if you’re only sending text only proposals, you can skip it.