
01Who this is for
- Sales agents who need to keep property or deal details separate from client information, reducing clutter in each record.
- Customer support teams that want to attach case specific notes to a ticket without mixing them with the overall contact history.
02Opportunity notes, explained
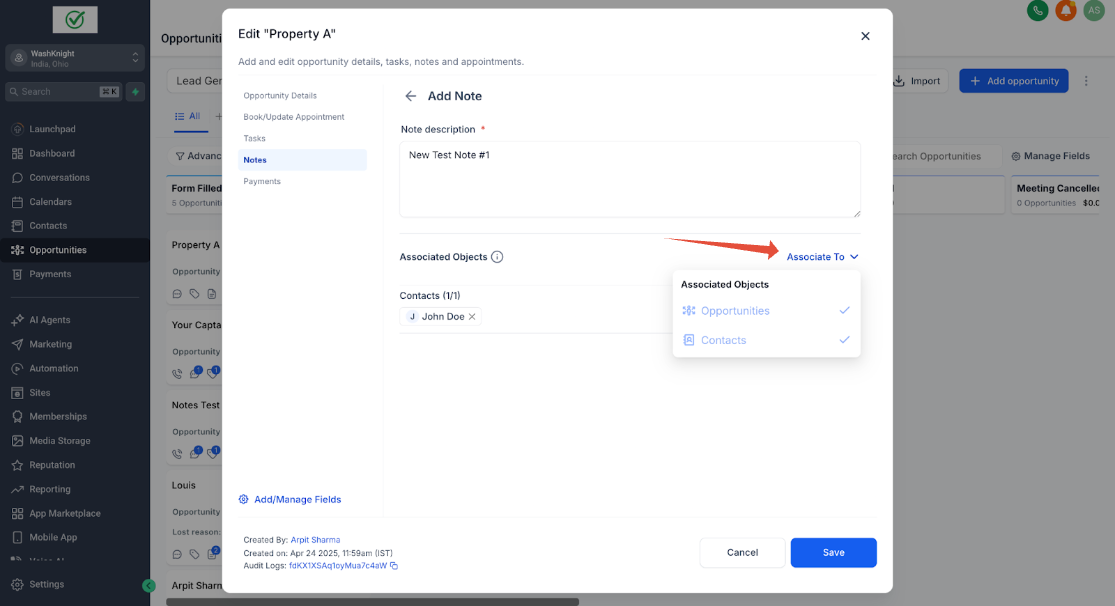
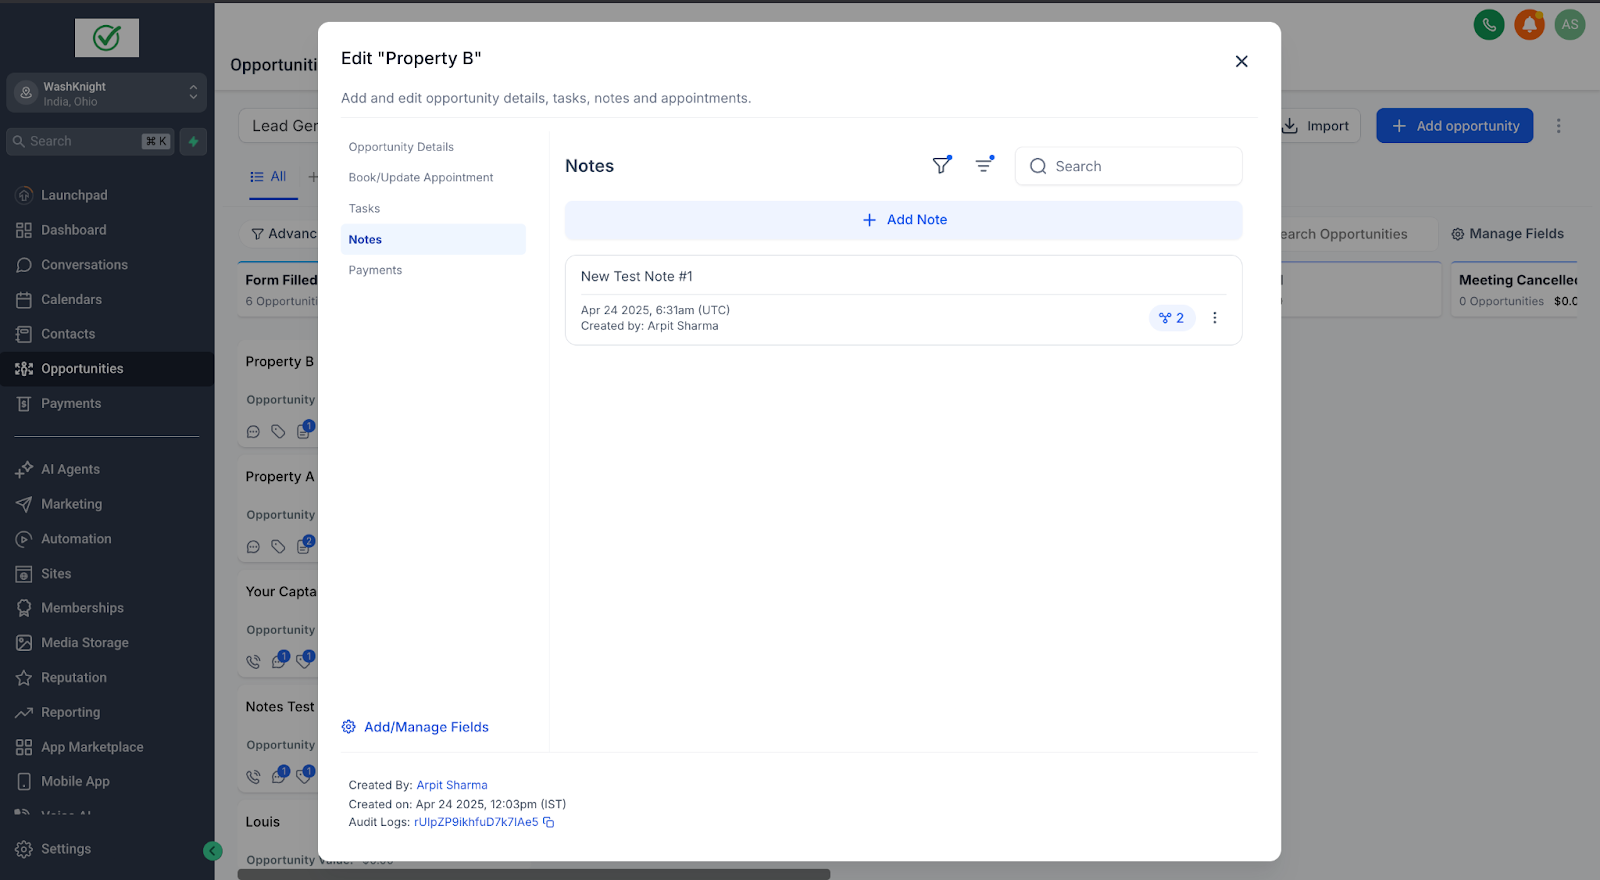
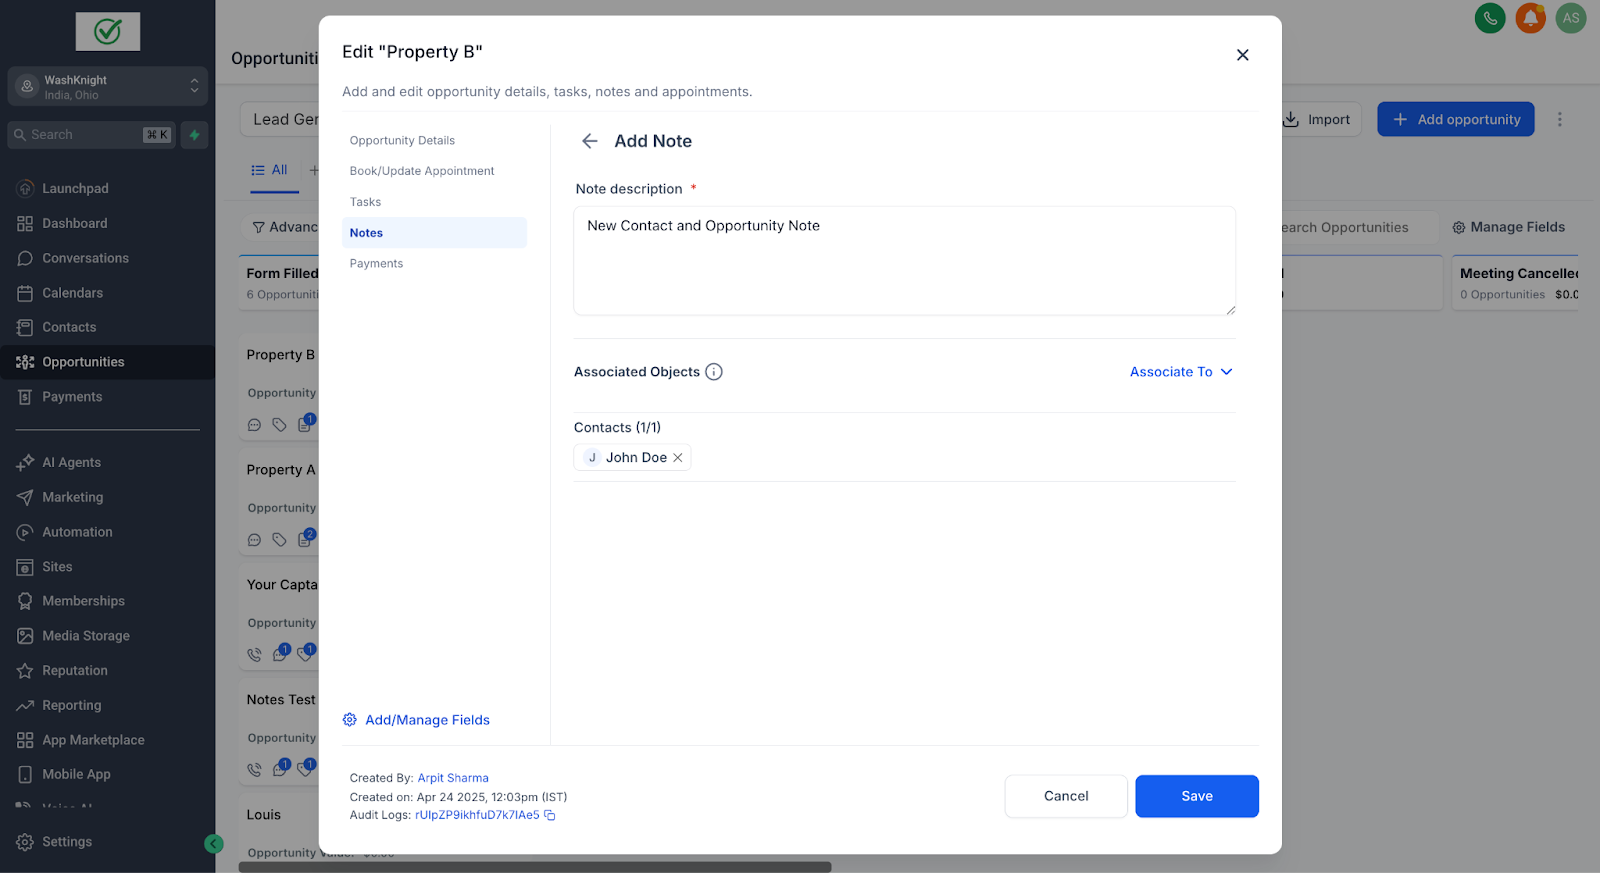
The Opportunity Notes feature adds a new note type that can be linked to an opportunity, a contact, or both at the same time. Each note lives in the Notes tab of either the opportunity view or the contact view, and its association can be changed later.
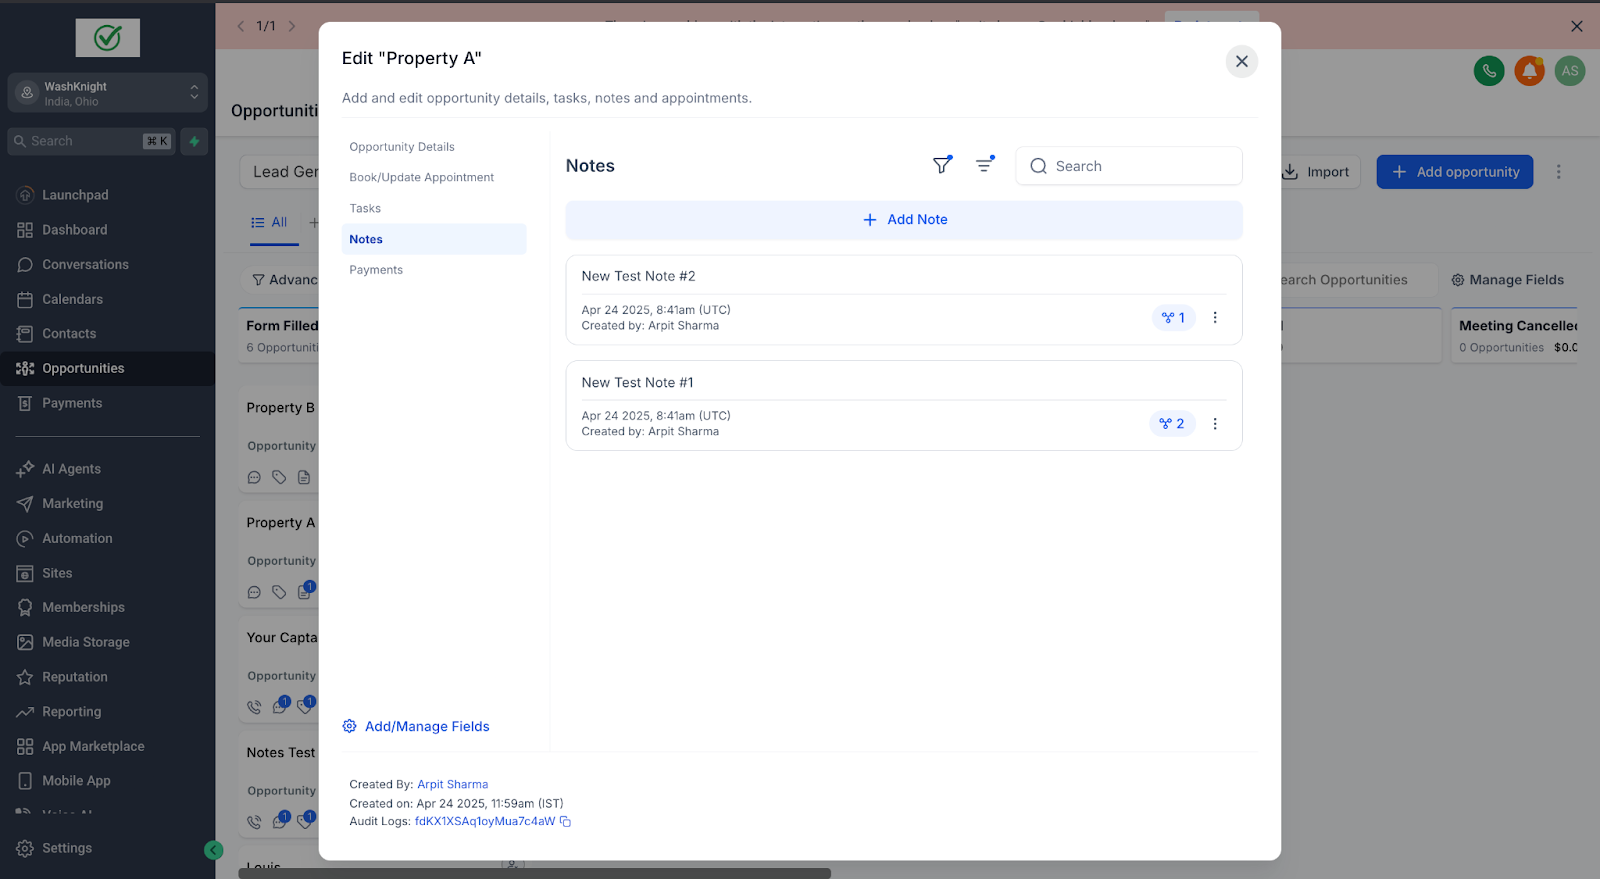
When a note is associated with both an opportunity and a contact, it appears in the note lists of both records. If the note is linked only to an opportunity, it remains visible solely under that opportunity.
The feature includes a filter tool in the Notes tab for both opportunities and contacts. The filter lets you display notes based on whether they are tied to opportunities, contacts, or both, making it easy to locate the right information quickly.
03How businesses use opportunity notes
- Real estate brokerage. Create a note for each property deal, linking it to the specific opportunity and the buyer's contact when needed. Use the filter to see only the notes that belong to a certain property or client.
- IT services firm. Add technical troubleshooting notes to a service ticket opportunity, optionally attaching the client contact for shared context. Filter notes to view only those linked to a particular client or ticket.
- Health clinic. Record patient visit summaries as notes on the appointment opportunity, associating the note with the patient contact for continuity. Use the note filter to pull up all notes related to a specific patient.
04Before you start
- Enable the feature by opening Subaccount > Settings > Labs and toggling the "Opportunity Notes" switch on.
05How to set up and use opportunity notes in HighLevel
Create a note via an opportunity
- Open the Opportunities section and select the desired opportunity.
- Open the Notes tab for that opportunity.
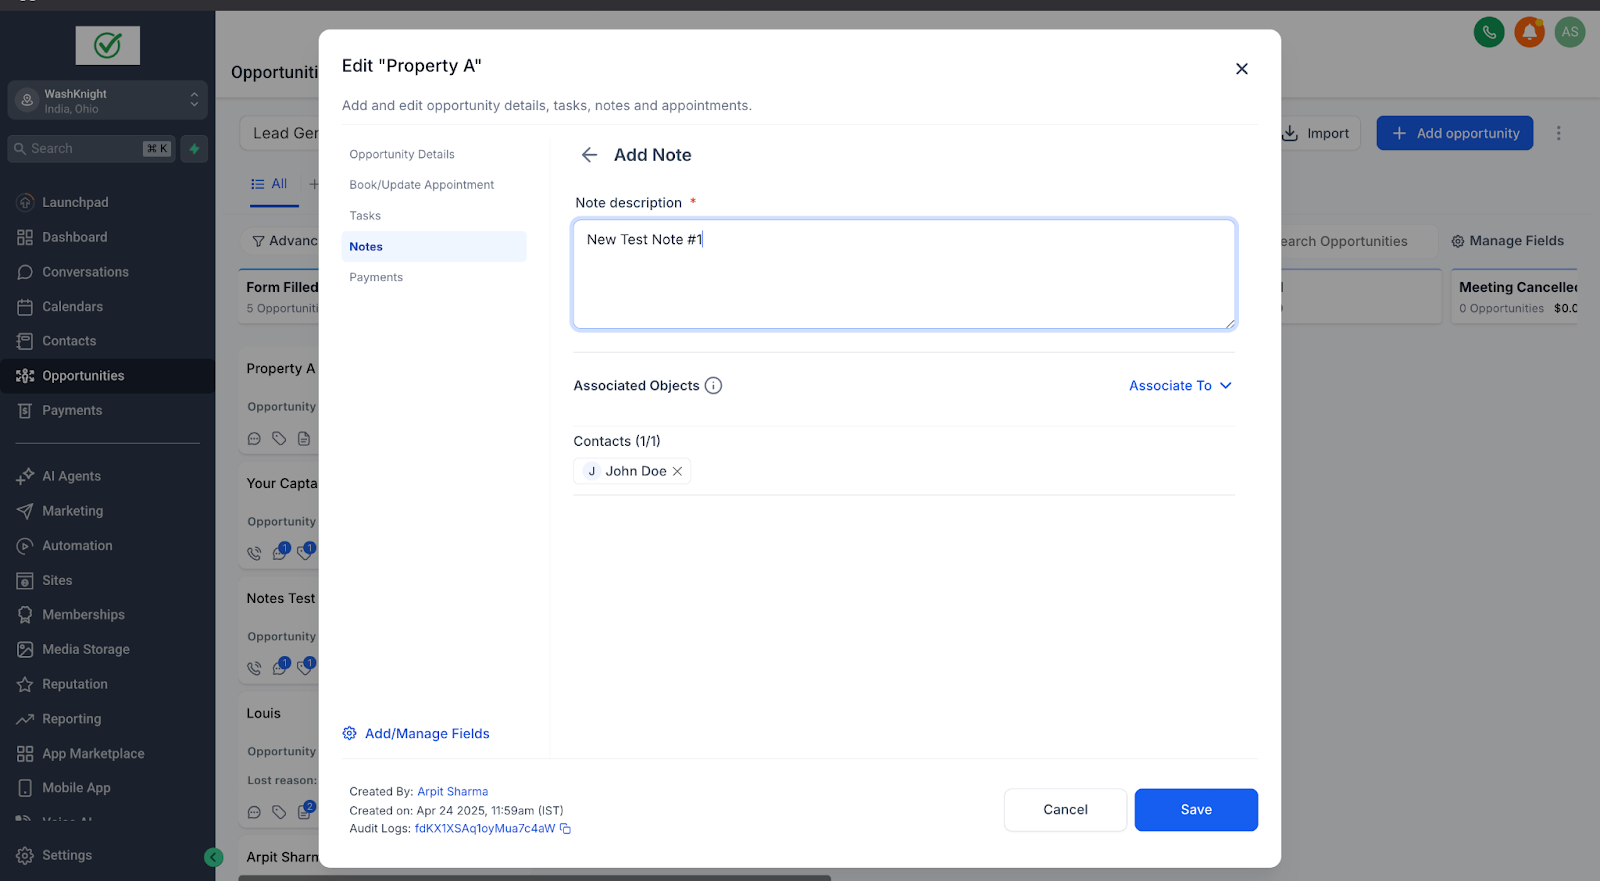
- Click the Add Note button.
- Enter the note text in the provided box.
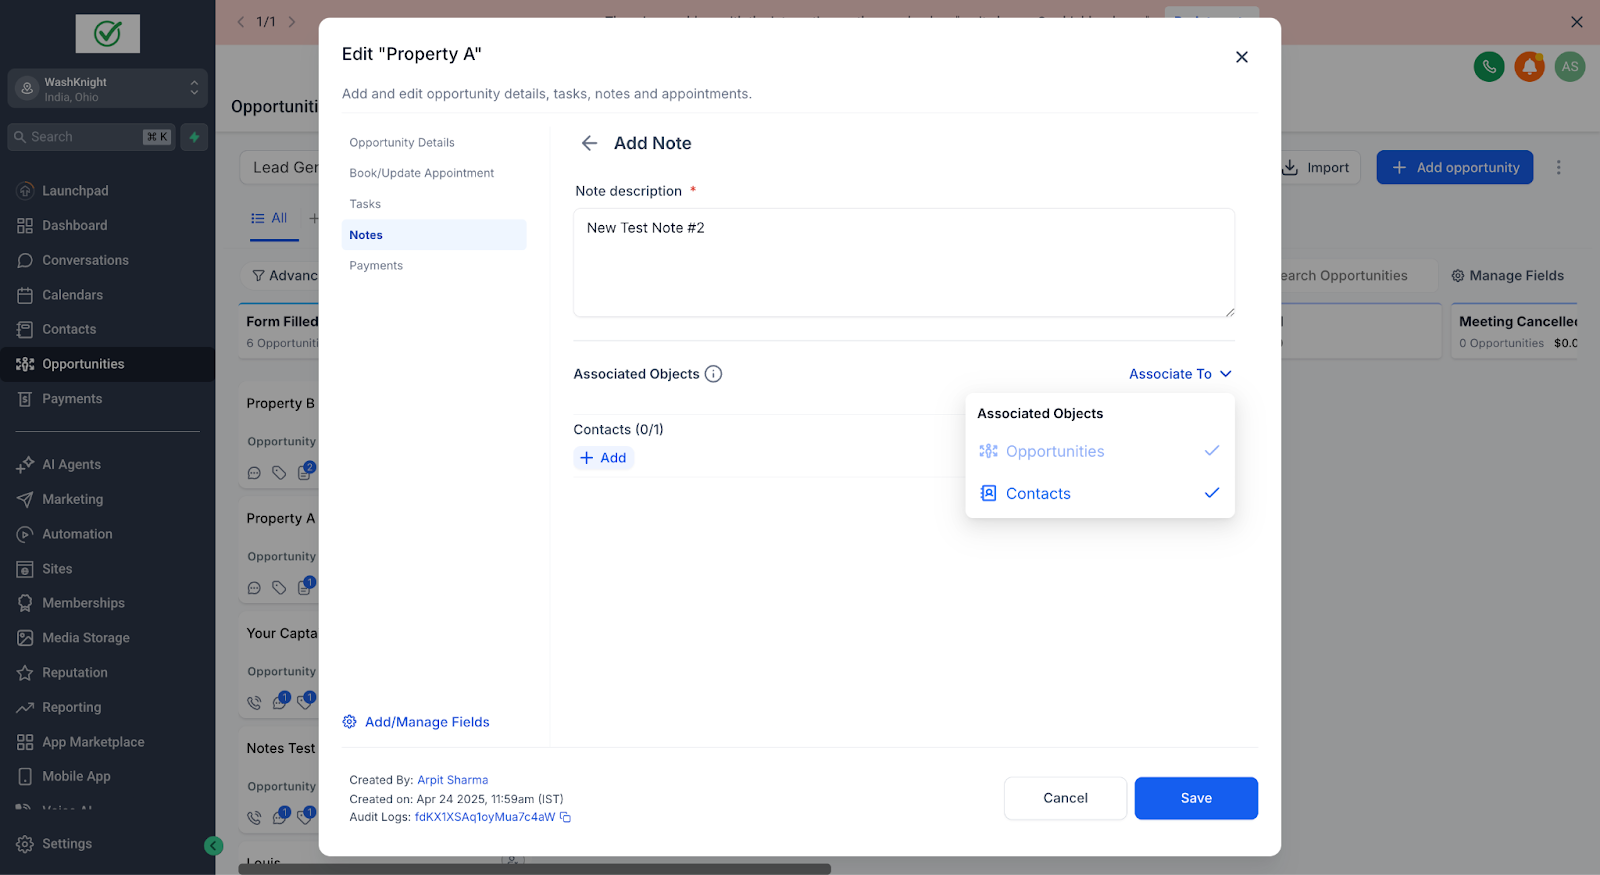
- Choose the association type, select any additional entities, and click Save.
Create a note via a contact
- Navigate to the Contacts area and open the required contact record.
- Click the Notes button within the contact view.
- Press the Add Note button.
- Enter the note text in the provided field.
- Use the Associate To option to link the note to an opportunity, a contact, or both, then click Save.
Filter notes by association
- Go to the Notes tab in either the Opportunity or Contact view.
- Click the Filter icon.
- Select the association criteria you want to display.
- Apply the filter to view notes that match the chosen associations.
06What it looks like in HighLevel
07Settings that matter
- Opportunity Notes. Turns on the ability to attach notes to opportunities, contacts, or both within the platform.
08Things to know before you rely on it
- Notes can be associated with an opportunity, a contact, or both, but not with other entity types.
09If something goes wrong
- Notes do not appear where expected. Verify that the note’s association settings correctly include the intended opportunity or contact.
10How it connects to the rest of HighLevel
- Explore all Opportunities & Pipelines features Opportunities & Pipelines overview
- Learn how to set up pipelines and stages Pipeline setup guide
- Understand opportunities in HighLevel Opportunity basics
Michael's take

Opportunity notes are worth the effort for any small business that juggles several deals per client. They keep each deal’s details tidy while still letting you pull in client wide info when needed.
Don’t forget to actually turn the feature on in Labs before you start creating notes.