
01Who this is for
- Sales managers benefit because the prospect appears in the pipeline right away, aligning with their team’s process.
- Marketing teams gain visibility of lead generation impact as prospects flow directly into opportunity tracking.
02Add prospects to a pipeline, explained
This feature connects the Prospecting tool with the platform’s pipeline system. When you add a prospect, you can turn on an option that routes the lead into a specific pipeline and stage. The prospect then becomes a deal record that can be managed like any other opportunity.
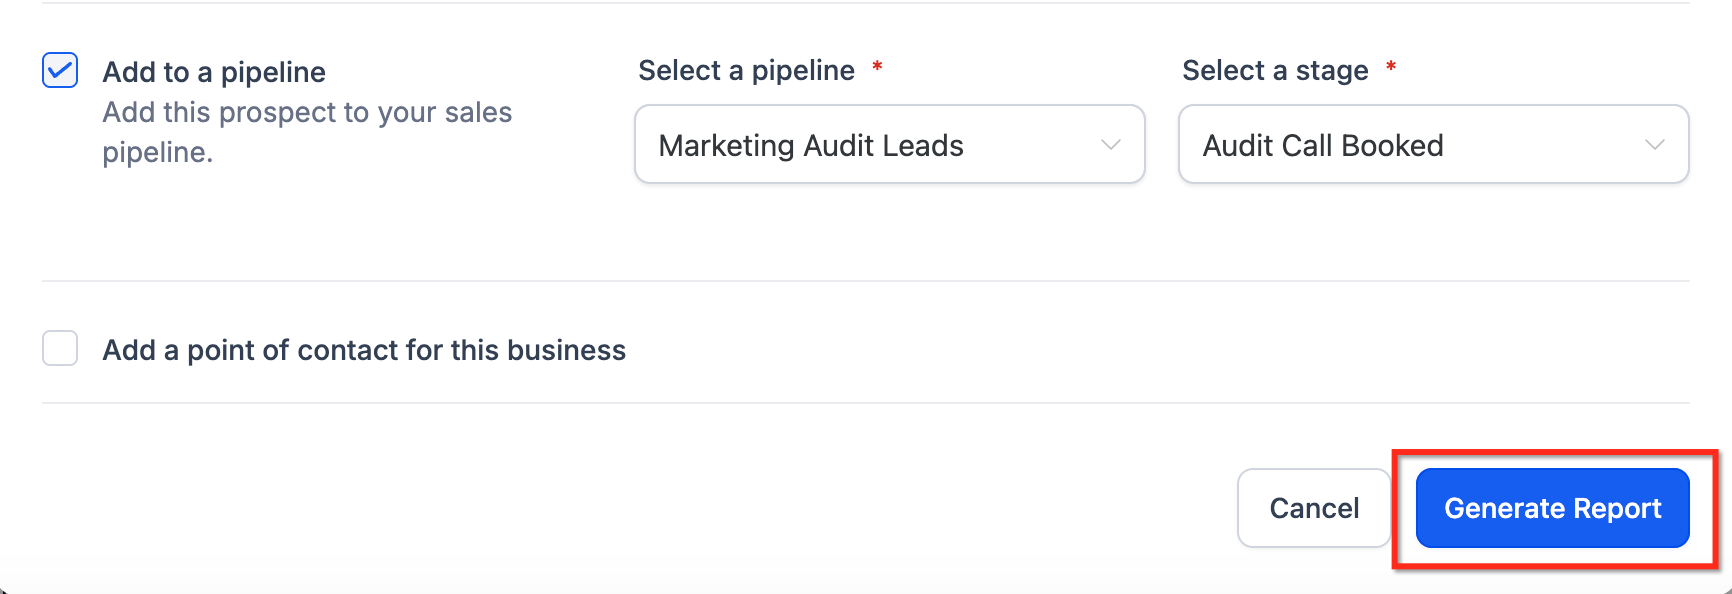
The routing occurs after you click Generate Report while the Add to a pipeline option is active. The new deal appears in the selected pipeline at the chosen stage, ready for follow up, automation or manual movement.
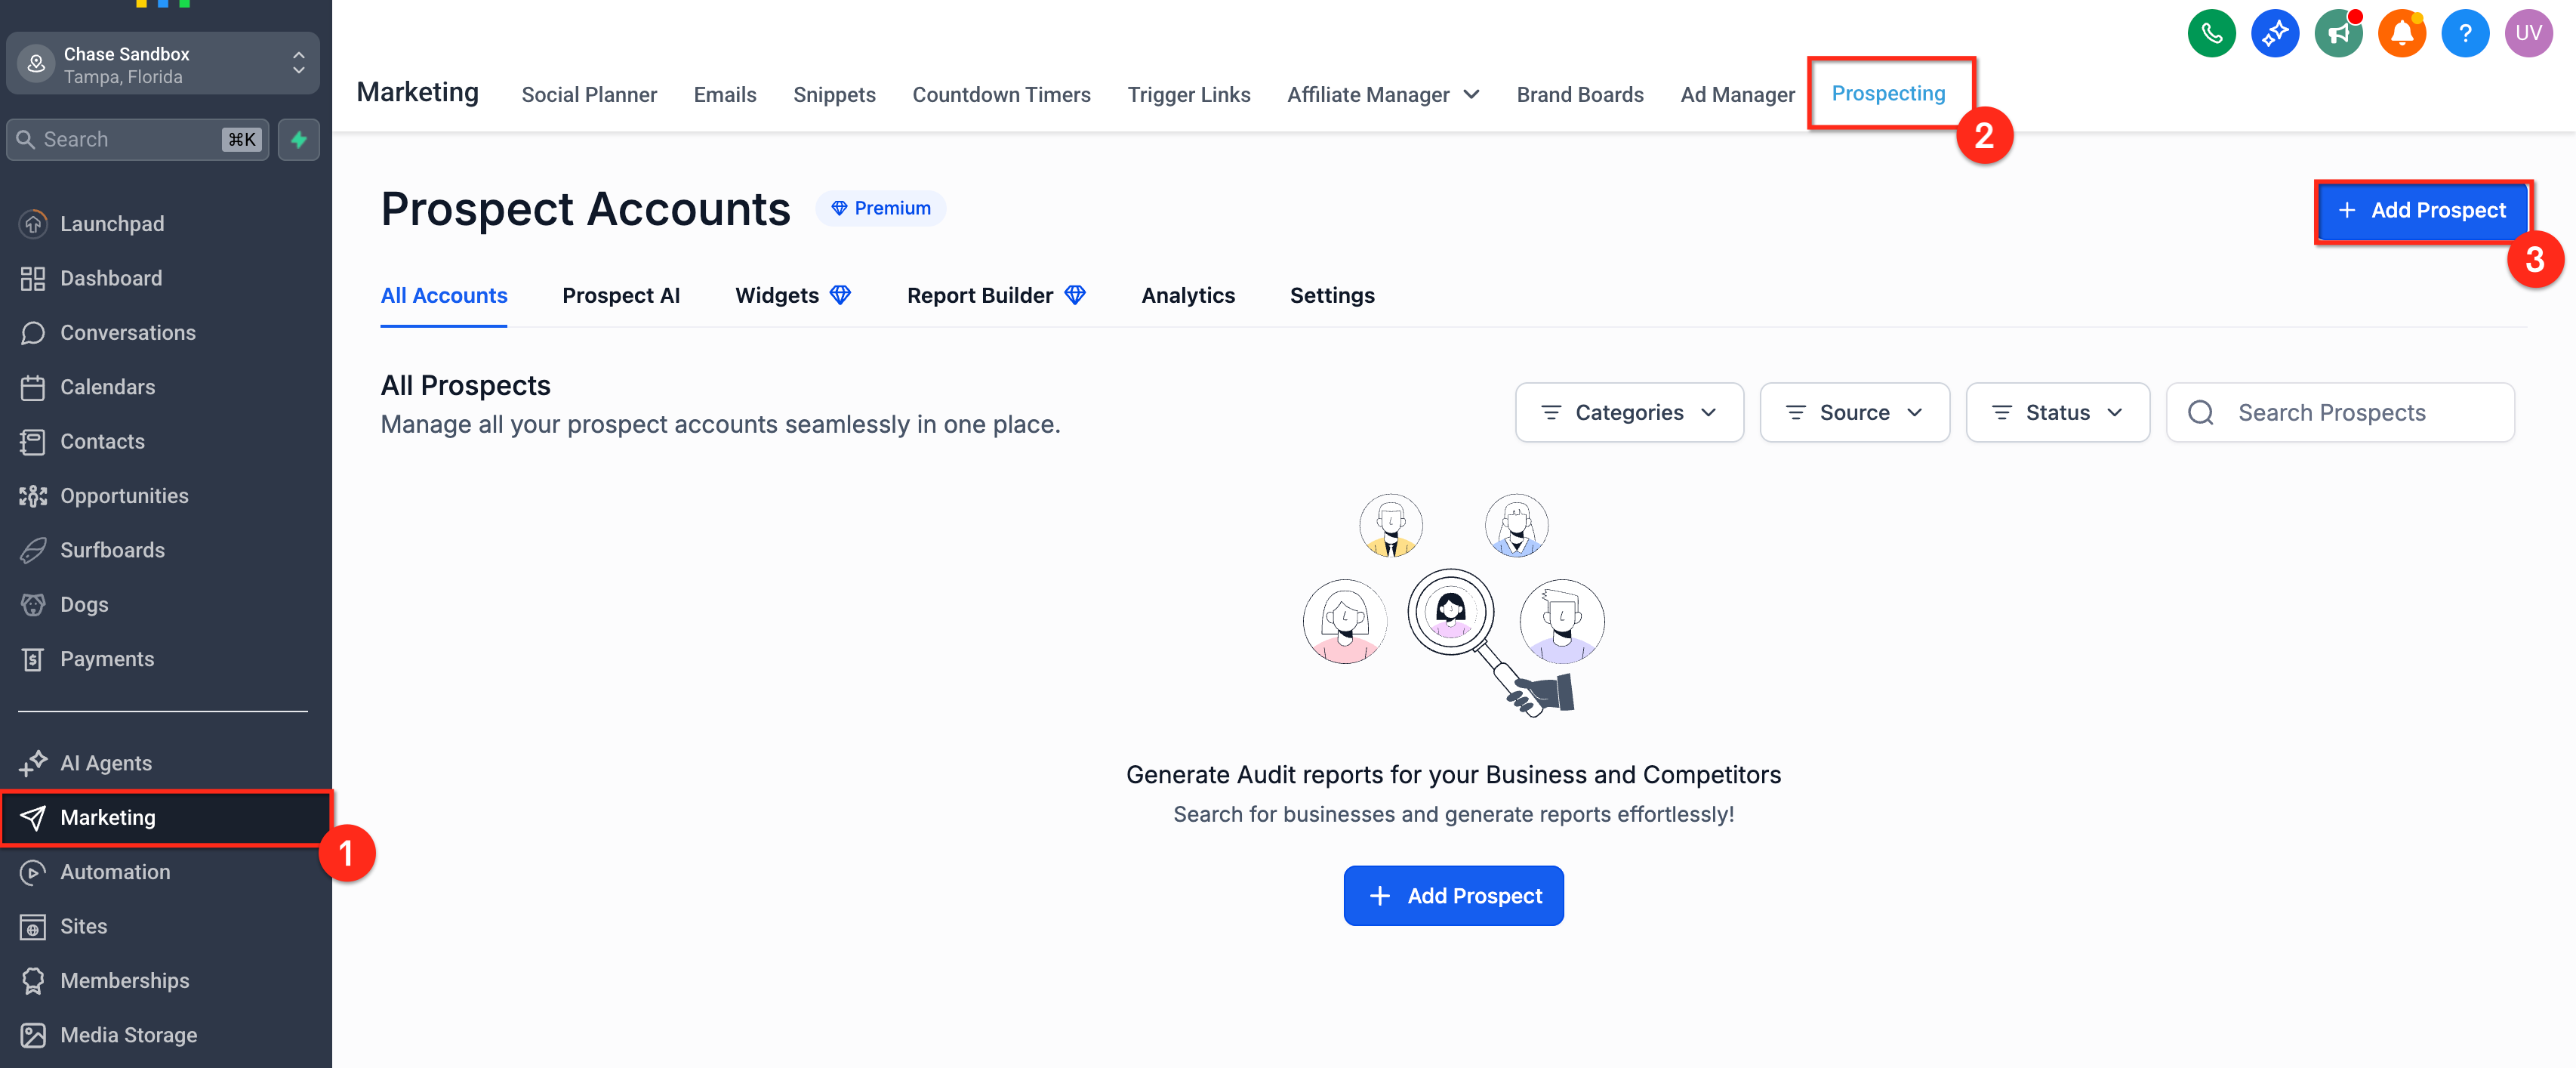
You find the option inside the Prospecting view of a subaccount. The setting works for both single prospect searches and bulk prospecting runs. Existing pipelines with defined stages must be present before you can select one.
03How businesses use add prospects to a pipeline
- Real estate agency. An agent searches for a property owner in the Prospecting tool, enables Add to a pipeline, selects the Sales pipeline and the Initial Contact stage, then generates the report. The owner appears as a new deal ready for follow up.
- Dental practice. The marketing staff imports a bulk list of new patient leads, turns on Add to a pipeline for each entry, chooses the New Patient pipeline and Consultation stage, and runs Generate Report. All leads are created as deals in one step.
- Software startup. A Founder locates a potential partner, activates Add to a pipeline, picks the Partnerships pipeline and Outreach stage, clicks Generate Report, and immediately sees the partner listed as an opportunity for further negotiations.
04Before you start
- Create at least one pipeline with defined stages in the platform.
- Work inside a subaccount where the Prospecting tool is available.
05How to set up and use add prospects to a pipeline in HighLevel
Add a prospect to a pipeline
- Open the Prospecting tool in the desired subaccount.
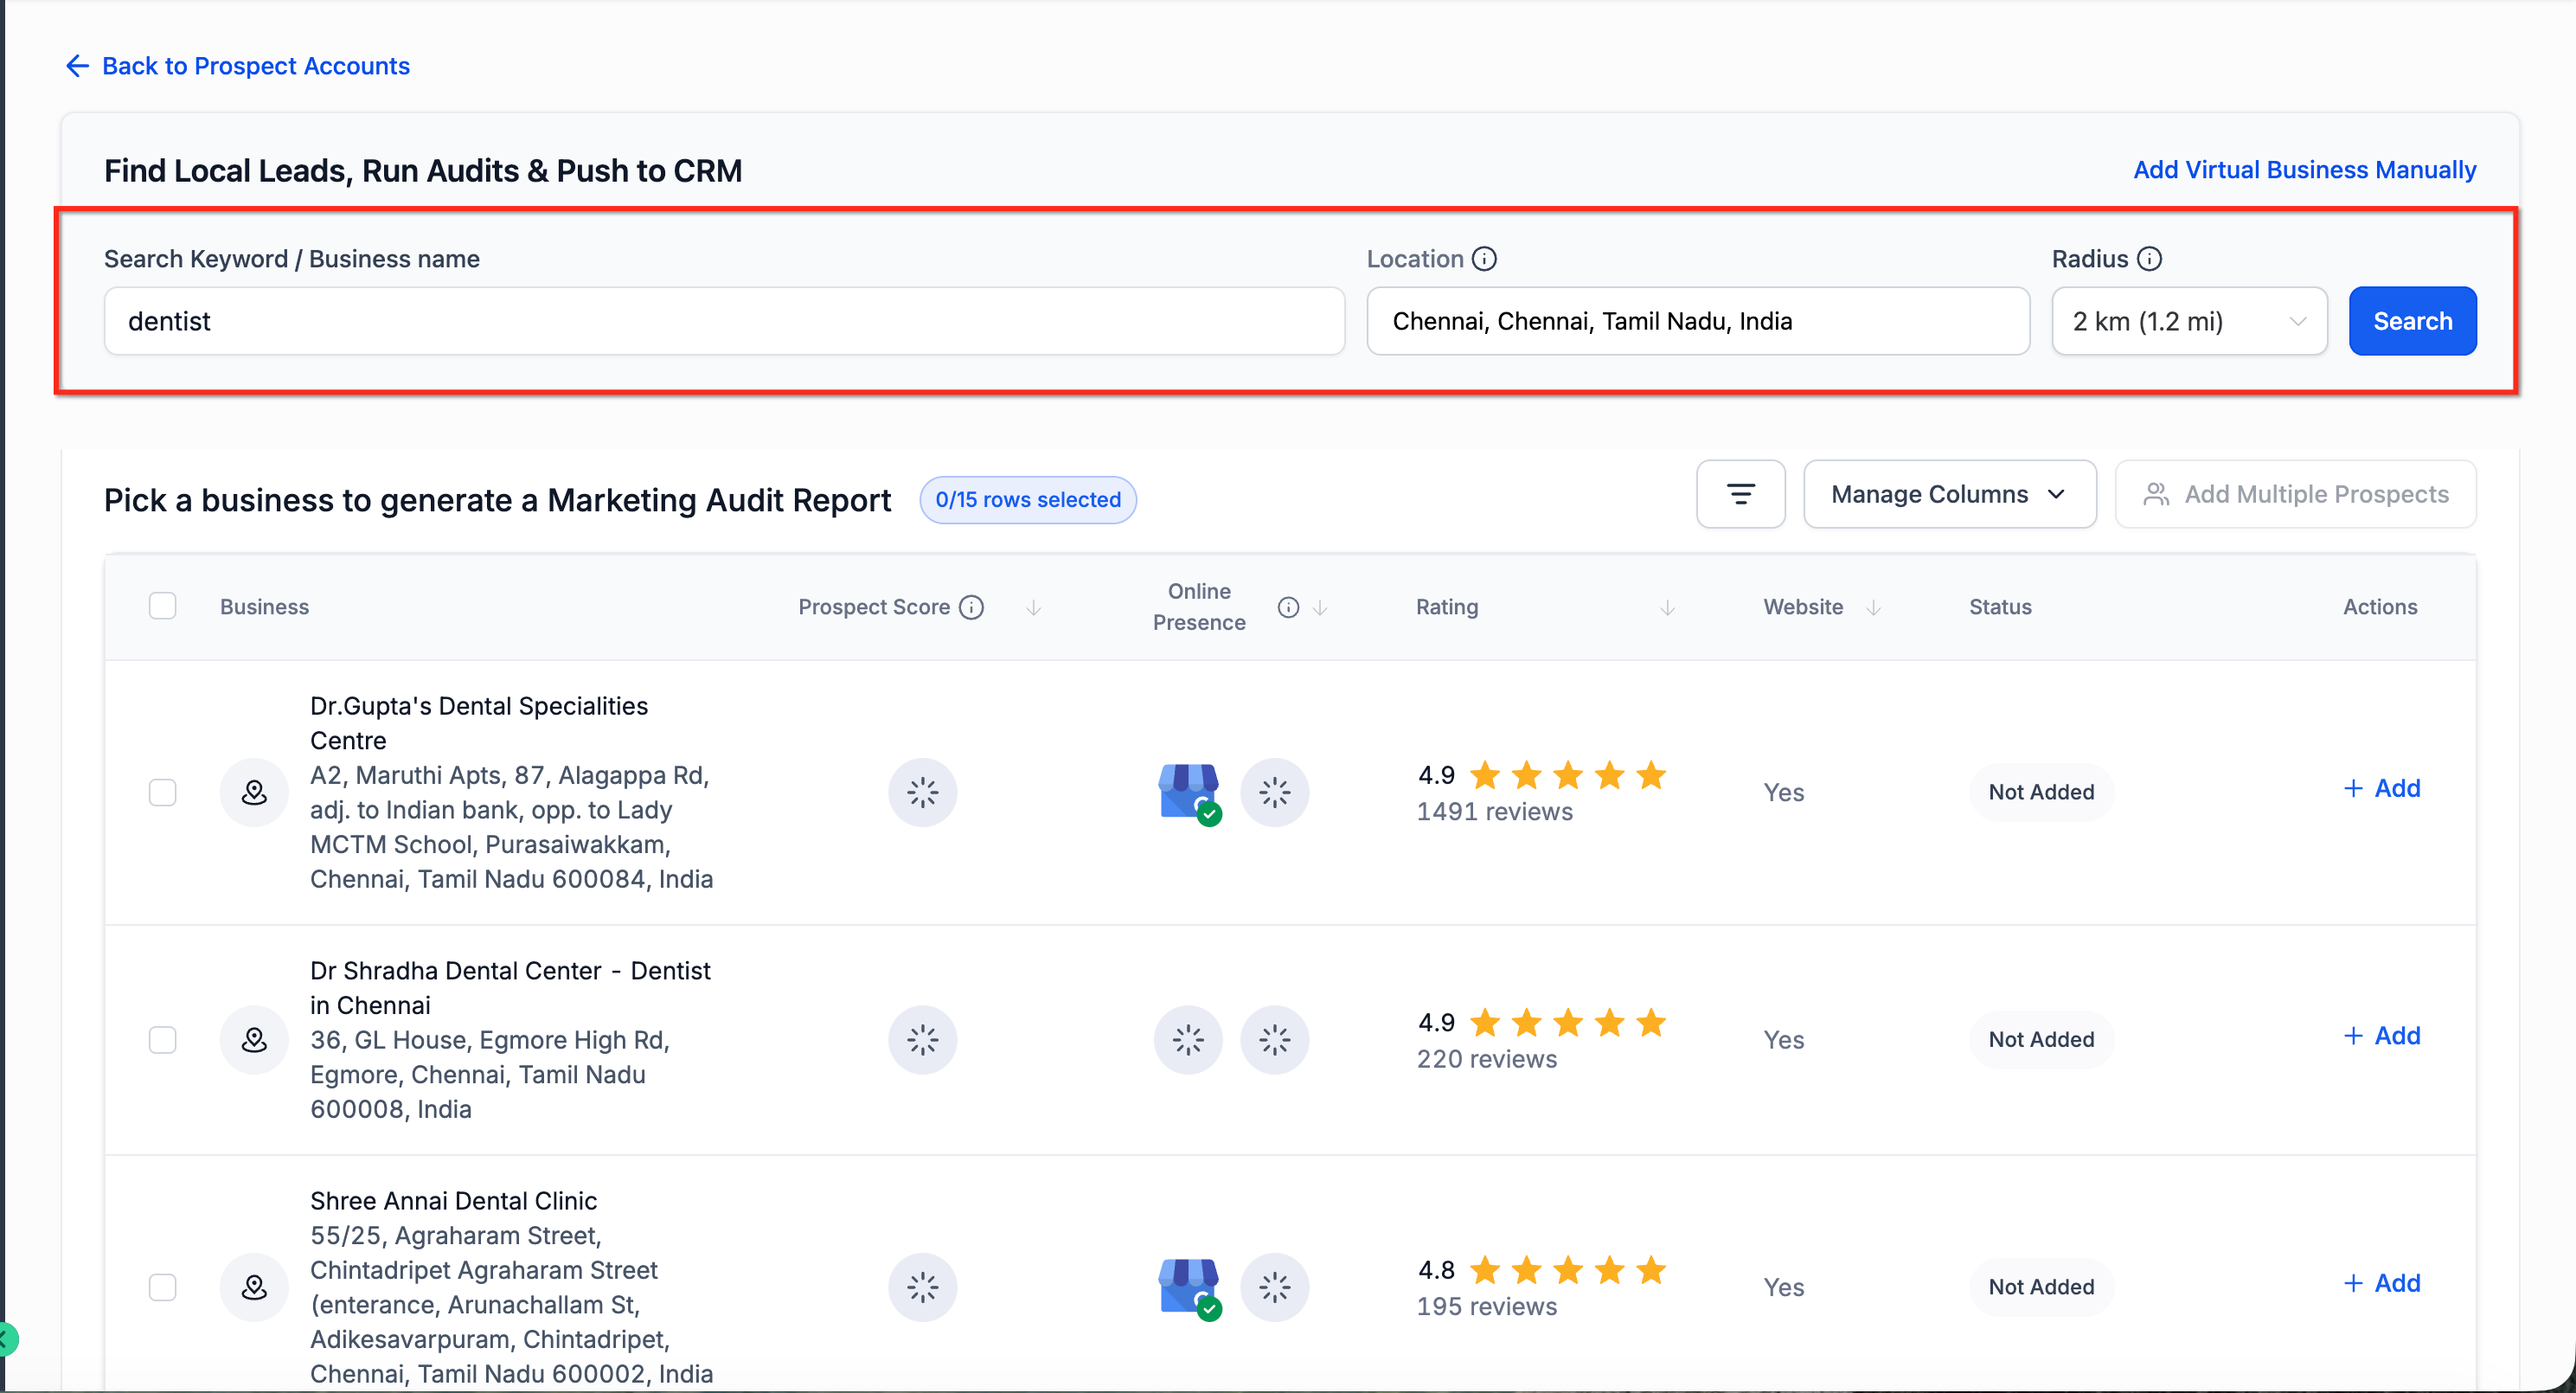
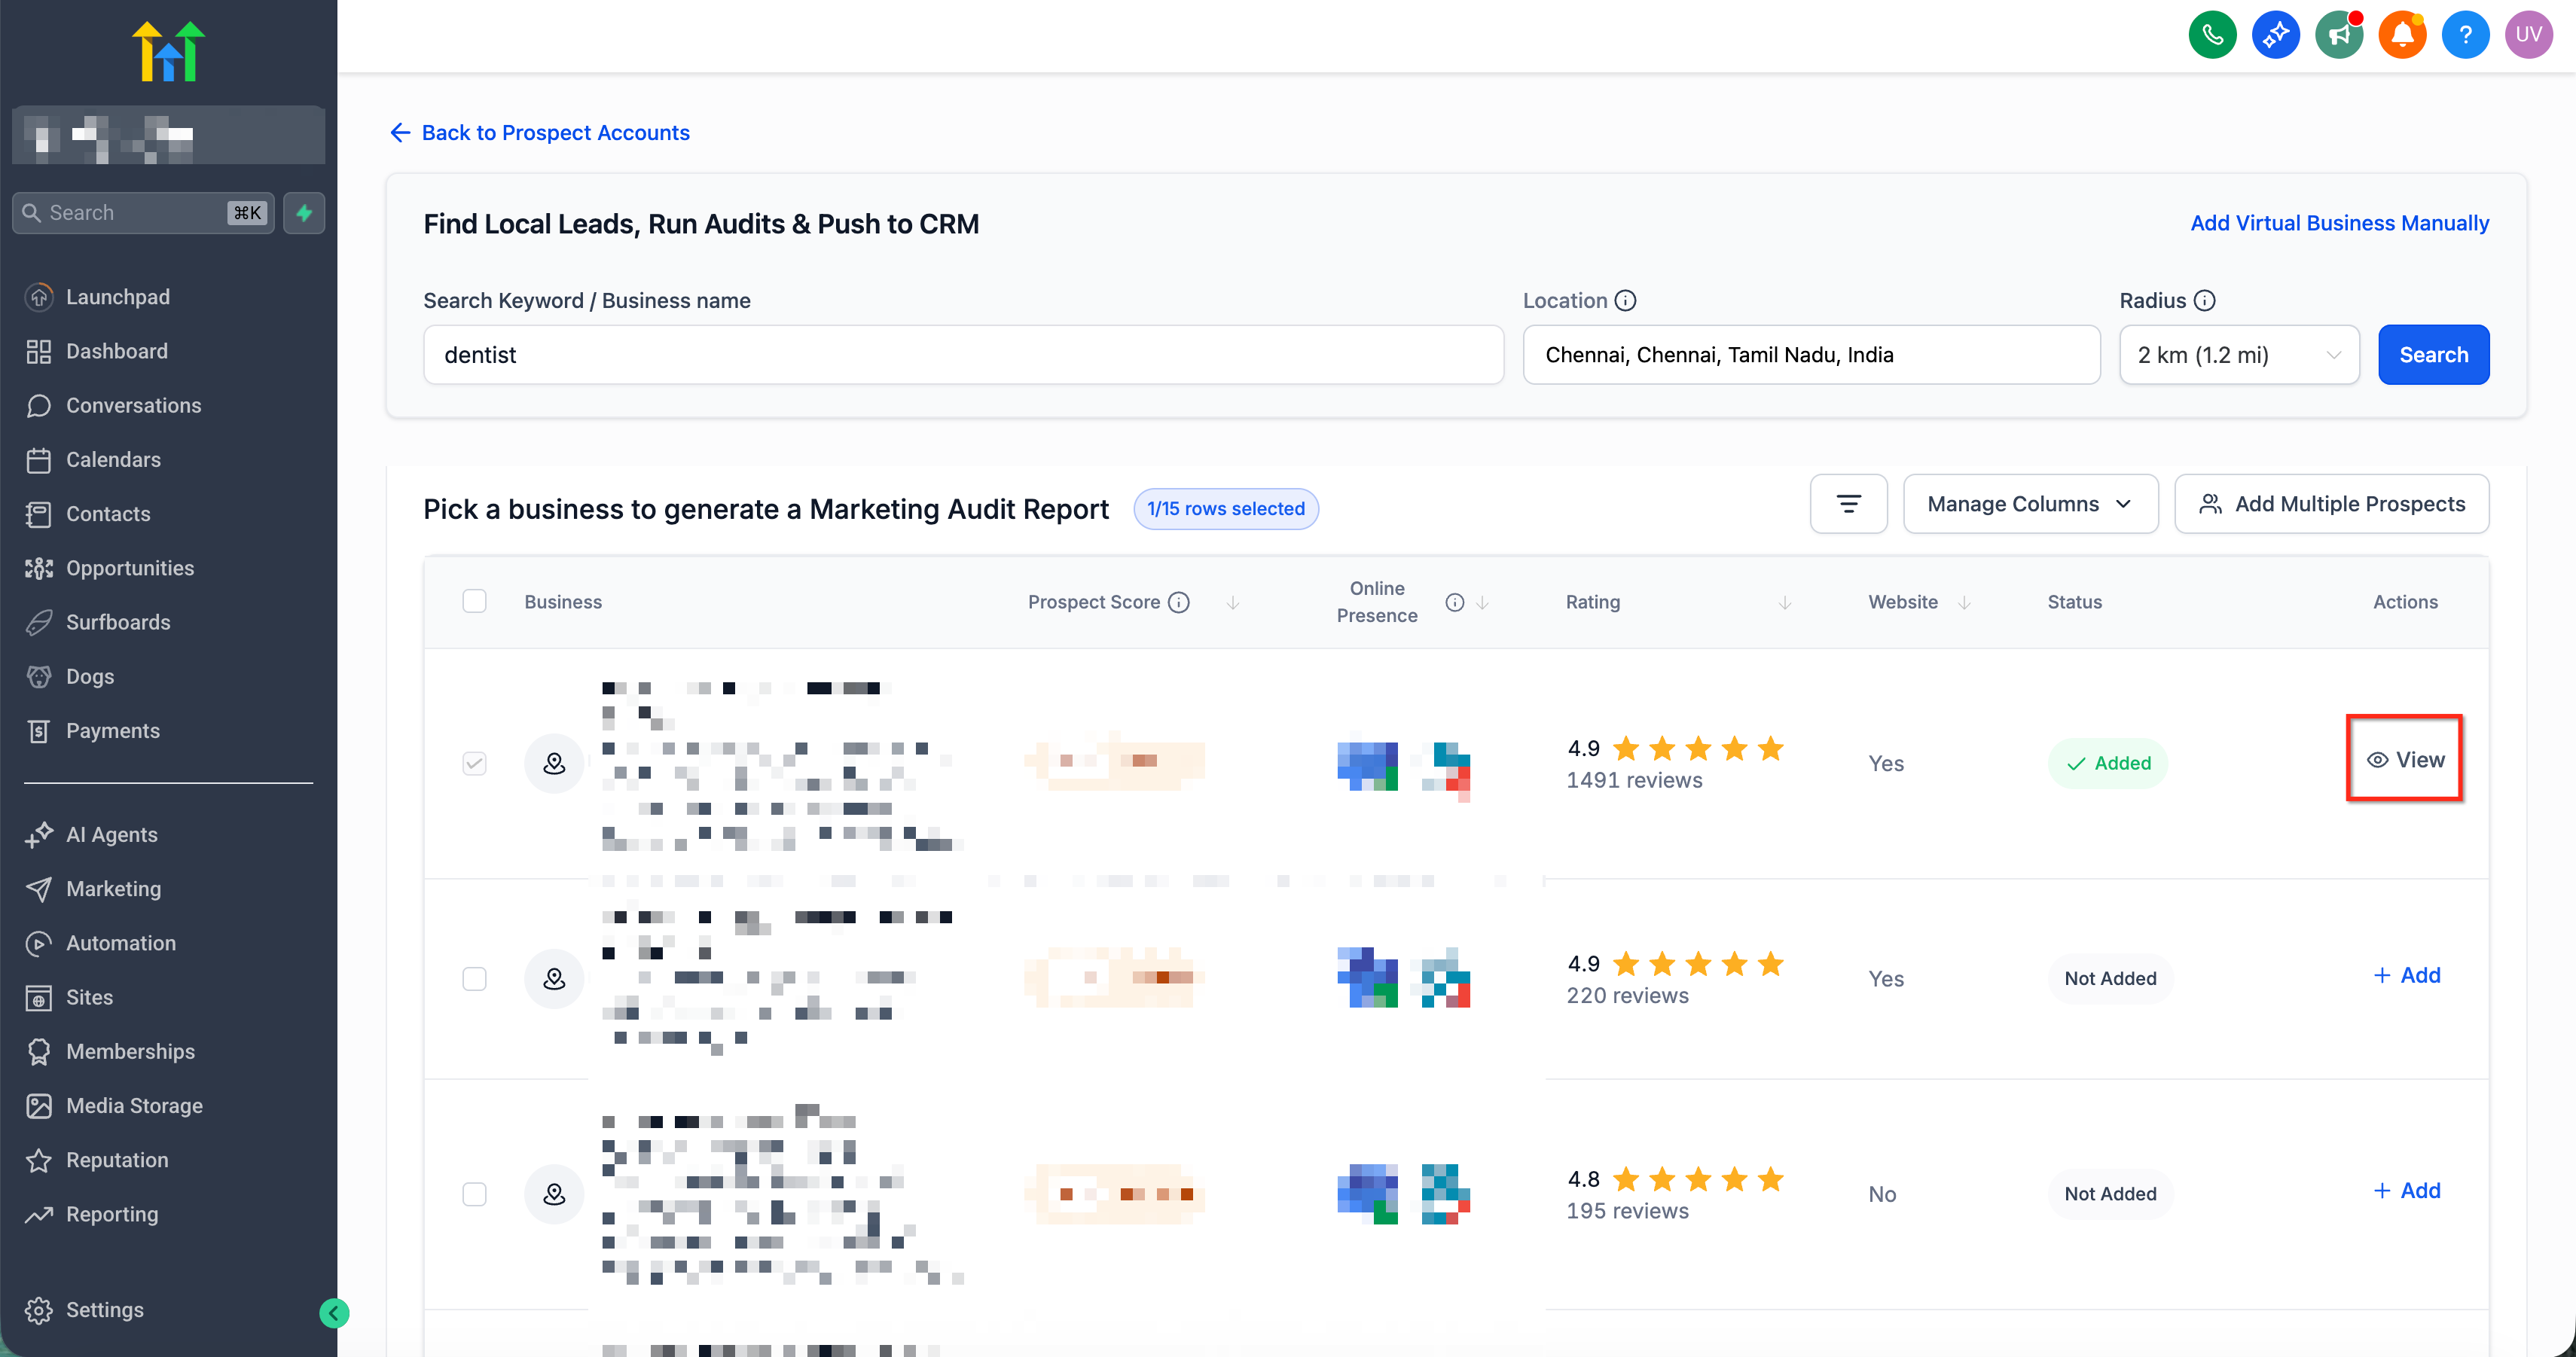
- Search for the target prospect using keyword, location and radius.
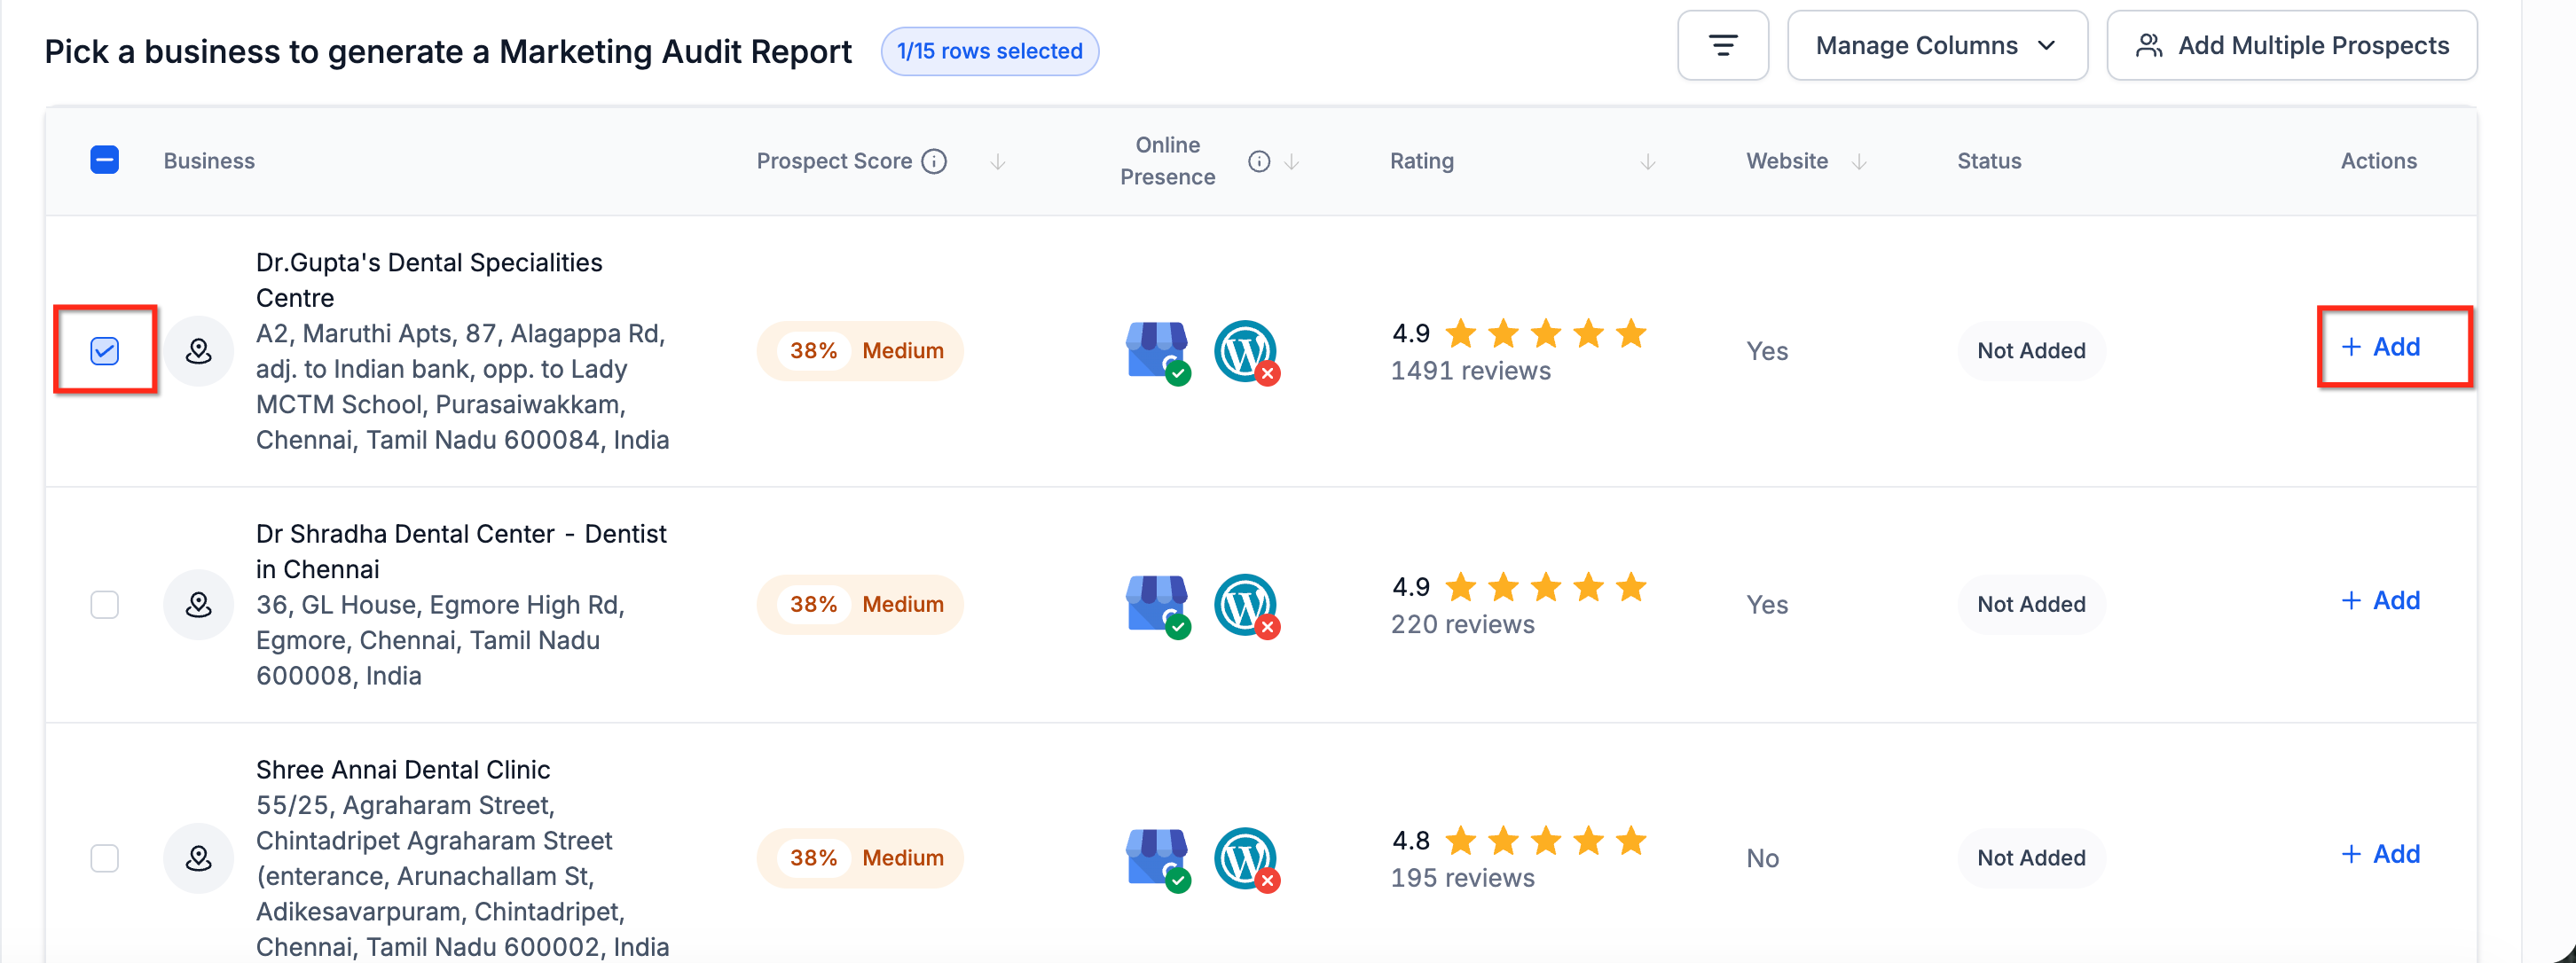
- Click the Add button on the prospect you want to capture.
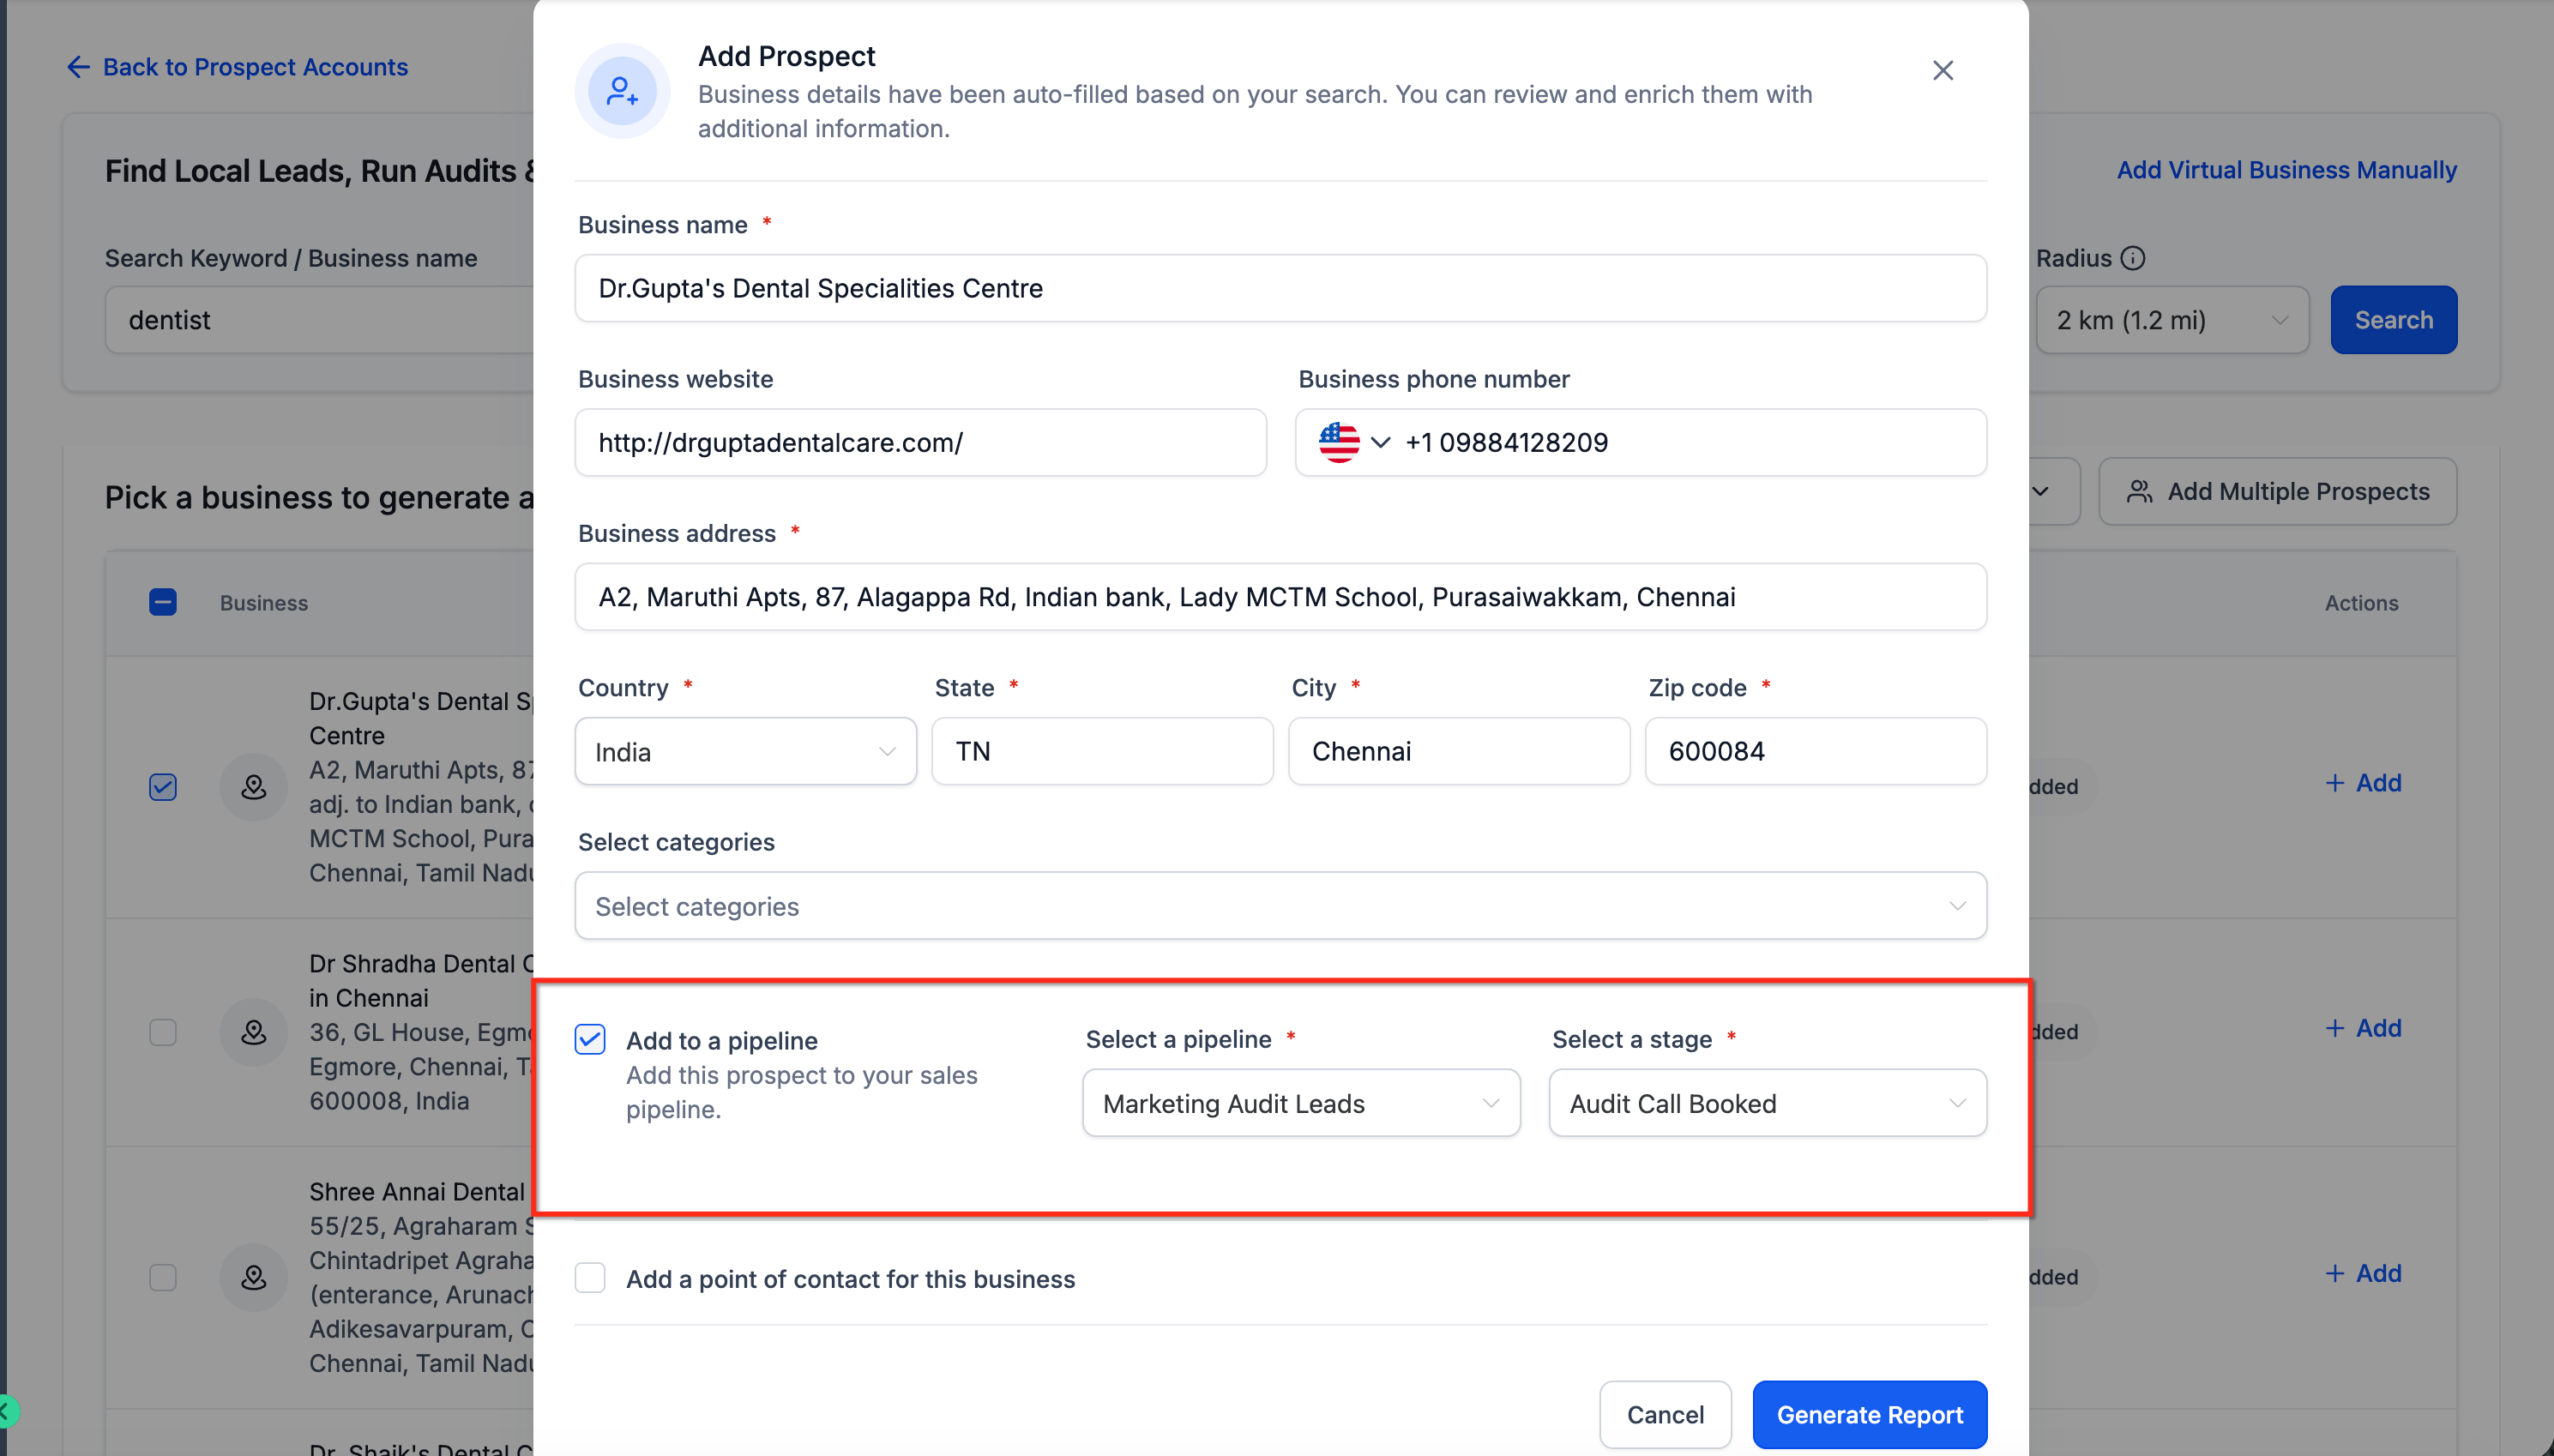
- Turn on the Add to a pipeline option, pick a pipeline, and choose a stage.
- Click Generate Report.
- Verify that the prospect appears in the selected pipeline stage.
06What it looks like in HighLevel
07Settings that matter
- Add to a pipeline option. Controls whether a newly captured prospect is sent into a chosen pipeline and stage instead of only being listed in a report.
08Things to know before you rely on it
- You must have an existing pipeline with stages to select when enabling the option.
- The feature works with both manual searches and bulk prospecting.
- After a prospect is added, you can move it between stages like any other deal.
09How it connects to the rest of HighLevel
- Learn how to set up pipelines and stages before using this feature. Setup pipelines
- Understand how opportunities function within the platform. Opportunity basics
- Explore automation triggers that fire on opportunity creation or stage changes. Automate opportunities
Michael's take

Adding prospects to a pipeline places a new lead into the chosen stage after you enable the option and generate the report, which can help keep outreach organized.
The first setting I would get right is selecting the correct pipeline and stage during the Add to a pipeline step. That ensures every new prospect lands exactly where your team expects it and may trigger automations that are configured for opportunity creation or stage changes.