
01Who this is for
- Email marketers who need precise control over section gaps to match design specifications.
- Small business owners creating newsletters and wanting consistent spacing for headings and paragraphs.
- Designers building client email templates who require repeatable pixel values across multiple sections.
02Layout margins and text spacing controls, explained
Layout margins adjust the vertical space outside a supported email section. Typography Settings let you set the space above and below paragraph and heading styles such as H1 H5. Both features give more flexibility when arranging email content.
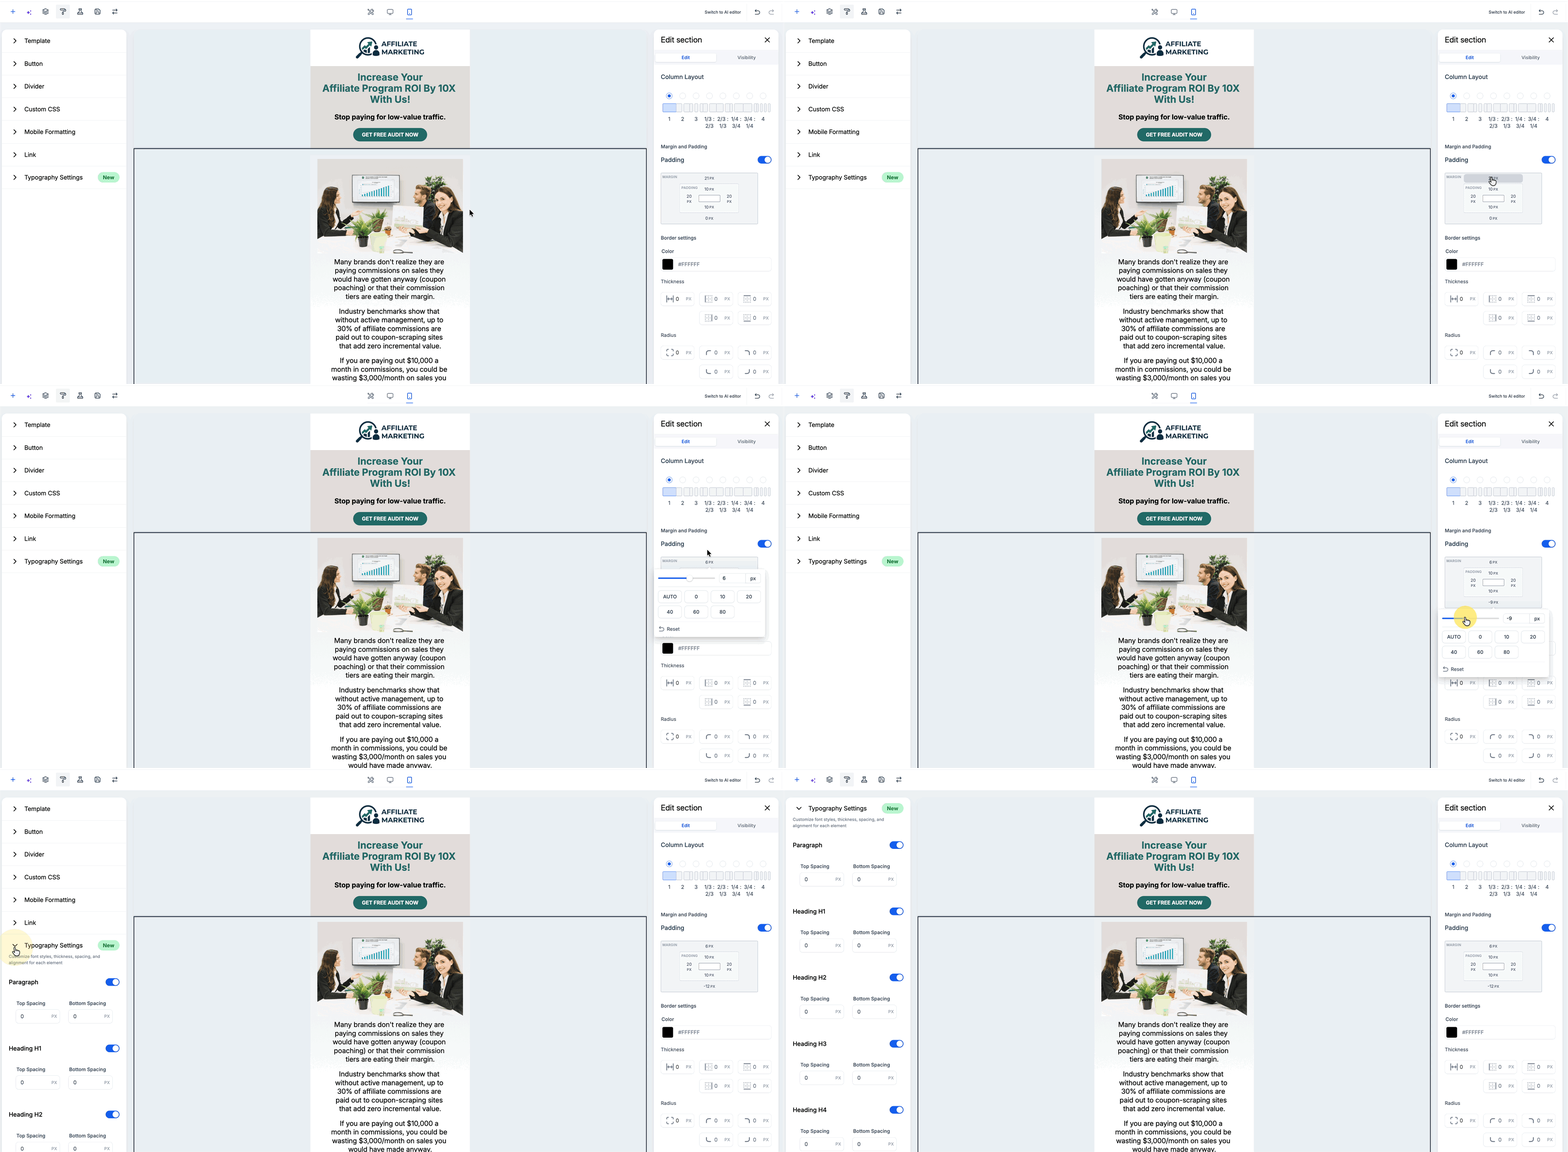
Margin values can be changed with a slider, typed directly in pixels, or chosen from presets. Top and Bottom Spacing for text styles are entered as pixel numbers. Any change updates the preview in the Email Builder immediately.
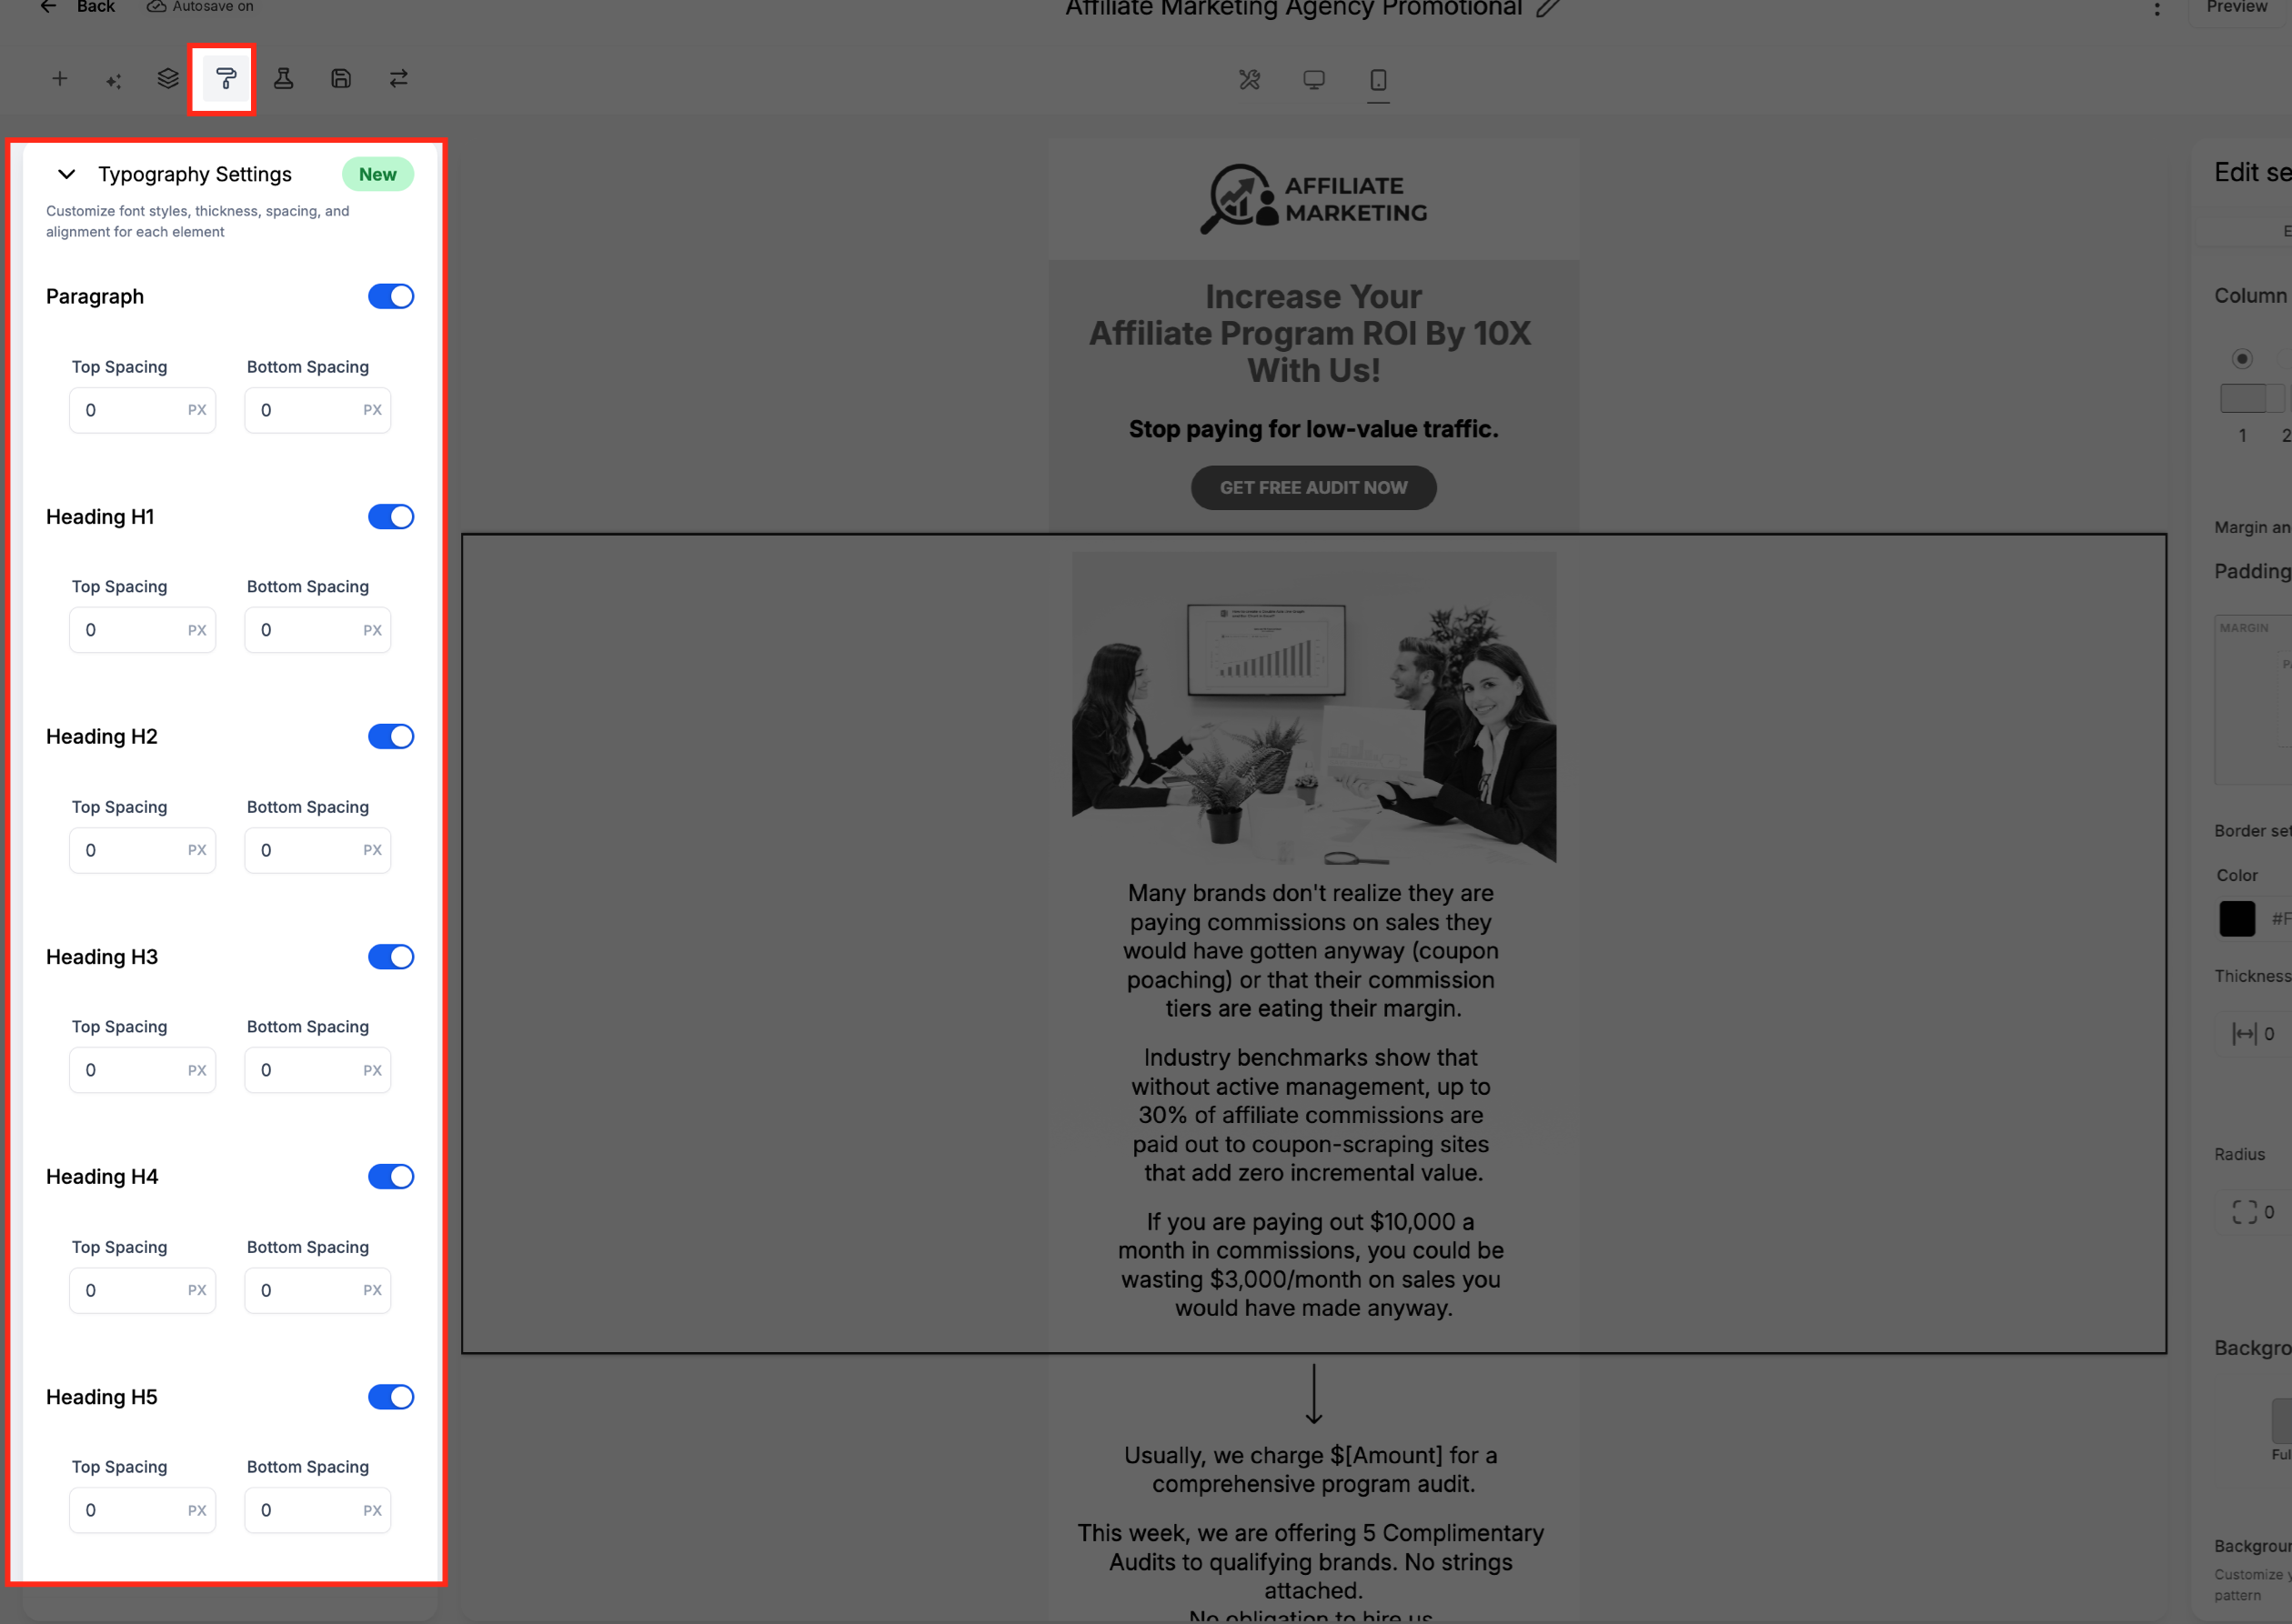
The margin controls appear in the Edit section panel of the Design Editor. Text spacing options are found in the Styling controls under the expanded Typography Settings section.
03How businesses use layout margins and text spacing controls
- Separate header and body sections. Apply a Top Margin to the header section and a Bottom Margin to the body section to create a clear visual break.
- Create uniform paragraph gaps. Enable Paragraph spacing and set identical Top and Bottom Spacing values to maintain consistent gaps throughout the email.
- Emphasize headings. Adjust the Top Spacing of a Heading style to increase space above it, making the heading stand out in the layout.
04The numbers and rules that matter
- Margin presets: AUTO, 0, 10, 20, 40, 60, 80.
- Supported text styles: Paragraph, Heading H1, Heading H2, Heading H3, Heading H4, Heading H5.
05How to set up and use layout margins and text spacing controls in HighLevel
Adjust layout margins
- From the HighLevel Subaccount, go to Marketing.
- Select Emails.
- Open Campaigns or Templates.
- Create a new email or open an existing email.
- Open the email in the Design Editor.
- Select the section whose spacing you want to adjust.
- In the Edit section panel, locate the Margin and Padding area.
- Click the Top or Bottom Margin box in the box model.
- Adjust the margin using the slider, type a pixel value, or pick a preset.
- Use Reset if you want to restore the margin value.
- Review the updated spacing directly in the Email Builder.
Adjust text spacing
- Open the email in the Design Editor.
- Open the builder’s styling controls.
- Expand Typography Settings.
- Enable the text style you want to configure.
- Enter a value in Top Spacing to control the space above the selected style.
- Enter a value in Bottom Spacing to control the space below the selected style.
- Review the change directly in the Email Builder.
06What it looks like in HighLevel
07Settings that matter
- Top Margin. Sets the vertical space above a selected section, measured in pixels.
- Bottom Margin. Sets the vertical space below a selected section, measured in pixels.
- Top Spacing. Controls the space above a chosen paragraph or heading style, measured in pixels.
- Bottom Spacing. Controls the space below a chosen paragraph or heading style, measured in pixels.
- Enable/disable toggle. Turns spacing controls on or off for each supported text style.
08Things to know before you rely on it
- Only Top and Bottom Margin values can be adjusted; left and right margins are not available.
- Margin and text spacing values must be entered in PX units.
- Presets for margins are limited to AUTO, 0, 10, 20, 40, 60, and 80.
- Text spacing is available only for Paragraph and Heading styles H1 through H5.
09How it connects to the rest of HighLevel
- Learn how to move the Email Builder edit panel and use the inline editor. Edit panel guide
- Set up and use the HighLevel template library for reusable designs. Template library overview
Michael's take

Want to tighten up the space between sections or headings in your emails without messing with HTML? Layout margins and text spacing controls give you a quick visual way to add or remove pixels above and below sections and text styles right inside the Email Builder.
I’d start by opening a template, picking the section that looks cramped, and sliding the top margin a few pixels higher. Then I’d hop into Typography Settings, enable the heading I’m using, and set a consistent bottom spacing so the whole email feels balanced. Test the look on desktop and mobile, and you’ll see the change in the preview.