
01Who this is for
- Ecommerce owners who need product photos displayed consistently across devices.
- Coaches and consultants who want to embed branded logos or banners in newsletters.
02Image elements, explained
The Image Element lets you place visual content directly into an email template. You can pull an image from your local computer, paste an external URL, or select a file already stored in HighLevel’s library. Once placed, the element offers controls for width, height, alignment, padding and an optional click through URL.
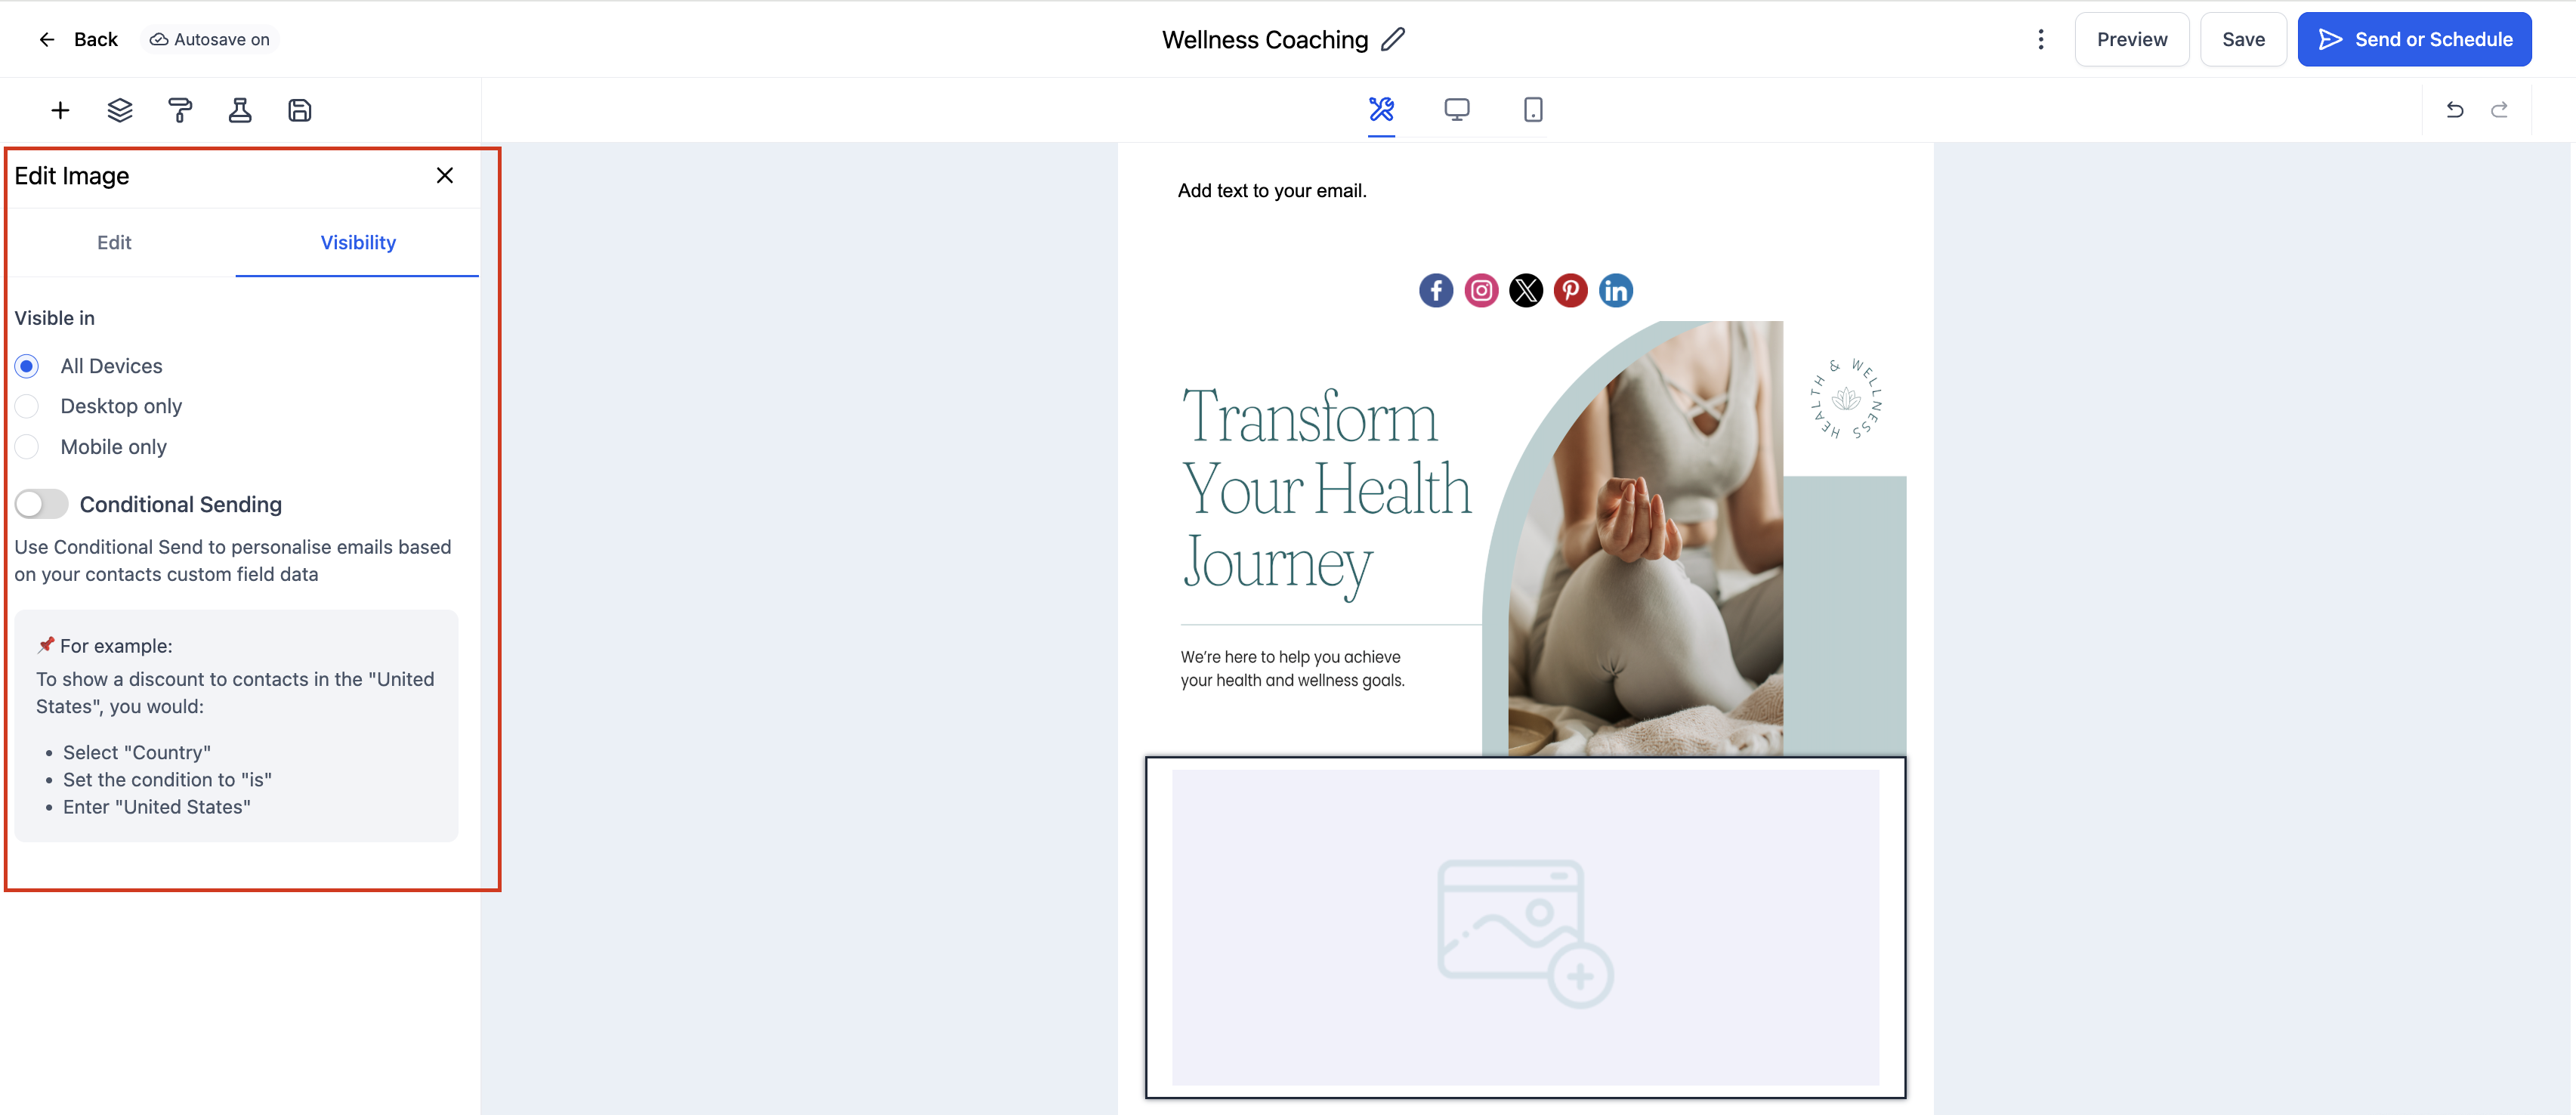
The element lives in the Email Builder under the Add Elements (+) drawer. After dragging it onto the canvas, the left hand Edit panel appears where all settings are configured. A Visibility tab lets you hide the image on specific devices or apply conditional sending rules. The final design can be previewed on both desktop and mobile screens before saving.
Images render across major email clients, and the platform automatically scales them for mobile devices. Using compressed files under 1 MB helps maintain load speed and deliverability.
03How businesses use the image element
- Ecommerce store. Upload product photos or enter external image URLs, set exact dimensions and alignment, add a link to the product page, then preview on mobile and desktop to ensure shoppers see the item correctly.
- Coaching business. Insert a branded logo image, adjust size and padding for a balanced header, attach a link to the booking calendar, and verify the appearance on both device views before sending the newsletter.
- Event planning company. Place venue or speaker images, set them to center alignment, add a click through link to the RSVP page, optionally hide the image on mobile, and preview the final email layout.
04The numbers and rules that matter
- Compressed images (under 1MB) are recommended.
- Supported file types: JPG, PNG, GIF.
05How to set up and use the image element in HighLevel
Add and configure the Image Element in an email template
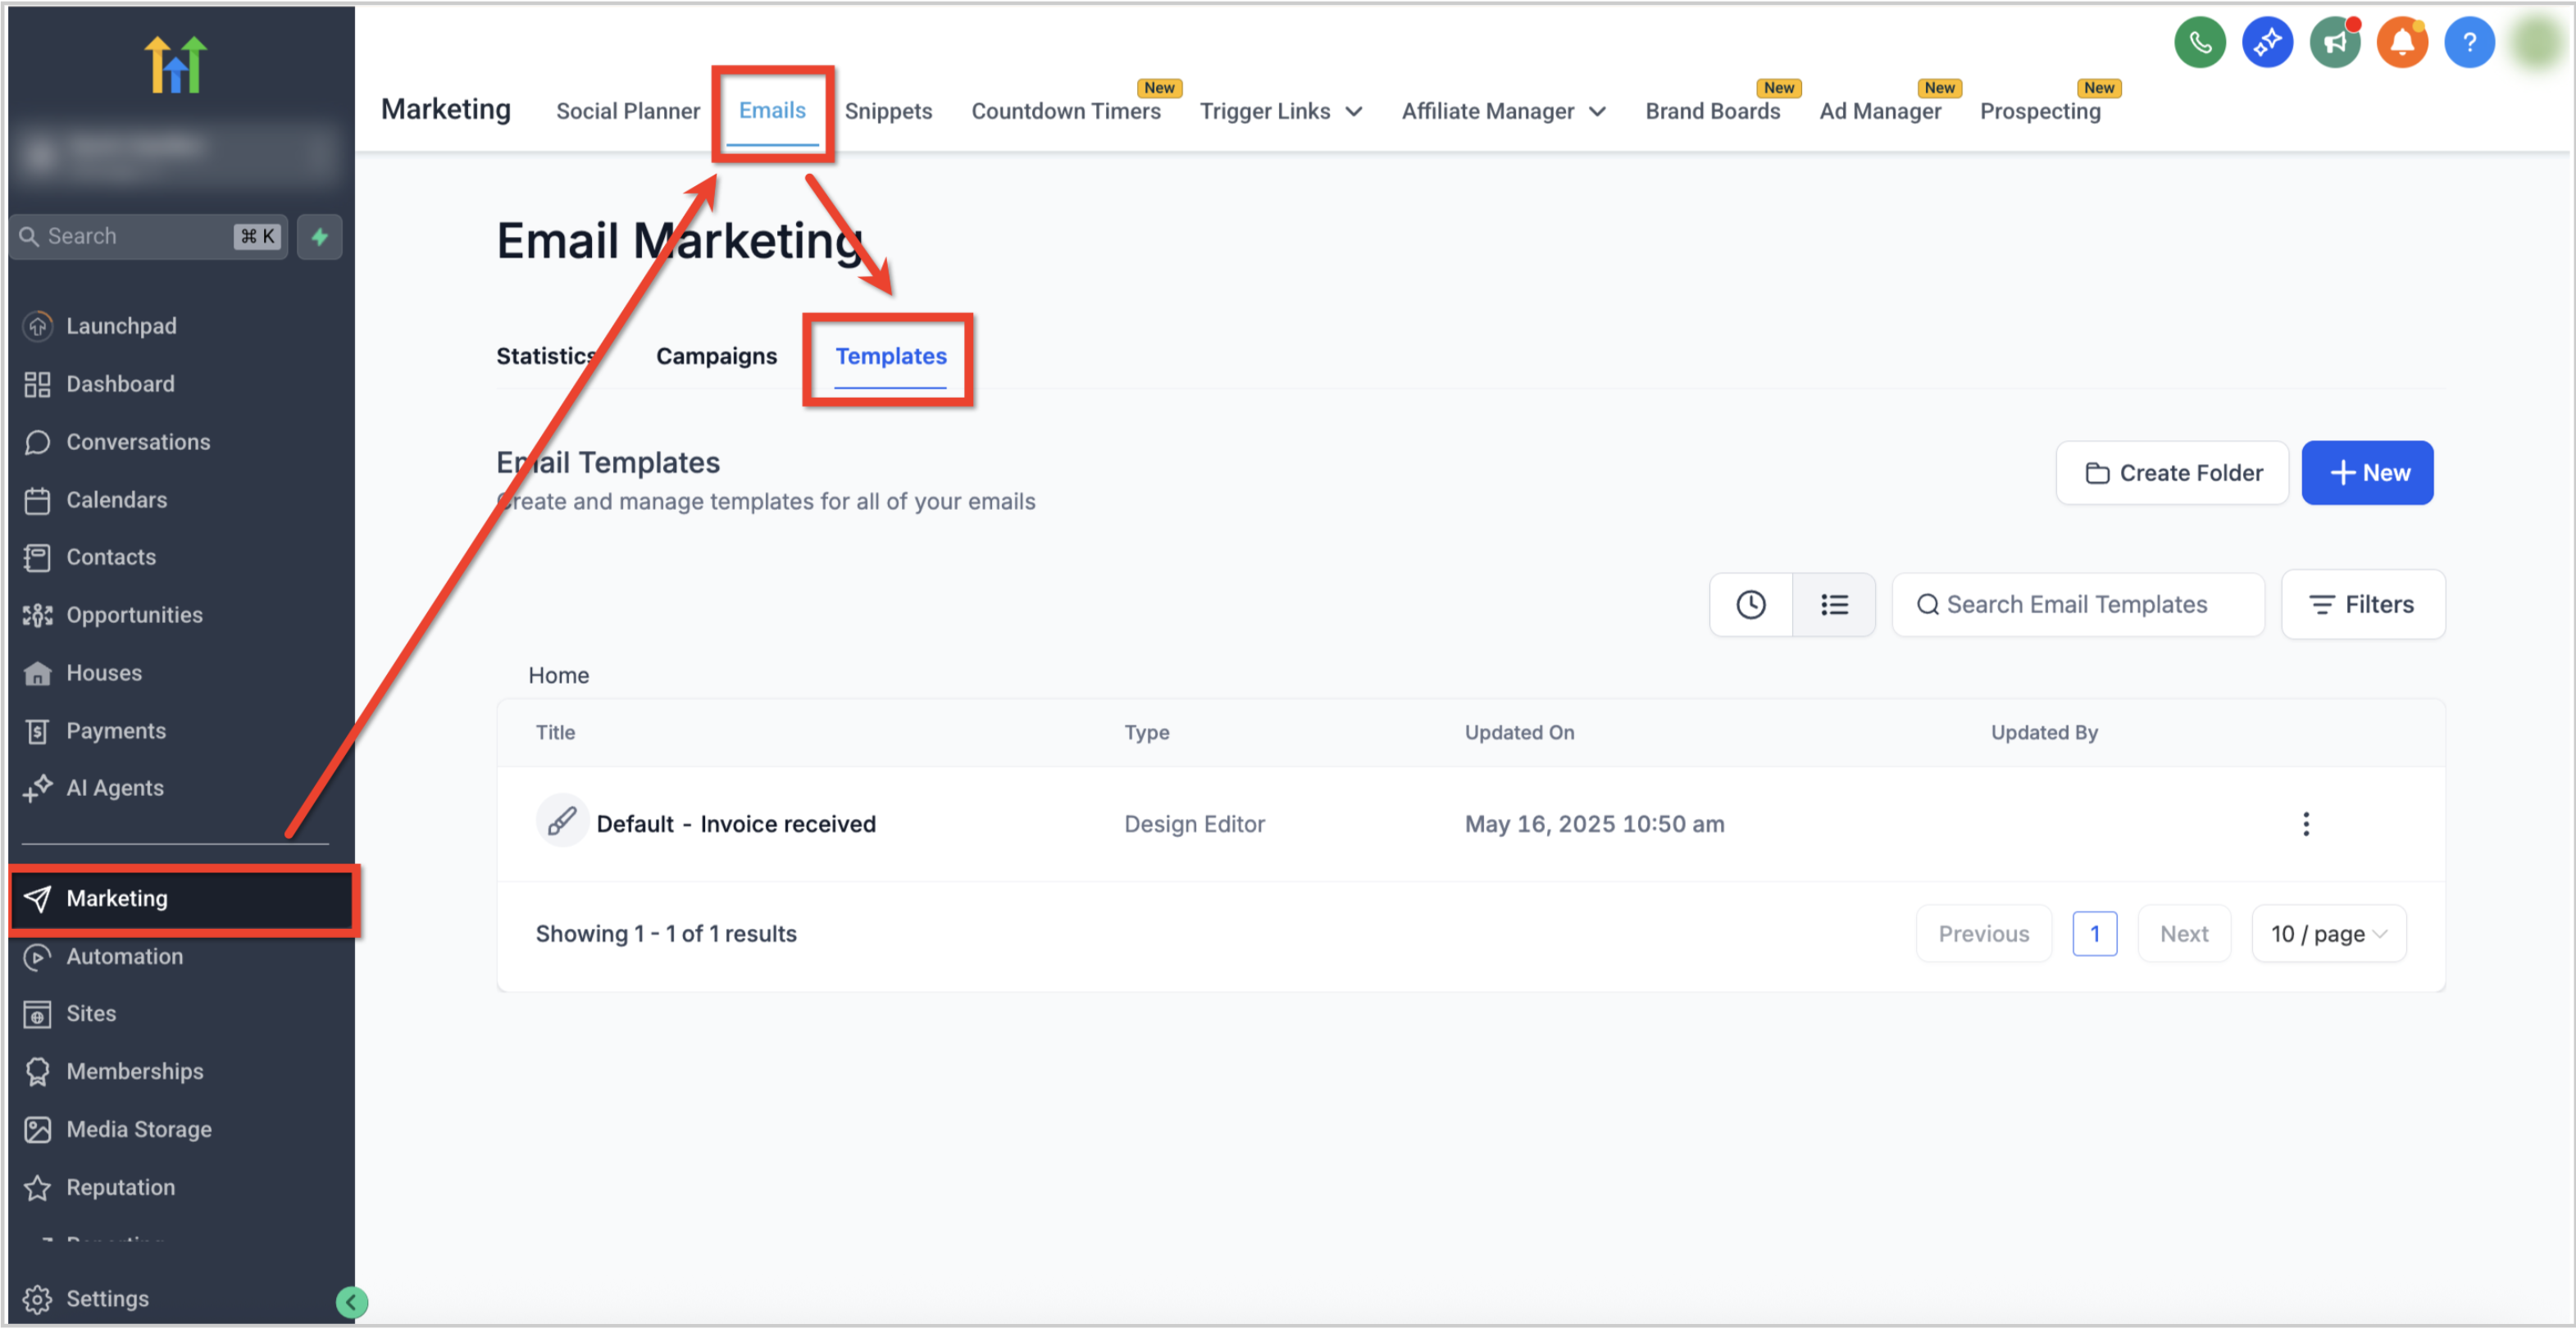
- Navigate to Marketing > Emails > Templates from the subaccount dashboard.
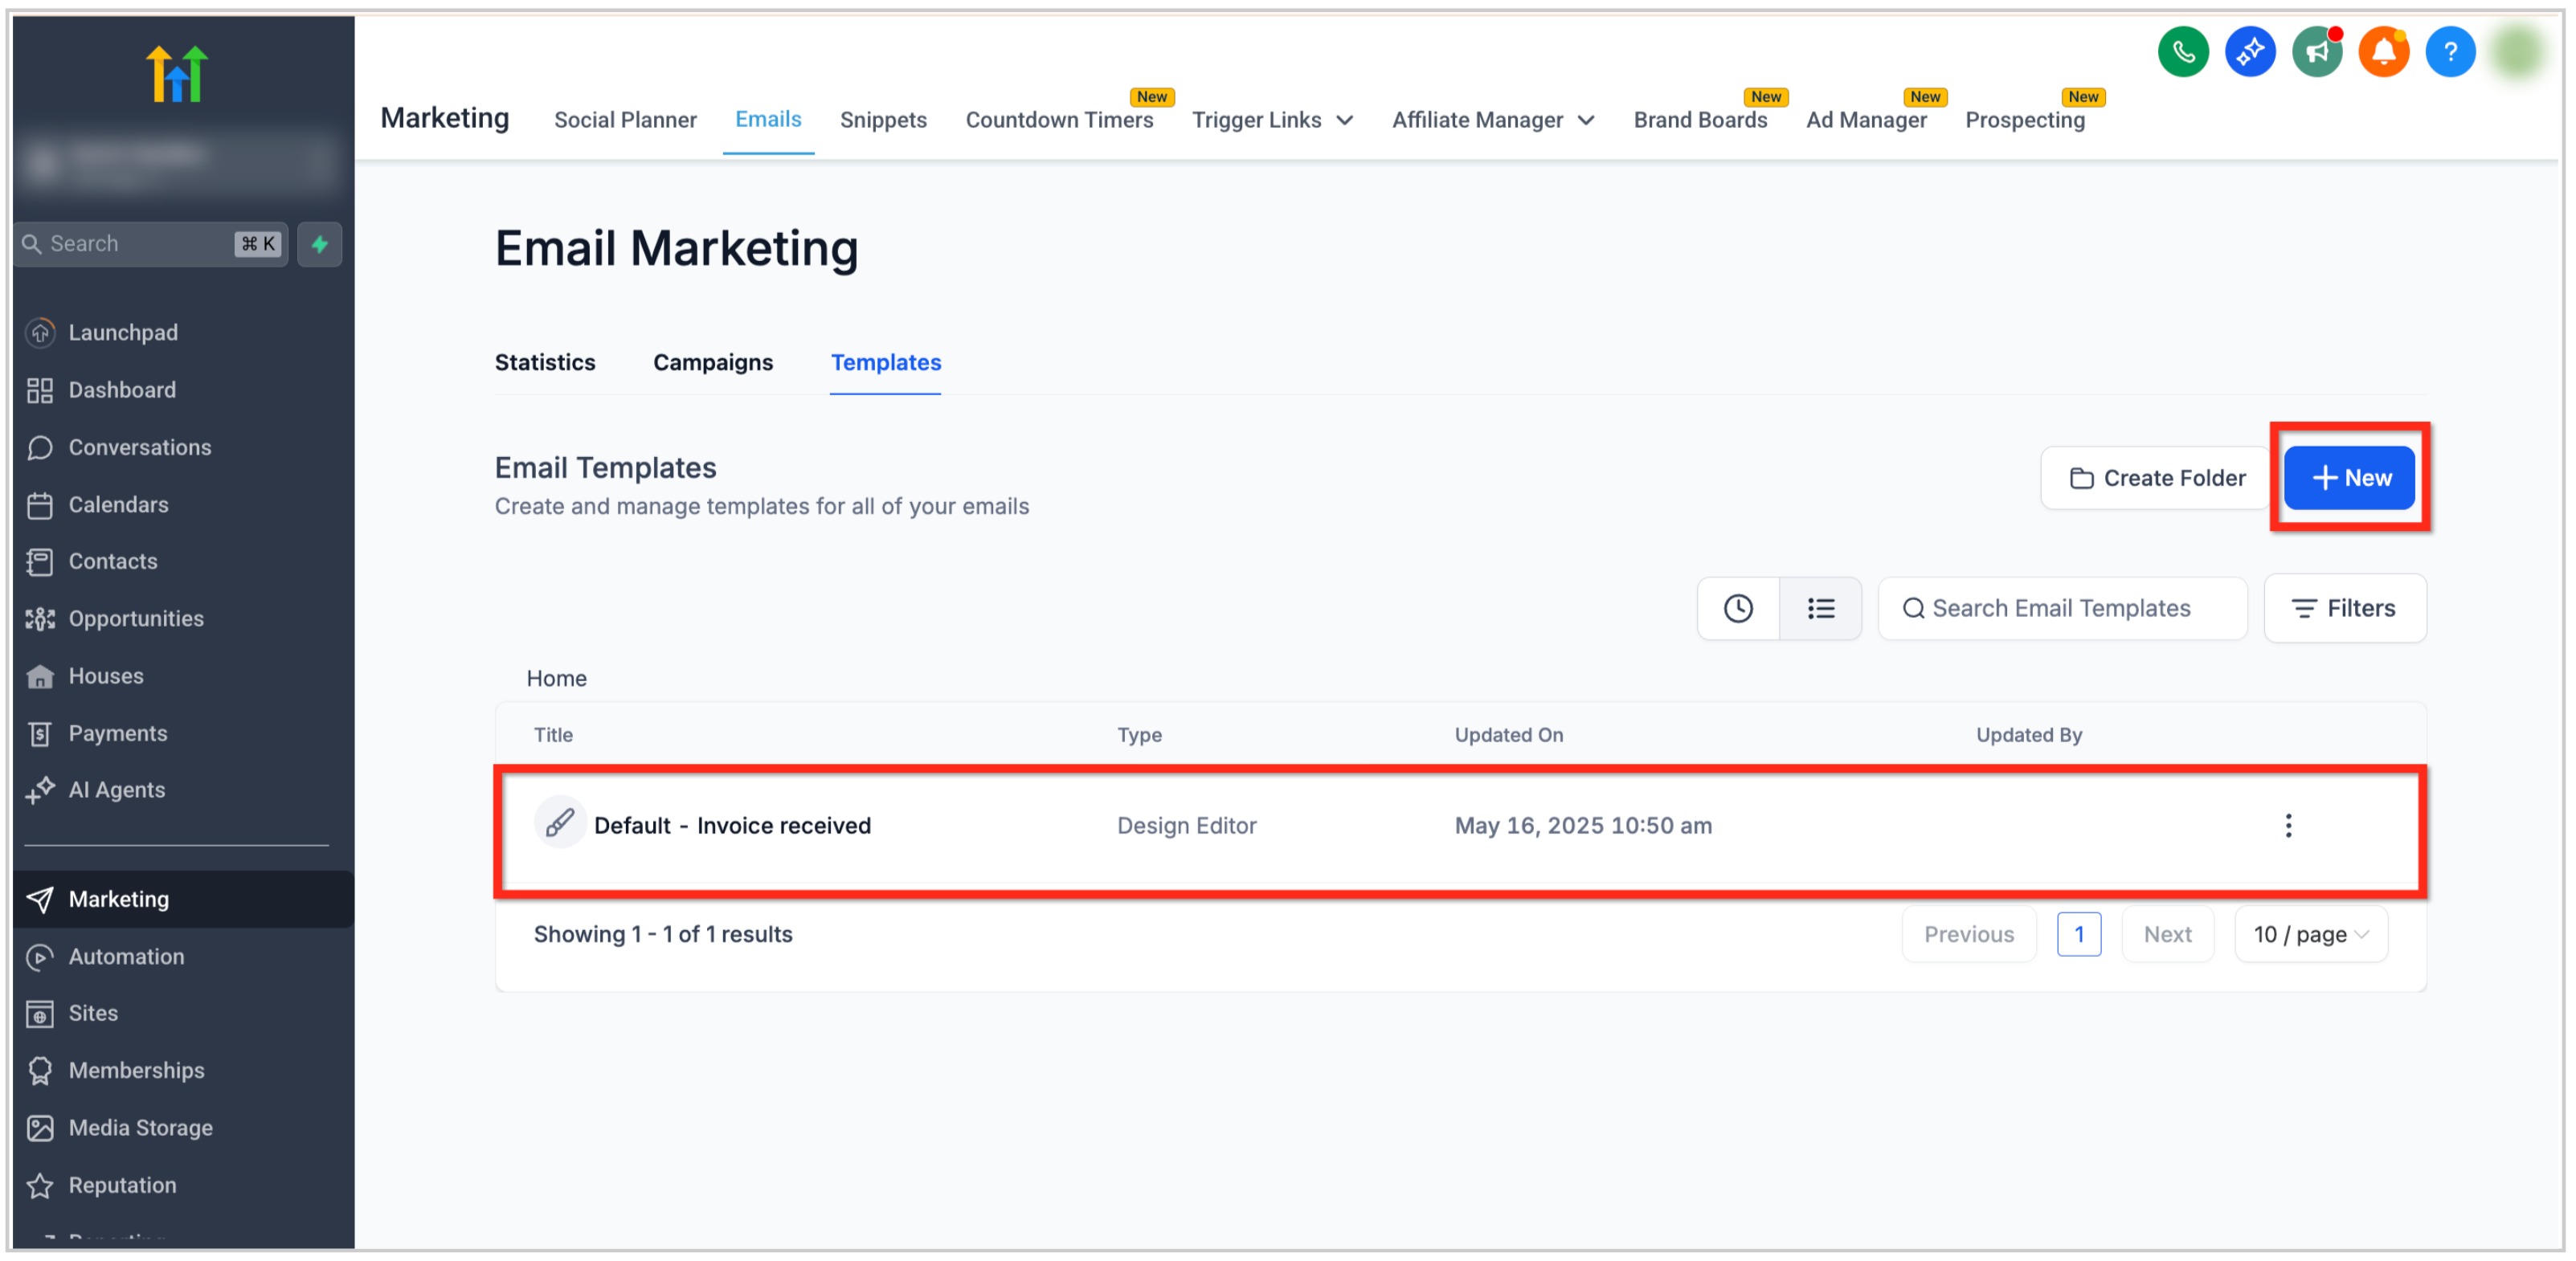
- Open an existing template or click the + New button to start a new one.
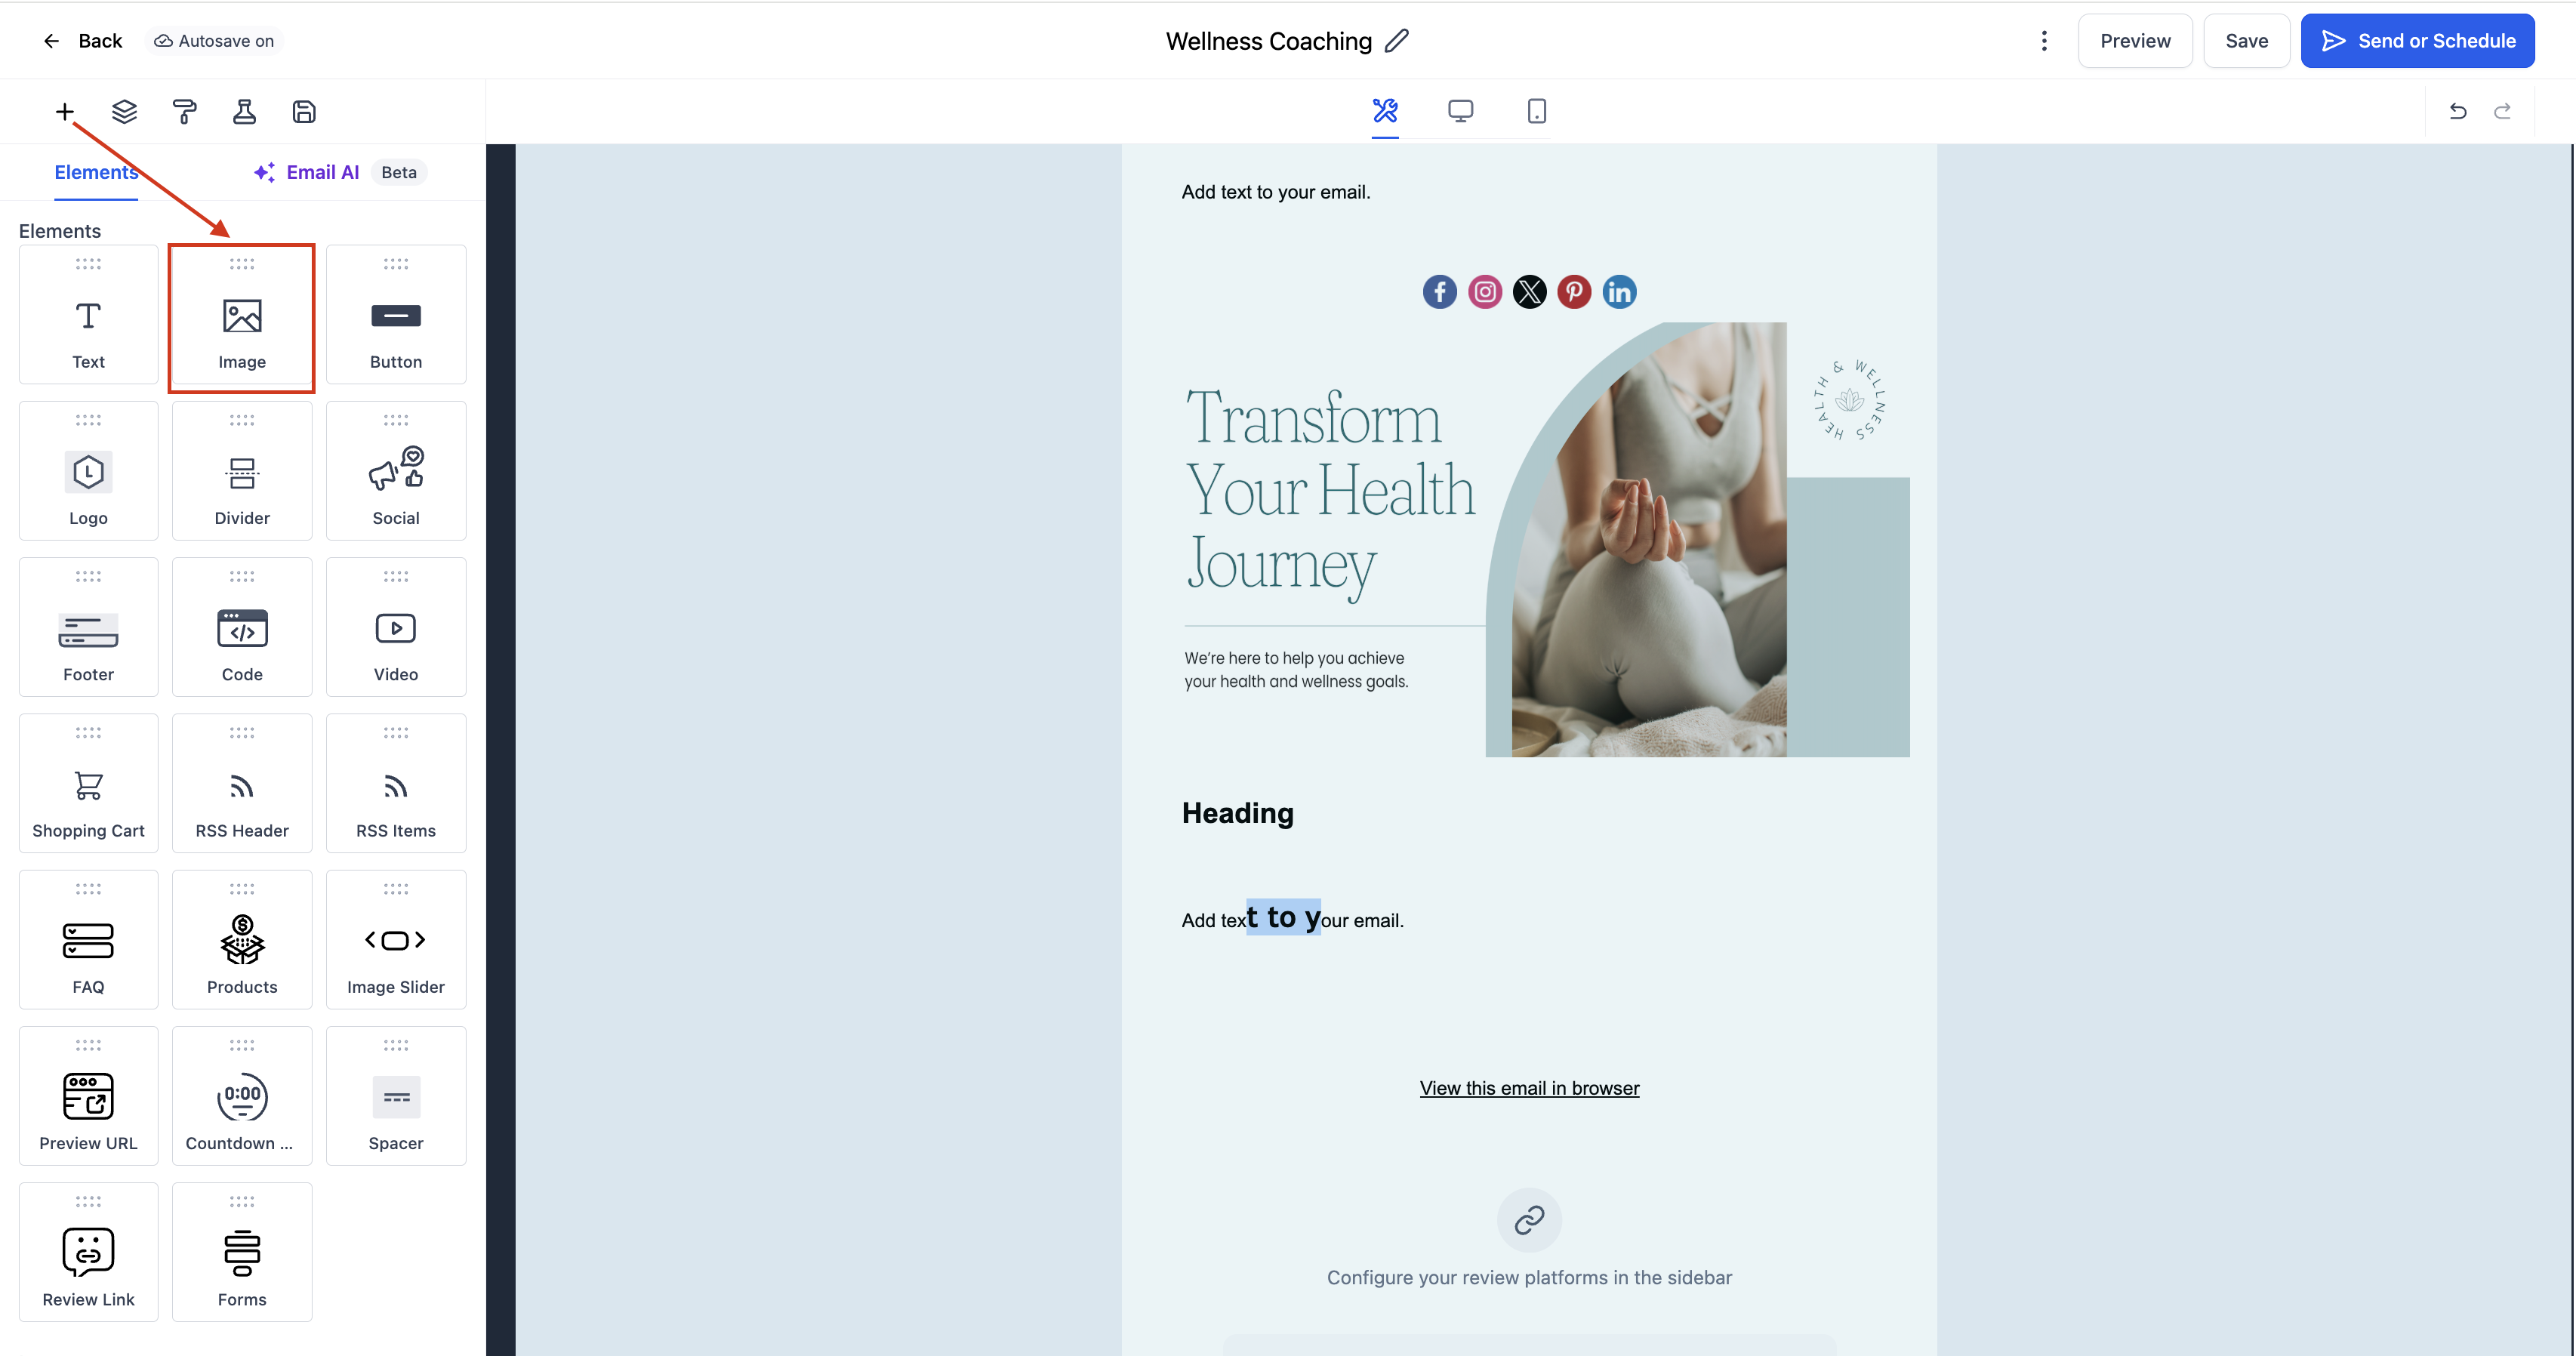
- In Email Builder, click the Add Elements (+) icon in the left sidebar.
- Find the Image Element listed under Elements.
- Drag the Image Element to the desired spot in the email layout.
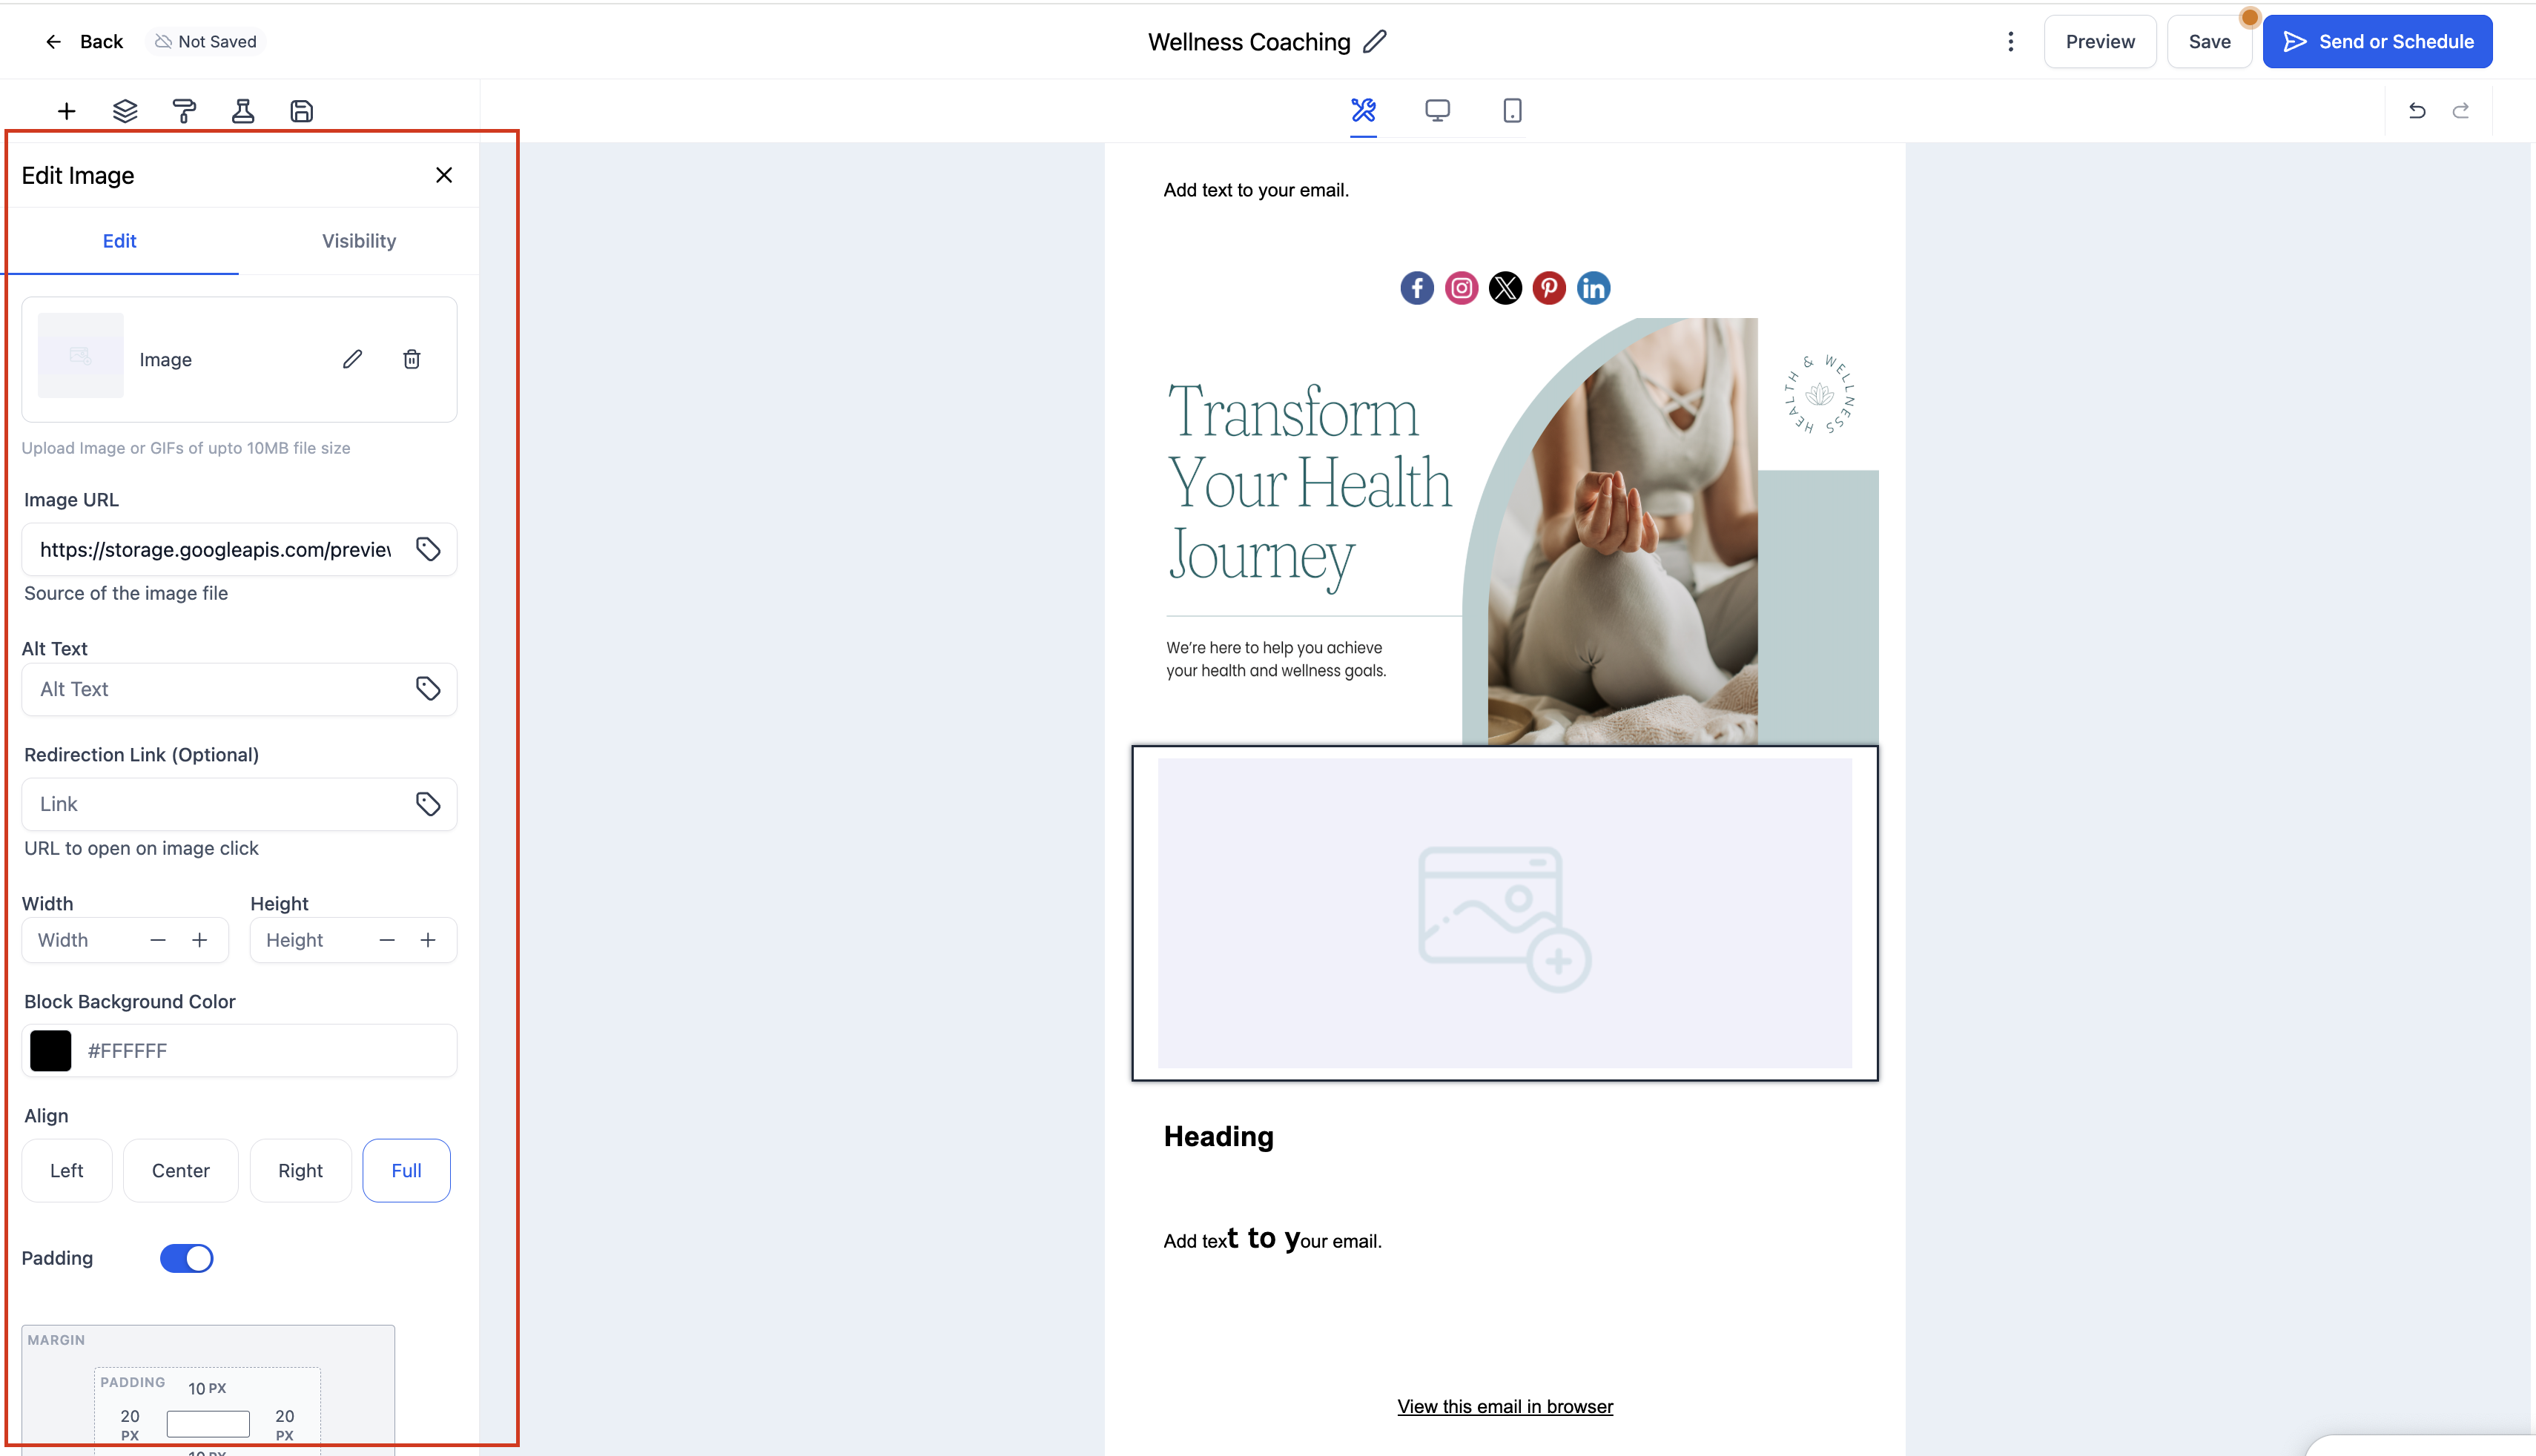
- Click the Image Element to open its Edit tab on the left panel.
- Upload an image file from your computer.
- Paste a direct link to an externally hosted image in the Image URL field.
- Enter custom width and height values or keep automatic scaling.
- Add a destination URL in the Redirection Link field to make the image clickable.
- Choose left, center, or right alignment for the image.
- Set padding values to control spacing around the image.
- Optionally open the Visibility tab to adjust device based visibility or conditional sending.
- Preview the email on both desktop and mobile to confirm the image displays correctly.
06What it looks like in HighLevel
07Settings that matter
- Width & Height. Controls the exact dimensions of the image, overriding automatic scaling if set.
- Alignment. Determines whether the image aligns left, center, or right within its container.
- Padding. Adds space around the image to improve visual balance.
- Visibility. Manages whether the image appears on desktop, mobile, or under specific conditional rules.
08Things to know before you rely on it
- Images should be compressed to under 1 MB to keep load times low and aid deliverability.
- Supported file formats are JPG, PNG and GIF.
- The element renders consistently across major email clients and devices.
09How it connects to the rest of HighLevel
- Add a video block with similar drag and drop steps. Video element
- Send or schedule the final email campaign after adding the image. Send email campaign
Michael's take

If I were building a welcome series, I’d drop a brand banner in the first email and link it to the homepage. Before sending, I’d preview on both device types to catch any sizing quirks and make sure the file stays under 1 MB.