
01Who this is for
- Marketing managers who need to adjust promotion deadlines without recreating funnels.
- Funnel builders who want updated styling or destination links across multiple pages.
- Email campaign owners who must modify timer links after an email has been sent.
02Countdown timers, explained
A countdown timer in HighLevel tracks a time bound event and can be placed in funnels, websites, emails, WhatsApp templates, or external embeds. Editing the timer updates its configuration, such as dates, duration, styling, links, or timezone, while keeping the same timer object.
When you edit a timer, HighLevel applies supported changes to all existing placements. Fixed timers modify the shared deadline, recurring timers may apply new wait times on the next cycle, and dynamic timers do not reset a countdown already started for a contact. The edit screen adapts to the timer type, showing only relevant fields.
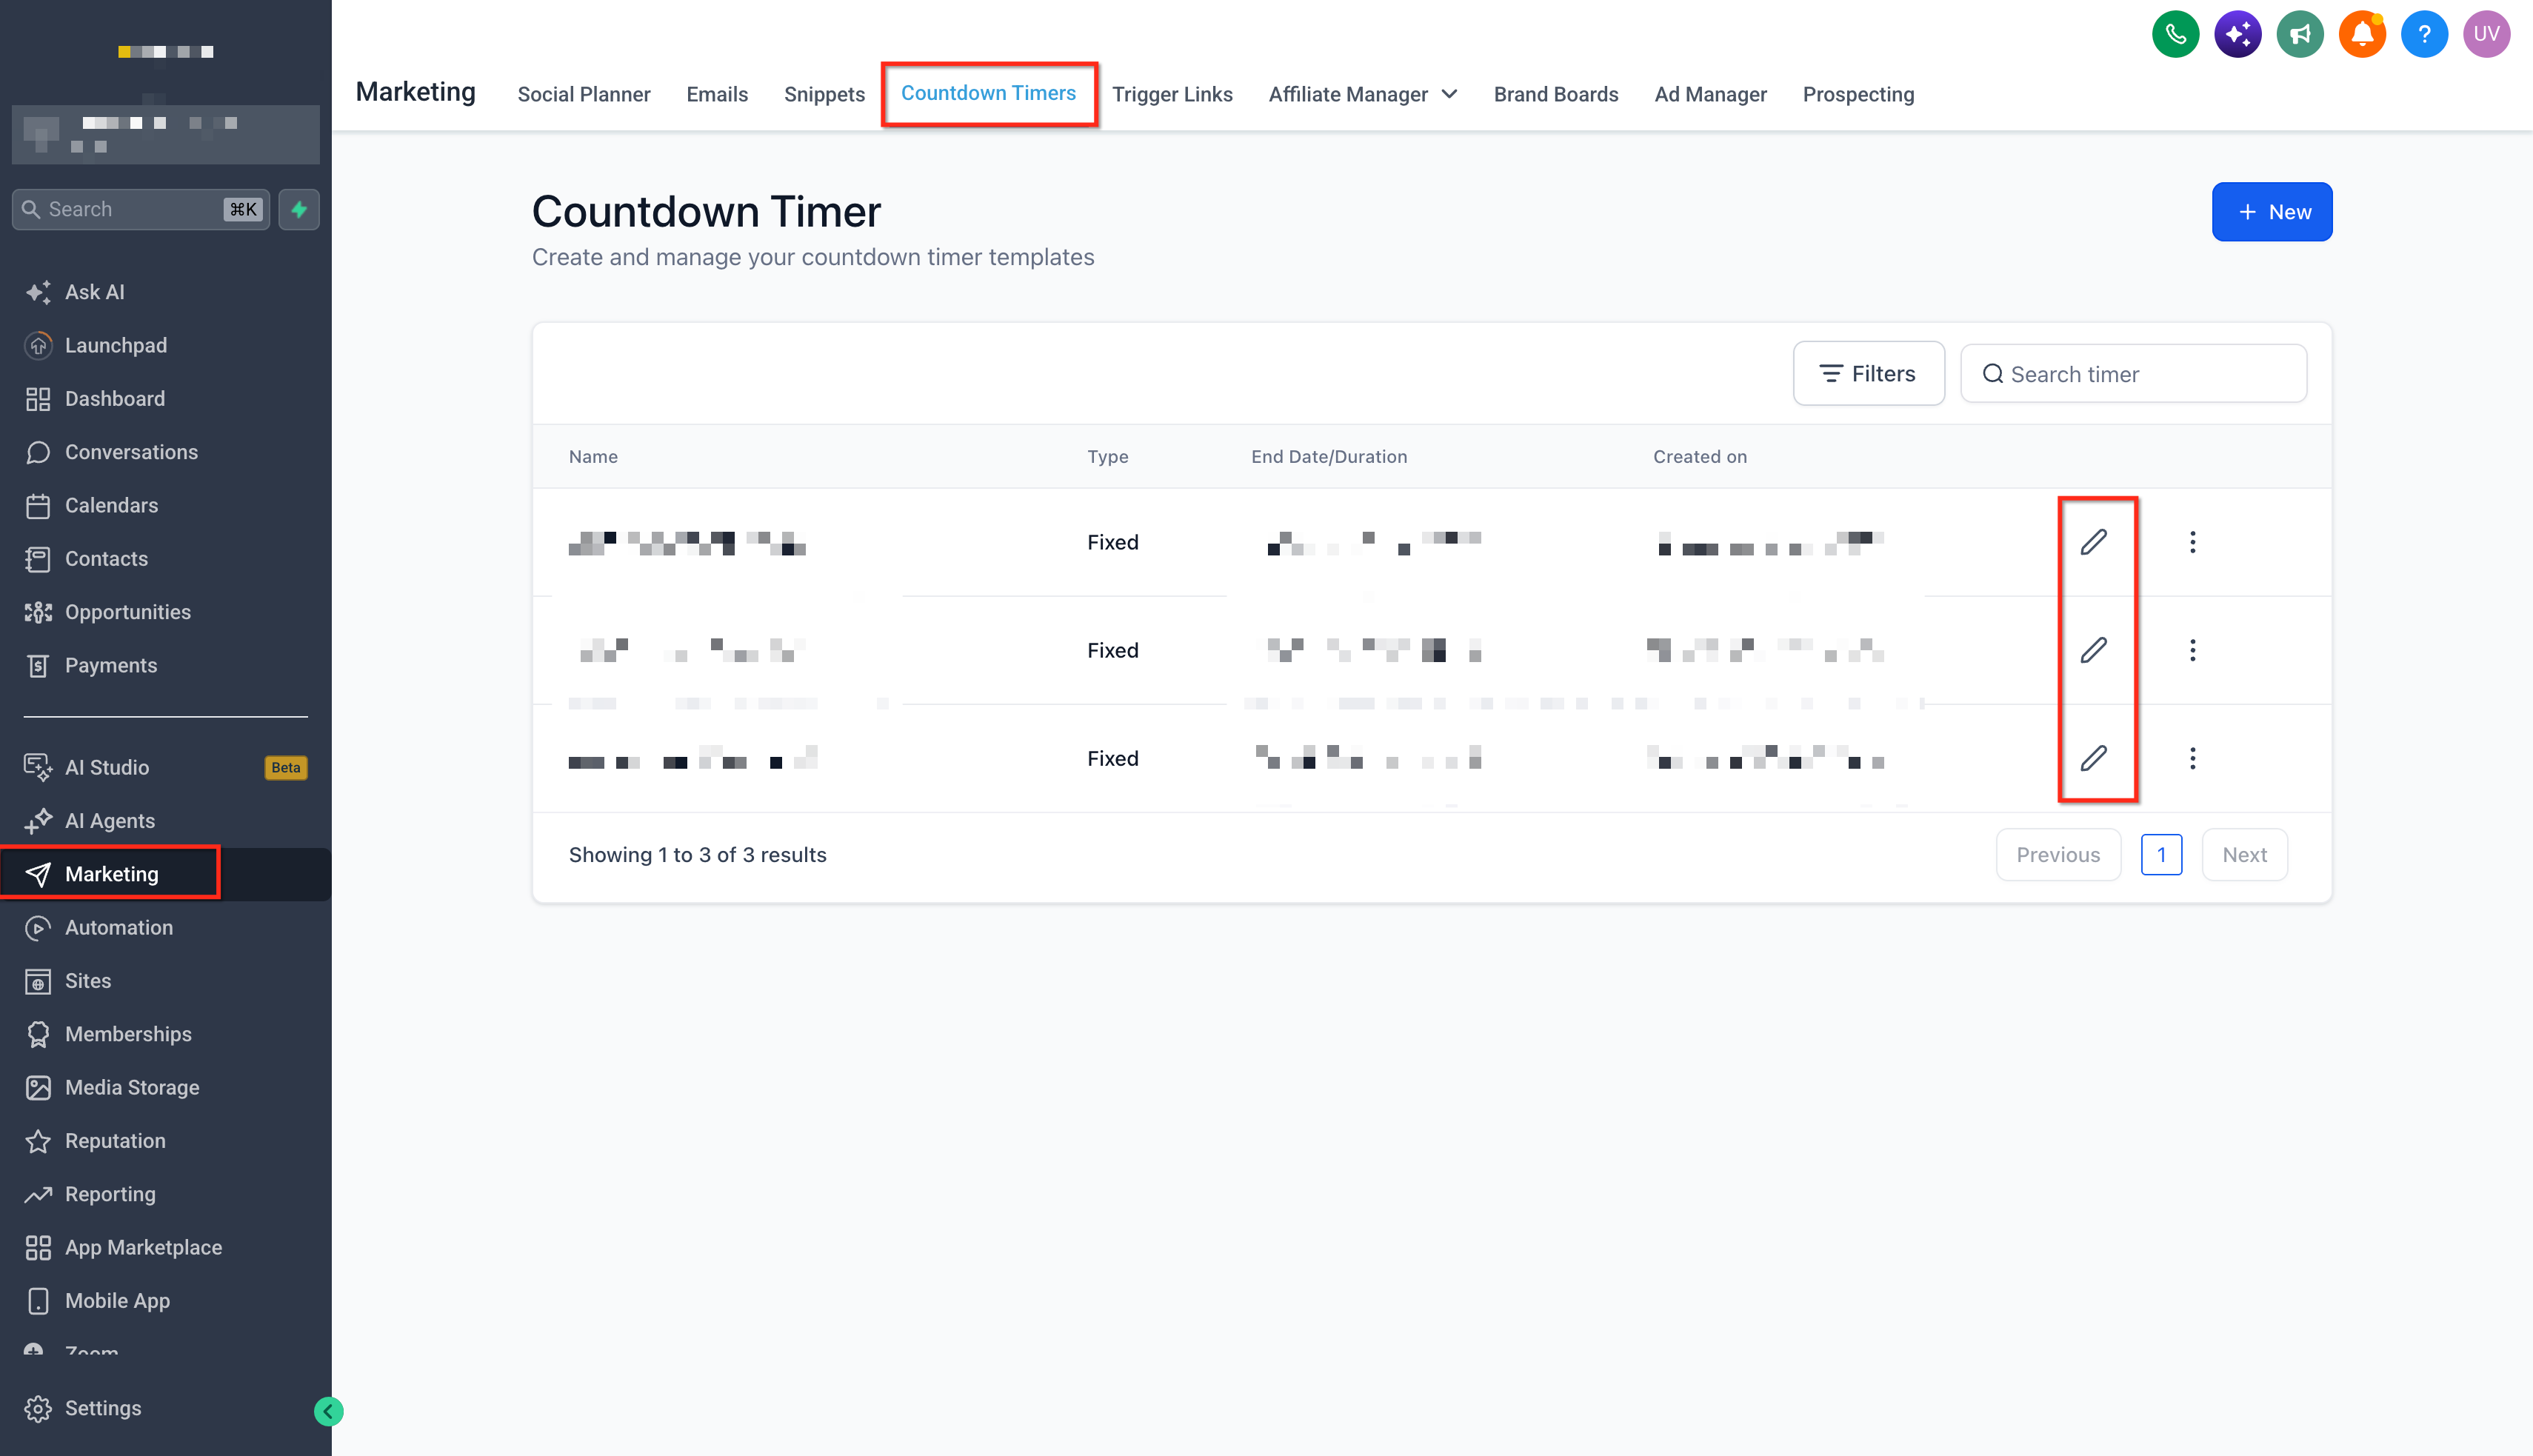
The edit workflow lives in the Marketing > Countdown Timers dashboard. From there you select a timer, open the actions menu, and choose Edit. After saving, you verify the timer in the channel where it is used.
03How businesses use editing a countdown timer
- Ecommerce store. The owner edits the timer’s end date and active link to extend a flash sale and redirect shoppers to a new product page. The changes appear on all live product pages that use the timer.
- Online course creator. The creator updates the wait time on a recurring timer so the next enrollment window opens later. The new wait period takes effect when the timer enters its next wait state.
- Local service business. The marketer changes the timer’s styling and expired link for a booking funnel. The visual update and new redirect are reflected right away on the live funnel.
04The numbers and rules that matter
- Editable settings can include timer name, appearance and styling, active link, expired link, timezone settings, timer labels, end date, duration, recurrence, wait time, loop events, trigger, and other timer type specific fields.
05Before you start
- Review where the timer is placed and which contacts may have already started the countdown.
- Test the updated timer in a live page before relying on it in an active campaign.
- Consider the impact of changing Active or Expired links on existing contacts.
06How to set up and use editing a countdown timer in HighLevel
Edit a countdown timer
- Go to Marketing > Countdown Timers.
- Find the timer you want to modify.
- Open the actions menu for that timer and click Edit.
- Check the timer type, because the editable fields depend on whether it is Fixed, Recurring, or Dynamic.
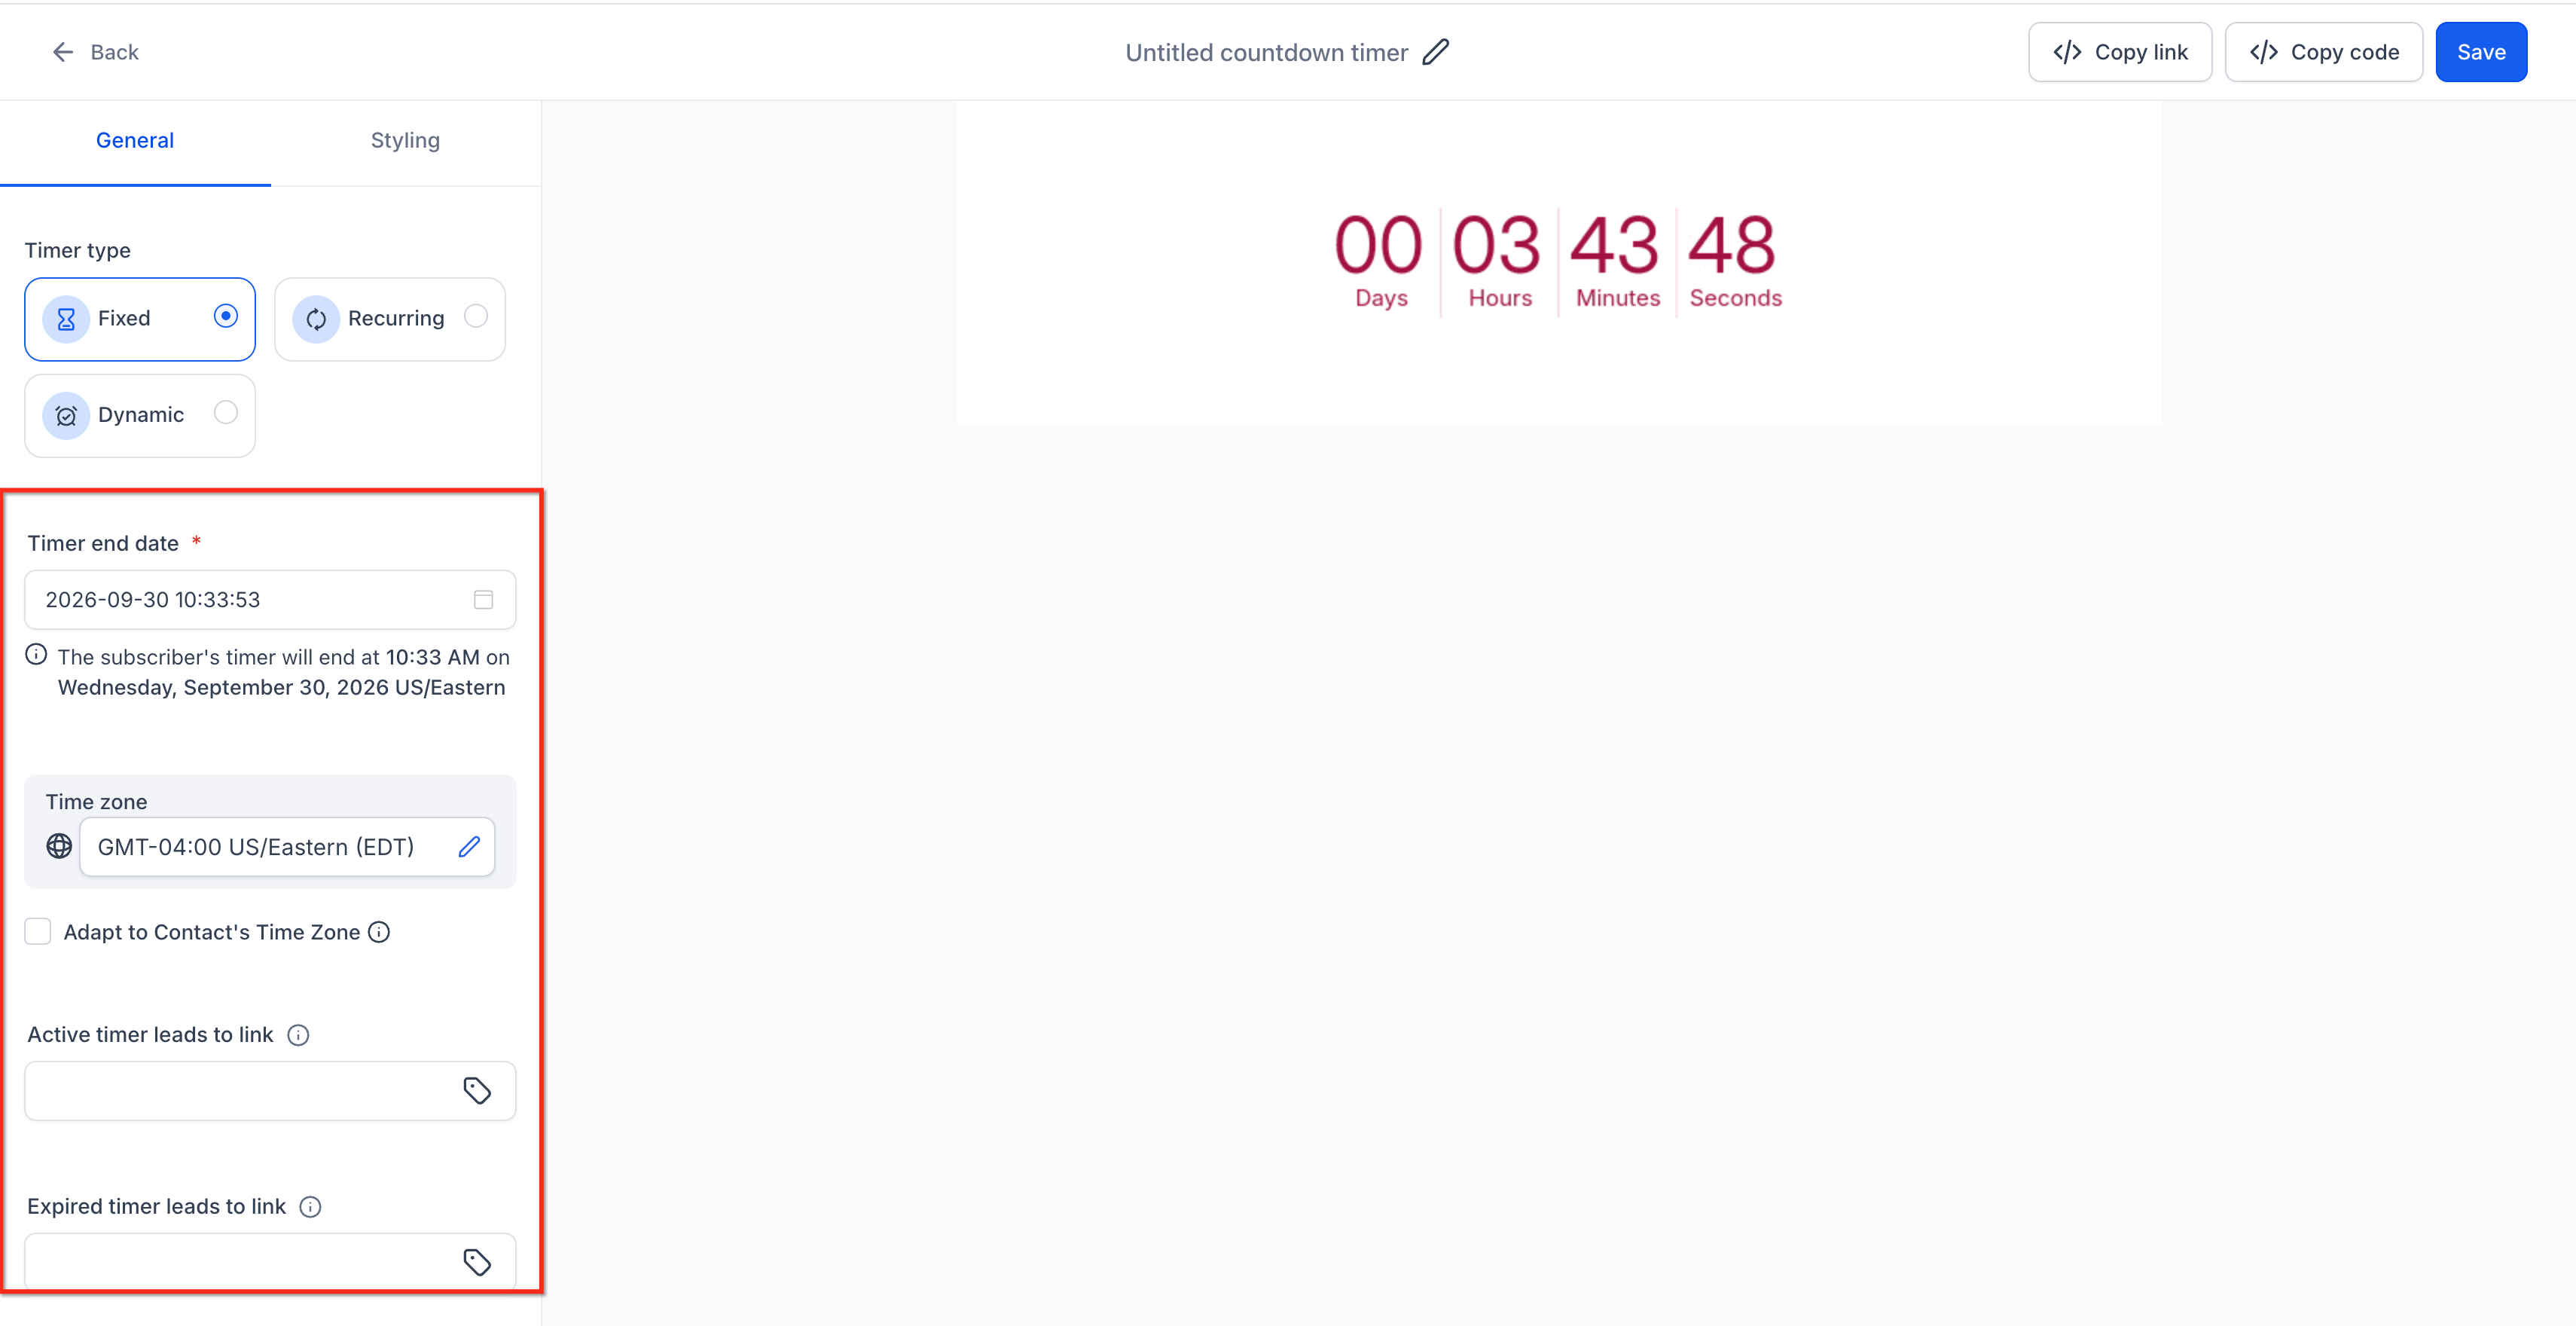
- Change the necessary settings such as timing, end date, trigger, recurrence, wait time, loop events, timezone, active link, expired link, styling, labels, or timer name.
- Look over any fields that could affect live contacts or current campaign placements.
- Click Save to apply the changes.
- Navigate to the channel where the timer is used and confirm the updated behavior.
- Do not remove or replace a timer from an active campaign without first checking how it is being used.
07What it looks like in HighLevel
08Settings that matter
- Timer name. Identifies the timer within HighLevel and can be renamed for easier management.
- Appearance and styling. Adjusts fonts, colors, labels, and size to change how the timer looks on the page.
- Active Link. Sets the destination URL contacts reach while the timer is counting down.
- Expired Link. Sets the destination URL contacts reach after the countdown reaches zero.
- Timezone settings. Specifies the timezone used for the countdown or whether it adapts to each contact’s timezone.
- Timer labels. Customizes the text shown alongside the timer units.
- End date and time. Defines the exact moment a Fixed timer reaches zero.
- Duration. Sets how long a timer runs for Fixed, Recurring, or Dynamic types.
- Recurrence. Controls the schedule for a Recurring timer to restart automatically.
- Wait Time. Specifies the pause between cycles for a Recurring timer; changes affect the next wait period.
- Loop Events. Determines actions that repeat each time the timer restarts.
- Trigger. Defines the event that starts a Dynamic timer, such as sending or opening an email.
09Things to know before you rely on it
- Changing a Dynamic timer does not restart a countdown that a contact has already triggered.
- Waiting time adjustments on a live Recurring timer apply only when the timer enters its next wait state.
- Edits to timers used in already sent emails may not affect the email content that has been delivered.
- External embeds that use the Copy Code feature must be tested after an edit because the platform does not update them automatically.
- If the Edit option is missing, the timer may have usage restrictions; you must use Archive, Clone, or create a new timer instead.
10If something goes wrong
- Edit action is unavailable for a timer. Look for an Archive button, use Clone to make a copy with new settings, or create a brand new timer if a fresh lifecycle is needed.
11How it connects to the rest of HighLevel
- Create a new countdown timer in HighLevel Getting started with timers
- Add countdown timers to funnels Timers in funnels
- Use countdown timers in email campaigns Timers in emails
- Sync timers across emails and funnels Sync timers
Michael's take

Editing countdown timers is handy for quick tweaks, but if you need a fresh timeline for a new promotion, cloning is safer. Teams that rely on strict email timing should skip editing dynamic timers that have already fired.