
01Who this is for
- Founders who run marketing agencies need reliable domain authentication for client email campaigns.
- Ecommerce owners rely on a dedicated sending domain to separate transactional mail from personal inboxes.
- Small businesses using HighLevel email for newsletters benefit from verified sending to avoid spam filters.
02DNS records, explained
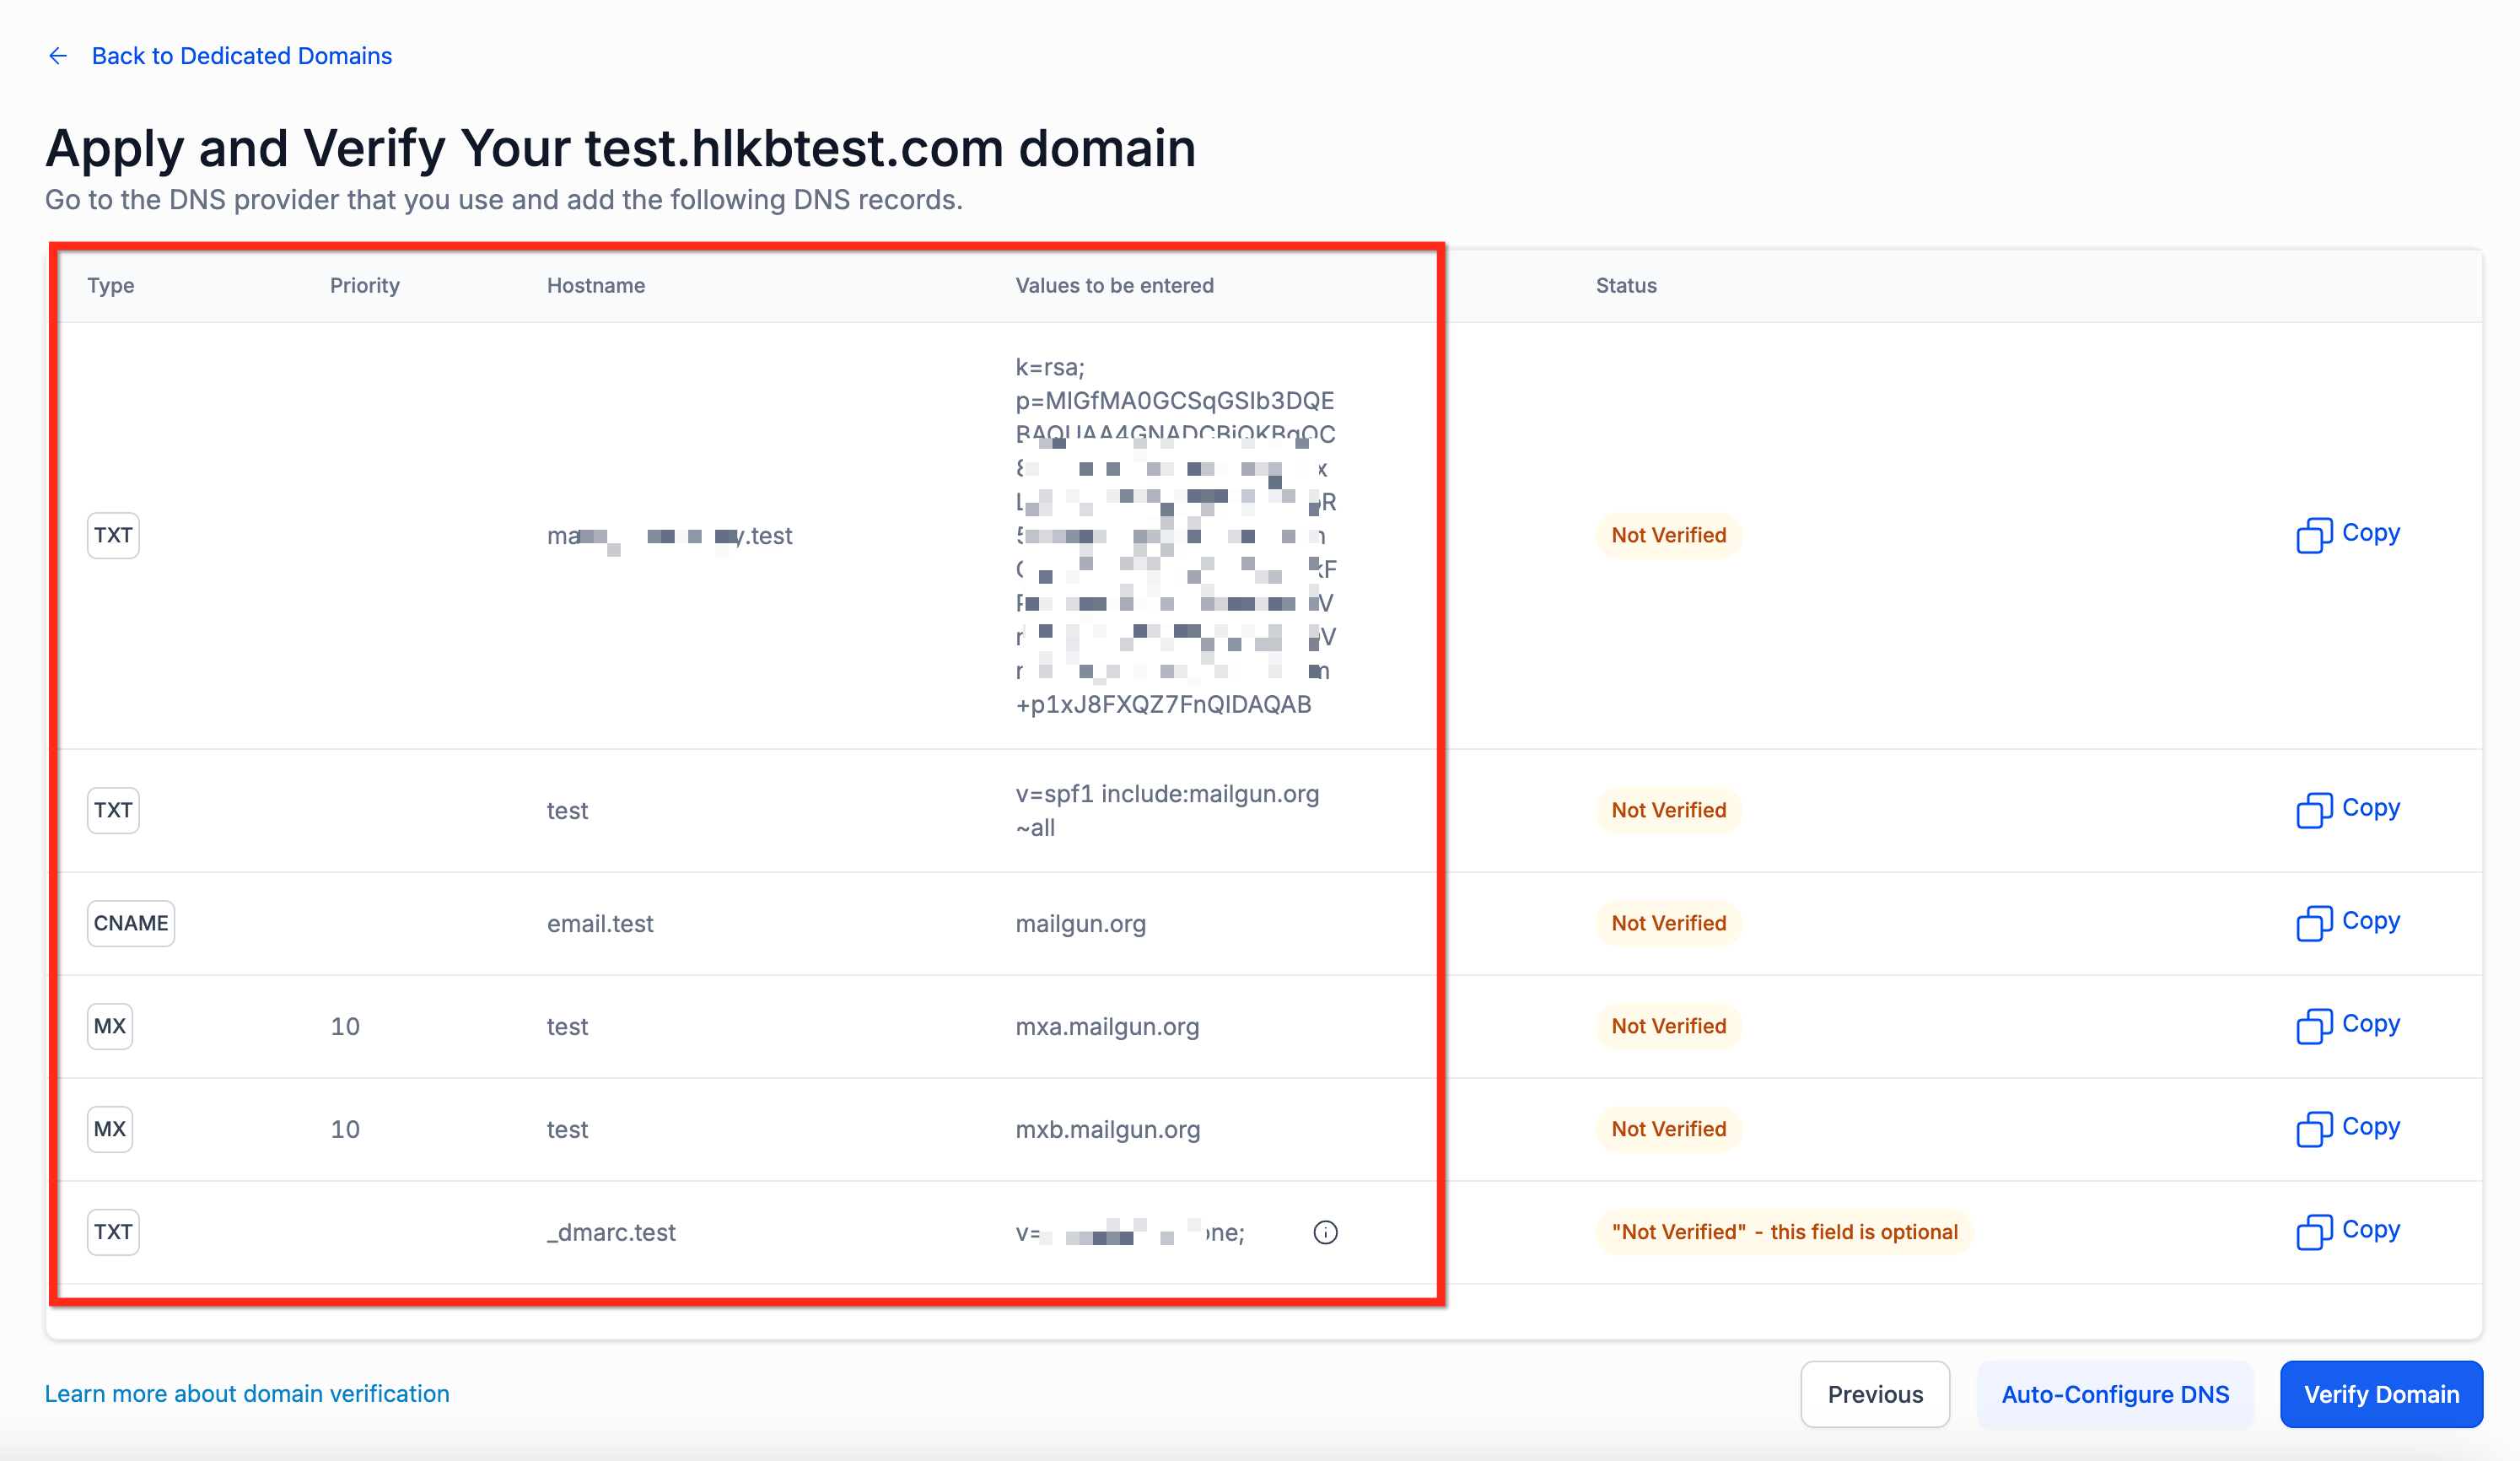
The feature provides a screen inside HighLevel that lists five DNS records, two TXT, two MX, and one CNAME, required to authenticate a dedicated sending domain. Each record shows its type, the Host name prefix, and the exact value to add at your registrar.
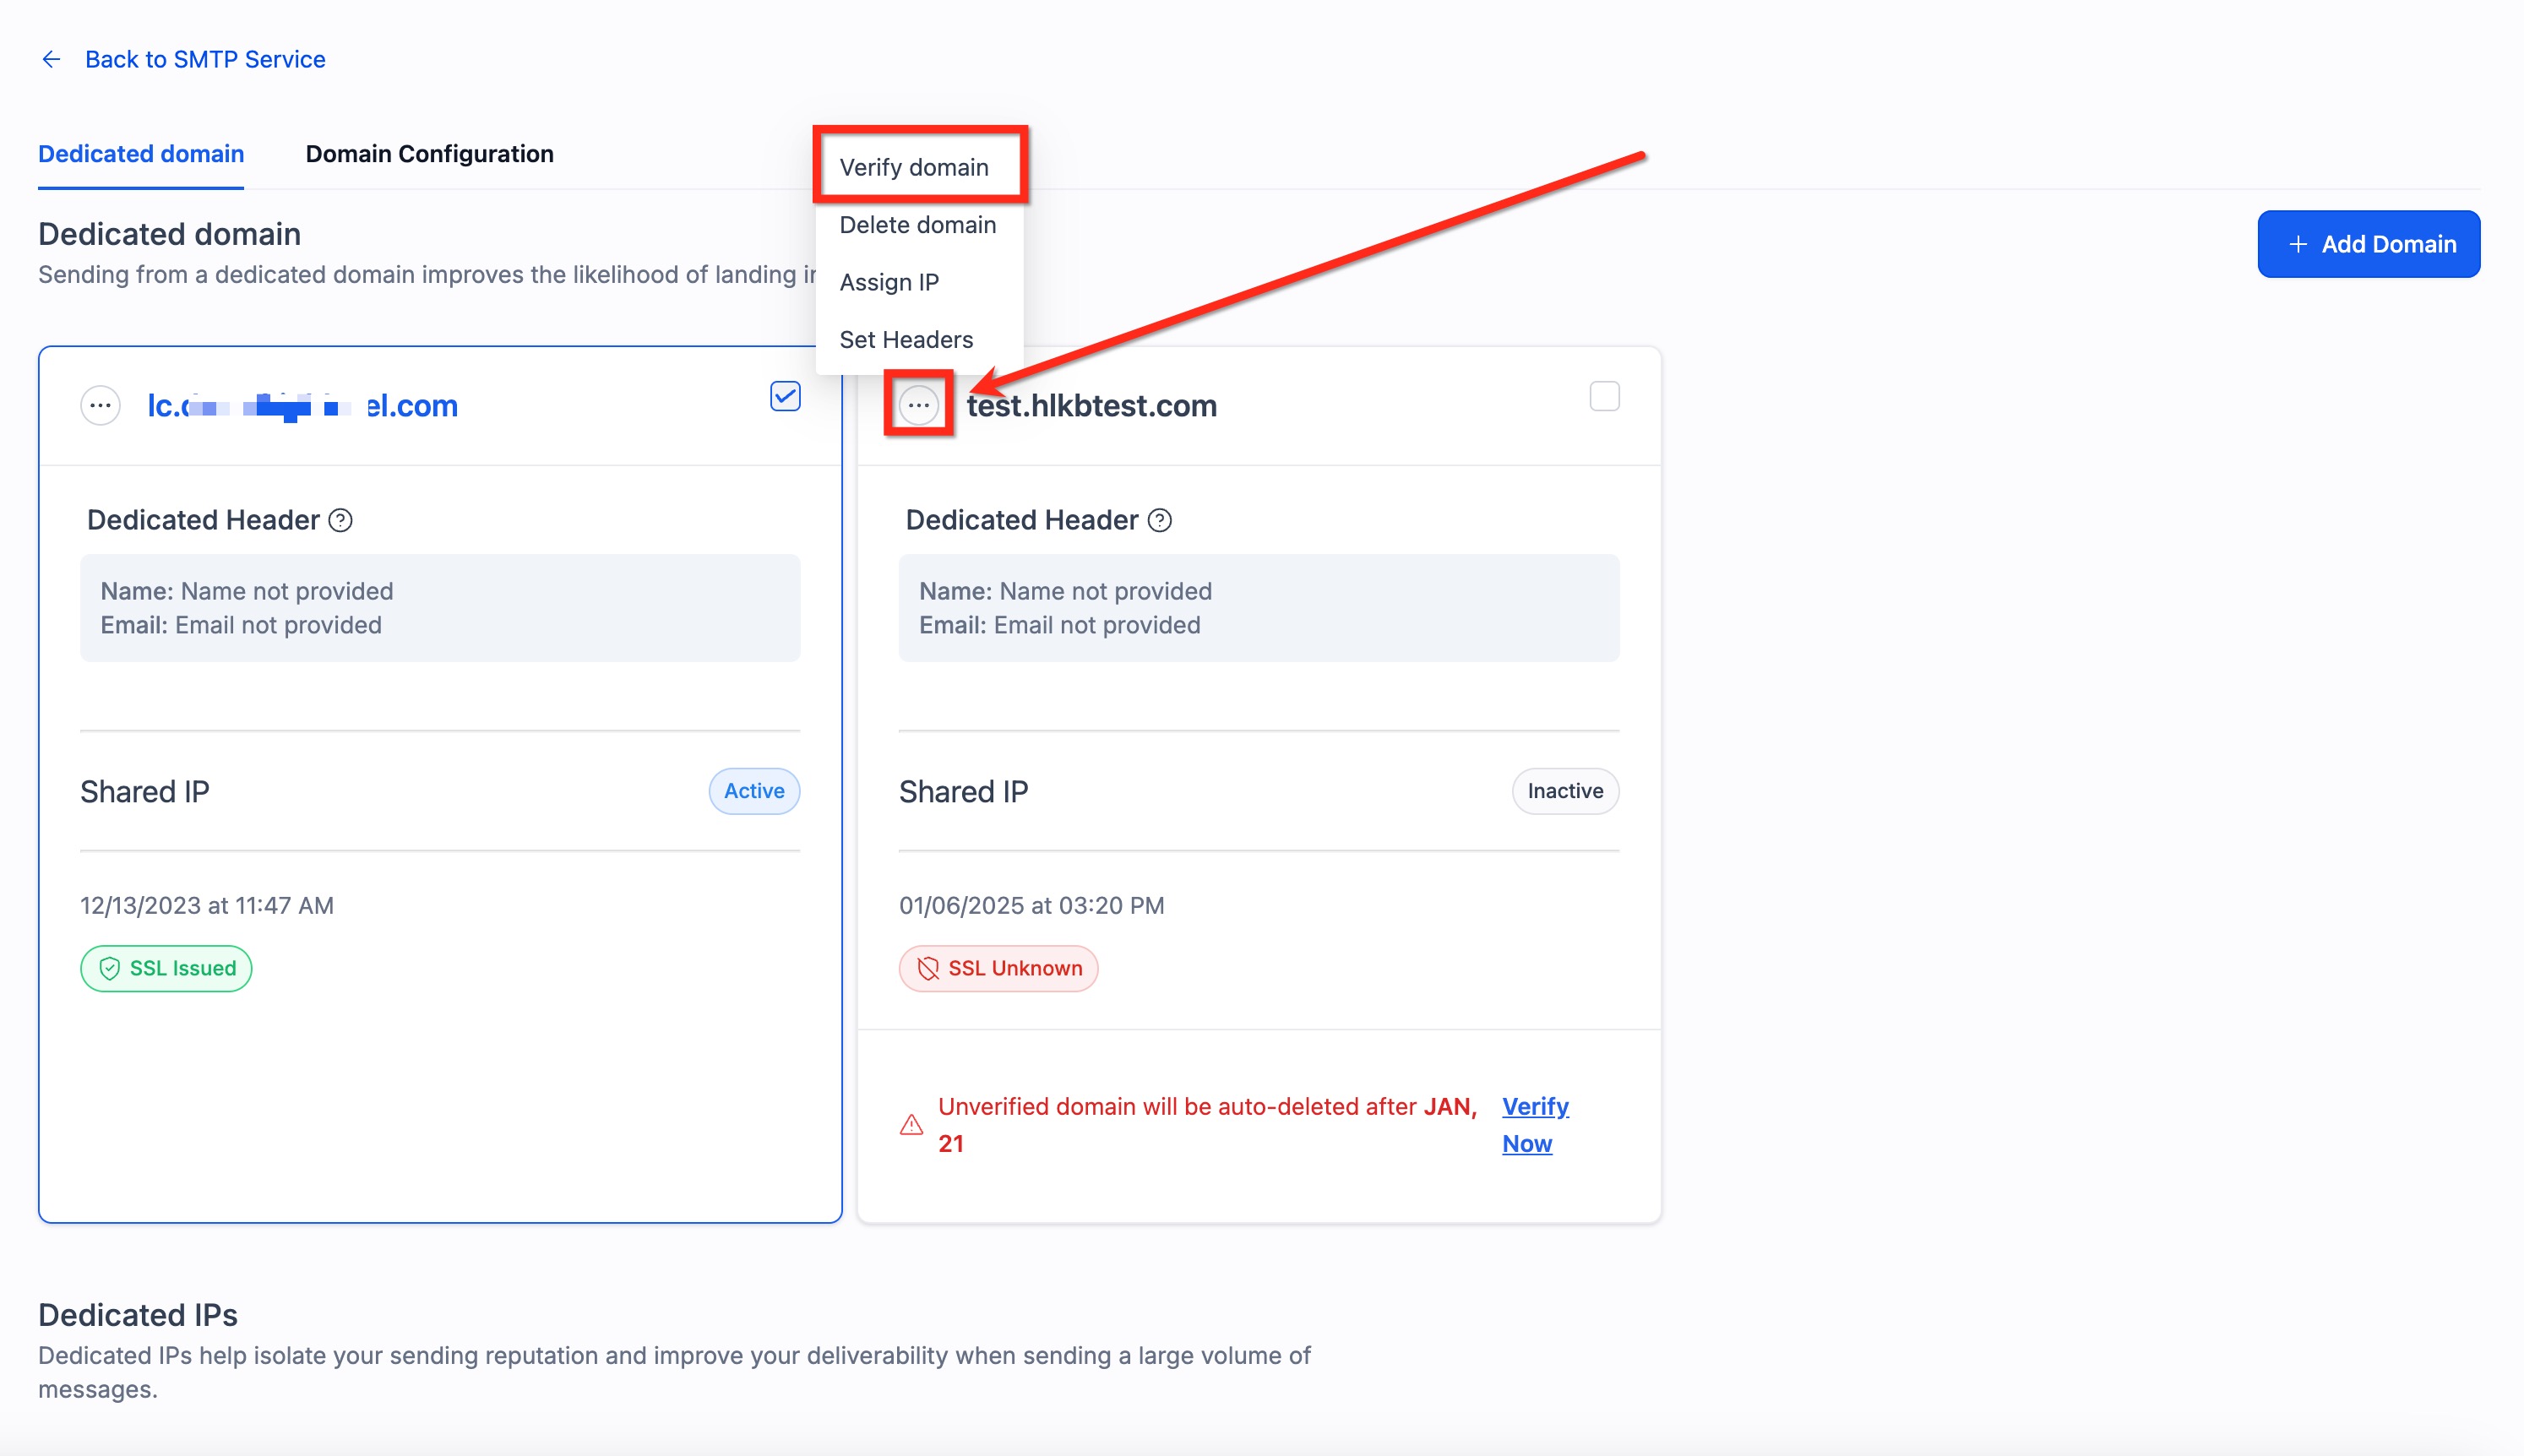
After you add the records at your DNS provider, HighLevel checks them when you click Verify DNS Settings. Successful verification signals that the domain is authorized to send email on your behalf, allowing the platform to use Mailgun endpoints for delivery.
You find this tool under the Email > Dedicated Sending Domains section of the HighLevel dashboard. It works with any DNS host that supports standard TXT, MX, and CNAME entries.
03How businesses use DNS records
- Marketing agency. The agency adds its client’s subdomain in HighLevel, copies the provided TXT, MX, and CNAME values, and asks the client’s web team to create the records in their DNS host. Once verified, the agency can send branded campaign emails from that subdomain.
- Online retailer. The retailer creates a dedicated sending domain like replies.shopname.com inside HighLevel, adds the five records to the domain registrar, and verifies them. This lets order confirmation and shipping emails originate from a domain tied to the store.
- SaaS startup. The startup registers a dedicated sending domain for its product, enters the DNS records supplied by HighLevel into its Cloudflare DNS dashboard, and runs verification. Verified status enables the platform to send onboarding and password reset emails reliably.
04The numbers and rules that matter
- 5 records are required: 2 TXT, 2 MX, 1 CNAME.
- Propagation can be minutes on Cloudflare or Siteground, up to 48 hours on GoDaddy or Namecheap.
- Supported providers listed: GoDaddy, AWS Route 53, Google Domains, Cloudflare, HostGator, Bluehost, Hover, Hostinger, Namecheap, InMotion Hosting, Squarespace, Hostwinds.
05Before you start
- Add the domain you intend to use inside HighLevel’s Dedicated Sending Domains page.
- Have login access to the DNS provider where the domain’s records are managed.
06How to set up and use DNS records in HighLevel
Add DNS records for a dedicated sending domain
- Open HighLevel and go to the Email > Dedicated Sending Domains section.
- Click Add Domain and type the domain you want to use.
- Save the new domain to display the required DNS records.
- Copy the Type, Name/Host, and Value for the first record shown.
- Log in to your DNS provider’s dashboard in a separate browser tab.
- Select the option to create a new DNS record.
- Choose the record Type shown in HighLevel (TXT, MX, or CNAME).
- Paste the Name/Host value exactly as shown, without the root domain.
- Enter the corresponding Value from HighLevel and save the record.
- Repeat for each of the five records, then return to HighLevel and click Verify DNS Settings.
07What it looks like in HighLevel
08Things to know before you rely on it
- You must add a total of five DNS records: two TXT, two MX, and one CNAME.
- Do not include the full domain in the Name/Host field; only the prefix is required.
- Propagation time varies by provider and can range from minutes to 48 hours.
- If you add records to a primary domain that already uses Google Workspace MX records, they will conflict; use a subdomain instead.
09If something goes wrong
- Verification shows a red ✗ immediately after adding records.. Wait 15 to 30 minutes, then click Verify DNS Settings again. If the error persists, double check that Type, Name, and Value match exactly and that no extra spaces or root domains were added.
- Records still show a red ✗ after 24 hours.. Log into your DNS provider’s dashboard to confirm each record saved correctly, then retry verification or contact support.
10How it connects to the rest of HighLevel
- Overview of dedicated sending domains in HighLevel Dedicated sending domain overview
- Guide for adding a dedicated sending domain via GoDaddy GoDaddy DNS guide
- HighLevel pricing and plans for email features Pricing page
Michael's take

Messing with DNS can feel risky, especially when you’re not sure how a small typo will break email delivery. Make sure you copy the values exactly as HighLevel shows them, and keep an eye on the Name field so you don’t accidentally double up the domain name.
When you get it right, your emails are sent from an authenticated domain.